How To Create a Book Order Form in WordPress
Let’s say you are the owner of a bookshop and have decided to allow your customers to order books from the website. Collecting orders directly from the website means that a customer can order your product from the comfort of her home, eventually generating more revenue.
Now you might be thinking that collecting orders from the website requires technical expertise. But the reality is, it is way more straightforward than you can probably imagine!
In this article, we will walk you through some easy steps on how to create a book order form in WordPress. So without any further delay, let’s jump in.
Why Fluent Forms?
When it comes to form-builder plugins for WordPress, many choices are out there. But not all of them can fulfill your needs in the best way. We recommend one plugin packed with all the features you will need.
We have chosen Fluent Forms to create the book order form in WordPress. Choosing Fluent Forms as our form builder plugin was an automatic choice for several reasons. It is the most lightweight form builder plugin in the market right now, with crazy functionalities.
With Fluent Forms, creating forms for your website is easier than ever! This WordPress plugin got you covered in creating anything from basic forms like survey forms and subscription forms to more interactive conversational forms, forms with payment integration, and much more.
Some of the key features of Fluent Forms are:
- It is a drag-and-drop form builder for ease-of-use
- It has dozens of pre-built form templates for quick form building
- Fluent Forms has conversational forms for creating interactive forms
- You can use conditional logic for better control over the forms
- There are 45+ native integrations for additional functionality
- It gives you the ultimate freedom of using a multi-column form layout
- Users can produce visual data report
- Fluent Forms has calculated fields for measuring numbers based on inputs
Create a book order form in WordPress
Every business wants its customers to have a smooth experience while ordering products. Creating a book order form in WordPress may sound like a daunting task. But using Fluent Forms, you can easily create a book order form with zero coding knowledge.
Let’s get started!
Step 1: Install Fluent Forms
Installing Fluent Form is similar to installing any other WordPress plugin. To install Fluent Forms, go to the Plugins section of the WordPress admin dashboard and click Add New. Now, look for Fluent Forms, install and activate it.
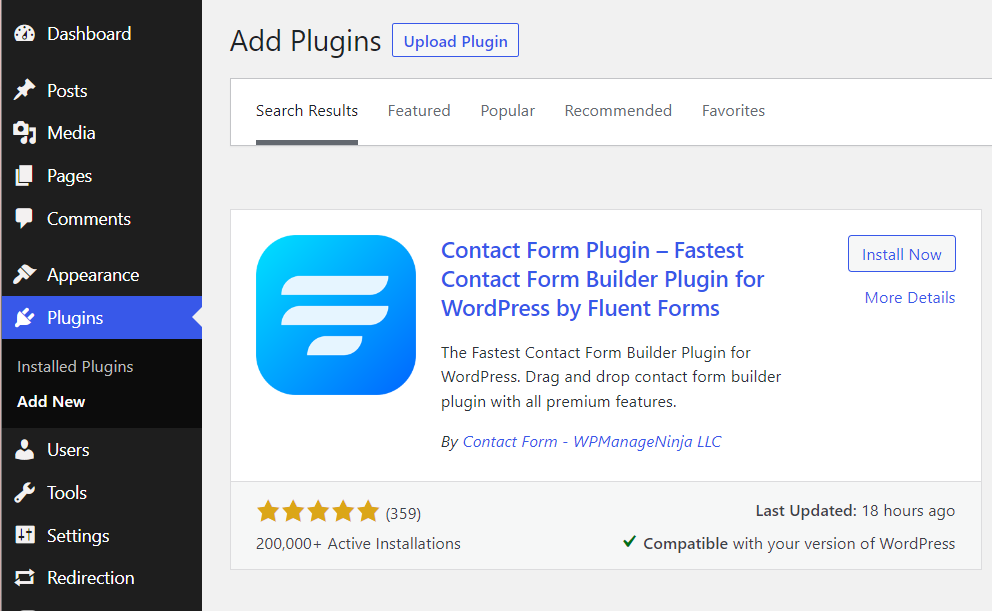
To be able to use the payment feature in your book order form, you will need the Pro version of Fluent Forms. The Pro version of Fluent Forms enables you to go limitless with many more features and functionalities. Once you have installed it, upgrade Fluent Forms to the Pro version and activate it with the license key.
Step 2: Create a simple book order form
Fluent Forms has dozens of useful pre-built form templates that you can choose and customize according to your needs. You can effortlessly create a book order form in WordPress by tweaking a pre-built template. To do so, click New Form under Fluent Forms in the WordPress dashboard. A pop-up window will appear with all the templates. You can choose the category from the dropdown menu.
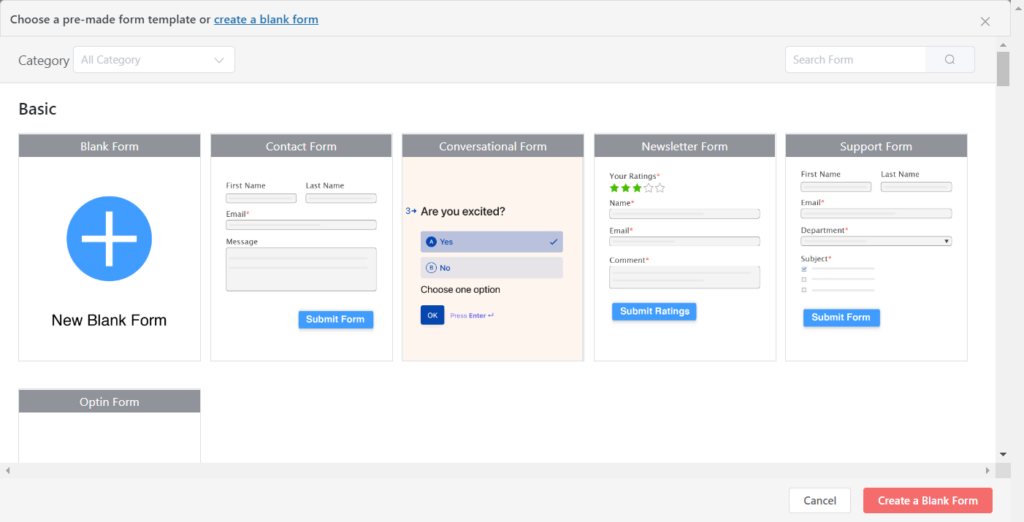
Hover over the desired template and click Create Form. Now you can customize the form according to your needs and create your first book order form. But we will show you how you can create a book order form from scratch.
Step 3: Create a book order form from scratch
To create a book order form from scratch, hover over New Blank Form and click Create Form. You will see a window similar to the one below.

On the right, you get various types of input fields to include in your form. All you need is to click on the desired field to add it to your form. Alternatively, you can drag and drop any field wherever you want. You will be presented with various customization options whenever you click on a field added to the form.
For the book order form, first, we will add a Two Column Container from the Container section of input fields.
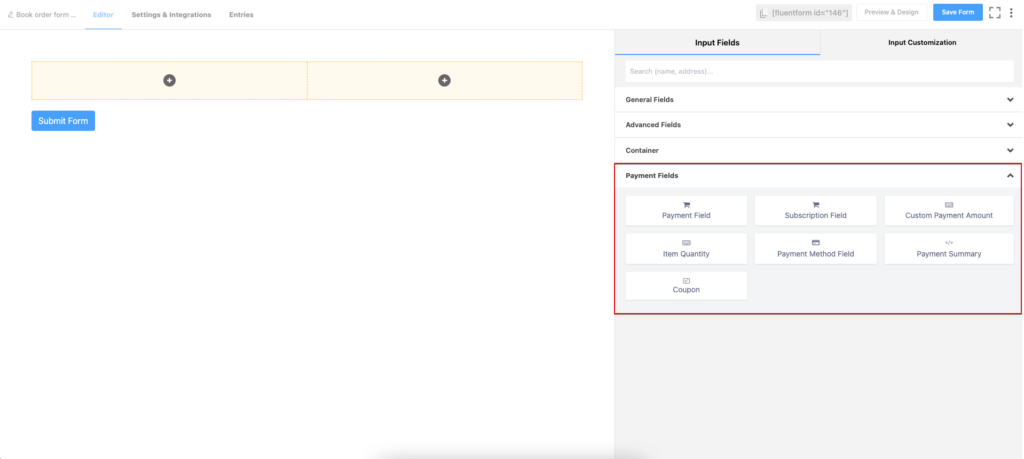
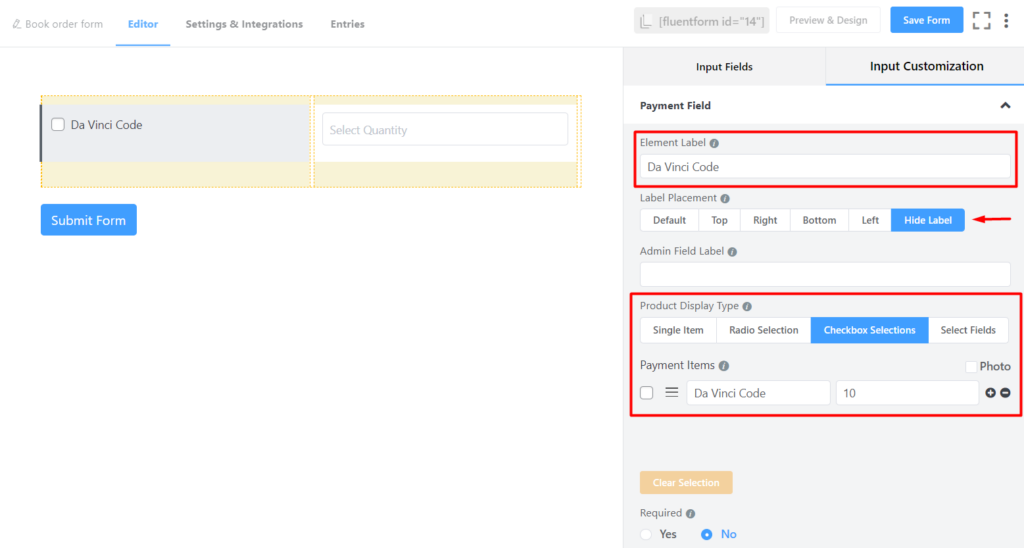
Then, we will drag and drop the Payment Field in the left column and the Item Quantity in the right column of the container. You will get these fields in the Payment Fields section. You can customize the input fields as shown below.
Now you can add your books and their prices using the Input Customization option of the Payment Field. Fluent Forms also allows you to include photos of your listed books.
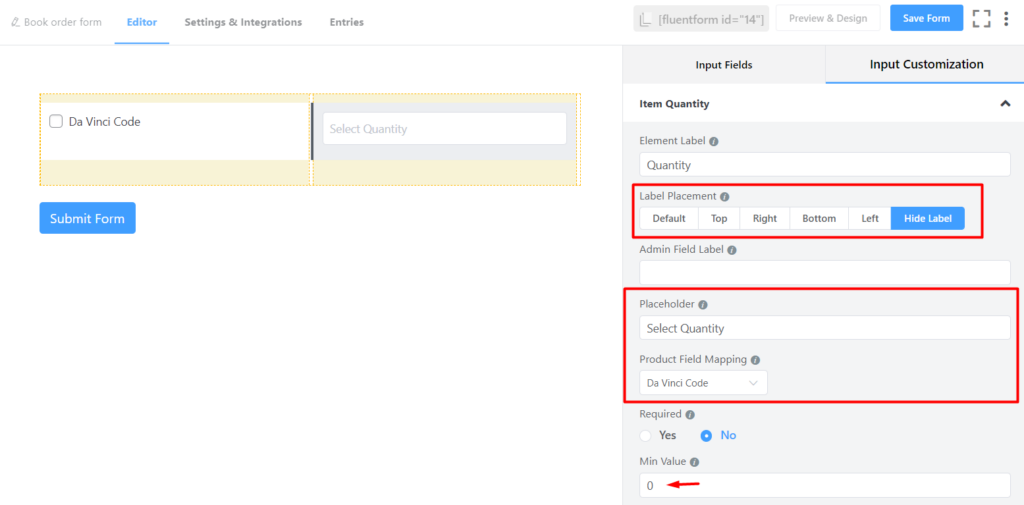
Select the relevant product from the Product Field Mapping option for the Item Quantity field.
Fluent Forms gives you an option called Conditional Logic to trigger an action based on one or more predefined conditions. You can use this option to show the Quantity field once a customer selects a book.
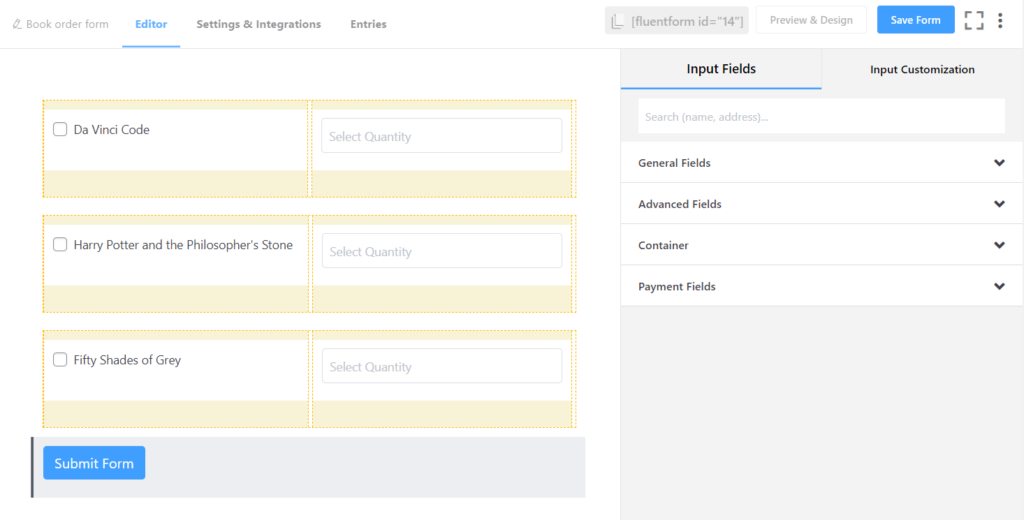
Following the same process, you can add more books for your customers to choose from.
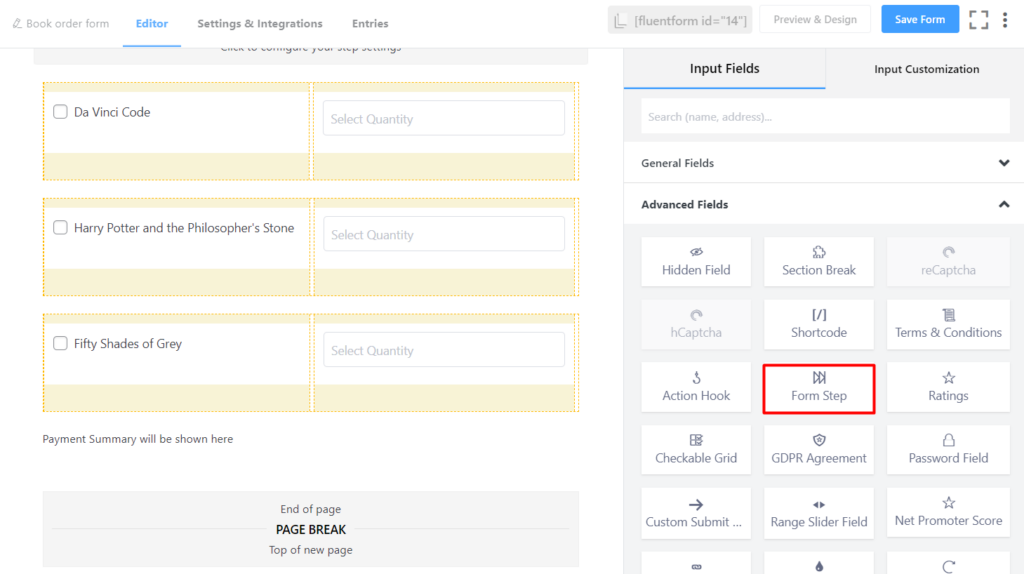
To show your customers a payment summary, click Payment Summary from the Payment Fields section.
Now, click Form Step from the Advanced Fields section to break down the ordering processing into multiple steps for a better user experience.
In the next step, you can add various input fields from the General Fields section to collect customer information for processing and delivering the order. Fluent Forms also gives you this amazing feature to integrate Google Maps with your form. In this way, the address field is auto-completed using this functionality which means that your customers no longer need to write the full address.
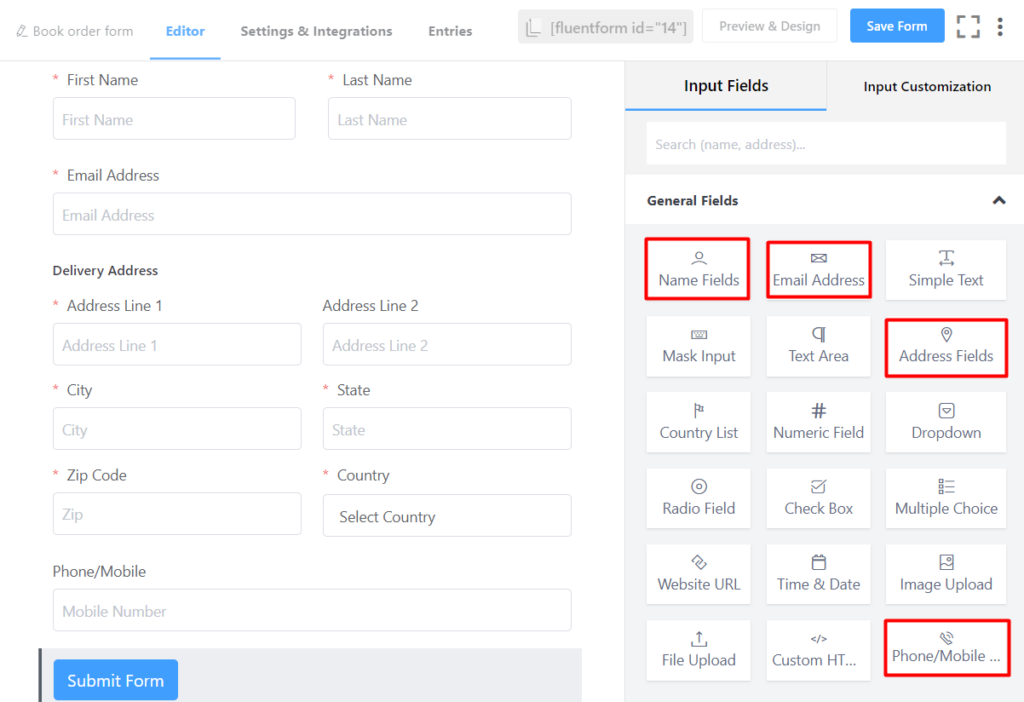
You can also use the Required option in the Input Customization section to make a field mandatory.
In the final step, add the Payment Method Field from the Payment Fields section to collect the payments. Fluent Forms support various payment methods, including Stripe, PayPal, etc.
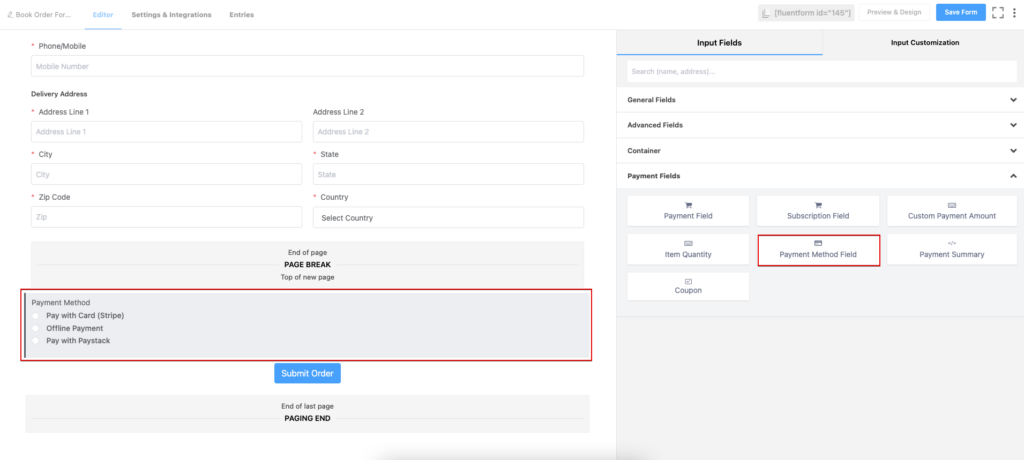
Lastly, if you want, you can change the style of the Submit button however you want.
Step 4: Configure your form’s settings
Before bringing the form live on your website, you can configure some settings for more customer engagement. If you click on the Settings & Integrations tab, Fluent Forms gives you a bunch of settings to play with.
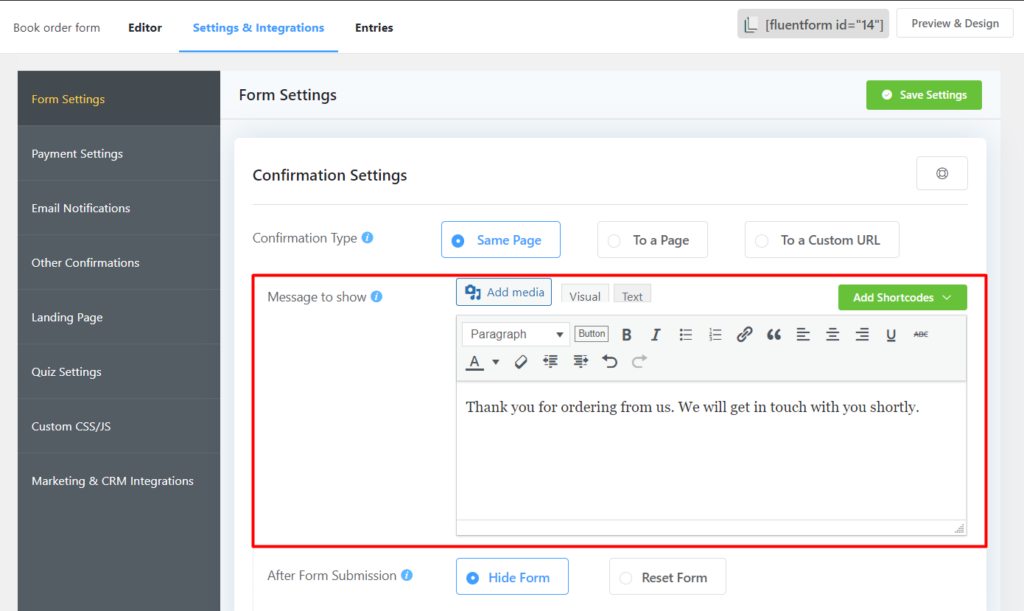
The Settings & Integrations tab allows you to –
- Change confirmation type, confirmation message, etc.
- Customize form layout.
- Schedule the form and restrict form entries.
- Prevent form submission based on user input.
- Show survey results to users and many more.
Step 5: Add the form to your website
And there you go! You have just completed making a simple WordPress book order form.
Now that you are done building a book order form, it’s time to publish the form on your WordPress site. There are two ways of doing it.
You can select your form created with Fluent Forms using the Gutenberg block editor or display it anywhere using a shortcode.
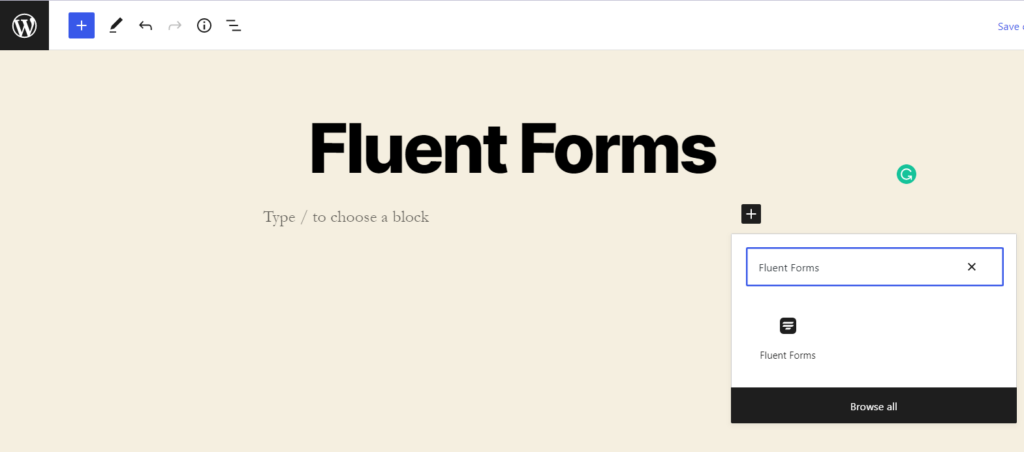
Click Add New under Pages in the WordPress dashboard’s left sidebar to publish your form using the Gutenberg block editor. Give the page a name. Click on the plus (+) icon or type forward-slash (/) on the empty space of the editor. Then type Fluent Forms and select it.
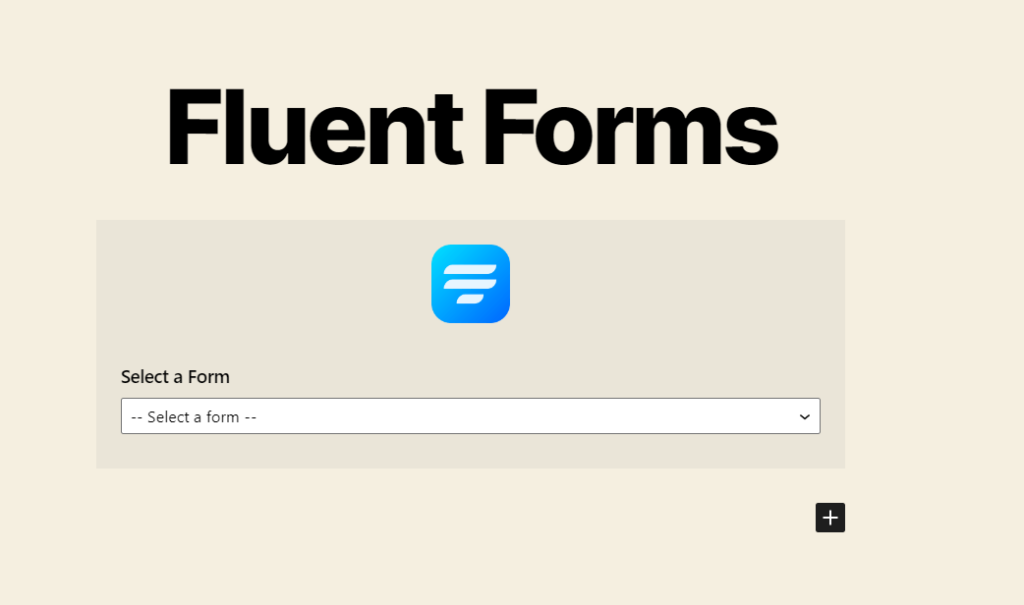
You will see a dropdown menu with a list of every form you have made using Fluent Forms. Choose the form that will appear on the page.
Click on Publish if you are happy with the preview. You can follow the same process if you want to publish your form on an existing page.
You can also use Fluent Forms’ shortcode feature as an alternative. Every time you create a form, a shortcode will appear in the top-right corner of the form editing window.
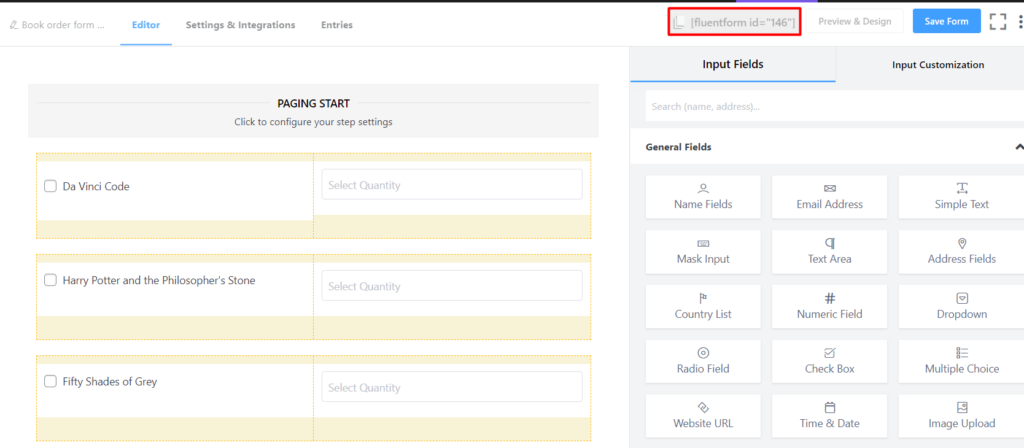
Copy the shortcode by clicking on it and paste it onto the page where you want your form to appear.
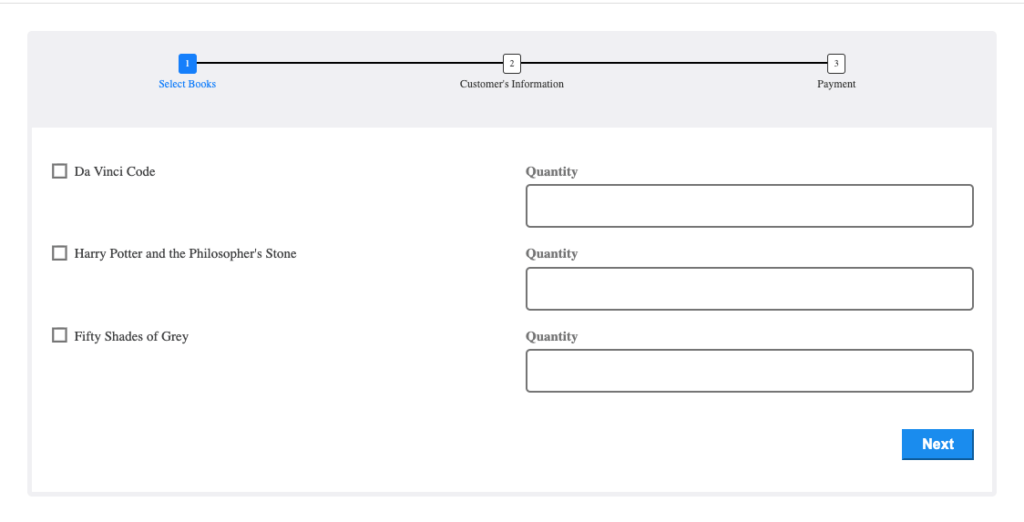
Now take a look at the image below to get a quick idea of how the form will appear on your customer’s end. We are not done yet! With Fluent Forms, you can also design a landing page dedicated to your book order form.
Wrapping up
Adding an order form to your bookshop’s website can significantly boost sales. It also gives you this huge opportunity to scale up your business and target more customers.
This article should come in handy if you want to create a book order form in WordPress. If you have further queries, you can comment down below. Also, you can follow us on YouTube, Twitter, and Instagram to get more tutorials and information like this one.





Leave a Reply