How to Create a Survey in WordPress

Surveys are insanely powerful once the user considers them relevant and worth answering the questions. And those surveys become resources when done perfectly with the most essential questionnaire.
So, it’s more about how you design the surveys. In WordPress, you get complete creative freedom to create a survey.
In this blog, I’ll show you the simple no-coding steps to create a survey in WordPress using a contact form plugin, along with setting up and styling your forms.
TL;DR
- A survey is a structured method of collecting information and opinions from a defined group of the audience
- In WordPress, you can create a survey using a form plugin like Fluent Forms, applying selection fields, conditional logics, and other relevant features
- With Fluent Forms, you can build a survey form by choosing a template, using the AI form builder, or adding a new blank form
- Fields such as radio field, checkbox, dropdown, and checkbox make a survey form engaging and fast-to-fill-out, when conditional logic elevates the experience
- Advanced from styler is the feature that you can use to apply your brand strategy and styles through image, color, font, etc.
- Set up confirmation and notification emails so that the users get notified once the form is submitted
What is a survey
A survey is a research method that relies on the opinions of a group of audience members, informed by their experience or attitudes and benefits both parties.
It involves structural questionnaires that are relevant to the respondent’s knowledge and deliver cumulative information.
Surveys altogether initiate awareness, feedback, suggestions, and detect problems while counting the solutions. It can be both online and offline, though the online ones are more common and popular because they return faster summaries.
Types of surveys you can run online
You can run different types of surveys online based on the purpose of the surveys, which might be:
- Brand awareness survey
- Market research survey
- Product survey
- Customer satisfaction survey
- Employee feedback survey
- Client feedback survey
How an online survey helps a business grow
An online survey isn’t simply a graph of opinions from people related to your business; it also helps you grow while opening new paths for expansion, leaving mistakes behind.
An online survey detects:
- What doesn’t work
- What should be improved
- What needs to be discontinued
- Where the ROI is fair and where it is not
- Where do you belong among the competitors
- What people still don’t know about you
- Which scopes are already crowded, and where is the gap enough to enter
- Which unchanged strategies possess the expected impact
Best practices to build surveys in WordPress
A survey’s foundation remains in its pillar of relevance and engagement.
- Help users find the keywords easily in the questionnaire
- Allow respondents to select more and write less
- Use visual content in complex things where necessary
- Make it a multi-step survey and show progress
- Help people save and resume the survey anytime
Steps to create a survey in WordPress: from scratch to live
Making a survey in WordPress is fun, as you can implement multi-dimensional approaches.
Here, I will take you on a tour to make a survey in WordPress in the simplest ways.
Step 1: install and activate a survey/form plugin
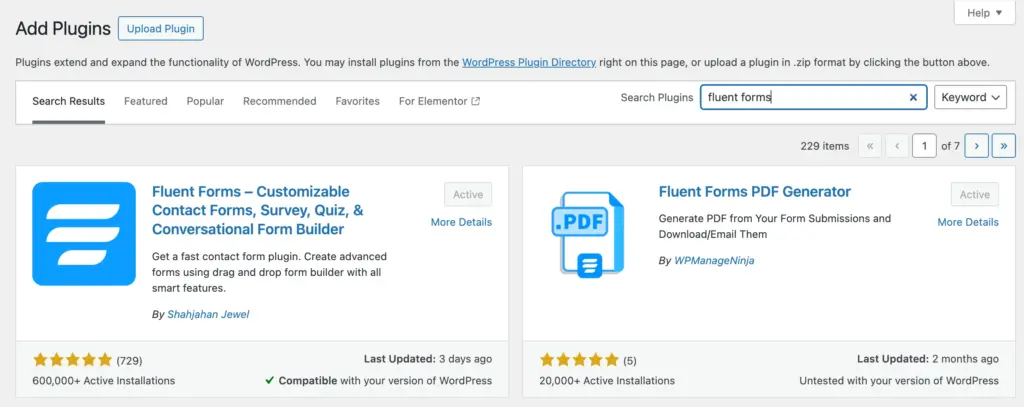
At first, you can add a survey/form plugin from your WordPress dashboard, if you haven’t already downloaded this. As the primary choice, you can use Fluent Forms, as this is a drag-and-drop form builder, suitable for any kind of surveys.
To add Fluent Forms to your WordPress site, you can simply search in the Add Plugin section, or you can upload the zip file.
Step 2: add a new form
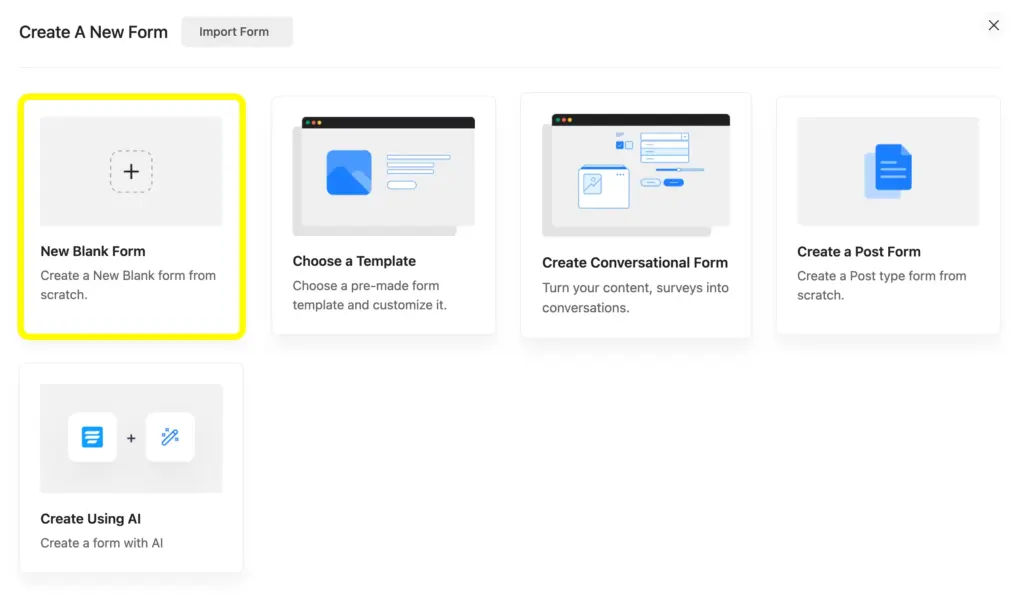
An online survey appears as a form, so you can add a new form from teh scratch. In Fluent Forms, you can use a template, make a form by choosing a template, using ai form builder, or use a new blank form.
Here, I will go for a New Blank Form and start from scratch.
Step 3: add required fields
When you click on the Add New Form button, it takes you to the Editor page, where you can easily add required fields, whether you want to drag and drop or use the search bar.
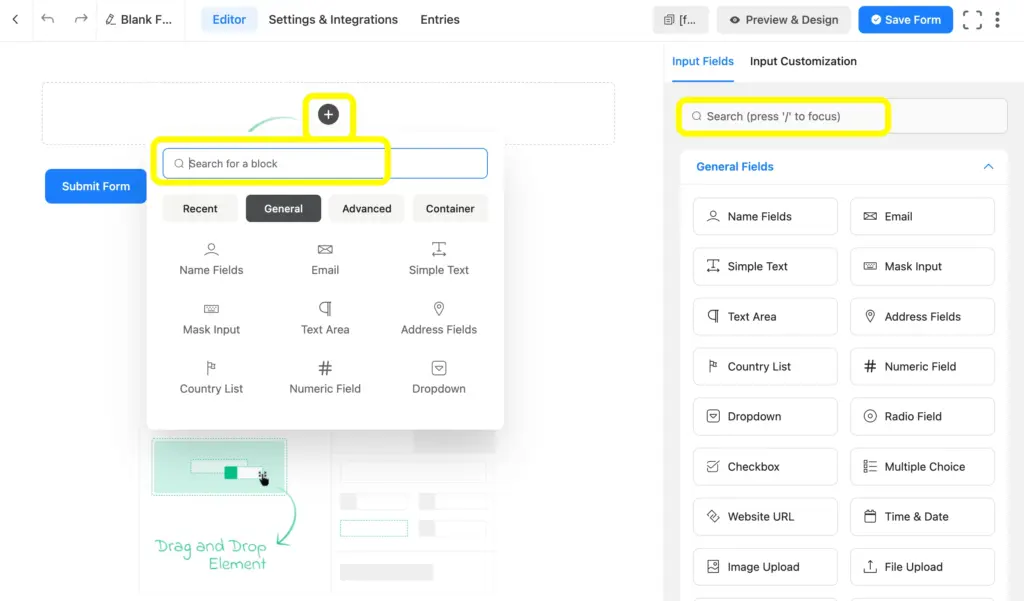
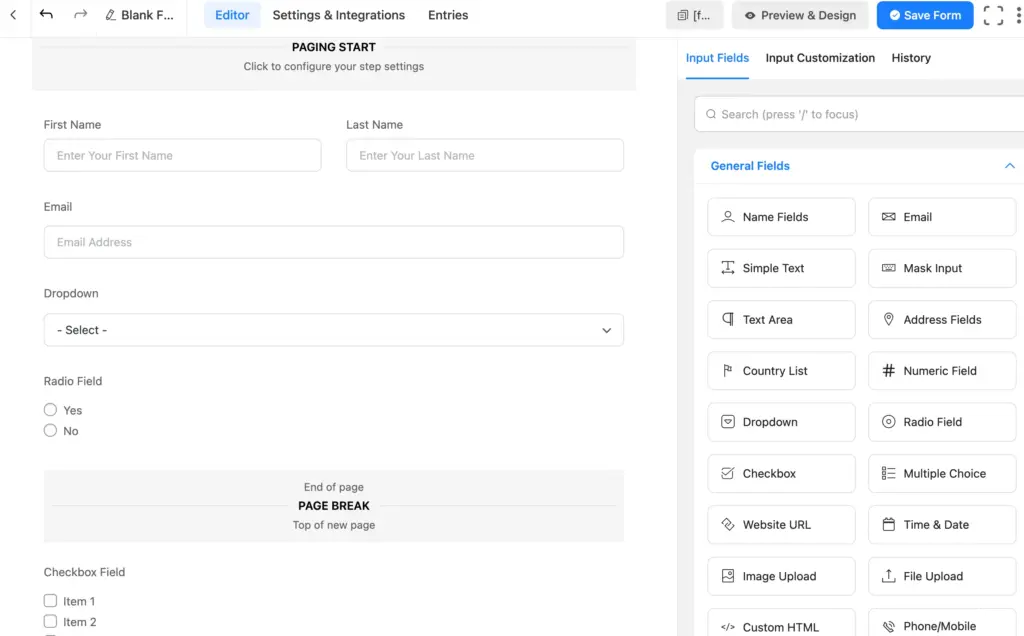
Here, I have added a few fields that can easily be dragged and dropped from the right side of the main part of the editor page. I’ve added the name fields, dropdown, and radio field, checkbox field, checkable grid, net promoter score, form step, and save and resume.
Step 4: customize the fields
Customizing a survey form’s fields makes it easier for users to complete it more quickly and with a better understanding.
To customize a field in Fluent Forms, simply click the field, and you will find the customization option on the right side.
As you can see here, I have customized the checkable grid field. I’ve added 4 Grid Columns and 4 Grid Rows, which has a checkbox with each, allowing users to mark any and every one of them.
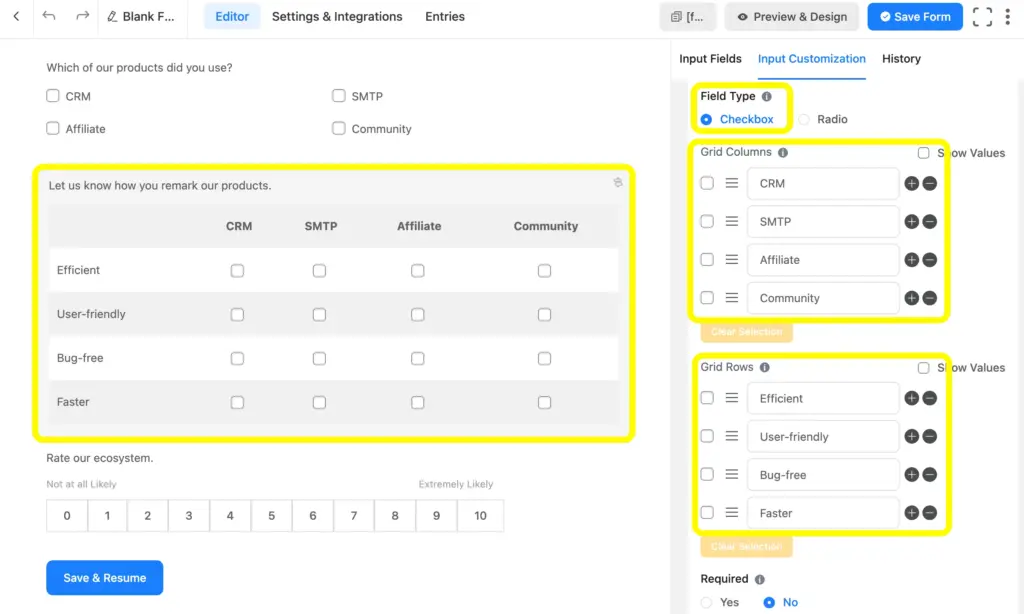
In a survey, it helps the user fill out the forms faster and get a comparative idea.
This way, you can customize every field of your survey form by clicking on the field you want to customize.
Step 5: save and check preview, check history (if you need to)
Once you are done with form customization, you can save the form and check the preview to proceed with the next steps.
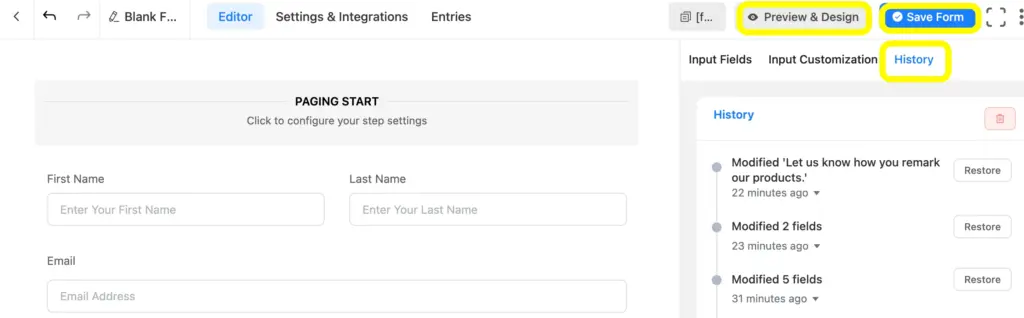
As you can see here, these three important buttons are all at the top right side of the form editor. You will find the Preview & Design button next to the Save Form button. You can check the latest version by clicking on the Preview & Design button. You can also check the History, which will appear when you click the History button below the Save Form button.
Let’s see how the preview appears on the next tab:
As it’s a multi-step form, it will appear in steps. This one has two form steps.
Step 1:
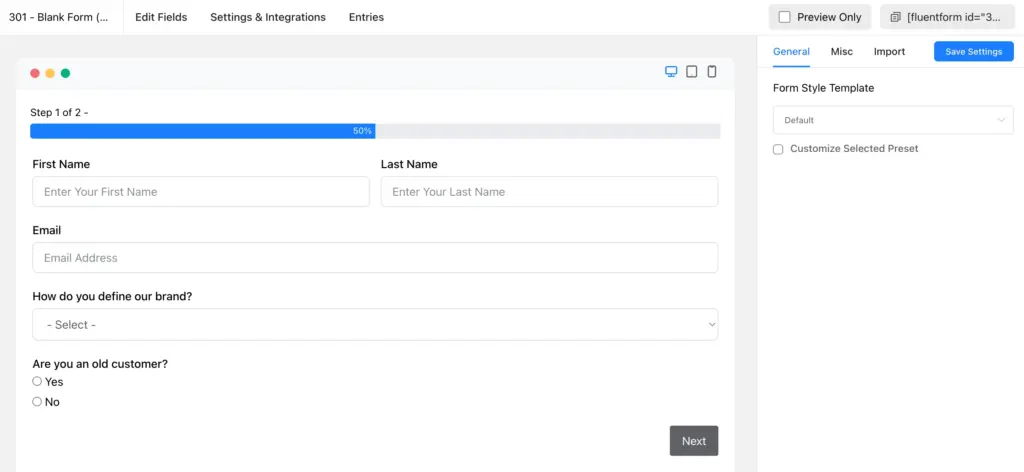
By clicking the Next button, the user will be directed to the next step.
Step 2:
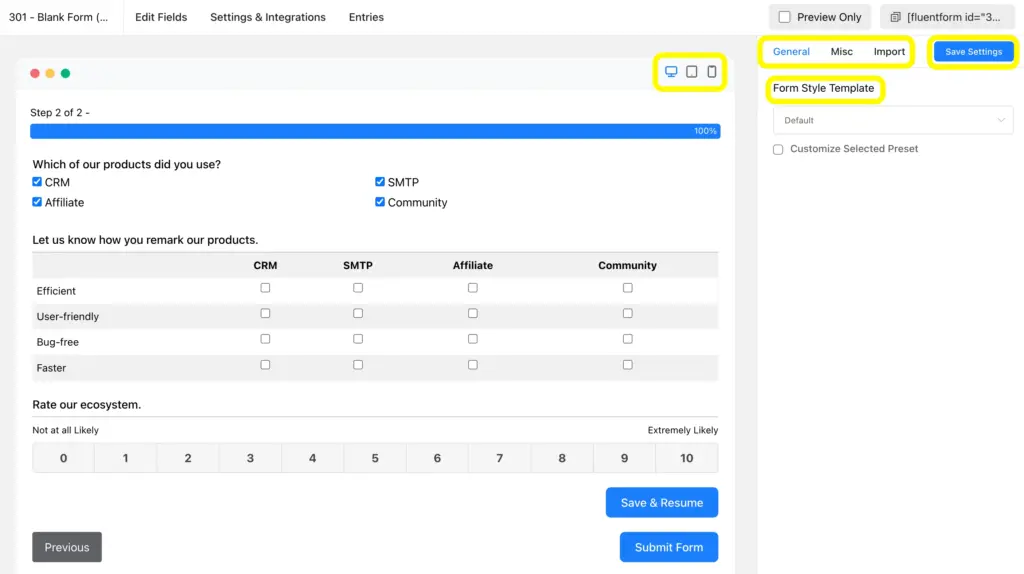
While checking the preview, you can set up the appearance by using the Form Style Template, and you can also Customize Selected Preset, and Import forms.
Later on in this blog, I’ll show how the Fluent Forms Advanced Form Styler works.
If you make changes in the preview part, please don’t forget to click on the Save Settings button at the top right corner.
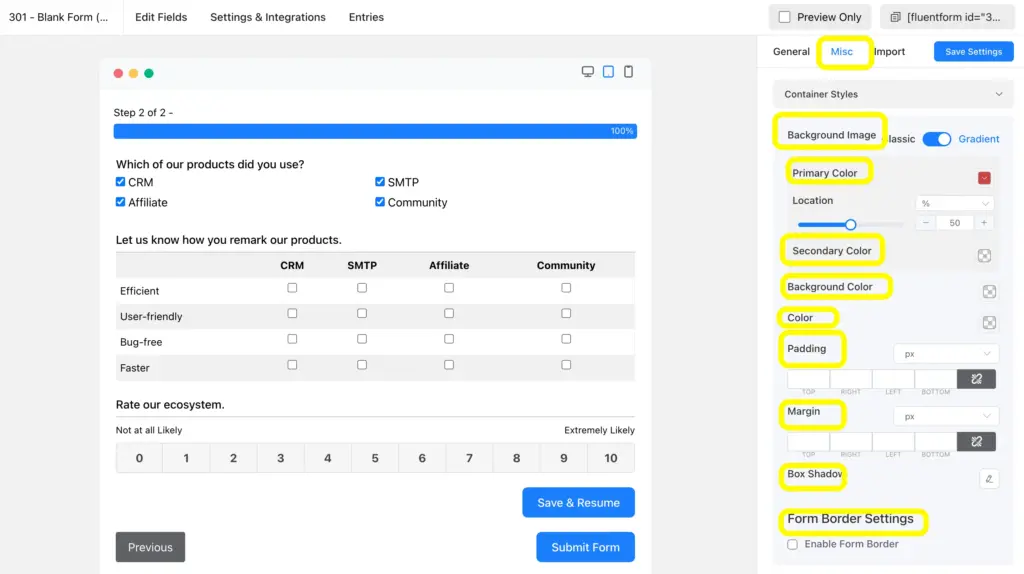
Step 6: apply your brand’s style
Using Fluent Forms, you’ll find that the preview section comes with many more options than just being a preview.
You can customize the form style in multi-level outcomes, empowering Fluent Forms’ advanced form styler. You can change the background image, color, and padding, etc.
Using this, you can apply your brand style. You can put your brand color, background image, and customize without coding.
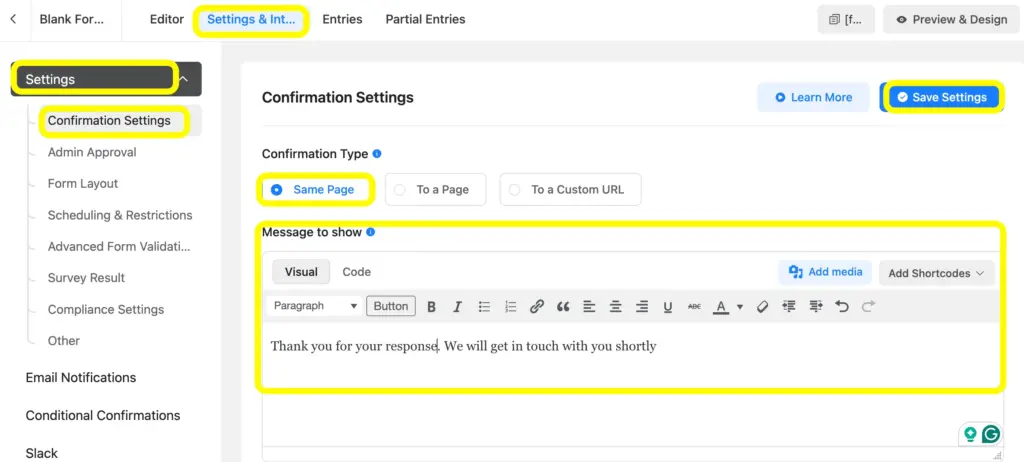
Step 7: set up confirmation, notifications, and scheduling
Once the form is built, set up notifications and confirmations from the Settings & Integrations.
Go to the Confrmation Settings and save it after customizing the message, so thath the users get notified once the form is submitted.
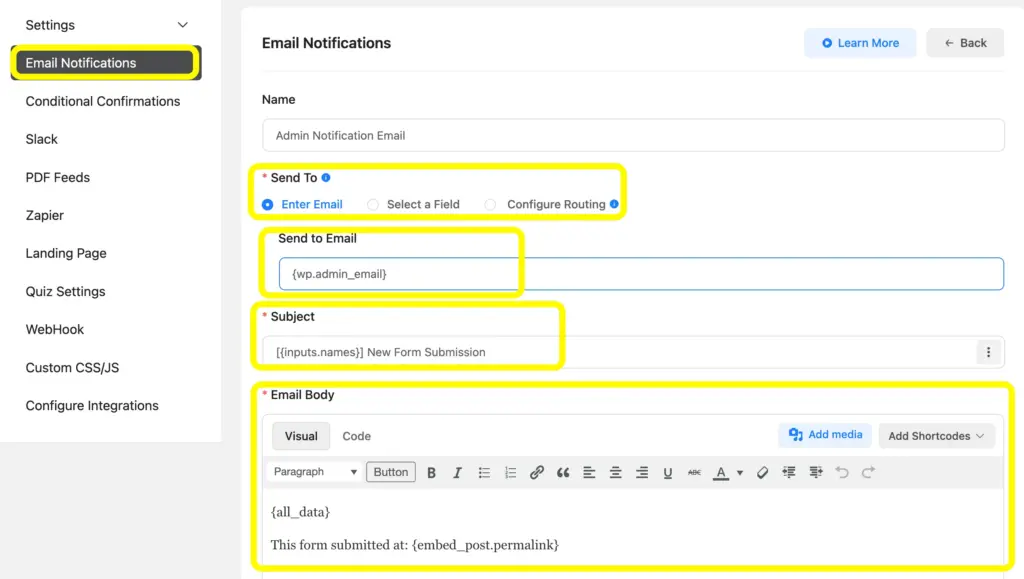
To send email notifications to multiple recipients, you can use the Email Notifications settings and set the recipients.
You can send an email notification to the admin by selecting the Enter Email, or the user by selecting Select a Field, which is typically the email field the user chooses, and the Configure Routing to send it to multiple recipients.
You can customize the Subject and Email Body.
Step 8: post-process for publishing
Once you have saved a form while renaming it, you can publish it on any page or post.
All you need to do is add the Fluent Forms block and select a form on the page/post. You can also use the shortcode copied from the editor page.
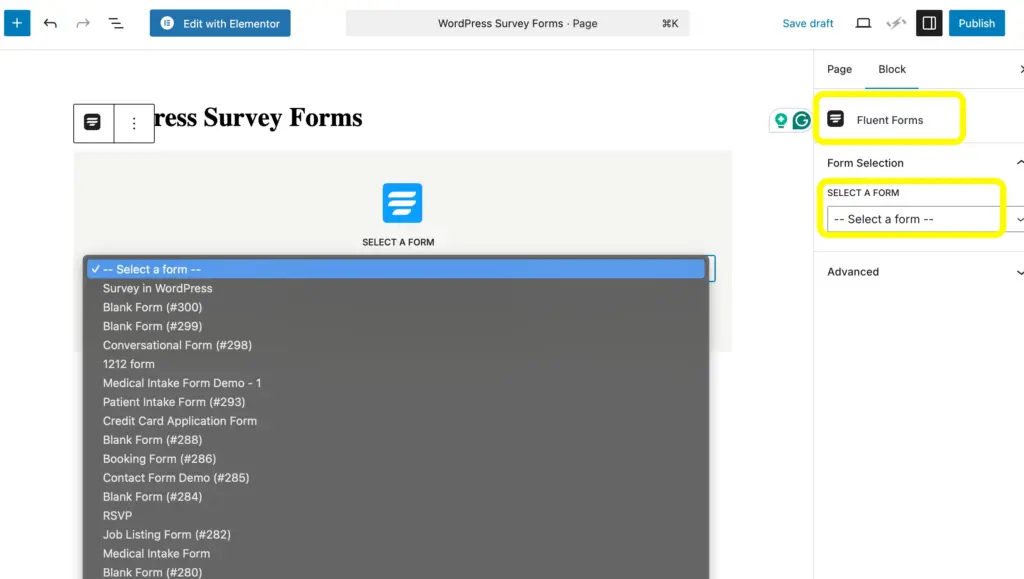
This is how you can create and publish a survey on your WordPress site.
Related features
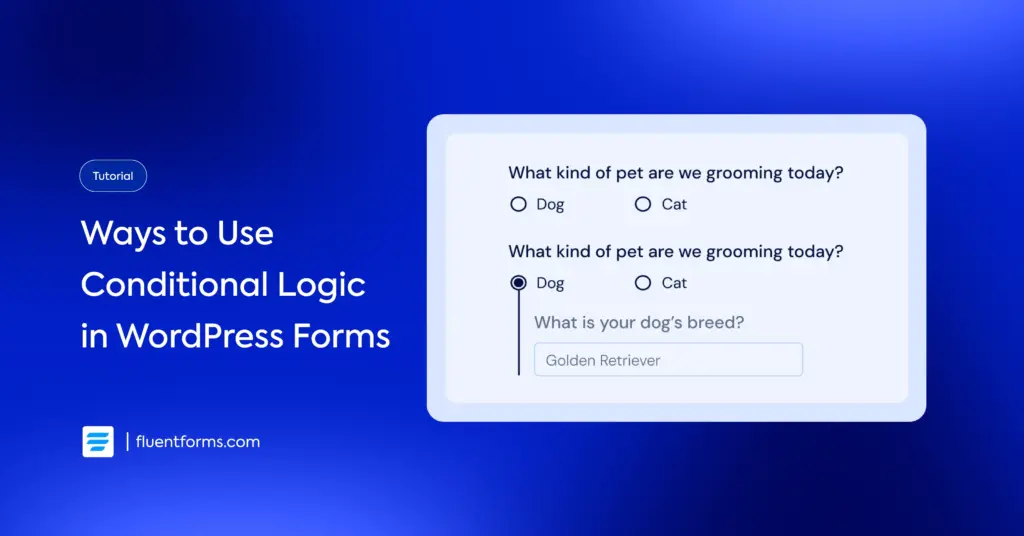
Conditional logic
Use Fluent Forms’ conditional logic to dynamically change the fields based on the previous responses and conditions. It makes your survey concise with more relevance, while only showing the related fields. The conditions can be applied to multiple fields as a group, too.
Accordion & tabs
Accordions and tabs help you pack the fields and show the field criteria at once. Fluent Forms accordions/tabs are set up with the scope to hide the fields of the other accordions/tabs that are not in action. It helps you organize the fields and save space. Makes the form function dynamically.
Reporting Dashboard
The reporting dashboard of Fluent Forms helps you get an overview of the form entries. You can see the performance of your survey with proper calculation. You can check the completion rate, top-performing forms, and submission timeline patterns. You can also get reports based on a specific date range and download the report as PDFs.
Save & resume
You can add a save and resume button to the input fields and help the user save the incomplete form and submit it later. Users will get an email notification once they hit the save and resume button.
Form step
The form step, which turns a form into a multi-step form, allows you to divide your survey forms into several pages. It breaks the monotony while bringing engagement when the user fills out a longer form.

Hi, this is Aparup. I am a Literature postgraduate, mixing my creative thoughts with my experience in the tech industry to surpass AI. Professionally, I am a content marketer seeking solutions to users’ problems regarding WordPress.


Leave a Reply