Authorize.net Integration in Fluent Forms for WordPress (Full Setup and use case)
Fluent Forms just introduced the Authorize.net integration – a feature many users have been asking for. And like always, when you request something that improves your workflow, we build it.
This guide walks you through everything: what Authorize.net is, why this integration matters, how to set it up step by step, and where it makes sense to use Authorize.net over other payment gateways.
Follow each step carefully. I’ll point out the usual problem spots along the way so you don’t run into avoidable issues. And toward the end, you’ll see how a test payment works and where Authorize.net brings a practical advantage.
TL;DR
- Authorize.net is now available in Fluent Forms for WordPress.
- It supports secure, one-time payments using Visa, credit cards, and electronic methods.
- Enable Authorize.net from Global Settings → Payment Methods.
- Get your API Login ID, Transaction Key, and Webhook Signature Key from your Authorize.net account.
- Set up required Webhook Events and paste your credentials into Fluent Forms.
- Add Authorize.net inside your Payment Method field and publish your form.
- Great for nonprofits, professional services, and businesses that prefer stable, secure card processing.
What is Authorize.net
Authorize.net is a global payment gateway known for stability, strong fraud protection, and dependable card processing. It’s widely used by nonprofits, professional service providers, educational institutions, and established businesses that need predictable, compliant payment handling.
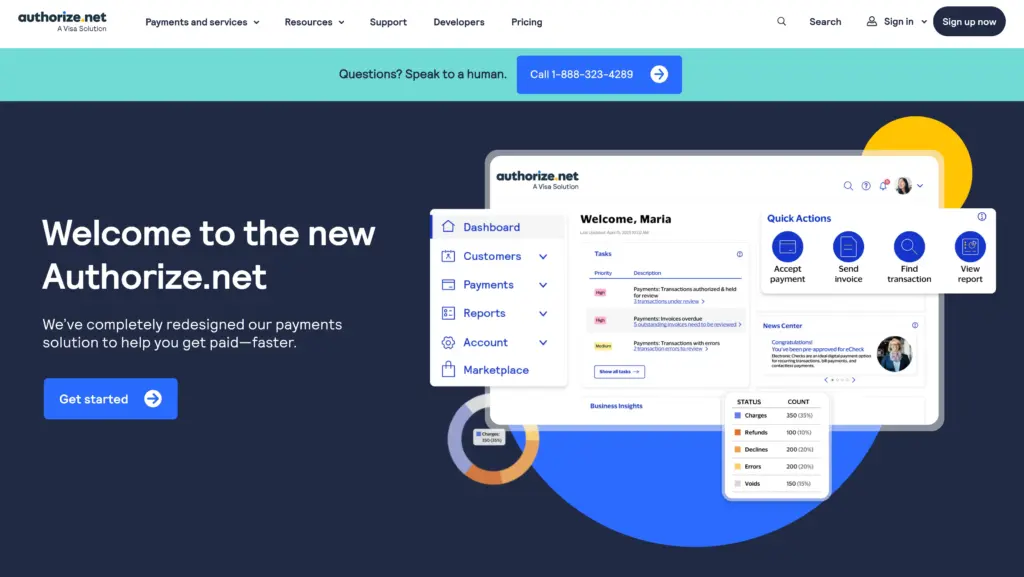
It lets you securely accept Visa, credit cards, and electronic payments – all built on infrastructure designed for accuracy and protection. Authorize.net isn’t trying to reinvent payments; it’s built to be reliable, consistent, and transparent.
And now that it’s available inside Fluent Forms, WordPress users get a direct, hassle-free way to collect payments without extra plugins, connectors, or hand-written code.
Why use Fluent Forms with Authorize.net
Authorize.net handles the transaction. Fluent Forms handles everything around it – the experience, the logic, and the structure.
Fluent Forms is a fast, lightweight WordPress form builder optimized for clean data capture. With the new Authorize.net integration with Fluent Forms, you can:
- Collect one-time payments inside any payment form
- Add Authorize.net alongside your other payment gateways
- Use conditional logic to display it only when needed
- Pair it with multi-step forms for guided checkouts
- Combine it with confirmations, notifications, and funnel logic
- Keep everything inside WordPress – no redirects and no extra add-ons
The flow becomes simple:
Fill Form → Process Payment → Confirm Submission
Instead of just embedding a gateway, you get full control of the journey – with dynamic fields, styling, and logical rules that match your brand.
Some of the key features of Fluent Forms are:
- 65+ input fields to collect any type of information
- Numeric calculation to create forms with calculators
- Multi-step forms to break long forms into multiple steps
- Conversational forms to provide a better form-filling experience
- Advanced post creation to collect user-generated content
- Conditional logic to show/hide input fields based on user behavior
- Integration with popular payment gateways to collect payments and donations
- Spam protection using hCaptcha, reCAPTCHA, Turnstile, Honeypot, Akismet
- Quiz and survey with advanced scoring
- Advanced form styler to align form with your brand identity
- Custom CSS and JS to create more advanced forms
- Export entries in CSV, Excel, ODS and JSON format
- PDF add-on to turn form submissions into PDF files
- Form scheduling and restriction based on different rules
- Double opt-in confirmation to ensure efficient data collection
- Email notification after form submission
- Conditional confirmation to show confirmation messages based on predefined conditions
- Advanced form validation to accept eligible submissions
- Reporting dashboard for an overview of the forms’ performance
- Fully responsive and accessible to ensure inclusivity
- 60+ integrations to expand core functionalities
More than 600K+ websites use Fluent Forms – and Authorize.net adds another dependable option for secure card payments.
How to integrate Authorize.Net with Fluent Forms
Note: Authorize.Net Integration is a Premium Feature. You’ll need Fluent Forms Pro to use it.
Enable Authorize.net Payment Method
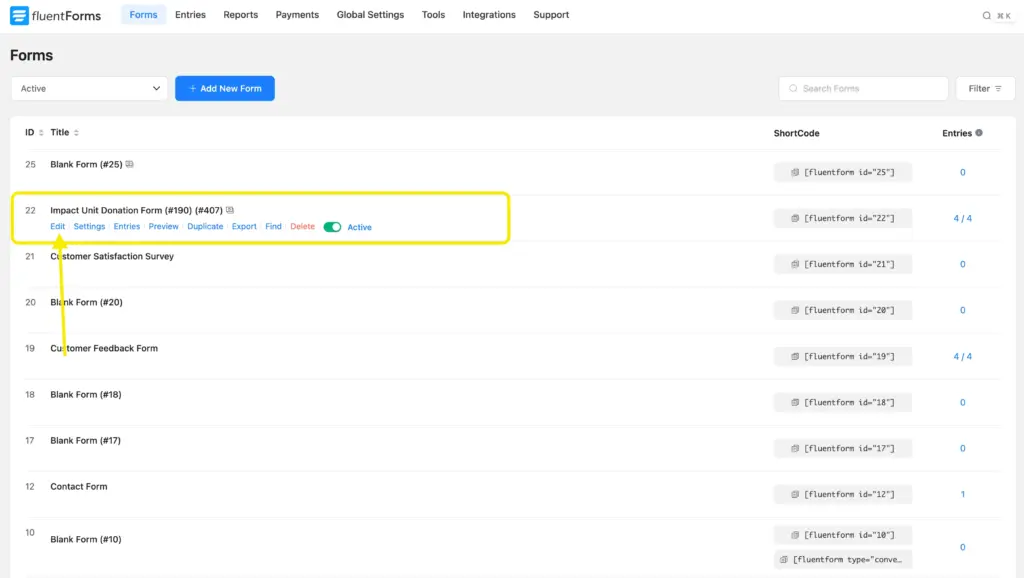
Go to Global Settings from the Fluent Forms Navbar. Open the Payment Settings tab and click the Payment Methods option.
Open Authorize.Net from the tab. Click Enable Authorize.Net Payment Method. Once enabled, it becomes available globally for all forms.

After enabling, you will see a settings panel appear. Here, you will have to do the setup that connects Authorize.net to Fluent Forms.
To do that, you will need to gather your credentials (we used the test ones), such as: API Login ID, Transaction Key, Webhook Signature Key.
Before going to the Authorize.net dashboard for credentials, copy your website’s Webhook URL (ends with/v1/authorizenet/webhook) from this page – you’ll need to paste it into your Authorize.net dashboard later to get the webhook.
Get the Credentials
Now I’ll help you locate the API Login ID, Transaction Key, and Webhook Signature Key.
Get API Login ID
Log in to your Authorize.net dashboard.
Go to Account → API Settings.
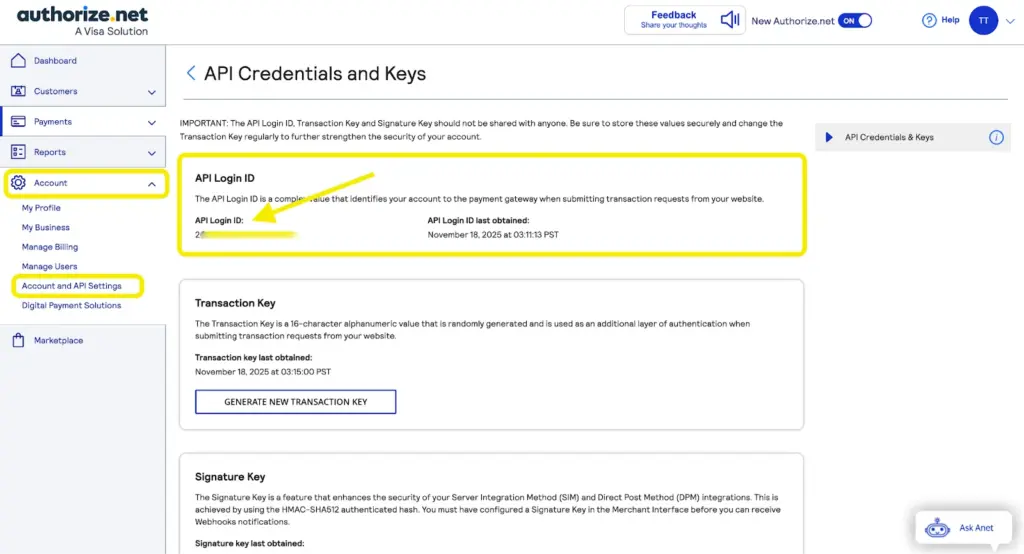
Copy your API Login ID.
Get Transaction Key
In the same API settings, scroll down and you’ll find the section Transaction Key.
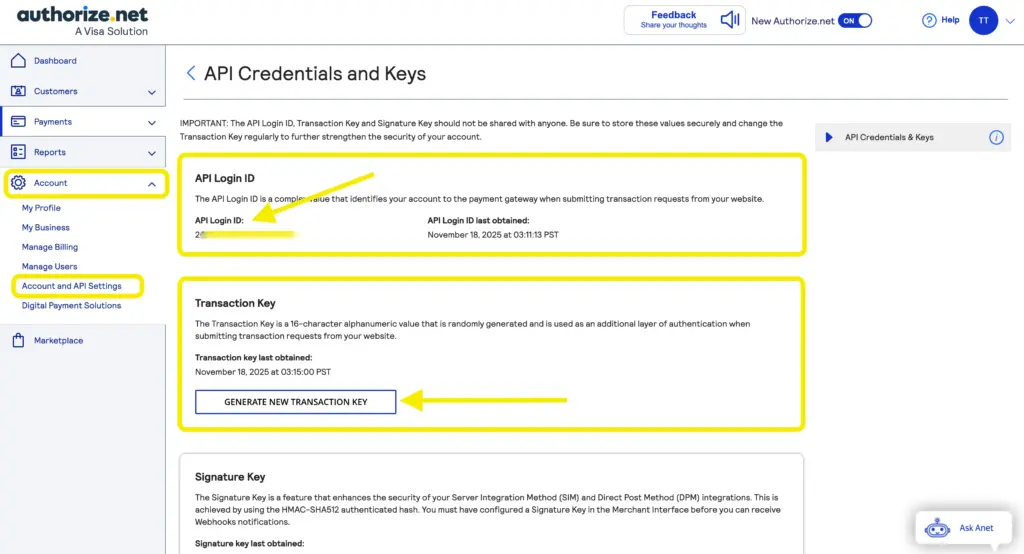
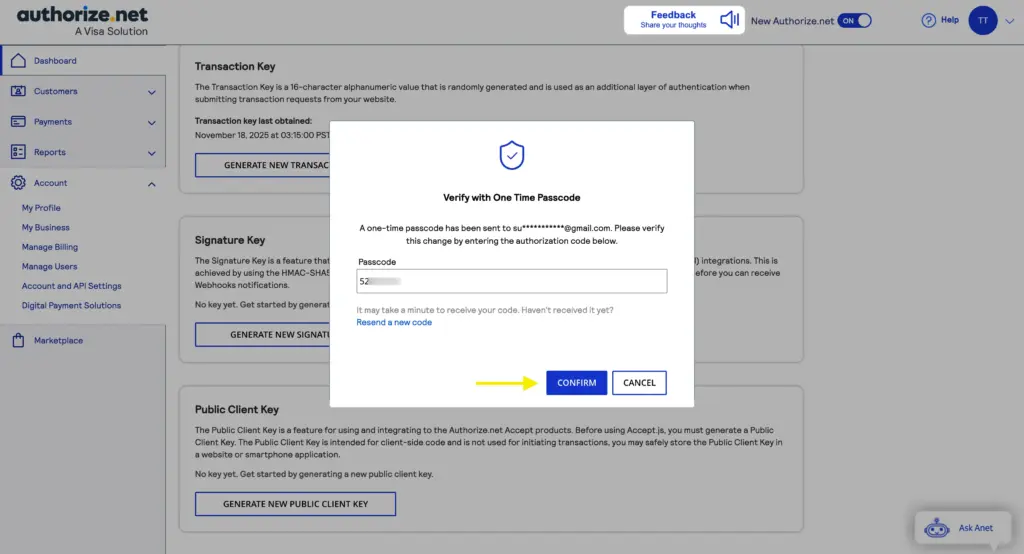
Click on Generate New Transaction Key. A pop-up appears – click Submit.

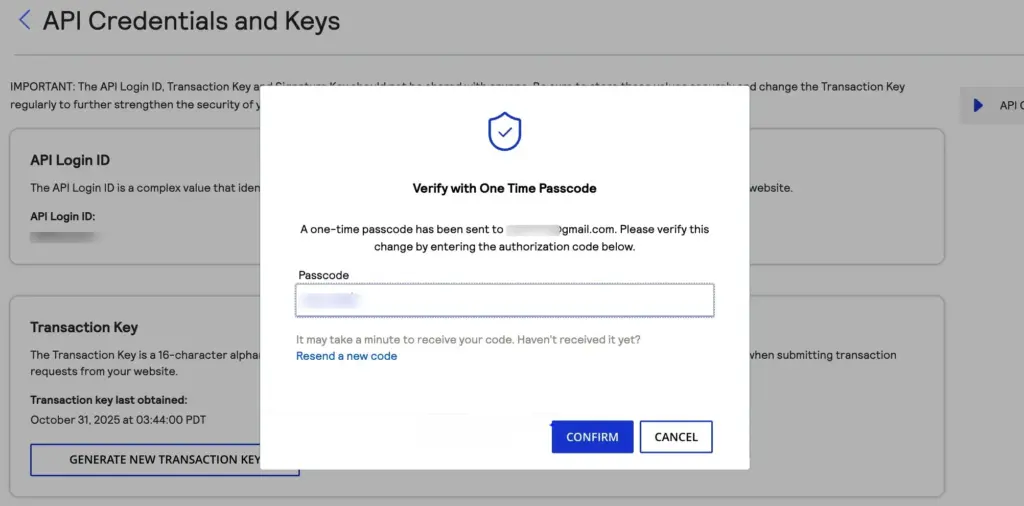
Enter the passcode emailed to you and click Confirm.
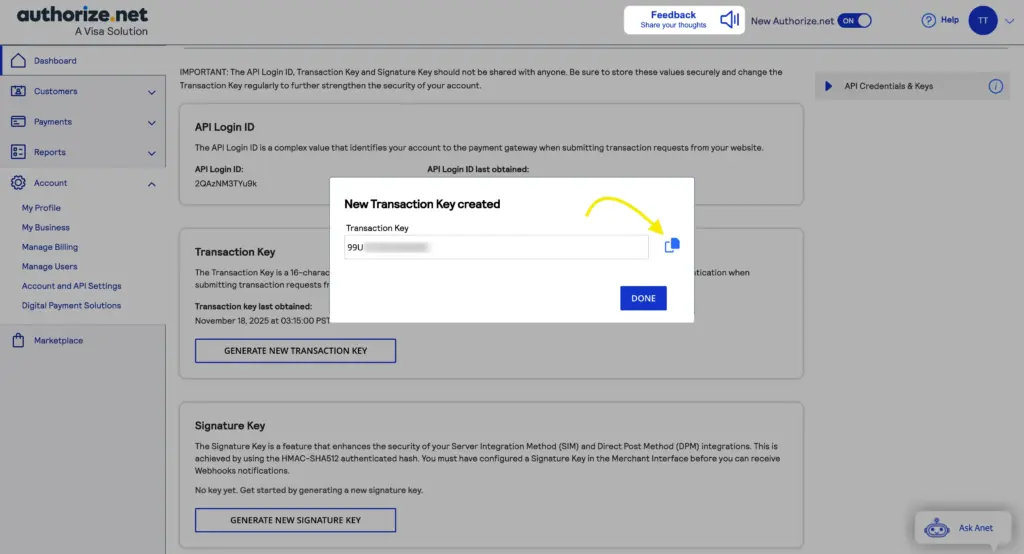
Copy the Transaction Key.
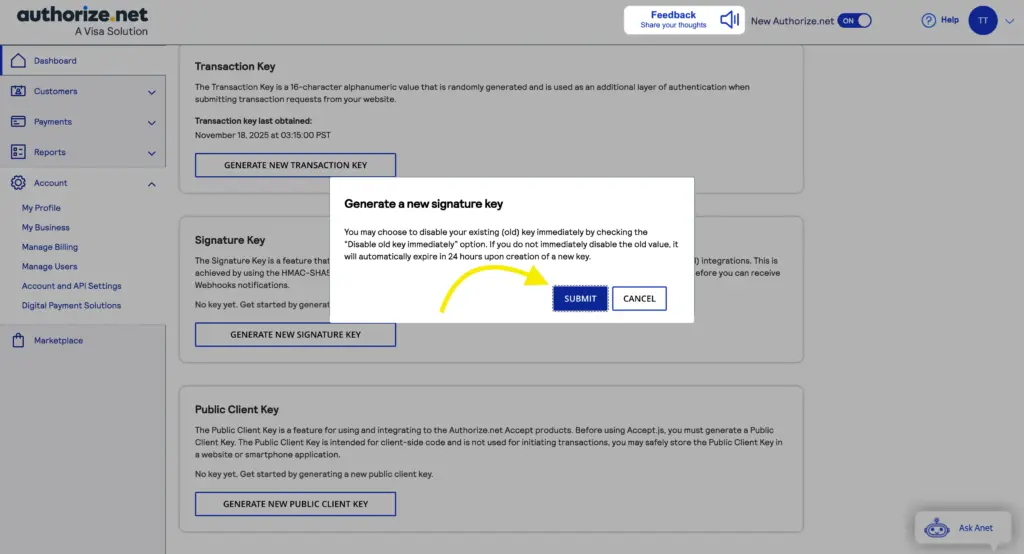
Webhook Signature Key
Scroll down a bit more and you’ll see the Signature Key option. Now, click on Generate New Signature Key.
If you somehow already have a key, the old key will be disabled when you generate a new one, keep this in mind.
Follow the same verification steps as above.
You’ll get the Signature Key in no time.
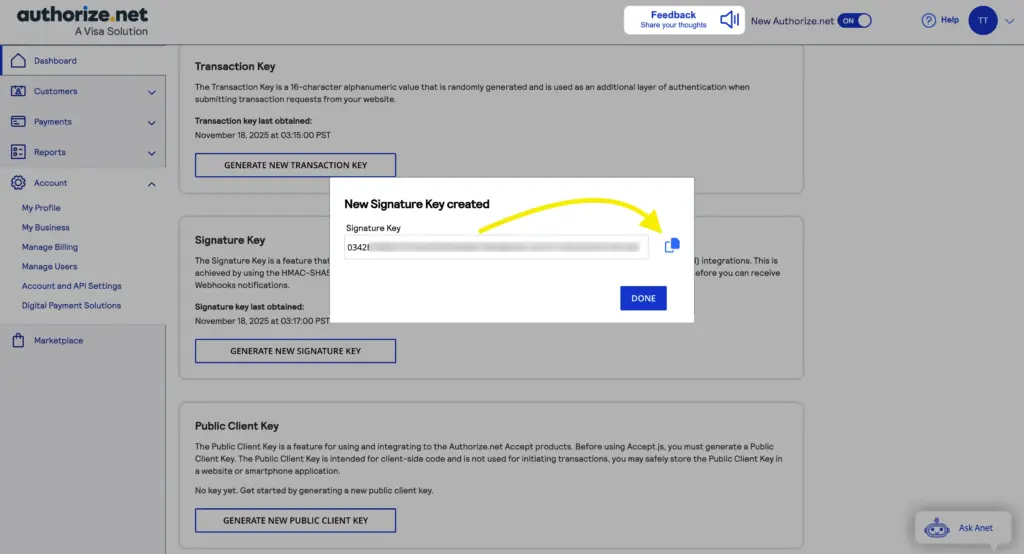
Copy your Signature Key.
Caution: Keep both the Transaction Key and Signature Key somewhere safe. Because if you lose them, you’ll have to generate them again and re-establish the connection.
Required Authorize.Net Webhook Events Setup
You’ll just need another set up for the integration to work from the Authorize.net end. That is setting up the webhook events.
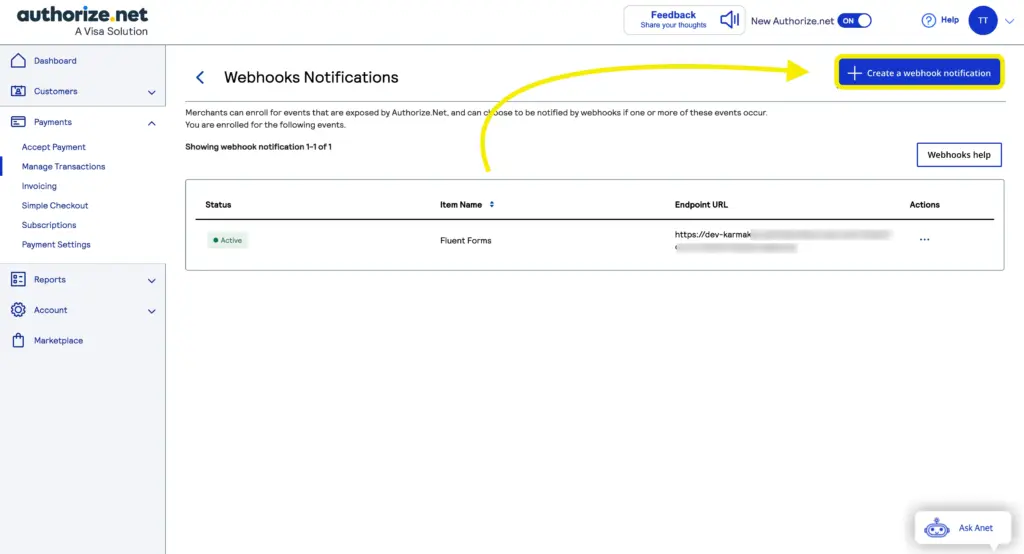
Go to Account and API Settings. Then scroll to Webhooks and click on it.

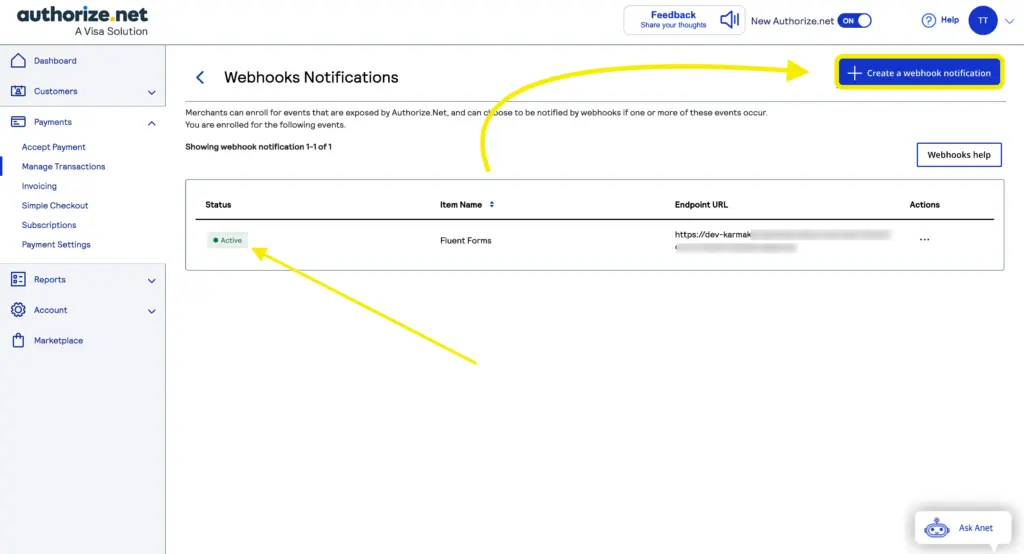
Now click Create a Webhook Notification.
Fill in: Webhook name, Endpoint URL (your webhook URL- ends with/v1/authorizenet/webhook), Status: Active.
Now select these events:
- AuthCapture Created
- Authorization Created
- Capture Created
- PriorAuthCapture Created
- Void Created
- Refund Created
- Fraud Approved
- Fraud Declined
Save the webhook.
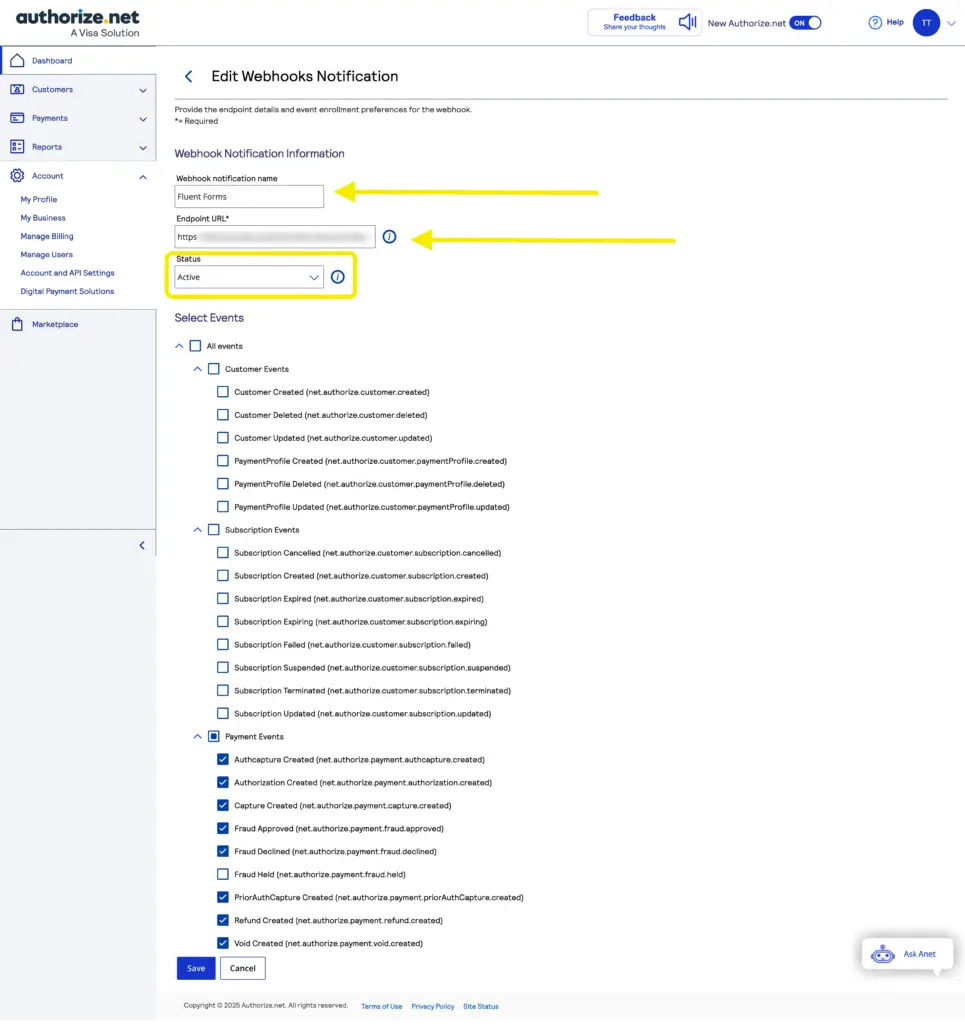
Confirm it shows as Active.
Configure Authorize.Net with Fluent Forms
Return to the Authorize.net settings in Fluent Forms.
Select your Payment Mode – Test (for sandbox payments) or Live. Choose your Transaction Type. We used the Test mode for demonstration.
Now paste your:
- API Login ID
- Transaction Key
- Webhook Signature Key
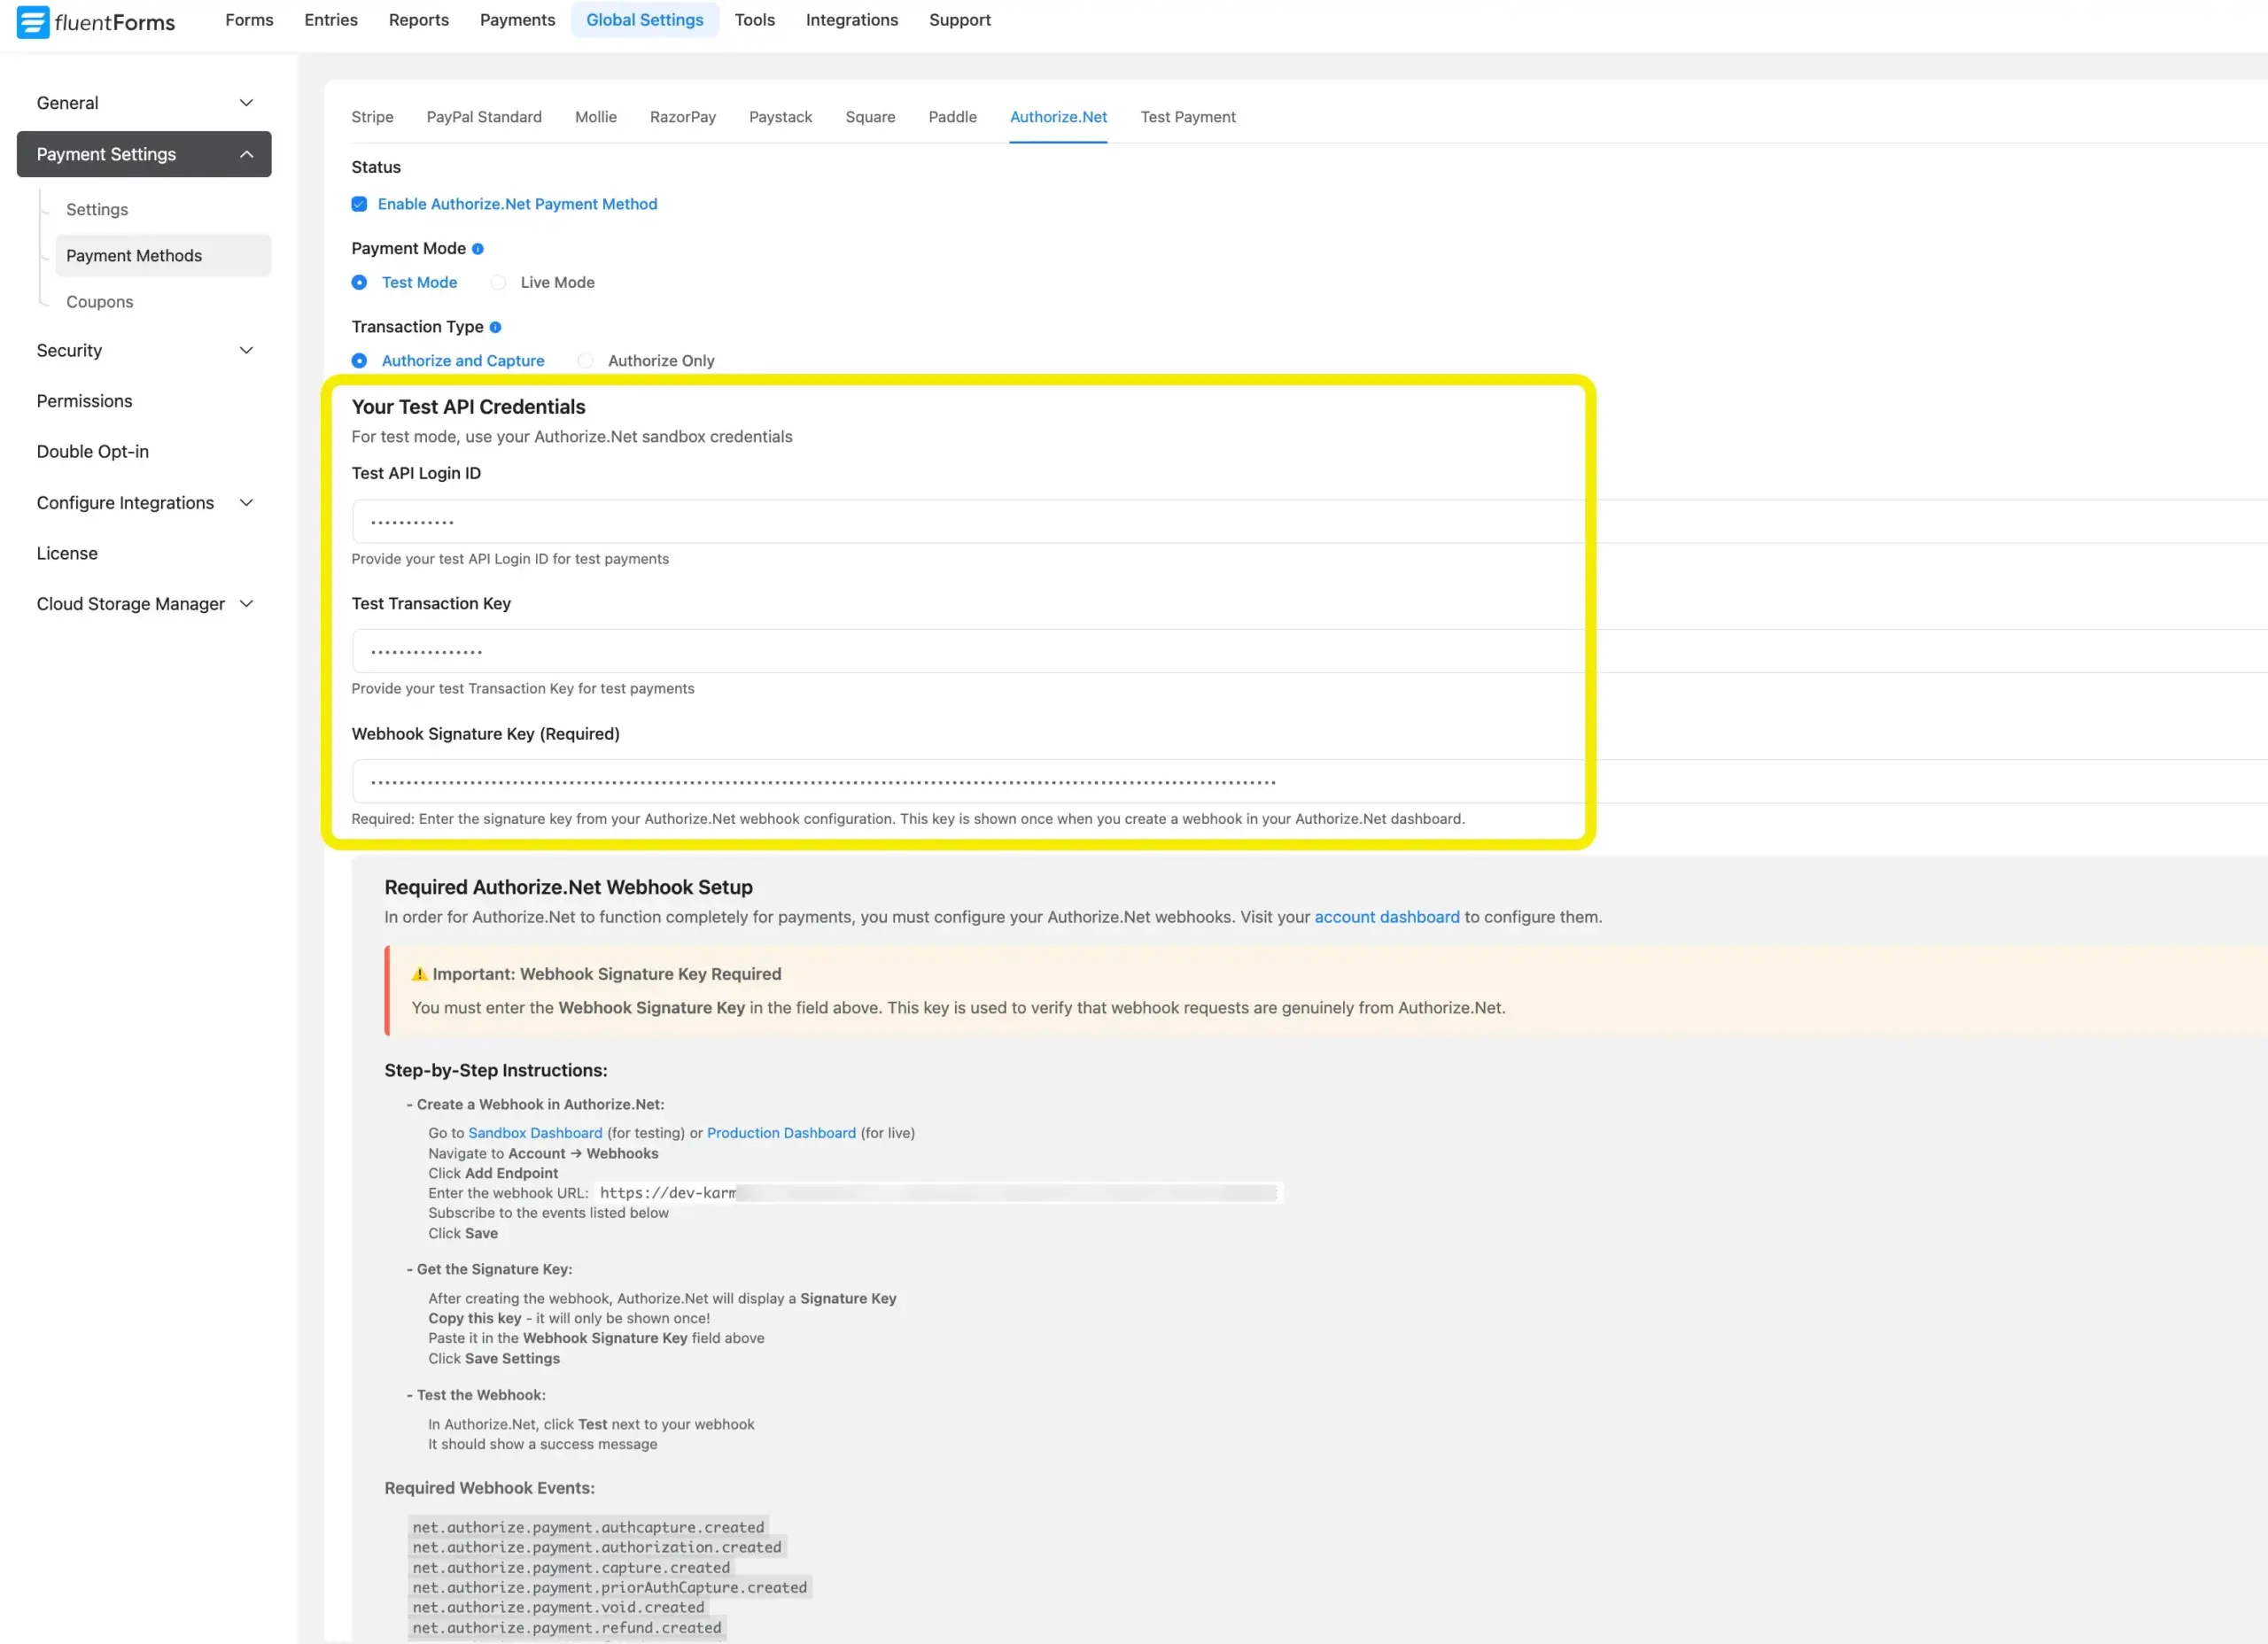
Click Save Settings.
Your Authorize.Net account is now connected.
Integrate Authorize.Net in Fluent Forms
You can now add Authorize.net to any existing payment form.
(If you don’t have one yet, you can follow the Payment Form documentation.)
Open the form’s Editor.
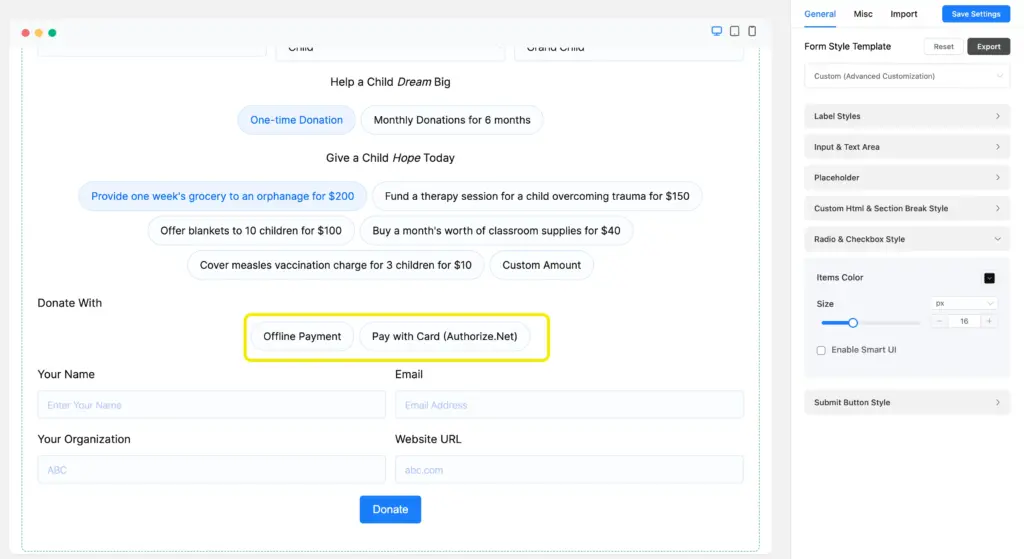
Within the editor, click on the Payment Method field. Go to Payment Methods. Click on the checkbox of Authorize.Net. Use the dropdown to adjust the Method Label if needed.
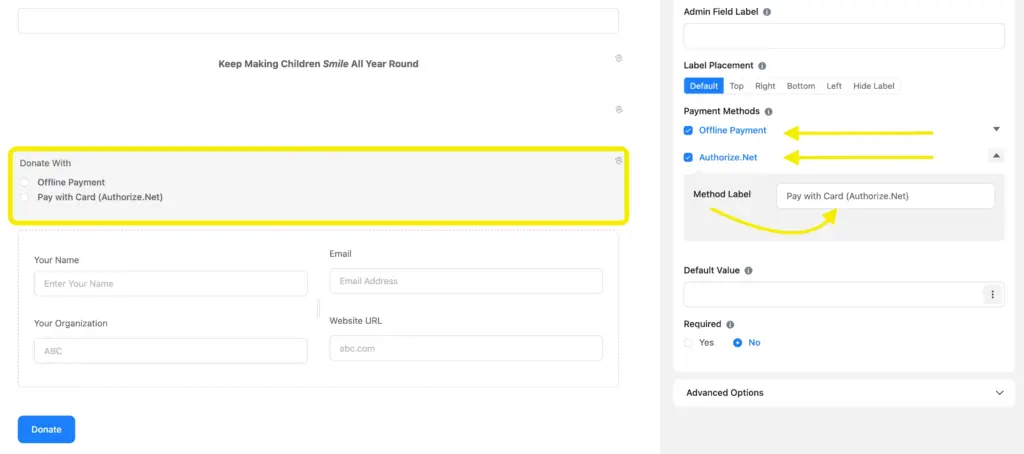
Click Save Form.
Here’s a preview of the form we used. You can design as you wish with the Advanced Form Styler.
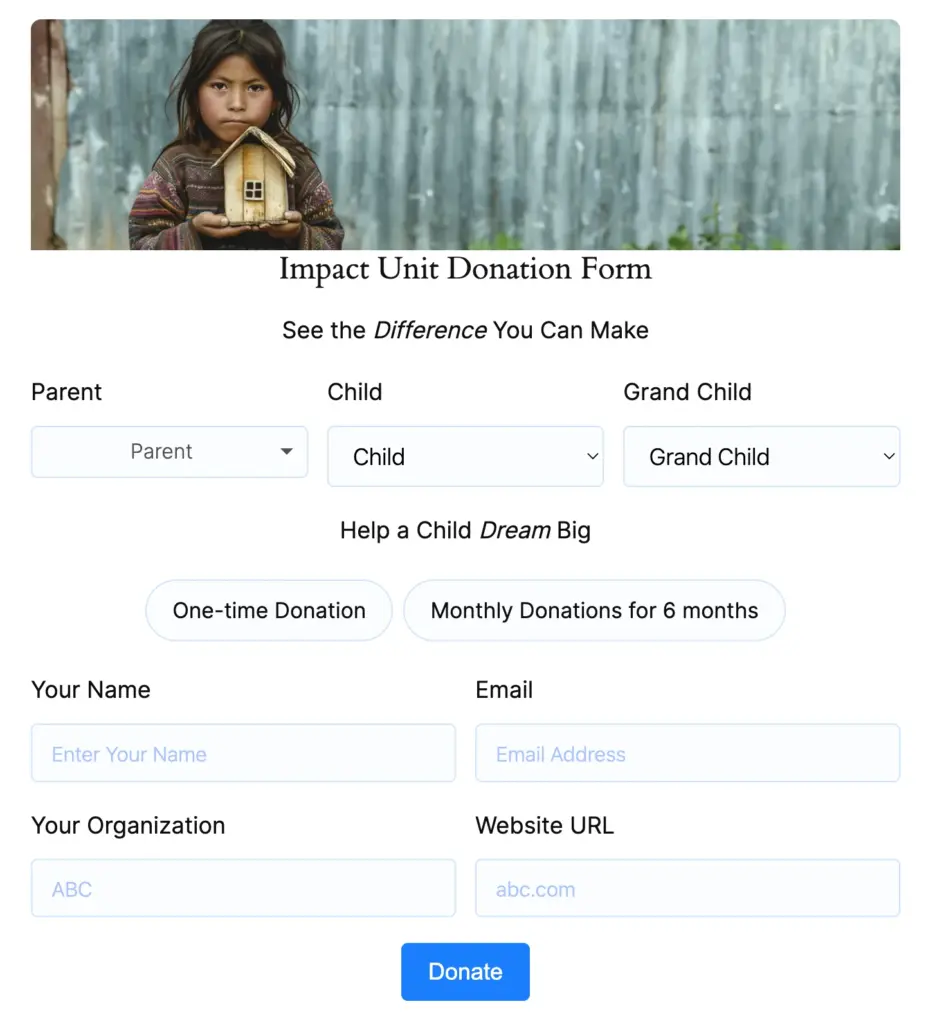
To publish the form, copy the shortcode or use the Fluent Forms block in the page you want to put the form.
You can download the form template for free and use it as you want.
Testing a payment (recommended)
Before switching to live payments, it’s worth running a quick test.
- Set your Payment Mode to Test
- Fill out the form like a regular user
- Submit it
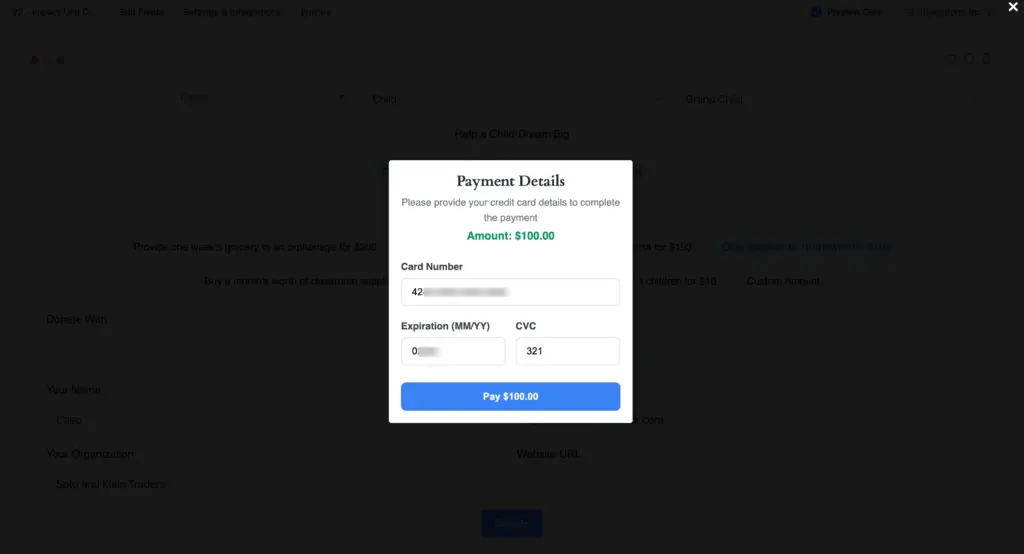
A pop up appears for the payment. Fill it up with a test card no. (4242-4242-4242-4242), expiry date and CVC. Complete the payment.
Now check:
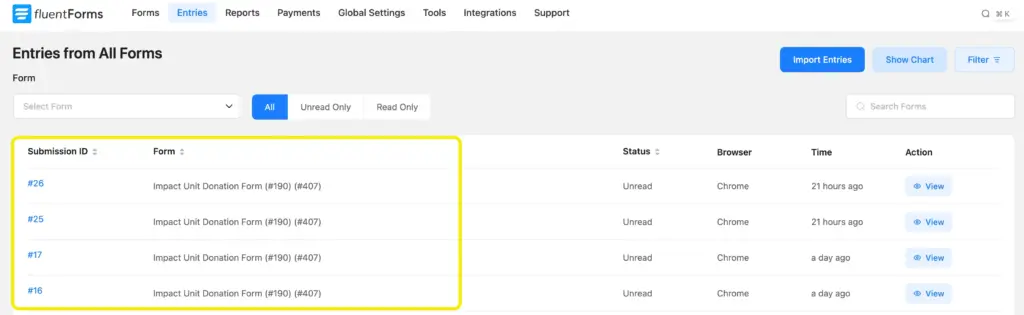
The entry appears under Fluent Forms → Entries.
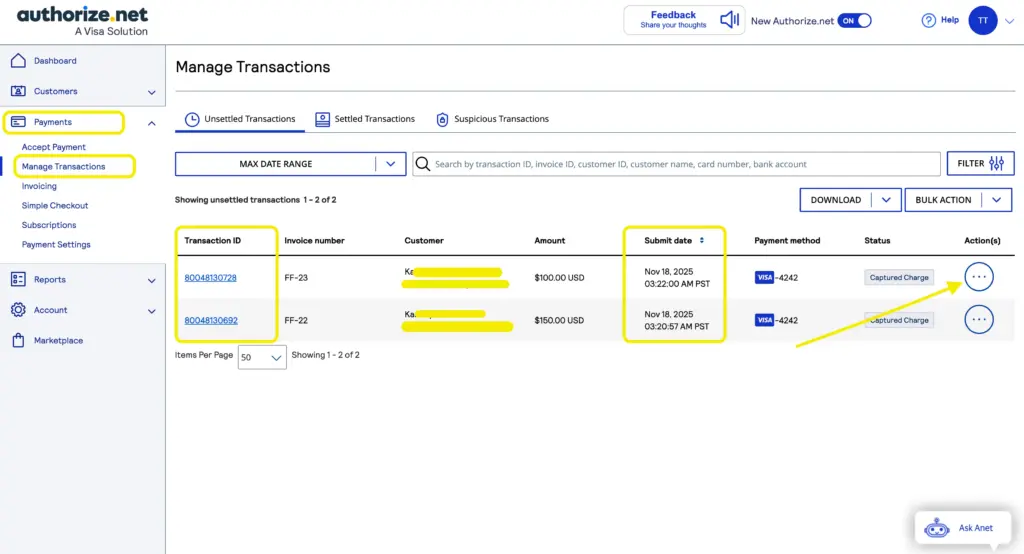
A test transaction shows up in your Authorize.net dashboard (in the Payments section).
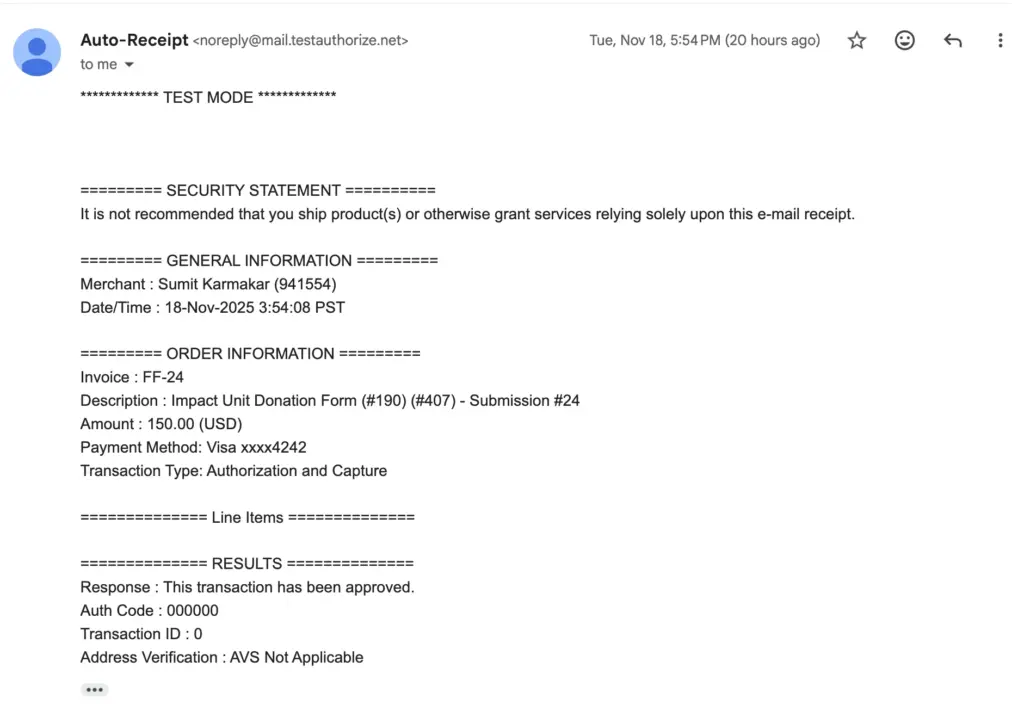
You get a confirmation email correctly.
If something doesn’t behave as expected, it’s almost always tied to the webhook setup or incorrect credentials – so those are your first checkpoints.
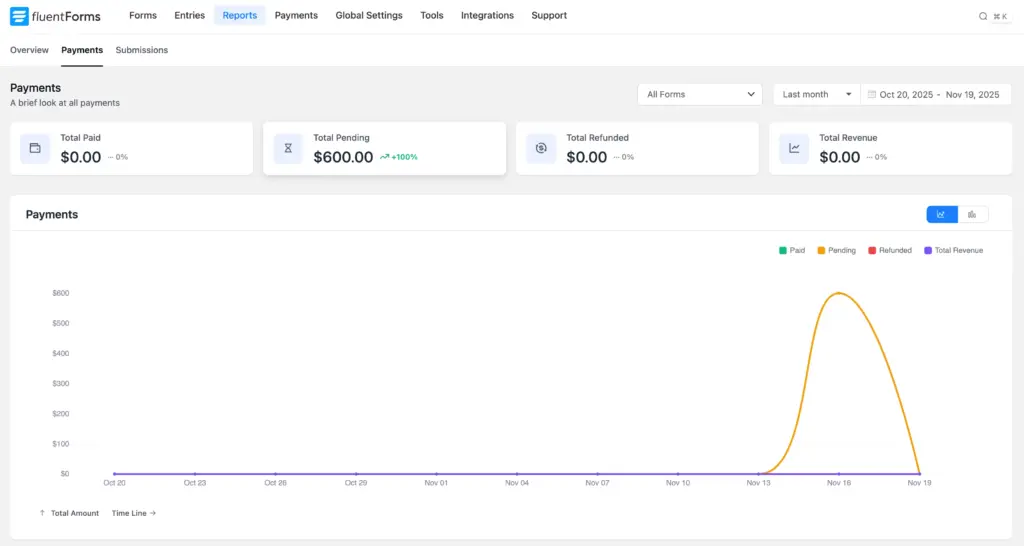
You can keep track of the successful or failed payments from the Fluent Forms Reporting Dashboard easily.
Troubleshooting tips
Here are the most common issues and where to look:
Payments not showing in Authorize.net
- Re-check the selected Webhook Events – even one missing event can break the flow
- Make sure the webhook is set to Active
- Ensure the Endpoint URL matches exactly
Payment method not appearing on the form
- Confirm Authorize.net is enabled inside the Payment Method field
- Make sure the form contains Payment Items
“Invalid credentials”
- Re-copy your API Login ID, Transaction Key, and Signature Key
- Make sure there are no extra spaces or formatting issues
Test mode works, Live mode doesn’t
- Test and Live modes require different credentials
- Many users accidentally reuse Test credentials in Live mode
Where Authorize.net makes the most sense
Use Authorize.net when:
- You need stable one-time payments without experimenting with newer gateways
- You rely on fraud-prevention tools built into the provider
- You’re a nonprofit already using Authorize.net for donor management
- You run professional services, education, or local businesses with existing Authorize.net merchant accounts
- You want a smooth, no-redirect card experience inside WordPress
If you’re using Stripe or PayPal and want an additional, dependable card option, Authorize.net fits well.
Enjoying this article?
We regularly publish actionable content on our blog. Subscribe to get them delivered straight to your inbox.
We won’t spam you. You can unsubscribe whenever you want.
Conclusion
The new Authorize.net integration gives WordPress users another dependable way to collect payments through Fluent Forms – cleanly, securely, and without extra plugins. Whether you’re handling donations, service payments, event fees, or straightforward checkout forms, this integration keeps everything streamlined.
Fluent Forms also supports Stripe (free), PayPal, Razorpay, Paystack, Mollie, Square, and Paddle– so you can mix and match based on what your business needs.
60+ Third-party Integrations
Expand your form functionality with seamless integrations.

If you run into anything while setting up Authorize.net, drop a comment – though this guide should cover everything you need.

This is Sumit. He’s a physics major who’s trying to understand both the physical as well as the WordPress worlds. Whenever he’s not busy, plays fifa or spends time with his family.


Leave a Reply