Integrate RazorPay in WordPress Forms for Effortless Transactions

Close your eyes, not literally, and think of WordPress forms. What comes to your mind? Product orders, gift registration, bookings, admissions, donations, etc. Yes, WordPress forms are now widely used to complete monetary transactions.
But is it safe? Of course! If you have the right tools by your side. So introducing to you Razorpay and describing in detail in this blog is how you can integrate Razorpay with Fluent Forms, a WordPress form builder plugin, in 3 simple steps.
Razorpay

Razorpay has innovative features that make accepting payments and donations a child’s play. So whether you are looking to accept simple payments and donations or automate payouts for your employees, you can easily trust Razorpay to do the job.
Some of the most impressive features that Razorpay has to offer are:
- 100+ payment methods
- Easily shareable payment links
- Automated payment receipts
- Payment buttons
- Subscription payments
- Payment splits, etc.
Related Blog: How to accept payments with WordPress payment integration
How to integrate Razorpay in WordPress
Razorpay is cherished among users all across the globe, and rightfully so. And connecting it is as easy as pie. We’ll be using Fluent Forms, the best WordPress contact form plugin, to show you how effortless it is. Just follow the 3 simple steps to integrate Razorpay in WordPress quickly.
To integrate Razorpay with Fluent Forms, you have to follow the steps –
- Sign up for Razorpay
- Enable payment module
- Configure Razorpay in Fluent Forms
These steps are elaborated for you below.
Step 1: Sign up for Razorpay
The first and the most obvious step is to sign up for an account. If you already have one, then skip over to the next step. If you don’t, just follow this link to sign up.
Step 2: Enable payment module

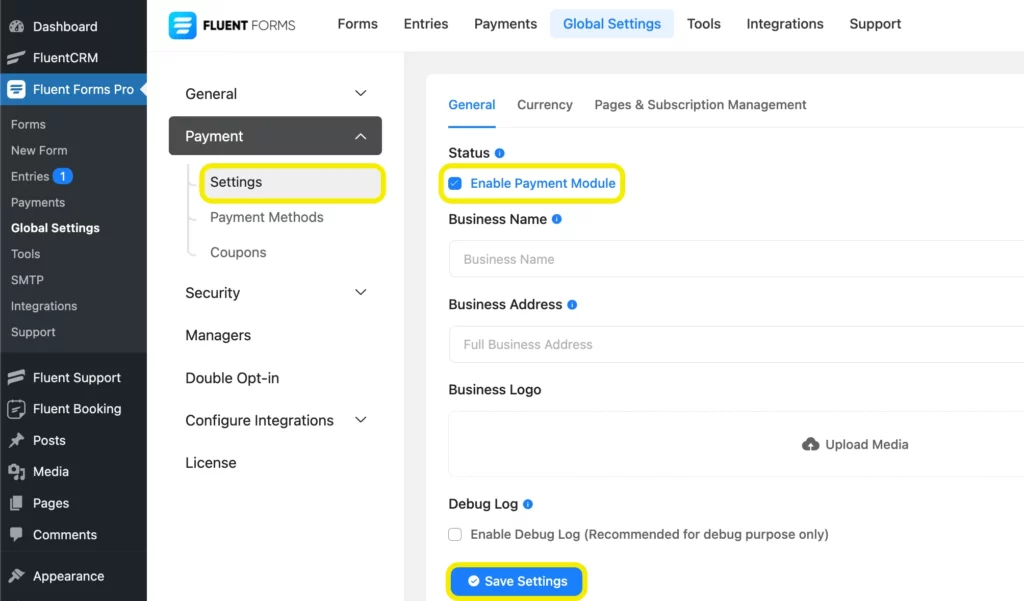
Before you set out to configure Razorpay, make sure you have WordPress payment modules enabled. To do that, head over to the Global Settings form your Fluent Forms dashboard.
From the side menu, select the Payment dropdown menu and then select Settings. An Enable Payment Module checkbox will appear in front of you. Tick on it to activate.
Step 3: Configure Razorpay in Fluent Forms

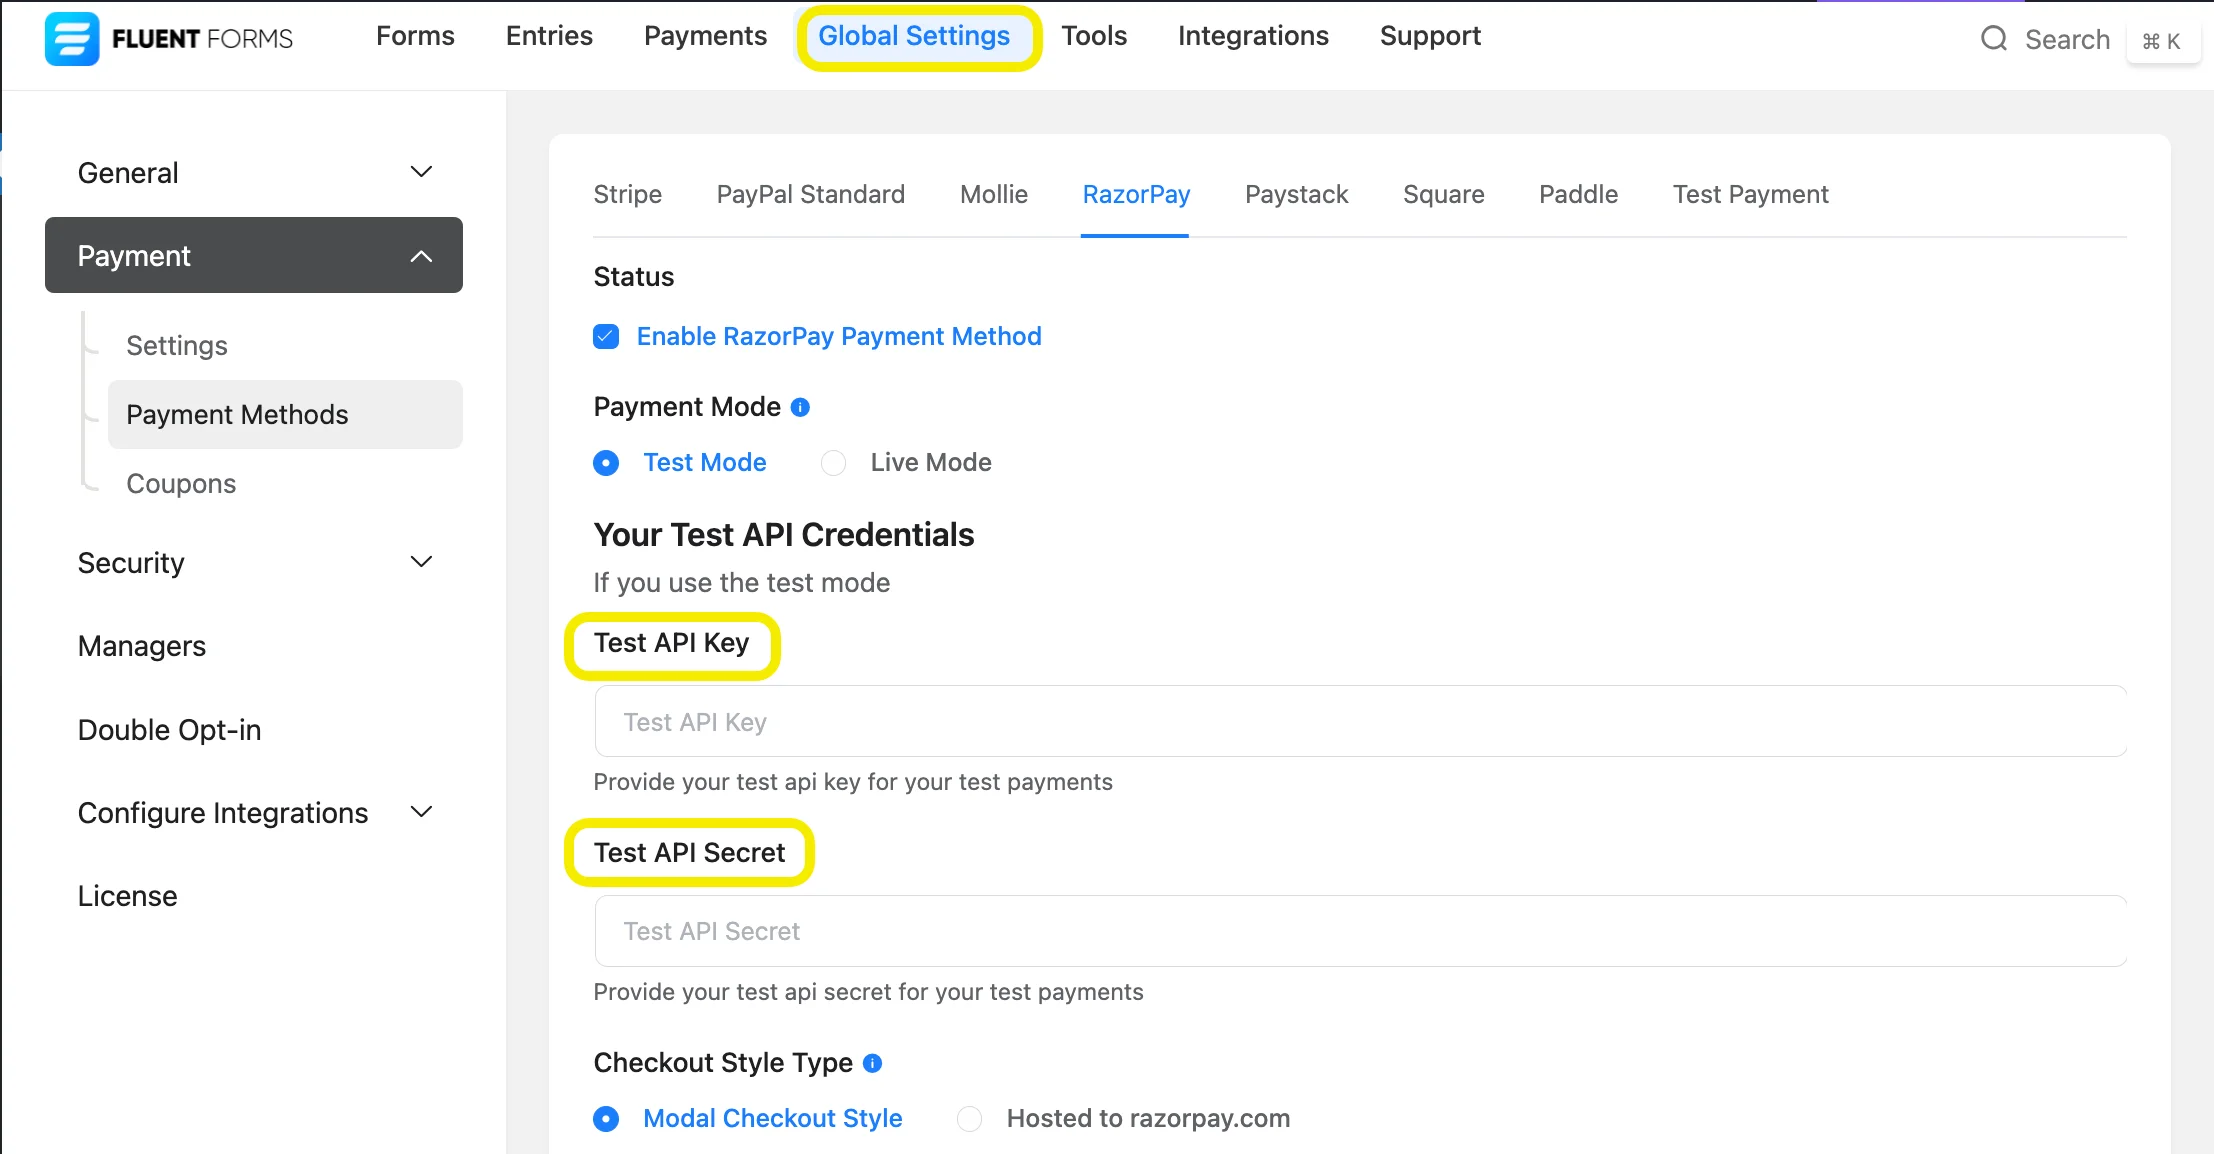
Now, for Razorpay configuration, locate the Razorpay module from the Payment Methods tab. Then check the Enable Razorpay Payment Method checkbox.
Next, it’s time to select the Payment Mode – Test Mode or Live Mode. Since we are only configuring Razorpay here for demonstration purposes, we will go with the Test Mode. You can follow the same steps to set up Razorpay on Live Mode for your website.
Once that is out of your way, it’s then time to select the checkout style type. There are two available styles. The Modal will enable embedded checkout, so you can complete the checkout process in the same form without leaving the page. But if you want to redirect your users to a dedicated Razorpay checkout page, then you can go with the Hosted by razorpay.com option.
As for the API keys, just sign in to your Razorpay account and go to the API Keys tab. Click to Generate Test Key and copy the Key ID and Key Secret. Head back to the Fluent Forms dashboard, and paste the keys in their respective fields. Remember to Save Settings.
Related Resource: RazorPay integration with Fluent Forms documentaion.
Fluent payment
Now that Razorpay is successfully integrated with WordPress, you can use it effortlessly to collect payments and donations. But, if you are looking for a change in flavor, Fluent Forms has diverse payment features to offer you. There are also 4 more payment gateway integrations – PayPal, Stripe, Mollie, and Paystack. Moreover, super-smart features like numeric calculation, advanced form validation, landing page, conversational forms, etc. make your payment form even more dynamic. But enough talk. Try out Fluent Forms and see for yourselves.
Other payment integrations you might want to check out:
60+ Third-party Integrations
Expand your form functionality with seamless integrations.


Leave a Reply