Fluent Forms 4.2 with Massive Features
Fluent Forms 4.2 is here with the most awaited features like Geolocation, Stripe embedded checkout, subscription payment, value calculation with Repeater field, and more. After the biggest update with Fluent Conversational Forms, we’ve been relentlessly working to keep our promises for launching new features. Let’s check out what this release includes in a nutshell:
- Autocomplete with Google Maps
- New Payment Gateway (Paystack)
- Subscription payment option
- On-site payment via Stripe without redirection
- New “Connect to Stripe” button (no API key needed)
- Modal Checkout for Razorpay
- Calculate values with Repeater Field
- Filterable API Logs
- Payment Pages & Subscription Management
Fluent Forms 4.2 update in details
We’re going to tell you briefly what the new update brings for you. Of course, you can experience all the features first-hand right after updating to the new version. And you’ll find relevant docs for each feature.
Geolocation with Google Maps integration
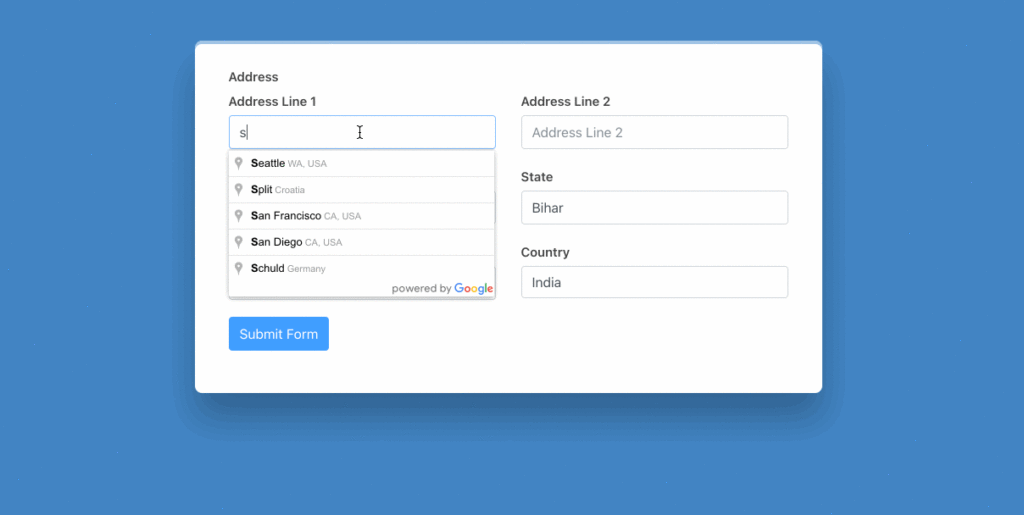
If a user starts typing their address, they will see suggestions and pick the one they’re looking for. When they choose a location, other fields such as city and country will be autocompleted. This is a time-saving feature where users don’t have to type every part of the address.
How to enable
Select the address field first, and choose the fields you want to keep. Now tick the box that says Enable Autocomplete (Google Map). Also, go to Google Maps Integration from Global Settings and connect Google Map API. You can follow this document to learn more.
Paystack Payment Gateway
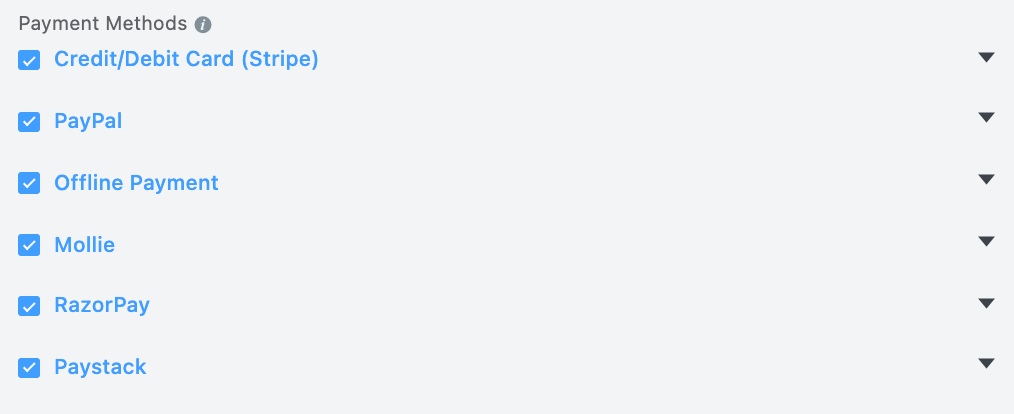
In addition to Stripe, PayPal, Mollie, and RazorPay, now you can use the new Payment Gateway “Paystack“.
How to enable
To set up Paystack with WP Fluent Forms, go to the global Settings from your dashboard and then choose Payment Settings from the left sidebar. Now click on the Payment Methods -> Paystack. You will be asked to give API Key and API secret. Log in to your Paystack account, go to Settings -> API Keys and Webhooks, grab the Test Public Key and Test Secret Key. Furthermore, you can check this doc to learn more about the setup procedure.
Subscription for payment
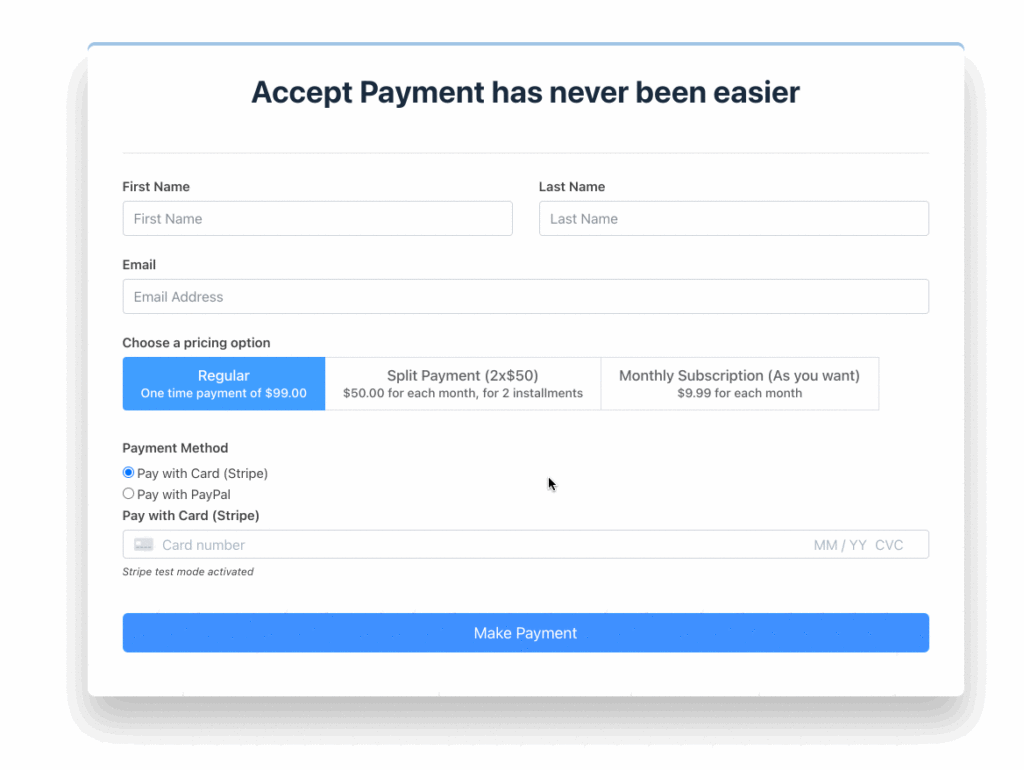
Previously Fluent Forms was empowered with one-time payment with multiple payment gateways. Now you can enable the subscription option for recurring payment. This feature is a life-saver if you run an online business or coaching program where installments or recurring payments are needed. Subscription is a great part of receiving donations as well. With Fluent Forms, you can enjoy both PayPal and Stripe for a subscription payment.
How to enable
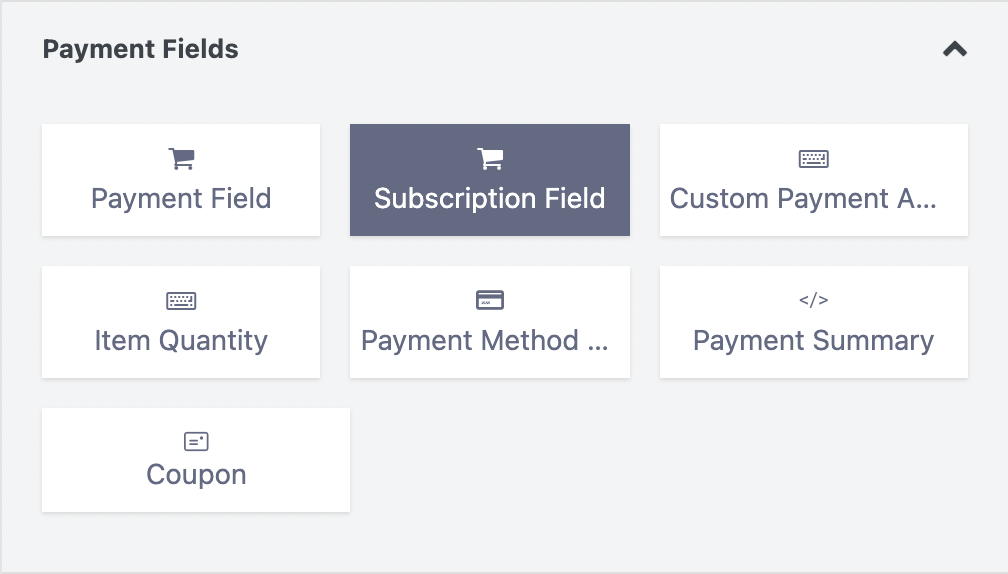
You’ll find Subscription Field under Payment Fields. Select the field, and there will appear many options to edit, such as single recurring plan vs. multiple pricing plans. You can customize each plan with different options when keeping multiple options.
There are two more crucial settings for Stripe and PayPal.
Stripe: For recurring payment to work correctly, you need to configure Stripe webhooks. Go to Global Settings > Payment Settings > Stripe. Now scroll down to the bottom, and you can read what it requires to set up webhooks. You can follow this document to learn more.
PayPal: While enabling subscription payment, you need to configure PayPal IPN. You can follow this document to learn more.
You can read this doc to learn more about the Subscription Field.
Stripe embedded checkout
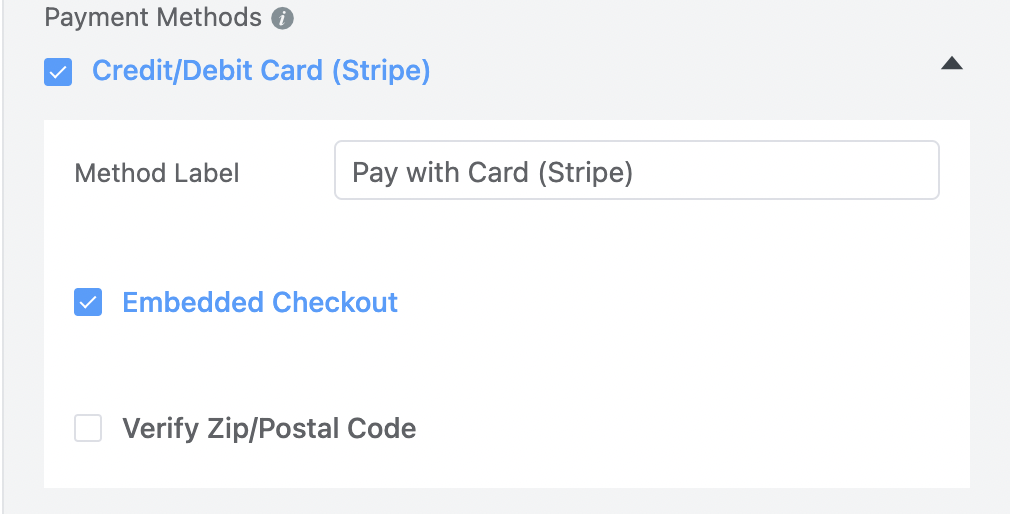
Your users no longer need to go to Stripe’s website, log in, and complete payment. With embedded checkout by Fluent Forms, users can submit their details on-site and pay immediately.
Let’s see how to enable this feature. You can see various options under Stripe while selecting the payment method field. Select Embedded Checkout from there. And that’s it.
Connect to Stripe button
Also, there’s a new way to connect with Stripe from settings without requiring API submission. All you have to do is click the button that says Connect to Stripe and complete the steps.

Modal checkout for Razorpay
We know users hate to leave a website for payment during checkout. Now we’ve introduced modal checkout with Razorpay for the one-time payment. When users select Razorpay for their payment gateway, a popup will appear. Users can complete the payment from the popup without leaving for Razorpay.
How to enable
Go to Global Settings > Payment Settings > Razorpay. Select Modal Checkout Style from Checkout Style Type.
Advanced calculation with Repeater Field
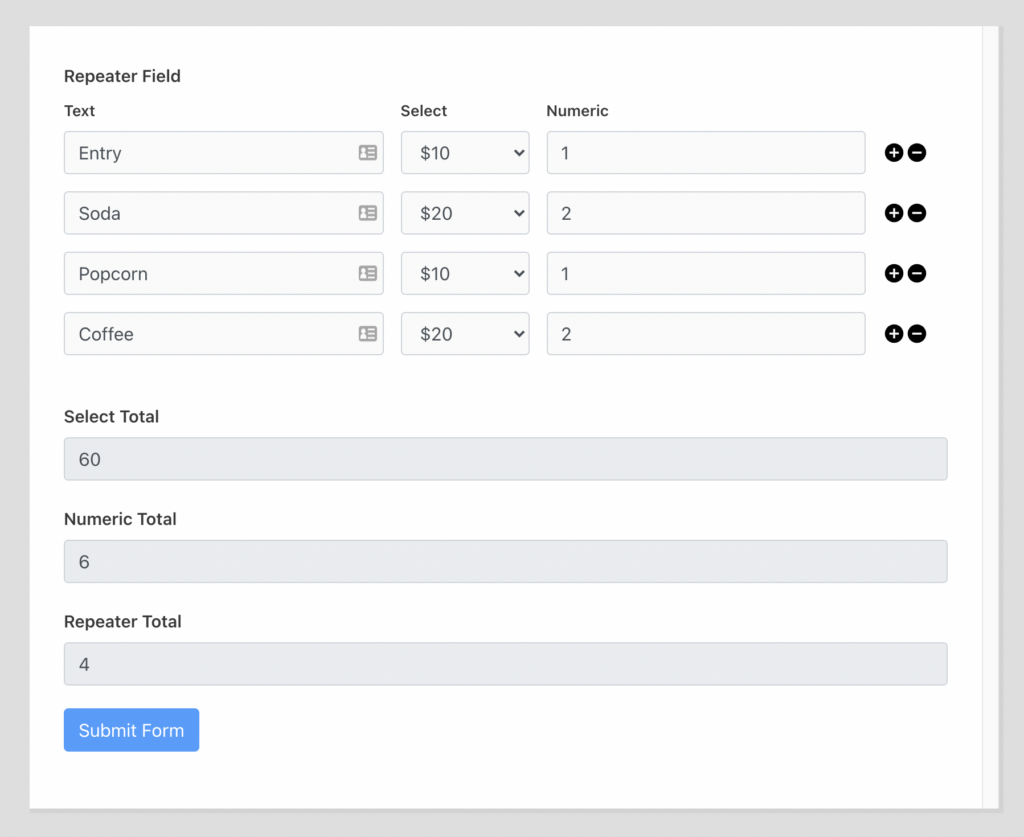
Repeater fields are now capable of calculating values. If you need advanced calculations on your website, this feature is the right solution for your needs. Users can add multiple fields front-end, and the calculation will happen at the same time.
How to do
You can use this feature in multiple ways, but here’s a use case to explain how it works. Keep in mind that calculations only work with Numeric and Select fields.
API Logs
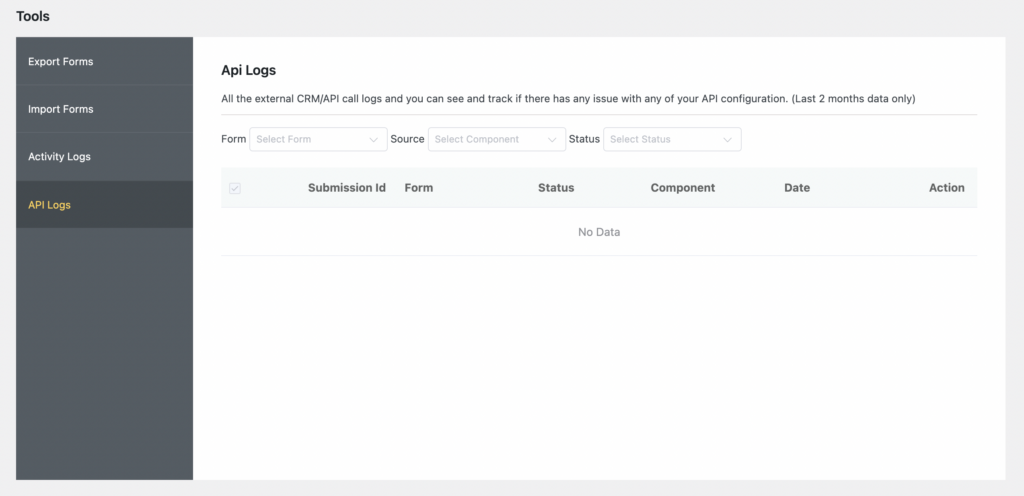
In addition to Activity Logs, now you can filter and see all of your API Logs from one window.
Payment Pages & Subscription Management
Now you can handle the display of payment history and payment receipt using the and
| Item | Quantity | Price | Line Total |
|---|---|---|---|
| Total | $0.00 | ||
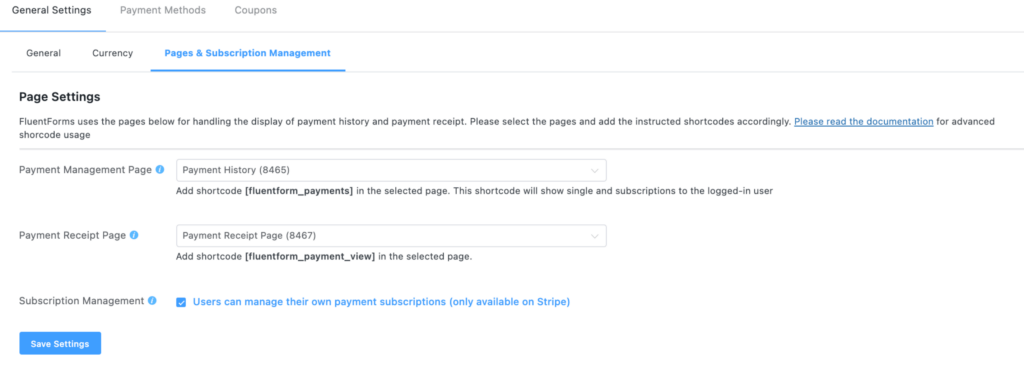
How to do
Add these shortcodes on any page and assign them in Global Settings -> Payment Settings -> Pages & Subscription Management settings. You can read this doc to learn more about Payment Pages & Subscription Management.
One Last Surprise
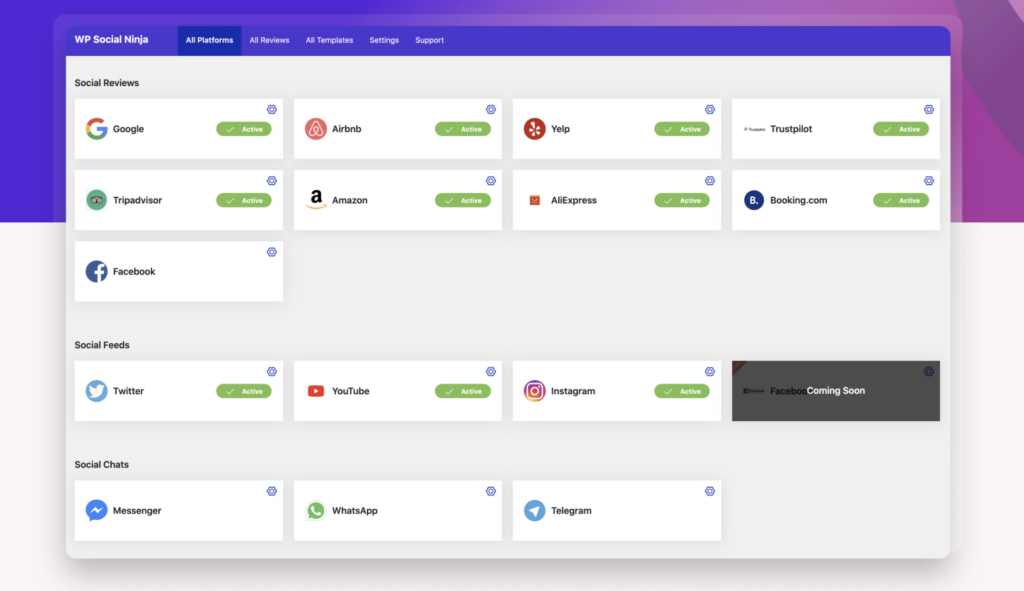
One of our teams is working on a new product for the last 8 months and finally, we are about to release it very soon. It’s a social media reviews, chat, feeds plugin. I think it will replace a couple of plugins and improve the overall experience. Introducing WP Social Ninja. Please signup for getting notifications. We will have a great lifetime license option for early adopters.
Hello, this is Jewel, CEO & Head of Ideas at WPManageNinja. I am obsessed with WordPress since 2009. My aim is to be a user-centric developer first, and a serial entrepreneur second. You will find me discussing various tech issues and trying to come up with scalable solutions on different forums when I am not busy coding.
6 responses to “Fluent Forms 4.2 with Massive Features”
-
Hi! Kindly provide your email so we can fast forward your request
-
Hi! It seems like we will need to access your site to check the issue. Feel free to reach out to our support team so they can have a look.
https://wpmanageninja.com/support-tickets/ -
Hi! You can check the following documentation and if you have more questions, you can reach out to our super-friendly support team. They will be more than happy to answer them.
https://wpmanageninja.com/docs/fluent-form/payment-settings/payment-management-settings/ -
Hi! If you want to filter countries, you can do it using a country field. In the advanced options of the country field, you will find all the options to filter the country list however you want. Currently, the address field does not offer similar functionalities.
As for the geolocation issues, I think it’s best if you could submit a support ticket at the following link so our team can have a close look at it.
Thanks.
https://wpmanageninja.com/support-tickets/ -
Thank you for reaching out to us. We’ll add the single-field address on the feature requests. And could you elaborate on the country-restricted issue? There already is an option to include/exclude specific countries.
-
Thank you so much! You appreciation keeps us going.






Leave a Reply