ActiveCampaign Email Marketing Automation Made Easy with WordPress Forms

Leads don’t convert themselves.
You capture them. Then what? If you’re manually following up, managing lists, and sending emails one by one, you’re wasting time.
That’s where automation changes the game. ActiveCampaign is built for that. It is not just an email tool. It is a full automation powerhouse for businesses that want to scale smarter, not harder.
But here’s the catch. None of that matters if your forms aren’t connected. If your WordPress forms aren’t feeding data directly into ActiveCampaign, you’re just collecting dust.
That’s why we’re here.
In this guide, we’ll show you exactly how to connect ActiveCampaign to your WordPress site using Fluent Forms. No messy workarounds. No missed leads. Just a smooth system built for growth.
Let’s get to it.
TL;DR
- ActiveCampaign works best when leads sync automatically.
- Fluent Forms sends WordPress form entries straight into ActiveCampaign.
- Contacts are created or updated instantly.
- Get your API key, enable the integration, create your form, map fields, and assign tags.
- Tags and segments are applied based on form responses.
- Automations start the moment someone submits a form.
- No CSV uploads, no manual follow-ups, no lost leads.
ActiveCampaign
ActiveCampaign is an integrated marketing automation software for email, sales, and CRM platforms. It helps its users to make powerful automation, email marketing, and customer relationship management.
It is considered the most powerful automation tool, allowing you to set up any virtual triggered campaigns, automation, segmentation, dynamic emails, sales follow-ups, and so on. Now you can send one-to-one sales emails via your inbox with ActiveCampaign. What’s more? Check out below.
- Easy to segment your subscribers
- A complete package for email marketing automation & CRM platform
- Excellent user interface
- Zapier integration to customize more amazingly
- Cost-efficient
Now that we know about the tool let’s see how to design email marketing automation with ActiveCampaign forms in WordPress. For this tutorial, we will use Fluent Forms to connect the automation software. Why? Let’s have a look at that too!
Why Fluent Forms
ActiveCampaign is built for automation. It helps you follow up, segment intelligently, and deliver the right message at the right time.
But none of that can happen if your leads aren’t flowing into the system cleanly.
And that’s where Fluent Forms comes in.
Fluent Forms is a fast, lightweight WordPress form builder designed for seamless data capture. With its direct ActiveCampaign integration, you can:
- Send new form submissions directly into your ActiveCampaign account
- Automatically tag and segment contacts based on responses
- Trigger automations the moment a form is submitted
- Eliminate copy-paste, CSV uploads, and manual list management
It connects your website forms straight into your automation engine – no friction, no extra plugins, no workaround hacks.
You can build any type of form: simple contact forms, lead magnets, webinar registrations, quote request forms, or multi-step qualification funnels.
Fluent Forms handles the structure – ActiveCampaign handles the follow-up.
And together, they form a clean growth pipeline:
Capture → Segment → Automate → Convert.
Fluent Forms doesn’t just gather leads. It delivers qualified, organized, automation-ready leads directly to ActiveCampaign so your campaigns, follow-ups, and workflows can run exactly the way you designed them.
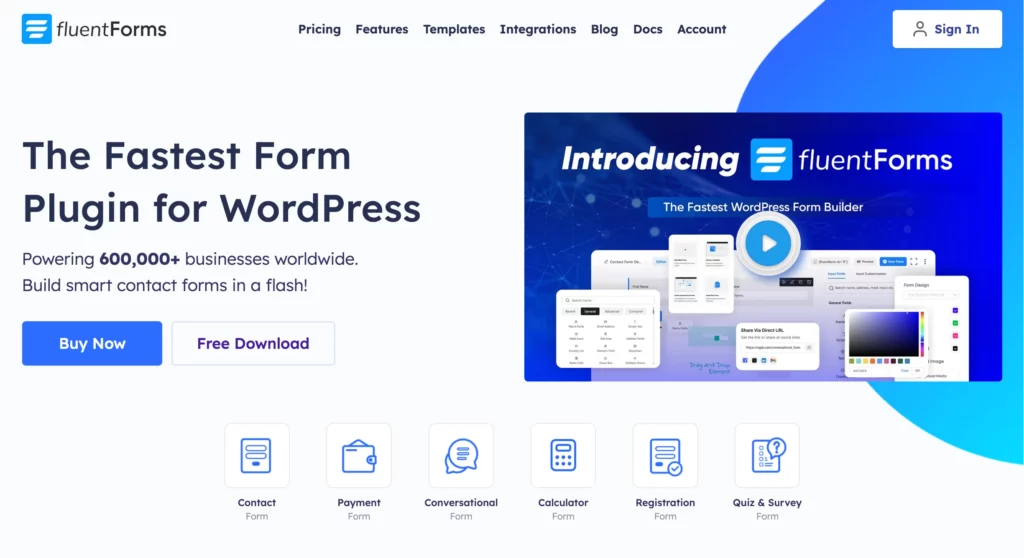
Some of the key features of Fluent Forms are:
- 60+ input fields to collect any type of information
- Numeric calculation to create forms with calculators
- Multi-step forms to break long forms into multiple steps
- Conversational forms to provide a better form-filling experience
- Advanced post creation to collect user-generated content
- Conditional logic to show/hide input fields based on user behavior
- Integration with popular payment gateways to collect payments and donations
- Spam protection using hCaptcha, reCAPTCHA, Turnstile, Honeypot, Akismet
- Quiz and survey with advanced scoring
- Advanced form styler to align form with your brand identity
- Custom CSS and JS to create more advanced forms
- Export entries in CSV, Excel, ODS and JSON format
- PDF add-on to turn form submissions into PDF files
- Form scheduling and restriction based on different rules
- Double opt-in confirmation to ensure efficient data collection
- Email notification after form submission
- Conditional confirmation to show confirmation messages based on predefined conditions
- Advanced form validation to accept eligible submissions
- Fully responsive and accessible to ensure inclusivity
- 60+ integrations to expand core functionalities
Check out the feature page to find the features you want to level up your form building experience. Currently, more than 600K+ websites use this form builder plugin, and the number is constantly growing. Although the free version of Fluent Forms can handle most of your basic needs, the Pro edition further pushes the limit.
Connect ActiveCampaign to WordPress with Fluent Forms
You can set up ActiveCampaign integration with Fluent Forms in five steps. Let’s check out what those are.
- Activate the ActiveCampaign module
- Get ActiveCampaign API URL & API key
- Create a form with Fluent Forms
- Setup the integration feed
- Automate your email campaign with ActiveCampaign
1. Get ActiveCampaign API URL & API key
First things first. You need your API credentials to make the connection.
Log in to your ActiveCampaign account. From the sidebar, go to Settings, then open the Developer tab. That is where you will find your API URL and API Key.
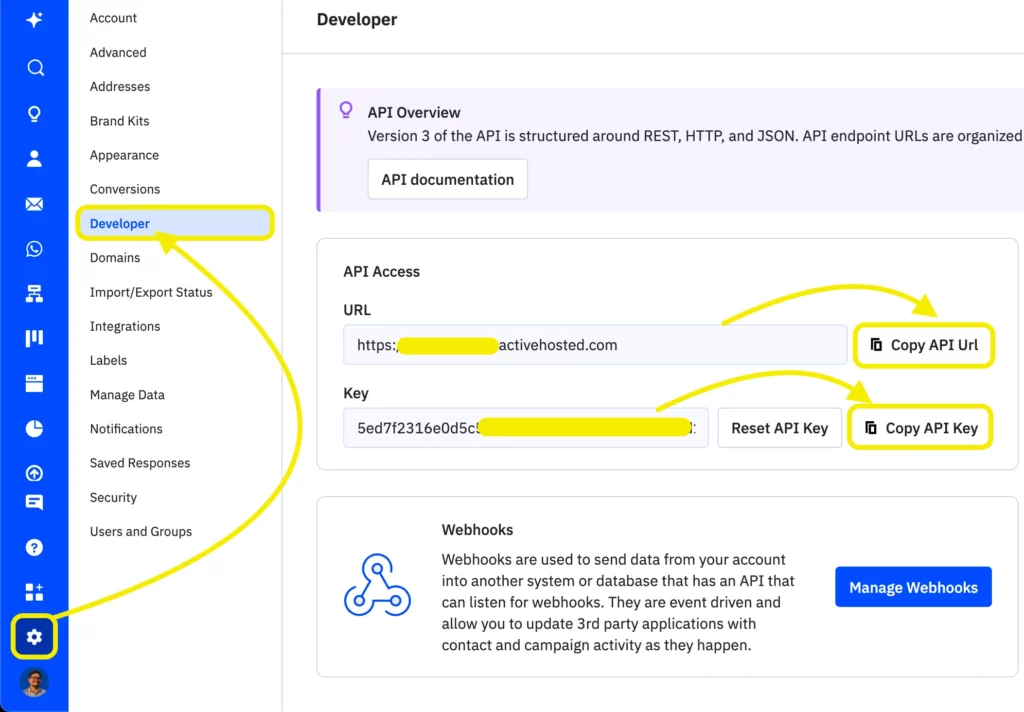
Copy them. Keep them somewhere safe. You will need them shortly.
2. Activate the ActiveCampaign module
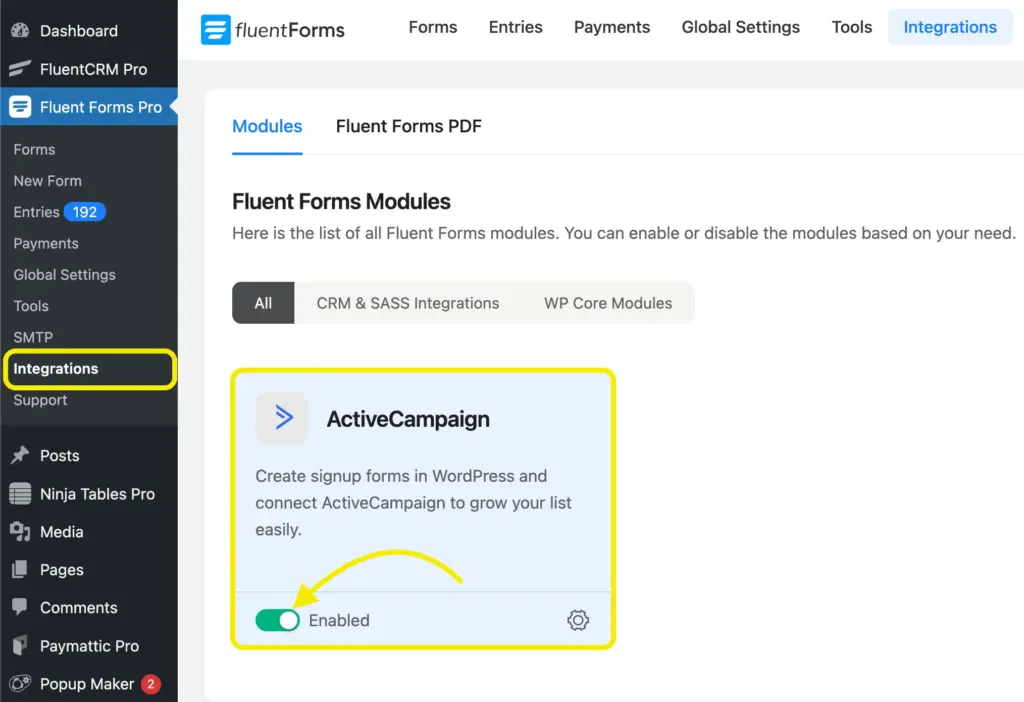
Next, head over to your WordPress dashboard. Navigate to Fluent Forms Pro → Integrations. Scroll or search through the list to find ActiveCampaign. Toggle it on to activate the module. That is all you need to do here.
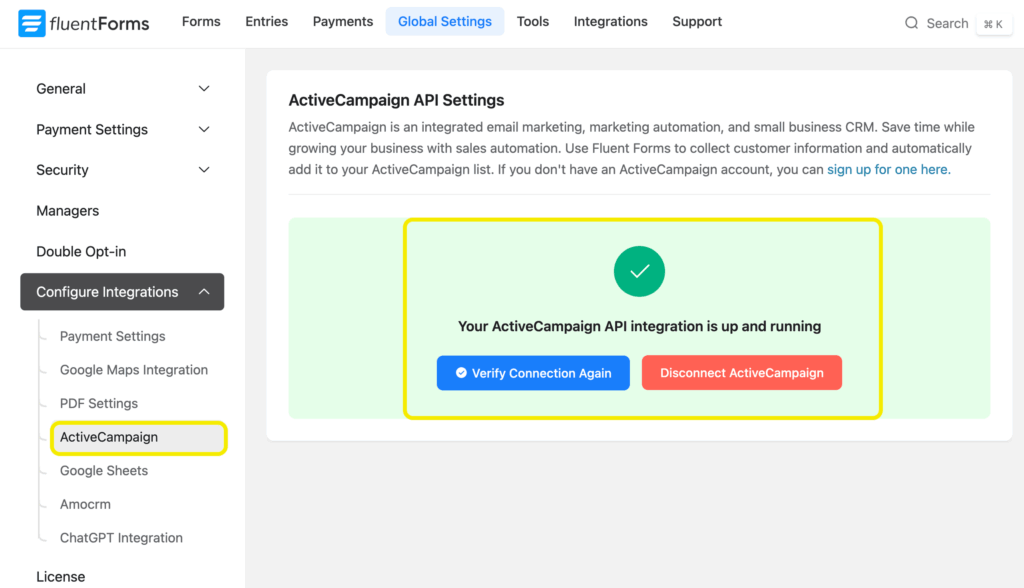
Now head over to the Global Settings, and select ActiveCampaign from the Configure Integrations dropdown menu. Paste the API URL and API Key there.
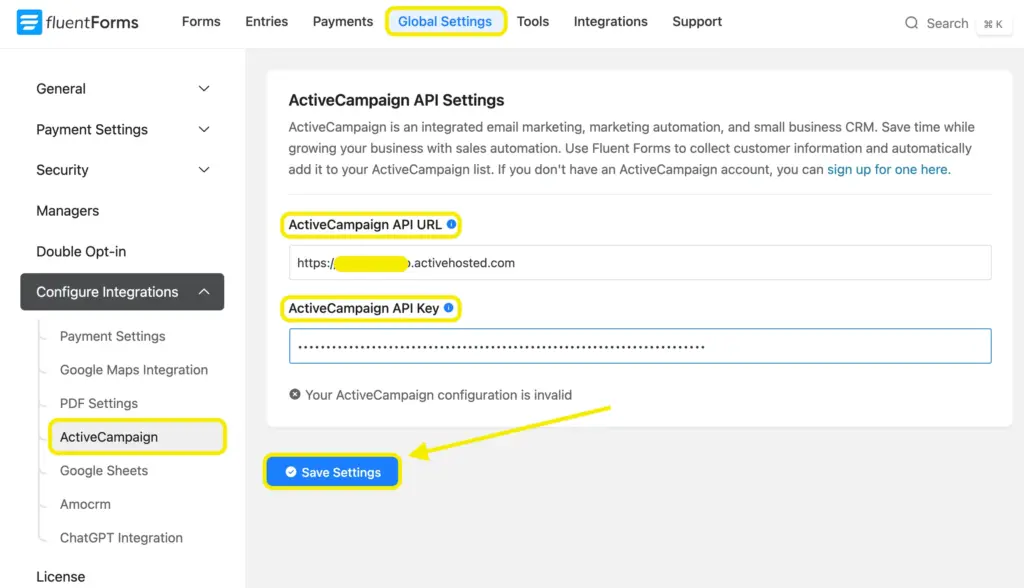
This is how a successful connection will look like.
3. Create a form with Fluent Forms
With the module active, it is time to create your form. Go to the Forms section in Fluent Forms.
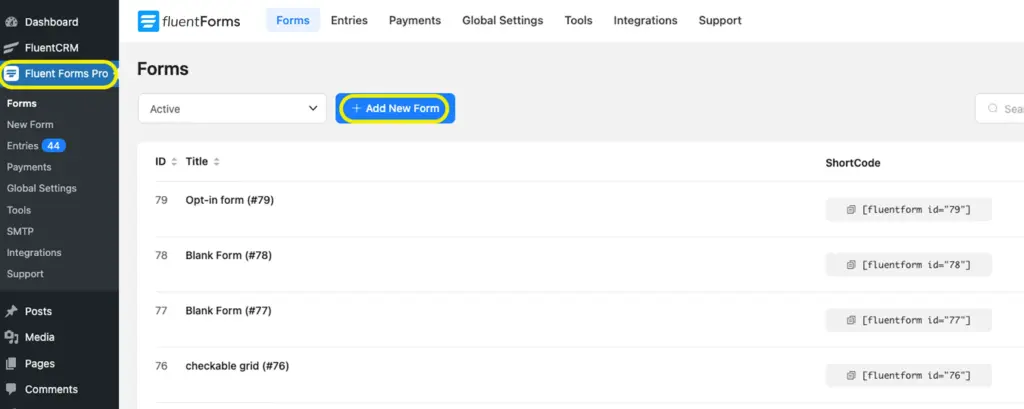
You can build a form from scratch or pick from over pre-built templates. Whether it is a simple contact form or a lead capture form, design it the way you want.
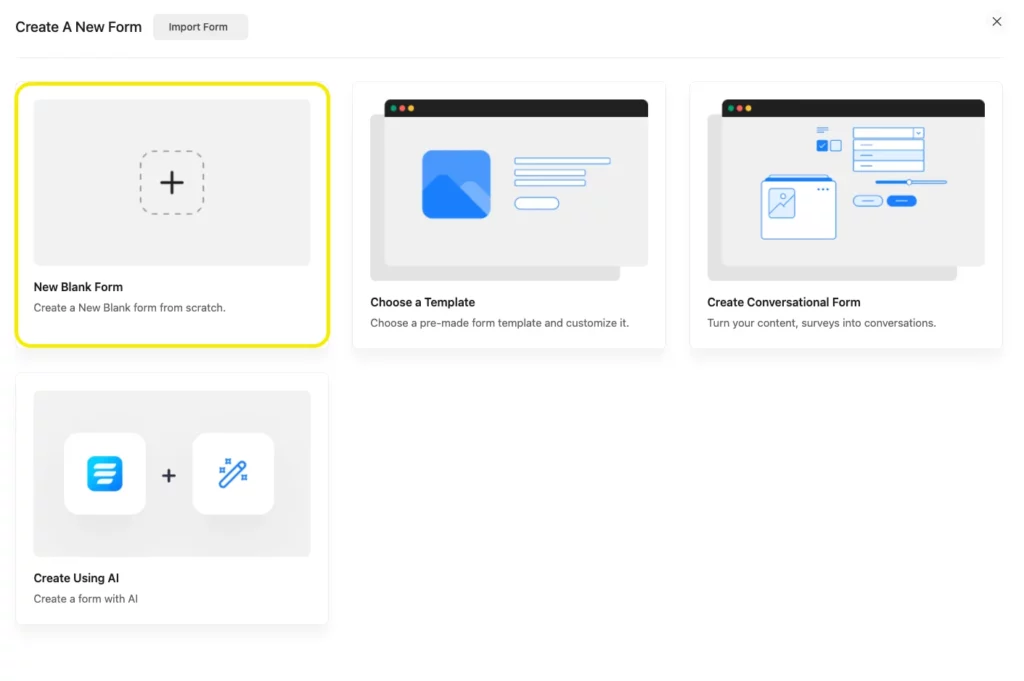
Here’s the form we used for demonstration.

4. Setup the integration feed
Now let us connect the form to ActiveCampaign.
In your form editor, open the Settings & Integrations tab. Click Configure Integrations, then Add New Integration.
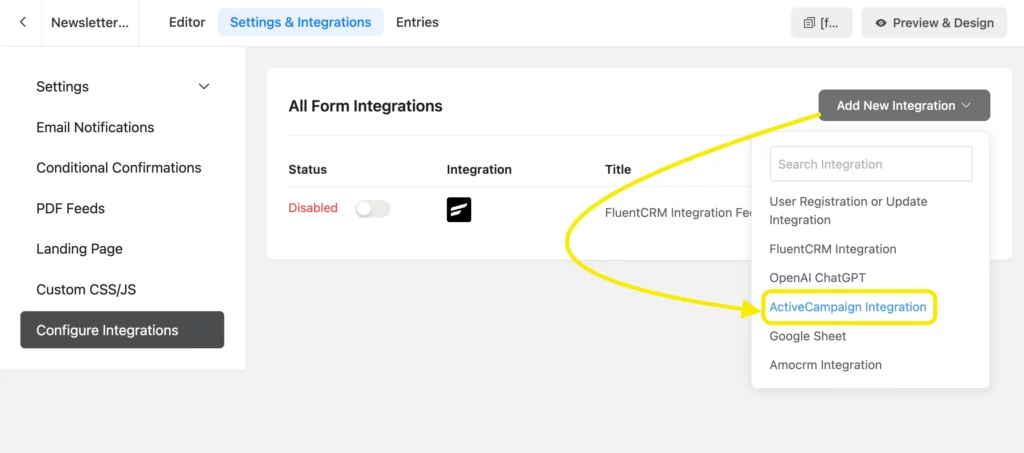
Choose ActiveCampaign from the list. Map your form fields like Name, Email, and any other information you are collecting.
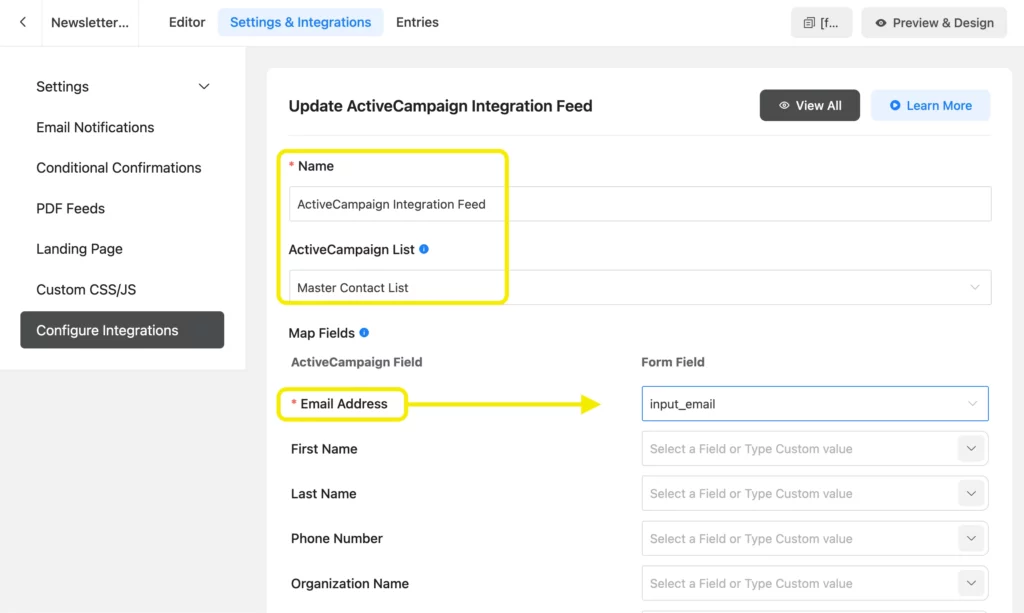
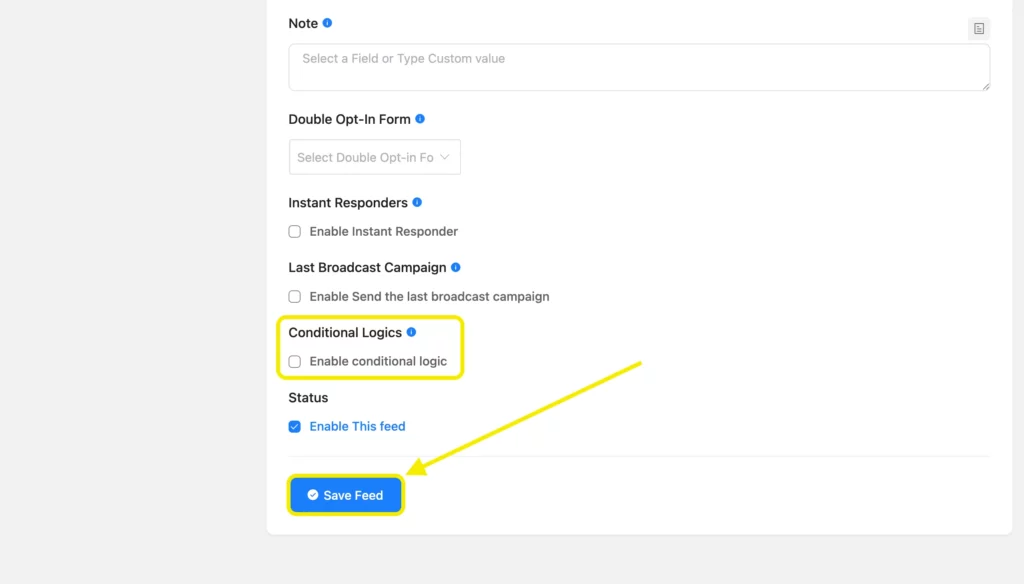
You can also apply Conditional Logic to segment contacts based on their responses. Once done, hit Save Feed.
5. Automate your email campaign with ActiveCampaign
Everything is set. Now your form submissions will automatically sync to ActiveCampaign.
This is where you can start building automation sequences, setting up follow-ups, and creating targeted campaigns.
Run a few test submissions to make sure everything works perfectly.
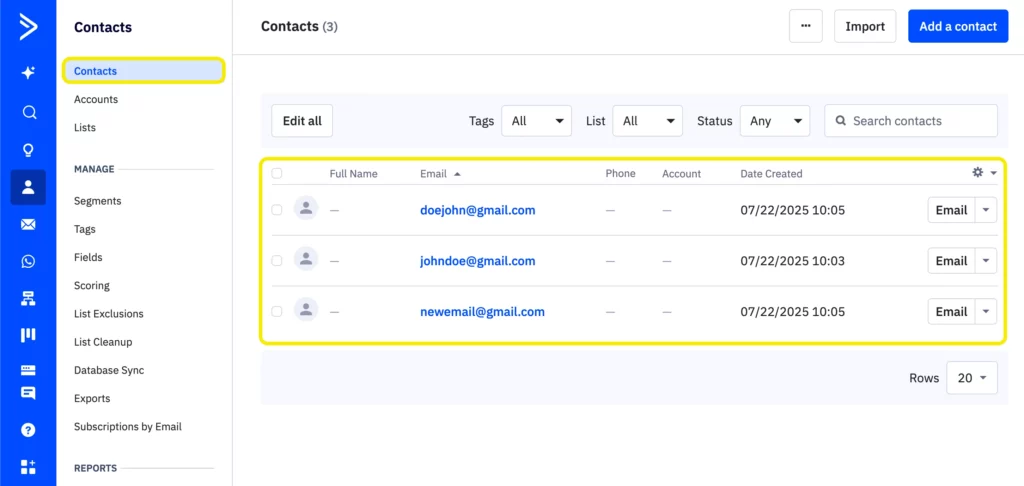
Once confirmed, let the automation take over while you focus on growing your business.
Don’t Just collect leads – engage them smartly
Connected ActiveCampaign to WordPress through Fluent Forms? That’s the easy part. What you do next is what counts.
Don’t just build lists. Build relationships.Set up automations. Personalize every email. Segment your audience so every message lands in the right inbox, at the right time.
But remember, automation is the assistant, not the strategist. Keep an eye on your data. See what’s working. Fine-tune your approach.
Because in the end, it is not just about tools. It is about how well you use them.
Have thoughts or questions? Drop them in the comments. We’re always up for a good conversation.




Leave a Reply