Craft Forms with Beautiful Background Pictures

Would you like to fill up an online form with dark text on a white background? Certainly, you wouldn’t. But if you are presented with a form with a beautiful background picture, I bet you will be happy to fill that up.
Images play a crucial role in ensuring the form looks aesthetically pleasing. But it does not stop there. The importance of the use of images goes beyond that. If you want to know why you should care about images while crafting effective forms and how to add beautiful background pictures to your forms, read this article.
Why do images matter?
From developing websites to designing social media promotional content for your business, you need to utilize the power of imagery. Pictures can tell stories effectively and help audiences to engage more with your business while having a strong impact on users’ emotional states.

According to a study by HubSpot, Facebook posts with photos result in 53% more likes and 104% more comments compared to average posts that only include texts.
This highlights the importance of using visually appealing images, which can be further enhanced by utilizing an image recognition app to automatically tag and categorize your visual content for better search engine optimization and discoverability.
Thus visuals are considered one of the most important aspects of web design. A properly selected visual can make your content more appealing to your targeted audiences and convey the message in the best possible manner. As a consequence, your business experiences more growth.
We all have heard the saying, “a picture is worth a thousand words.” Images can bring your products or services to life, so the prospective customers can better visualize the experience of using them.
Now you have a brief idea of how important images are for the growth of your business. Getting the size and format of the image right is the first thing.
Understanding image sizes and formats
Images of different dimensions and formats are used to serve different purposes. In order to take advantage of using images, you should have a good grasp of their sizes and formats.
Background images generally cover the entire display, so you need to find large images. If your images are not large enough, the pixels will be noticeable, leading to a bad user experience. For example, when selecting a background image that covers the entire display, you should choose a photo that is at least 1920 pixels in width and 1080 pixels in height.

Having large images has a downside too. They consume your valuable website storage space and reduce the page load speed. This means that you are likely to experience a high bounce rate. So you have to optimize the size of the images considering both aspects.
To get the best out of images, you got to take care of two attributes of an image: size and format. You have already learned about the first one. Let’s learn about different formats:
- JPEG: JPEG is among the most common image formats. It’s a lightweight lossy compression image format best suited for products, blogs, and background images used on websites.
- PNG: PNG uses lossless compression. You can use PNG images for images that require a transparent background, such as icons, logos, etc.
- GIF: GIF image format can be used for displaying short animated clips.
- WEBP: This is a relatively newer image file format. They offer images with far better quality at a smaller size compared to JPEG.
Understanding license types
There are different types of licenses for images to protect the rights of the creators. These licenses define what a user is legally allowed to do with that photo. Understanding different license types are important to ensure you don’t fall into any legal trap.
We will discuss the three most common types of licenses in this article:
- Royalty-Free (RF): Following a one-time fee payment, a copyrighted work can be used in various circumstances under a royalty-free license.
- Creative Commons (CC): Creative commons licenses enable photographers to protect their work in basic terms while allowing people to use it for free.
- Copyright Free: The term “copyright free” refers to an image that has been intentionally distributed without copyright by its creator. This implies that you can do whatever you want with the image and don’t even have to give credit to anyone.
Great! I believe you have a decent understanding of image sizes, formats, and license types. Now you must be wondering where to find some beautiful background pictures that can communicate the messages with your targeted audience.
Best free sources for beautiful background pictures
Finding beautiful background pictures is essential when it comes to growing your business online, and it’s easier than you thought, thanks to some great websites. Below is a list of sources where you can find tons of amazing pictures.
Unsplash
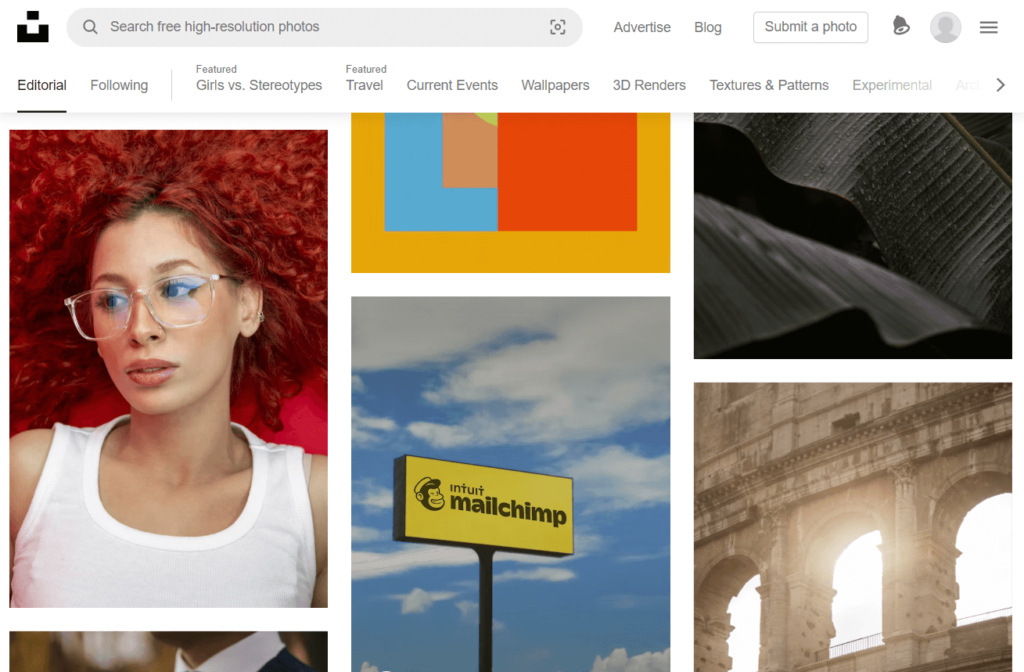
Unsplash is one of the best sources of freely-usable images, with over three million hand-picked photos. Creators from all over the world submit their works in this repository. You can search for almost anything, and you will likely get your desired photos in the search result. Also, Unsplash allows you to filter your search result by orientation and color.
According to the Unsplash license, attribution is not required but appreciated. You can use the photos for both commercial and non-commercial purposes.
Pixabay
Pixabay is yet another option for the best-quality stock images. You will find beautiful pictures for any kind of work and use them for free. Again, attribution is not necessary but always appreciated.

Pexels
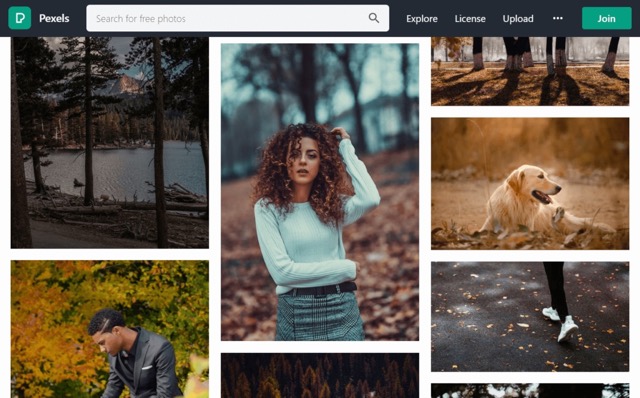
Pexels is another rich source for high-quality free stock photos. Every day new high-resolution photos are being added to Pexels. It also doesn’t require any attribution.
How to add beautiful background images in your forms
Online forms are used to collect important information from users. But form abandonment is a real issue that website owners frequently deal with. One of the main reasons for form abandonment is poor visual aesthetics.
Improving the appearance of forms and making them look appealing will lead to lower form abandonment and higher conversion rates. One way to do this is to add beautiful background pictures to your forms.
We will use Fluent Forms as the WordPress form builder plugin to show you how to do that. Fluent Forms is the most lightweight plugin for creating fantastic forms. This drag-and-drop form builder provides so many astounding features to get your work done. Fluent Forms allows you to design a variety of forms. It is also the quickest form-builder plugin available on the market right now.
Fluent Forms has a cool feature called Landing Page that lets you publish your form on a dedicated landing page. You can use any custom background image on the landing page. Let’s see how you can do that.
Step 1: Install Fluent Forms
First, install and activate Fluent Forms on your WordPress website if you haven’t already done so. Installing Fluent Forms is similar to installing any other WordPress plugin.
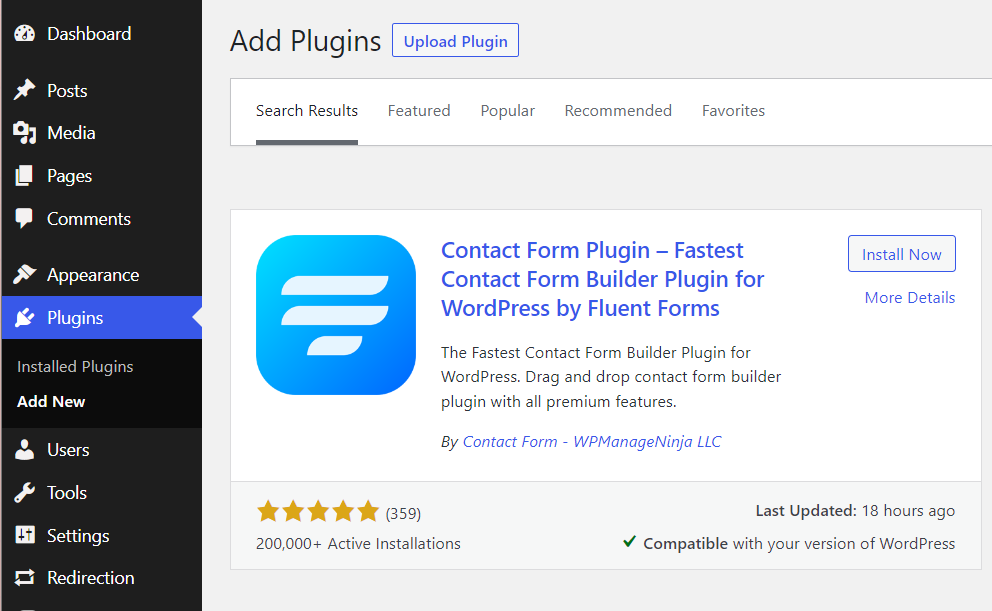
You need to upgrade to the Pro edition of Fluent Forms to use the Landing Page feature. You can access a whole bunch of extra features and functionalities in Fluent Forms Pro.
Step 2: Create a form
Now let’s create a new form or edit an existing one. Fluent Forms gives you the best form-building experience. Its drag-and-drop form creation process allows you to develop any type of form within minutes. Hover over Fluent Forms Pro on your WordPress dashboard and click on New Form > Create Form.
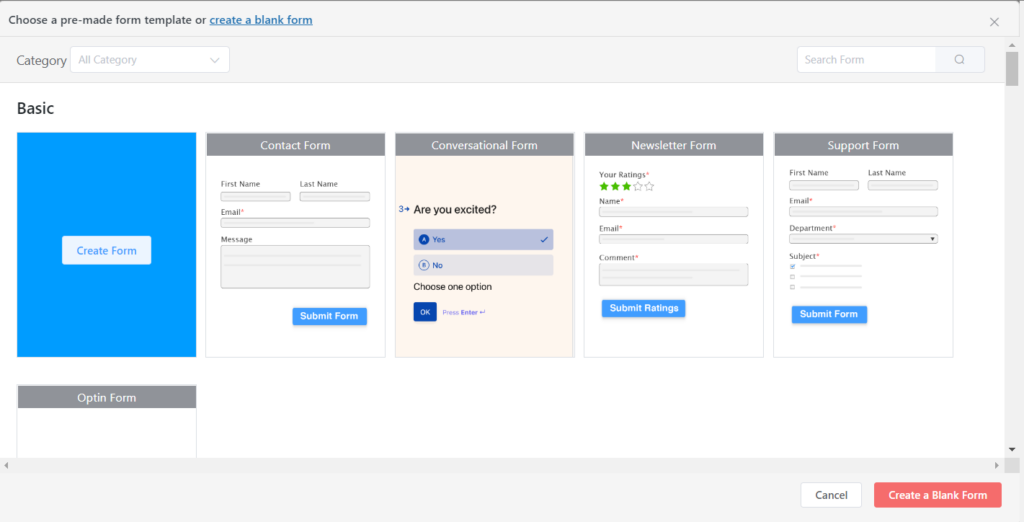
You will see a form editor interface, as shown below.
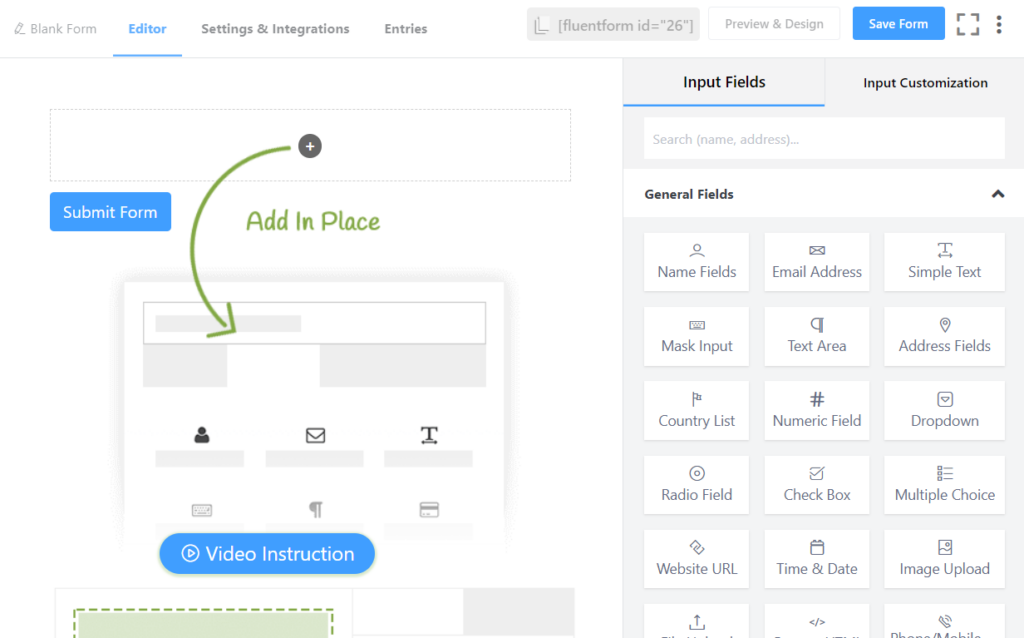
Rename the form. Now add necessary input fields to your form. Simply click on the desired field or drag and drop it on the form editor.
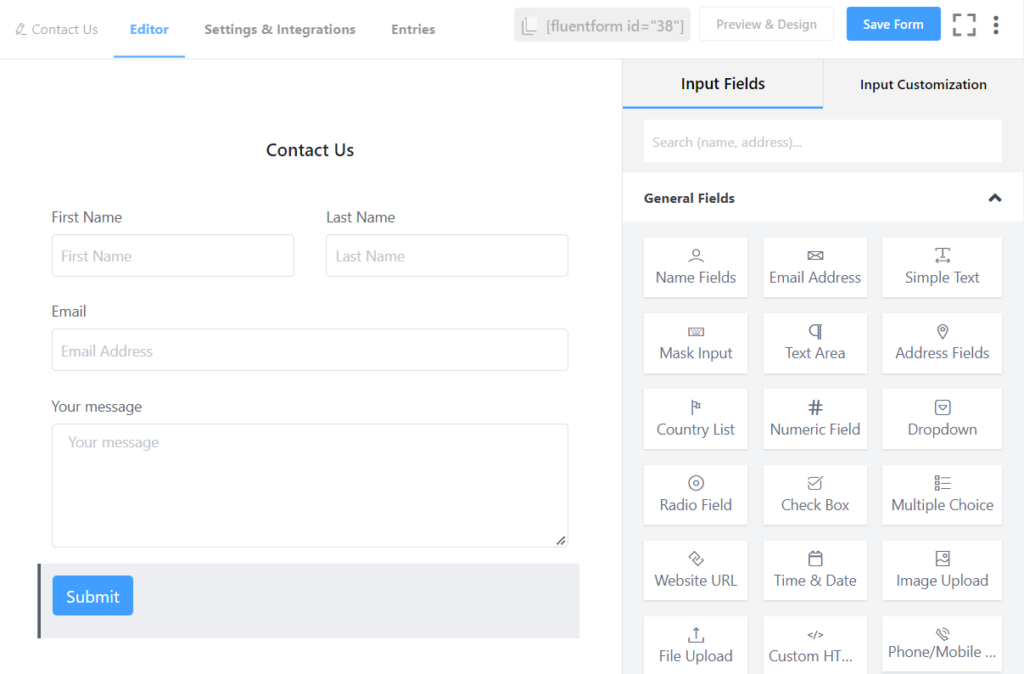
You can customize the input fields by clicking on them. Fluent Forms gives you the ultimate freedom of customizing forms to suit your needs.
Step 3: Configuring form’s settings
Once you have added all the necessary fields to the form, you have to configure the form’s settings. When you click on the Settings & Integrations tab, you will be presented with some settings to configure your form. Here you can change the confirmation message that will be shown to the respondents when they submit the form.
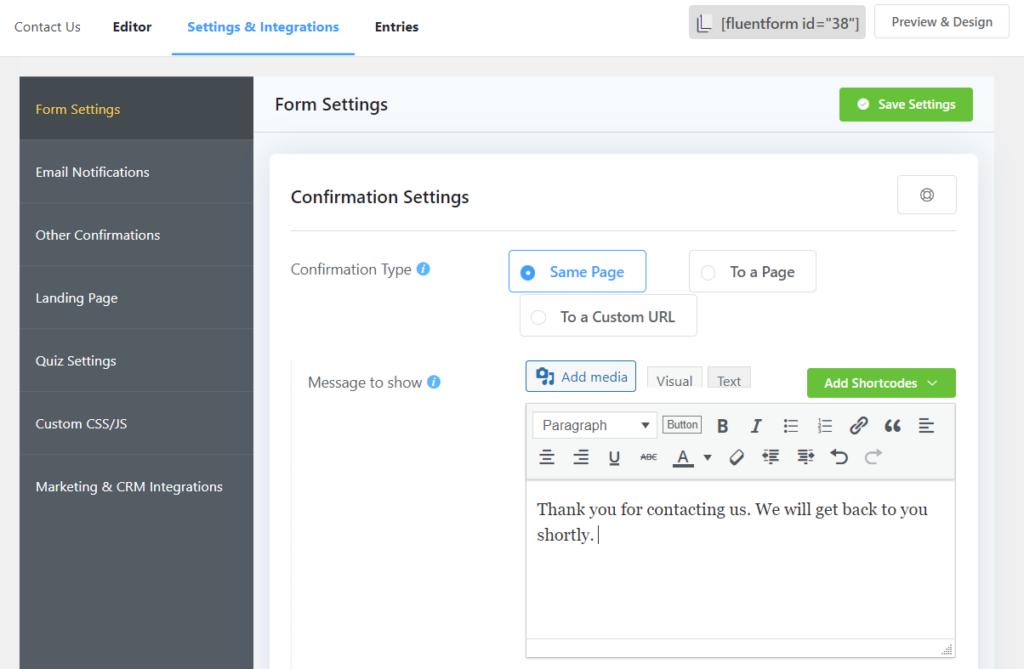
Alternatively, you can show an image or a video as the form confirmation message. Some other things that you can do in this Settings & Integrations tab are:
- Try different form layout options
- Schedule and restrict form entries
- Enable advanced form validation
Step 4: Enabling Landing Page feature
To add a beautiful background image to the form, we have to enable the Landing Page feature of Fluent Forms. Go to Settings & Integrations > Landing Page and check the box beside Enable Form Landing Page Mode.
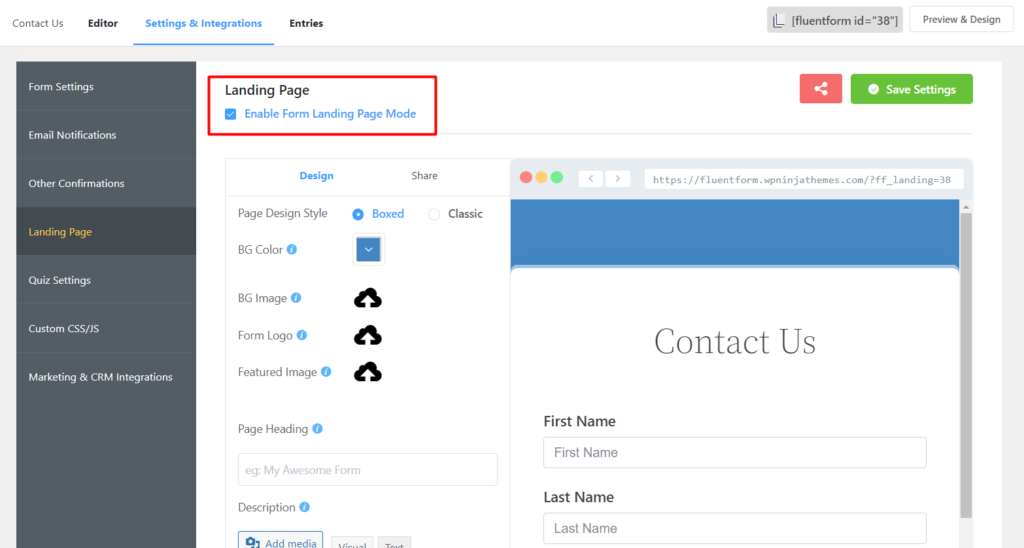
You can customize the design of this landing page according to your choice. To add a background image, click on the upload icon beside BG Image. Select an image from the Media Library or Upload one.
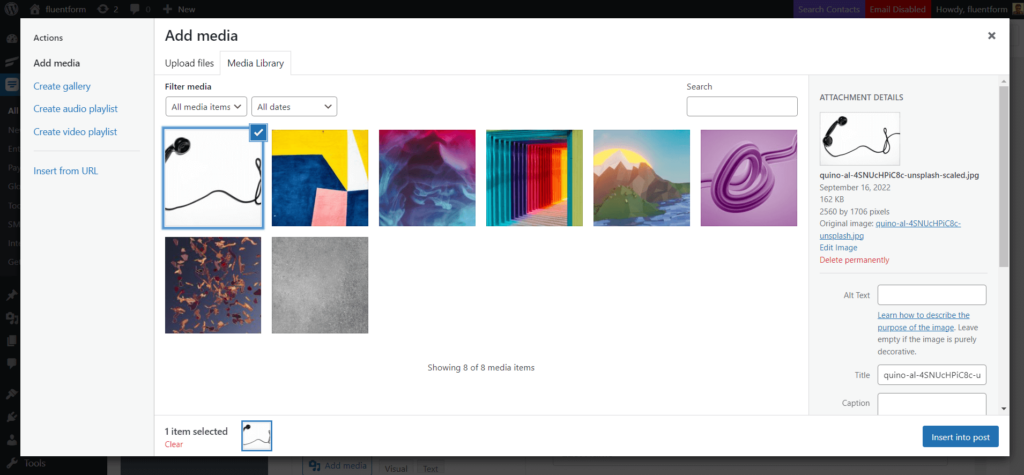
Click on Insert into post. Voila! Your selected image just got added to the background of your form.
If you want, you can also add a Form Logo that will be shown at the top of your form and a Featured Image that will be shown in the social media share preview.
Don’t forget to click on Save Settings after the necessary customization.
You will find the URL of the landing page at the top of the live preview.
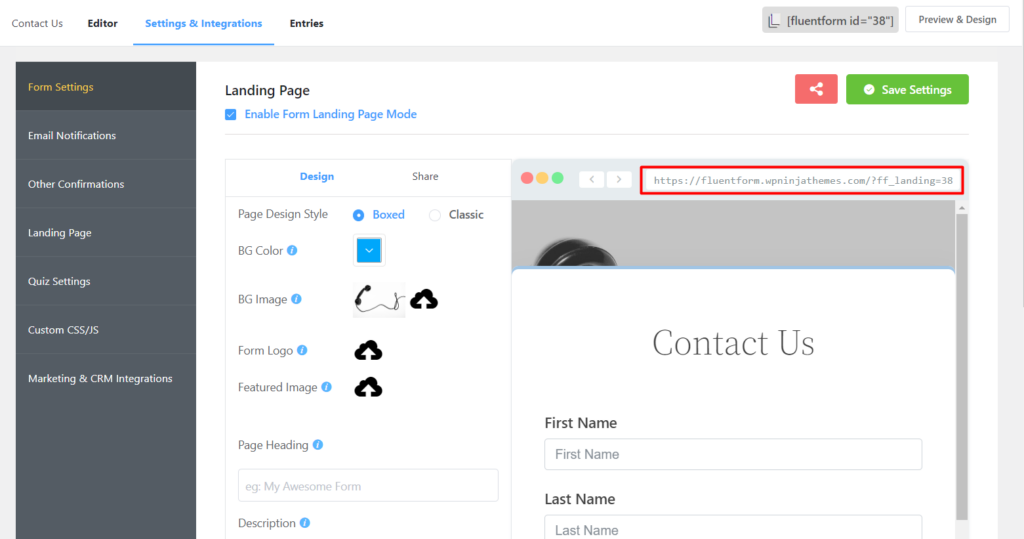
Copy and paste this URL into the address bar of a browser, and you will see a beautiful form you just made with Fluent Forms. You can add some Custom CSS to make your form look even more beautiful.
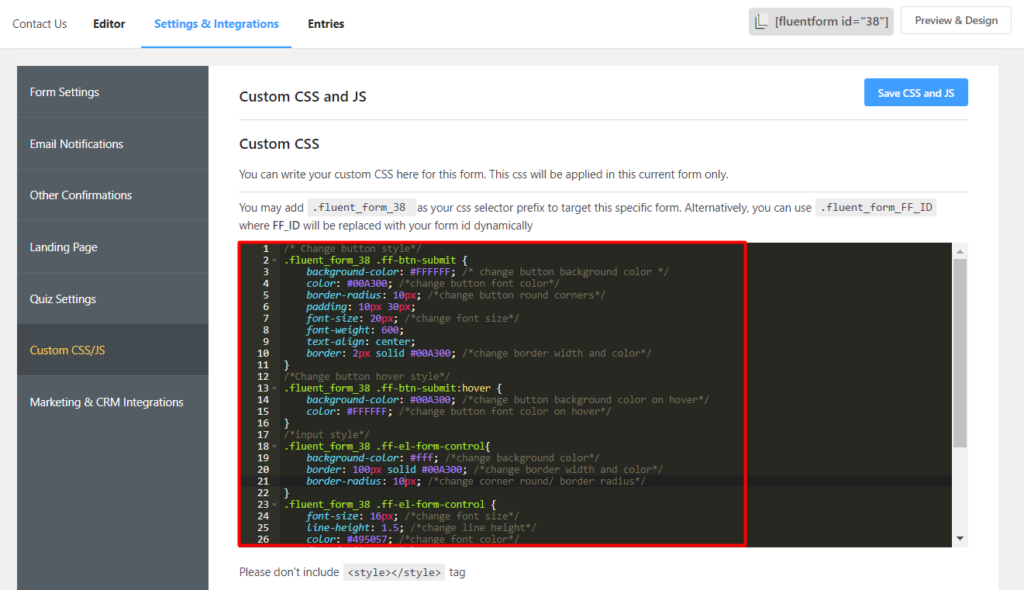
Your form is now ready to be published. Simply use the URL of the landing page to redirect your users to that page.
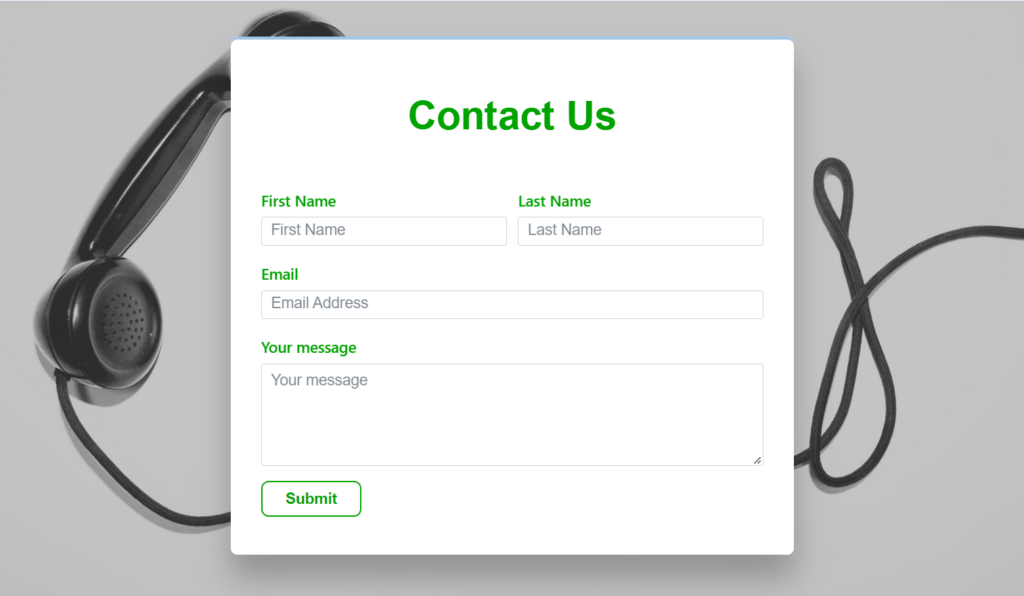
An alternative way
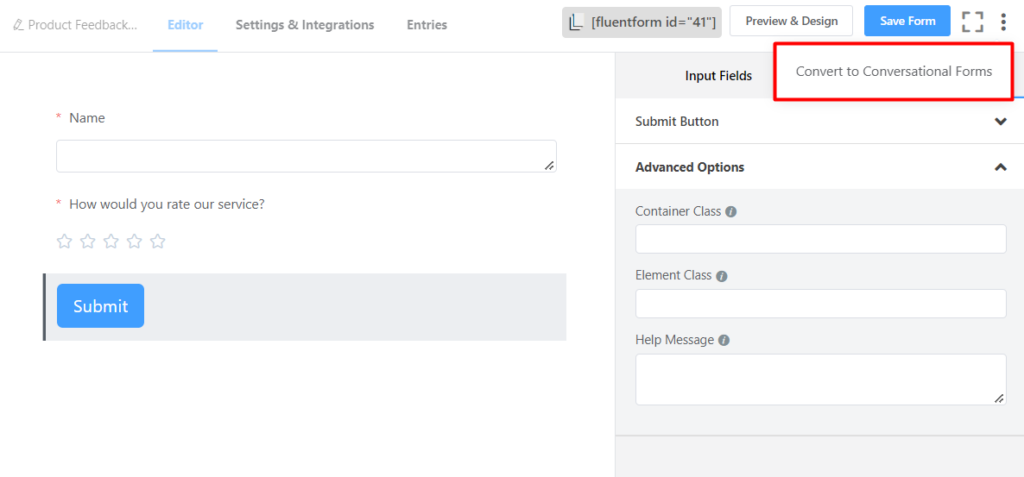
Fluent Forms has another crazy feature named Conversational Forms. This interactive form type allows users to respond to one question at a time in a conversation-like environment. You can make a conversational form even more interesting by adding beautiful pictures to it. To do that, first, create a new conversational form or convert a traditional form by clicking on the three dots and then Convert to Conversational Forms.
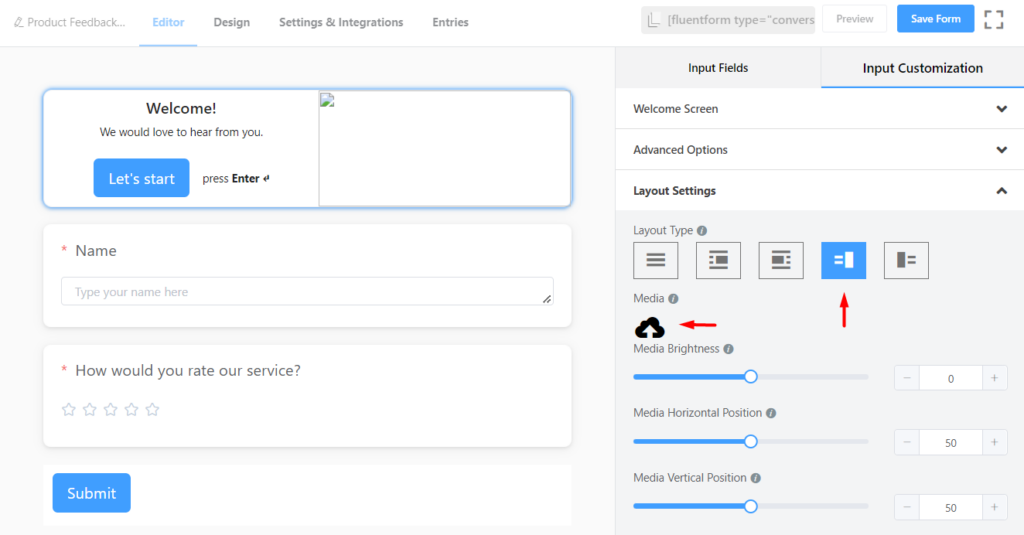
You can customize each field by clicking on them on the form editor interface. For example, we want to add an image to our welcome screen. Click on the Welcome Screen field and then click on Layout Settings. Select a layout type that allows adding an image, and you will get an option to upload your image.
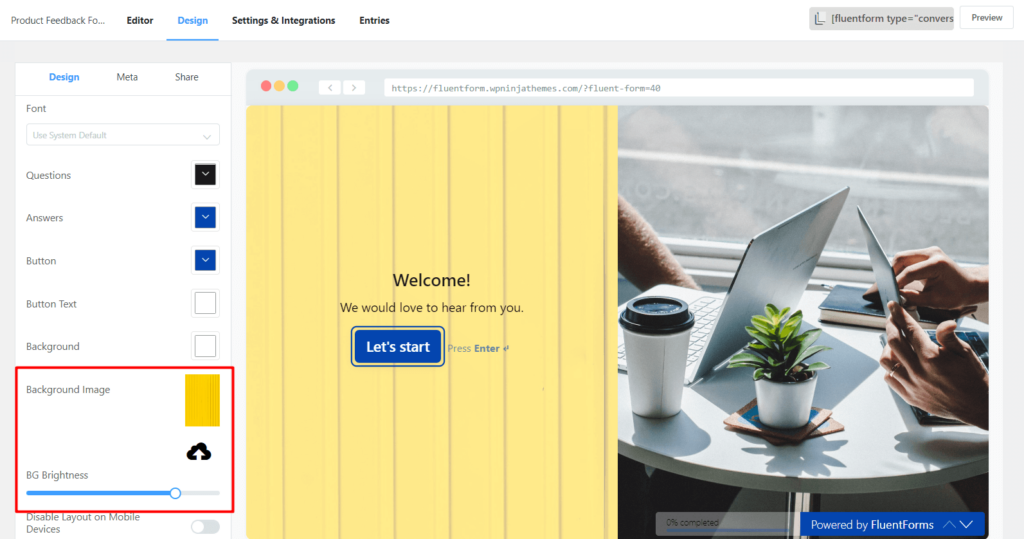
Upload your desired images for each field. Don’t forget to click on Save Form. From the Design tab, you can set the Background Image for your conversational form and change the BG Brightness.
Once you are happy with the overall look, hit Save Settings.
There you have it! Your conversational form is now ready to go live to collect responses.
Final words
Everyone is a fan of beauty. So are your users. If you are not taking the aesthetics of your web forms seriously, it’s high time you do so. This article showed the process of crafting online forms with beautiful background images.
Check out our social media channels for more content like this. Comment down below if you have any questions.





Leave a Reply