

How to Create an Event Sponsorship Form on WordPress
Most event organizers still collect sponsorships by email or a PDF pledge form. It works until you have multiple tiers and sponsors who want to pay online.
You can build a proper event sponsorship form in WordPress with Fluent Forms instead: a sponsor picks a tier, uploads their logo, pays, and lands in an organized list. I’ll show you how to create it step-by-step, including tiers, payment, and tracking submissions once sponsors start signing up.
TL;DR
- Fluent Forms builds a sponsorship form with tiered pricing, logo uploads, and eight payment gateways, no code required.
- The Payment Item field sets up tiers (Gold, Silver, Bronze, or custom tier titles), with a Payment Summary field showing the running total.
- Add optional extras, like extra booth space or a program ad, as priced add-ons a sponsor can select alongside their tier.
- Stripe is free to connect (Fluent Forms keeps a 1.9% fee on the free plan); Pro removes that fee and adds seven more gateways.
- Multi-step layouts, sponsor slot caps, and early-bird coupons are Pro features worth adding once the form is live and working.
- Free FluentCRM tagging or Pro syncs to Google Sheets, Notion, and Trello keep your sponsor list up-to-date without manual entry.
- The same structure handles one-time payments, recurring annual sponsorships, and in-kind pledges.
Why Your Event Needs a Dedicated Sponsorship Form
A generic contact form tells you a company is interested. It doesn’t tell you which tier they want, what they owe, or whether they’ve actually paid.
A dedicated sponsorship form presents your packages clearly, so a sponsor can compare Gold against Silver at a glance. It collects payment on submission, so you don’t have to follow up for a check. And it drops every response into one place, Fluent Forms’ Entries table, where you can filter by tier, export the list, or hand it to whoever manages sponsor relationships.
It also increases the conversion rate. A sponsor who has to email you for a bank account number or wait for a manual invoice has time to reconsider. The faster your process moves from “I’m interested” to “paid,” the fewer sponsors you lose.
Kinds of Events a Sponsorship Form Is Suitable for
The build below adapts to most events that sell sponsorships, with small adjustments to how each one structures its packages.
Conferences and trade shows usually sell tiers around booth size and stage time: a top sponsor gets a keynote mention and premium floor space, a smaller one gets a logo on the printed program.
Galas and fundraisers tend to sell table seats and program ad space instead of booth space. Sports leagues and tournaments sell jersey placement, field banners, and announcer mentions.
Webinars and virtual summits sell pre-roll mentions, slide placement, and inclusion in the follow-up email. Community festivals often mix all of the above, plus vendor booths.
None of that changes the form mechanics, just the labels and benefits attached to each tier. I’ll use a conference example through the steps below and note where a different event type would swap in a different field.
Why Build This With Fluent Forms
Fluent Forms is the fastest form builder plugin for WordPress, and it fits sponsorship forms specifically because payment collection is built in. The free version connects to Stripe (a 1.9% fee applies), includes the fields you need for tiers and totals, and keeps every submission in your own WordPress database instead of a third-party dashboard.
You can start entirely on the free plan and add Pro later for multi-step layouts, sponsor slot limits, or the other seven payment gateways.
How to Price Your Sponsorship Tiers
Before you open the form editor, decide what you’re actually selling. A tier without a clear benefit mentioned is just a price tag, and sponsors compare it against what similar events charged them last year.
Start from your event’s real costs, printing, staging, catering, venue, etc. Price a sponsorship at what it should cover, say, a third of your venue cost. Three or four tiers are usually enough. With too many options, sponsors spend their time comparing instead of picking one.
Space the prices so the jump between tiers matches the difference in benefits. Keep the lowest tier low enough that a small local business can comfortably say yes; that tier often brings in more total sponsors in dollars.
How to Create Your Event Sponsorship Form in WordPress
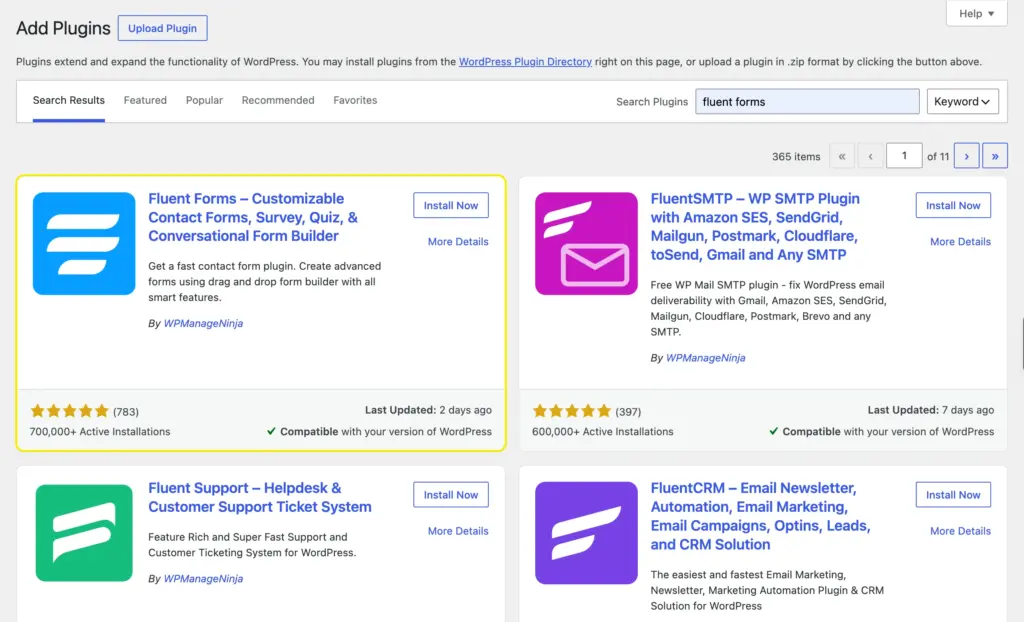
1. Install the Fluent Forms plugin
From your WordPress dashboard, go to Plugins → Add New Plugin, search “Fluent Forms,” then click Install Now and Activate.
2. Start from Scratch or the Sponsor Request Form template
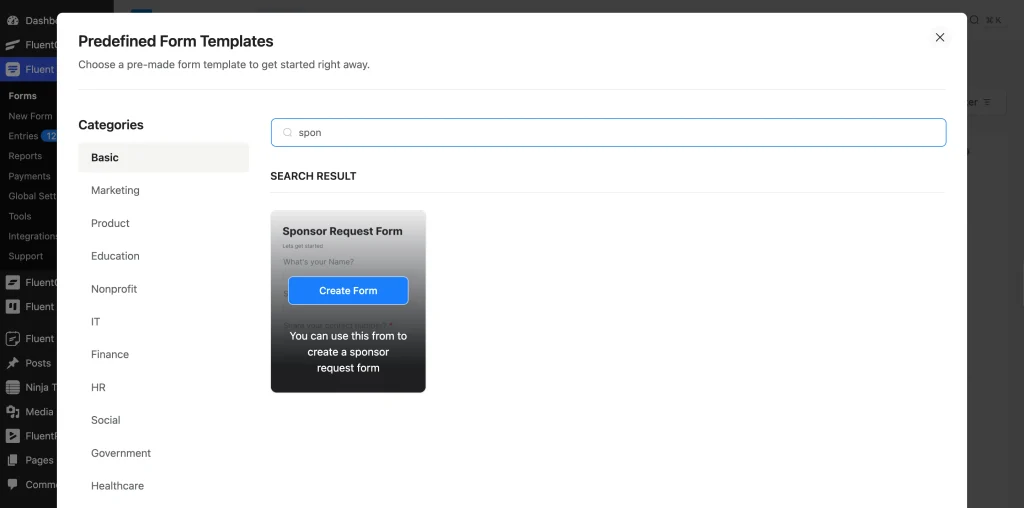
To start from a template, go to Fluent Forms → New Form → Choose a Template, search “sponsor” in the template library, and select it to skip the blank-page setup. Adjust the fields and options to your liking.
You can also download the event sponsorship form template and import it to your site.
Choose Create a Blank Form to start from scratch instead, and follow the steps below.
3. Add sponsor and company contact fields
Whichever starting point you picked, confirm these core fields are on the form:
- Name (split into first and last)
- Email, with validation turned on
- Phone number
- Company name (a Simple Text field)
- Job title or role (a Simple Text field), useful when the person submitting isn’t the final decision-maker.
- Website URL, so you can link their name back to their site if you publish a public sponsor page
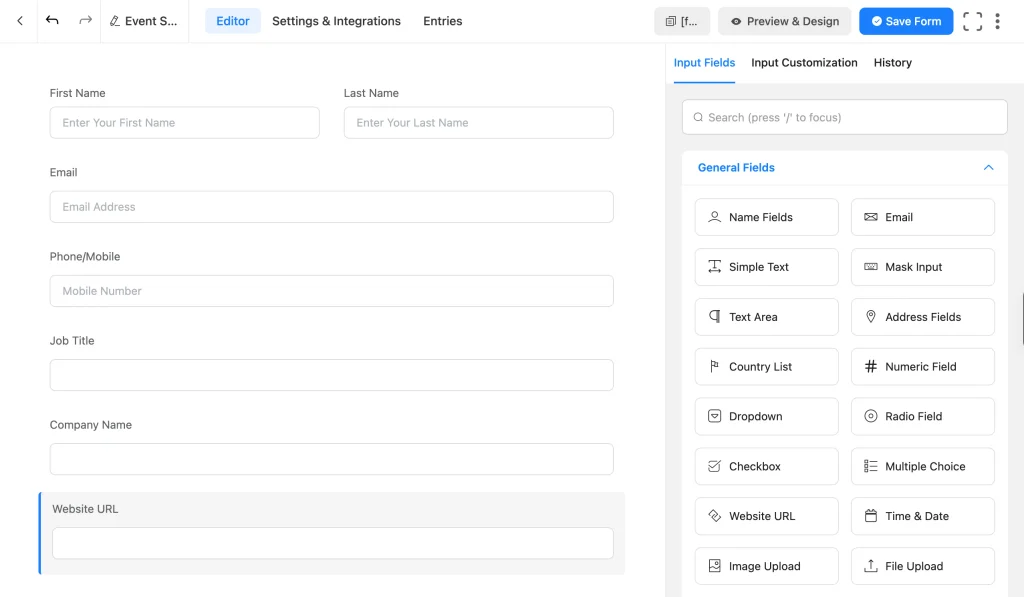
All of these are core fields available in the Fluent Forms free plan (except the Phone/Mobile field).
4. Add a company logo upload field
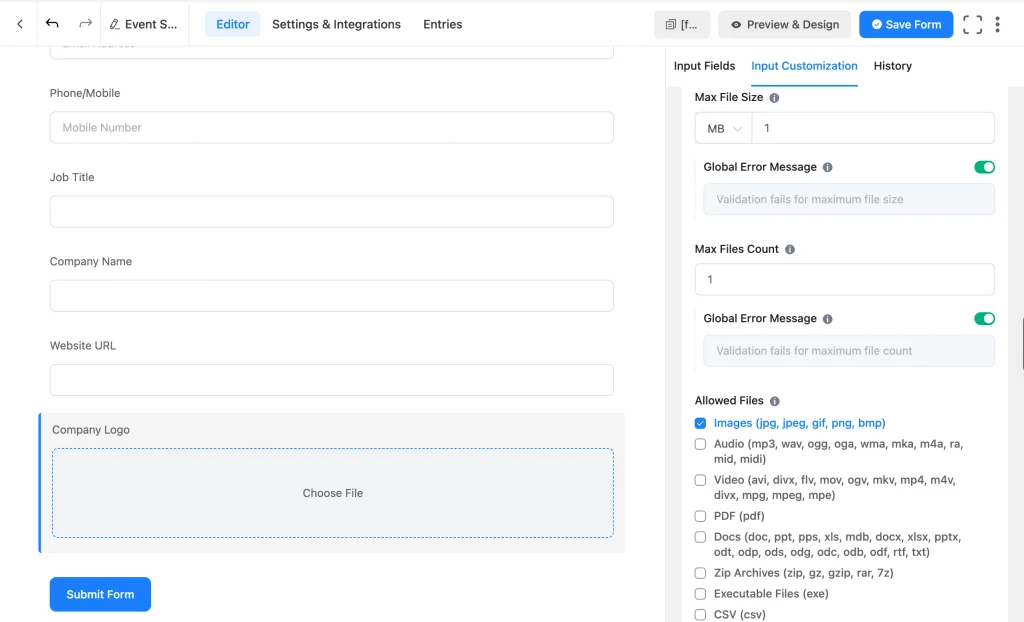
Most tiers include logo placement somewhere: on your website, in a printed program, or on an event banner. Add a File Upload field so sponsors can send their logo with the submission instead of in a separate email.
Set the accepted file types to image formats (PNG, JPG) and cap the file size under the field’s advanced options. The File Upload field is a Pro feature. If you’re on the free plan, ask for a logo link instead. A URL field labeled “Link to your logo (Google Drive, Dropbox, etc.)” works as a free workaround until you upgrade.
5. Build your sponsorship tiers with the Payment Item field
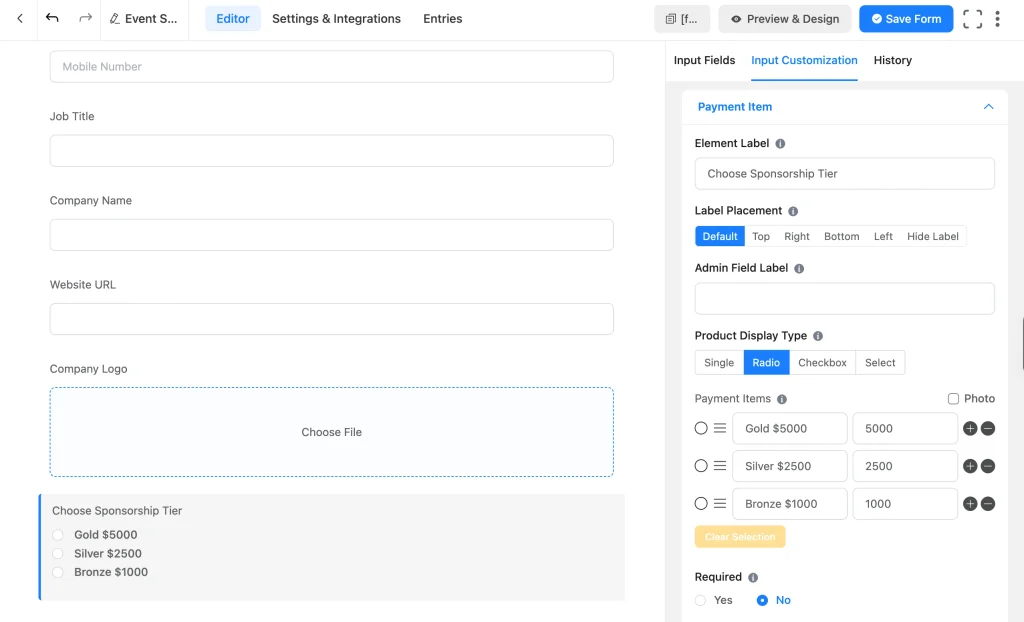
Payment fields help you collect payment from your sponsorship form. Add a Payment Item field, set its Display Type to Radio so a sponsor can only pick one tier, then add the options with price attached to each: Gold Sponsor ($5,000), Silver Sponsor ($2,500), Bronze Sponsor ($1,000), or other names and amounts suitable for your event.
A conference example, using the pricing logic from the section above:
| Tier | Price |
| Gold | $5,000 |
| Silver | $2,500 |
| Bronze | $1,000 |
The Payment Item field is free on every plan.
Show benefits using conditional logic
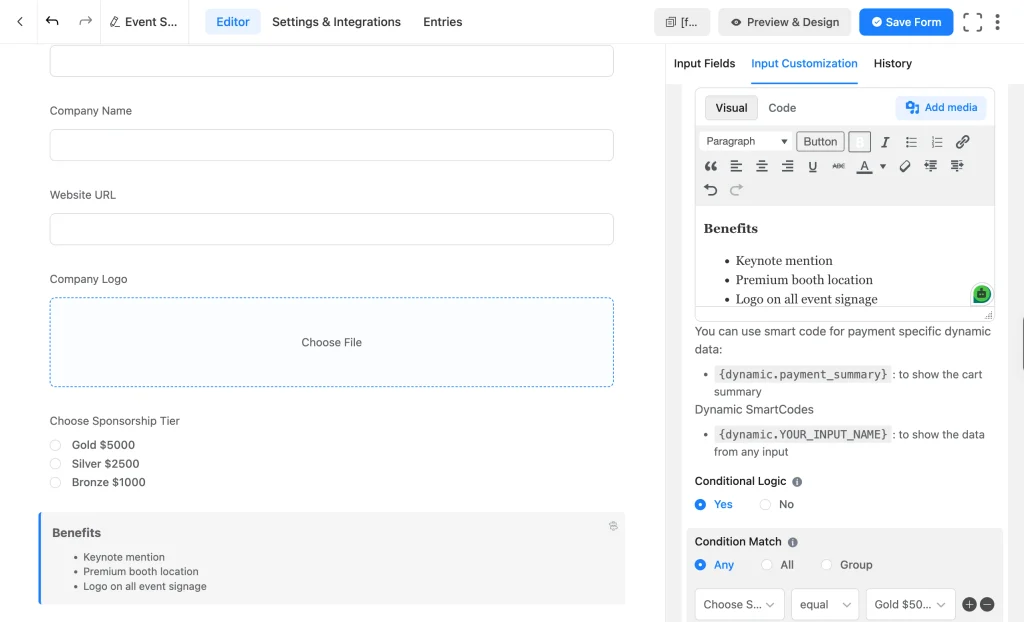
Add one Custom HTML field (doesn’t require writing code) per tier, each holding a short list of what that tier includes. Set each field’s Conditional Logic to show only when the Payment Item field equals that tier, so a sponsor sees the Gold benefits after picking Gold, the Silver benefits after picking Silver, and so on.
| Tier | Benefits |
| Gold | Keynote mention, Premium booth location, Logo on all event signage |
| Silver | Standard booth, Logo on the event website and printed program |
| Bronze | Logo on the event website only |
Check the radio button next to your most popular tier in the Payment Item field’s Radio tab to set it as the default. That tier’s benefits show the moment the page loads, instead of a blank space before anyone’s picked.
6. Let sponsors add extra benefits
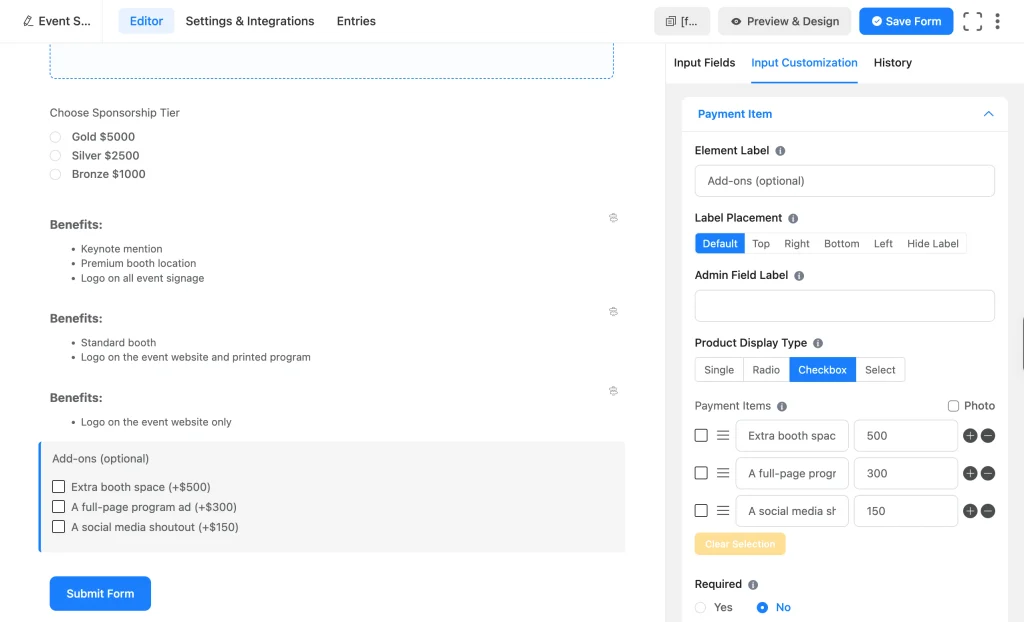
Some sponsors want more than their tier includes. Add a second Payment Item field, this time set to Checkbox display, for optional add-ons: extra booth space (+$500), a full-page program ad (+$300), a social media shoutout (+$150). Because it’s a checkbox, a sponsor can select as many as they want, and Fluent Forms totals them automatically.
7. Add an in-kind sponsorship option
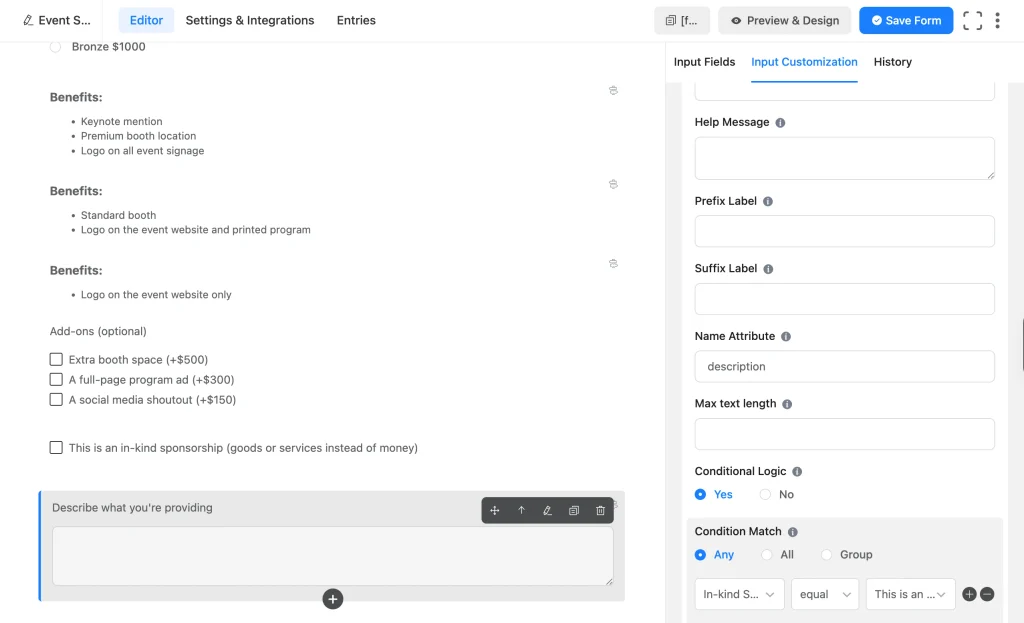
For businesses offering goods or services instead of cash, add a Checkbox field labeled “In-kind Sponsorship” with a single option “This is an in-kind sponsorship (goods or services instead of cash).” Keep the label hidden.
Add a Text Area field right after it labeled “Describe what you’re providing,” and use free field-level Conditional Logic to show it only when that checkbox is ticked.
8. Add the Payment Summary field
Drop in a Payment Summary field right before the submit button. It shows a total of the selected tier plus any add-ons, so a sponsor sees exactly what they’re about to pay instead. This is a free field. Save Form.
9. Connect a payment gateway
Go to Fluent Forms → Global Settings → Payment → Payment Methods, enable Stripe, and click Connect with Stripe to link your account.
Stripe is free to connect, though Fluent Forms keeps a 1.9% fee on transactions processed through the free plan (on top of Stripe’s own processing fee). Pro removes that 1.9% cut and unlocks seven more gateways: PayPal, Mollie, Razorpay, Paystack, Square, Paddle, and Authorize.net.
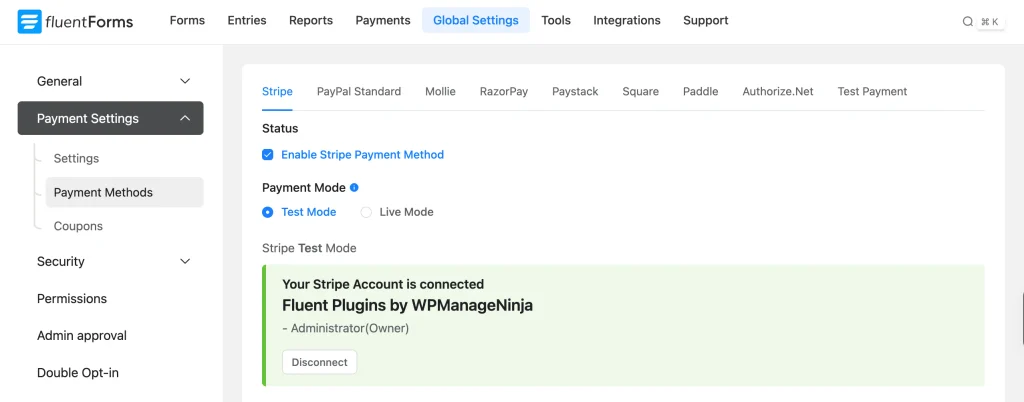
Next, add the Payment Method field to your form. Select the connected gateway you want to enable for this form.
10. Break a long form into steps (optional, Pro)
If your form has grown quite long, consider splitting it with the Form Step field: Company Info, then Sponsorship Level, then Payment. Shorter screens tend to get finished more often than one long scroll. You can set step titles, customize step and progress bar styles, and save per-step data (incomplete submissions).
11. Add a sponsorship agreement and consent
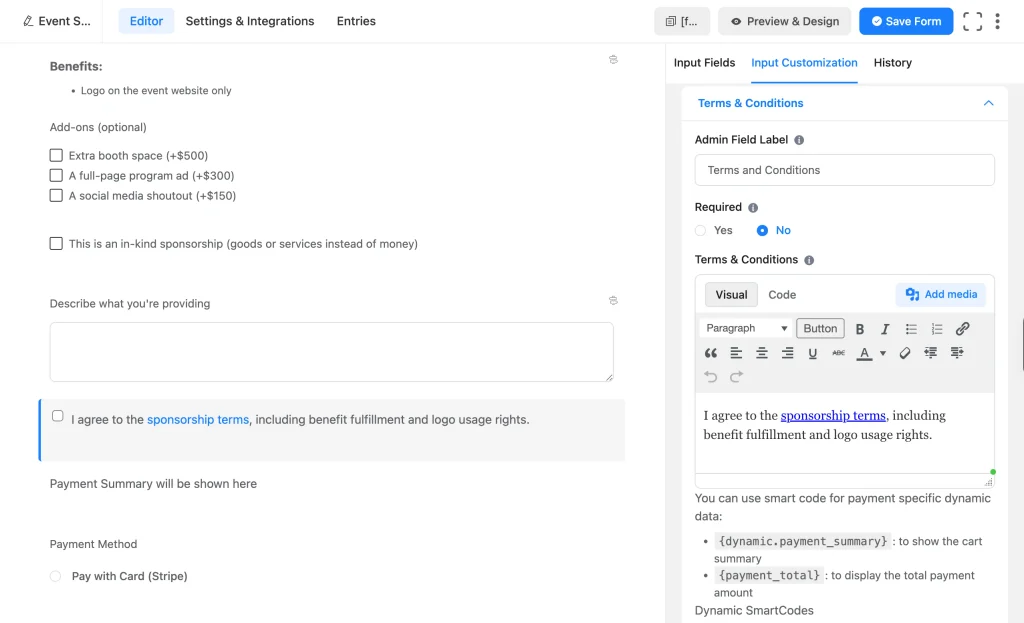
Add a Terms and Conditions field “I agree to the sponsorship terms, including benefit fulfillment and logo usage rights,” linked to a terms page if you have one written up. This isn’t a substitute for a signed contract on a large-sum sponsorship, but it sets clear expectations for smaller tiers. Click Save Form.
12. Set up confirmation messages and email notifications
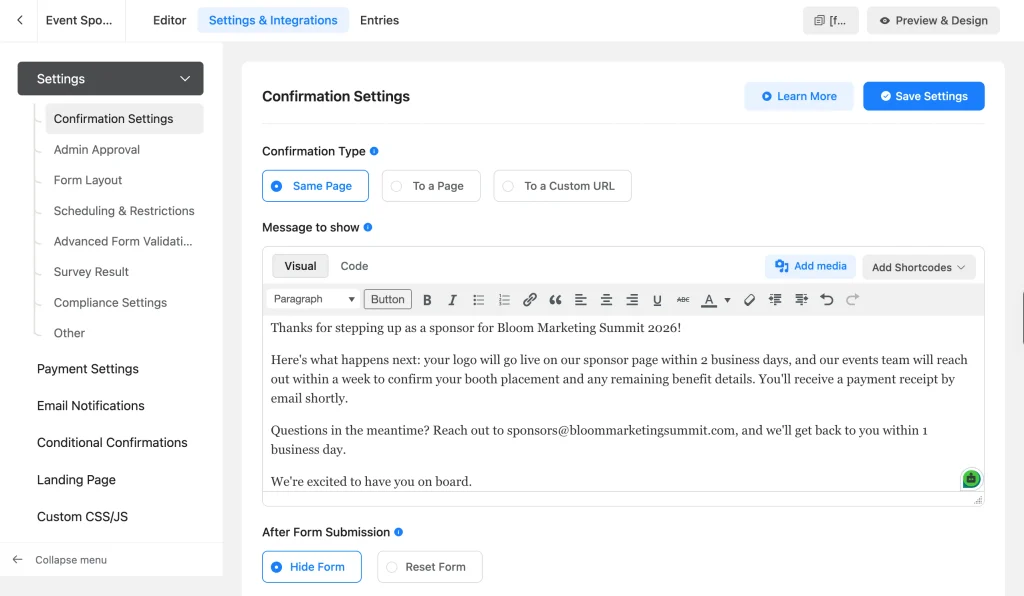
Under Settings & Integrations → Confirmation Settings, write a thank-you message that tells the sponsor what happens next: when their logo goes live, when they’ll hear from your team, and who to contact with questions.
Under Settings & Integrations → Email Notifications, set up a notification to your team so nobody misses a new sponsor, and a receipt email to the sponsor confirming what they paid. If you want different team members notified based on tier, that’s conditional routing under Send To → Configure Routing, a Pro feature. For receipts, the free PDF add-on can attach a proper PDF copy of the entry instead of a plain-text email.
13. Protect your form from spam
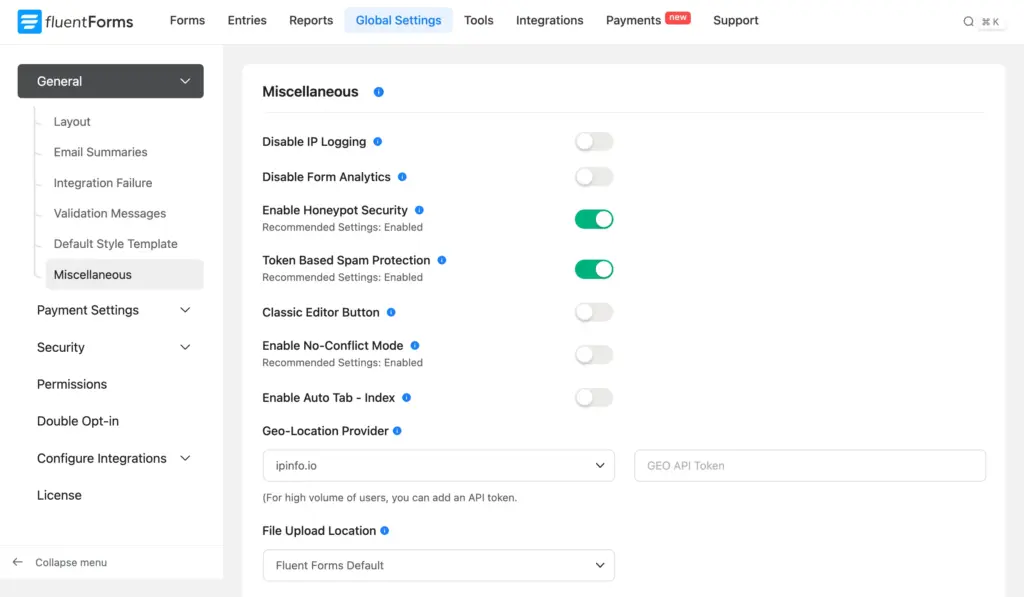
Sponsorship forms sometimes attract bot submissions trying to hit your payment flow. Turn on reCAPTCHA, hCaptcha, Turnstile, or the built-in Honeypot field under Global Settings → General → Miscellaneous. All of these are free.
14. Test your form before you go live
- Submit a real test payment from incognito for each tier in Stripe’s test mode and confirm the Payment Summary total matches what you expect.
- Check the checkbox field once and confirm the in-kind Text Area reveals itself, then submit both with and without it checked.
- Read through your confirmation message and check any conditional routing if you set it up.
- Open the form on a phone. See that the tier lists with detailed benefits stack up properly on a narrow screen.
- Confirm both notification emails actually arrive: your team’s alert and the sponsor’s receipt.
15. Embed and publish your form
Copy the form’s shortcode and paste it anywhere on a page or use the Fluent Forms block if you’re building in the WordPress block editor. A dedicated “Become a Sponsor” page tends to convert better.
Common Sponsorship Scenarios
The steps above cover a multi-tier conference form with add-ons, but the same fields can be rearranged for other situations without starting over.
- Single flat-rate sponsorship: A Payment Item field with a single price point, no tiers or add-ons. Works for a small local event selling one package at a set price.
- Multi-tier with add-ons: What’s built above. Fits most conferences, trade shows, and larger fundraisers.
- Recurring annual sponsorship: Swap the Payment Item field for a Subscription field so a sponsor renews automatically each year. Only Stripe and PayPal process recurring billing.
- In-kind sponsorship: The in-kind checkbox from step 7. Useful for local businesses offering supplies, catering, or services instead of cash.
- Capped sponsorship slots: Inventory (Pro) limits how many sponsors can pick a top tier, so you don’t oversell spots on any tier.
Free vs Pro at a Glance
Check the full breakdown for every field and setting on the plugin. Here’s the part that matters most for a sponsorship form:
| Free | Pro |
| Core contact fields (Name, Email, Phone, Text) | File Upload field for logos |
| Payment Item, Payment Summary, Custom Payment Amount fields | Seven additional gateways: PayPal, Mollie, Razorpay, Paystack, Square, Paddle, and Authorize.net. |
| Stripe gateway (1.9% transaction fee on top of Stripe’s own fee) | Stripe with no added platform fee |
| Subscription field for recurring sponsorships | Multi-step layout (Form Step field) |
| Field-level Conditional Logic (show/hide a field based on an answer) | Settings-level conditional logic (email routing, conditional logic in CRM feed) |
| Spam protection (reCAPTCHA, hCaptcha, Turnstile, Honeypot) | Coupons and discount codes, inventory (capped sponsor slots per tier). |
| Free PDF receipts add-on | Calculation on custom amounts |
Bonus Features to Consider
Once the core form is live and taking payments, these are worth a look as your sponsorship program grows.
Early-bird pricing with coupons (Pro)
Offer a discount code for sponsors who commit before a deadline, for example, 15% off any tier for anyone who signs up within two weeks of your public announcement. Coupon codes are a Pro feature.
Capping sponsor slots (Pro)
Inventory limits how many sponsors can pick a tier, useful for proper distribution of items like booth space or stage time. Set the cap right on the Payment Item field, under its advanced options.
Tracking sponsors with FluentCRM
You can connect Fluent Forms to FluentCRM with both plugins’ free versions. It lets you automatically add form submitters as contacts in FluentCRM the moment they submit, complete with tags, lists, or custom field data mapped from the form. From FluentCRM, you can run automations, email campaigns, etc.
You can also use Dynamic Tag Selection (free) to tag contacts differently based on their answers (for example, tagging a sponsor by which tier they picked). Advanced conditional logic on the feed requires Fluent Forms Pro.
Syncing to Notion, Trello, or Google Sheets (Pro)
Send sponsor data to tools (Notion, Trello, Google Sheets) your team already uses for tracking and planning. If you’re using the free version of Fluent Forms, you can connect it to FluentBoards for data management.
Tips to Improve Sponsorship Form Completion
- Show amounts, not just tier names. The Payment Summary field keeps totals visible so nothing feels like a hidden fee.
- List benefits next to each tier option so a sponsor can compare Gold against Silver without emailing you first.
- Use the classic layout if your form has fewer fields. Save multi-step layouts for forms with complex tiers and a higher number of fields.
- Tell sponsors what happens next in your confirmation message, for example, when their logo goes live or when your team will reach out.
- Automate tagging sponsors by tier the moment they submit, so follow-up doesn’t wait for a manual process.
Frequently Asked Questions
Can I offer more than three sponsorship tiers?
Yes, you can add as many tiers as you want. A golden rule is to assess how many tiers a sponsor can compare before it gets confusing.
Does Fluent Forms charge a fee on sponsorship payments?
Only on the free plan’s Stripe connection, which carries a 1.9% platform fee on top of Stripe’s own processing fee. Pro removes that added fee.
Can sponsors pay by bank transfer instead of a card?
Yes. Turn on the Offline Payment Method under Global Settings and set it to Live Mode. It then shows up as a selectable option on your Payment Method field next to Stripe and PayPal. A sponsor who picks it submits the form without paying online, and you follow up to collect the bank transfer.
Can I limit how many sponsors take a top tier?
Yes, with Inventory (Pro), which caps the number of times a specific option can be selected.
Can I set up a recurring or annual sponsorship?
Yes, using the Subscription field. Only Stripe and PayPal process recurring billing.
Is there a sponsorship form template already built in?
Yes, the Sponsor Request Form template in the Fluent Forms template library, which you can use as a starting point and customize.
How do I keep track of sponsors after they submit?
Every submission lands in Fluent Forms → Entries by default, where you can filter and export. Free FluentCRM tagging or Pro syncs to Google Sheets, Notion, or Trello can keep an outside list updated automatically.
Do I need to know coding to build this?
No. Every field and setting described above is available through the drag-and-drop Fluent Forms editor.
Your Sponsorship Form Is Ready to Go Live
You now have a form that does more than collect sponsor contact: it presents tiers, takes payment, handles in-kind pledges, and organizes every sponsor into one place you can act on. Start free with Fluent Forms today and have a working sponsorship form live before your next outreach round.
Build Smarter Forms for Free

Sarika writes for Fluent Forms and loves to offer insights into small businesses. She’s curious and enjoys discussing ideas, interests, and perspectives. In her free time, she’s either marvelling at architectural beauties or trying different cuisines.




Leave a Reply