
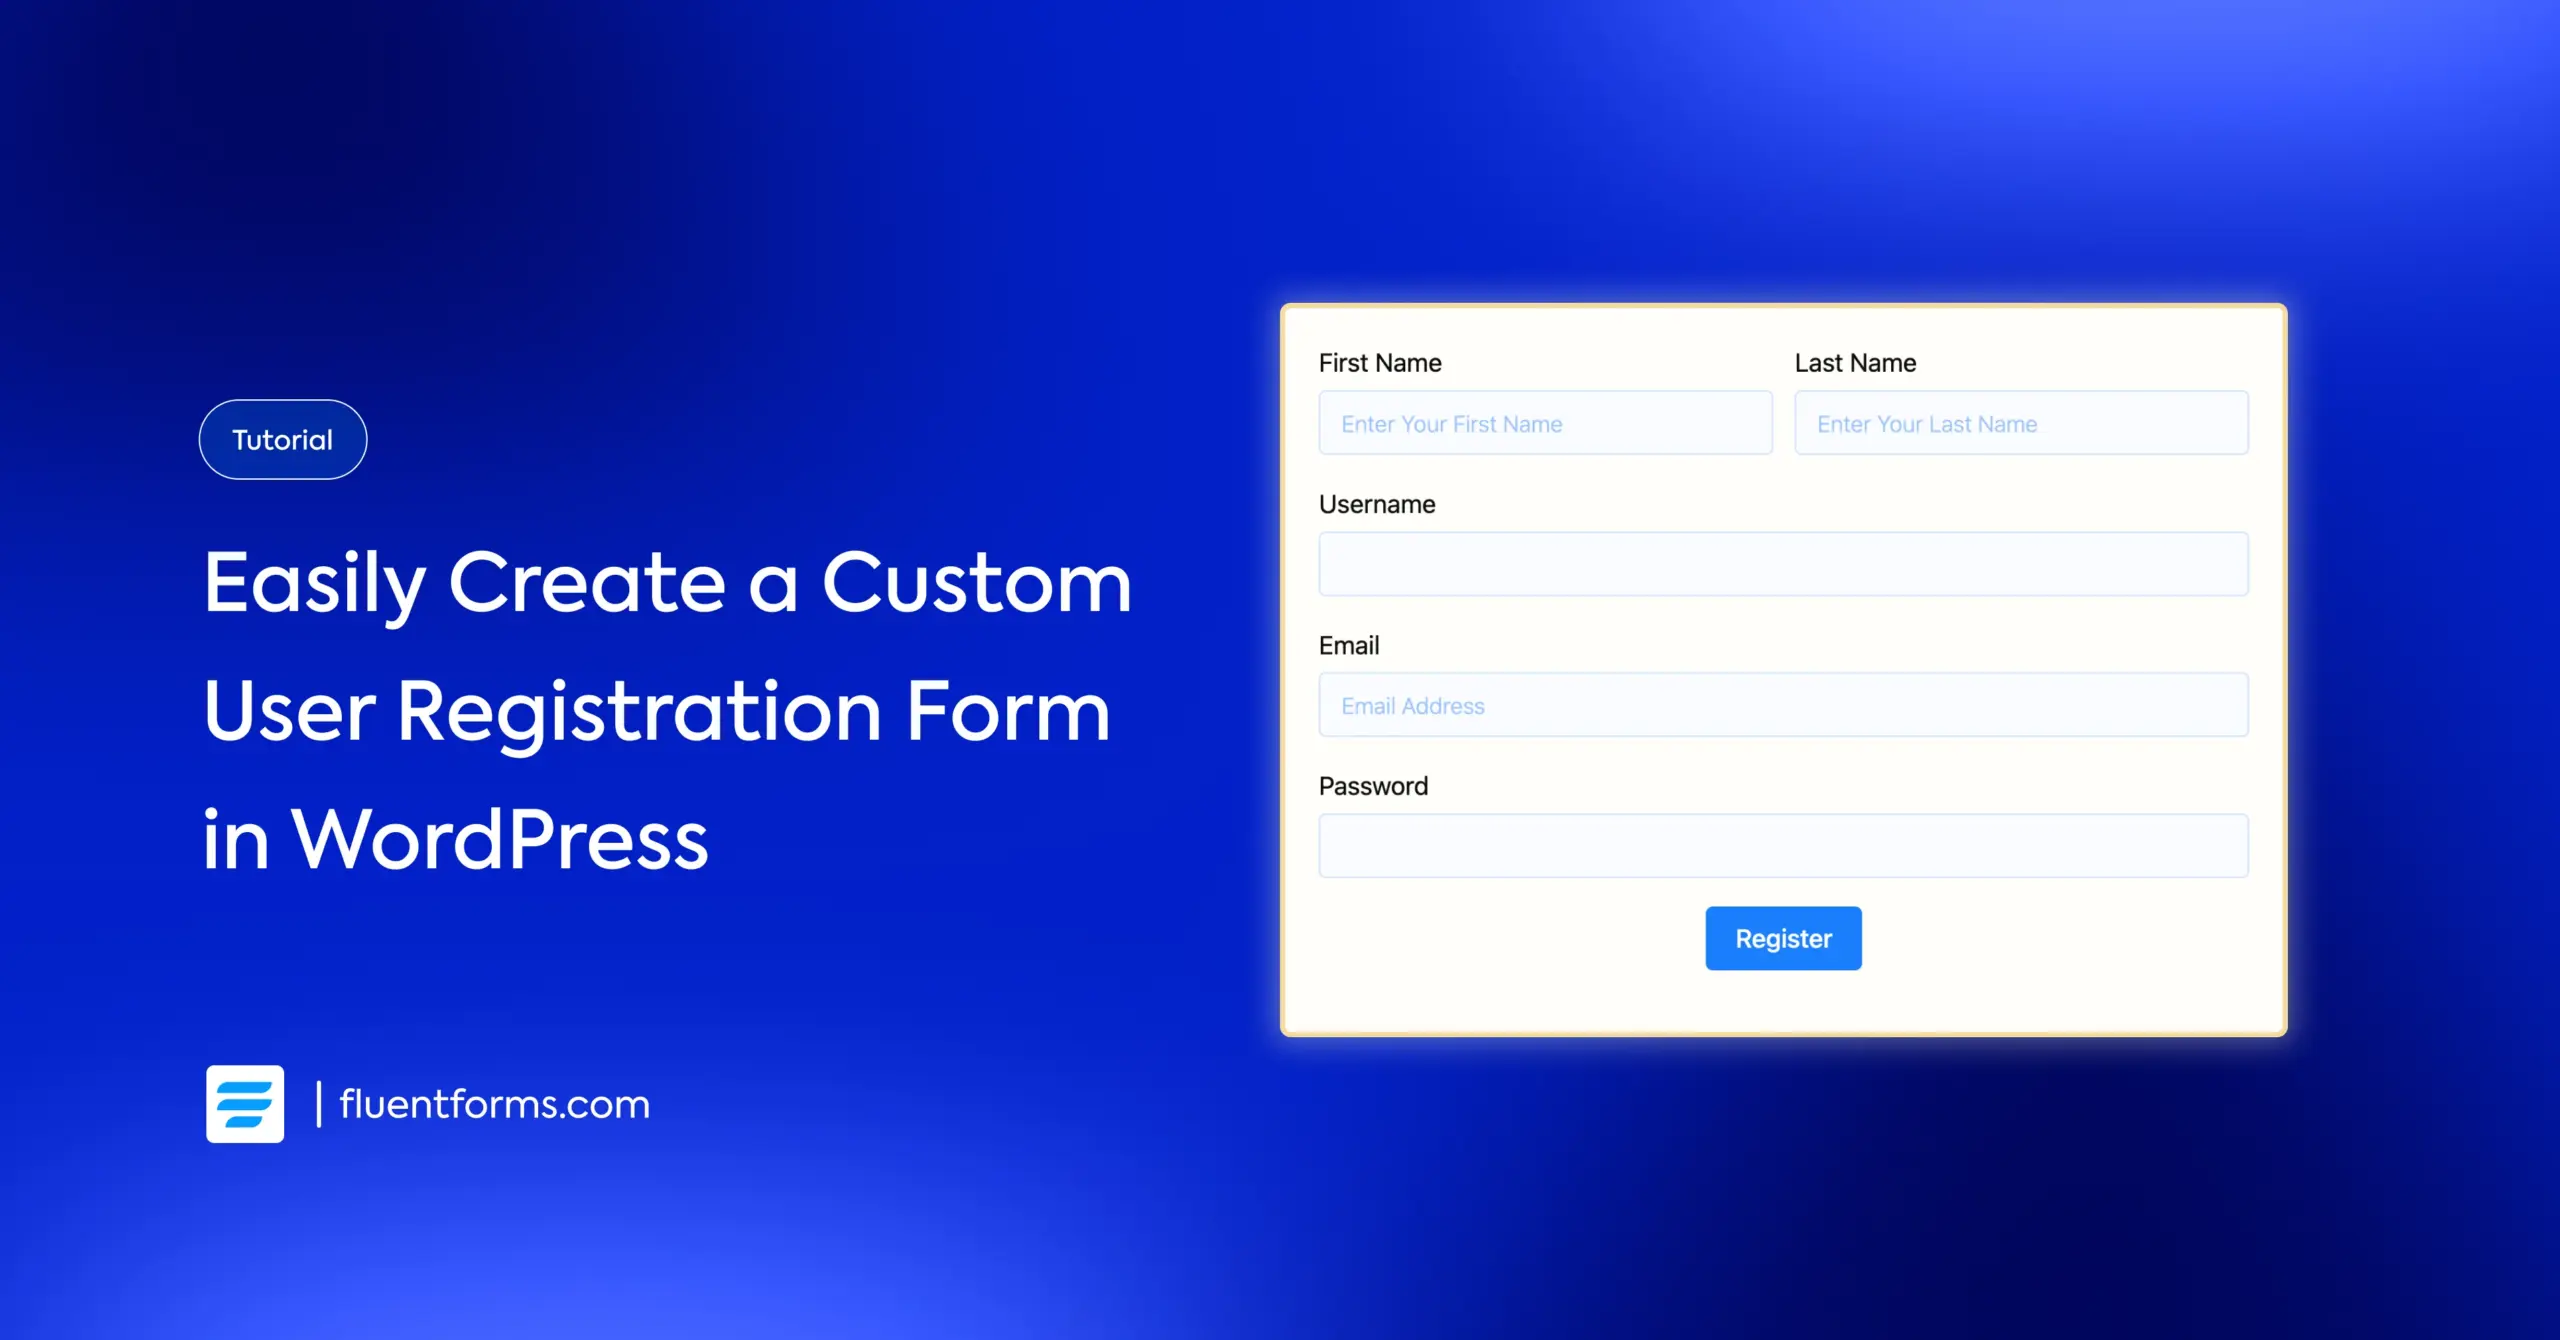
How to Create a User Registration Form in WordPress with Fluent Forms
WordPress’ default registration form gets the job done. However, it gives you very little control over how people sign up, with no branding options or extra fields. You need more flexibility to maintain professionalism in your membership or community site’s registration form.
With Fluent Forms, you can build a custom user registration form in WordPress that looks like part of your site. Moreover, it collects the right information, keeps spam out, and sends people where they need to go after signing up. That ensures a better experience for users and a cleaner workflow for you. Let’s get started.
TL;DR
- Upgrade from Default: Replace the limited WordPress registration form with a branded, custom-field version using Fluent Forms Pro.
- Enable the Module: Activate the User Registration or Update module under Integrations to link your forms to WordPress user creation.
- Map Your Fields: Create a form and use the Registration Feed settings to map form inputs (like email and username) to specific WordPress user roles and profile fields.
- Optimize UX: Enhance the user journey by enabling auto-login, setting up custom redirects to welcome pages, and using the Advanced Form Styler to match your site’s branding.
- Prioritize Security: Use Honeypot, token-based spam protection, CAPTCHA, etc., to enhance security (or the FluentAuth plugin to prevent spam and add features like Social Login and 2FA).
Why You Should Replace the Default WordPress Registration Form
The default registration form is functional. It doesn’t come with the flexibility you need. If you want a phone number, company name, or any other field that helps your workflow, the default form falls short.
Besides, you might want the signup page to match your brand or have users land on a welcome page after registration. Fluent Forms gives you the functionality to do that and more. Here’s what you can control:
- A branded frontend registration experience
- Custom profile fields
- Better control over user roles
- Cleaner onboarding
- Spam protection options
- Smarter redirects after signup
- A registration flow that feels intuitive, not forced
If registration is the first step in the relationship, design it with purpose. Because people notice when you didn’t.
Prerequisites: What You’ll Need
Before you start, make sure you have:
- A functioning WordPress site
- Fluent Forms Pro (user registration is a paid feature)
- A page where you’ll publish the form
Step by Step: How to Create a User Registration Form in WordPress
Now let’s build the form.
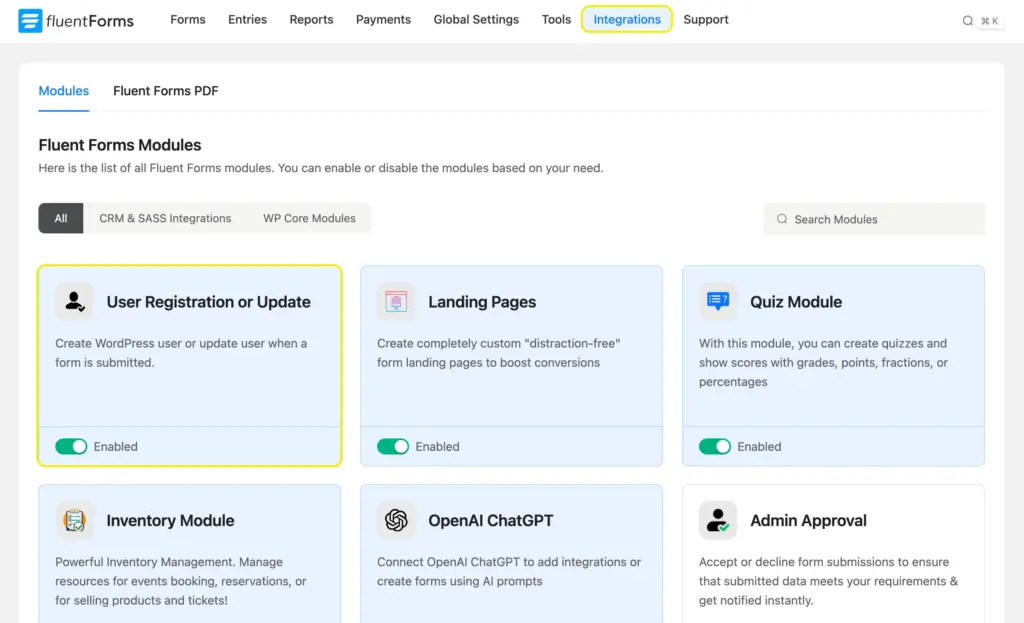
Step 1: Enable the User Registration or Update module
Once you have Fluent Forms Pro activated on your site, navigate to Fluent Forms > Integrations > Modules. Enable the User Registration or Update module. This is the bridge between the form and WordPress user creation.
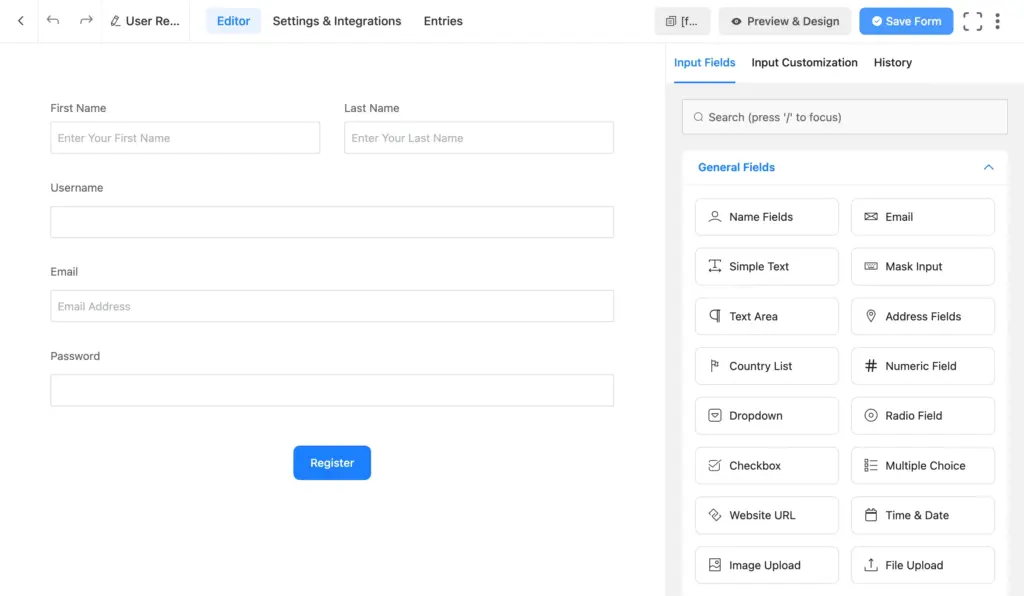
Step 2: Build your custom registration form
Next, create the form itself. Go to:
- Fluent Forms > Add New Form
- Choose a blank form or a template
- Add the fields you need
For a solid registration form, you’ll usually want:
- First name
- Last name
- Email address
- Password
- Username if your setup needs it
- Any custom profile fields that matter for your site
You can also add fields like:
- Phone number
- Company name
- Website
- User type
- Country
- Role-specific details
Remember, the more fields you add, the more friction you create. Only ask for the most important information. If you want to collect extra information, keep it optional.
Step 3: Configure the user registration feed
In this section, I’ll show you how to create accounts from the form. Click the Settings & Integrations tab from the top menu bar. Scroll down to Configure Integrations from the left panel. Click Add New Integration > User Registration or Update Integration.
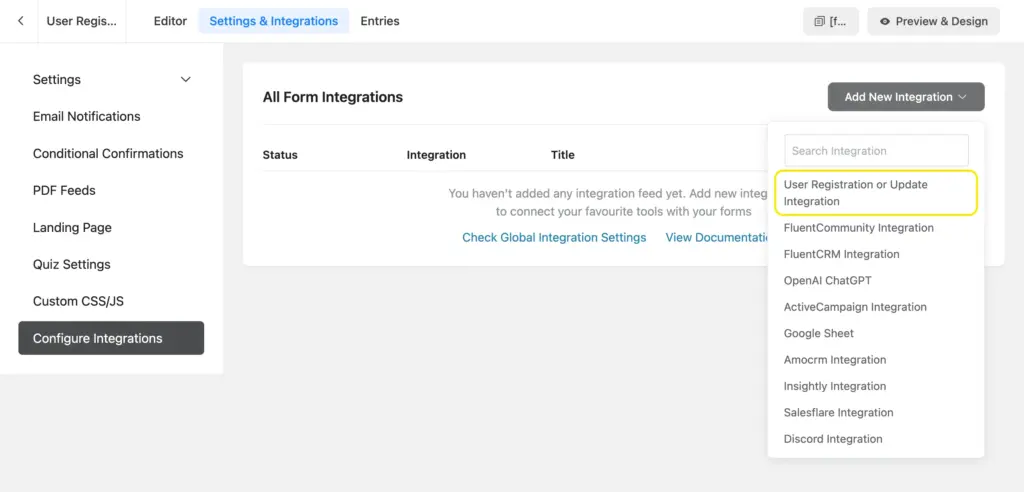
Now, map your form fields to WordPress user fields inside the registration feed. Simply select the relevant form field from the dropdown for each user registration field.
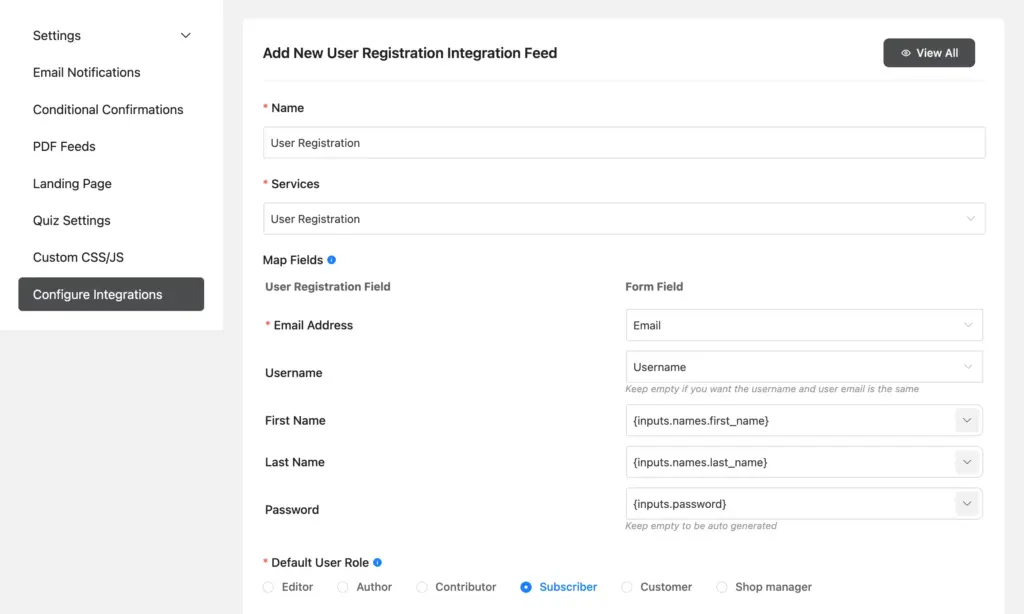
If the fields aren’t mapped in the registration feed, the account won’t be created properly. So check it carefully and set the Default Role correctly. For most public registration forms, it should be Subscriber. Assign the higher roles only to your team members or users who strictly need them.
Step 4: Enable auto-login
Now decide what happens after signup. Use auto-login for the smoothest possible experience. The user registers and immediately moves into the site without having to log in again.
Don’t allow auto log-in when verification is important, for example, for membership or community sites. If you want less friction, auto-login is a strong choice. If you want more control, activation is safer.
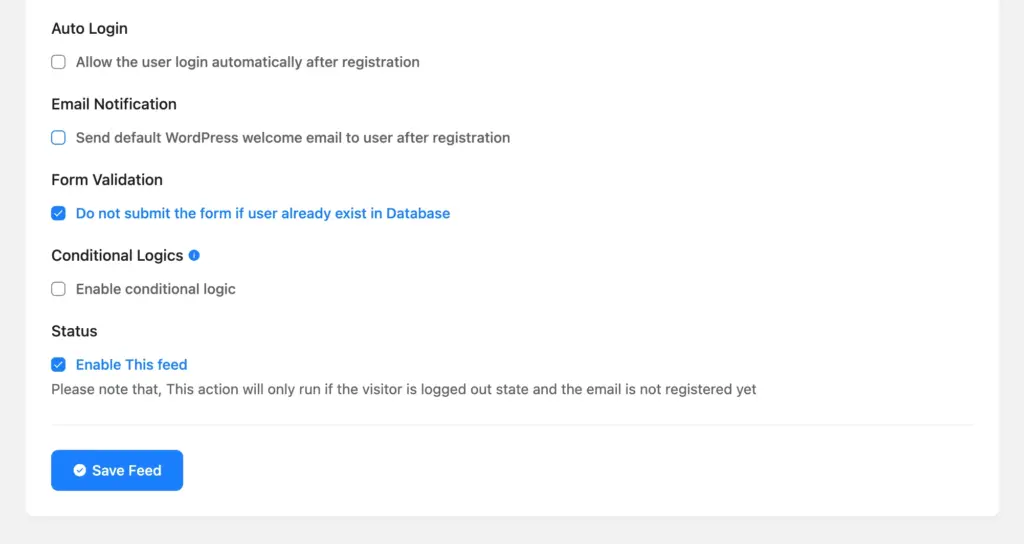
You can also apply conditional logic to the registration feed. That way, the registration only succeeds when the user inputs meet those conditions. Besides, you can send users a welcome email after a successful registration.
Set the redirect after registration
What’s more, you can select which page the users land on once they are registered and logged in. Send them somewhere useful, like:
- A welcome page
- A dashboard
- An onboarding page
- A profile page/account
- A member’s area
Go to the form’s Confirmation Settings and select To a Page. Select the page using the dropdown menu. Once users successfully log in, they’ll land on this page.
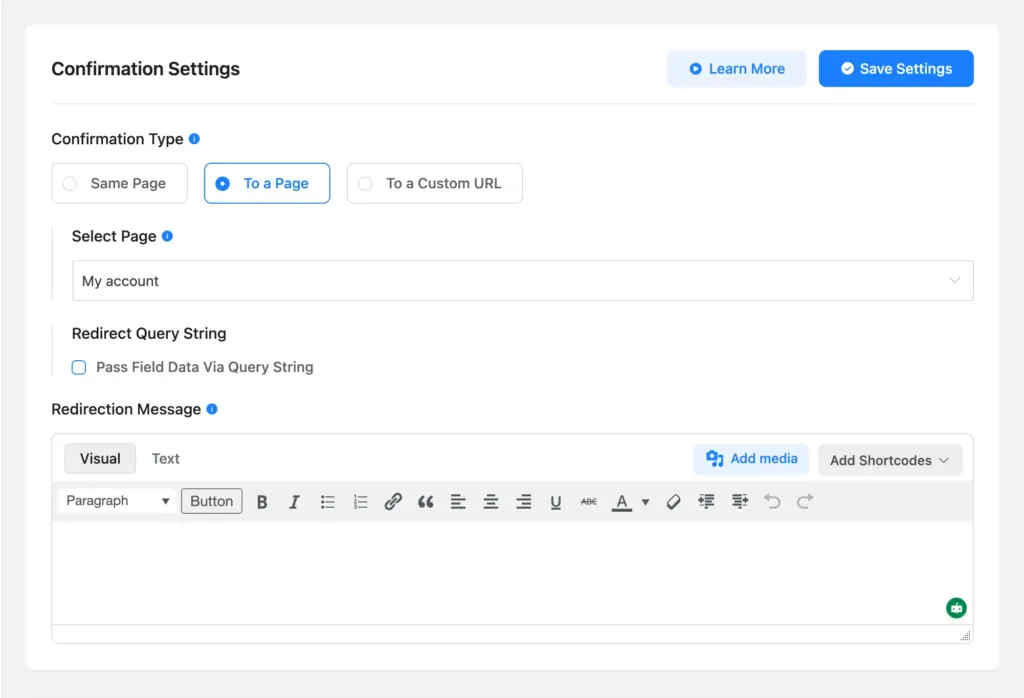
Good redirects create an effortless user experience and lead users where they need to be.
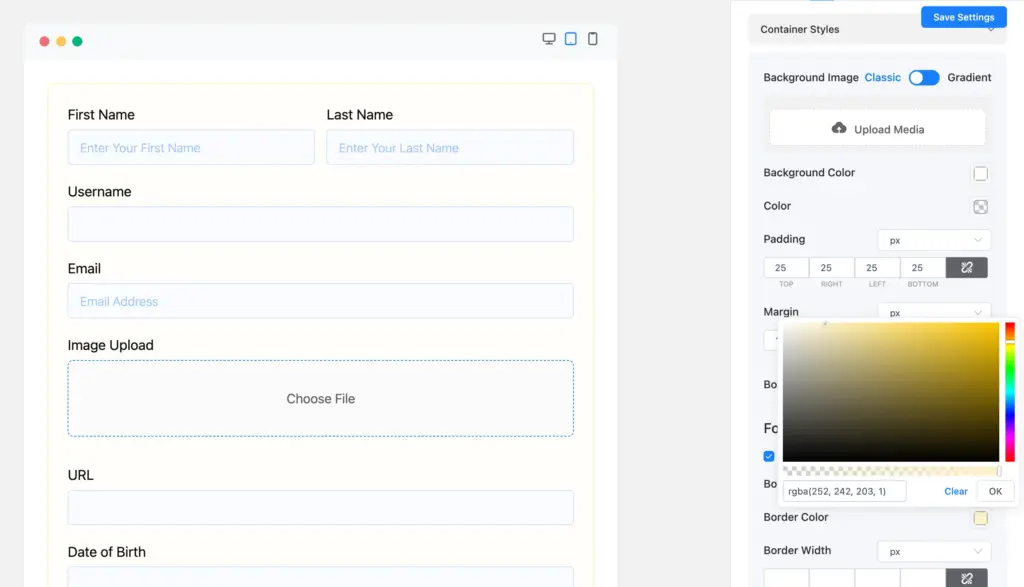
Step 5: Style & test the form before publishing
People tend to trust well-designed and maintained websites. Your users might find a lack of effort and unprofessionalism in a generic registration form. That’s why your registration form should match the look of your site.
Use Fluent Form Pro’s Advanced Form Styler to make it feel like your brand. It’s a visual styling tool that allows you to adjust:
- Colors (background & elements)
- Typography
- Button style
- Margin and padding
- Field layout
- Box shadow
- Normal & hover state
Once you’re happy with the design, copy the shortcode and paste it into your registration page. Test the form while logged out or in incognito mode so you can see the real user experience. Check that:
- The form submits successfully
- The user account is created
- Field mapping works
- The default role is correct
- Auto-login behaves the way you expect
- The redirect sends users to the right page
If everything’s working properly, publish the page, add it to your navigation or onboarding flow, and you’re done.
Setting Up the Login System
Once people can register, they need an easy way to get back in. Fluent Forms offers two basic options:
Option 1: Add custom PHP code to your theme file
This works great for a simple login form. You only have to add a little code to your theme file. The basics are straightforward:
- Add email and password fields
- Make sure the field name attributes are correct
Add the custom PHP code in theme functions (functions.php) or a snippet plugin like FluentSnippet to process the login.
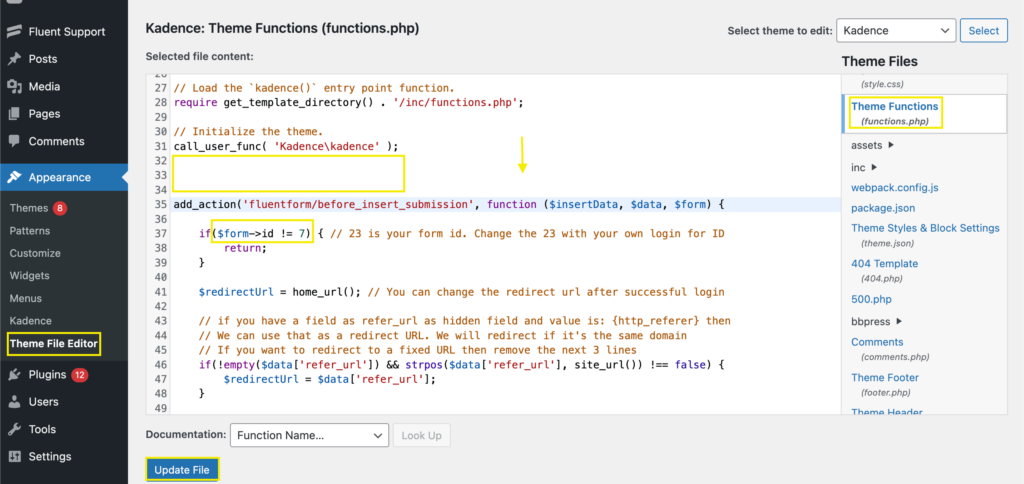
The key field names are:
- Email field name: email
- Password field name: password
Learn More: How to Create a Login Form Using Fluent Forms.
Option 2: Use FluentAuth
FluentAuth is a free plugin that natively integrates with Fluent Forms and offers a bunch of login features. It provides a cleaner & more secure experience, and no custom code is required. Here’s what you get with FluentAuth:
- Social login
- 2FA
- Magic links
- Login/logout redirects
- Limit login attempts
- Audit logs
Learn More: Getting Started with FluentAuth.
Best Practices for User Registration Forms
A good registration form doesn’t just create accounts. It protects the site and makes the user experience effortless.
1. Implement spam protection
If your registration form is public, spam protection is mandatory. Because the goal is to make life easy for real people and impossible for bots. Use the security tools Fluent Forms offers, such as:
- Honeypot
- Token-based spam protection
- CAPTCHA or Turnstile if needed
- Strong validation rules
Learn More: Complete WordPress form security checklist.
2. Redirect users after successful registration
A good redirect makes the flow feel natural. A bad one makes it feel abrupt. After registration, send users where they actually need to go:
- Dashboard
- Account page
- Product page
- Community area
- Welcome screen
- Onboarding page
3. Style your form to match your brand
Your registration form is usually the first interaction users have with your brand. Match its design to the rest of your website so users aren’t confused. Besides, a well-designed form makes the experience feel intended and professional. Start with the basics:
- Logo (via the custom HTML field or the landing page feature)
- Colors & fonts (use brand colors and fonts)
- Button styles (keep button text personalized and use contrasting colors)
These will build trust with a consistent brand presence, and you can always adjust further from here.
4. Use auto-login to reduce friction
Auto-login is one of those small UX choices that makes a big difference. Instead of making someone register and then immediately log in again, you let them move to the next step. This removes unnecessary friction, especially on membership sites, communities, and onboarding-heavy websites. Just make sure it fits your security model first.
5. Customize your lost password page
Your lost password page is just as important as your login or registration page. It should convey the same professionalism. Fluent Forms lets you easily create a custom lost password form (with a custom code snippet) that you can design using your brand styles to maintain a consistent brand presence.
These small details are what turn a decent registration form into a really great one. When you protect the form, guide users to the right next step, keep the design consistent, and remove unnecessary friction, the whole experience feels smoother. That’s exactly how you go from a generic form to one that people actually enjoy using.
Convert More with a Well-thought-out Registration Form
A good registration form does more than create a user account. It sets the tone for the entire experience. When the form is clean, branded, and easy to complete, people feel like they’re in the right place from the start.
With Fluent Forms, you’re not stuck with the default WordPress setup. You get a registration flow that fits your site, collects the right information, and gives you control over what happens next. That removes friction from the user experience and compromises on your part.
So, are you ready to offer a delightful onboarding experience to your users? Because this is your cue to maintain professionalism and brand consistency throughout your website. Just follow the simple steps from this tutorial and watch your conversion rate move up.

Sarika writes for Fluent Forms and loves to offer insights into small businesses. She’s curious and enjoys discussing ideas, interests, and perspectives. In her free time, she’s either marvelling at architectural beauties or trying different cuisines.


Leave a Reply