
How to Build a Personality Quiz in WordPress (with Typeform-Style Results)
Typeform made personality quizzes popular for a reason. The one-question-at-a-time format feels like a conversation, not a form. Users stay engaged, finish the quiz, and share their results. But your data lives on Typeform’s servers, and you get a monthly response limit, not to mention tiered pricing.
I have the perfect solution to that. You can build the same experience on your own WordPress site using Fluent Forms: conversational format, personality scoring, custom result pages, and social share buttons.
I’ll show you the entire process in this guide, starting from planning your personality types and mapping questions to building the quiz, creating result pages, and adding share buttons so your users can spread the quiz for you.
TL;DR
- A personality quiz maps each answer to a personality type instead of grading for correctness. The type with the most answers wins.
- Fluent Forms uses the Personality Quiz score type and conversational forms to create a Typeform-style, one-question-at-a-time quiz experience on your WordPress site.
- Plan your personality types and option mapping before you build. This makes the setup fast and accurate.
- Use Radio Fields for quiz questions and options, Show Values to map options to personality types, and the Quiz Score Field set to Personality Quiz.
- Write a conditional confirmation message for each personality type. This is your custom result page, and it shows full-screen on the same conversational quiz form page.
- Add social share buttons inside each confirmation message so users can share their results on Facebook, X, and LinkedIn.
- Optionally, capture emails before showing results to turn every quiz completion into a lead.
What Is a Personality Quiz
A personality quiz asks a series of questions in which each answer points to a personality type rather than to a correct answer. There’s no right or wrong. As users select their answers, each choice adds toward a personality type. At the end, the type with the most answers becomes the result.
You’ve probably taken one. “What type of leader are you?” “Which city matches your vibe?” “What’s your creative style?” They show up on BuzzFeed, Instagram Stories, coaching websites, and brand landing pages. The format works for engagement, lead generation, audience research, and product recommendations.
The key difference from a trivia or scored quiz: a trivia quiz checks knowledge and awards points for correct answers. A personality quiz sorts people into categories based on preferences. There’s nothing to study for, and every result feels personal.
Why Personality Quizzes Work
People tend to share personality quiz results. Because it says something about who they are. Each share brings new quiz takers to your site without any ad spend.
Every submission also gives you data. You learn which personality types your audience identifies with most, which tells you what messaging, products, or content will connect with them. A coaching site that sees 60% of quiz takers match “The Observer” knows their audience values depth and research.
If you add an email field before the results, every quiz completion becomes a lead. The conversion rate is high because users are genuinely curious about their results. They’re motivated to finish and submit.
What You’ll Need
Before you start building, make sure you have:
- A WordPress website
- Fluent Forms Pro (the Quiz Module is a Pro feature)
- Your personality types and question mapping are planned out (I’ll show you how in the next section)
If you’re new to Fluent Forms, check out our starter guide and the full quiz feature set, including trivia quizzes, scoring, grading, and personality types. This article specifically addresses creating personality quizzes in a conversational format.
Plan Your Personality Types and Questions
Outline the quiz structure before building it in Fluent Forms.
Define your personality types
Start with 3 to 5 types. Give each one a name and a short description. These descriptions will appear in your result pages, so make them feel insightful and positive. Nobody shares a result that makes them feel ordinary.
For this tutorial, I’m using four personality types:
- The Catalyst: A natural leader who brings people together and makes things happen.
- The Spark: A creative mind who brings fun, new ideas, and smiles to everyone.
- The Architect: A quiet thinker with a deep understanding and problem-solving mind.
- The Explorer: A calm observer who loves to live in the moment.
Write your questions
Aim for 5 to 8 questions. Each question should have one option per personality type, so four options for four types. Use scenario-based questions instead of direct self-assessment. “What would you do if…” is more engaging than “Are you more introverted or extroverted?”
Map each option to a personality type
For easier setup, keep the mapping consistent across questions. All option A answers point to the same type, all option B answers point to another, and so on. Don’t worry about users spotting patterns. Fluent Forms has a Randomize Options setting that shuffles the option order on every reload.
Here’s how two of my example questions are mapped:
|
Question |
Option |
Maps to (Show Values) |
|---|---|---|
|
Q1: You receive an anonymous envelope with $1,000 and a note: “Spend this by midnight, but not on yourself.” |
A. Treat your closest friends to an unforgettable dinner |
The Catalyst |
|
B. Fund a local street artist to paint a community mural |
The Spark |
|
|
C. Pay off a stranger’s overdue utility bill |
The Architect |
|
|
D. Buy a rare, obscure book for a local archive |
The Maverick |
|
|
Q4: You’re at a large gathering where you don’t know anyone. How do you navigate the room? |
A. Find the host and ask them to introduce you around |
The Catalyst |
|
B. Orbit the food station and chat with whoever stops by |
The Spark |
|
|
C. Find the quietest corner or the resident pet |
The Architect |
|
|
D. Join a lively circle, listen closely, then make a witty remark |
The Explorer |
Complete this mapping for all your questions.
How to Build a Personality Quiz in Fluent Forms
With your personality types and mapping ready, the setup in Fluent Forms is straightforward. Follow these steps in your WordPress dashboard.
Step 1: Enable the quiz module
Go to Fluent Forms Pro > Integrations from the top navigation bar. Search for Quiz Module and click the toggle to turn it on.
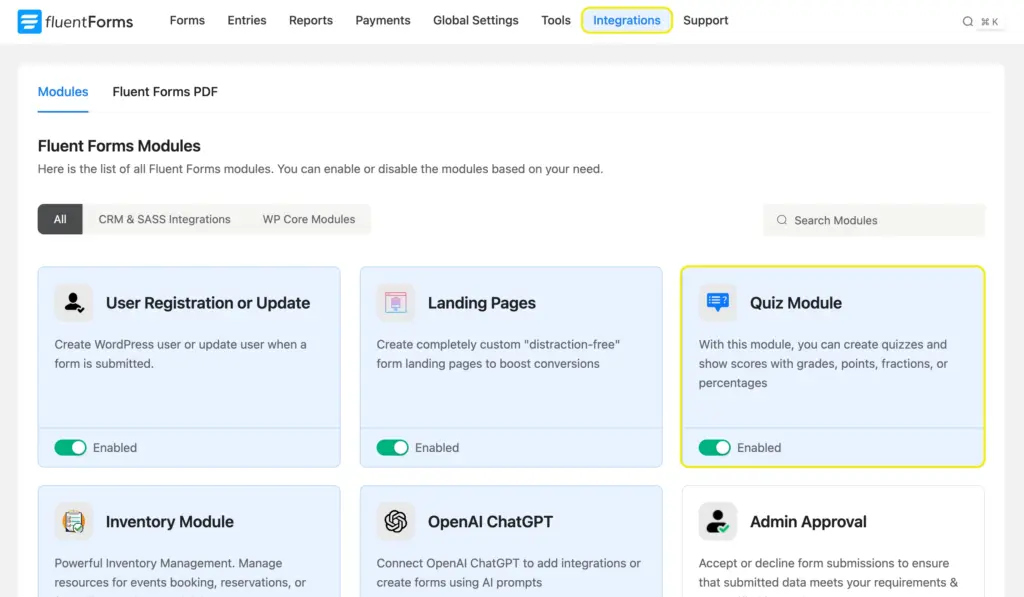
This activates the quiz score field and all personality quiz settings across your forms.
Step 2: Create a new conversational form
Go to Fluent Forms > New Form. In the pop-up, select Create Conversational Form.
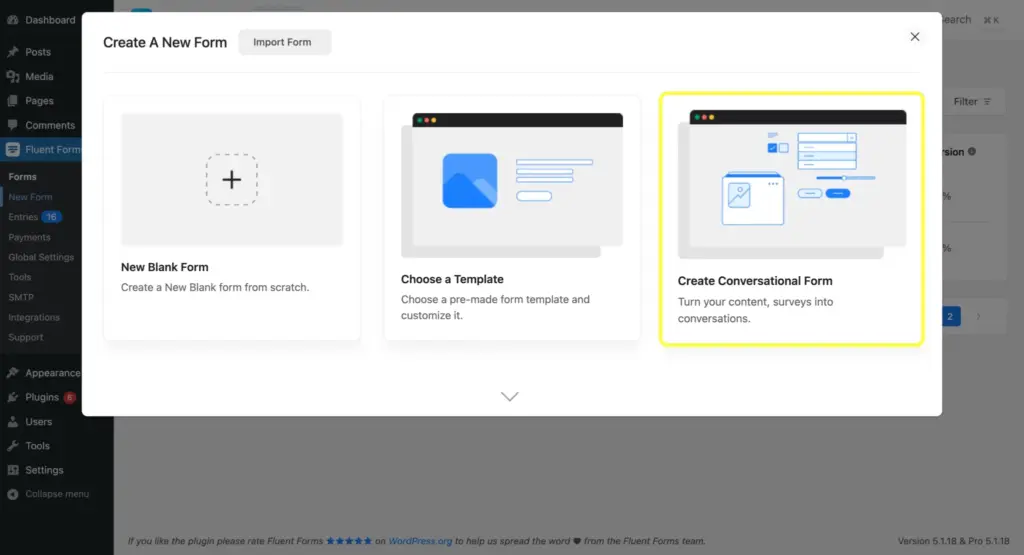
The conversational format presents one question at a time. Users select their answers and move to the next question. It’s the same one-question-at-a-time experience that makes Typeform quizzes popular.
Give your form a name in the editor. Some fields are already inserted in the conversational form. Hover over them and click the bin icon to remove the fields you don’t need.
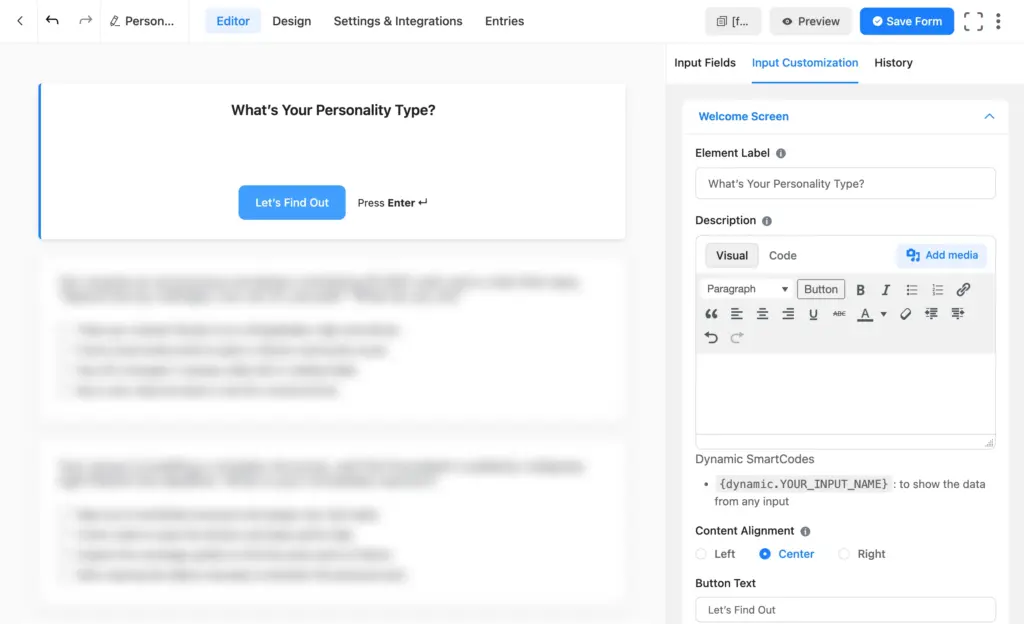
Step 3: Add a welcome screen
From the Advanced Fields panel, drag a Welcome Screen onto the editor at the top.
The welcome screen is the first thing users see. It sets expectations, builds curiosity, and gets them to click “Start.” Keep it short:
- Heading: What’s Your Personality Type?
- Description: Answer 8 quick questions and find out which personality you are.
Button text: Let’s find out
Step 4: Add your questions using radio fields
Drag a radio field to your form editor from the input fields on the right. Type the first question in the Element Label. Add the four answer choices in the Options section.
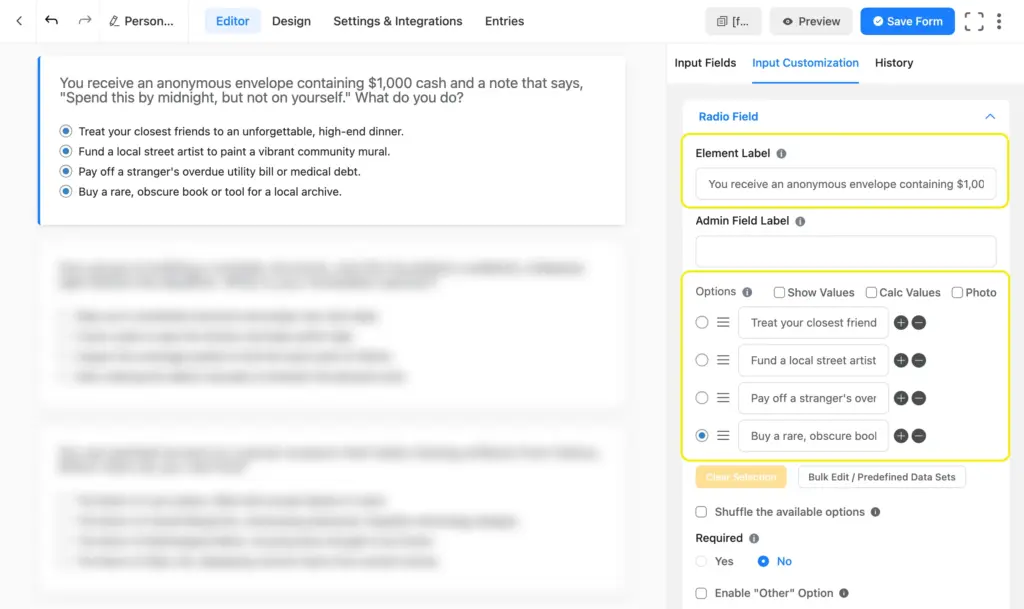
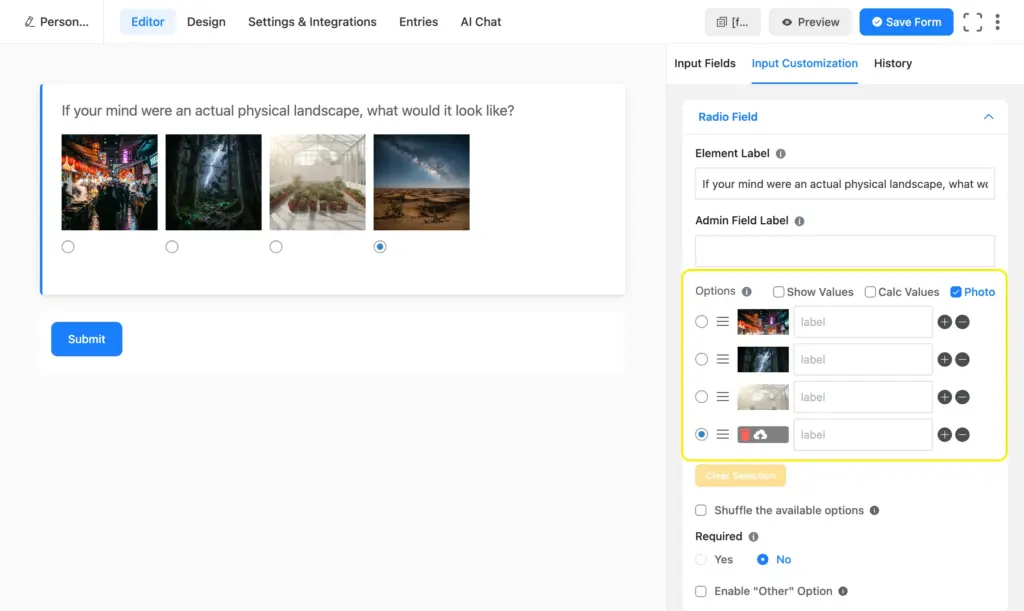
Repeat this for all your questions. You can also change the layout for each field separately. To add images as options, click the Photo checkbox next to the calc values.
In conversational forms, each radio field gets its own full-screen page. No visual clutter from other questions.
Step 5: Map options to personality types using Show Values
Click on a radio field to open its settings. Check the Show Values box. A text field will appear next to each option.In each Show Values box, type the personality type name that the option maps to. For example, if option A maps to “The Catalyst,” type The Catalyst in the box next to it.
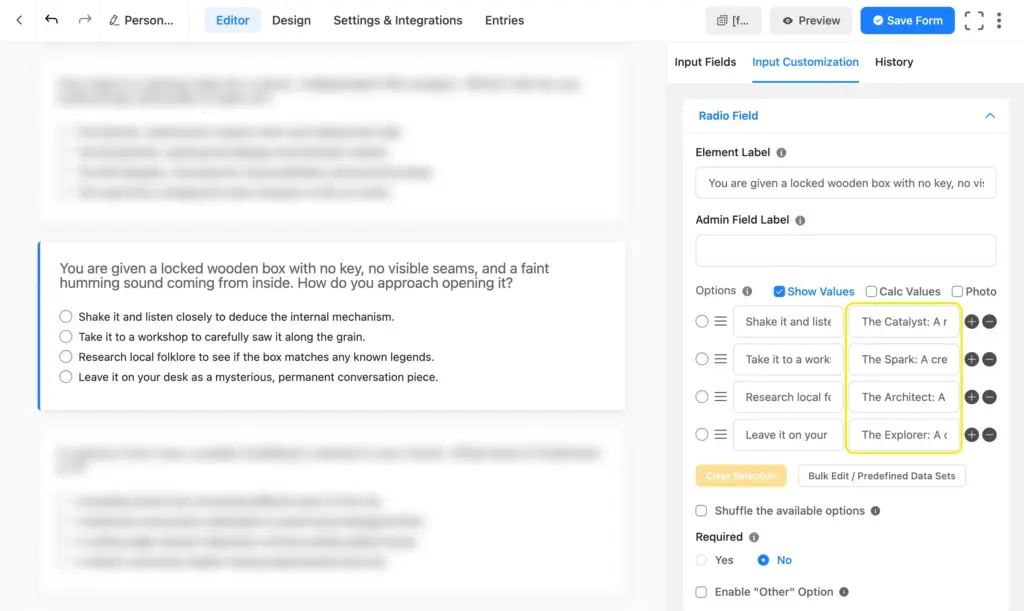
This text will appear as the personality type if you dynamically embed the result anywhere using a shortcode. I’m going for the full text: The Catalyst: A natural leader who brings people together and makes things happen.
Do this for every option in every question. Keep in mind: The personality type name must be an exact match across all fields, including capitalization and spacing. Copy-paste to avoid typos.
Step 6: Add and configure the quiz score field
From the Advanced Fields panel, drag a Quiz Score field into the form below your last question. This field stays hidden from users. It handles the personality calculation in the background.Click the Quiz Score field to open its settings. From the dropdown, set the Score Type to Personality Quiz.
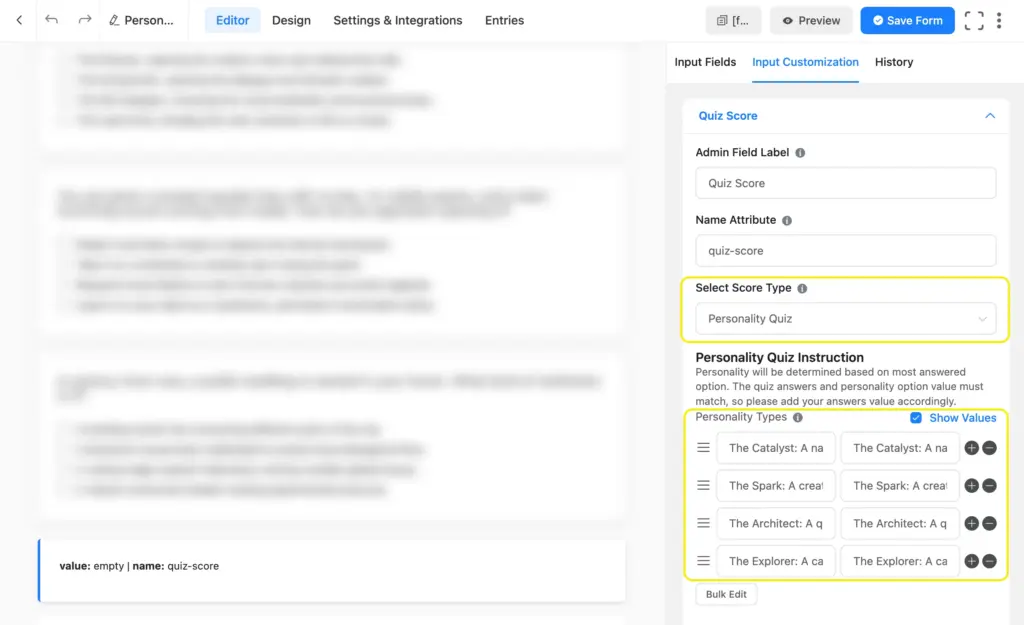
A Personality Quiz Instructions panel will appear. Add your personality type names in the first column and repeat the exact same names in the corresponding Show Values boxes. You’ll need one row per type, so four rows for this quiz.
The Show Values here must match exactly with the Show Values you assigned to your radio field options. If “The Catalyst” is spelled differently anywhere, the quiz won’t calculate correctly.
Click Save Form.
Step 7: Configure quiz settings
Navigate to Settings & Integrations > Quiz Settings. Check the Enable Quiz Module checkbox.
Configure these settings:
- Append Result: Leave this off. We’ll show custom result pages using conditional confirmations instead of a generic results table.
- Randomize Questions: Optional. Keeps the quiz fresh by changing question order on each reload.
- Randomize Options: Turn this on. This shuffles the answer options so users can’t spot the A-B-C-D pattern in your mapping.
- Quiz Questions: Toggle on all the questions that should be included in the personality calculation.
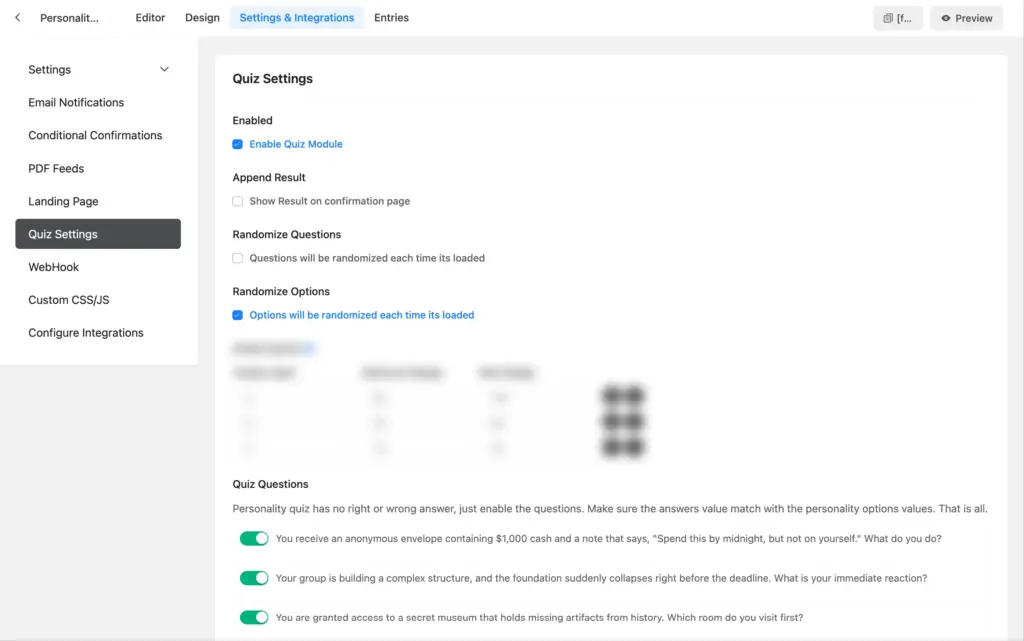
Click Save Settings.
Step 8: Write conditional confirmation messages (your result pages)
This is the most important step. The confirmation message is what users see immediately after submitting the quiz, and in conversational forms, it appears full-screen. This is your Typeform-style result page.
You’ll create one confirmation message per personality type. Each one is shown conditionally, so users only see the result that matches them.
Go to Settings & Integrations > Conditional Confirmations > Add Confirmation.
For each confirmation:
- Add a Confirmation Name (e.g., “Result: The Catalyst”).
- Set Confirmation Type to Same Page.
- Write the result message. Include the personality type name as a heading, a short description of what the type means, key traits or strengths, and a CTA (link to related content, a product page, or a follow-up action).
- Enable Conditional Logic. In the condition boxes, select Quiz Score in the first box, equal in the second, and select the matching personality type in the third.
- Click Save Notification.
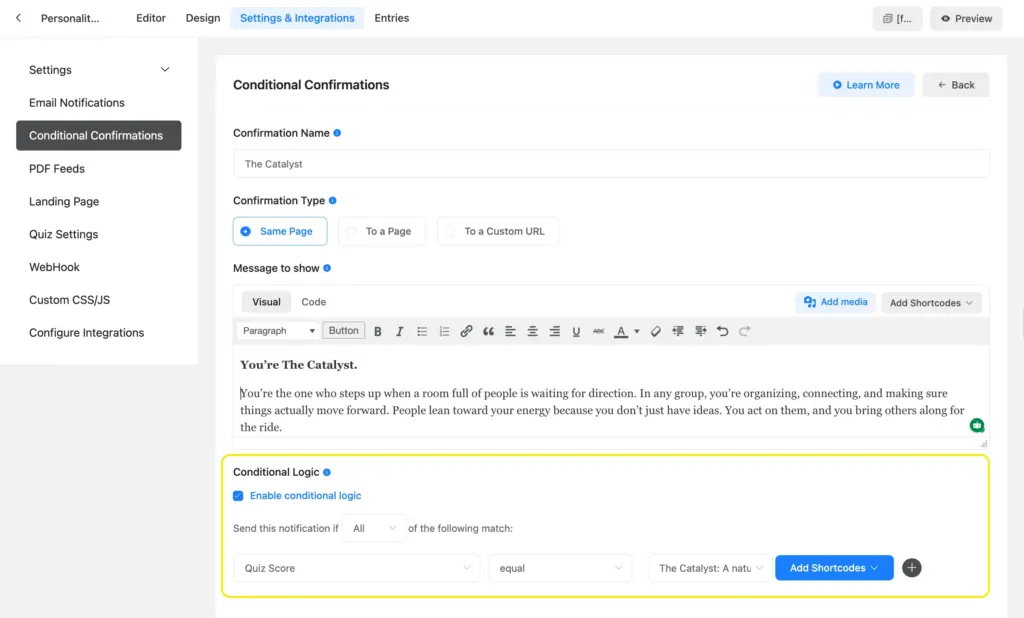
Repeat for each personality type. Here’s an example result message for The Catalyst:
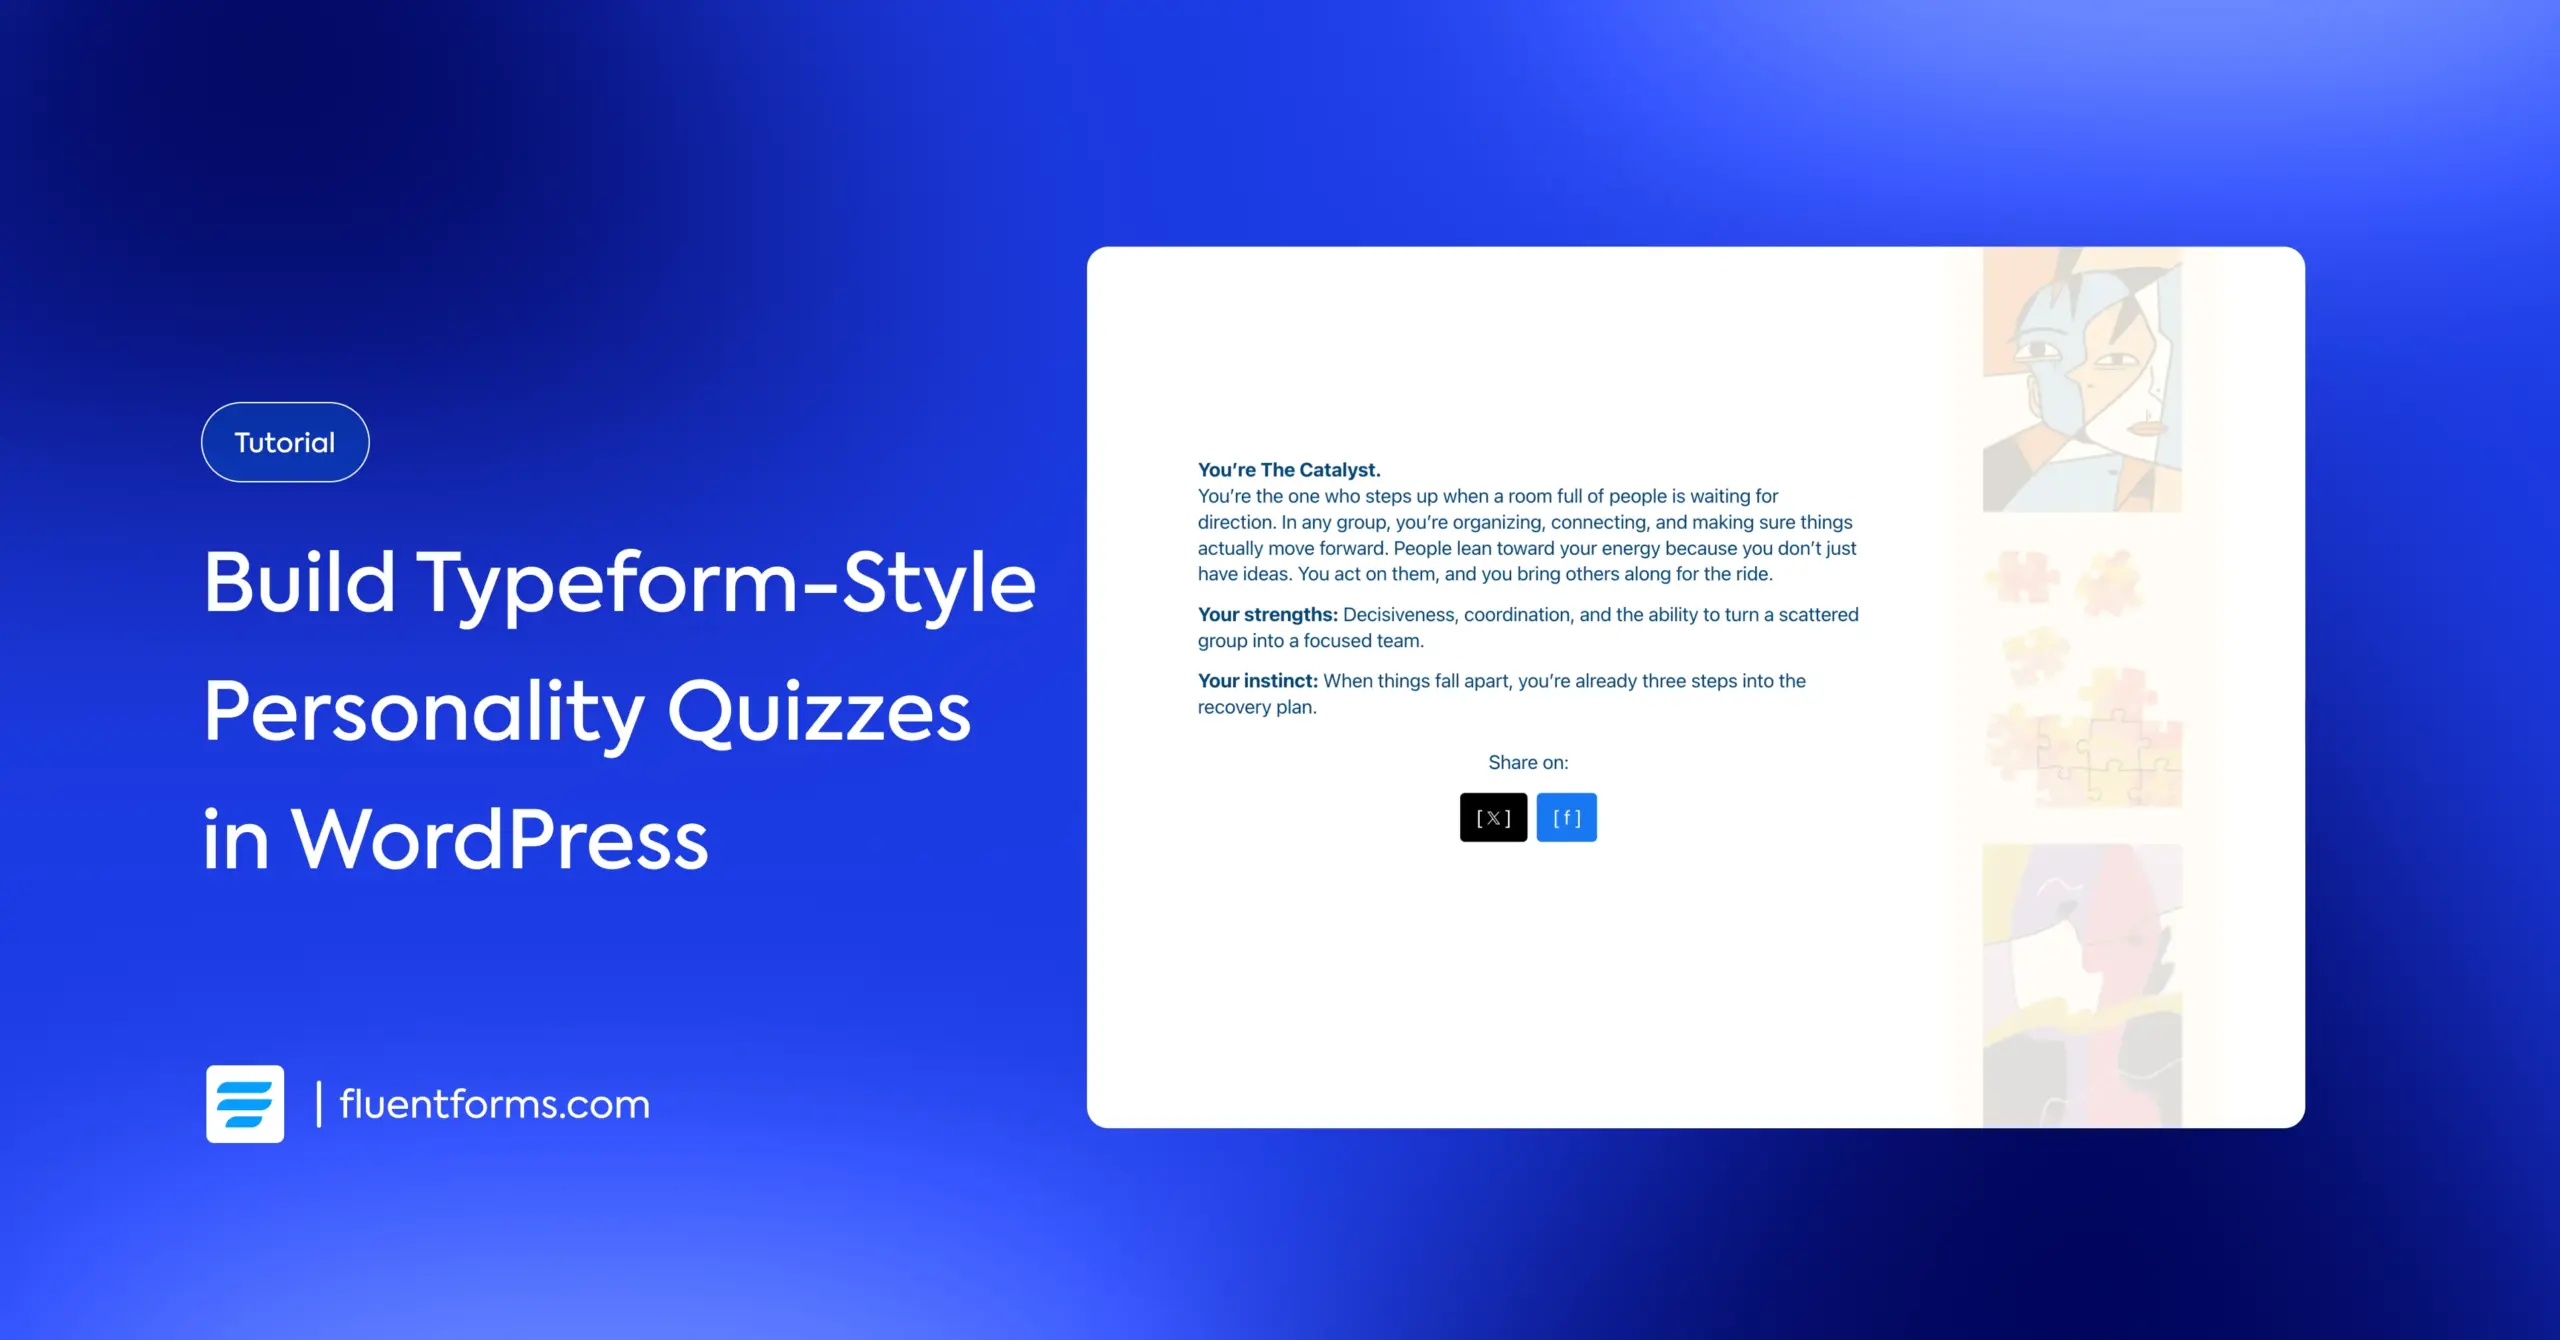
You’re The Catalyst.
You’re the person who steps up when no one else will. In any group, you’re the one organizing, connecting, and making sure energy moves in the right direction. People follow your lead because you don’t just talk about what needs to happen. You make it happen, and you bring others along.
Your strengths: Leadership, coordination, decisiveness, and rallying people around a shared goal.
Write each result message so it feels personal and positive.
Step 9: Style your personality quiz
Go to the Design tab in the form editor. You can customize:
- Font: Match it to your site’s typography.
- Question and answer colors: Set the text colors for questions and response options.
- Button colors: Customize the background and text colors for navigation buttons.
- Background: Add a solid color or background image. Adjust the image opacity for readability.
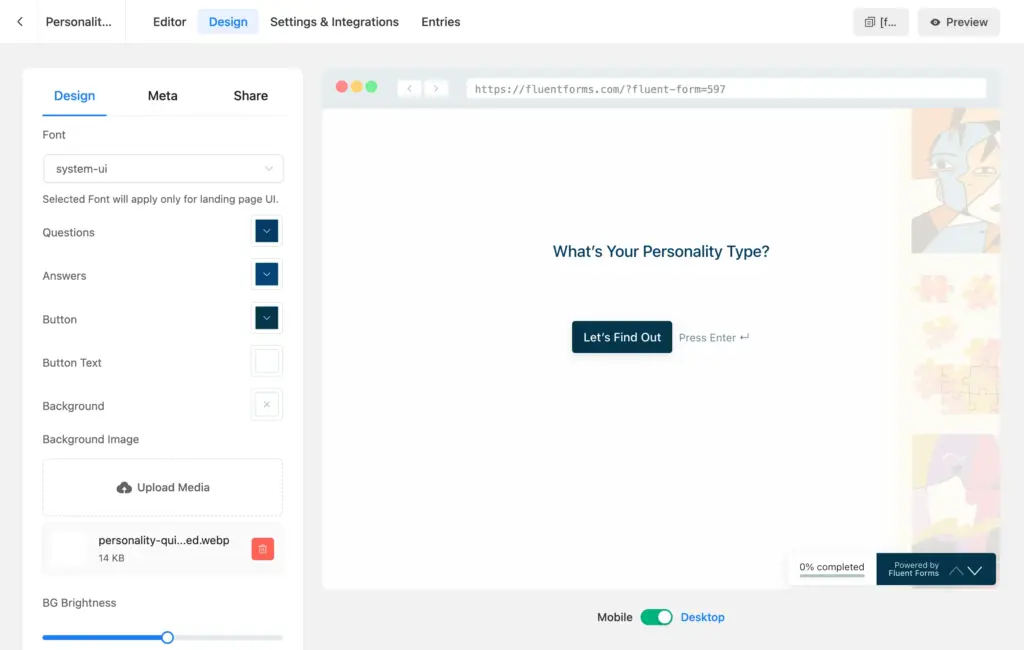
The conversational form also shows a progress bar (set up percentage/step count from the Meta tab) by default, which tells users how far along they are. This keeps completion rates higher, especially on longer quizzes.
For detailed instructions, check out the conversational form design documentation.
Step 10: Publish and share
You can share the quiz in three ways:
- Direct URL: Conversational forms work as standalone landing pages. Share the URL on social media, in emails, or as a CTA button link. Clicking it opens a full-screen quiz.
- Shortcode: Publish the full-screen version on a page.
- HTML embed code: Use this to embed the quiz in its own box (custom height and width) on any page or post. You can embed it on a different domain or outside WordPress as well.
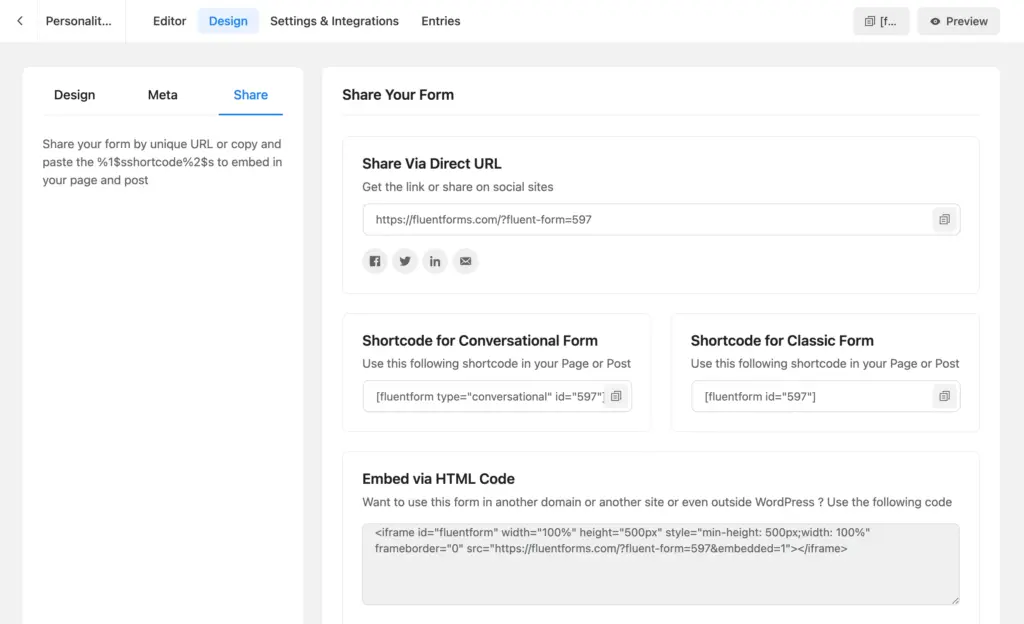
The direct URL is the best option for a personality quiz. It gives users a full-screen, distraction-free experience.
Add Social Sharing to Your Quiz Results
Allowing participants to share their results brings more traffic to your site. When someone gets a result they connect with, give them a way to post it.
You can add share buttons directly inside each conditional confirmation message. Here’s how.
Open one of your confirmation messages (e.g., “Result: The Catalyst”). In the message editor, add a button. Add a clear button text (e.g., LinkedIn) and paste the share URL as the button’s link.
Use these share URL formats for the most common platforms, customize the text, and swap in your quiz URL:
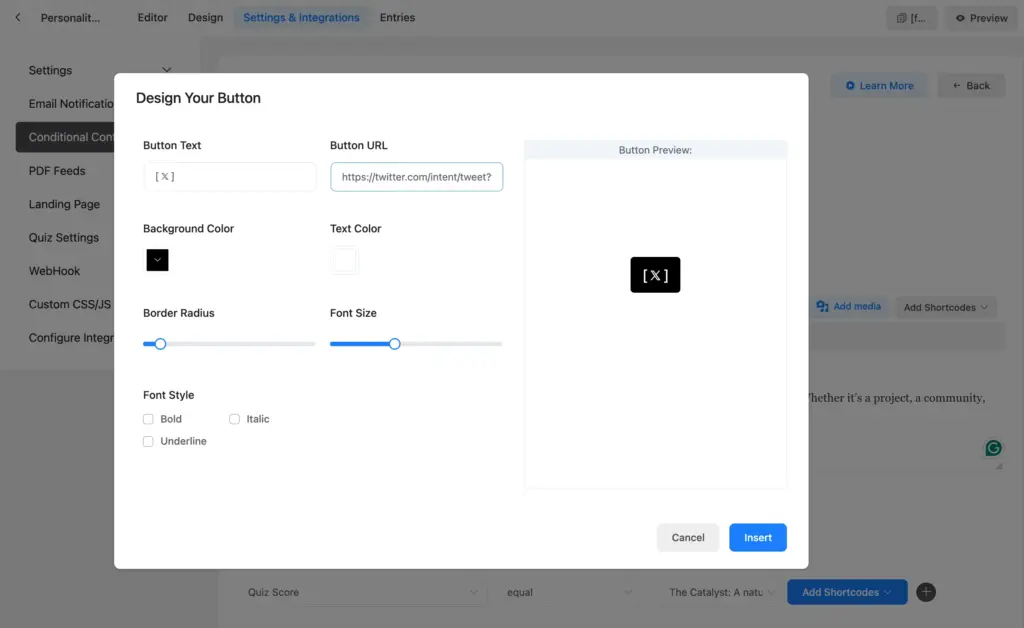
X (Twitter):
This URL only works after you’ve taken the quiz, as the {inputs.quiz-score} shortcode is dynamically replaced with your personality type.
Facebook:
https://www.facebook.com/sharer/sharer.php?u=https%3A%2F%2Ffluentforms.com%2F%3Ffluent-form%3D597
Linkedin:
You can copy the same button URLs across all personality types. The button contains the quiz score shortcode, so the score will be shared dynamically.
Since each confirmation message is conditional, you can also tailor the share text to match the result. The Catalyst confirmation gets Catalyst-specific share copies. The Explorer confirmation gets the Explorer copy.
Capture Emails Before Showing Results
Want to turn quiz completions into leads? Add an email field right before the submit button.
Use a label that explains the value: “Where should we send a copy of your result?” or “Drop your email and we’ll send you a detailed breakdown of your type.”
This works because users are already invested. They’ve answered 8 questions, and they’re curious about their result. The email field is a small ask at that point.
You can set up a conditional email notification for each type, just like the conditional confirmation message. Set up FluentSMTP for email deliverability. As soon as users submit the quiz, they get an email with detailed notes on their personality.
Once you’re collecting emails, connect them to your email marketing tool. Fluent Forms integrates withFluentCRM, Mailchimp, ActiveCampaign, and dozens more. You can set up automated sequences that reference the user’s personality type in the follow-up emails.
Tips for a Quiz People Actually Share
Make every result feel like a compliment
No one shares a result that sounds neutral or negative. Each personality type should have clear strengths and a description that makes the user think, “That’s exactly me.”
Use scenario questions, not direct self-assessment
“What would you do in this situation?” is more engaging than “How would you describe yourself?” Scenarios also make it harder for users to manipulate their results.
Test every user path
Complete the quiz, first selecting all A answers, then all B, all C, all D. Confirm each path shows the correct result and the right confirmation message. Then try mixed answers to see how the majority-wins logic handles a realistic set of choices.
Keep it to 5 to 8 questions
5 to 8 questions make the quiz long enough to feel accurate, yet short enough that people finish. If your quiz needs more than 10 questions, check whether some are redundant before adding more. You can also group questions into categories and switch to step forms.
Turn on Randomize Options
If all your “Catalyst” answers sit in position A across every question, attentive users will notice. Randomizing the option order on each reload prevents pattern recognition without changing the mapping logic.
Place it where engagement is most
Homepage, blog sidebar, email campaigns, social media bios, and landing pages get more traffic. A personality quiz works as both content and a conversion tool. Put it wherever you want visitors to interact.
Write share-worthy result copy
The confirmation message is the single most important piece of text in the entire quiz. It’s what users screenshot, post, and send to friends. Spend more time on the four result messages than on the questions themselves.
Build Quizzes That People Engage With
Personality quizzes are one of the few content types people actively seek out, finish voluntarily, and share without being asked. They’re engaging for users and valuable for you. Every completion tells you something about your audience, and every share brings new visitors to your site.
With Fluent Forms, you can build the full experience on your own WordPress site. Conversational format for the Typeform-style, one-question-at-a-time feel. Personality quiz scoring to match users with their type. Conditional confirmations for custom results. And social share buttons to turn each result into an organic reach.
Define your types, map your questions, and follow the steps above. Once the form is live, Fluent Forms handles the logic and scoring for your quiz.
Build Smarter Forms for Free


Sarika writes for Fluent Forms and loves to offer insights into small businesses. She’s curious and enjoys discussing ideas, interests, and perspectives. In her free time, she’s either marvelling at architectural beauties or trying different cuisines.


Leave a Reply