Elementor Forms: How to Create an Elementor Contact Form

Elementor is one of the most popular page builders with high functionalities and vast features. But might surprise you that they don’t have a multi-functional form builder in their dashboard. What Elementor Form offers is very simple and straightforward. If you want to use more advanced options like accepting payments or conducting surveys, you still need a dedicated form builder plugin. Moreover, to manage form submissions, you need to install an additional plugin to manage your entries with Elementor. In this article, we will learn how to make the best Elementor Contact Form and manage data with the same plugin.
How to create an Elementor Form
We’ll show you two methods of creating an Elementor contact form to help you choose as per your need.
- Create a contact form with Elementor Pro
- Best way to create an Elementor Contact Form (for Free)
Create a contact form with Elementor Pro
If you want to create a form with Elementor, you’ll need to purchase Elementor pro. With the pro license, you can access the form widget and design your form inside the Elementor page builder. You’ll also have the access to a whopping number of form templates. Moreover, you’ll have a number of cool features that can transform your website.
Steps for creating a contact form with Elementor –
1. Adding Elementor form to your page
To add a form to the page, you need to open a page or add a new one, then click on edit with Elementor. Now search for Forms in the widget bar on the left side. If you don’t have the pro license you cannot avail of this feature.
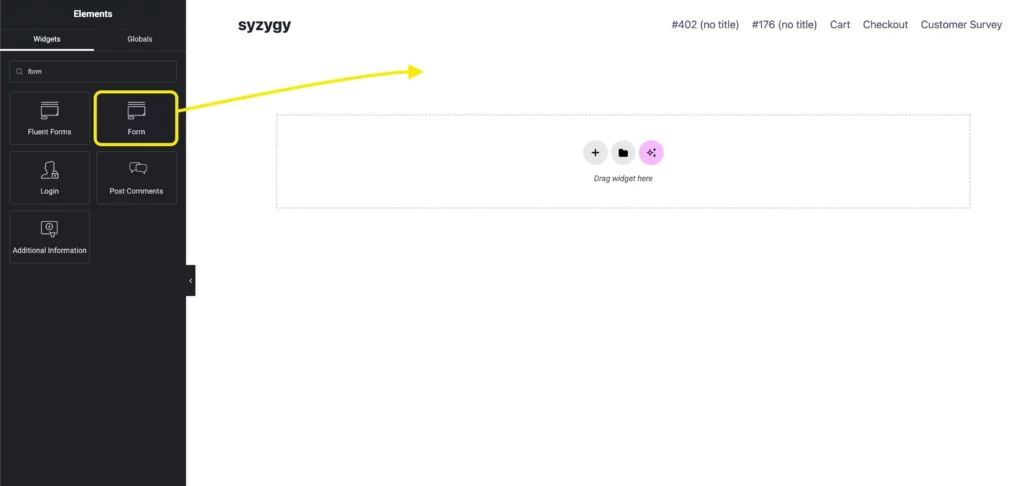
Now drag and drop the widget on the page you want to create your Elementor form. You’ll see a basic contact form appears on your page.

2. Adding different fields to your Elementor form
You can see Elementor form has a bunch of features on its sleeve. You just need to explore and create your desired forms in minutes. Now, what about you need different fields and options rather than the pre-populated ones? You can add 18+ fields to your Elementor forms and these are –
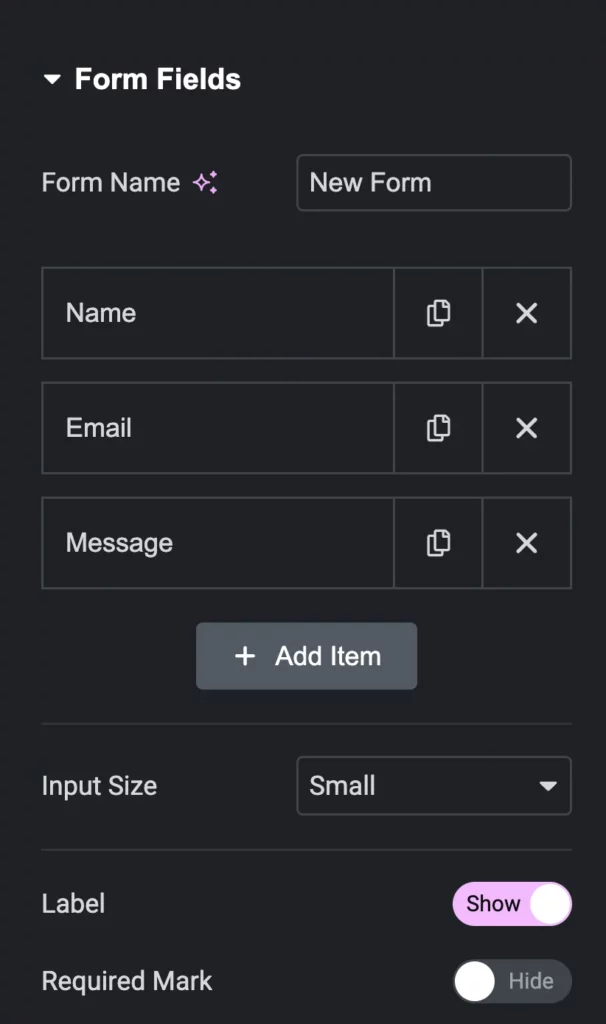
- Text
- Text Area
- URL
- Tel
- Radio
- Select
- Checkbox
- Acceptance
- Number
- Date
- Time
- File Upload
- Password
- HTML
- Hidden
- reCAPTCHA
- reCAPTCHA V3
- Honeypot
- Step
That’s a good number of field types to play with. You can make different forms with this form builder. Now you need to customize the settings and design your form to make it eye-popping.
3. Setting up the form submission
After the form submission, you can set up the email directory and data you want to get from the form submission. This is no rocket science. You can set up all the options like –
- To
- Subject
- Message
- From Email
- From Name
- Reply-to
- CC
- BCC
All the options to send an email.
4. Design your Elementor Form
There are a handful of options to design your form. From changing the width of the columns to changing the background color of your form, from setting up the placeholder to changing the typography, you can do whatever you want with your form.
Go to the Style option to give a unique look to your form.
Why Elementor form is not enough for you
First of all, you cannot avail all the options of a normal form builder plugin in Elementor forms. However, it only offers the basics. If you try to create different forms and analyze the data you will need another form builder in your WordPress tech stack.
Secondly, no built-in features for managing submissions. You have to install another plugin to do so. Which is not an optimal step for your website. You need to choose a form builder plugin that offers various fields, functionalities, and integrations as well as a data management service to analyze your leads.
Thirdly, Elementor comes with a shortcode widget that helps to integrate any WordPress plugins that have a shortcode option. Though you can use Elementor’s shortcode widget to add your forms you cannot customize of your form using Elementor. That’s why you need to choose a form builder that can be edited in the Elementor layout as they offer essential add-ons to do so.
Best way to create an Elementor Contact Form (for Free)
Forms are one of the key components of any website. From capturing leads to conducting surveys, from taking payments to making quizzes, a modern form builder should have these options in its package.
Also, you should be able to customize the form in the Elementor layout to give it a vibrant and attractive look. Many form builders have the shortcode feature but you cannot edit them without the Elementor pack.
Fluent Forms gives you the full flexibility to edit and customize your forms within the Elementor page builder. The Forms widget for Elementor includes multiple options to alter color and typography for each field on your form. You can style the overall text content of the form as per your choice.
- You can choose the font color, size, type, and many more options for your website form that perfectly matches your website looks.
- You can have access to typography options for each text content of the form.
- Color options for all form fields are available too.
- Moreover, particular color and typography options for form labels, error messages, and success messages
You can also access all these key features of Fluent Forms –
- 60+ input fields to collect any type of information
- Numeric calculation to create forms with calculators
- Multi-step forms to break long forms into multiple steps
- Conversational forms to provide a better form-filling experience
- Advanced post creation to collect user-generated content
- Conditional logic to show/hide input fields based on user behavior
- Integration with popular payment gateways to collect payments and donations
- Spam protection using hCaptcha, reCAPTCHA, Turnstile, Honeypot, Akismet
- Quiz and survey with advanced scoring
- Advanced form styler to align form with your brand identity
- Custom CSS and JS to create more advanced forms
- Export entries in CSV, Excel, ODS and JSON format
- PDF add-on to turn form submissions into PDF files
- Form scheduling and restriction based on different rules
- Double opt-in confirmation to ensure efficient data collection
- Email notification after form submission
- Conditional confirmation to show confirmation messages based on predefined conditions
- Advanced form validation to accept eligible submissions
- Fully responsive and accessible to ensure inclusivity
- 60+ integrations to expand core functionalities
Now that you know the benefits of using Fluent Forms, let’s make Elementor Contact Forms a jiffy.
How to add an Elementor contact form
The simplest way to set up an Elementor contact form is with Fluent Forms. You neither need to install different add-ons separately like other form builders nor do you need to customize the form outside Elementor.
Here are the steps to create Elementor Contact Forms with Fluent Forms
Install and activate Fluent Forms Pro
Installing Fluent Form is similar to installing any other WordPress plugin. You can install and activate it from your WordPress dashboard or download it from WordPress.org if you want.
To install from the WordPress dashboard go to WordPress Admin Panel and click on Plugins → Add New. Now, search for Fluent Forms, click Install, and then Activate the plugin.
To download from WordPress.org click on this Fluent Forms link and download. Now go to your WordPress Admin Panel and click Add New from Plugins option. Now upload the .zip file and search for Fluent Forms in the list of your installed plugins, and click on Activate.
Though Fluent Forms have a whopping number of fields and functionalities in the free version, you need to upgrade to the pro version to access all the features of Fluent Forms. See Fluent Forms Pro vs. Free features here.
Upgrading to the Pro version is pretty straight forward click the link to learn how to upgrade to Fluent Forms Pro.
Make an Elementor contact form
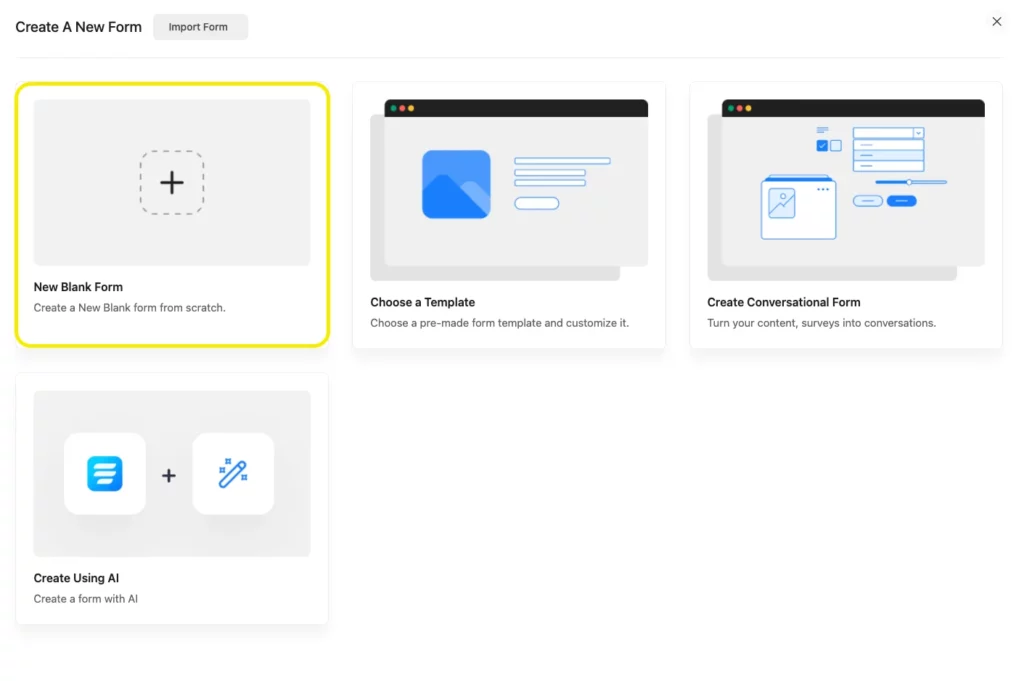
With Fluent Forms, you create beautiful and creative forms within minutes. To create an Elementor contact form go to your WordPress Dashboard > Fluent Forms from the left side. Click on the Add New Form option.
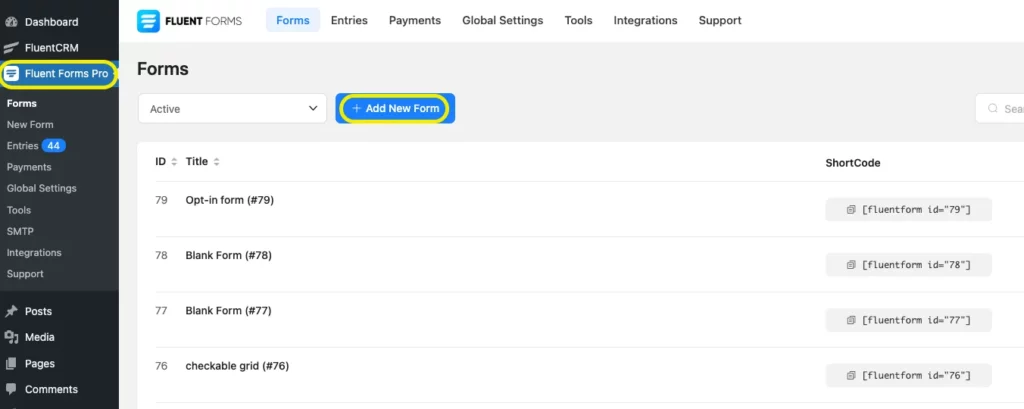
Create a blank new form or you can choose one from the pre-built form templates.
Add fields as per your choice to create a contact form for your website. We’ve added the Name, Email, Subject, and Your Message option for our simple Elementor Contact Form.
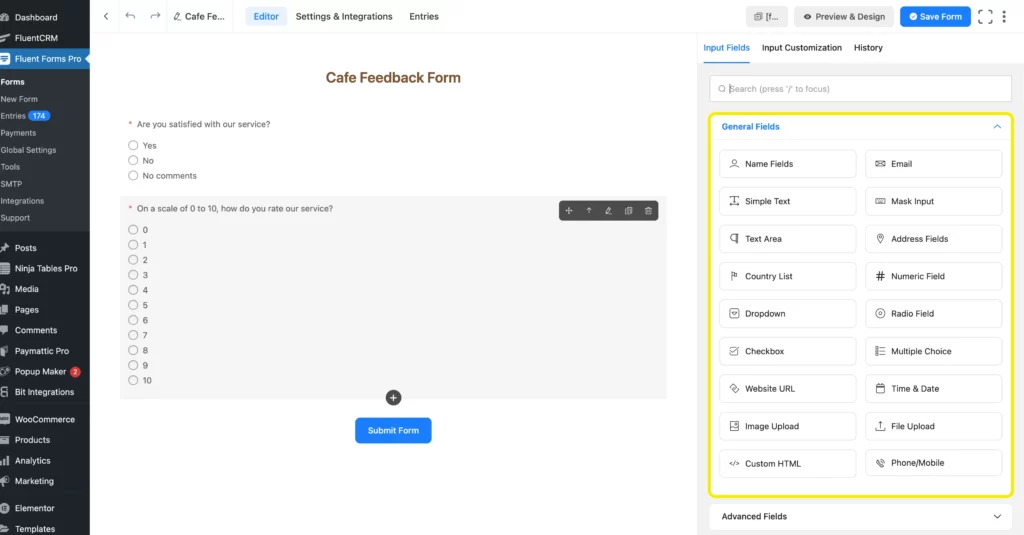
Customization like remaining and positioning the label is very simple in Fluent Forms. You can also set up Conditional logic to your fields to make a more advanced form. But as we are keeping it simple, we don’t need any other fields to stuff the form. Lengthy forms can be overwhelming for the users, you can use Multi-step Forms or Conversational Forms to avoid form abandonment.
Now save the form and copy the shortcode. You can use the shortcode feature of Fluent Forms that works with all the available page builders including Elementor, Oxygen, Divi, Visual Composer, and so on. And this feature gives you direct Elementor widget support in your form, in order to use one less plugin.
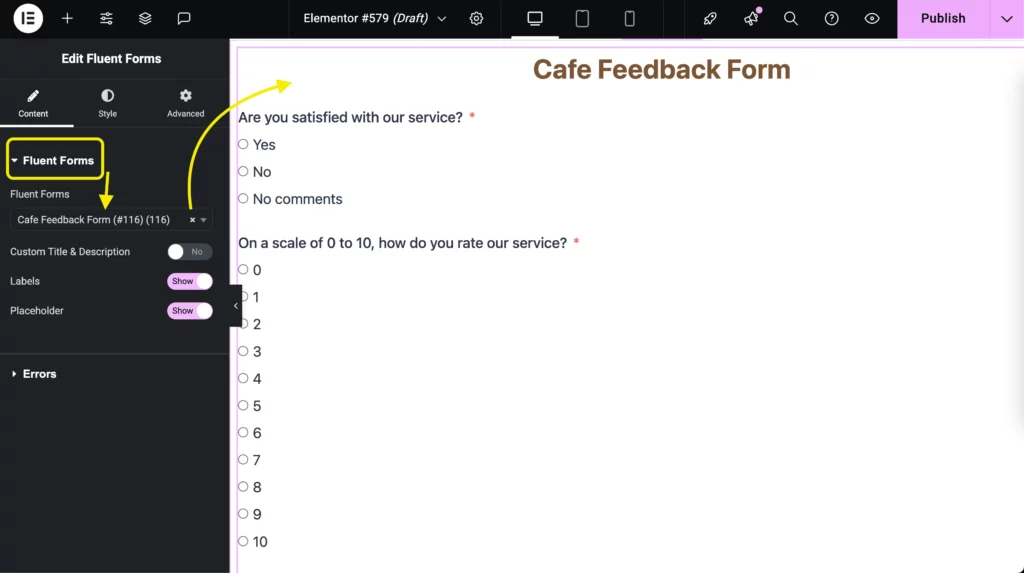
Customize the forms as you like, and you can access numerous options of Elemetor. From aligning input text to resizing & reshaping the input fields, from adding classic & gradient background colors to changing the typography. You can do whatever you want with your Elementor forms.
Final thoughts
It doesn’t matter if you use forms for fun or business, a nice and well-polished form always attracts people. Elementor page builder comes with everything but a multifunctional native form builder. With Fluent Forms, you can have it all and can design your desired Elementor contact.
Moreover, you can publish your form on a different page or inside a blog, wherever you want. Try some different layouts and designs, try different field options and make your Elementor forms as per your choice. We hope this article gave you the direction to creating an Elementor contact form for your WordPress site.
If you have any queries, comment below. Let us know how can we improve our plugin and follow us on our social media platforms.




Leave a Reply