How to Craft a Maintenance Request Form Template in WordPress
Do you want an easy way to accept maintenance requests for your apartments or rentals? You can do that smoothly by making an online maintenance request form template to accept internal requests or get applications from your clients or users. You can also send email notifications to the maintenance service providers. How?
In this article, we’ve created a maintenance request form demo in just six easy steps for your WordPress website that you can make easily without any technical knowledge. First, let’s know the benefits and good examples of some maintenance request forms used by rental business owners or counties.
Fluent Forms is the most beginner-friendly form builder. Download now and start crafting beautiful forms FREE!!!
Why is a maintenance request form needed?
Trying to keep track of your service requests without any tools or templates can be a challenging task. In 2022, managing your maintenance tasks through phone calls, notes, or text messages seems boring, especially when your work is labor-intensive. So, what are the benefits of using a maintenance request form template?
- Repair request forms allow your clients to forward an urgent request to rectify any technical problem. So, with a comprehensive request list of all the equipment that needs a checkup, your supervisors can point out extremely affected machines and schedule them to repair as soon as possible.
- Manage requests promptly with alerts and deadlines.
- Remove the possibility of disorganized, misinformative, and hassle tasks that happened because of manual workflows.
- Managers know all the updates of each request without difficulties as they run the process with an automated system.
- Even the clients get quick access to the status of their requests.
- Sending email notifications to workers, managers, and clients is easier by triggered actions of the respective tool rather than manual texts or emails.
- Offer repair teams intuitive guidelines on how to implement a particular task.
- Time tracking of each request with KPIs and huge reports makes the process to be done efficient way.
Knowing these benefits, let’s see what some actual maintenance forms look like.
Amazing examples of maintenance request form templates
Servicing request forms are used by many companies in different ways. For example, there are apartment maintenance request form templates, vehicle maintenance request form templates, maintenance service request form templates, hotel maintenance request form templates, etc. Here are some more excellent examples of maintenance request forms.
Maintenance request by ‘Trion’ real estate management
Trion, a real estate management company in New York, USA, placed a fantastic maintenance request form template on their website. You’ll see a Resident Services & Maintenance Requests button on the home page. Click on that button to get the maintenance request template.
They have asked about the requester’s name, email, request subject & details, attachments, company details, phone number, etc. on the form. Basically, this is a great formation of a maintenance request form template to use.
Court house maintenance by ‘Lewis County’ New York
Lewis County in New York is another great example of maintenance request forms. This site is basically about solving all the county’s problems regarding housing, schools, elections, courts, vehicles, social services, hospitals, attorneys, human resources, and more. To submit the maintenance request form, move on to the Forms button from the homepage, and click on the Maintenance button from the opened list. You’ll get a form like this.
This form is a bit different than the previous one. As it’s provided by the county of a specific area, it asks about the departments first to clarify the process. Then it goes for the general information like name, email, phone, etc.
Maintenance requests by ‘NYC Intern’
NYCIntern arranges furnished apartments for students and interns in New York City at a low price. They have also added a maintenance request form template on their website for their rental apartments. As a result, interns or students can easily submit a request form if there is any technical problem in their building. To get the form, you must move on to the Resources button on the home page. From there, click on the blue-colored Maintenance Request Form- City Point button to get the form.
Generally, they’ve asked about the resident & building detail, apartment number, student or interns’ name, email, number, & detailed information about the issue.
Now, you must be thinking about how these companies have formed these beautiful request forms. Well, this is easy with WordPress plugins.
WordPress has tons of form builders to design any forms for your websites. This article will use Fluent Forms to showcase our maintenance request template.
Why use Fluent Forms?
Fluent Forms is one of the most powerful form builders in the WordPress community. Despite providing robust features, it’s a very lightweight tool. It comes with a sleek & smooth interface that any beginner can make form within a couple of minutes. Some core features of the plugin are:
- Drag & drop
- 60 input fields
- Spam protection
- Global styler
- 70+ pre-built templates
- PDF addon
- Signature addon
- 40+ third-party integrations
- Conversational forms
- Quiz module
- GDPR field
Moreover, Fluent Forms has an action hook, checkable grid, custom submit button, color picker, net promoter score, range slider, image upload, file upload, multiple choice form, form step, etc., fields to make your form an advanced one. It also supports containers, dedicated payment fields, and payment integrations like
- Mollie
- Paystack
- Stripe
- PayPal
- Razorpay.
Besides, you can collect subscription payments with its Stripe and PayPal modules.
What else? The plugin is enough to give all the access to run your whole website. As it’s integrated with Zapier, MailChimp, CleverReach, Gist, Campaign Monitor, Getresponse, Platformly, Trello, Drip, Zoho, Sendinblue, Moosend, Sendfox, Ninja Tables, FluentCRM, WP Social Ninja, Ninja Tables, Fluent Support, Twilio, Hubspot, Discord, MailerLite, Insightly, Salesforce, Slack, Telegram, and more. Isn’t it amazing?
Making a maintenance request form takes just a few minutes with Fluent Forms. So, without further ado, let’s move on to the process.
Make a maintenance request form template with Fluent Forms
To make this tutorial, we’ll follow these six simple steps.
- Make a maintenance request form
- Design your maintenance request form
- Convert your form into conversational form
- Configure form settings
- Set form confirmation notifications
- Publish your form
Now, let’s make a detailed tutorial.
Step-1: Make a maintenance request form
We want to make a property maintenance request form with Fluent Forms. This will be a single-page form, as multi-step forms can be time-consuming in these types of emergencies. So, move on to your WordPress dashboard, install & activate Fluent Forms Pro.
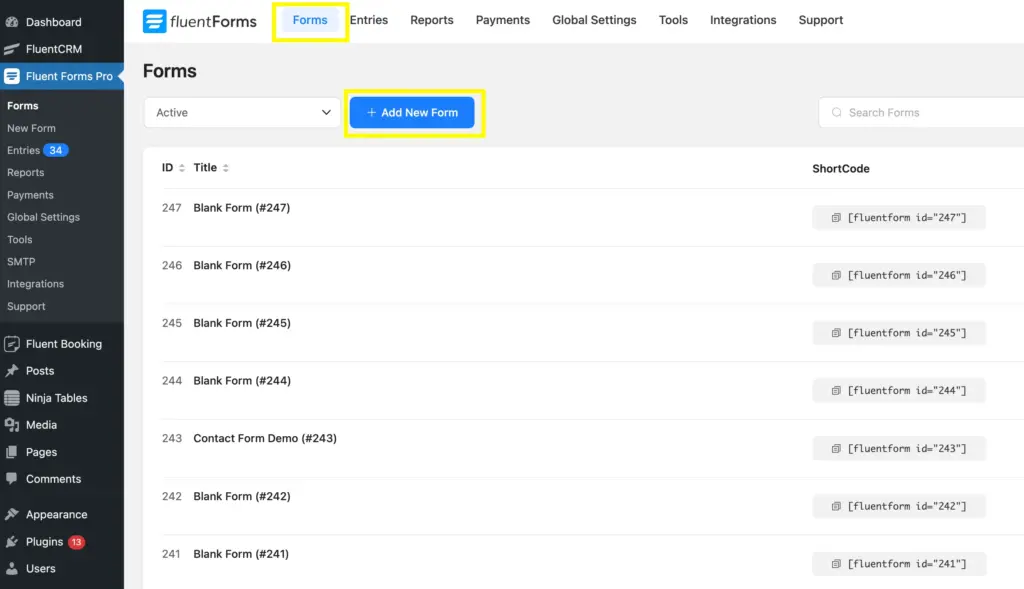
Click on the Fluent Forms Pro, and tap on the Add a New Form button from the top left corner.
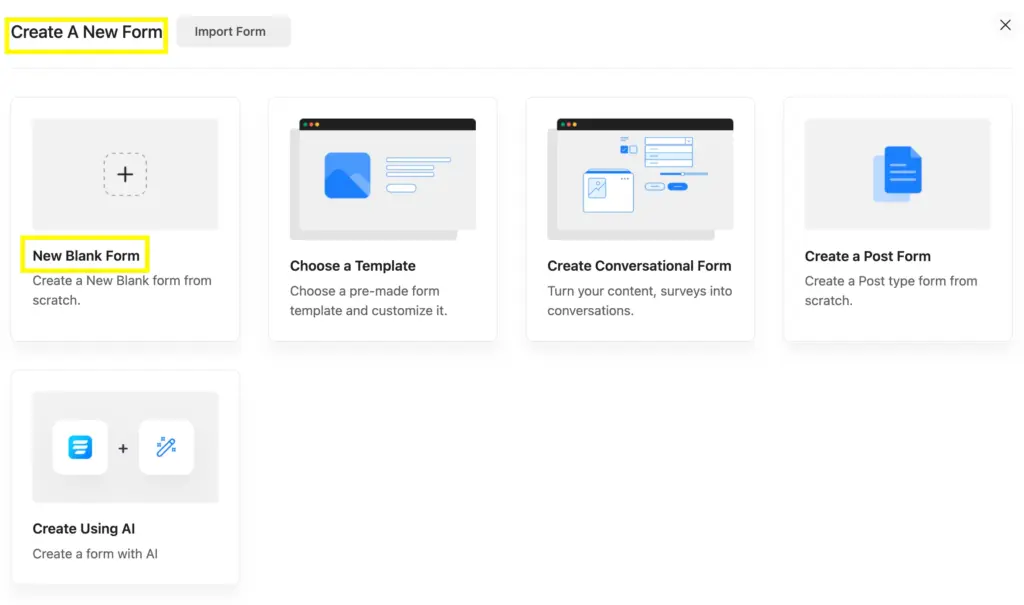
Here, you can select the ready maintenance request form template as we have 70+ pre-built form templates, and the Database Management Help Request Form is one of them.
But we’re not selecting this one as we want to craft a property maintenance form. So, we’re choosing the Blank Form option.
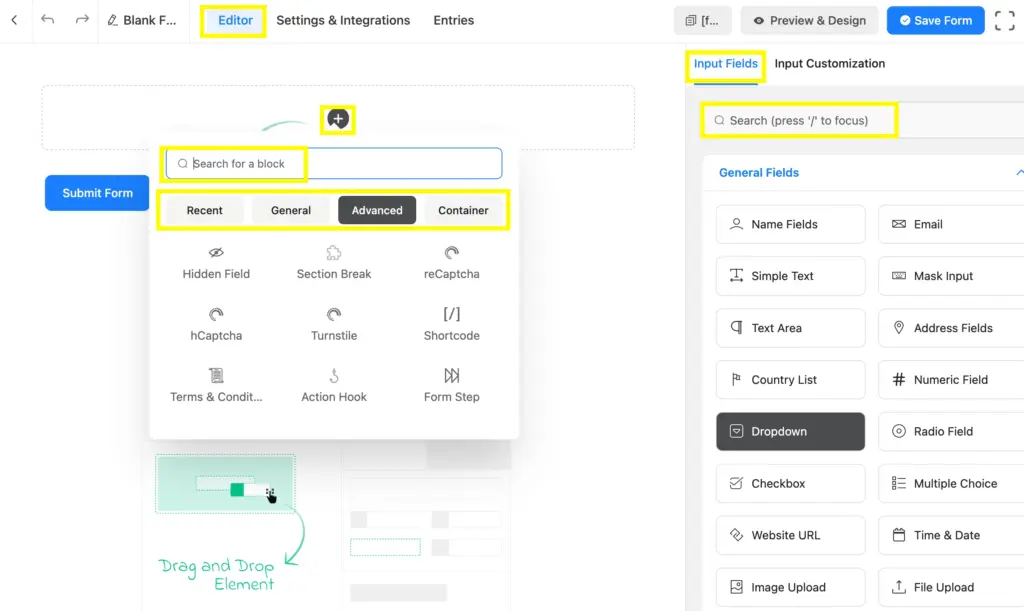
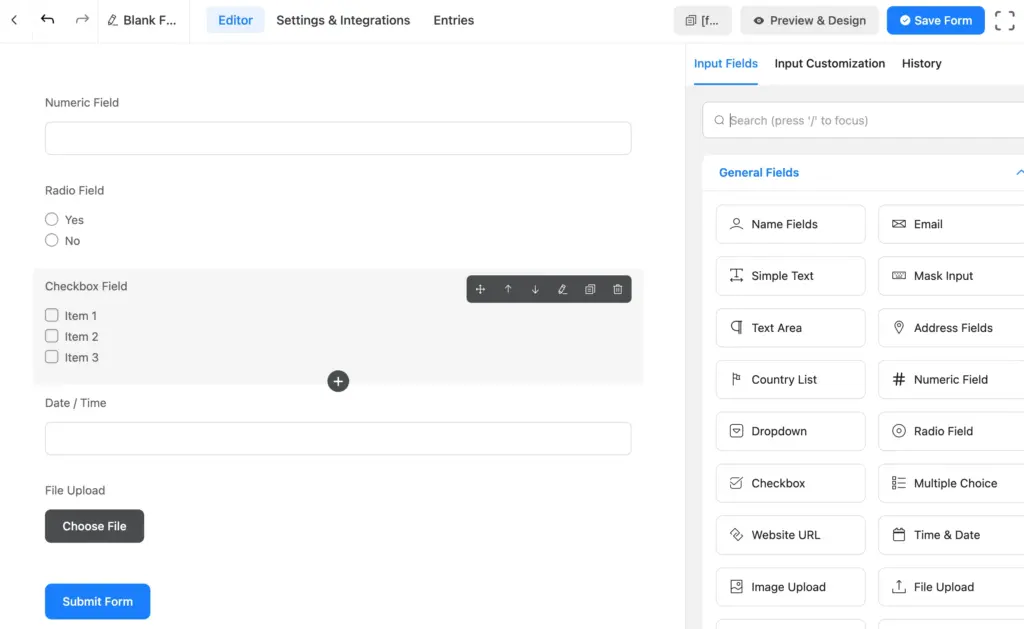
Give your form a name by clicking on the Blank Form option from the top left corner. Now drag and drop the necessary fields from the input fields section on the right sidebar, or by clicking on the plus icon on the form editor.
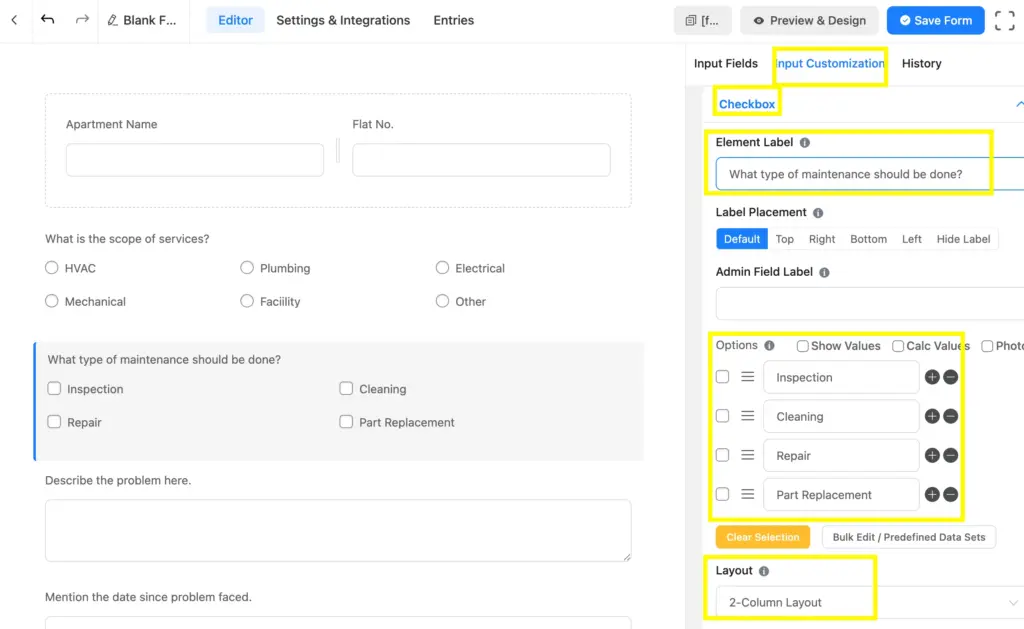
For example, we’re adding a name, email, number, address, file upload, dropdown, Textarea, and a radio field from the General Fields section. Now to edit the form fields, click on the pencil icon of the respective field, and you’ll be taken to the Input Customization section of that field.
We keep the element label the default one for name, email, number, and address fields. Removing the Address Line 2 option from the address field.
Marking name, email, and phone fields as required.
Now moving on to the Dropdown field. Let’s change the element label to ‘What service do you need?’ and the options as housing, lift, parking, electricity, water, and gas. Additionally, marking the field as required.
Let’s set the Textarea field now. At first, changing the element label from the text area to describe the maintenance details and labeling the field as required.
Next, go to the edit option of the file attachment field. Here, convert the element from file upload to Describe the details about the maintenance, keeping the button text name as it is, giving access to upload not more than 20MB files, maximum file count 4, and ticking the files type we would allow for this form.
Now, let’s add a radio field and move on to the customization section for that field. Let’s ask if our service is allowed to enter their home when they’re not at home.
Now, get down to the Advanced Fields section. Drag and drop the rating input and range slider field from the available 21 advanced fields.
Then, go to the input customization section of the Rating field, and edit the element label, star rating labels, etc. We’re changing the element label to ‘How would you like to rate the property maintenance service?’.
On the range slider section, we’re asking them to rate their neighborhood on a scale of 0-10.
Finally, let’s customize the submit button by changing its’ name, size, and position.
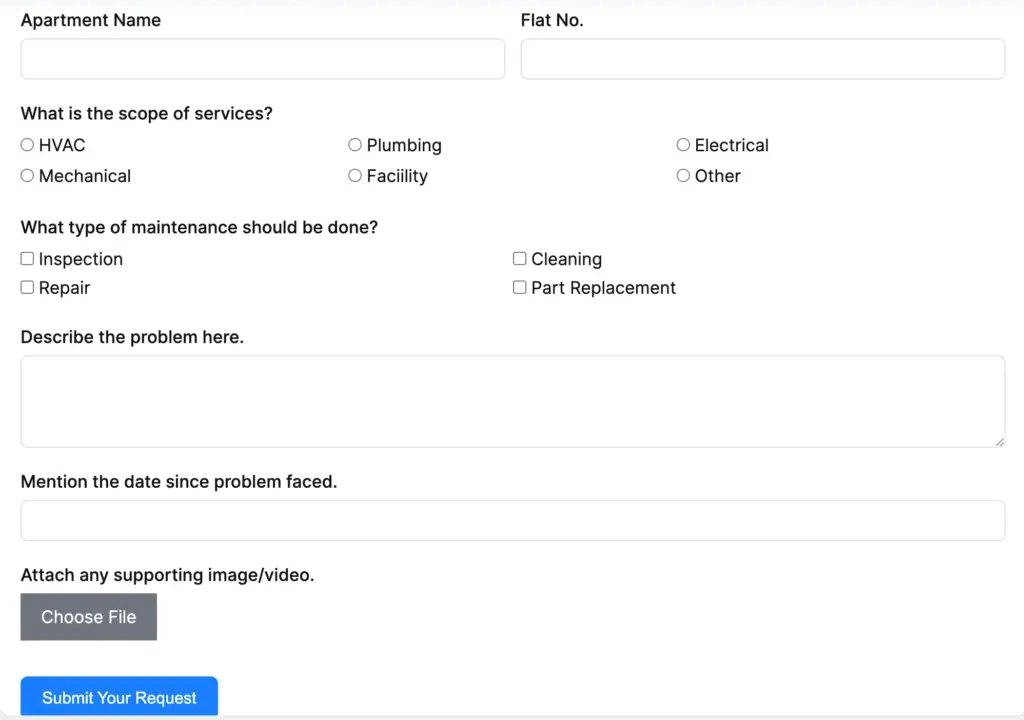
When all the settings are done, don’t forget to save the form by clicking on the Save Form button from the top right corner. Here is the final preview of the form.
Step-2: Design your maintenance request form
Let’s design the form with the global styler option of Fluent Forms. Go to the Preview & Design option from the form editor. Select any template from the available options.
We’re selecting the Classic editor and also going for the Custom (Advanced Customization) template. Because we want to customize the fields more.
For example, from the General section, we’ve given color to the Label Styles, Input & Textarea, Placeholder color, Radio & Checkbox Style, Range Slider Style, Submit button color, etc.
In the Misc button, you can set the Container Styles, Asterisk Styles, Inline & Outline Error Message Style, After Submit Success & Error Message Styles, etc.
Finally, you can import other existing form designs from the Import section.
We’re skipping this part as we don’t want to import any other form design. Lastly, don’t forget to save the settings by clicking on the Save Settings button from the top right corner.
Step-3: Convert your form into conversational form
Fluent Forms comes with an amazing Conversational Forms feature. You can make a conversational form from scratch or convert a normal form into a conversational one after designing it. As we’ve already crafted ours, we’re converting this form into a conversational form, and let’s see how to customize it with Fluent Forms.
Again move on to the form editor, and click on the three dots options from the top right corner of the editor. There you’ll get the Convert to Conversational Form button. Click on it.
After clicking the button, you’ll get a confirmation popup. Click on the Convert button.
Now, as we’ve already added the necessary fields from the default form editor, we’re moving on to the Design section from the conversational form editor.
Here, we’re settling on the Font Style, Button Color, Background Color, etc.
You can add a background image related to your form if you want. For instance, as our form is a maintenance request form, we’re adding a maintenance image to the form. To add the image, simply upload one on the WordPress backend, add tags or titles and Insert it into the post.
Moreover, you can adjust the brightness of the background image to adjust with the fonts.
Besides, there are many other options like disabling the branding logo, disabling the mobile screen view, etc. Don’t forget to tap the Save Settings button when all the modifications are done.
Here is the preview.
Step-4: Configure form settings
Go to the Settings & Integrations section of the form from the Design option. Here you’ll get the Form Settings page in the first place from the settings list. First of all, you’ll see the Confirmation Settings of the form after form submission. For example, we’re settling the confirmation type, message to show after submission, what to do with the form when the submission is made, and more.
You can also enable the double optin option if you want. Then you can set the Form Layout, form Scheduling & Restrictions, and many other options.
Click on the Save Settings button.
Step-5: Set form confirmation notifications
Moving on to the next segment of the list, Email Notifications. Here you can customize the emails you need to send after submission. This part will allow you to add the email name, sending place, subject, email body, conditional logic, attachments, etc., to your email. Additionally, you’ll need the FluentSMTP plugin to send the email confirmation.
If you go for the Other Confirmation option, you can make some extra confirmations for your clients. At last, the Marketing & CRM Integrations option will allow you to connect your form with any available third-party tools that are connected with Fluent Forms. You just activate them from the Integrations part, copy the API or secret key from their accounts, and paste them here on the Fluent Forms dashboard.
Suppose you want to do your marketing campaign with the ActiveCampaign plugin. If you set all the automation processes on ActiveCampaign’s account and connect it with this form of Fluent Forms, it will automatically collect clients’ emails and do the campaign. For more details, check out our article on connecting ActiveCampaign with Fluent Forms.
Step-6: Publish your form
Publishing any forms with Fluent Forms is super easy. For instance, if you want to show your form on a dedicated page, go to the pages section from the WordPress dashboard, and click on the Add New button.
Then add the Fluent Forms’ Gutenberg block by clicking on the plus (+) icon as it has a dedicated Gutenberg block to design anything without coding or add-ons.
Now select the form and publish it on your website.
Do the same to publish the form in any blog post.
There is another way to publish the form. You can copy the form’s shortcode and paste it anywhere on your website, either to a blog post or a page. One more thing, you’ll get both the shortcodes of conversational form and normal form. You can copy anyone for your convenience and paste.
It’s a fun game, isn’t it? You can make any contact form without any coding knowledge with Fluent Forms.
To conclude
Designing any form with Fluent Forms is as so sleek and smooth. More so, Fluent Forms is the user-friendly form builder in which 200K+ people keep their faith. On the other hand, you’ll have many fields and integrations to make your form fluent and arrange your data easily.
Follow us on Facebook, Twitter, Instagram, and YouTube for more tutorials like this.
Hello, This is Prema. I work as a marketing strategist for Fluent Forms at WPManageNinja. When I am not playing with words, I go to explore nature.
Leave a Reply
You must be logged in to post a comment.