
How to Manage Recurring Stripe Subscriptions in Fluent Forms
Your subscriber paid last month. They should pay again this month, automatically, without you chasing an invoice or sending a reminder.
Recurring Stripe subscriptions inside Fluent Forms handle that entire cycle, from first charge to cancellation, without leaving your WordPress site.
TL;DR
- The Subscription field in Fluent Forms connects directly to Stripe for automated recurring billing.
- Stripe webhooks must be configured once, or renewal payments fail silently.
- The
[fluentform_payments]shortcode lets logged-in users view payment history and cancel subscriptions.- The
[fluentform_payment_view]shortcode shows individual payment receipts.- Pausing a subscription is done from the Stripe Dashboard, not from Fluent Forms.
- Stripe gives you three options for paused invoices: void, draft, or uncollectible.
How Recurring Stripe Subscriptions Work in Fluent Forms
Fluent Forms includes a Subscription field under Payment Fields. You drag it into any form, set the billing interval, and Stripe handles the rest after the first charge.
The subscription field gives you control over five variables: plan name, price per cycle, billing interval (daily, weekly, monthly, yearly), total billing times, and whether to include a signup fee or trial period. Each one maps directly to a Stripe subscription object.
Say you run a $30/month coaching program with a $10 signup fee and a 4-month commitment. You set the price to $30, interval to monthly, total billing times to 4, and the signup fee to $10. The first charge is $40. Every month after that, Stripe charges $30 automatically.
The webhook is not optional
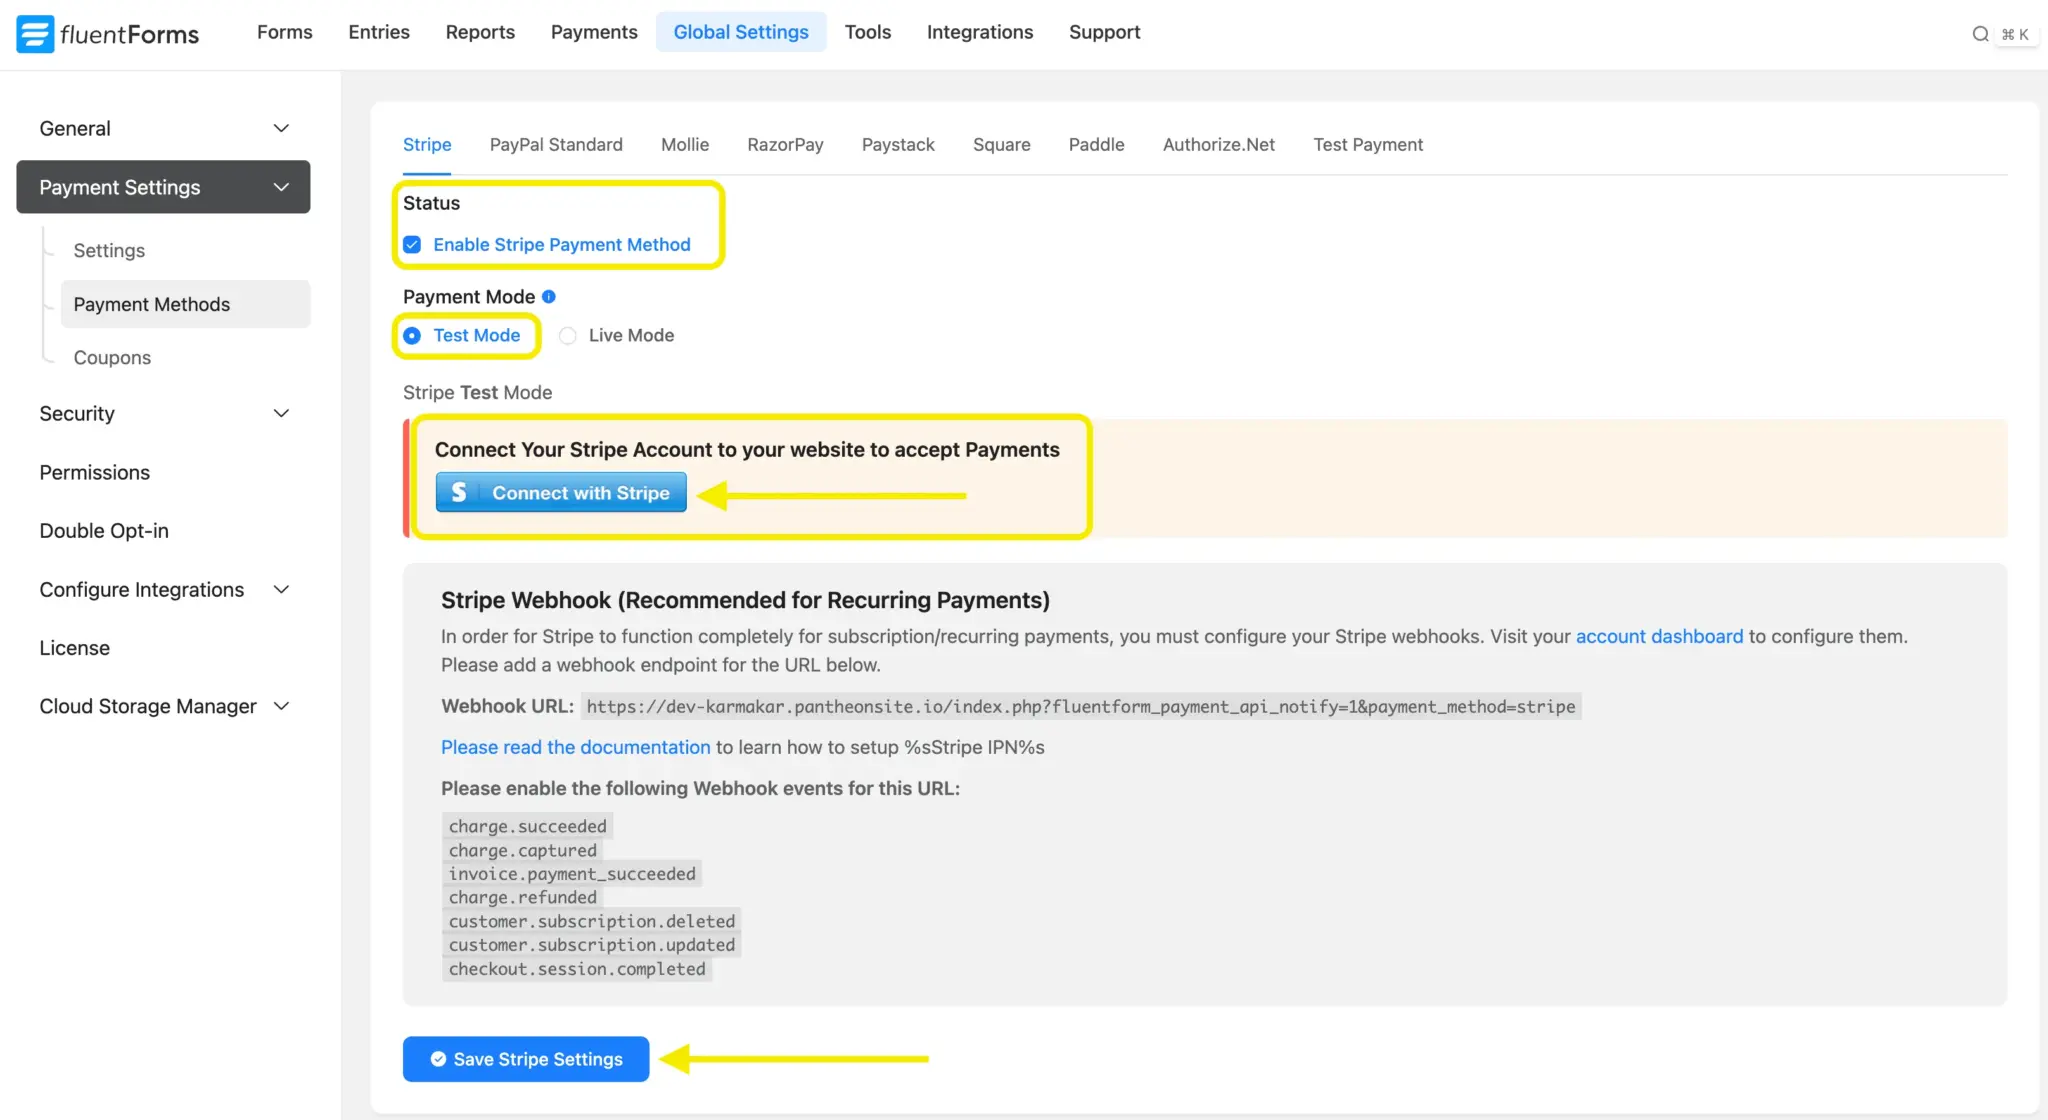
Before any of this works for renewal payments, you need to configure Stripe IPN (Instant Payment Notification). This webhook tells your WordPress site when Stripe processes a renewal charge.
Without it, the first payment goes through fine. But every renewal after that? Stripe charges the card, your site never hears about it, and the payment status in Fluent Forms stays stuck. Configure the webhook once in Global Settings > Payment > Stripe, and you never think about it again.
Setting Up Your First Recurring Payment Form
Start from the Fluent Forms dashboard. Create a new form or open an existing one.
Add the required fields
You need three things at minimum: a Name field, an Email field, and the Subscription field from the Payment Fields section in the right sidebar.
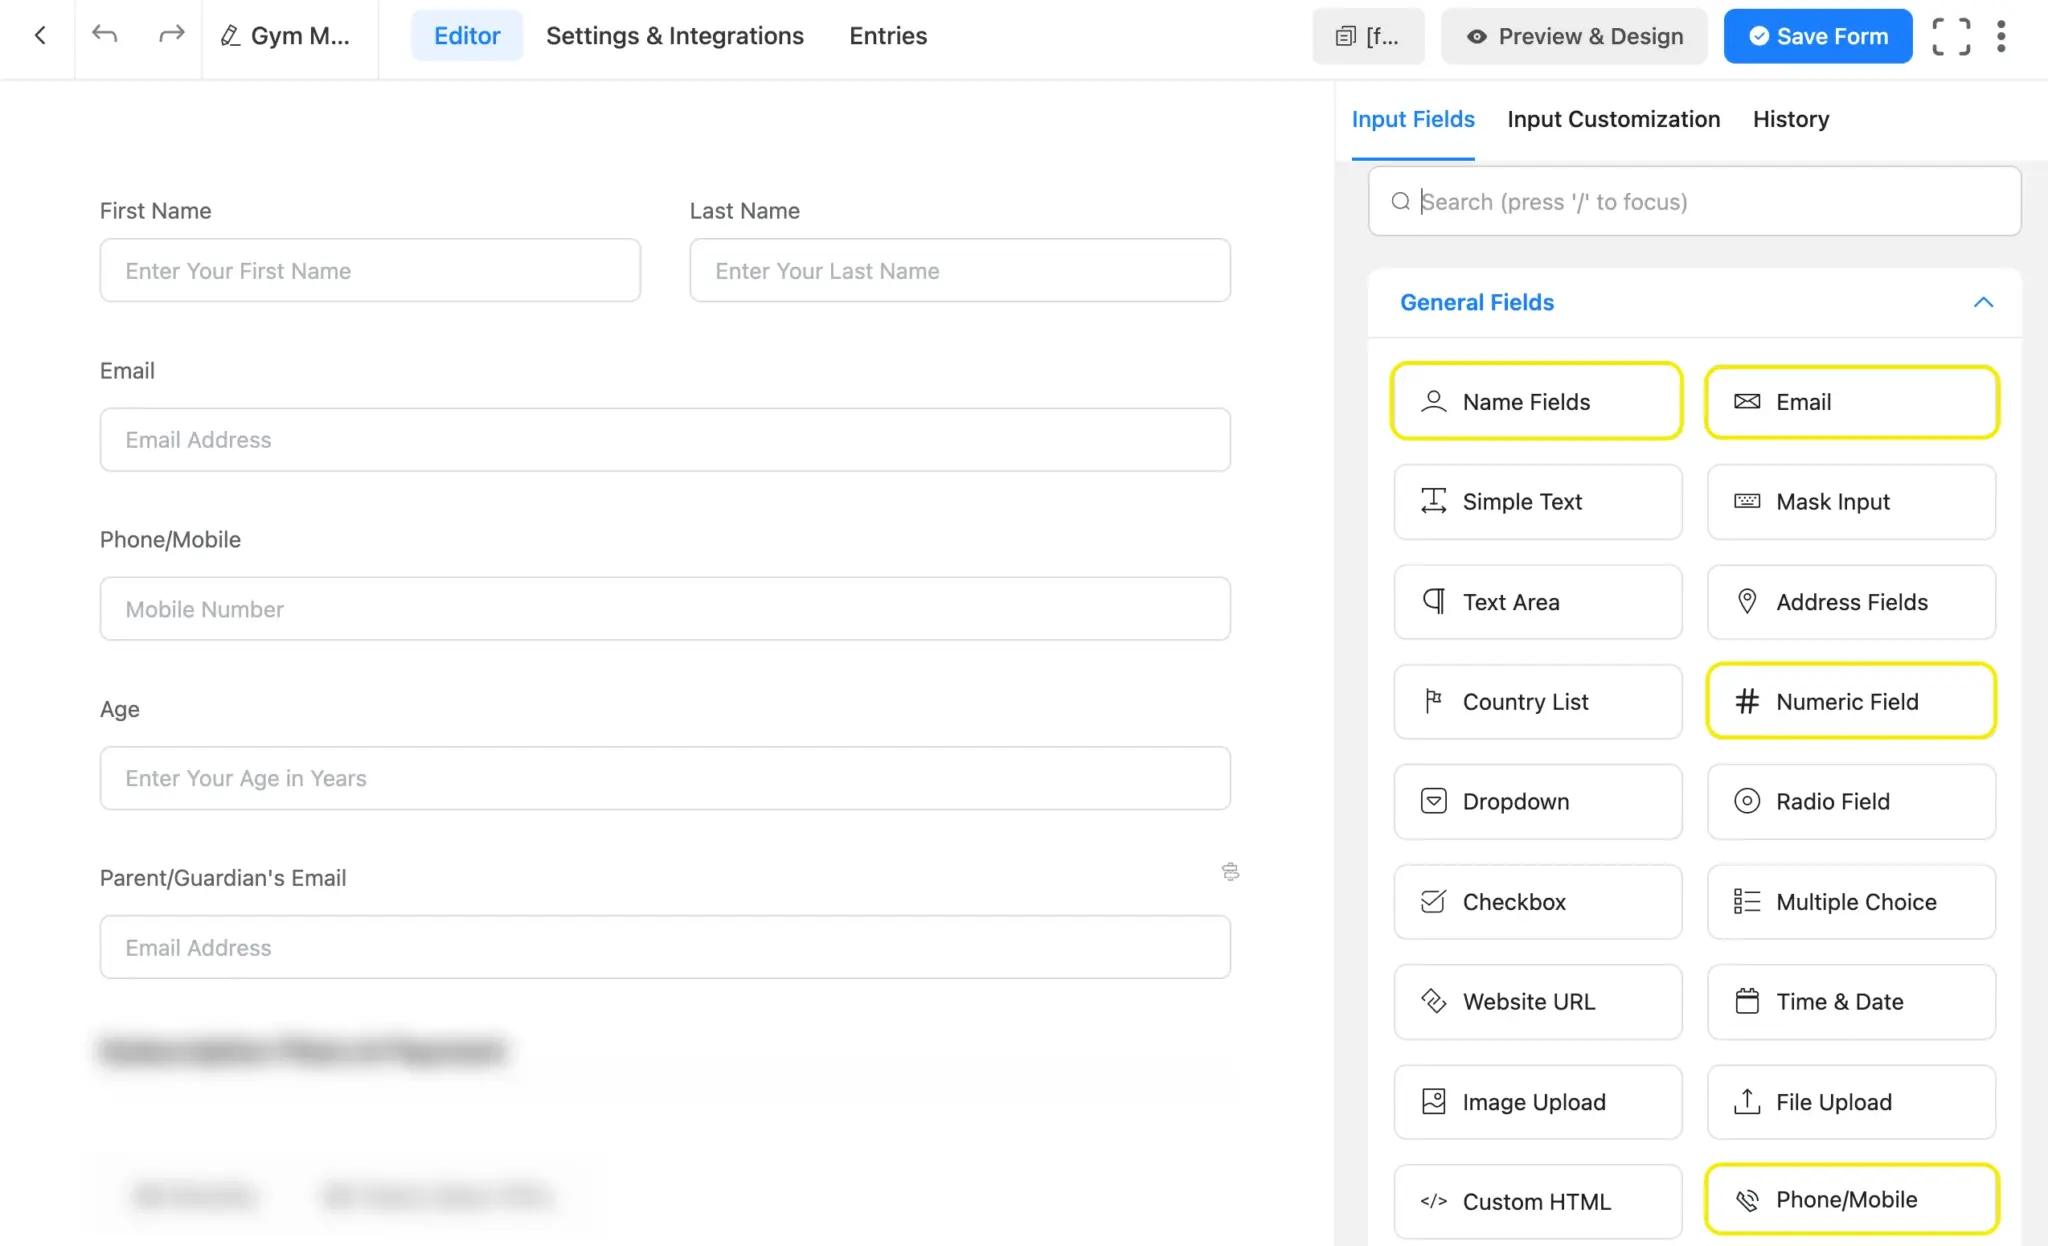
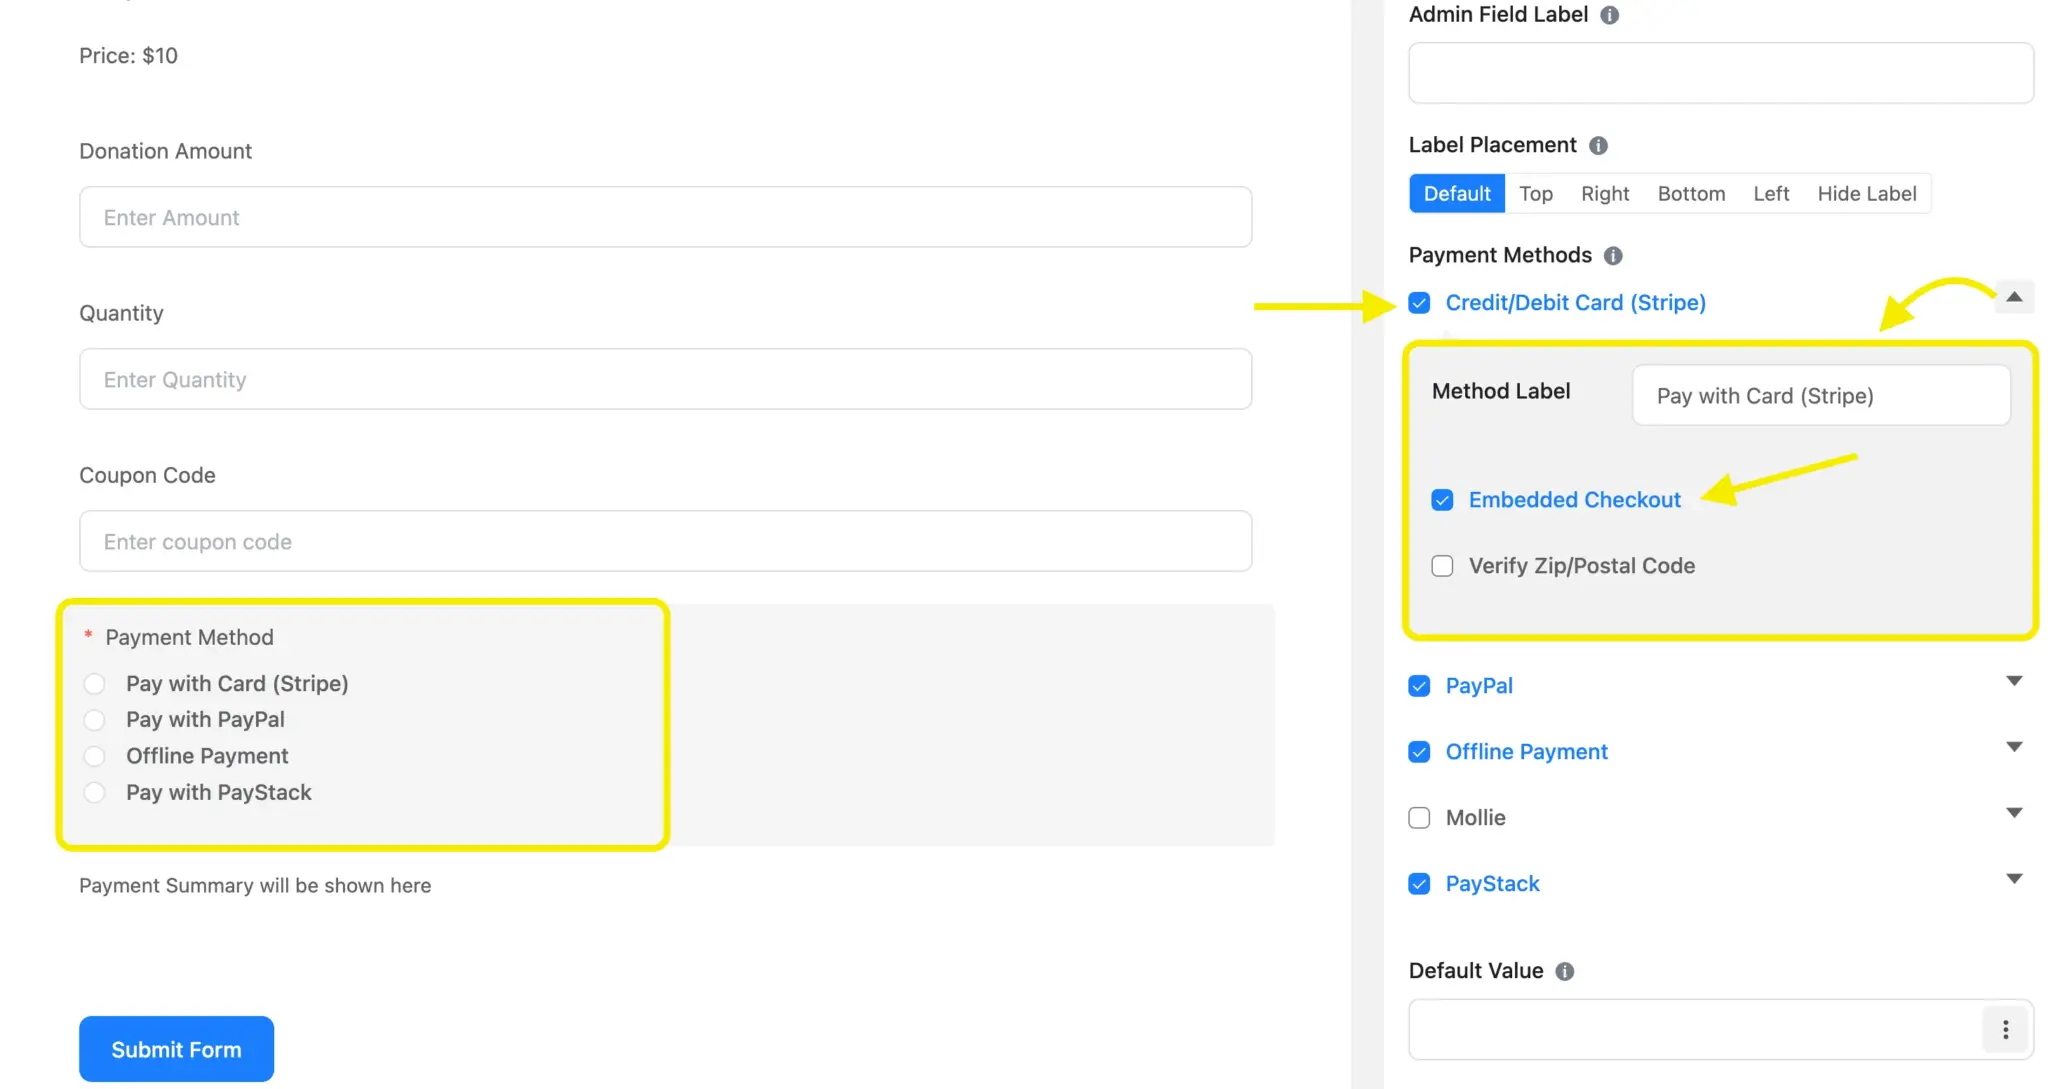
Add a Payment Method field at the bottom so the user sees the Stripe checkout.
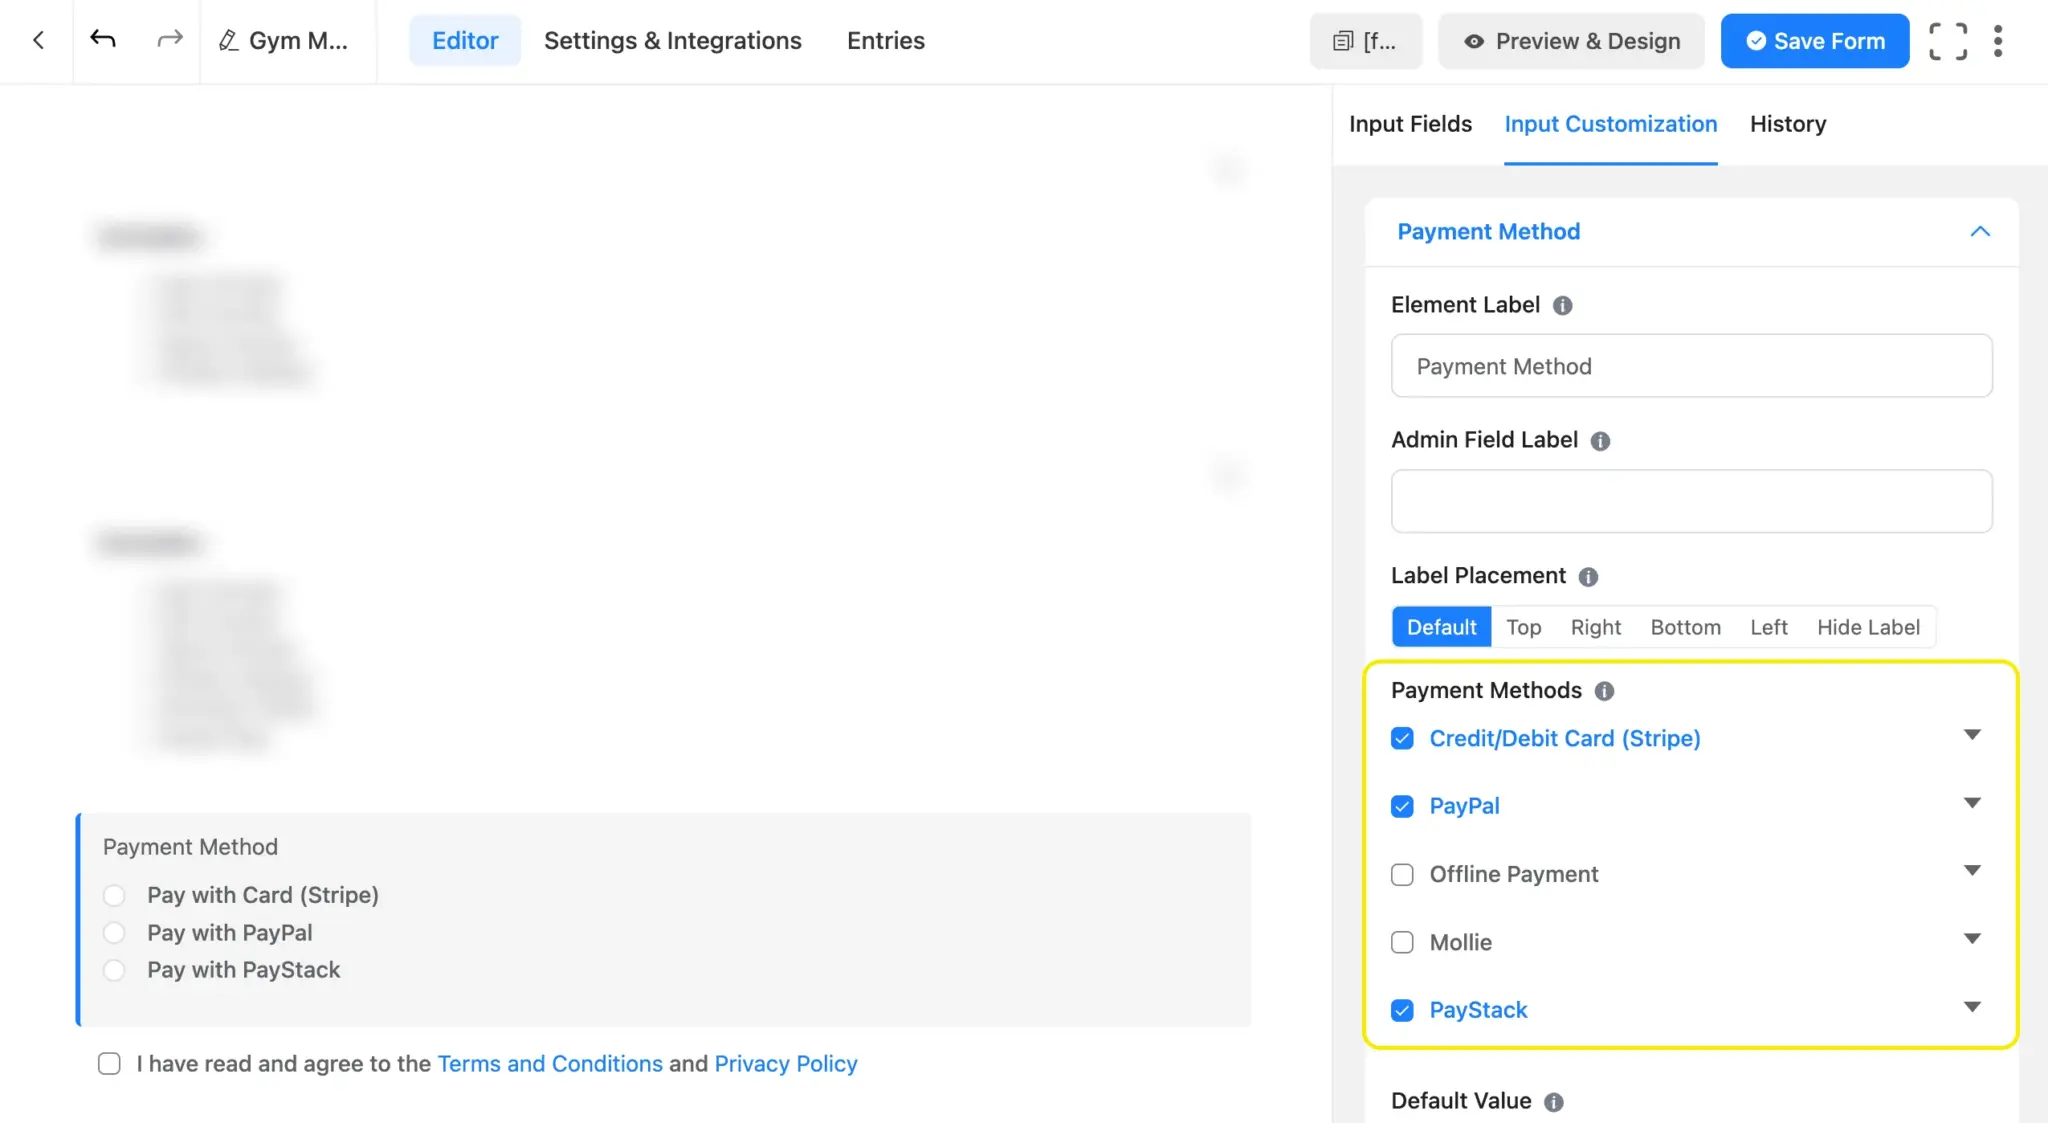
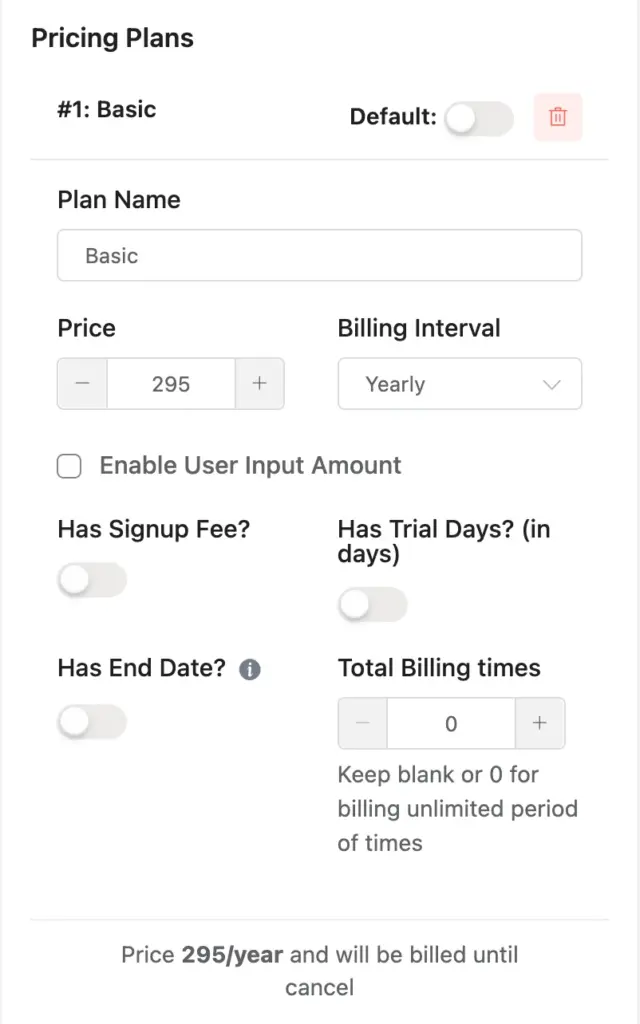
The Subscription field options appear in the right panel once you add it.

Here is what to configure:
Element Label: The name your visitors see. Something like “Monthly Plan” or “Subscription Tier.”
Subscription Type: Choose Single for one plan. Choose Multiple if you want to offer pricing tiers (a radio or dropdown selector lets users pick).
Plan Name: A clear label for what the user is buying. “4-Month Coaching” is better than “Plan A.”
Price: The amount per billing cycle.
Billing Interval: Daily, Weekly, Monthly, or Yearly.
Total Billing Times: Leave blank for indefinite billing. Set a number to auto-stop after that many cycles.
Two optional settings worth knowing: Has Signup Fee adds a one-time charge on top of the first payment. Has Trial Days delays the first charge by a set number of days, so the user submits the form without paying and gets billed automatically when the trial expires.
Enable Stripe as the payment method
Go to Global Settings > Payment > Payment Methods. Enable Stripe.
If you have not connected your Stripe account yet, click “Connect to Stripe” and follow the authentication steps.
Back in your form, add the Payment Method field. Select “Embedded Checkout” under the Stripe settings if you want the card input to appear directly inside the form. Users stay on your page. No redirect to Stripe’s hosted checkout.
Save the form. Copy the shortcode from the top of the editor. Paste it into any page or post. Your recurring Stripe subscriptions form is live.
Give Users a Self-Service Payment Page
Collecting recurring Stripe subscriptions is the first half. The second half is letting subscribers manage their own billing without emailing your support team.
Fluent Forms handles this with two shortcodes and one toggle.
Payment History page
Create a new WordPress page. Add the shortcode[fluentform_payments] to it.
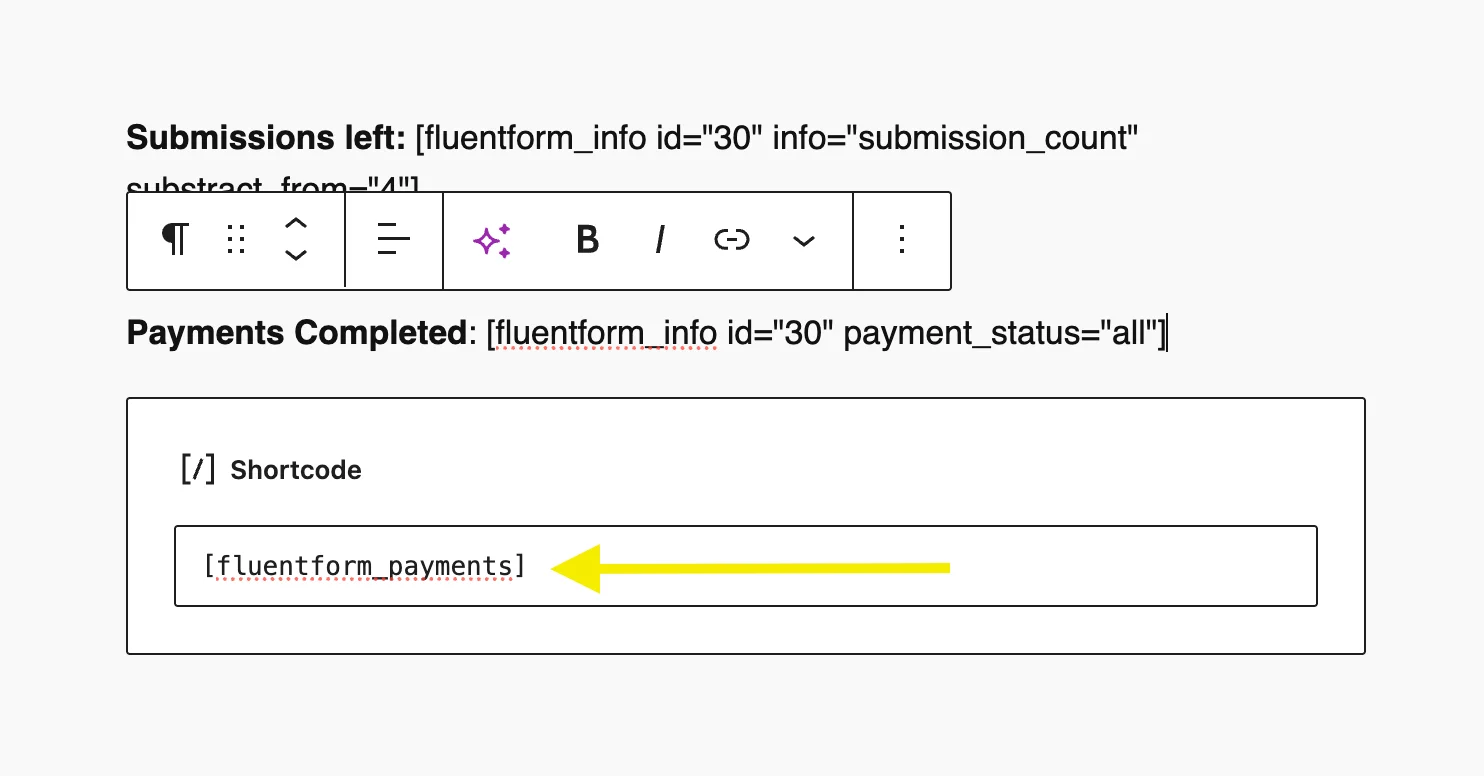
This page shows every logged-in user a table of their past payments: amount, status, payment method, date, and a “View” link for each transaction.
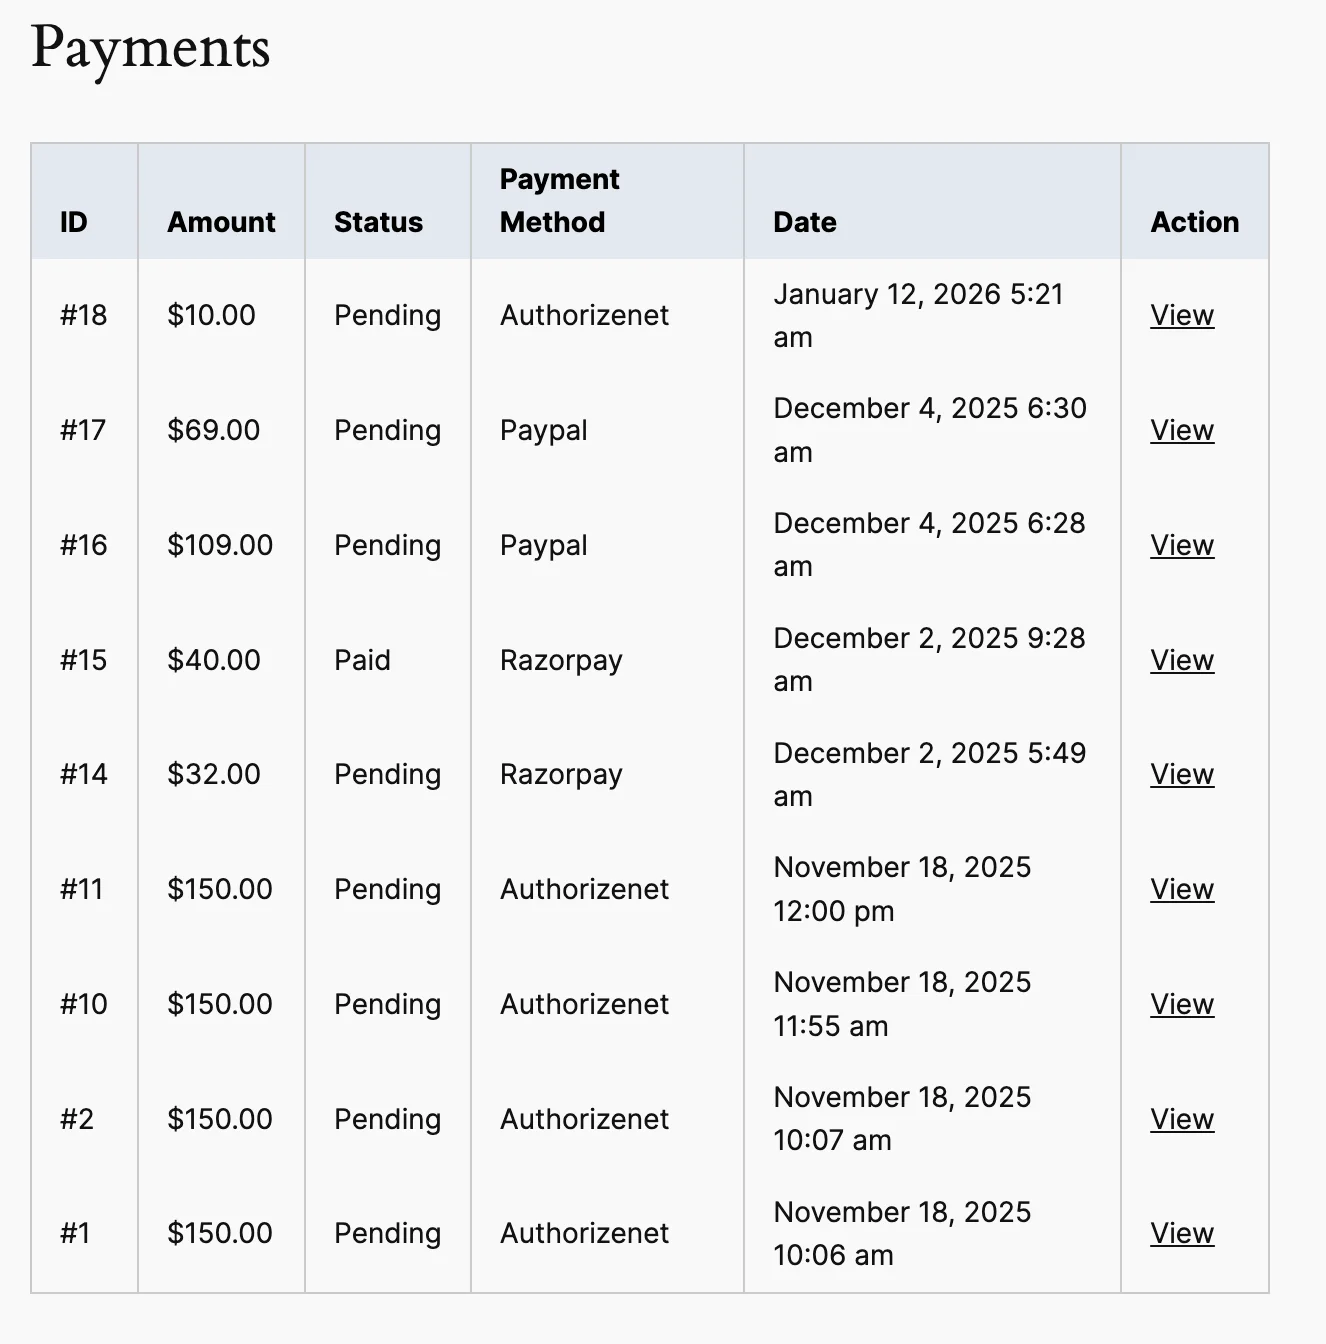
Subscribers who have active recurring plans also see their subscriptions listed here. If you enable Subscription Management (covered below), they get a cancel button next to each active subscription.

Payment Receipt page
Create a second WordPress page.
Add the shortcode[fluentform_payment_view] to it. This page displays the details of a single payment: transaction ID, payment method, items purchased, amounts, and status.
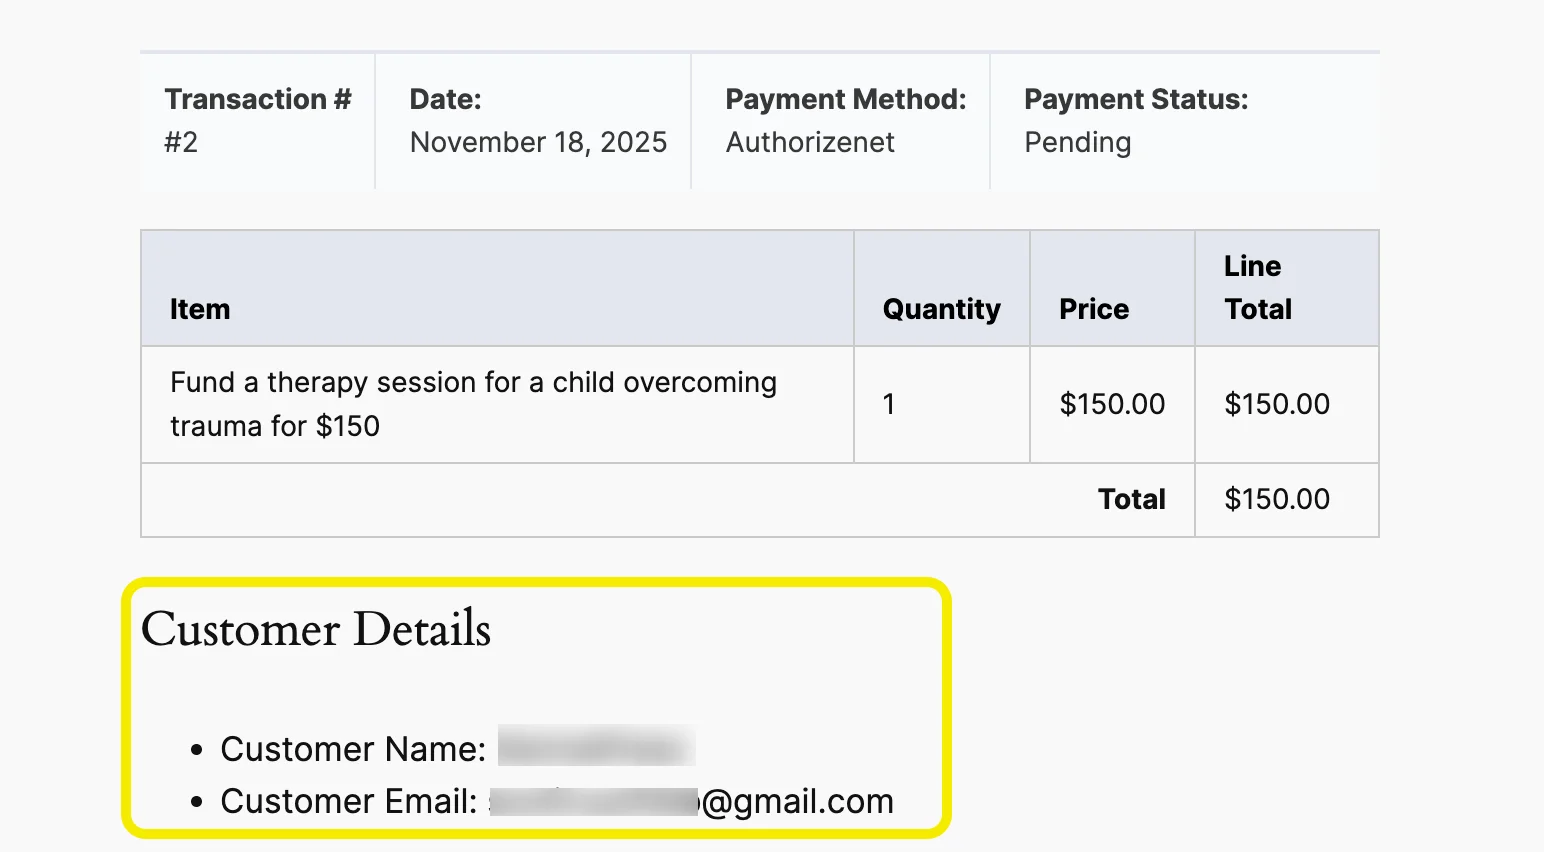
Users reach this page by clicking “View” from the Payment History table. Both one-time and subscription payments are supported.
Connect the pages in settings
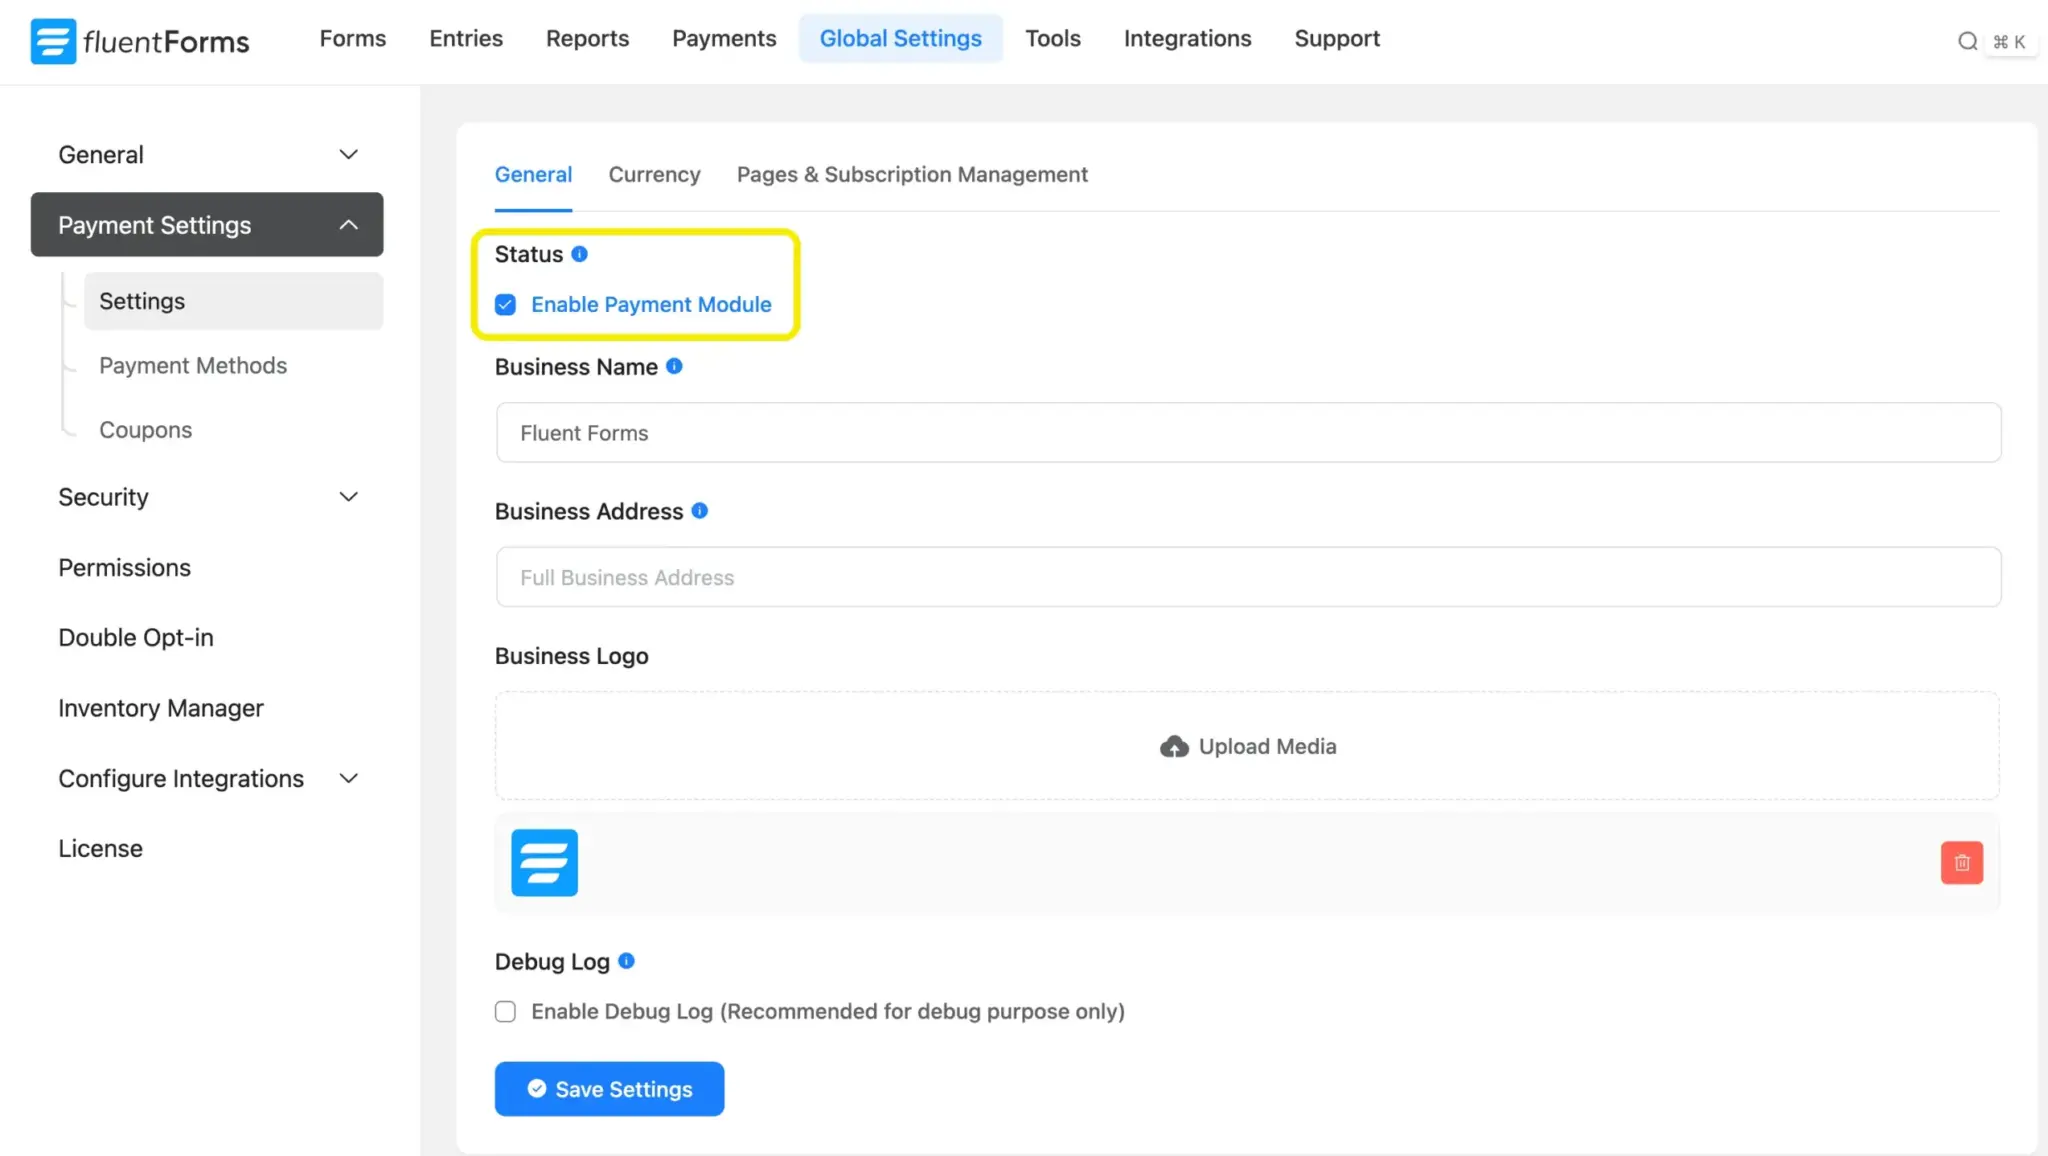
Go to Global Settings > Payment > Settings > Pages & Subscription Management. Assign your Payment History page and Payment Receipt page in the dropdowns.
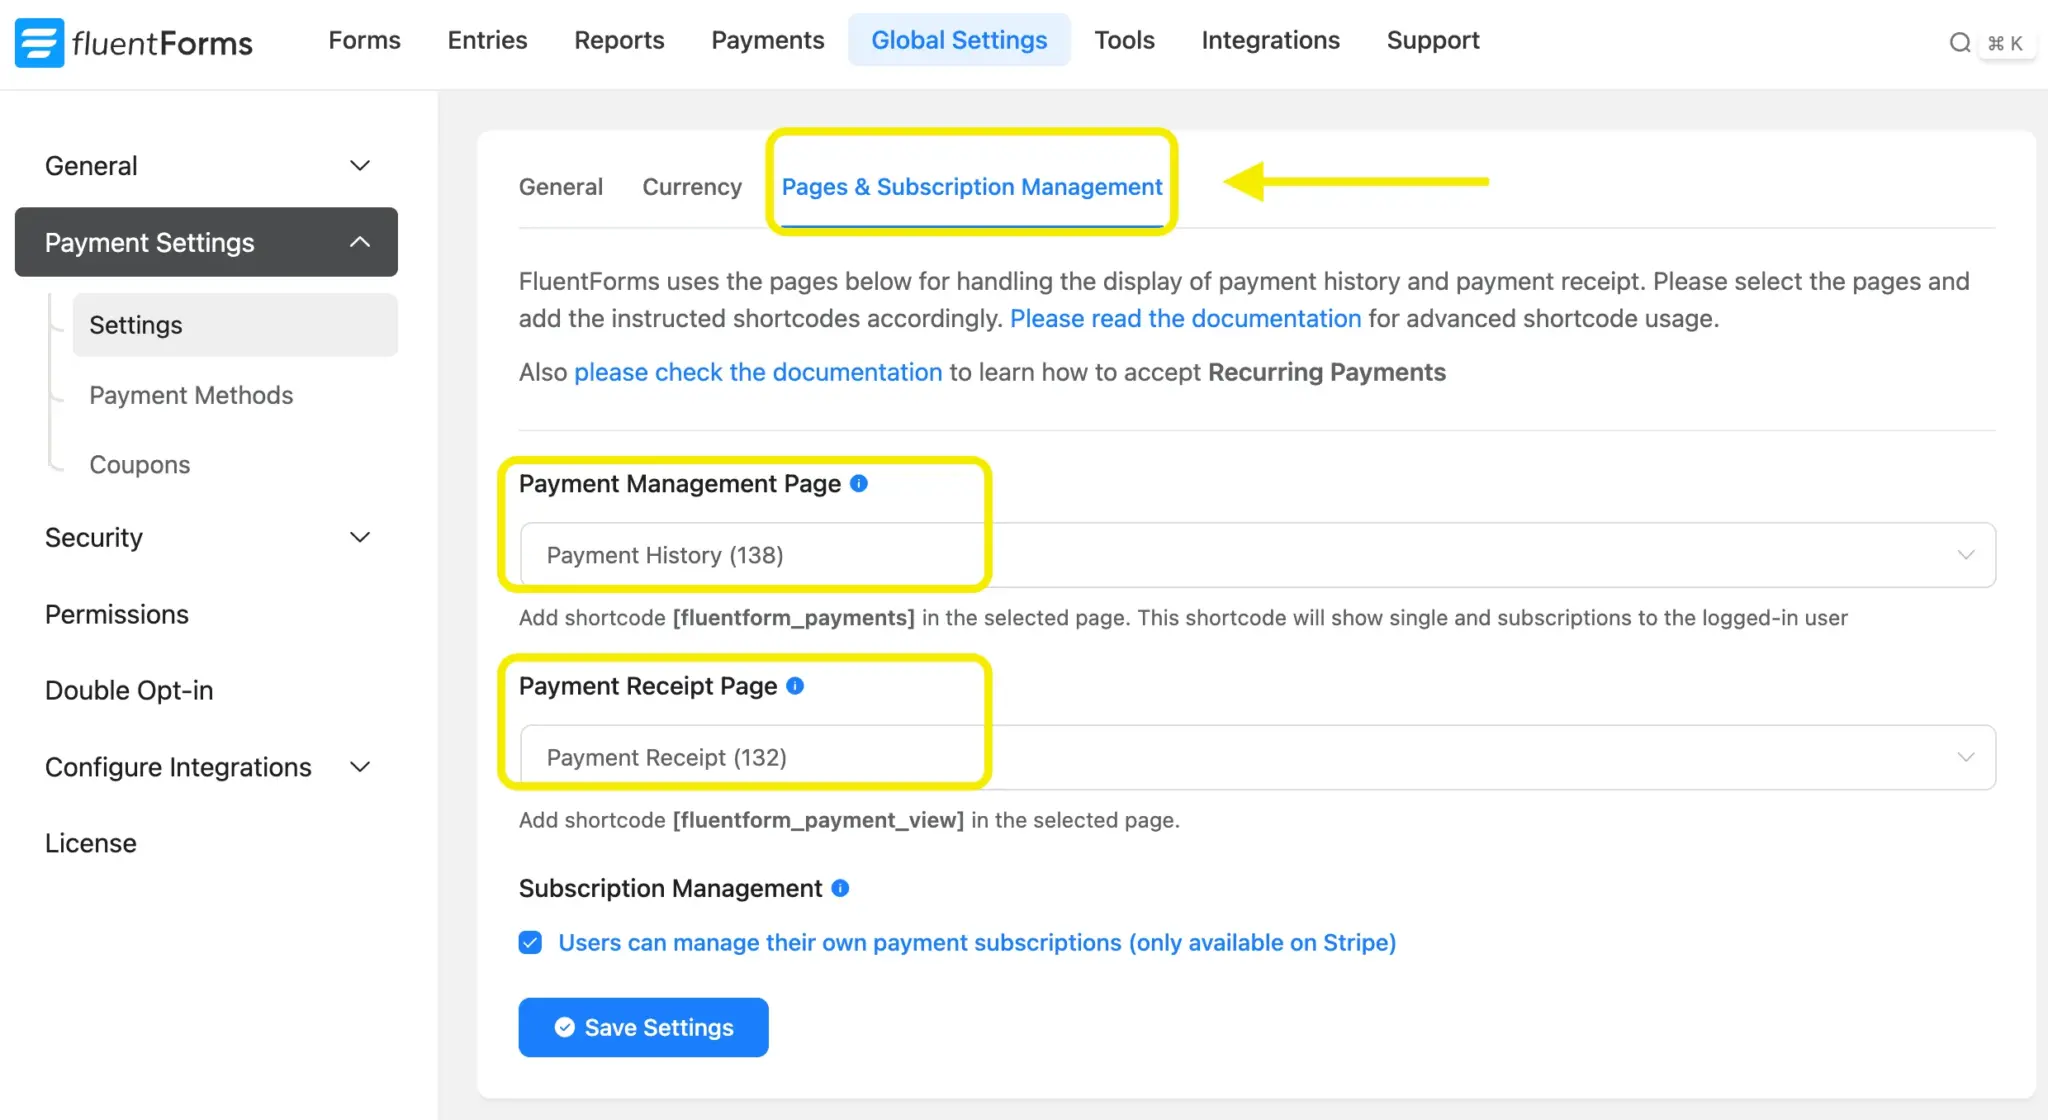
The third option on this screen is Enable Subscription Management for Stripe. Check this box. It adds a “Cancel Subscription” button to the Payment History page for any active Stripe subscription.
Hit Save Settings. Your users now have a self-service portal where they see every charge, view receipts, and cancel recurring Stripe subscriptions on their own.
When You Need to Pause Instead of Cancel
Sometimes a subscriber asks to skip a month. They are not leaving. They need a break. Canceling wipes the subscription object in Stripe, and you would have to create a new one from scratch.
Fluent Forms does not have a built-in pause button. For pausing, you go to the Stripe Dashboard directly.
How to pause from the Stripe Dashboard
Open your Stripe Dashboard. Go to Billing > Subscriptions. Find the subscriber. Click their subscription.
From the subscription detail page, click the overflow menu (three dots) and select “Pause payment collection.” You get two choices:
Pause indefinitely. Stripe stops collecting payments until you manually resume. The subscription stays active in status, but no invoices are charged.
Pause until a specific date. Set a resume date and Stripe restarts billing automatically on that day.
What happens to invoices while paused
Stripe still generates invoices during a pause. You choose what happens to them:
Void invoices if you do not want to charge for the paused period at all. The subscriber owes nothing. The subscription stays active.
Keep invoices as drafts if you want the option to charge later. When you resume, you set the draft invoices to auto-advance and Stripe collects on them.
Mark invoices as uncollectible if you want to record the missed revenue without attempting collection.
For most WordPress site owners running memberships or coaching programs, voiding invoices is the cleanest option. The subscriber takes a break, comes back, and billing picks up where it left off.
Resuming a paused subscription
Go back to the same subscription in Stripe. Click the overflow menu and select “Resume payment collection.” Stripe generates the next invoice on the original billing cycle.
If you paused with a set resume date, this happens automatically. No action needed on your end.
Enjoying this article?
We regularly publish actionable content on our blog. Subscribe to get them delivered straight to your inbox.
We won’t spam you. You can unsubscribe whenever you want.
Test and Manage Subscriptions Yourself
Open your Fluent Forms dashboard right now. Create one subscription form with Stripe connected. Set up the two payment management pages. Enable the cancel button. That gives your subscribers a complete billing experience inside your WordPress site, and it takes about 15 minutes.
The Fluent Forms payment documentation covers each setting in detail if you get stuck on a specific field. And for anything Stripe-side, the Stripe subscription docs walk through pause, cancel, and resume at the API level.
If you are collecting recurring Stripe subscriptions through forms, give your subscribers the tools to manage their own billing. Fewer support tickets. Cleaner records. Better retention.

This is Sumit. He’s a physics major who’s trying to understand both the physical as well as the WordPress worlds. Whenever he’s not busy, plays fifa or spends time with his family.


Leave a Reply