How to Create a WordPress Booking Form
A booking form is more than a reservation or appointment request. It can be designed with a complete set of steps that ensures smooth communication, reducing back-and-forth communication. Additionally, payment is made with the preferred method, notifications are sent instantly, and the design is stylized to help users make the right decision.
In WordPress, creating a perfect booking form is half done when you are not using the right form plugin in the right way, understanding the scope of form development, while implementing ideas that enhance form effectiveness.
In this blog, I’ll show you the simplest ways to help you create a booking form in a way that not only gets the submission but also helps you manage other digital tasks of a booking.
TL;DR
- A booking form is used to collect a reservation request reserve a hotel, guest house, conference hall, etc
- With Fluent Forms, you can easily build a WordPress booking form using the AI form builder, template, or start from scratch
- Name, Email, Phone, Date, Payment, and relevant fields make a booking form work properly
- Conditional logic, calculation, and even custom code can be used to make the form more tailored
- You can easily publish a form in WordPress using the shortcode and stylize the form without coding
- Set up the email notification and check the preview and design to settle the device-responsiveness
Booking forms in WordPress: what a good form plugin can do
A booking form can’t be addressed either as a simple one or a complex one. It’s not simple because you need to add a date/time range, customize it accordingly, add the payment fields, and ensure it’s precise. And, not complex because it doesn’t need too many fields or can be built with a form plugin if used properly.
There are a few reasons why a form plugin can be the perfect tool to make an effective booking form for your business.
- Multiple selection options to choose what to reserve
- Email confirmation to reach out to the users
- Payment options to instantly pay the bill or a partial bill in advance
- Coupon code to offer discounts
- Form security and spam protection
- An advanced styler to provide a proper view
Useful fields to build a booking form on WordPress
Every booking form needs a precise structure built with relevant fields where people can choose time and space, and also can send requests if they have any. So, there should be a few fields every time you build a booking form for your WordPress website, whether it’s for an appointment, event reservation, restaurant, hotel, or guest house.
When choosing the form fields, consider that your user may reach out to you or confirm a booking once they have filled out the reservation form, eliminating the need for multiple back-and-forth communications.
- Name and email field for clear identification
- Phone number field, preferably a validated one
- Multi-container so that the form gets a concise version
- Checkbox and radio field to make sure the users can easily choose their preferences
- Simple or rich text input for any kind of special requests
- Date and time field, preferably with a custom date range
- Payment fields with summary
Steps to create a booking form on WordPress
Creating a dynamic booking form in WordPress is not complex when you get the right form builder. With Fluent Forms, you can build a booking form with all the required fields.
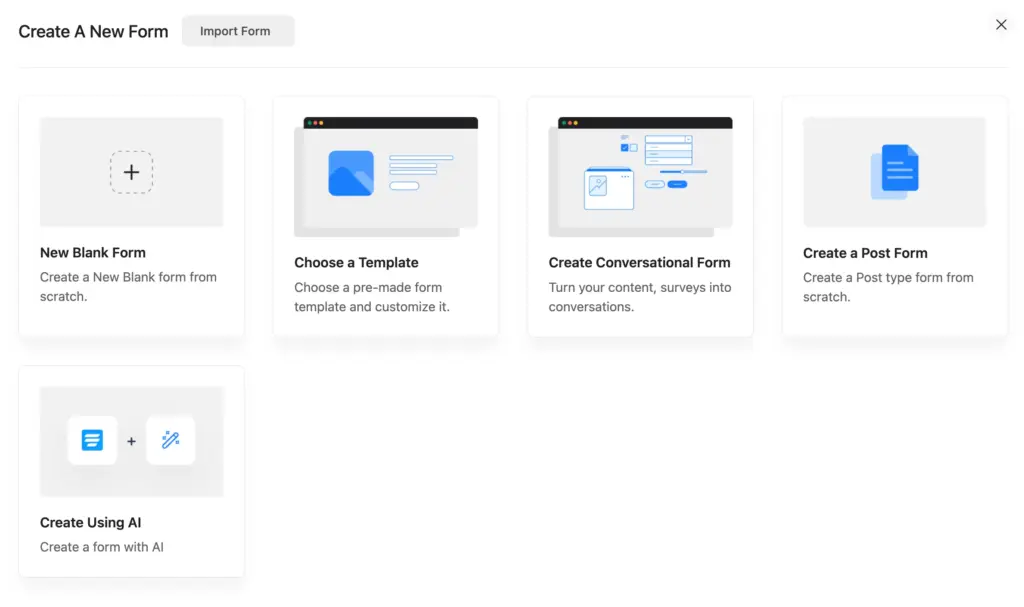
Fluent Forms allows you to create a form in different ways. You can choose a template from the 100+ form templates included in the Fluent Forms plugin, or you can create one using AI with the AI Form builder, which is a free feature. And, if you want to build a form from scratch, applying your creative ideas, you can start with a new blank form.
Step 1: add the required fields
Once you have entered the editor page, you can now add fields in several ways.
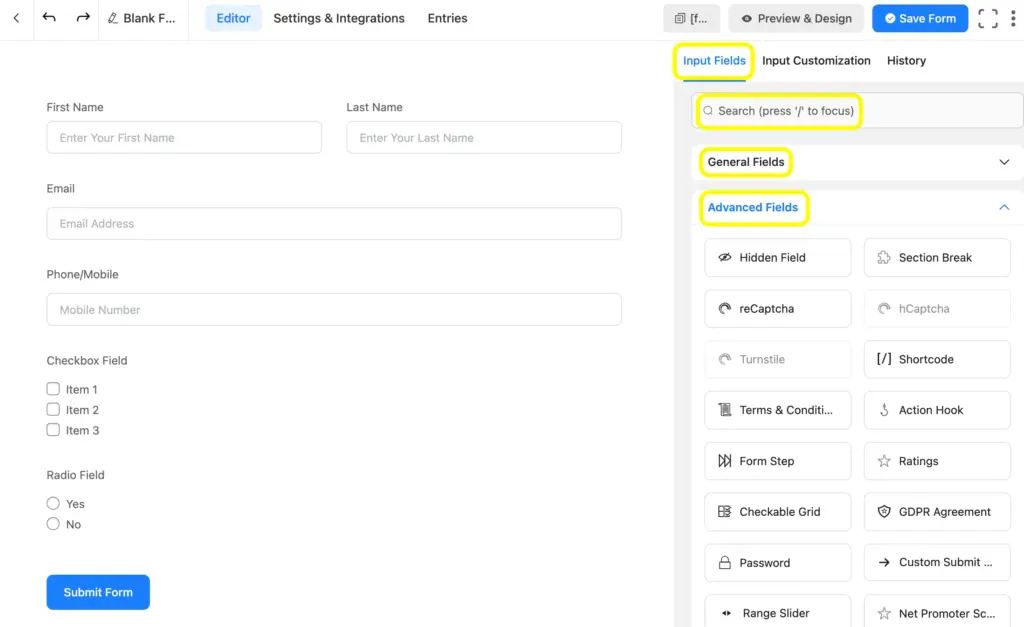
As you see here, you can add fields from input fields. You can simply click on the field name of both General Fields and Advanced Fields, and you can also drag and drop or search for your preferred field. There is always a + sign as well with every imputed field, which also allows you to add fields instantly.
Here, I have imputed a few fields as the primary ones, which might be extended to more fields later.
By the way, Fluent Forms now comes with 60+ general and advanced fields, whereas the advanced ones are accessible once you have subscribed to the Pro version.
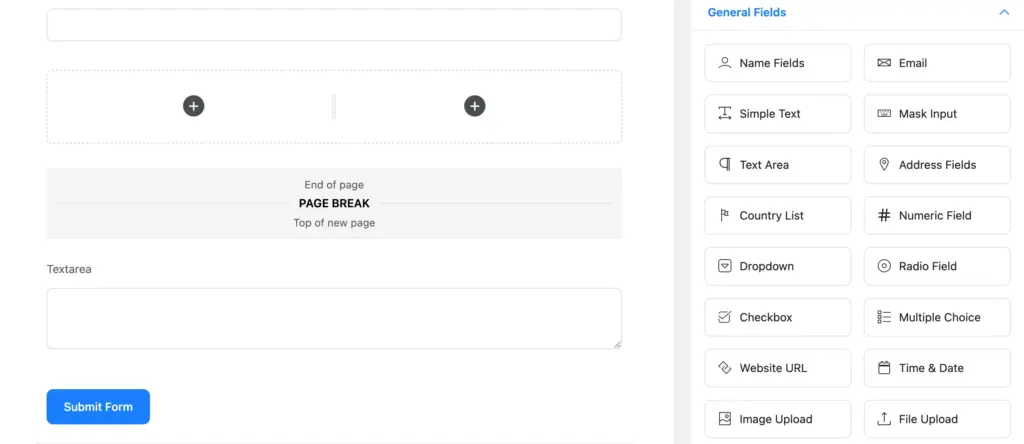
I will now add the Time & Date field, Two-column container, Form Step, and Text Area fields so that the booking form can be more relevant and useful.
Step 2: customize the fields
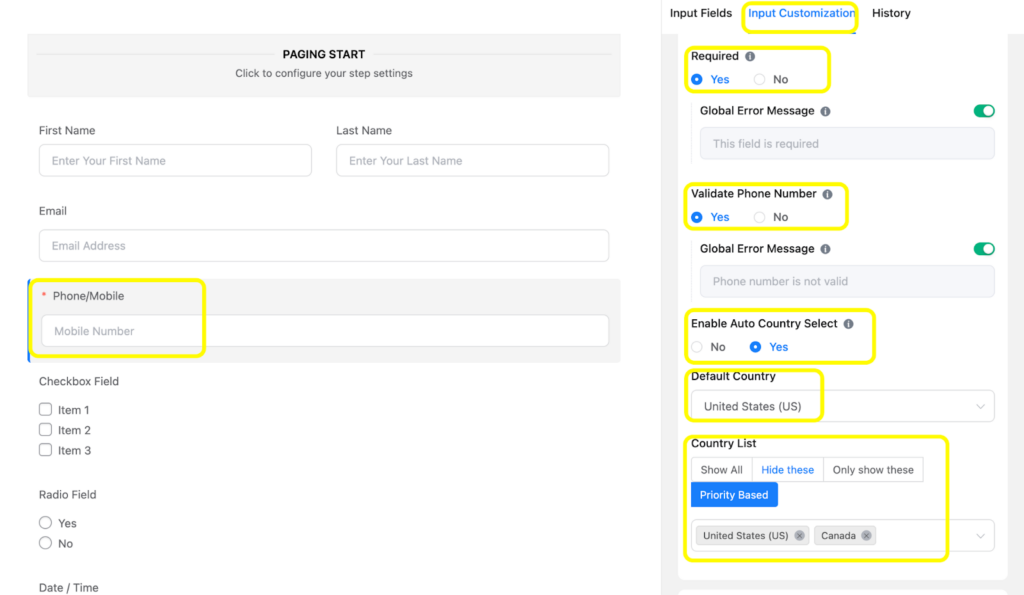
In Fluent Forms, you can customize each field with the best possible and decorated Input Customization option. Here, I have shown the Phone Number field’s customization, where you can customize in several ways, including Validate Phone Number, marking the field as Required(with a global error message), you can also Enable Auto Country Select, while setting the Default Country, and putting the Country List as Show All, Hide This, Only Show These, and Priority Based, as per your needs.
Also, you can use features such as conditional logic and numeric calculation, which makes the customization dive deeper. The conditional logic of Fluent Forms can be applied to both match and unmatch. Another specialty of this feature is that you can apply a group condition to tailor the responses exactly as you want. And you know what? This is a completely free feature.
Step 3: apply custom code where required
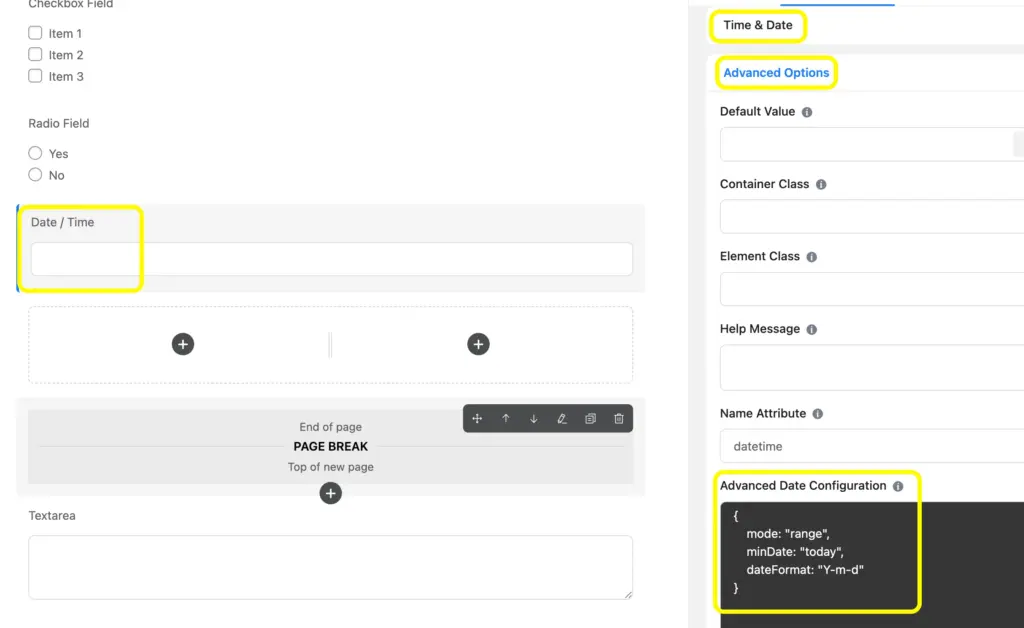
In a Fluent Forms form, you can apply custom code. For example, here I have included a code for the date range, which makes the date selection accurate and easy for the users. As you see, it’s the advanced customization where you can apply Advanced Date Configuration with a simple JS code.
Step 4: add payment fields
Once you are done with the other relevant fields, you can now add the payment fields, such as payment item and payment summary.
Fluent Forms make it easy to collect payment with 8 payment gateways: Stripe, PayPal, Square, Mollie, Paddle, Paystack, Razorpay, and Authorize.net. In its free version, Stripe payment gateway is available for everyone (a 1.9% transaction fee with Stripe standard fees).
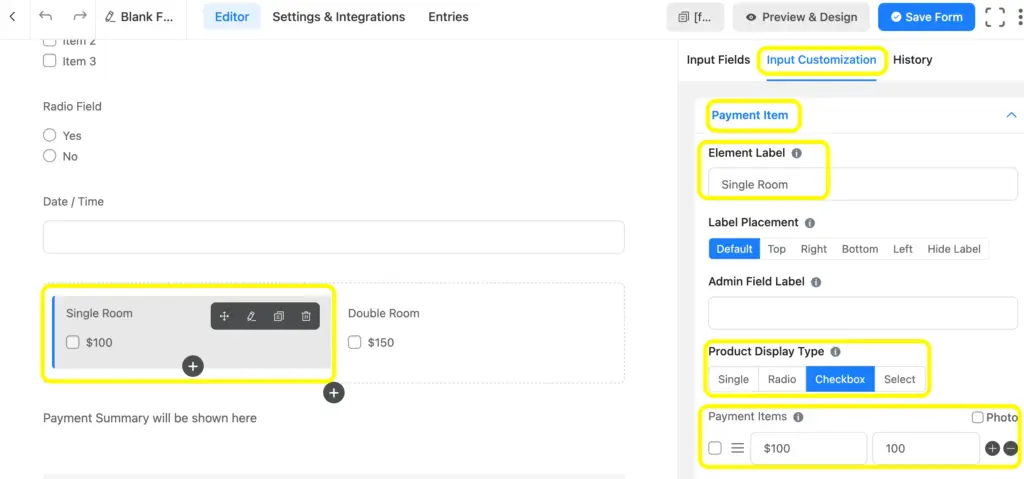
As you can see here, I have customized the Payment Item field and added the amount of the bill. I’ve edited the Element Label and selected the Product Display Type as a checkbox, and added the payment summary. Once you do that, the user will get the payment summary with a single click.
Step 5: set up notification and confirmation emails
Once you have customized the fields, it’s time to set up the notification and confirmation email.
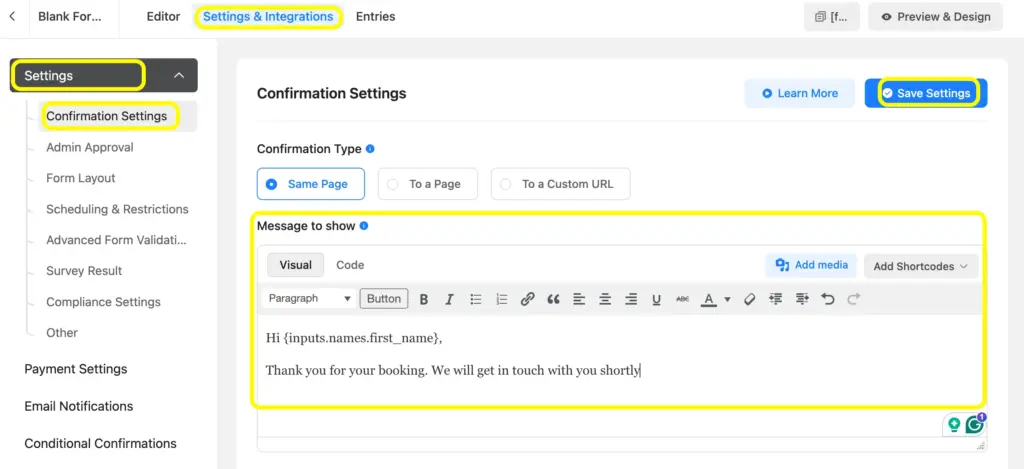
To set the confirmation, go to the Settings and Integrations button next to the Editor button at the top of the page. Then click on the Confirmation Settings and type your custom message. You can add media as well in the text box. Don’t forget to Save Settings once you are done setting up the confirmation email.
To notify admins once a form is submitted, enable the Email Notification Settings. This form submission notification allows you to get notifications automatically once the user has submitted a form. All you need is to set up the notification, whether with or without conditions. You can customize the message and get to know who has submitted a form, including any specificity in the form entry.
Step 6: check the preview and publish the form
Once all the settings are done, you can easily publish the form right after saving the form and checking the preview. You will see all necessary fields at the top of the form editor page.
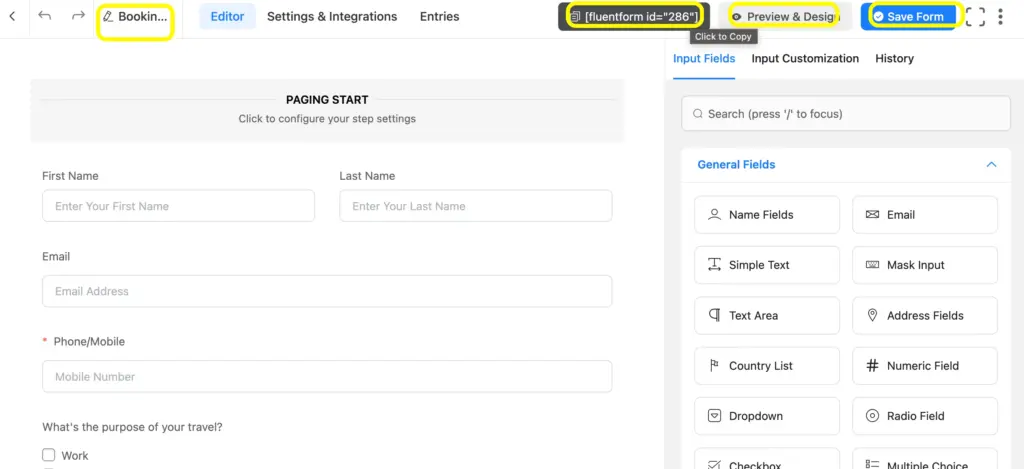
To check the preview, click on the Preview & Design button at the top right side, and then the preview page will open in a new tab.
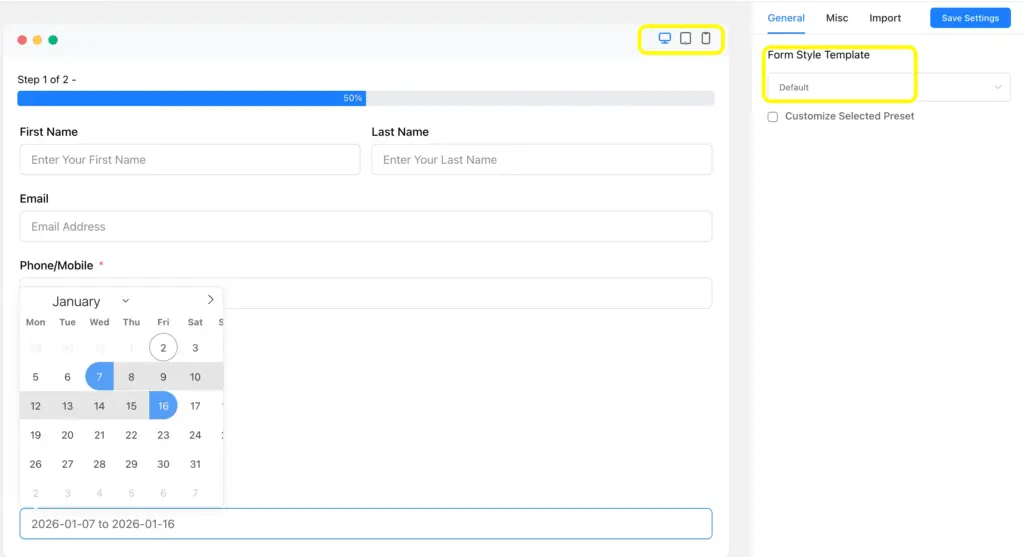
On the preview page, you can also check the device-responsiveness and form style template. Fluent Forms Advanced Form Styler offers you a bunch of colors for typography. You can also edit the shadow, border, margin, and padding. You can also import styles from any standard forms to match branding consistency.
Fluent Forms also offers Gutenberg Form Styler, if you want to embed your form as a block now you can style your form inside Gutenberg block. Here’s how it looks –
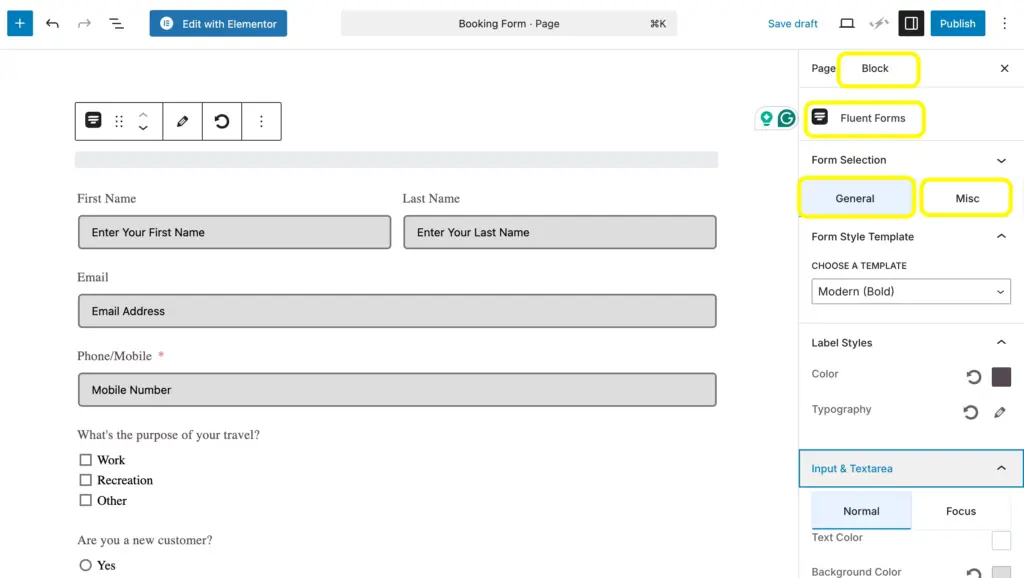
As you can see here, you just need to choose a Fluent Forms block in your page or post and then go to the Block and make any edits using Gutenberg. That makes your form look more than a form and appear with an accomplished view as per your brand standards.
Step 7: empower your booking form with FluentBooking
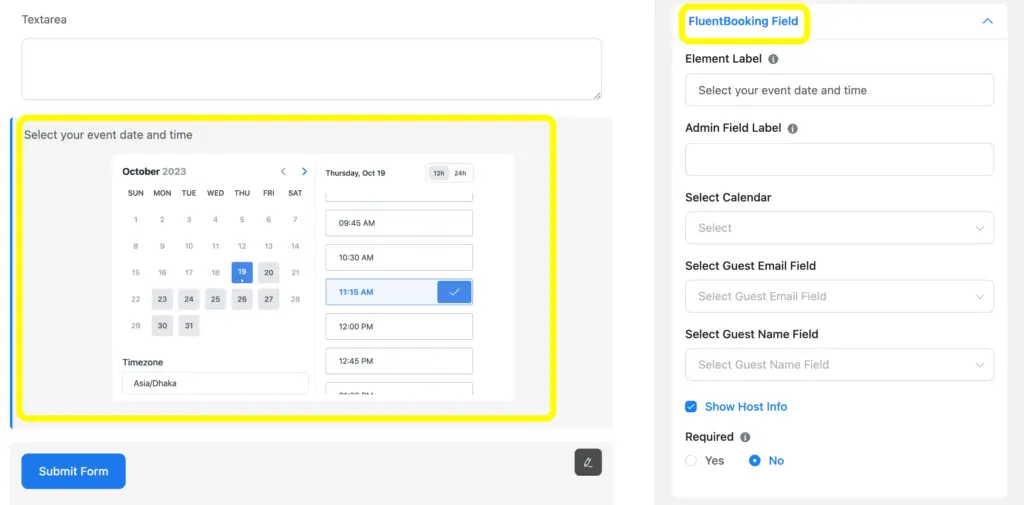
While creating a Booking Form in Fluent Forms, you can empower WordPress form using Fluent Forms’ FluentBooking integration that comes with relevant fields and features. With this integration, you can customize the date formats and time formats and set up recurring events easily.
Step 8: Set up SMS notification to stay in touch
Once you integrate ClickSend with Fluent Forms, an SMS notification tool, you can easily send notifications via SMS to your website users. This makes your booking workflow automated and helps communicate with the users instantly in a smoother way.
Look at how you can set up the messages after connecting ClickSend to Fluent Forms:
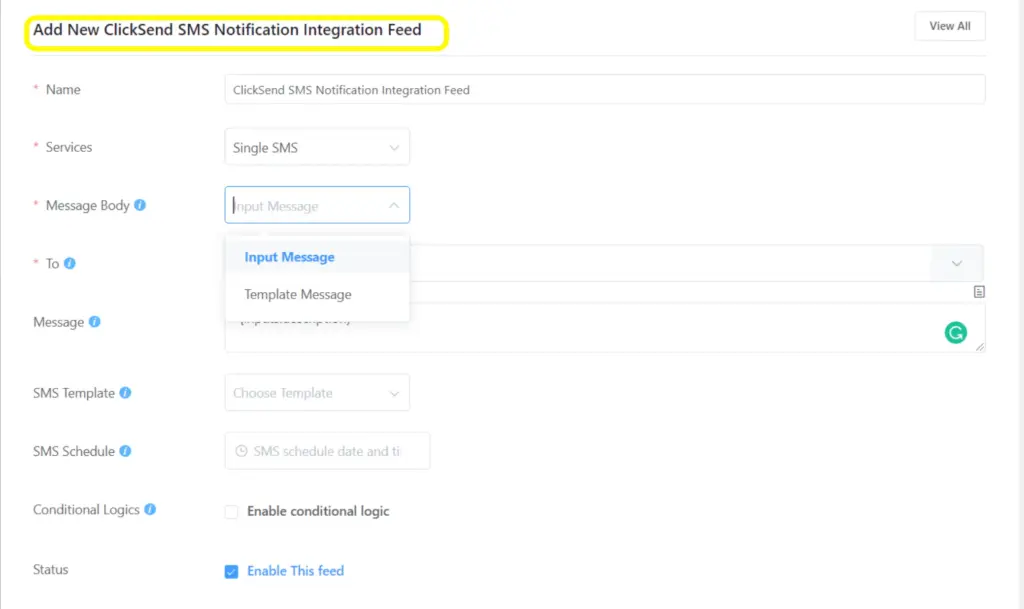
The communications scopes via Fluent Forms don’t end here. You can also access impactful communication channels such as Telegram, Discord, Twilio, and Slack to get your form notifications.
So, these are the steps on how you can ensure a smooth booking system on your website. You can uplift the booking experience by following some maintenance, and also use other features of Fluent Forms to make sure the booking is well-organized using a single form plugin in your WordPress website.
Best practices for building a WordPress booking form
A booking form is the final touchpoint for the host site to welcome the guests, so it needs every preparation to be set up for a reservation.
Here are the best practices to ensure a superb WordPress booking form that connects the users to your travel/event/hotel business.
- Take requests even if there is no availability, and reply to the users. Be their favorite.
- After getting their email, utilize the lead and send them offers if you have any. Keep up the connection.
- Attach the form to the home page and the other pages where more users visit. Remind them of booking immediately.
- Keep the save and resume option so that users can resume booking from where they left off.
- Show the terms and conditions clearly in the form so that the users don’t think you are hiding anything.
- Set up the admin email notification, preferably with the conditional logic to organize the priority. Get back to the users as soon as possible.
- If you are collecting payments with your booking form, always set up SMS notifications to know about new form entries instantly.
- Follow all security settings, ensure your forms is secure and safely handling customers’ information.
Related features
Conditional logic
Provide the users with a personalized experience by eliminating fields based on users’ interests. Fluent Forms’ conditional logic feature helps you make the form dynamically respond based on users’ actions. Eventually, it makes the form appear to be more precise.
Auto delete form entries
Why store the old form entries and get the dashboard complicated? Using Fluent Forms, you can automatically delete form entries after a certain period of time. This helps you get a clean dashboard and easily find the fresh entries.
Form restriction
With the Fluent Forms’ form restrictions feature, you can easily restrict form entries based on IP, country, or keywords. You can simply do that by using the advanced form validation settings from the form settings option. In terms of booking, it helps you keep up the security to chase spamming.
Form security
Fluent Forms ensures form security powered by several security integrations, including Akismet, Turnstile, hCaptcha, reCAPTCHA, etc. On one side, you can enable the login requirements, and on the other side, you can access to control block entr submissions. Fluent Forms also comes with GDPR compliance, which gains users’ trust.





Leave a Reply