[ How to Set Scroll Offset ]
If your website contains a sticky header menu. In that case, users may encounter problems where the form is partially obscured under the header when auto-scroll is enabled in a multi-step form. To fix this, you can set a Scroll Offset to adjust the scroll position, ensuring the form is fully visible.
This article will guide you on how to set the Scroll Offset using Fluent Forms.
Setting Scroll Offset #
To set the Scroll Offset, you need to add Custom CSS, JavaScript, or Both. This script instructs the auto-scroller to allow some space at the top of the page while scrolling, preventing the form from being hidden under the sticky header.
First, open an existing Form where you want to set the Scroll Offset and go to its Editor page.
If you don’t have any existing forms, follow the Create Blank Form or Create Form using the Pre-built Template documentation to create a new one.
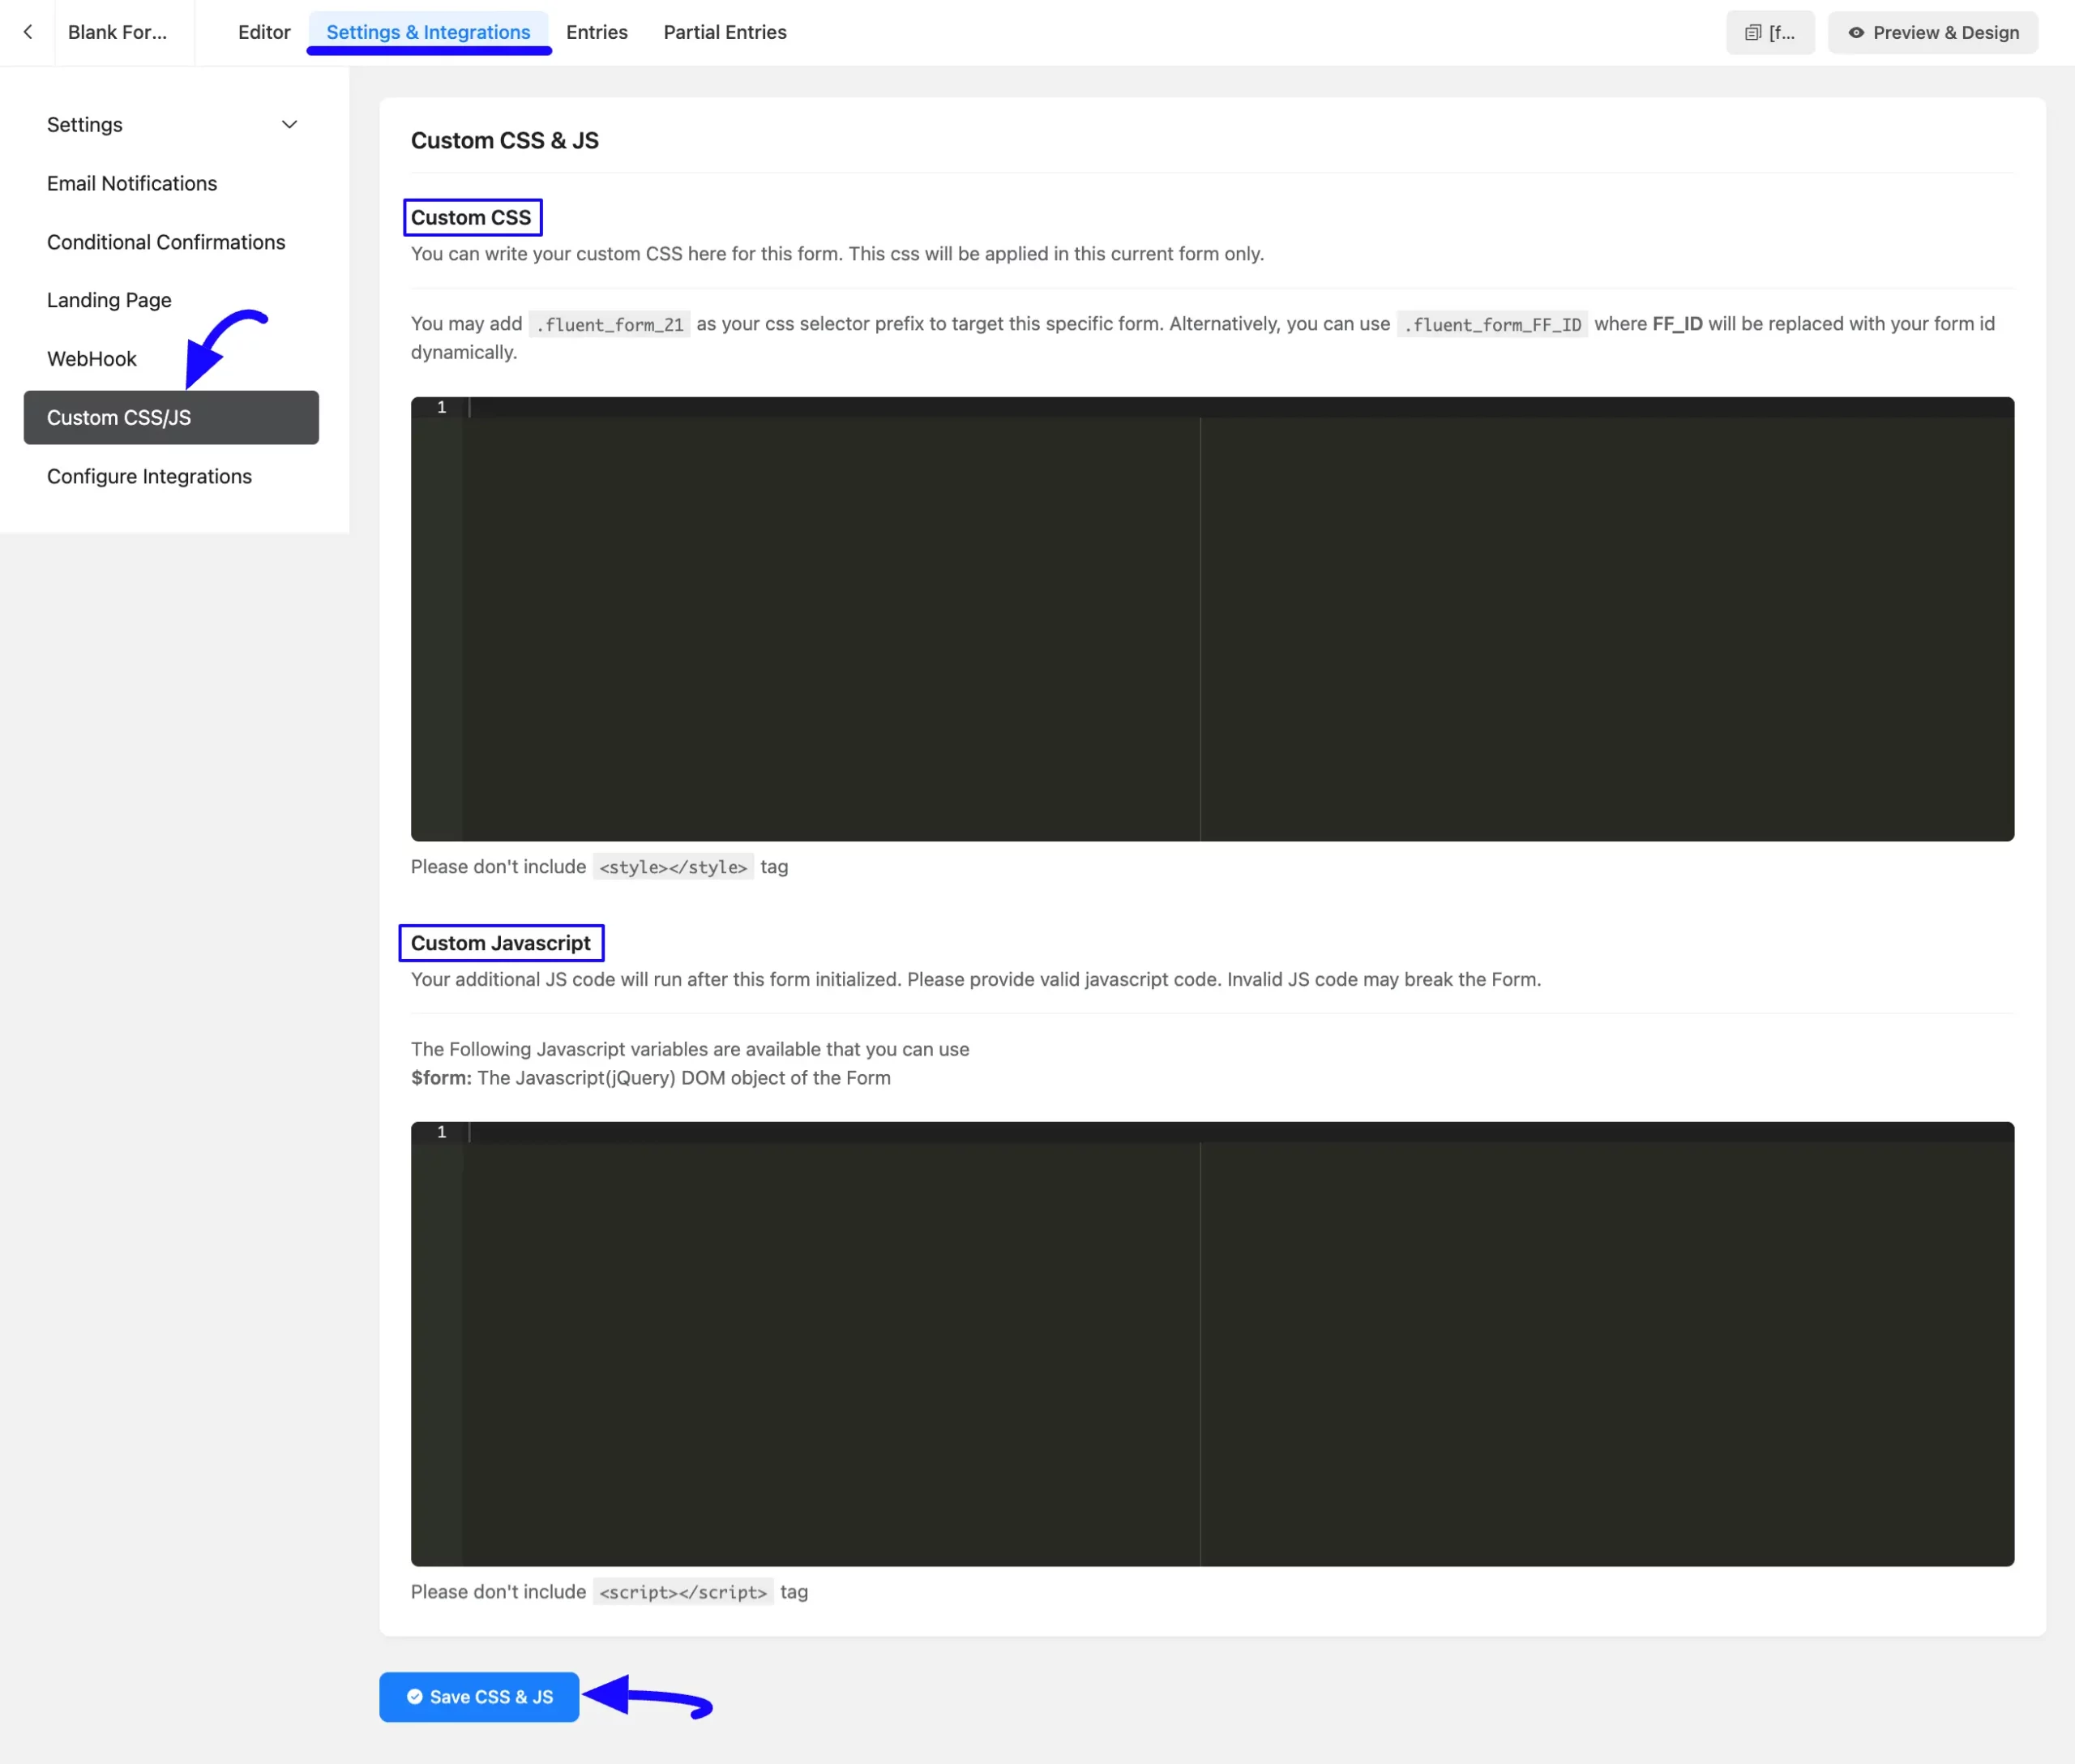
Once you are on the Editor page of your desired form, go to the Settings & Integrations section, and open the Custom CSS/JS tab from the left sidebar. Then, enter the CSS, JavaScript, or Both here according to your requirements.
For example, here, I use the JavaScript only to explaine the process.
window.ff_scroll_top_offset = 20;
In this script, 20 represents a 20-pixel offset. You can adjust this value according to your needs.If 20px does not entirely resolve the problem, experiment with raising or reducing the value until the form scrolls to the required place without being slowed by the sticky header. This change improves the user experience by preventing any elements of your multi-step form from getting lost by a sticky header menu.
Once you are done, press the Save & JS button and the Scroll Offset will be set in your desired forms.
If you have any further questions, concerns, or suggestions, please do not hesitate to contact our @support team. Thank You.


