Sometimes, Fluent Forms users experience email deliverability issues (i.e., their email is not sending to the destination). This means their form users may not receive confirmation emails or other expected notifications. A couple of factors can contribute to email not sending issues.
This article will guide you through troubleshooting and fixing the email deliverability issue with Fluent Forms notifications, ensuring that emails are sent and received properly.
Check Email Notification #
The very first troubleshooting you can do is check whether your Email Notification setting is enabled. To learn how to ensure the email notification is enabled, follow the steps below –
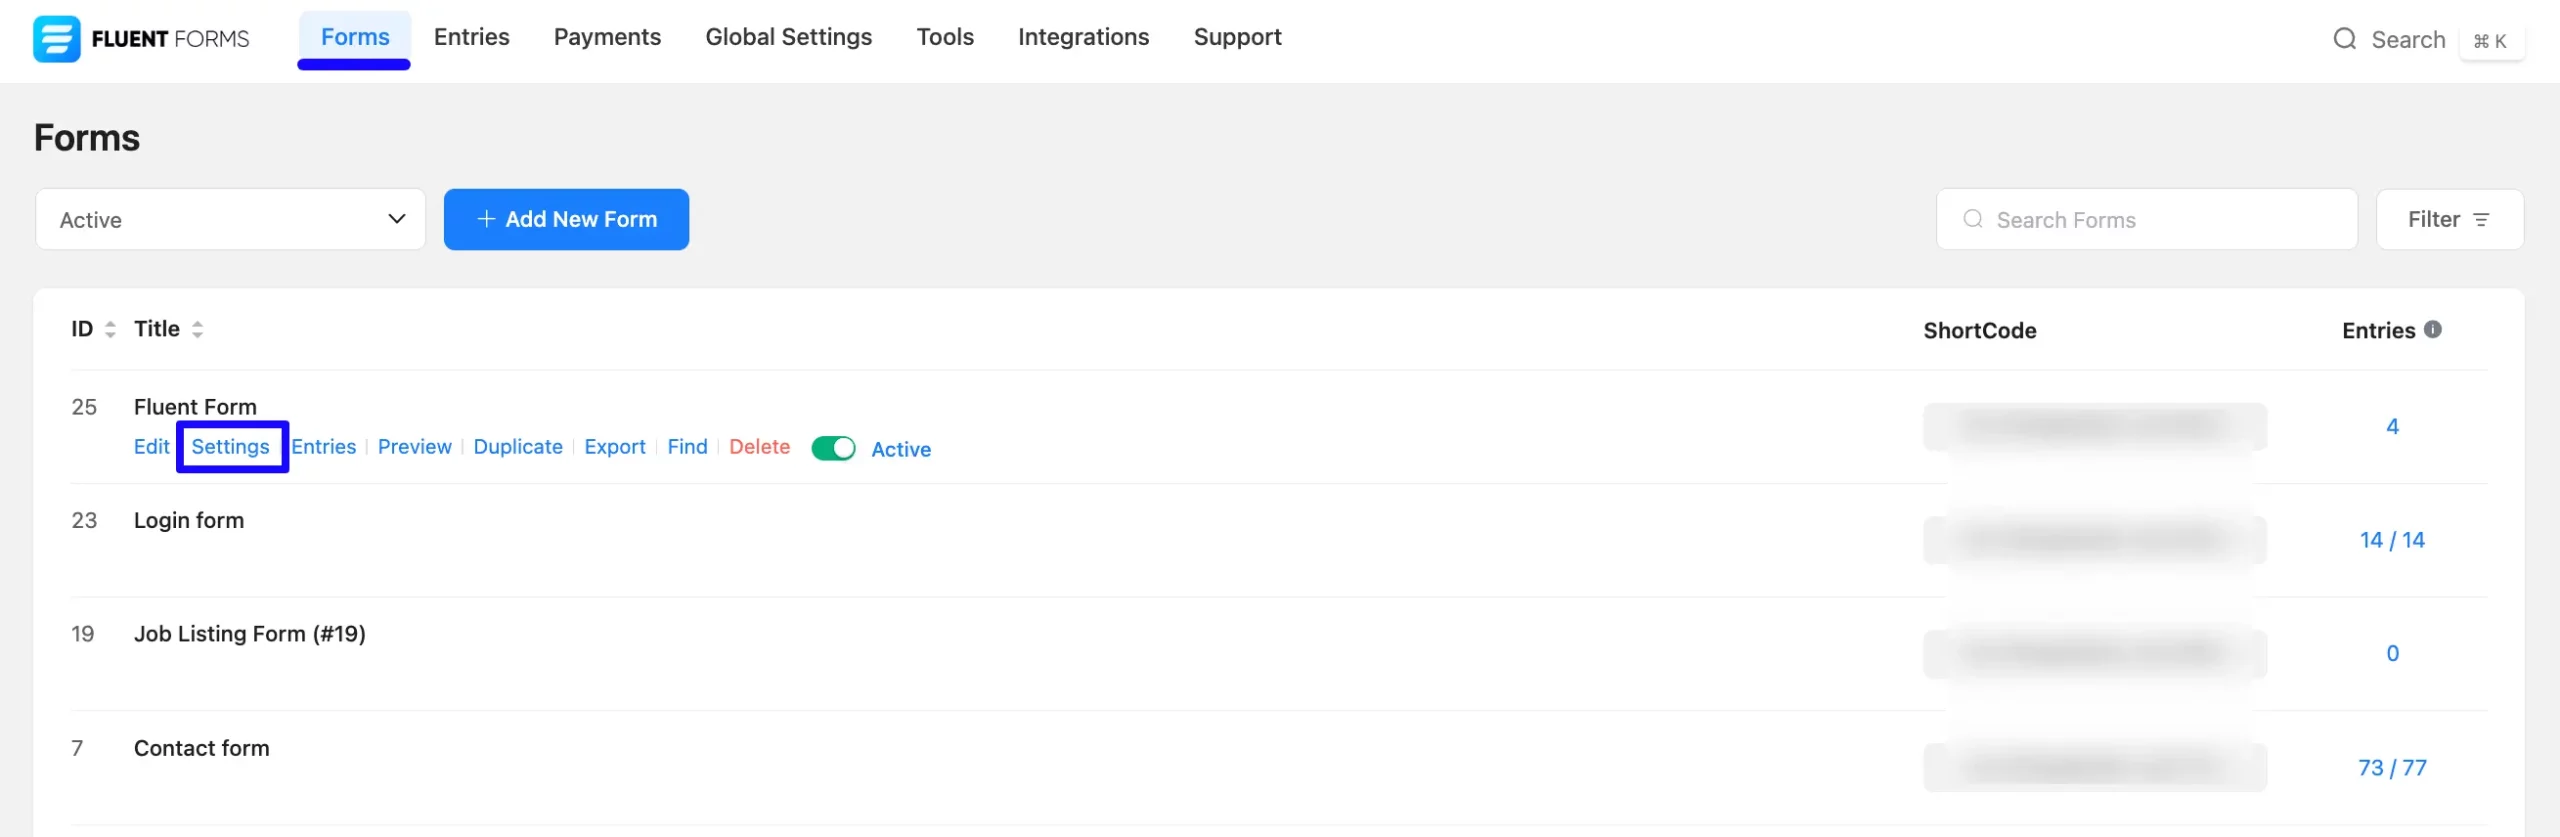
First, go to Forms from the Fluent Forms Navbar and click the Settings of your desired form where you encountered the email deliverability issue.
If you do not have any existing forms, read the Create a Form from Scratch or Create a Form using Templates documentation to create a new one.
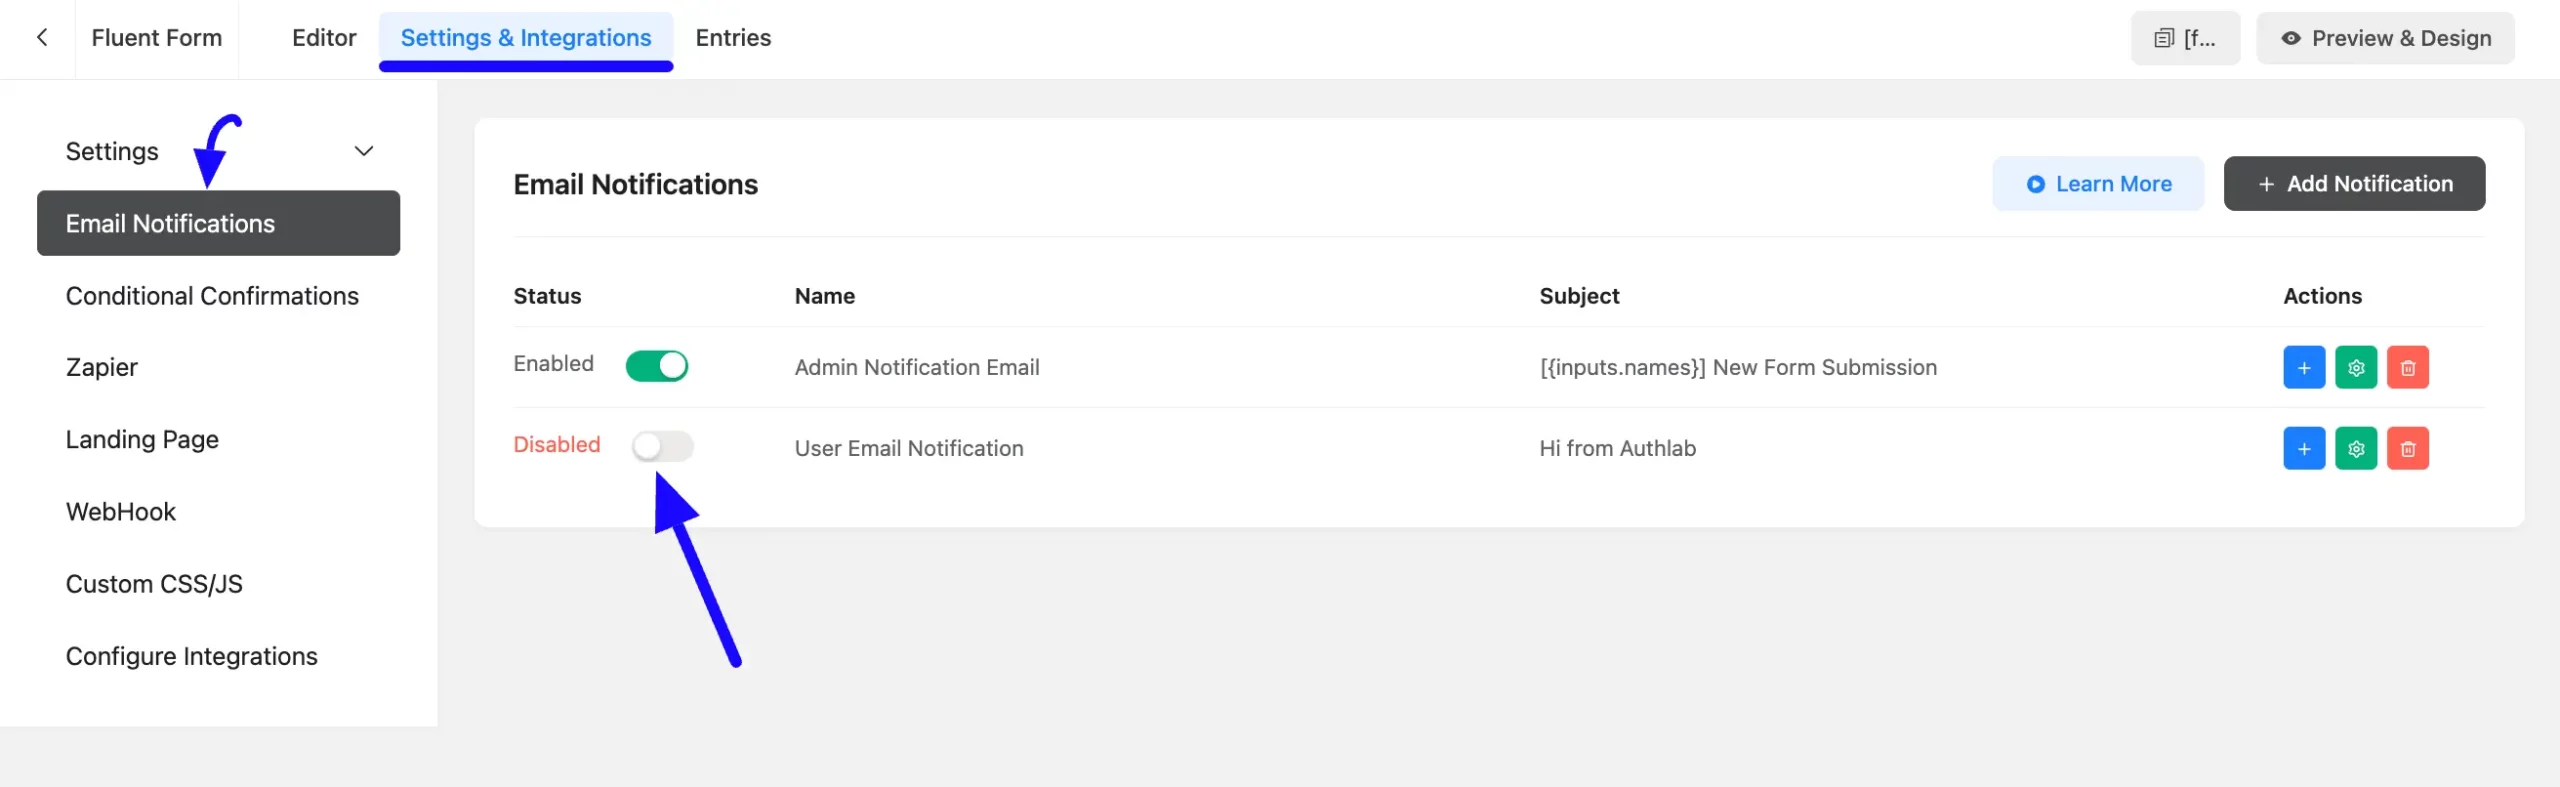
Once you are on the form’s Settings & Integrations page, open the Email Notifications tab from the left side, and you will see all of the Email Notifications you added.
Now, if your desired email notification is showing Disabled, turn on the Toggle switch and the notification will be Enabled.
To learn more detail about Email Notification, read this Documentation.
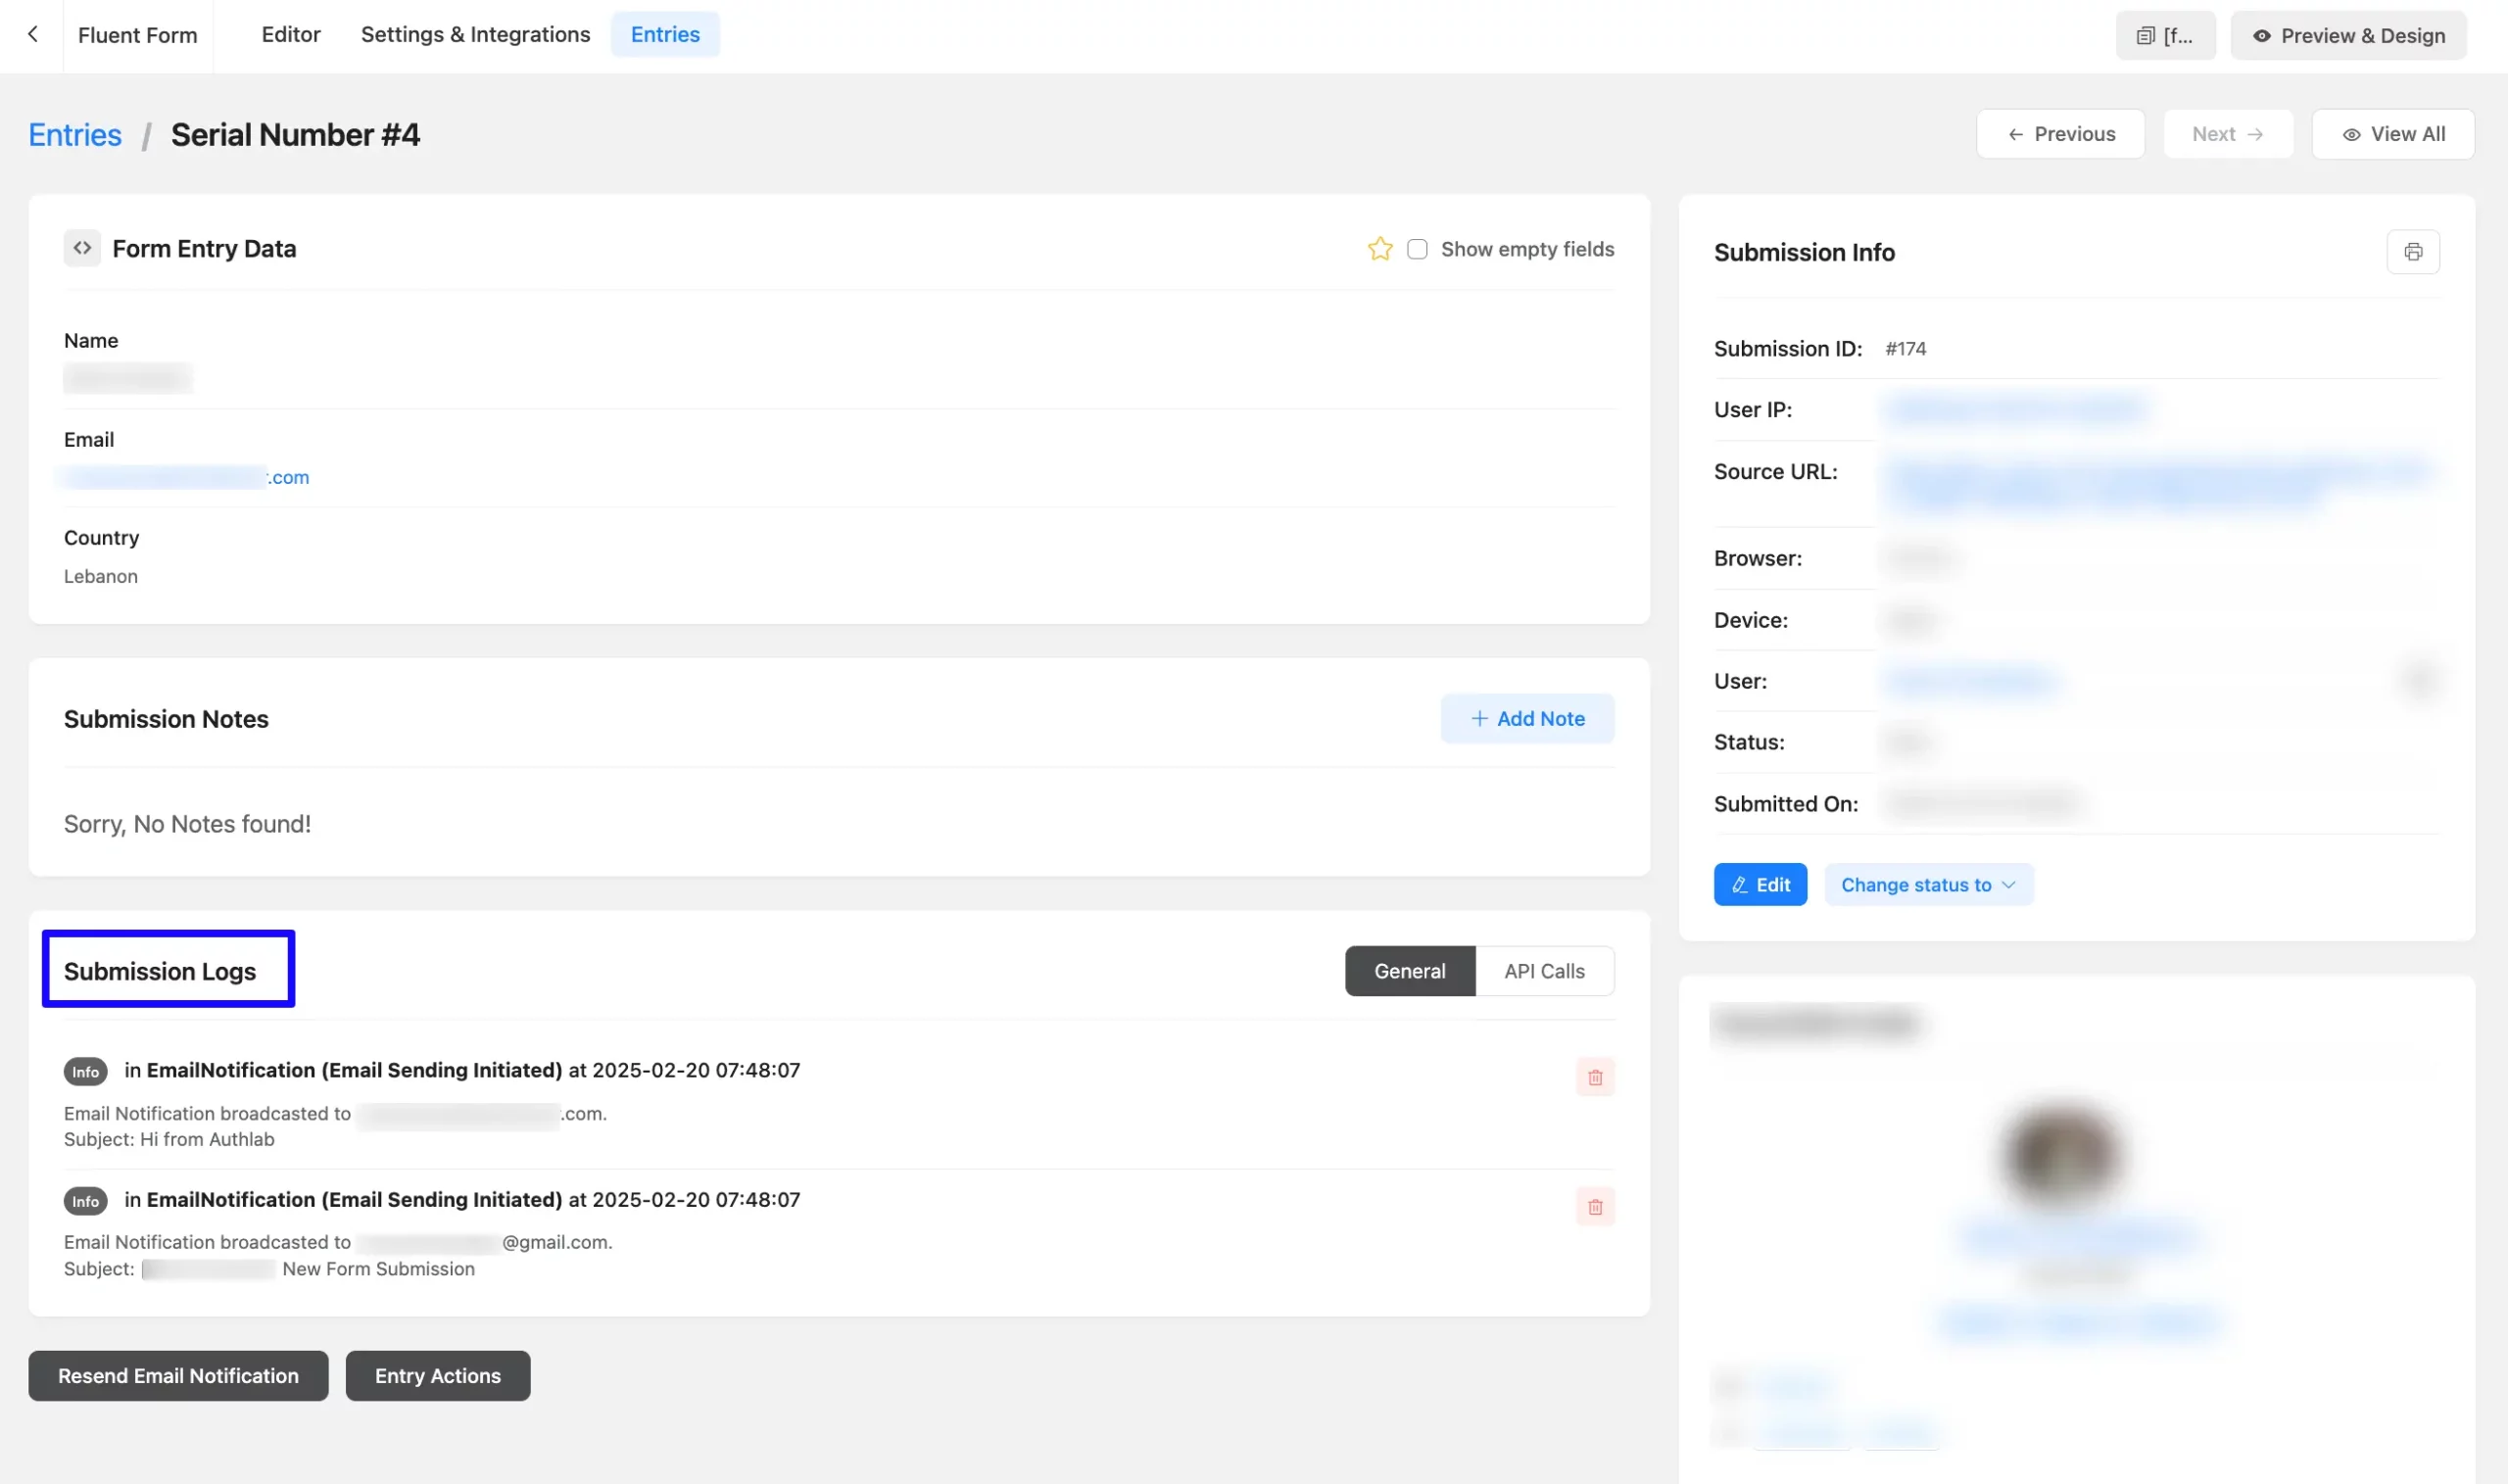
Check Submission Logs #
Check the Submission Logs (which record all submission activities of a form in one place) for the form experiencing email confirmation issues. This may help you determine why the email was not sent to the destination.
To learn how to check the form Submission Logs of a Form, follow the steps below:
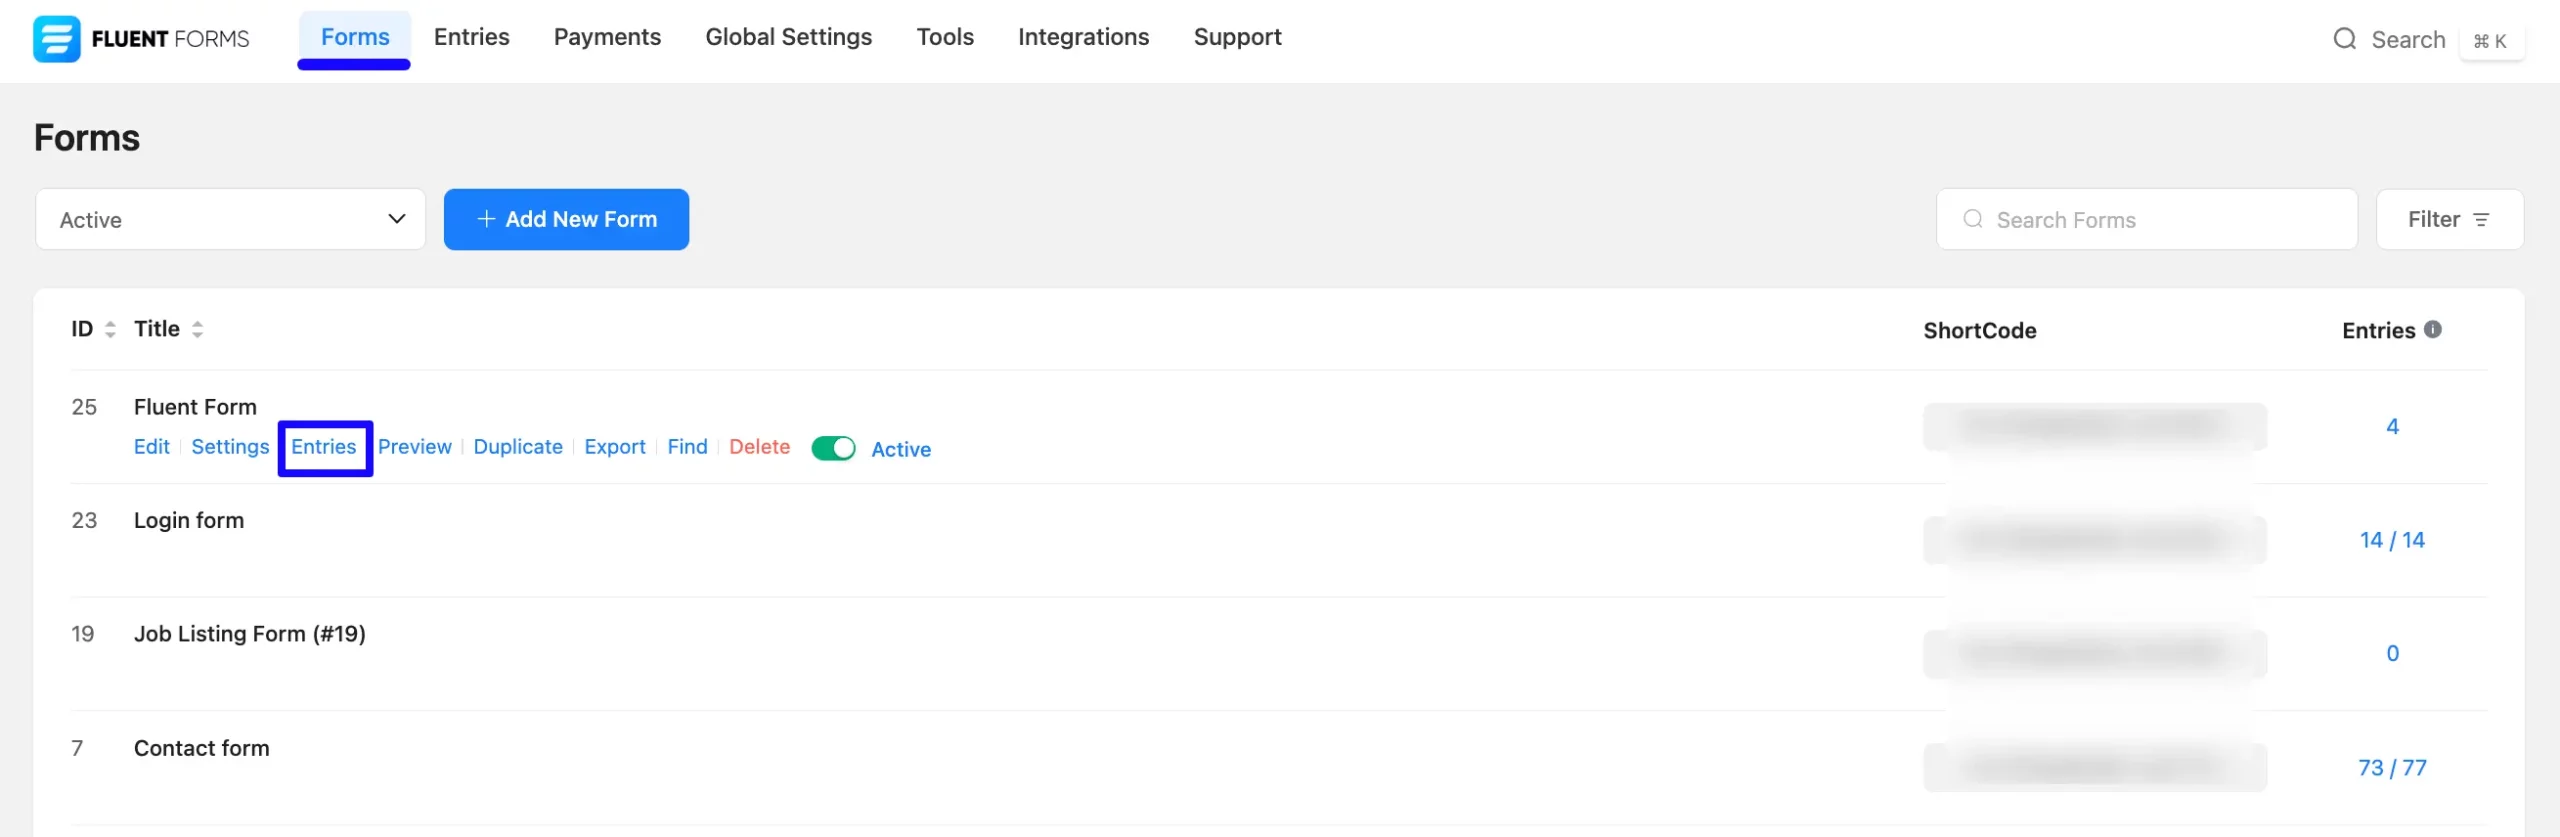
Go to Forms from the Fluent Forms Navbar, click the Entries of a chosen form where you faced the issue, and you will get all the submission entries for this particular form.
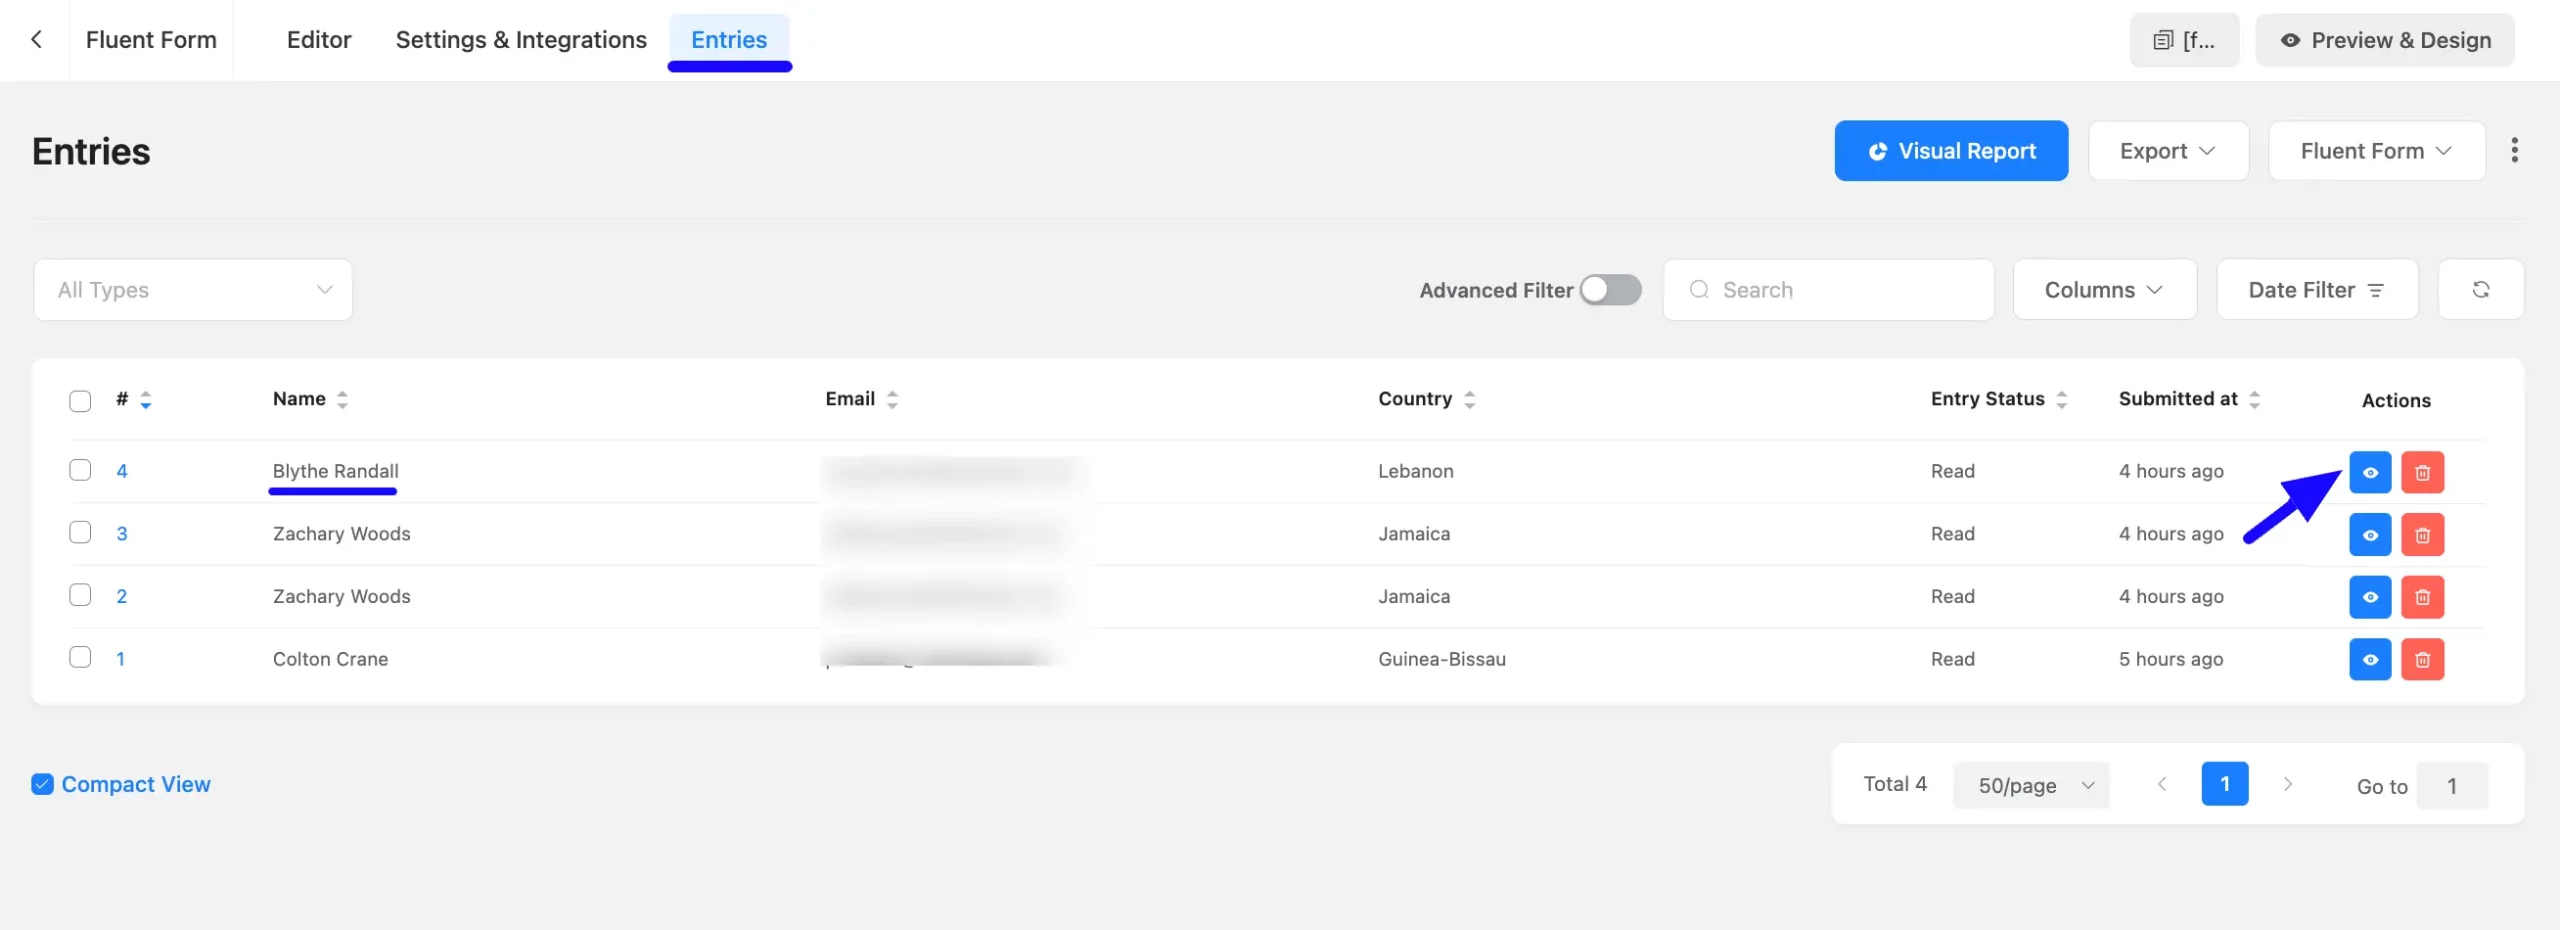
Now, open the submission entry you want to check by clicking the Eye Icon under the Actions column. To learn more details about Form Entries, read this Documentation.
Once you open the desired entry page, scroll down, and you will get your desired Submission Logs for this particular form submission.
To learn more details about submission activity logs and API calls, refer to the Activity Logs and API Logs documentation.
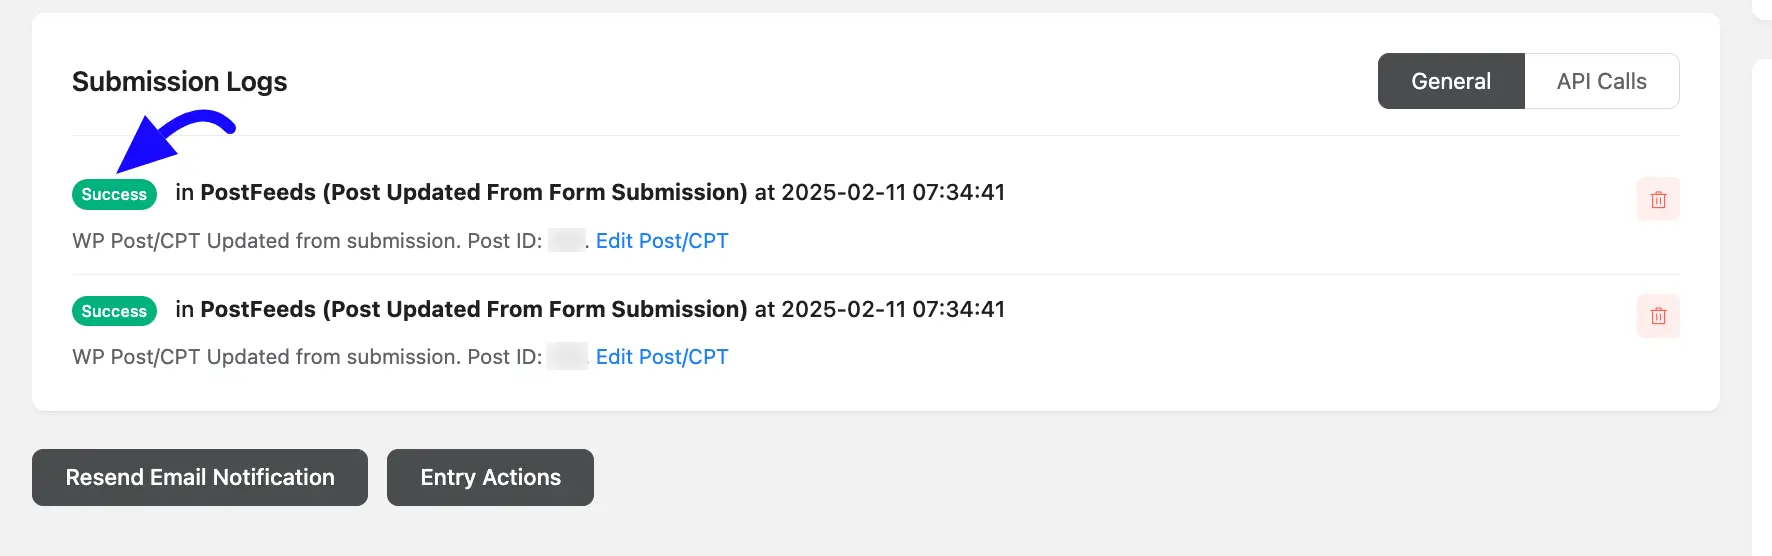
Now, you can see a message as Email Notification broadcasted (i.e., the email is successfully triggered, and Fluent Forms is working as it should).
If the form fails to trigger an email notification, you will see an error message with a “Failed” status under the Submission Logs, explaining the reason for the error.

But if the form successfully triggers the email notification and sends it to the destination, you will see a “Success” status under the Submission Logs.
Check SMTP for Emails #
We always recommend using an SMTP plugin in your WordPress site for better email deliverability. You can try out FluentSMTP, a free SMTP plugin that does not require any license. FluentSMTP ensures real-time email delivery, making sure all emails reach users’ inboxes efficiently. It uses your chosen SMTP server to send emails in batches and can resend emails if they get blocked.
To learn how to install and activate FluentSMTP in your WordPress Site, read this Documentation.
Additionally, to learn how to connect an external server with FluentSMTP, refer to this Documentation.
Test your Email Deliverability with FluentSMTP #
FluentSMTP includes an “Email Test” feature to test if your email connection (SMTP server) is working. This helps you verify your email is functional on your server and confirm the email deliverability. To learn more about email testing, click here.
To learn more about using FluentSMTP, refer to the video below.
If you have any further questions, concerns, or suggestions, please do not hesitate to contact our @support team. Thank you.


