Fluent Forms allows you to configure payment settings both globally and individually for all Payment Forms created with Fluent Forms (e.g., business name and logo, currency, payment history, receipt page, etc.).
This article will guide you through setting up the Payment Settings for all Payment Forms globally.
Configuring Payment Settings Globally #
To learn how to configure the Payment Settings globally for all your payment forms, follow the steps with the screenshots below –
First, go to Global Settings from the Fluent Forms Navbar, open the Payment tab from the left sidebar, click the Settings option, and three options appear. These are:
- General
- Currency
- Pages & Subscription Management
All three options are explained below:
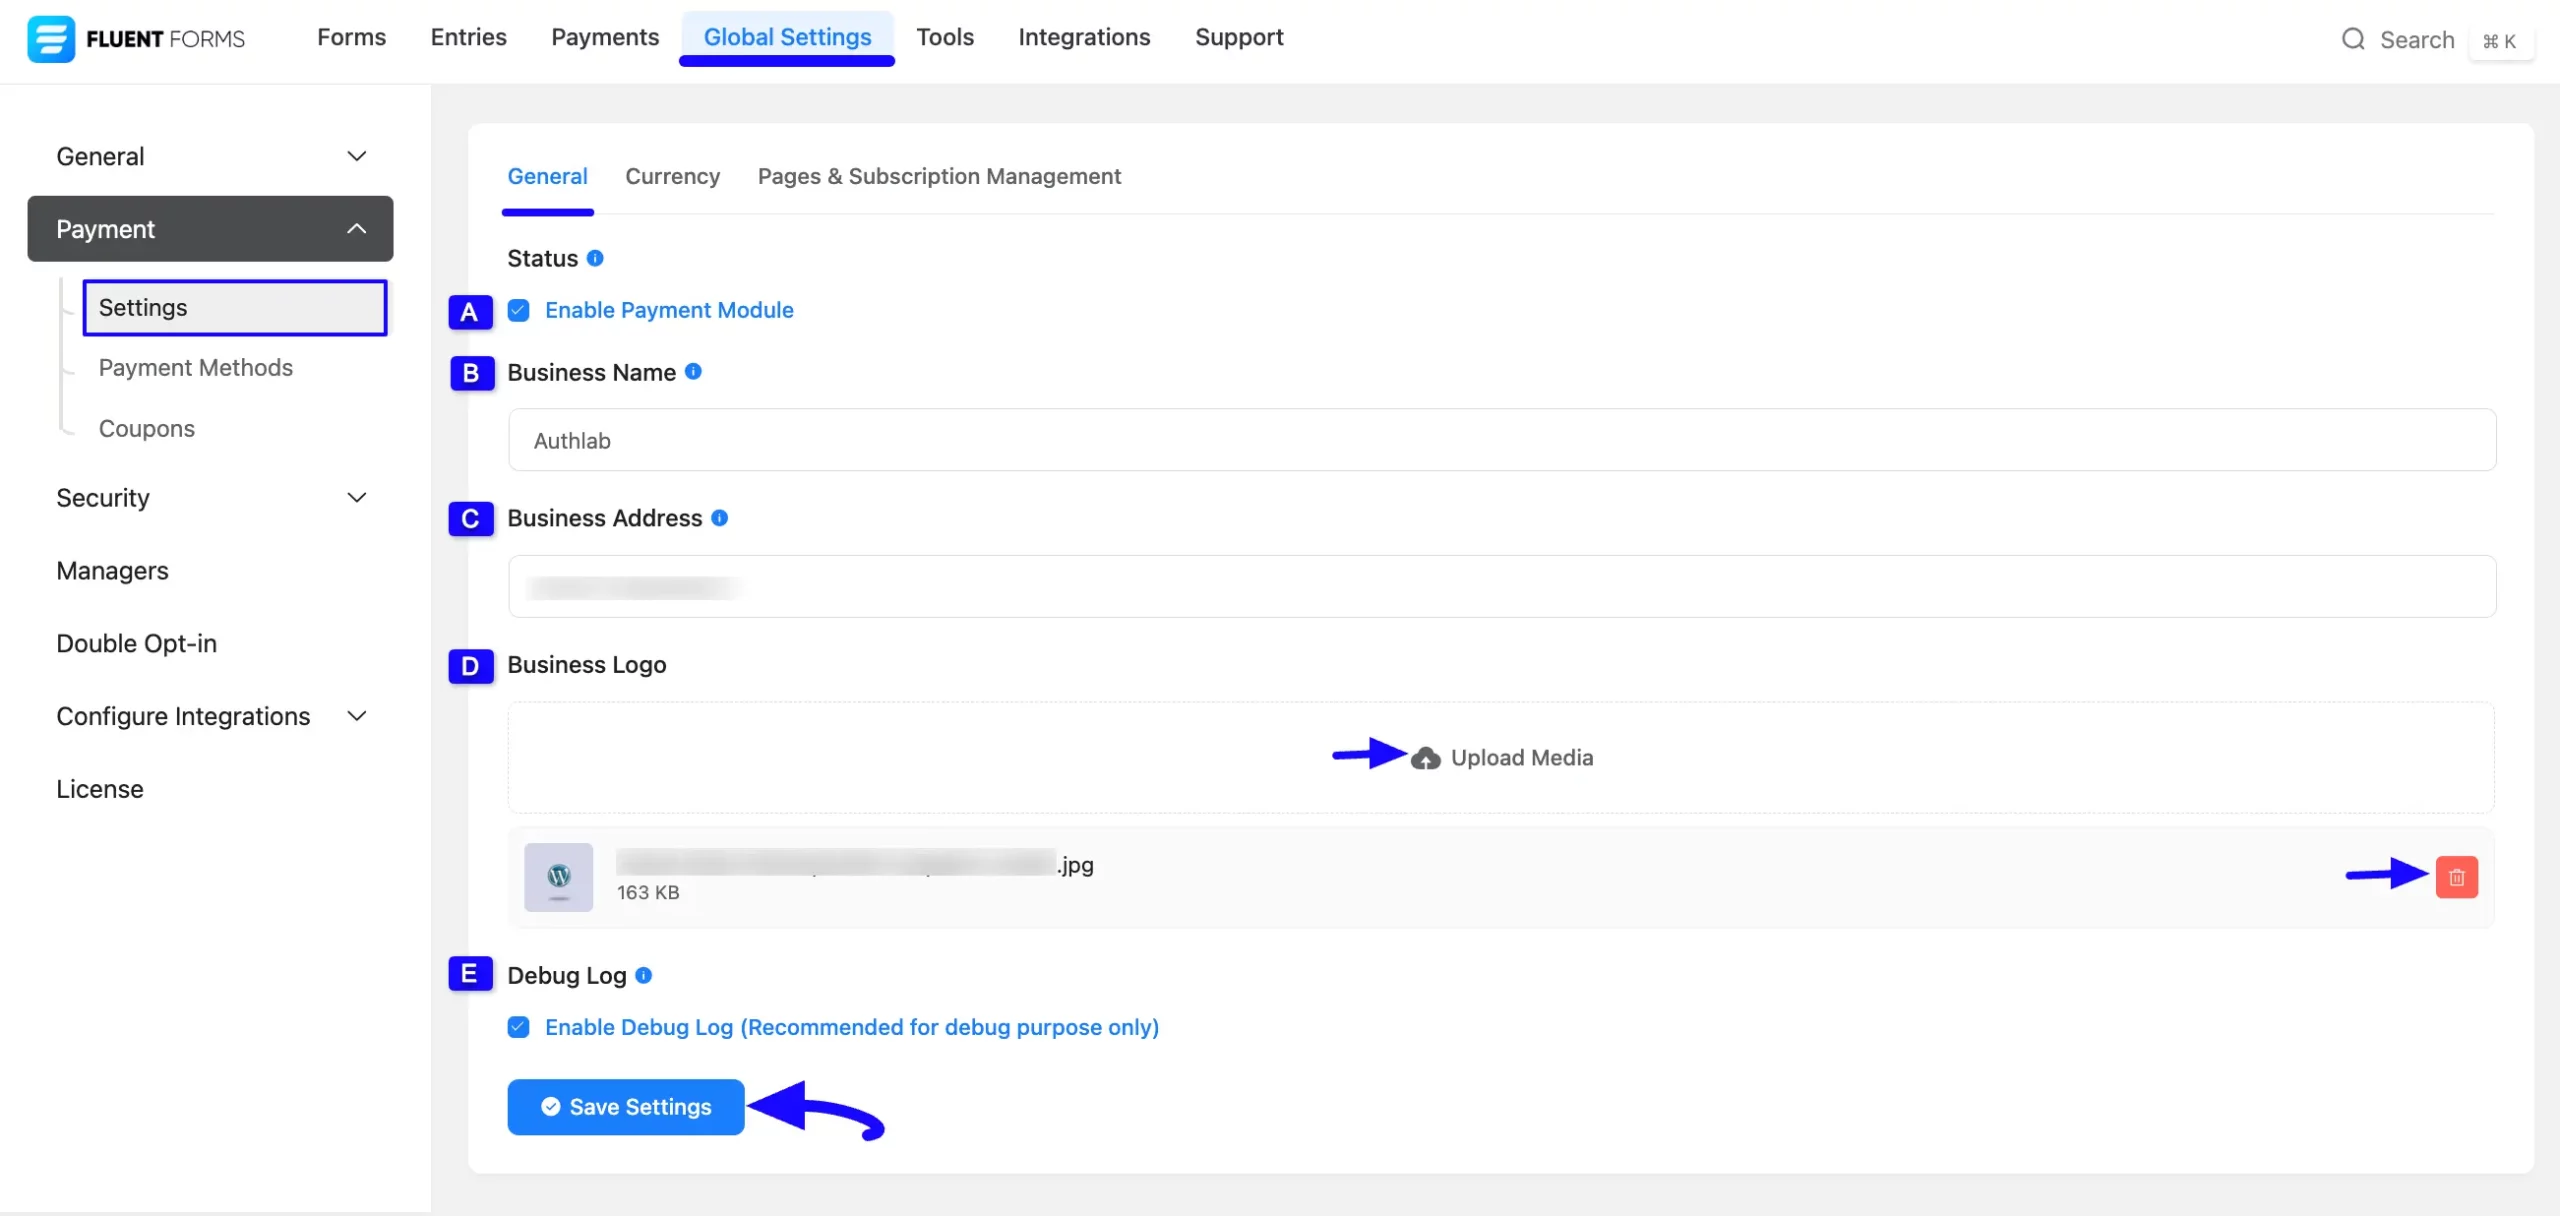
1. General #
Under this tab, you will get the following options to configure your payment settings. Remember, this General Setting will function globally for all Fluent Forms.
A. Enable Payment Module: This option is enabled by default, giving you access to the Payment Module (i.e., all payment-related input fields) among all forms. If you uncheck the box, the Payment Module will be disabled for all forms. But if you want to accept payment through Fluent Forms, you need to keep it enabled.
B. Business Name: Here, you can provide your business name. It will be used for the Payment method’s business name when redirected to checkout.
C. Business Address: Here, you can provide your full business address, including street, city, zip, state, and country.
D. Business Logo: Here, you can add your business logo using the Upload Media button and delete it anytime if needed by clicking the Trash Icon.
E. Debug Log: Enable this option only for test purposes. Once you enable this, Fluent Forms will debug IPN and Payment errors in the log.
Once you are done, click Save Settings to save the configuration.
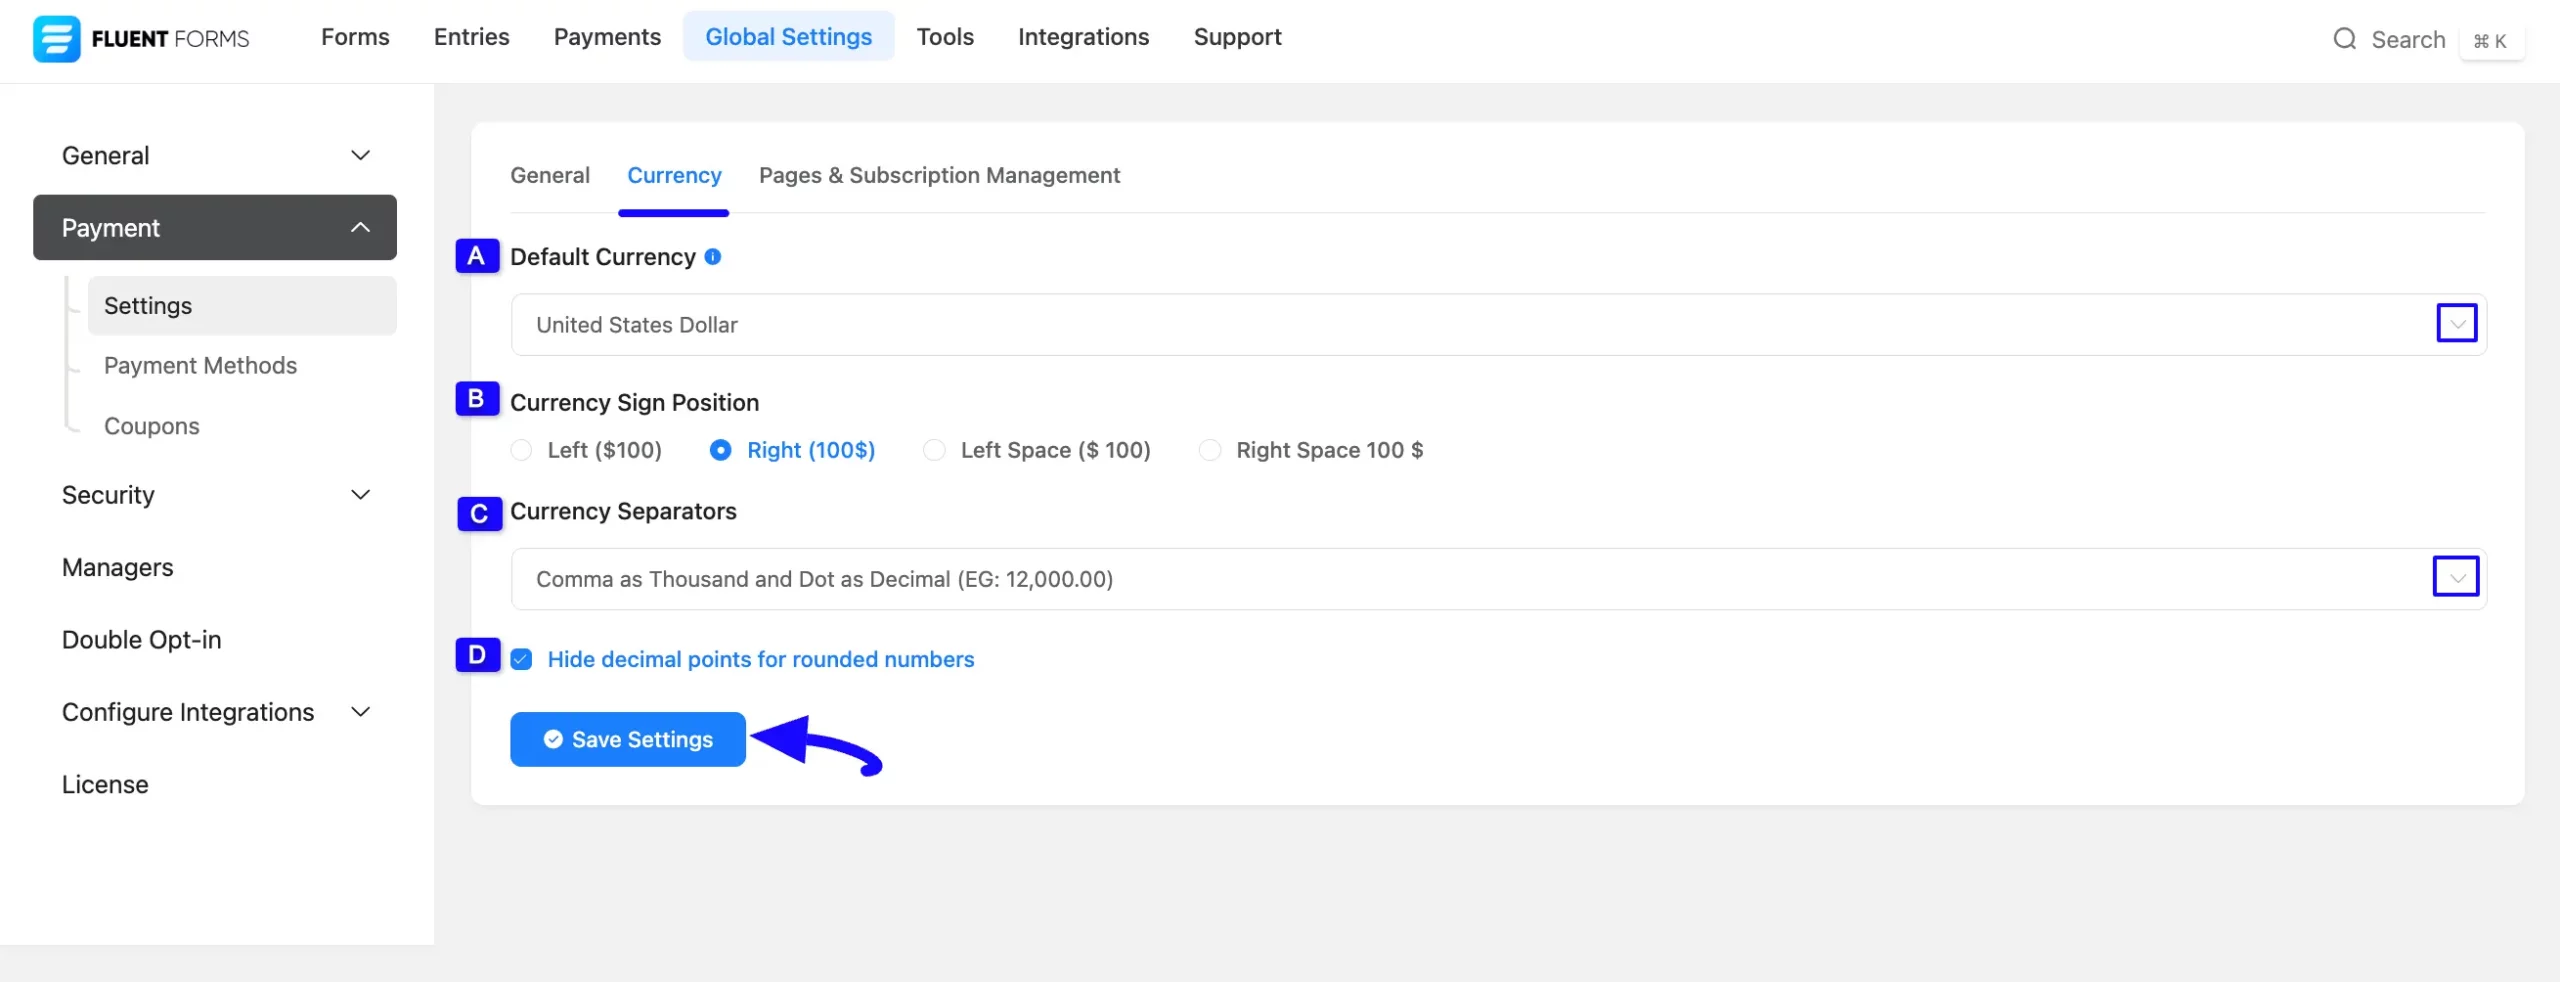
2. Currency #
Under this tab, you will get the following options to define your currency settings globally. Remember, this Currency setting will function globally for all Fluent Forms.
A. Default Currency: Here, you can set the desired default currency type globally for your payment forms using the dropdown list. You can also set your currency for a specific form using the form’s payment settings.
B. Currency Sign Position: Here, you can set the currency sign position according to your requirements by clicking the checkbox, e.g., I choose the Right (100$) option.
C. Currency Separators: Here, you will get two types of currency separators from the dropdown list. Choose anyone according to your needs.
D. Hide decimal points for rounded numbers: Check this box if you don’t want decimal points if the currency figure is rounded.
Once you are done, click Save Settings to save the configuration.
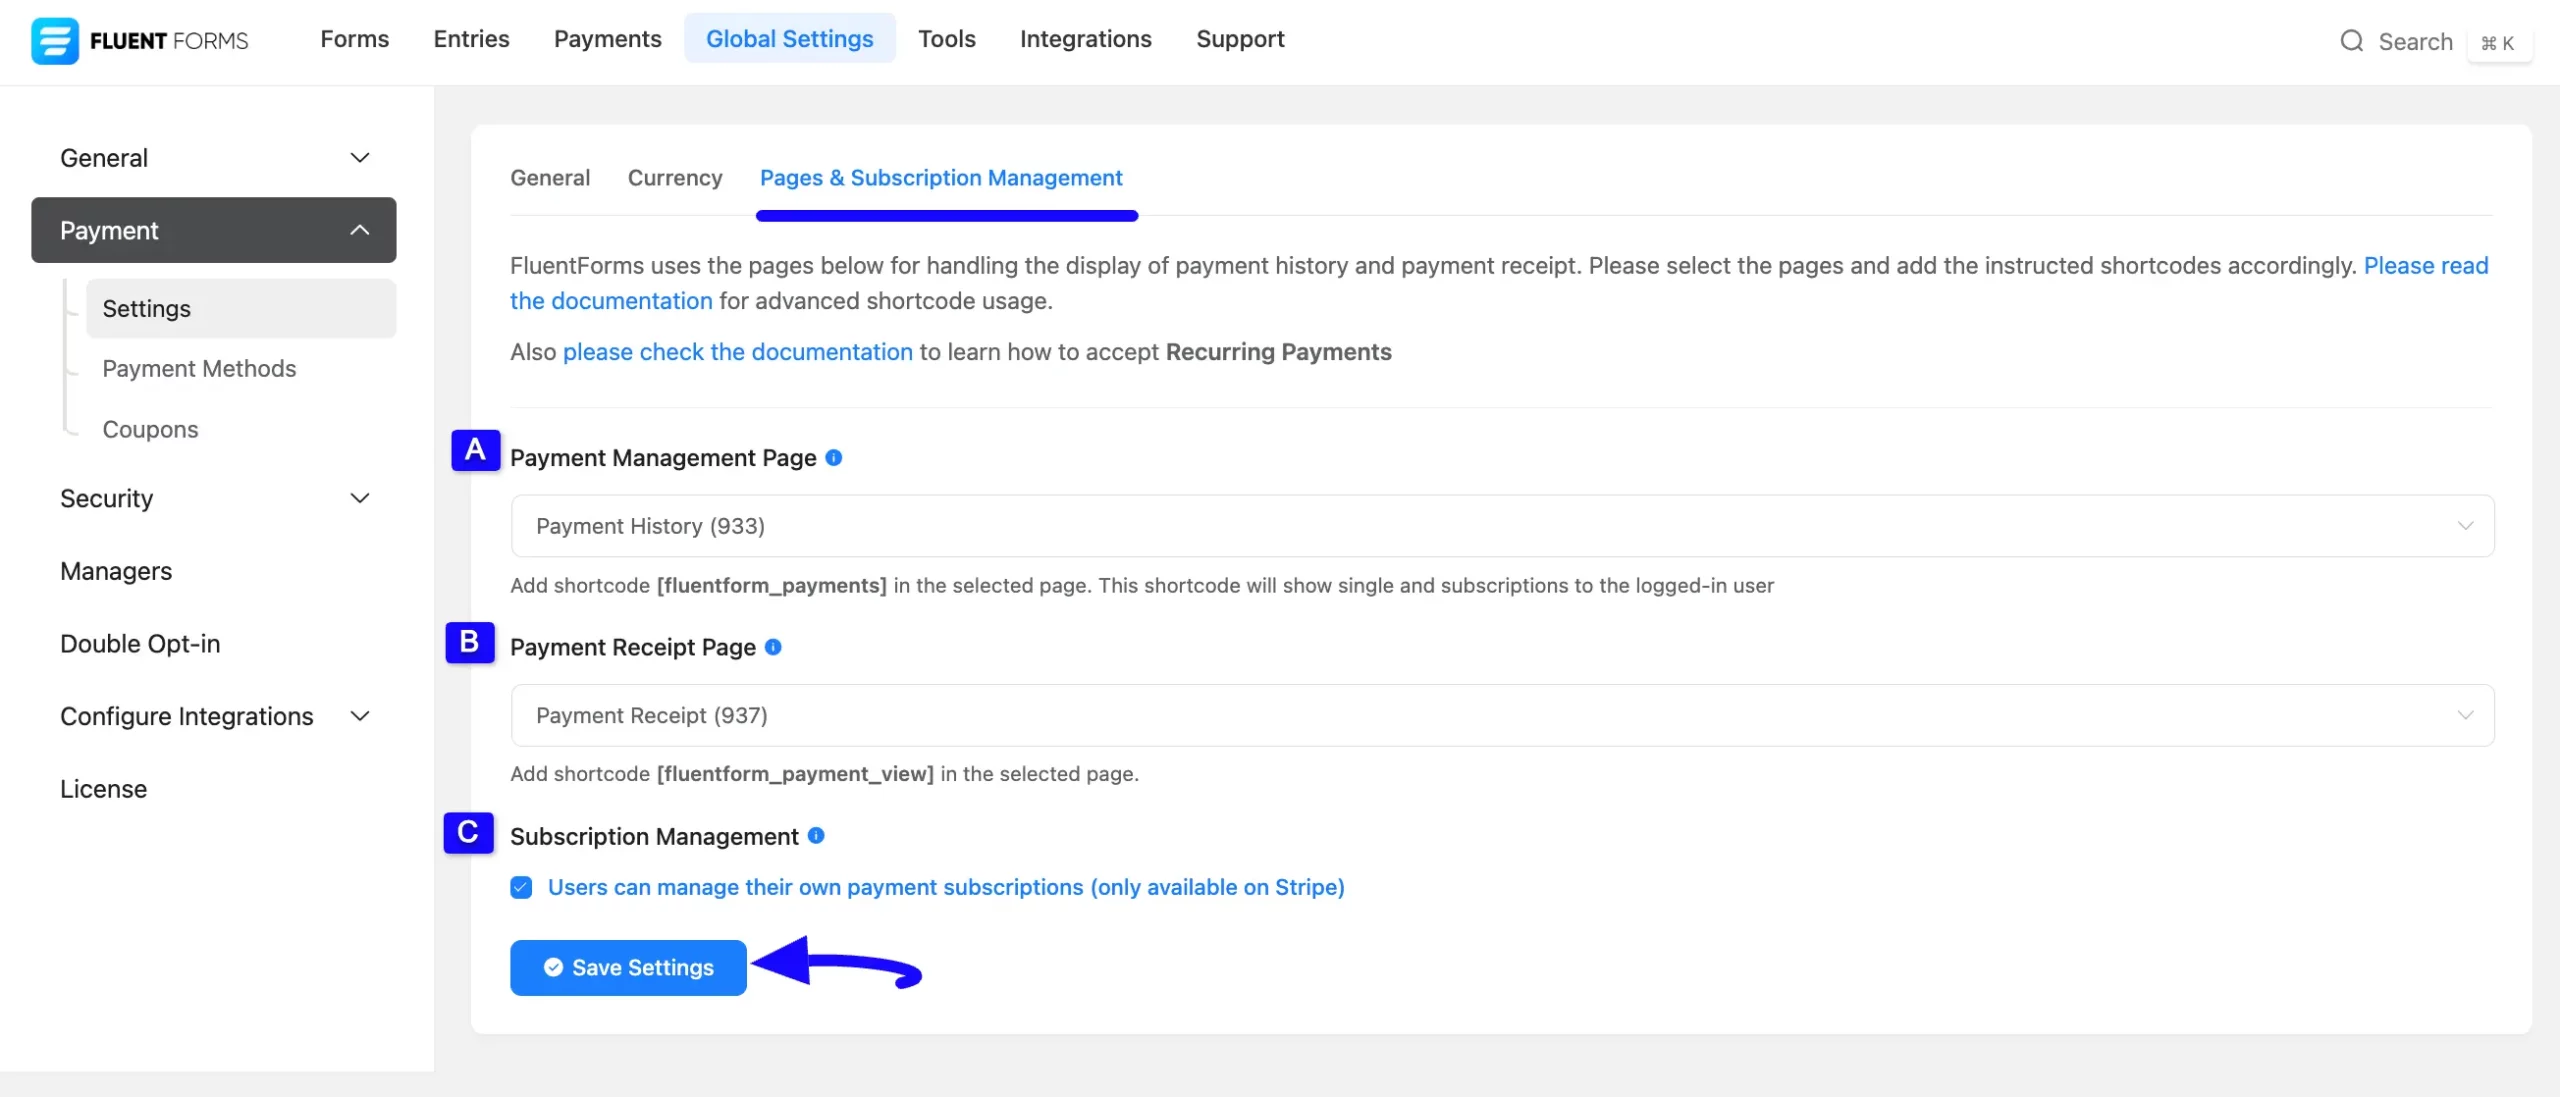
3. Pages & Subscription Management #
Under this tab, you will get the option to display your Payment History and Payment Receipt on your desired pages. Also, you can enable Subscription Management for Stripe only.
Remember, this setting also functions globally for all Fluent Forms.
Once you are done, click Save Settings to save the configuration.
All the settings mentioned above are briefly explained below:
A. Payment (History) Management Page #
Through this option, you can select an existing desired page where only the logged-in users can see their Payment History (i.e., single payments and subscriptions).
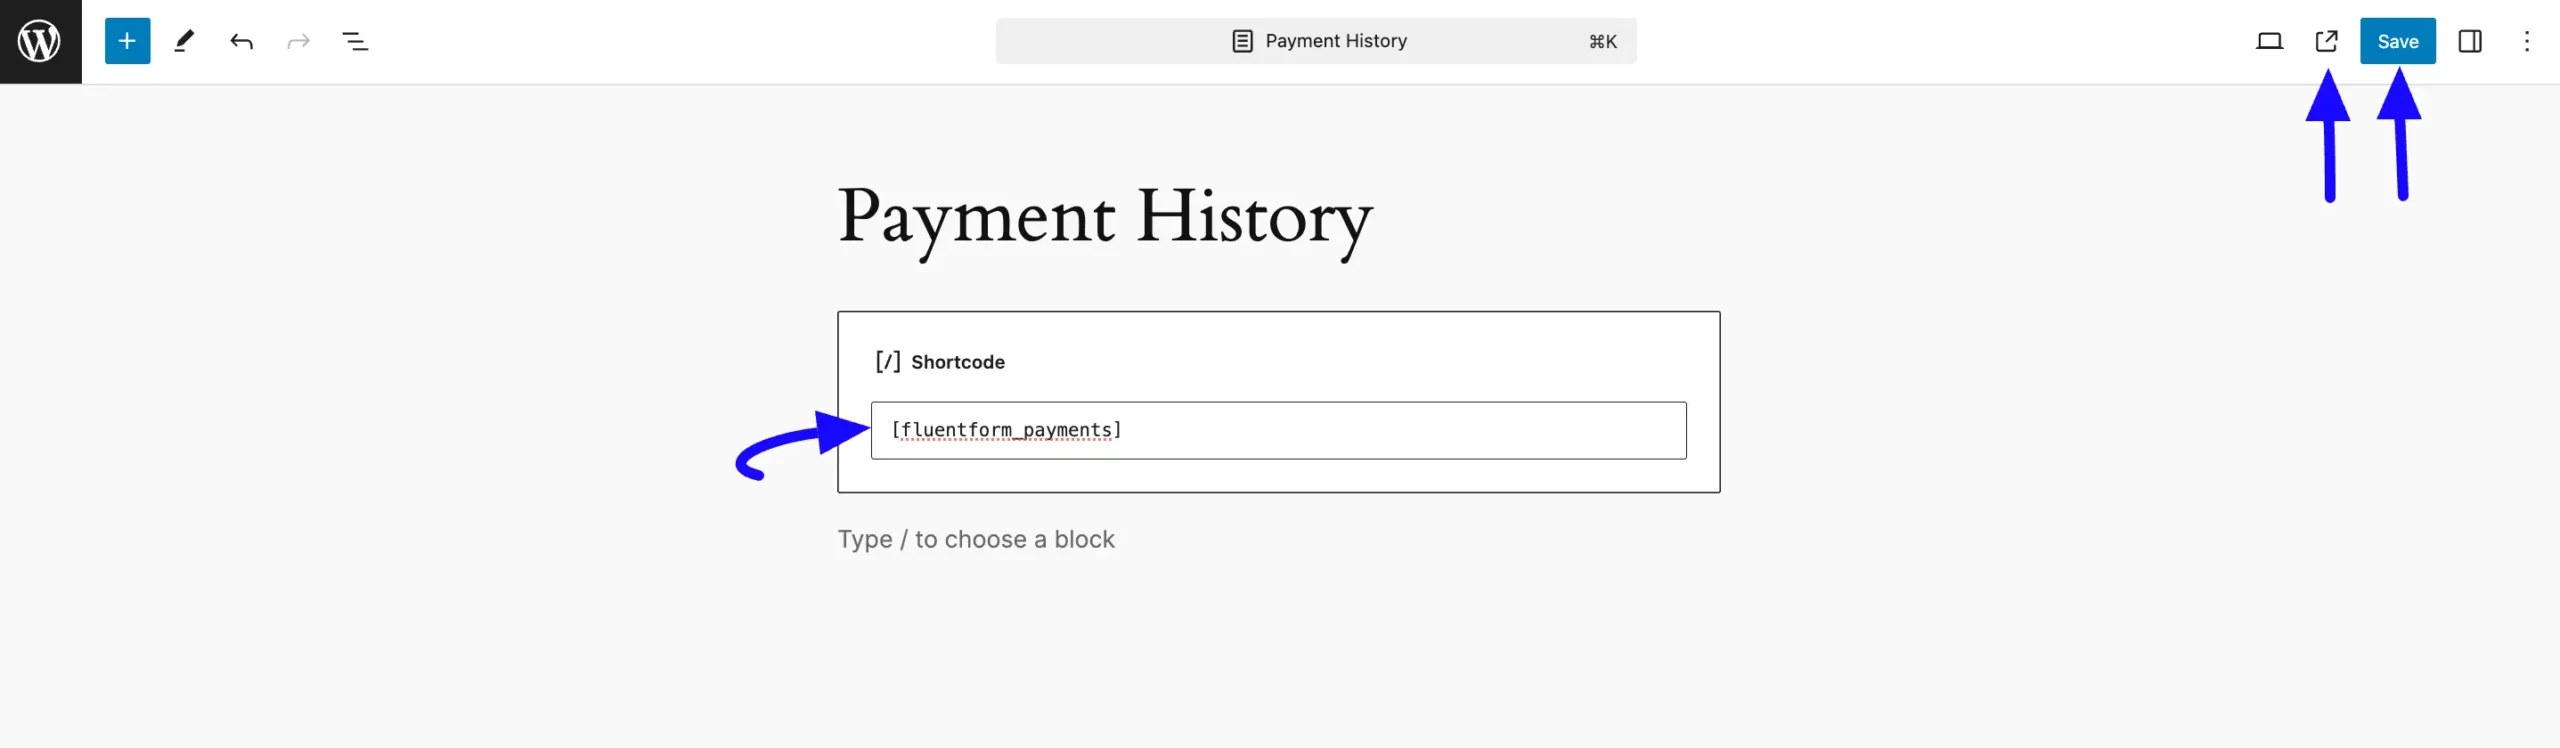
You can also add the Payment History using this shortcode on the selected page.
Then, click the Save button to save all the changes, and press the Preview button in the middle to see the form preview.
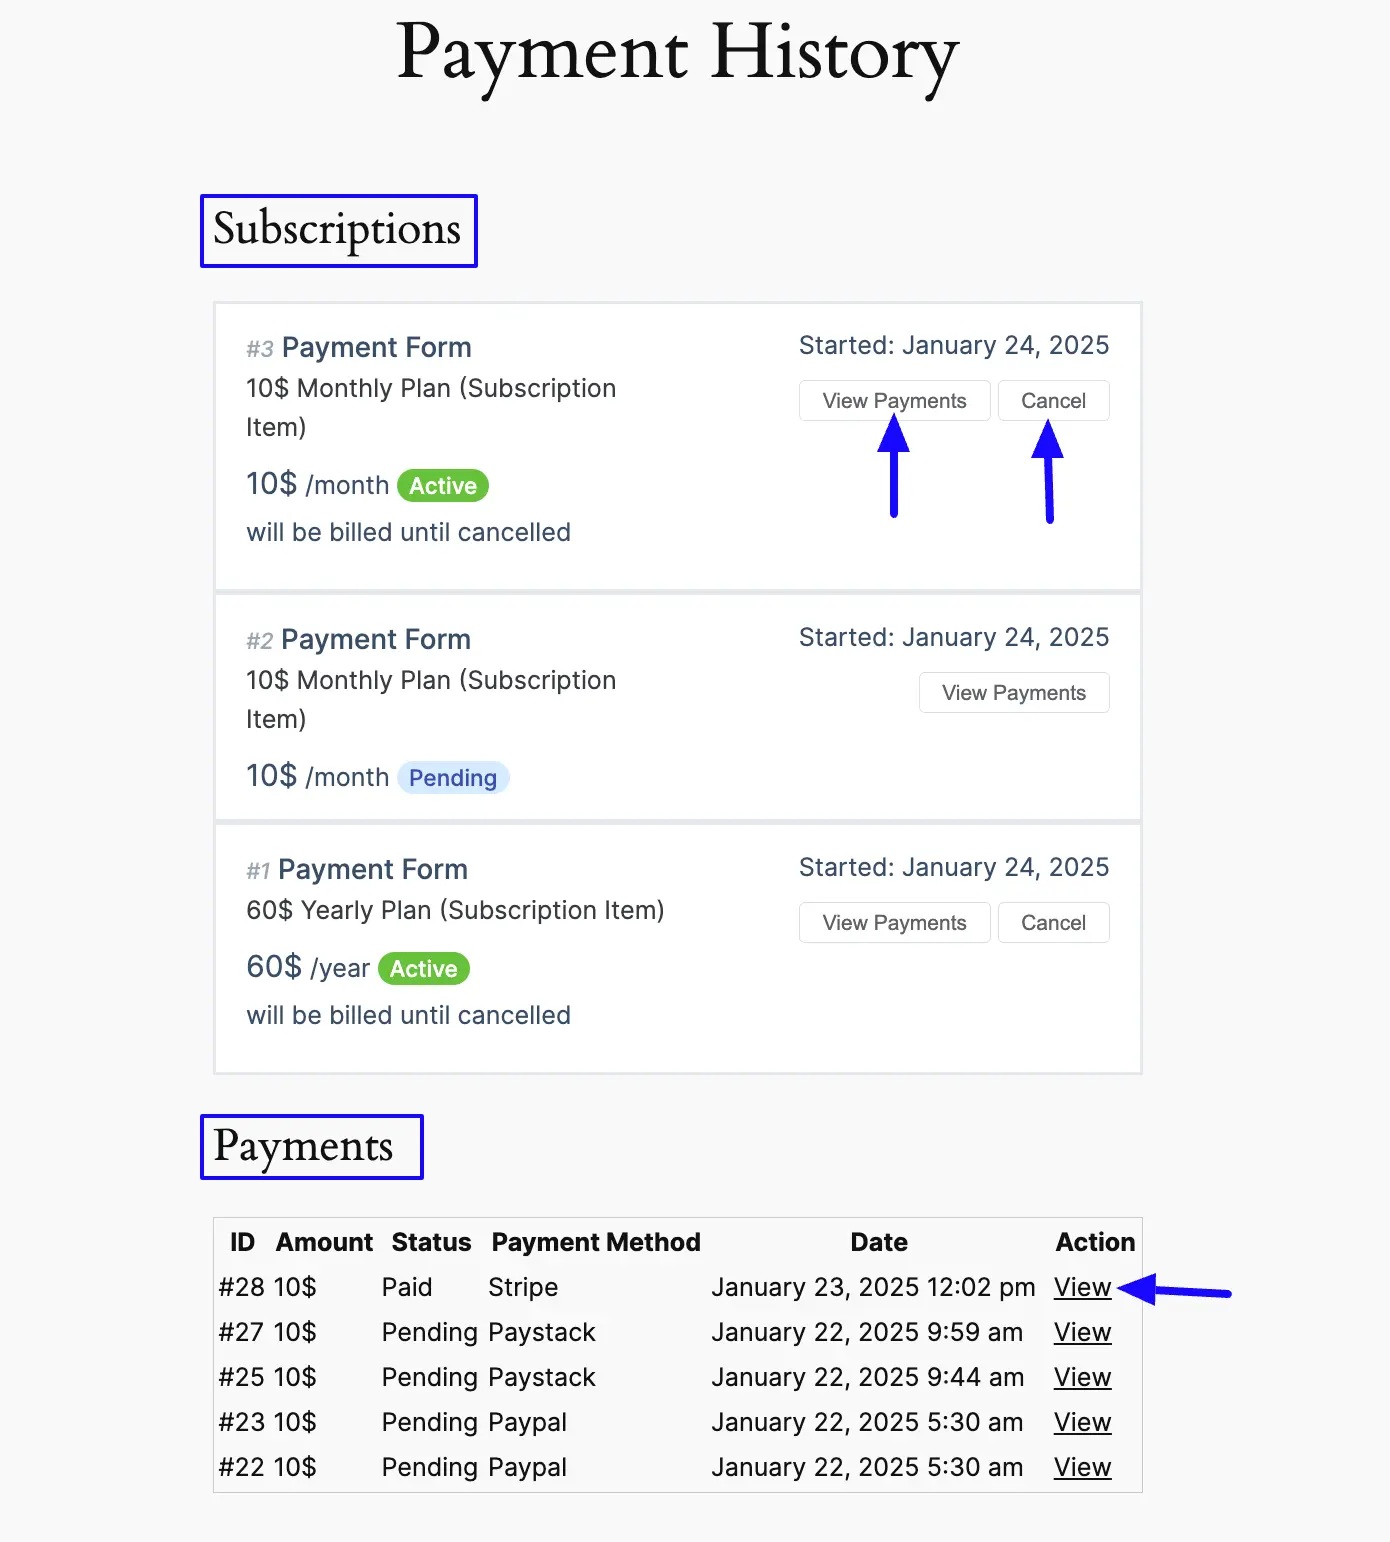
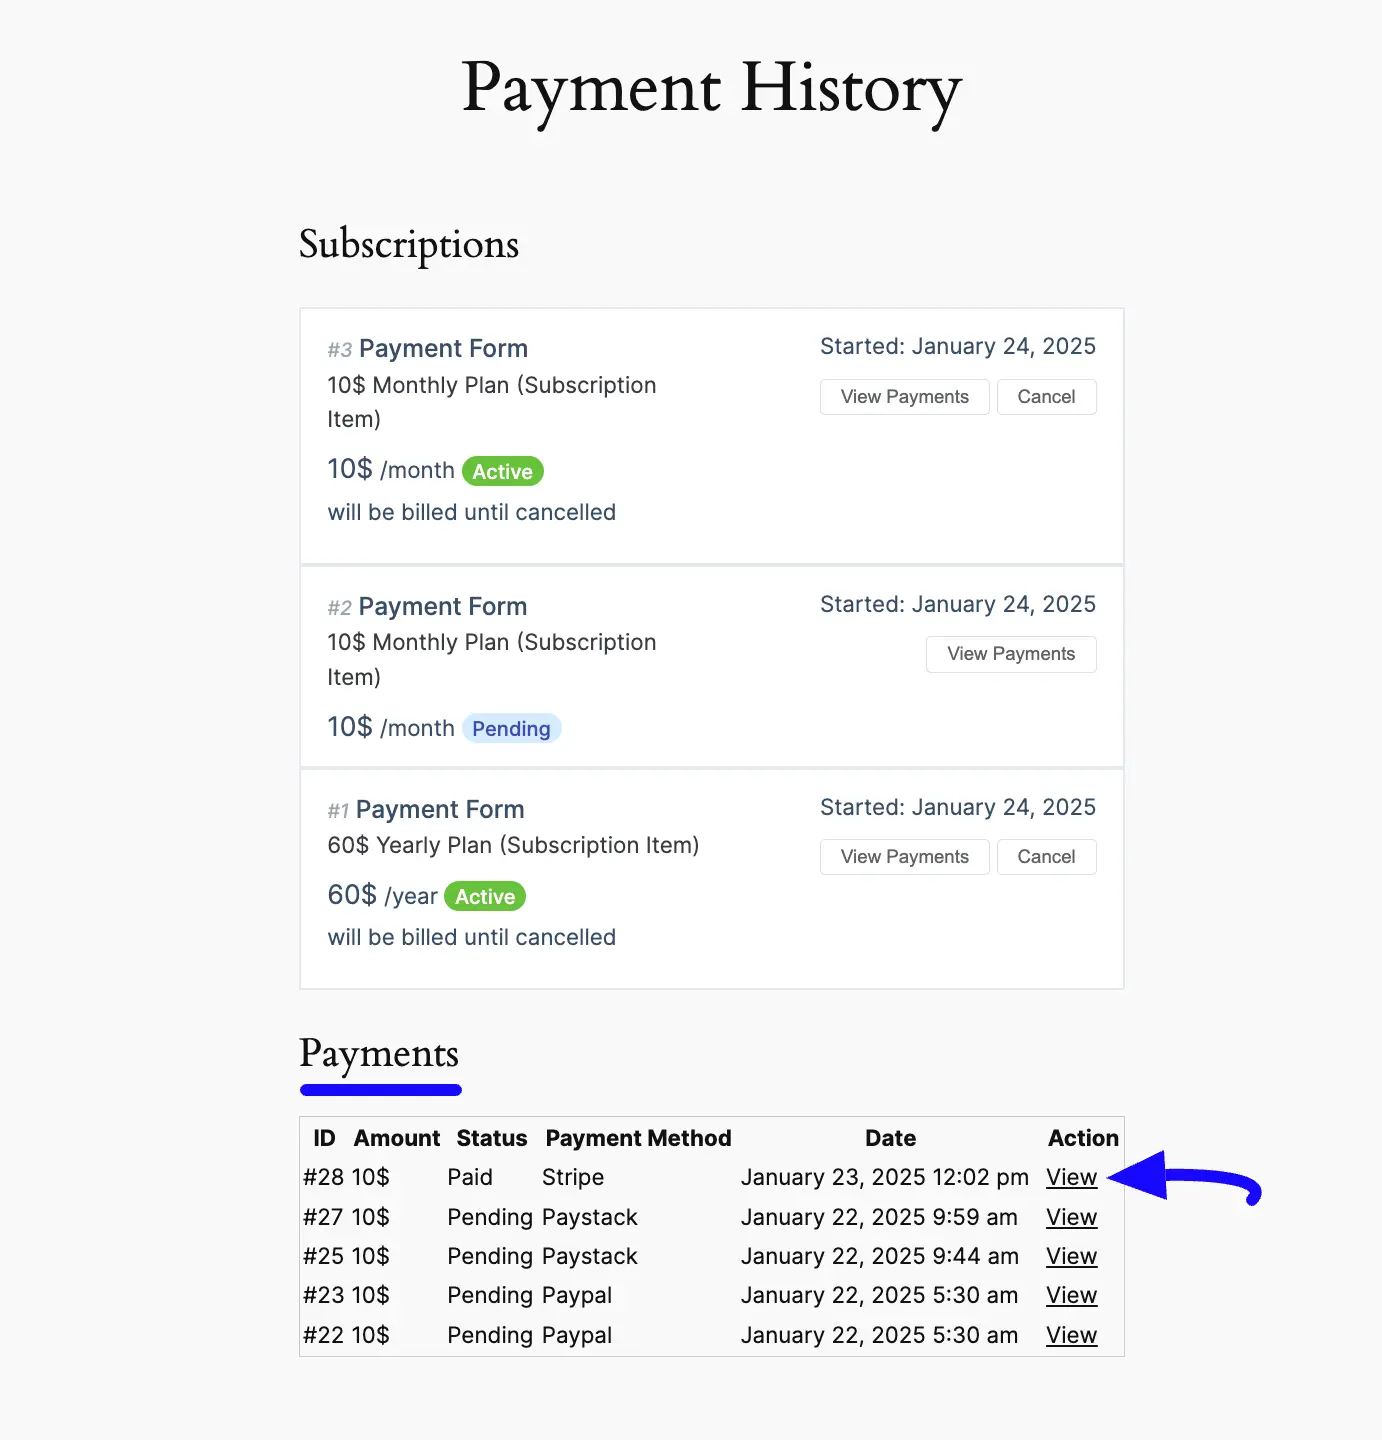
Here, you can see the Preview of the Payment History Page where you will get the following options.
- Subscriptions: Under this section, only the logged-in users can see the Payment History of each Subscription of their payment forms. Plus, here, you can see the payment-related details by clicking the View Payments button in the left corner. Also, users can cancel their subscriptions anytime if needed by clicking the Cancel button
- Payments: Under this section, only the logged-in users can see the Payment History of each single payment of their payment forms. From here, you can see the individual Payment Receipt by clicking the View link.
B. Payment Receipt Page #
Through this option, you can select an existing desired page where users can view their payment receipts, and manage single & subscription payments.
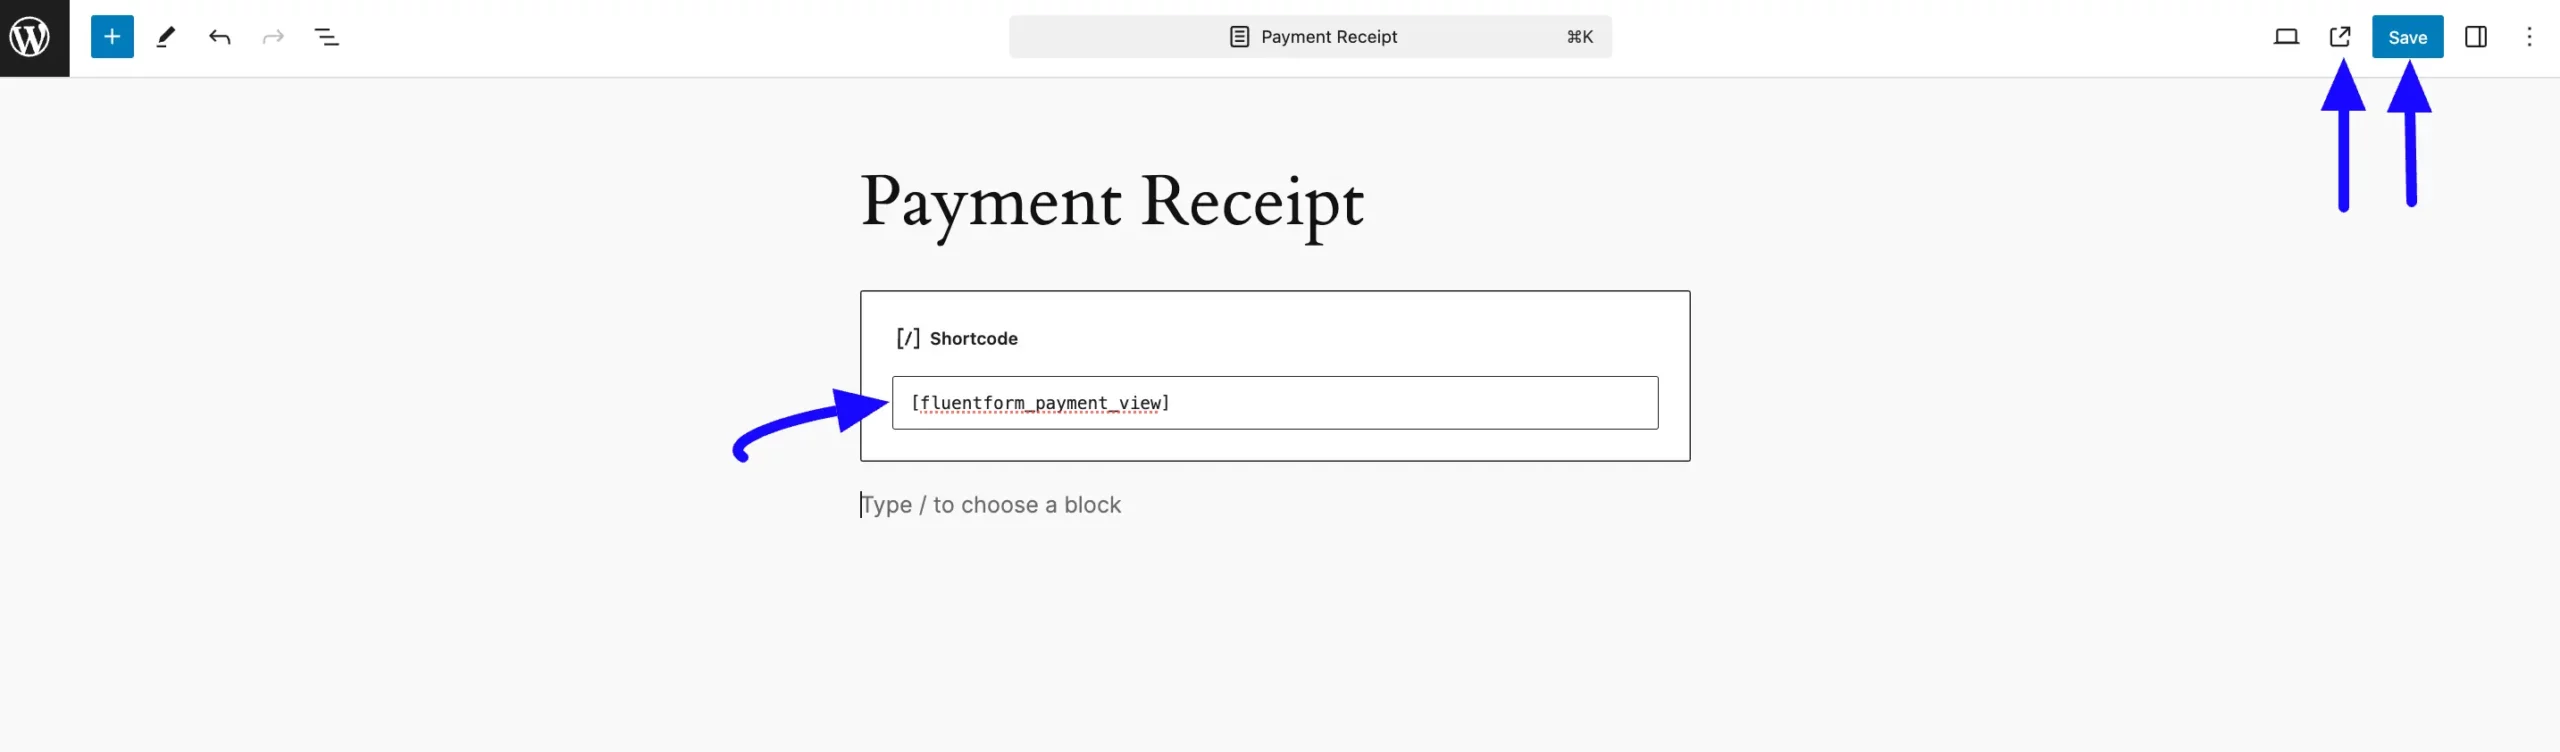
You can also add the Payment Receipt using this shortcode on the selected page.
Then, click the Save button to save all the changes, and press the Preview button in the middle to see the form preview.
Here, you can see the Preview of a single Payment Receipt under the Payment Receipt page.
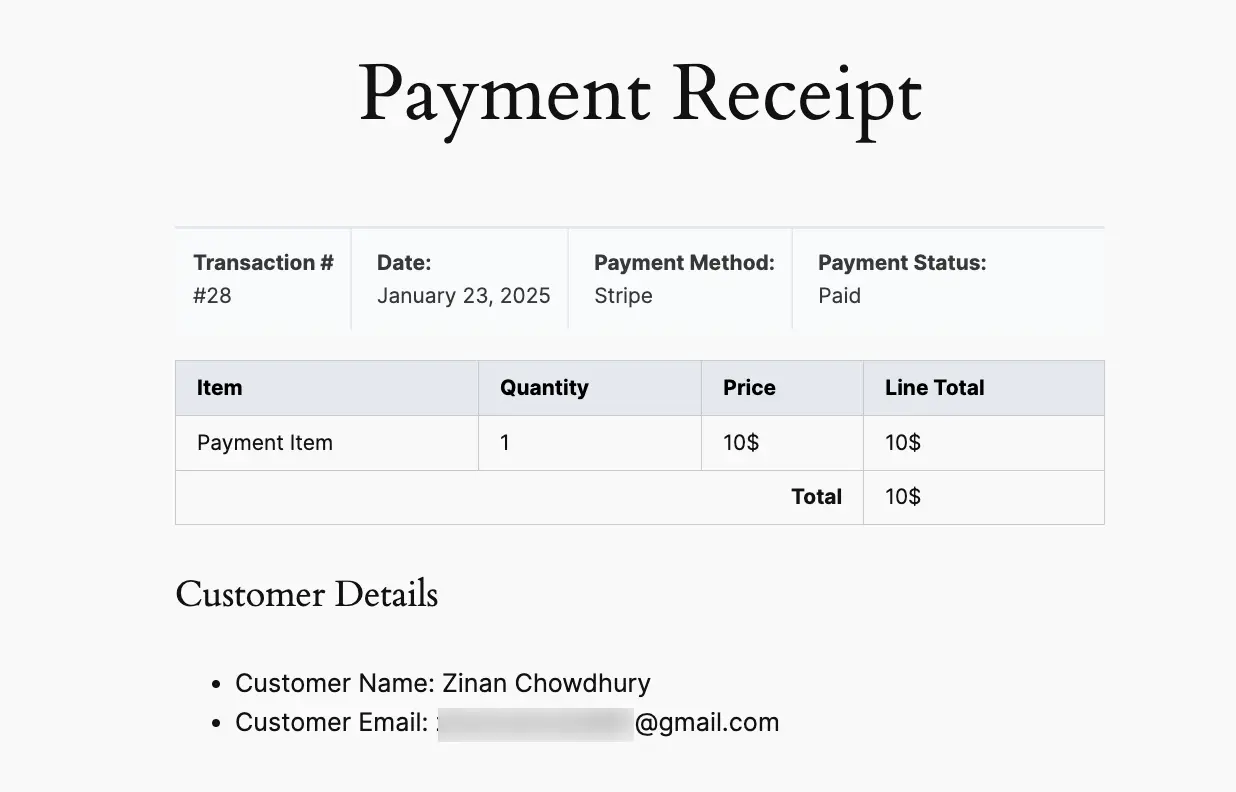
Remember, you can see the individual Payment Receipt by clicking the View link of a single Payment on the Payment History page.
C. Subscription Management #
Enable this option if you want to allow your users to manage their own subscriptions, like canceling an active subscription. This subscription management will function only for the Stripe payment method.
Once you are done, click Save Settings to save the configuration.

Configuring Payment Settings in a Specific Form #
To learn how to configure the Payment Settings for a specific payment form, follow the steps with the screenshots below –
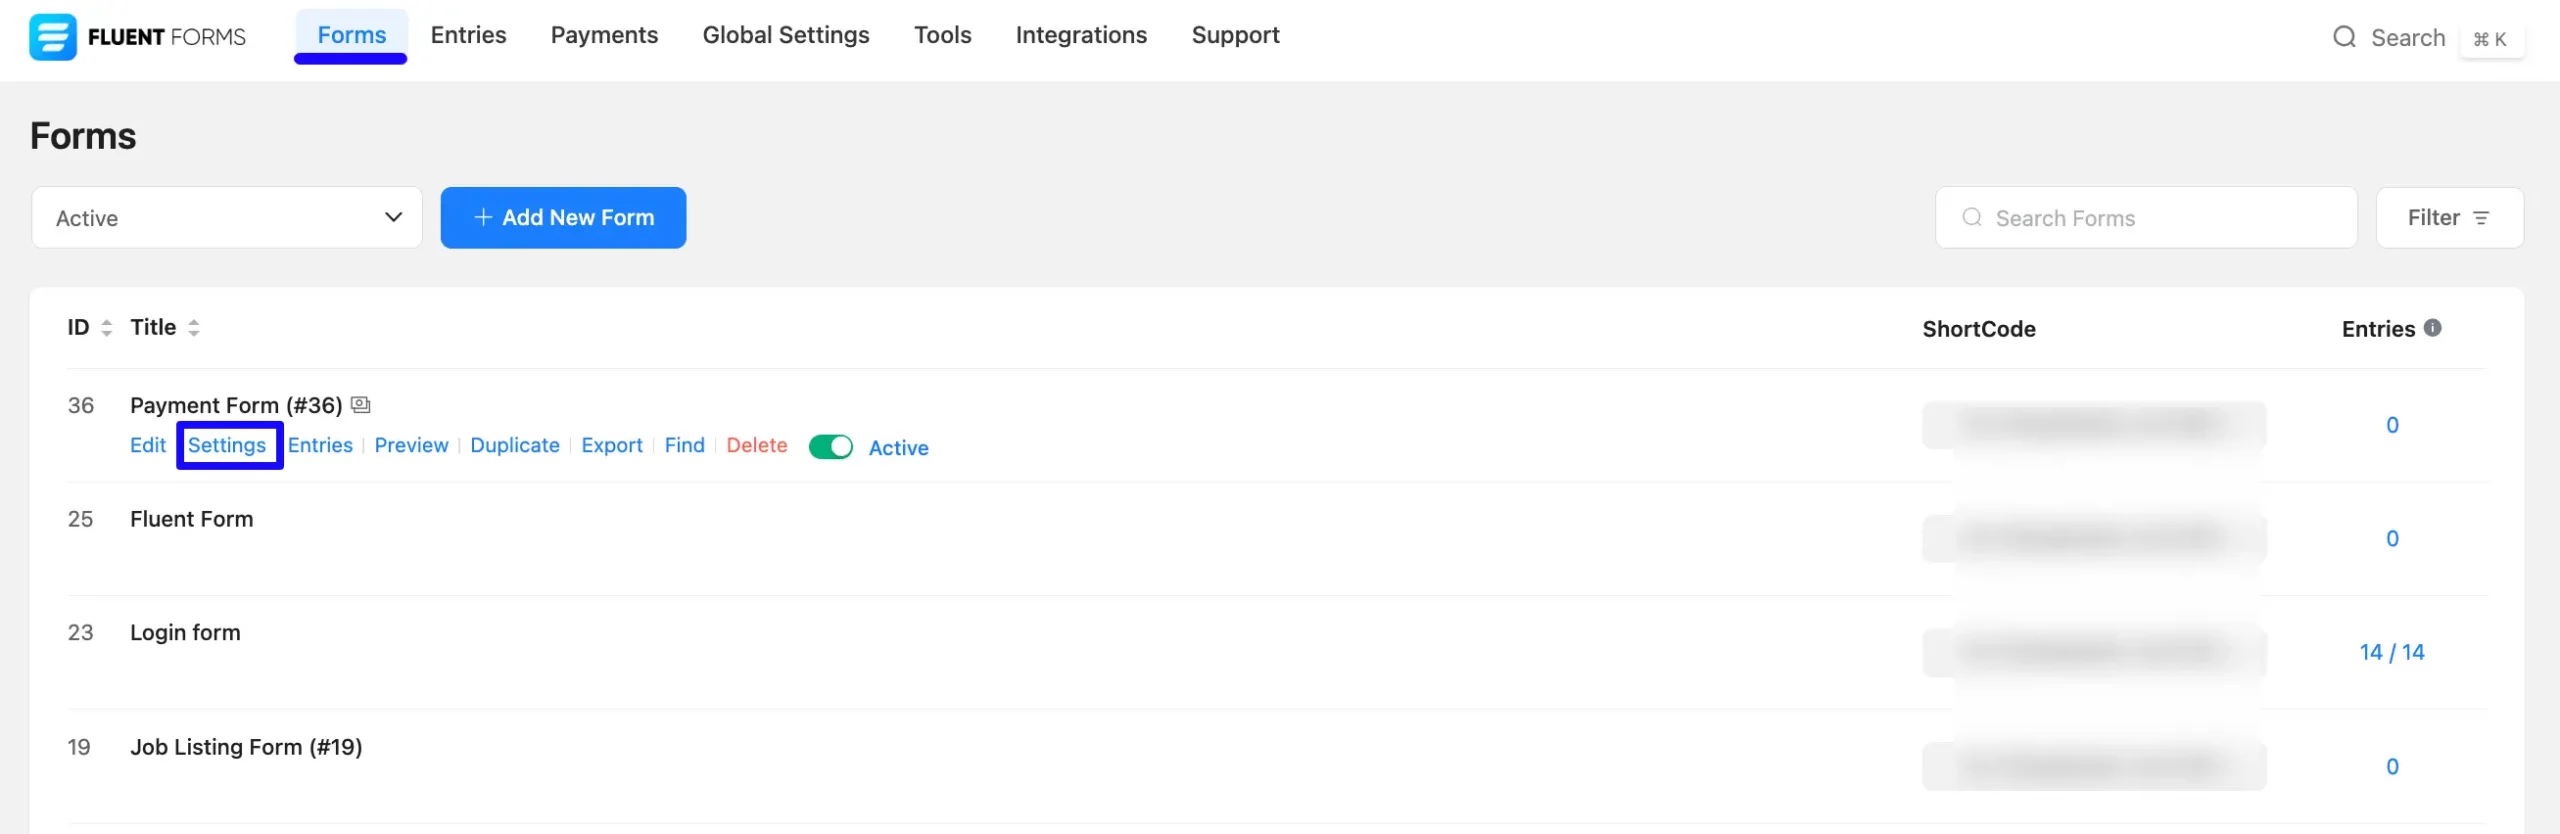
First, go to the Forms from the Fluent Forms Navbar, and click the Settings option of the desired Payment Form.
If you don’t have an existing Payment Form, read this documentation to crate a new one.
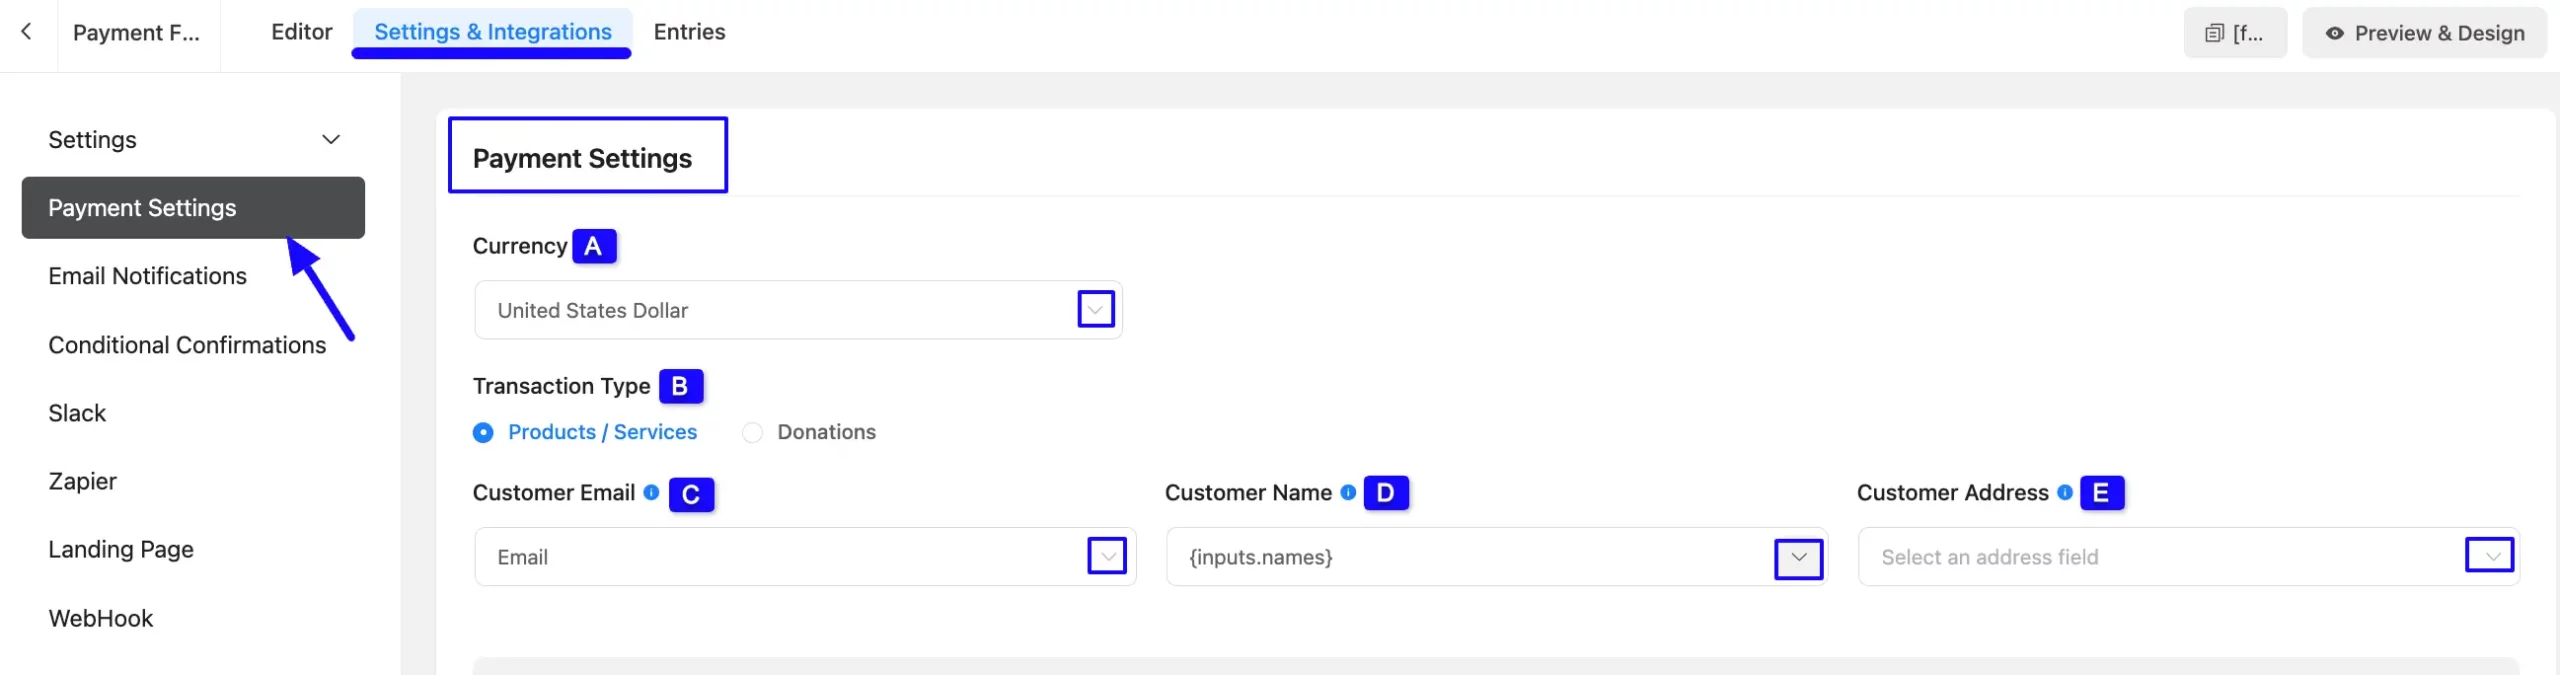
Once you are on the Settings and Integrations tab, click the Payment Settings option, and you will get the following options.
A. Currency: Using this option, you can set the desired default currency type specifically for this form using the dropdown list.
B. Transaction Type: Using this option, you can select the transaction type between Products/Services and Donation based on your preference.
C. Customer Email: Here, you need to map the Email field by clicking the Arrow Icon. It’s an optional field but recommended to be mapped.
D. Customer Name: Here, you need to select the name field from your form inputs. It’s an optional but recommended field. If the user is logged in then this data will be picked from logged in user. You can also get the shortcode list by clicking the arrow icon to use dynamic data.
E. Customer Address: Please select the customer address field from your form’s address inputs. It’s required for payments in India. You can also get the shortcode list by clicking the arrow icon to use dynamic data.
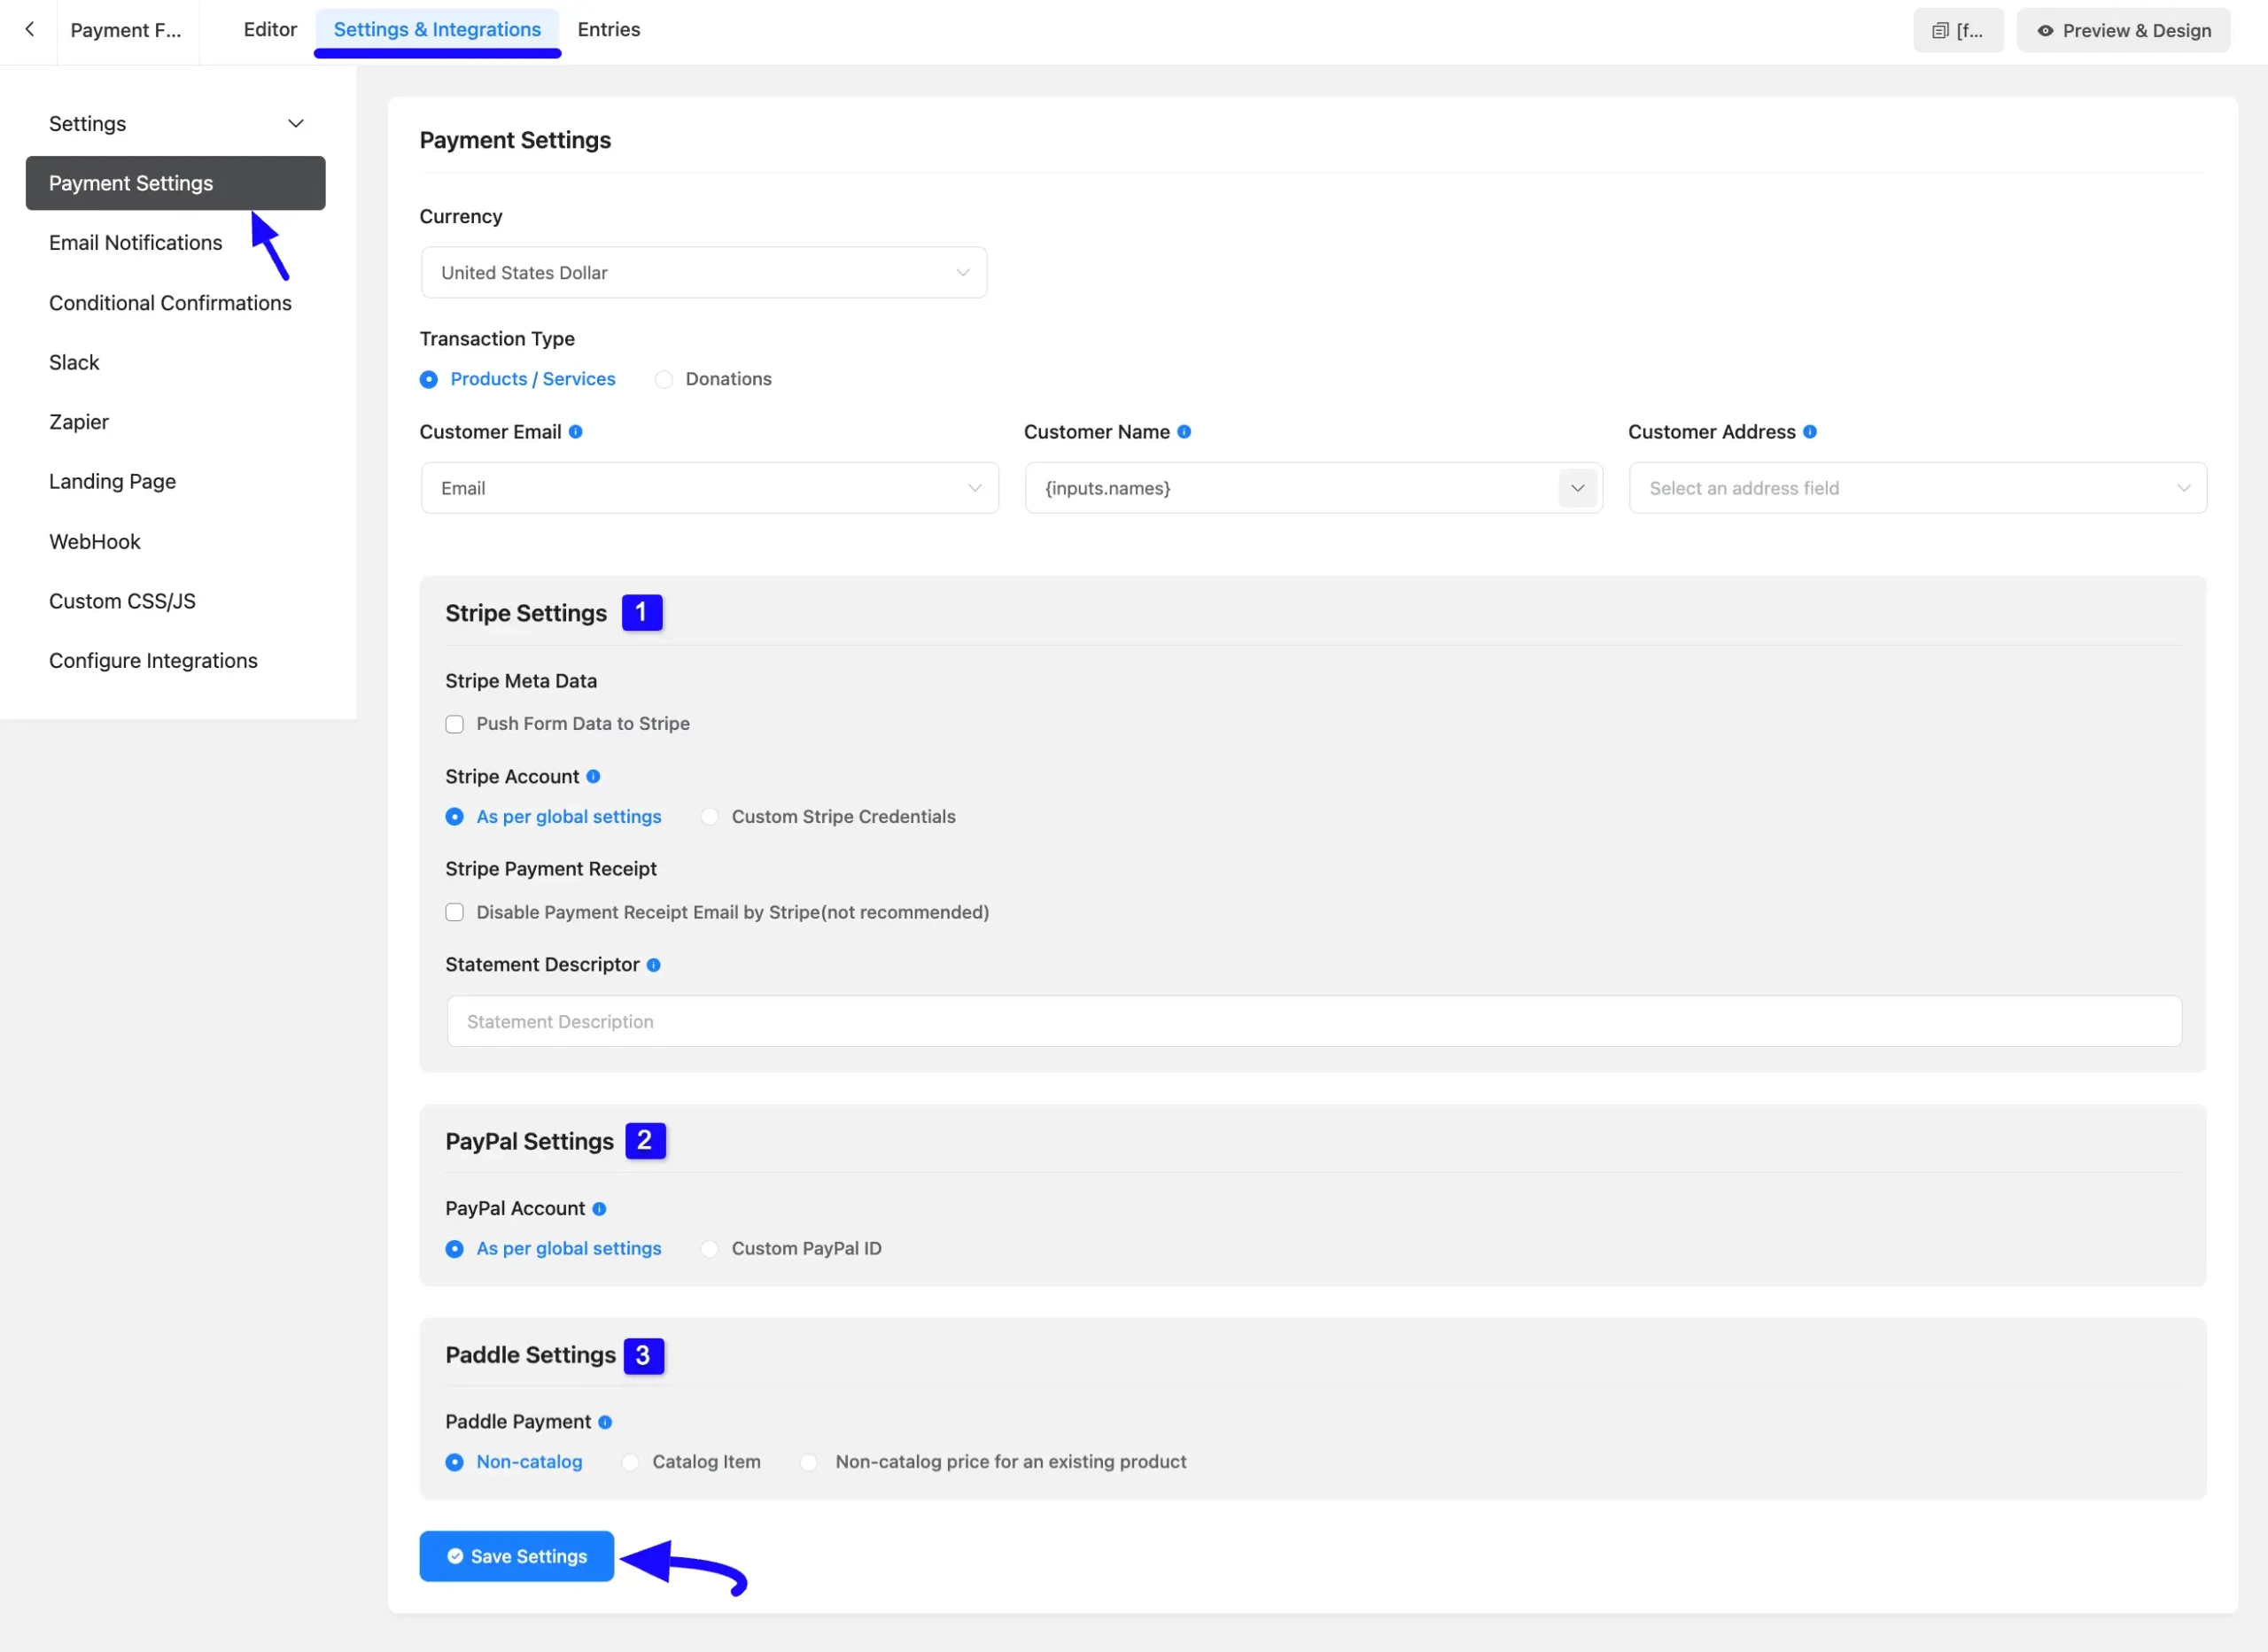
Do not forget to click the Save Settings button to save all your changes.
Form-specific Payment Method Settings #
On this page, you will also get Three major Payment Method Settings options that you can customize according to your needs, specifically for this form. These are:
- Stripe: To learn more details about the Stripe Settings, click here.
- PayPal: To learn more details about the PayPal Settings, click here.
- Paddle: To learn more details about the Paddle Settings, click here.
Do not forget to click the Save Settings button to save all your changes.
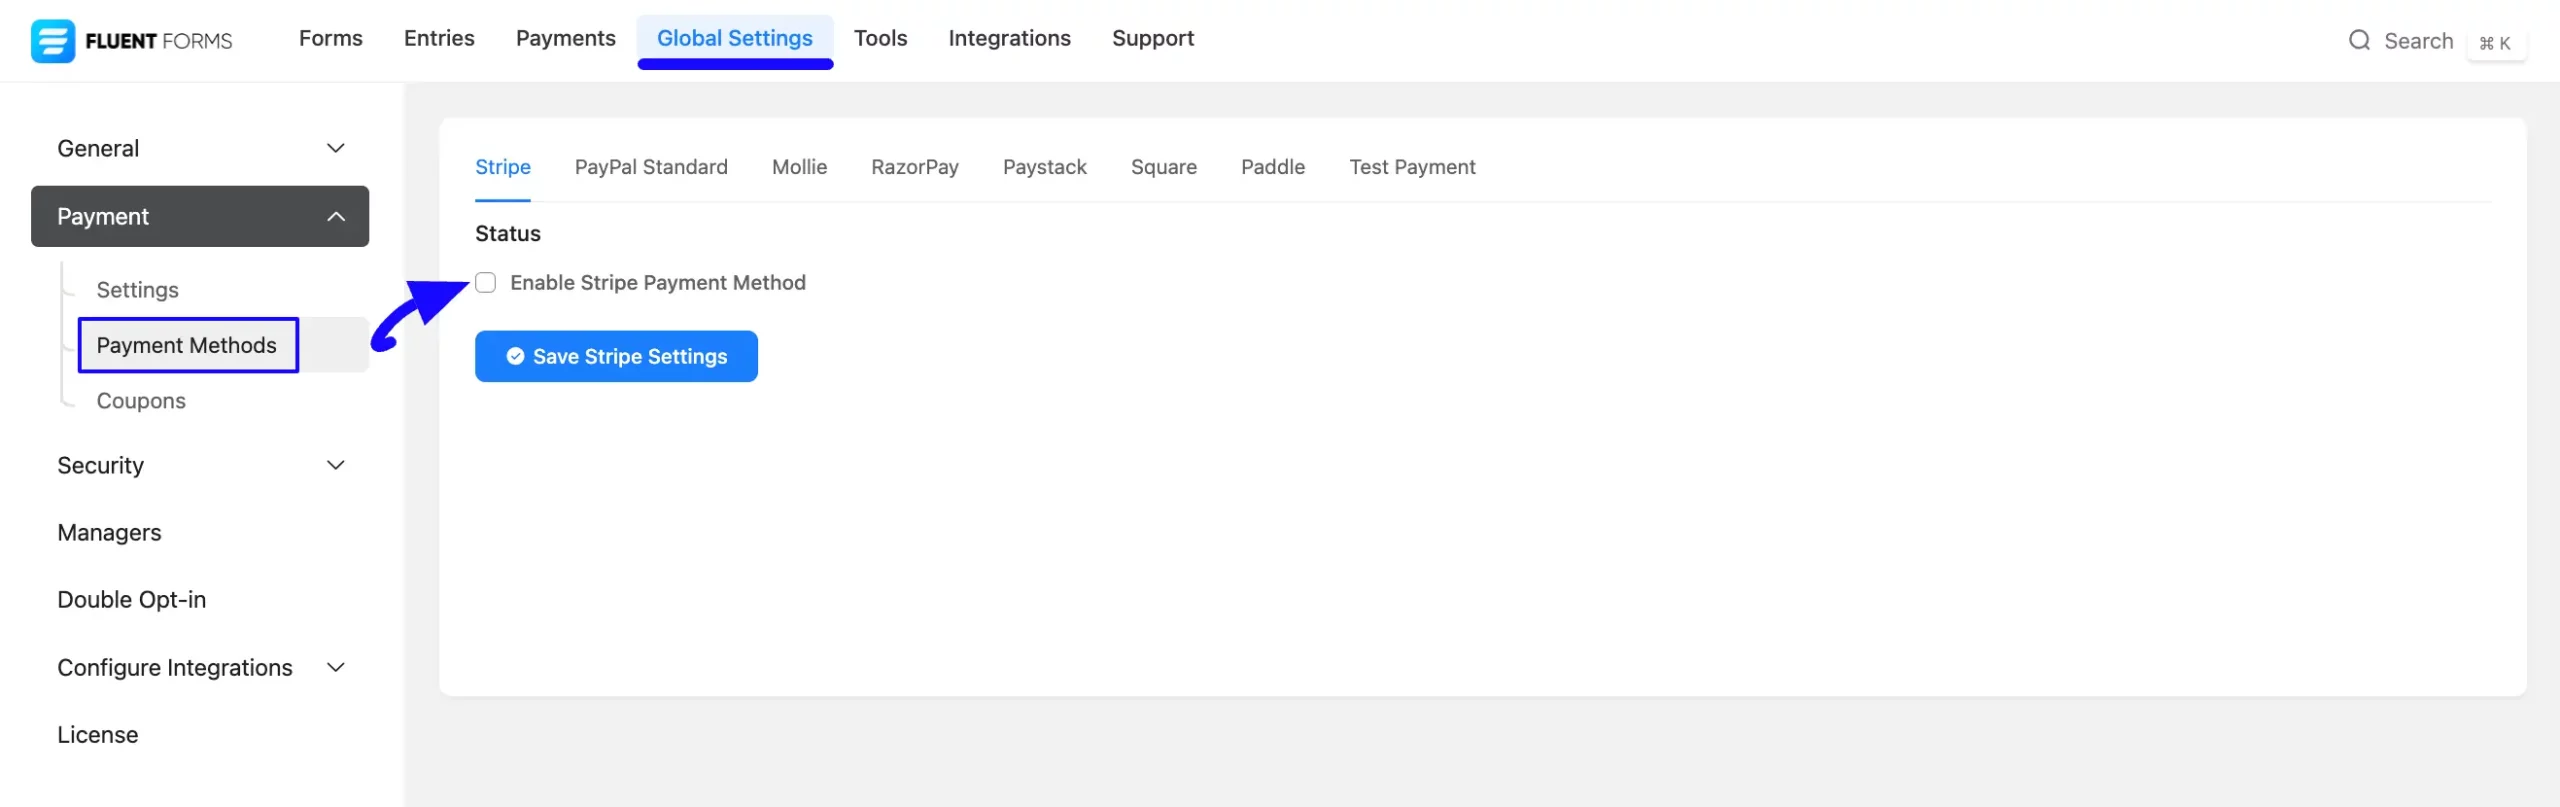
Remember, to get these form-specific Payment Method Settings, you need to ensure these Payment Methods are globally enabled.
To learn how to enable payment Methods Globally, follow the steps below –
To enable the desired Payment Methods, go to the Global Settings from the Fluent Forms Navbar, open the Payment tab, click the Payment Methods option, and you will see all the available payment platforms.
Now, go to your desired payment platform/s and check the Enable Payment Method. This will activate all your desired payment methods within the Payment Fields module for every form.
If you have any further questions, concerns, or suggestions, please do not hesitate to contact our @support team. Thank you.


