The Fluent Forms Global Inventory Manager feature allows you to track and manage multiple forms efficiently.
Suppose you’re selling a limited number of Bus tickets. You can manage the inventory across different forms for stock accuracy. Once tickets sell out, a message can be displayed to users.
Before using the Global Inventory Manager, you must activate the Inventory Module in Fluent Forms.
Enabling the Inventory Module #
To learn how to enable the Inventory Module, follow the steps with the screenshots below.
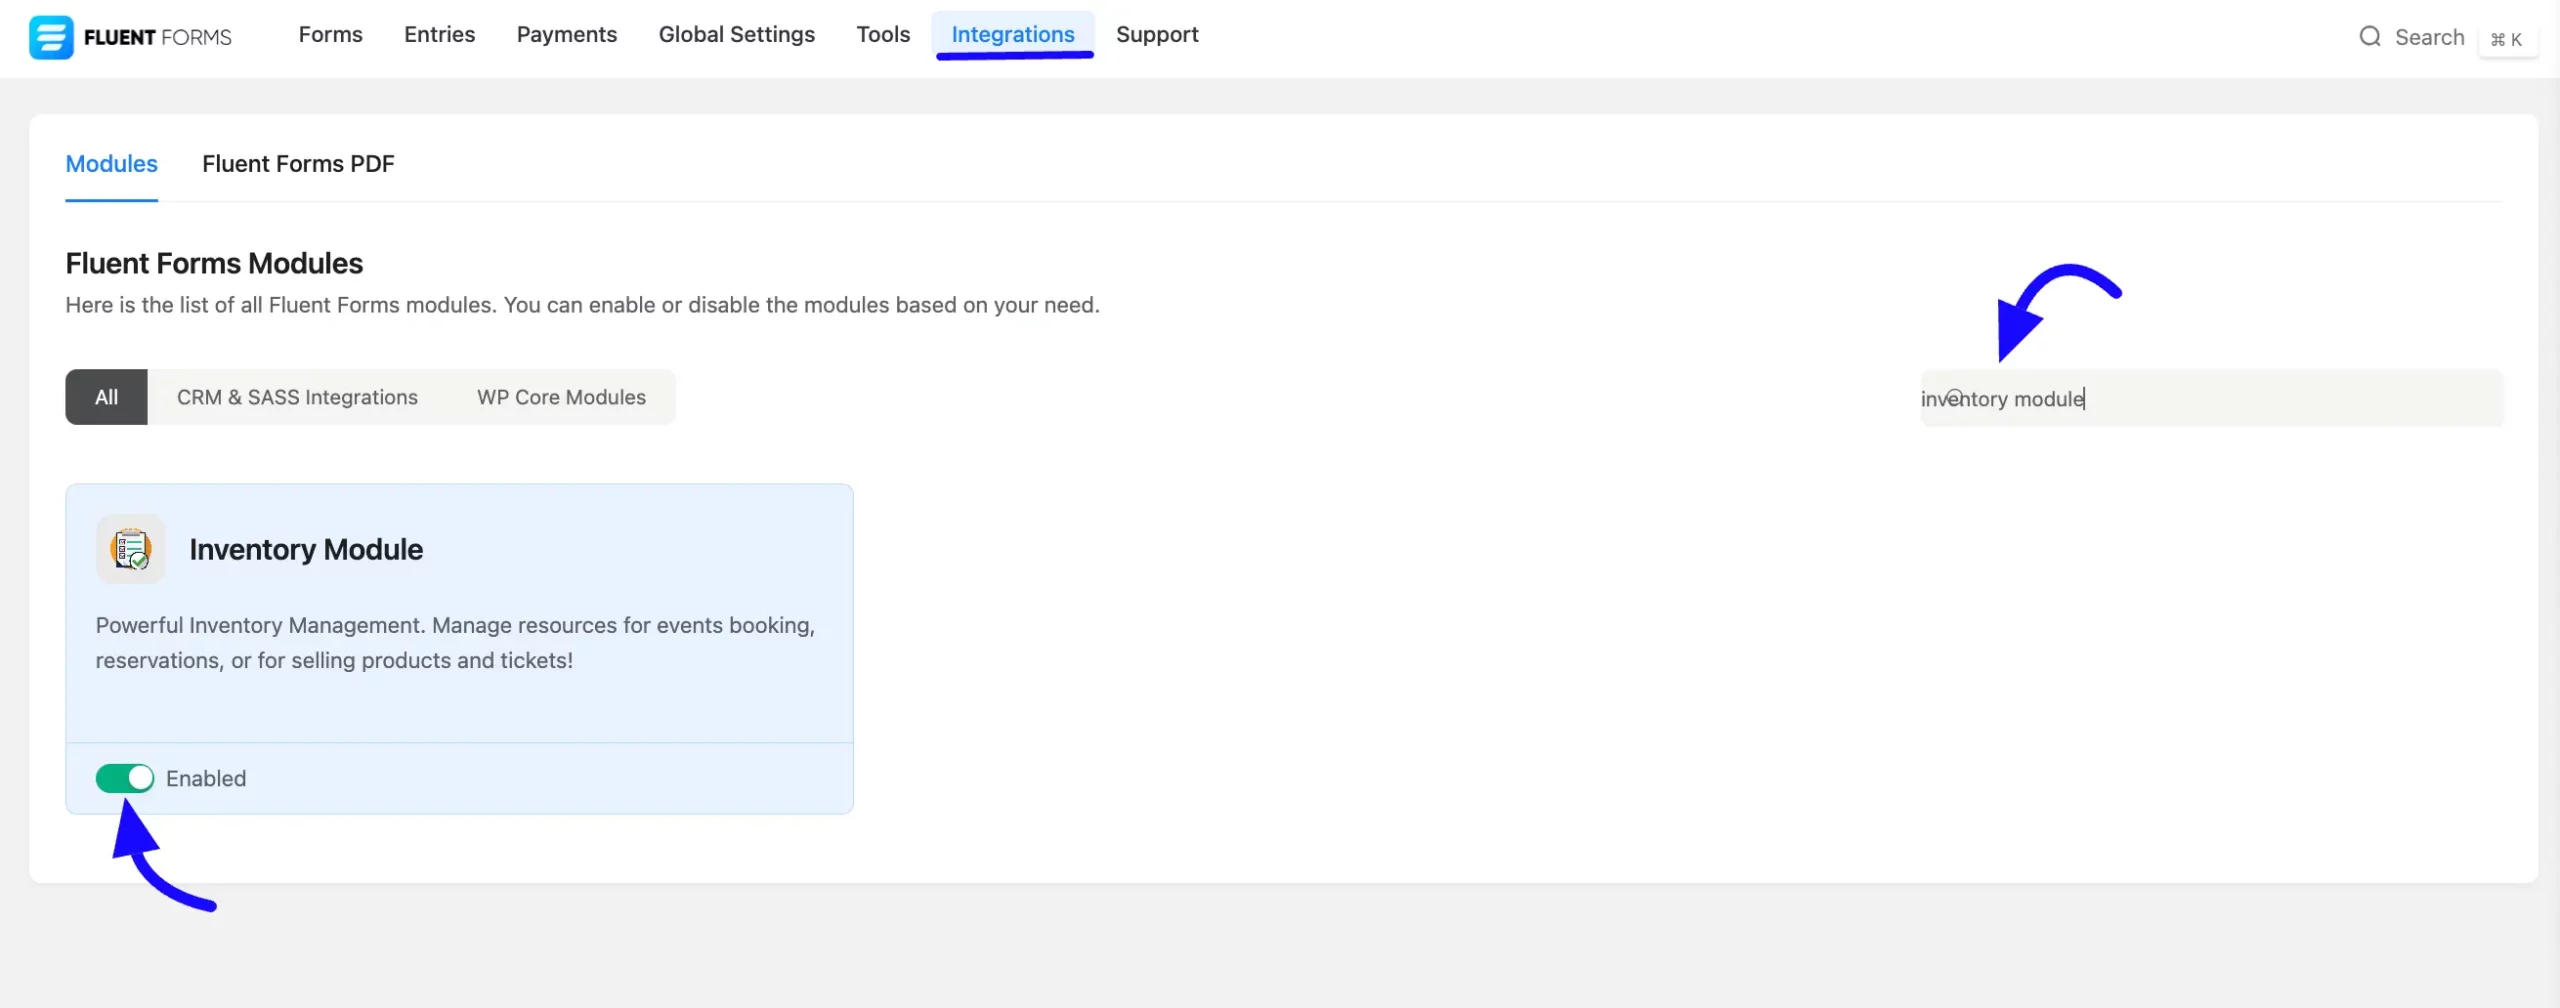
First, go to Integrations from the Fluent Forms Navbar, search for Inventory Module through the search bar, and get the inventory module.
Now, turn on the Toggle to enable the Inventory module.
Accessing the Inventory Manager #
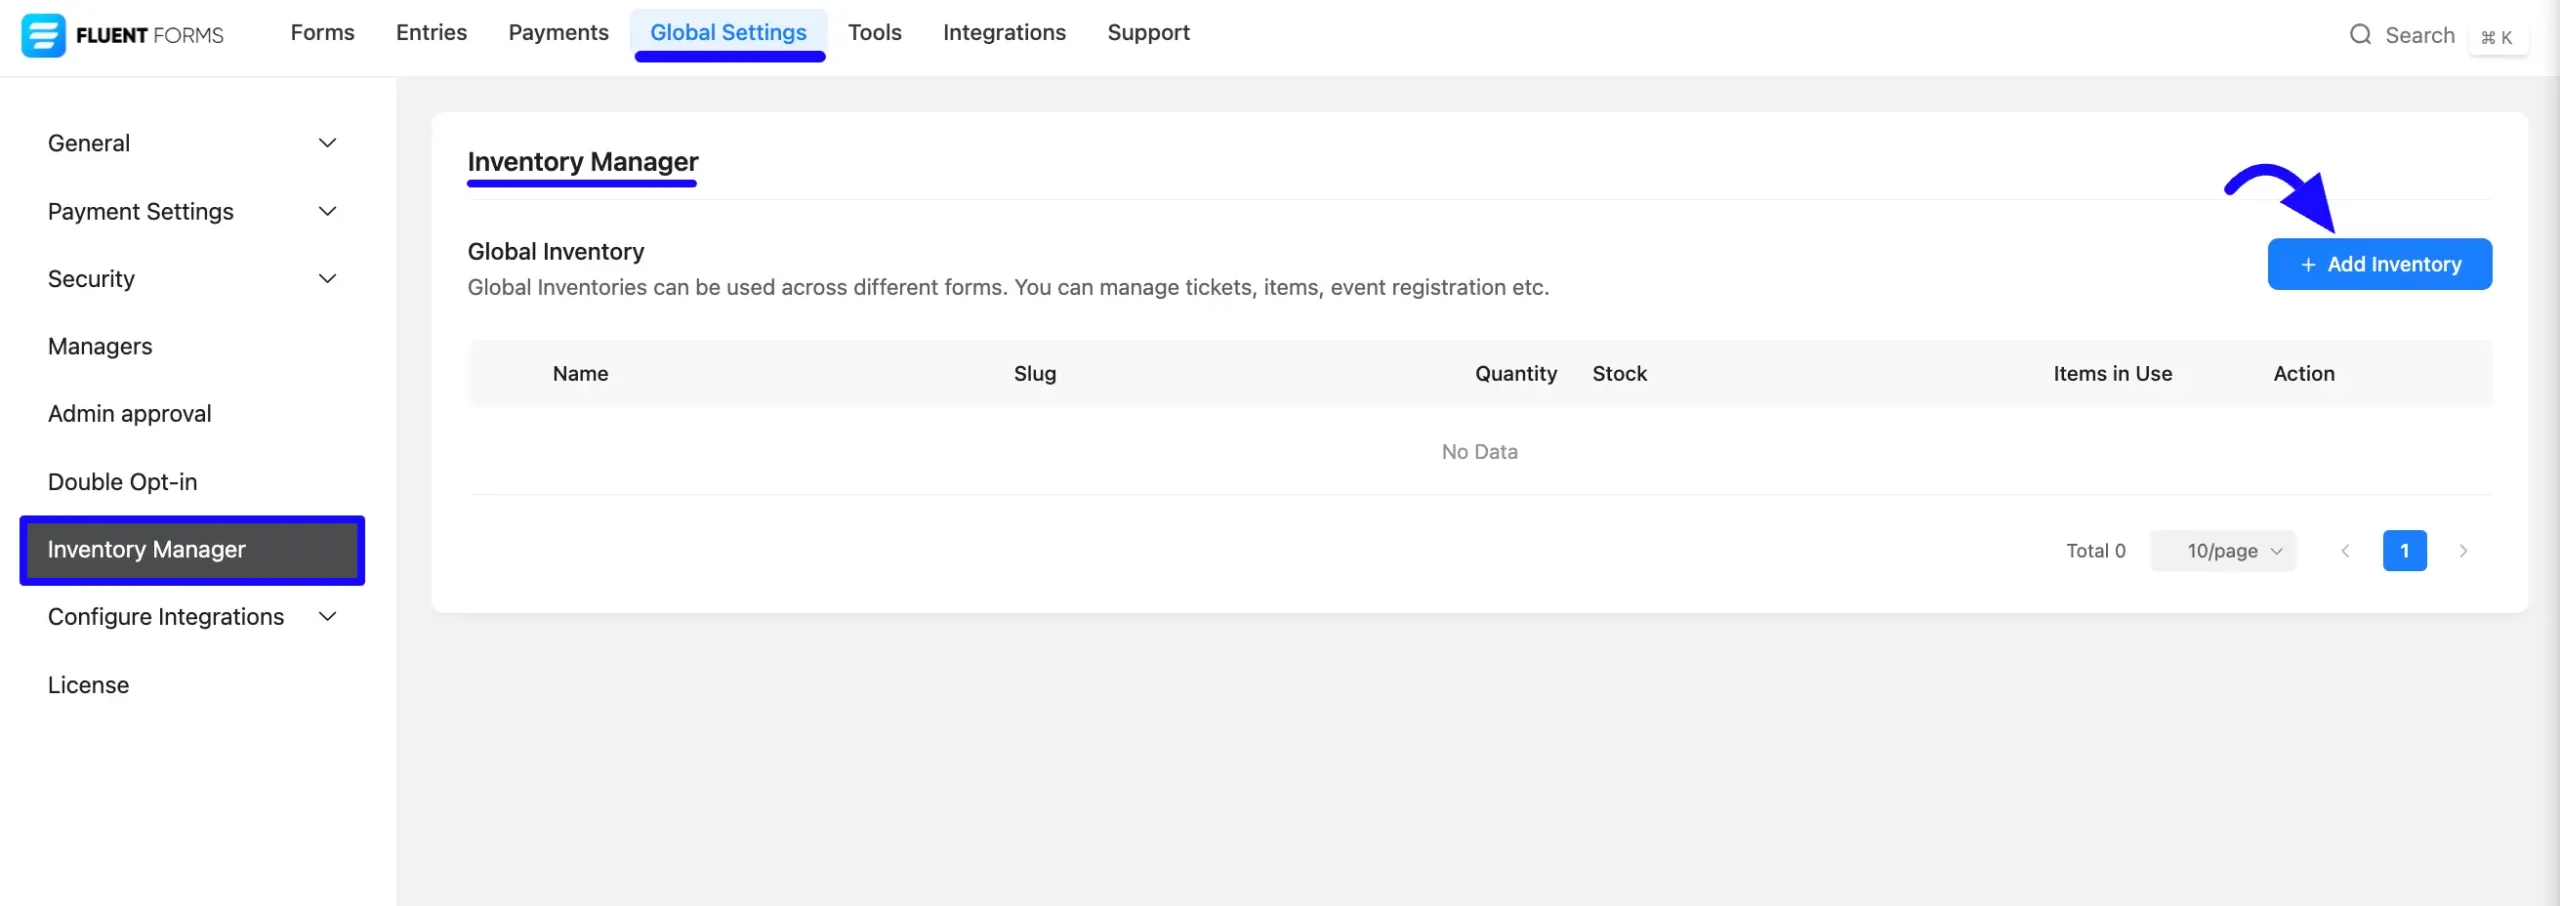
To access the inventory manager, navigate to the Fluent Forms Global Settings section. Then, select Inventory Manager from left sidebar. Now, click the Add Inventory button to add items.
Adding an Inventory Item #
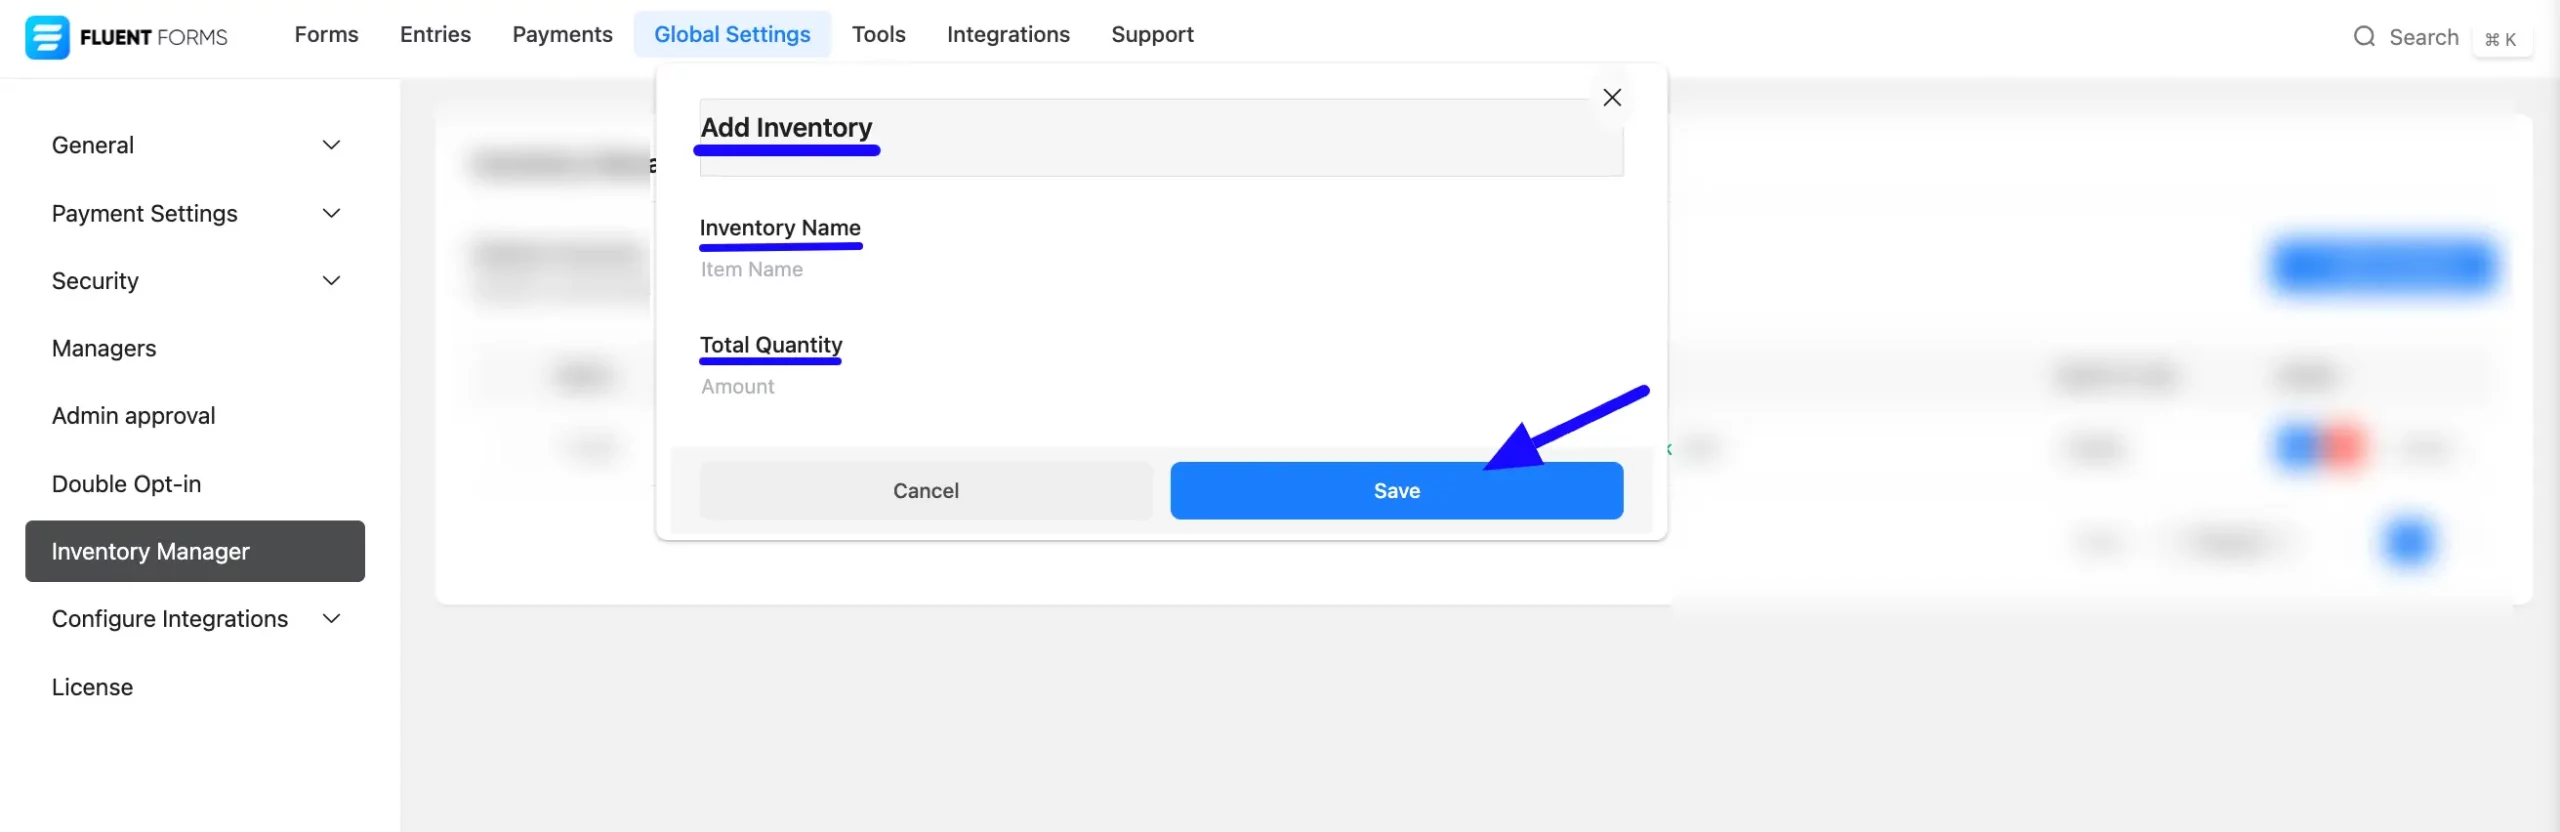
After clicking the Add Inventory button, a pop-up will appear. Now, enter the Inventory Name and set the Total Quantity that shows the available quantity in your inventory. Next, click the Save button to store the item in the Inventory Manager.
Adding a Global Inventory Item to a Form #
Now, to add a global inventory item to a form, first, open the specific form where you want to use the Global Inventory Item.
If you do not have any existing forms, read Create a Form from Scratch or Create a Form using Templates documentation to create a new one.
Add a field that supports inventory tracking, such as:
- Payment Item
- Checkbox
- Radio Field
- Dropdown Field
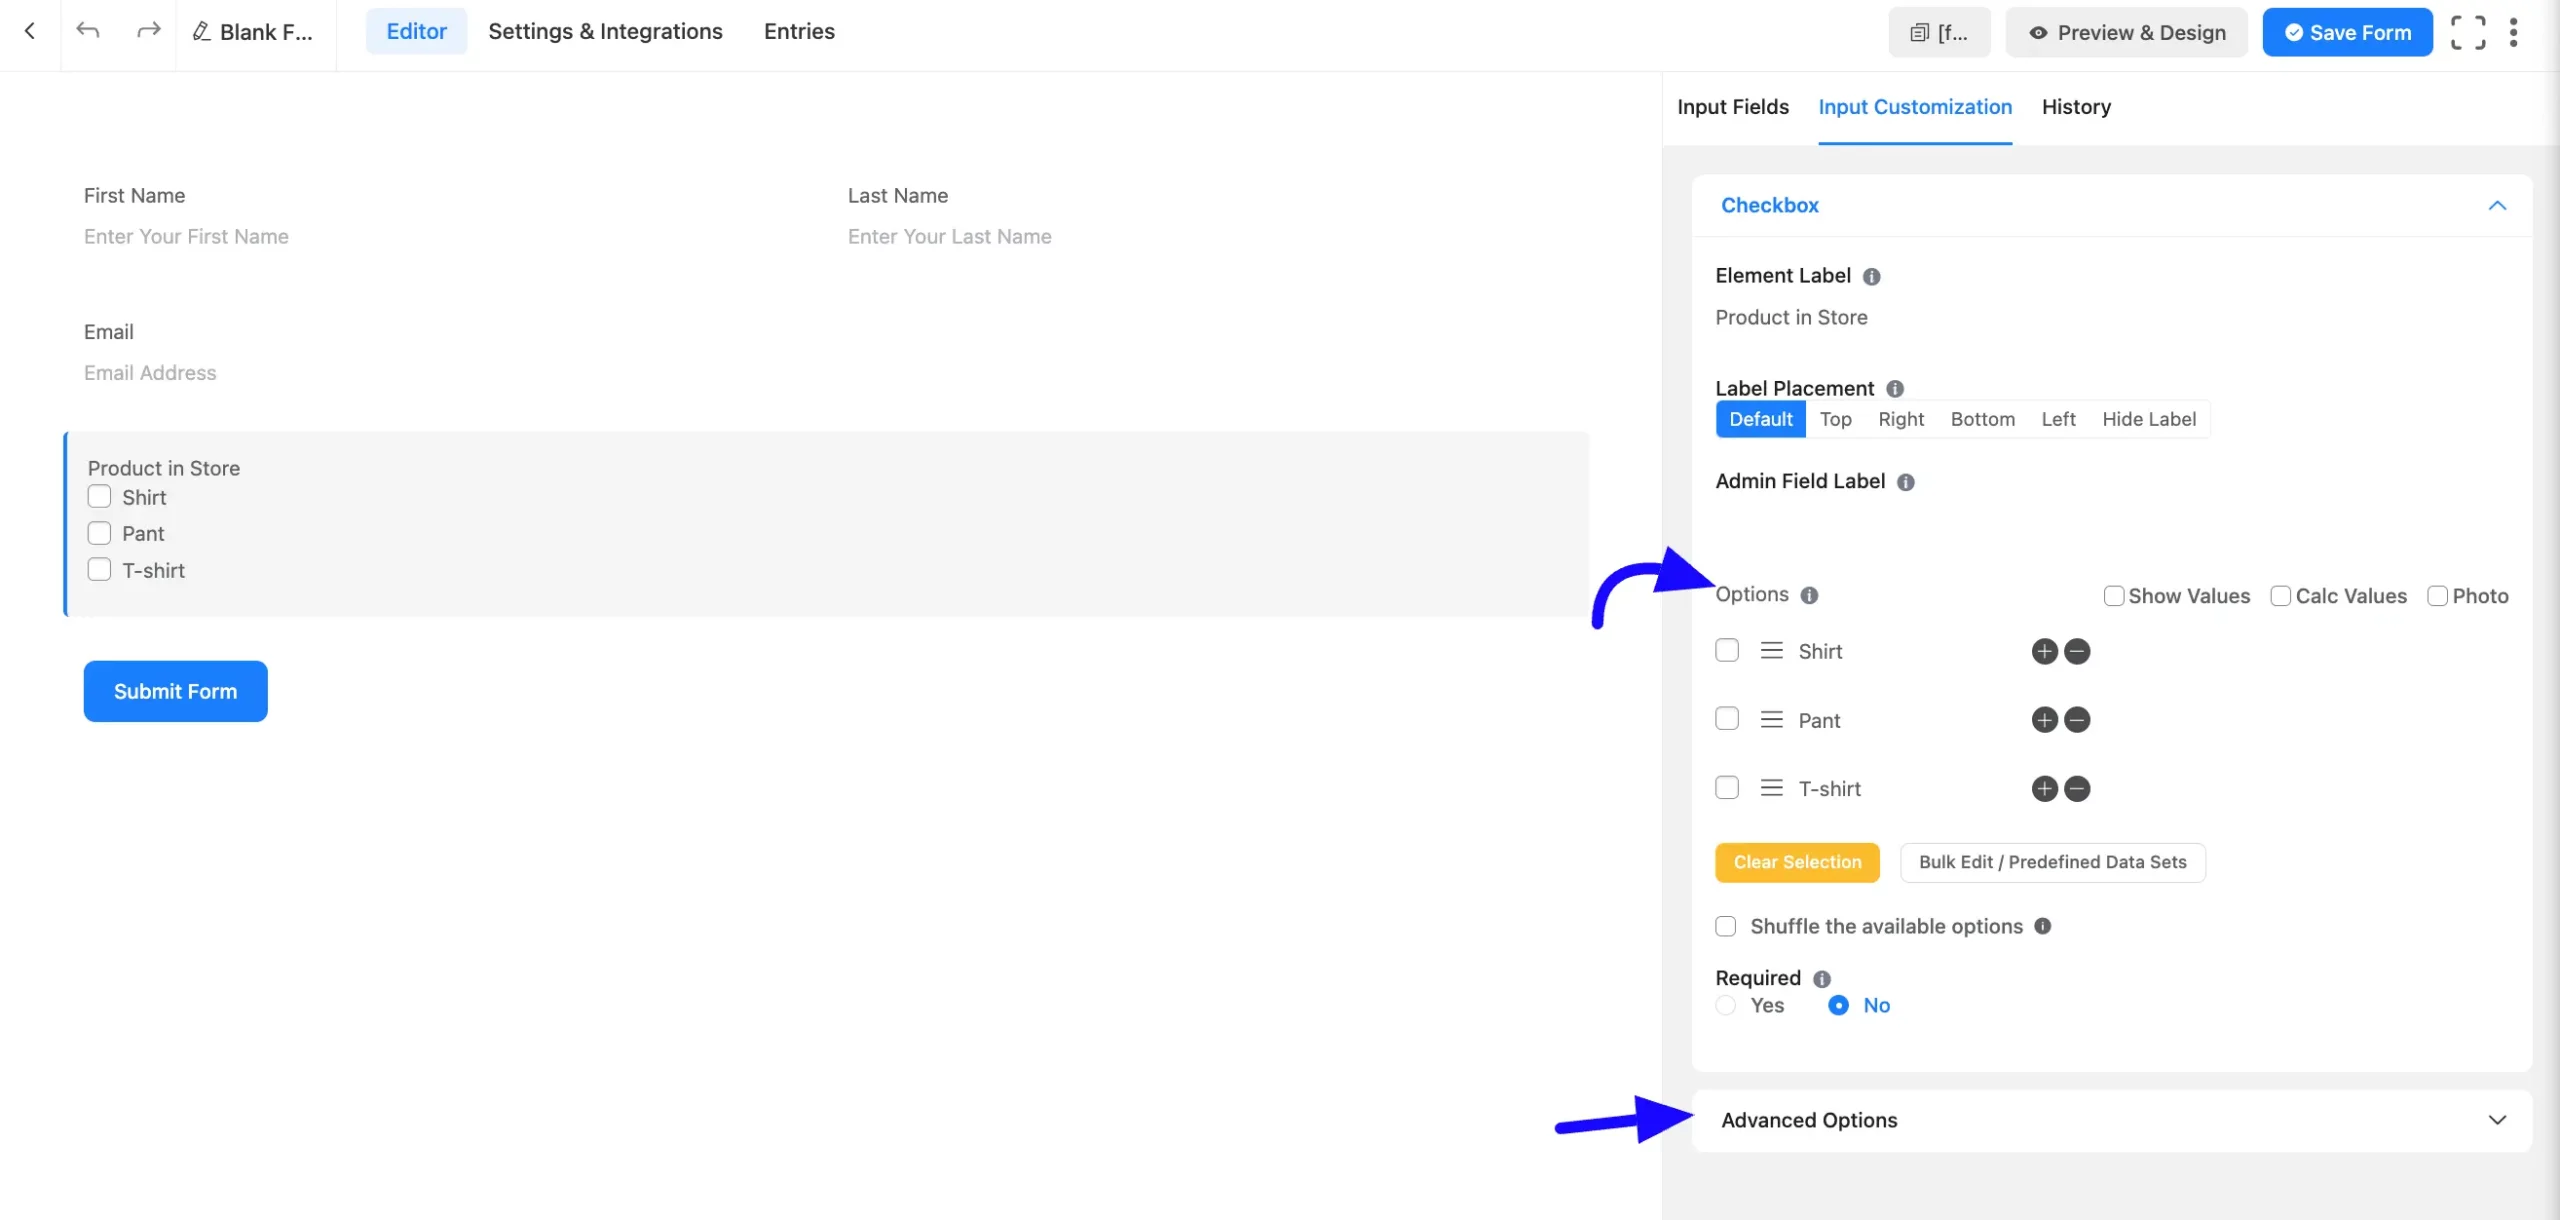
In this example, we use the Checkbox Field.
Within the Checkbox field options, add Items to connect with your Global Inventory Items.
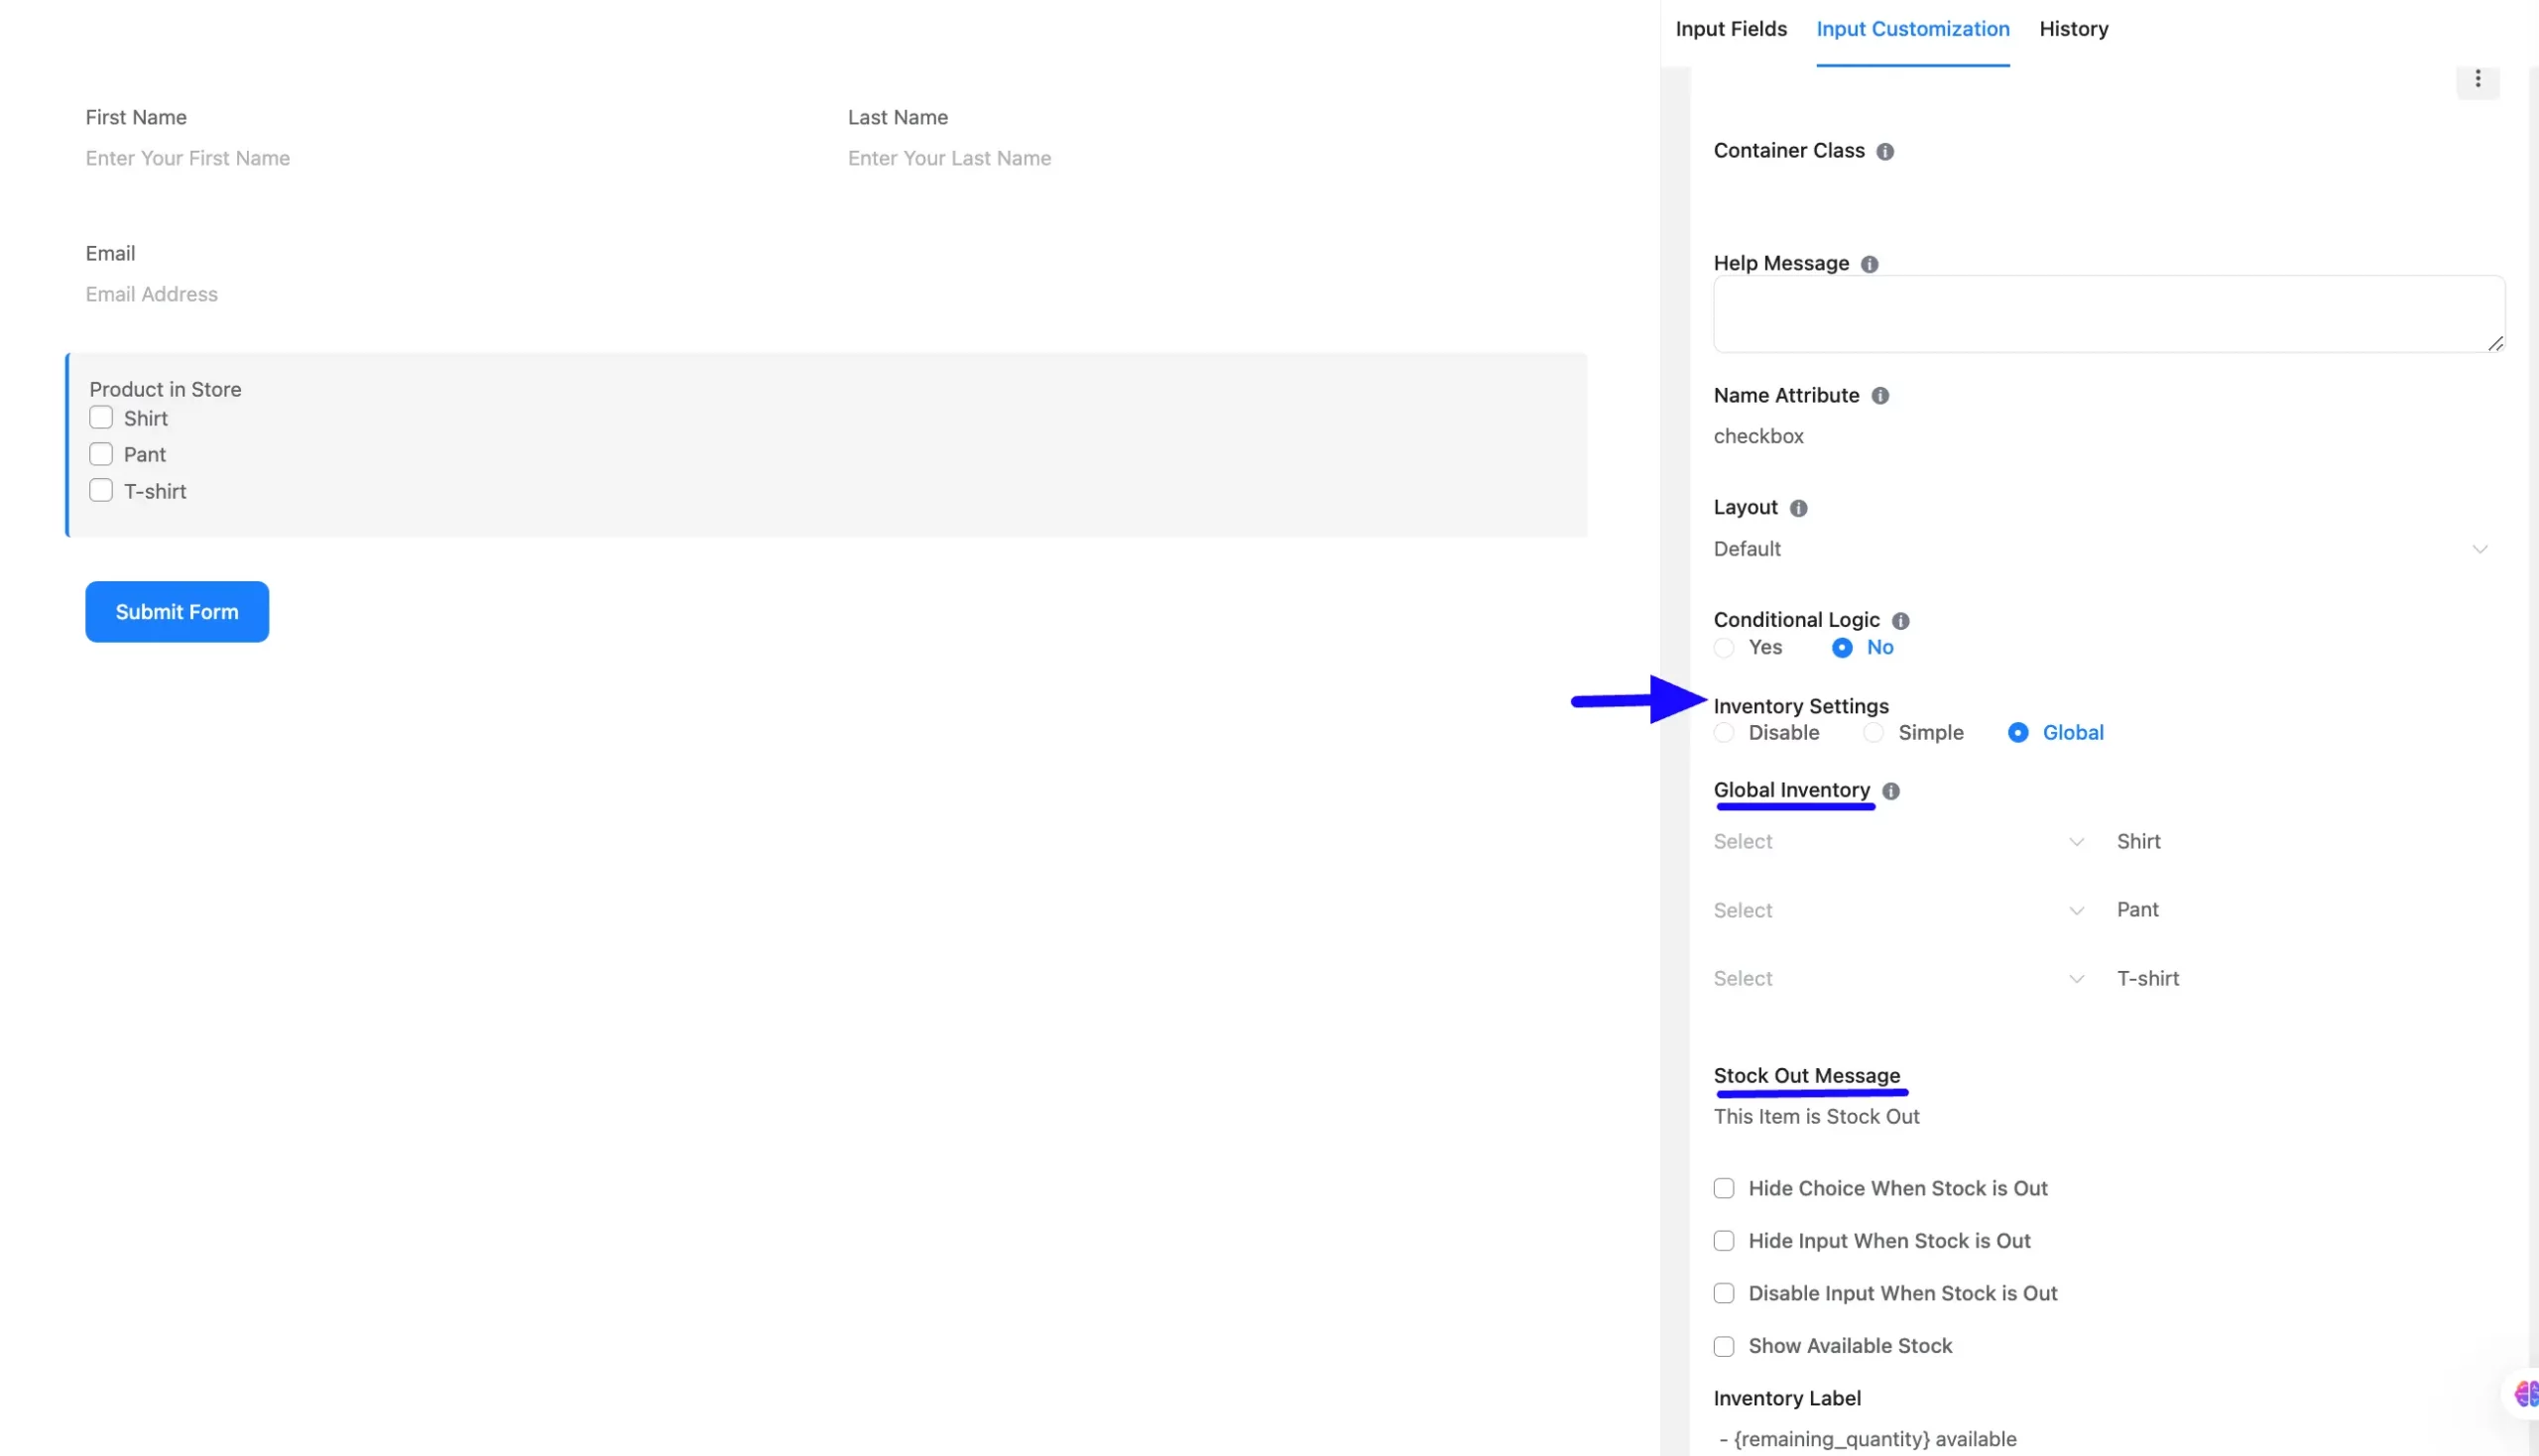
Configuring Inventory Settings #
Now, configure the inventory settings. Navigate to the Advanced Options of the selected field. Then, go to Inventory Settings and enable the Global Checkbox to integrate Global Inventory items.
Select the appropriate inventory item from the Global Inventory drop-down. Next, customize the Stock-Out Message and other settings based on your requirements.
If you want to learn a detailed guide of global inventory setting, then read this article.
Embed the Form into Frontend #
Once you complete the customization, click the Save Form button to save all your changes. Click the Preview & Design button in the middle to see the form preview.
To integrate and display the form on a specific page or post, copy the Shortcode from the top right side and paste it into your desired Page or Post.

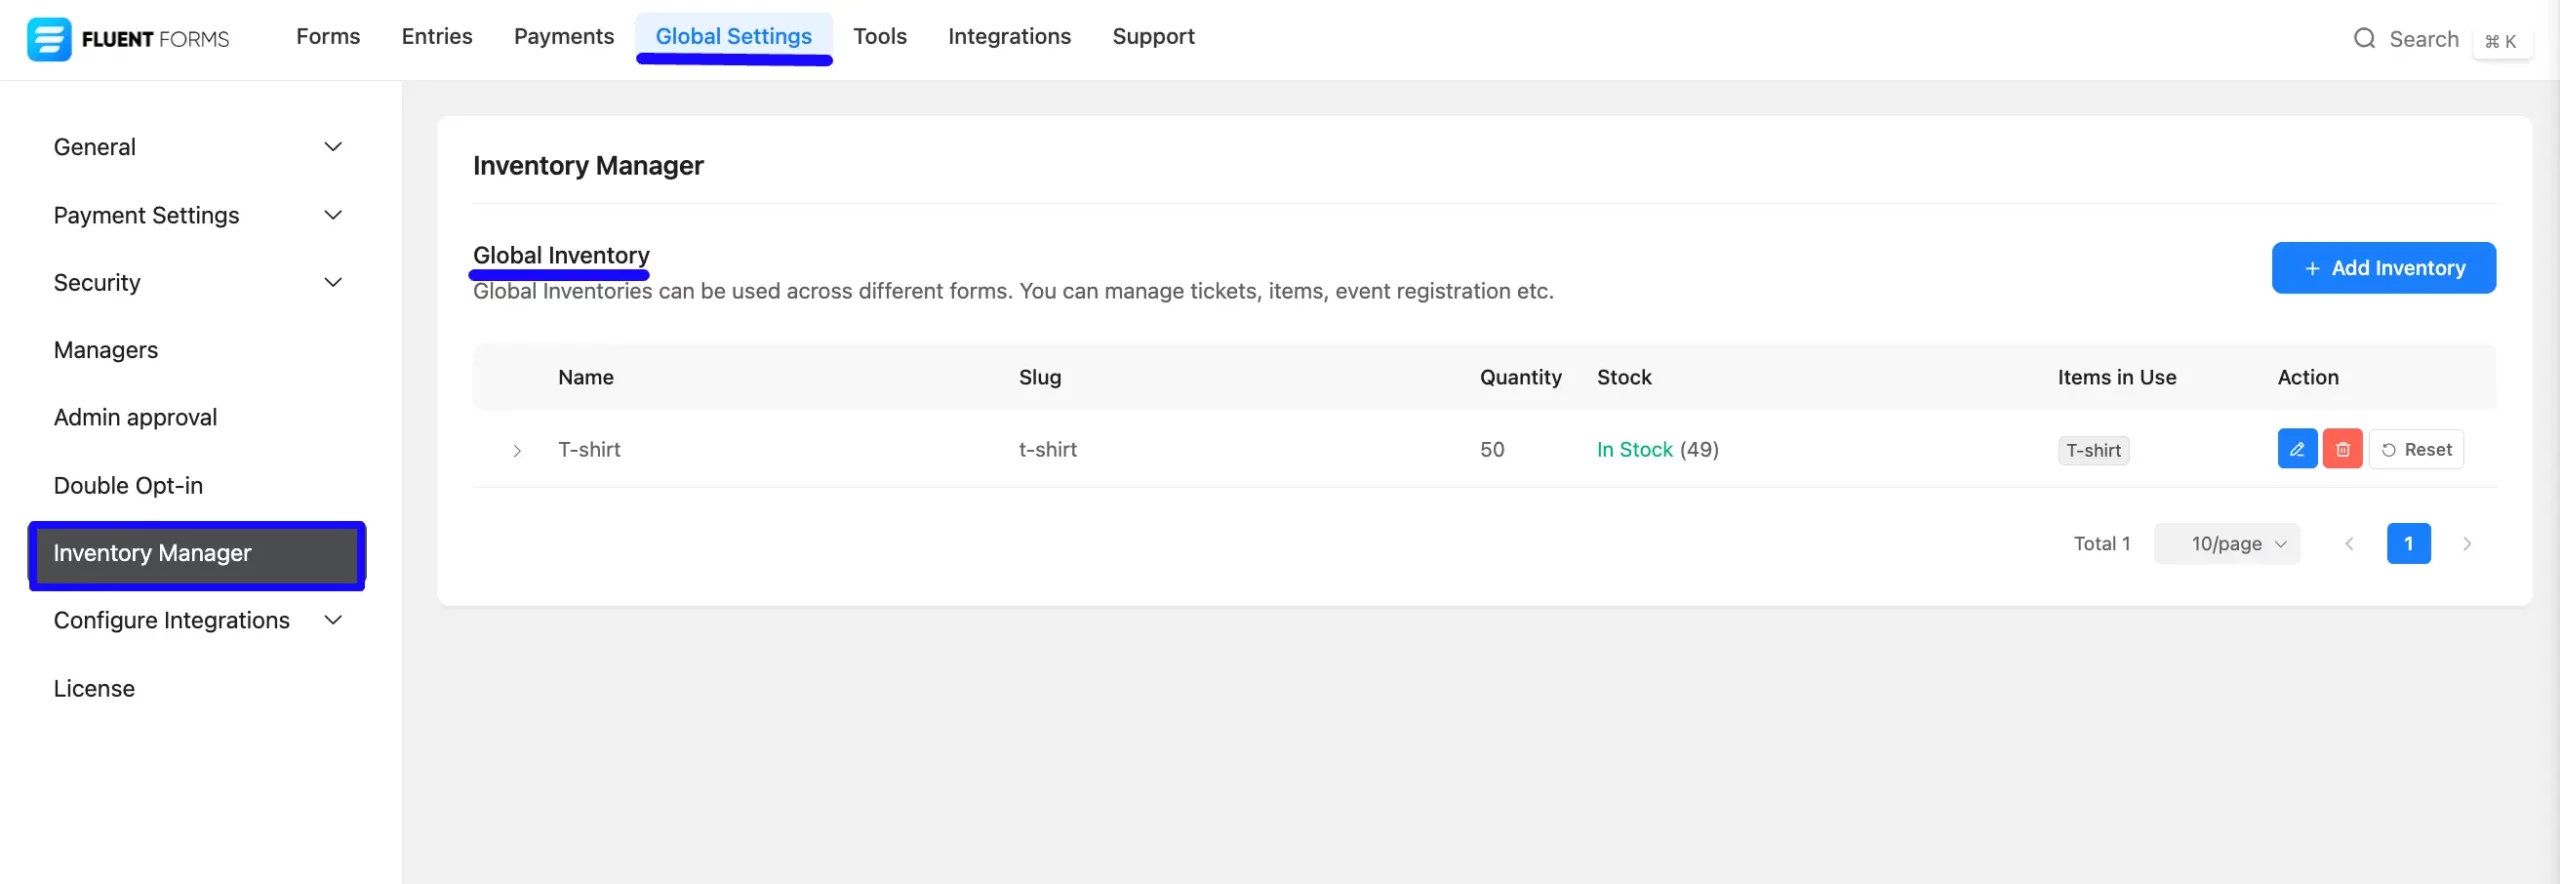
Viewing Inventory Details #
To monitor your inventory, go to Global Settings Inventory Manager section. Click on the left-side Arrow icon to reveal detailed inventory reports.
The report will display remaining stock levels and the forms through which items were sold. If needed, you can reset the inventory from this section.
In this process, you can easily manage your inventory across multiple forms using the Global Inventory Manager in Fluent Forms.
If you have any further questions, concerns, or suggestions, please do not hesitate to contact our support team. Thank you.


