Fluent Forms integrates Google Maps to allow your users to auto-fill the Address Field with the help of Google Maps. This article will guide you through integrating Google Maps in Fluent Forms on your WordPress Site.
Remember, Google Maps is the Premium Feature of the Fluent Forms Plugin. So, you need the Fluent Forms Pro plugin to integrate this.
Integrating Google Maps with Fluent Forms #
To learn how to integrate with Google Maps, follow the steps with the screenshots below –
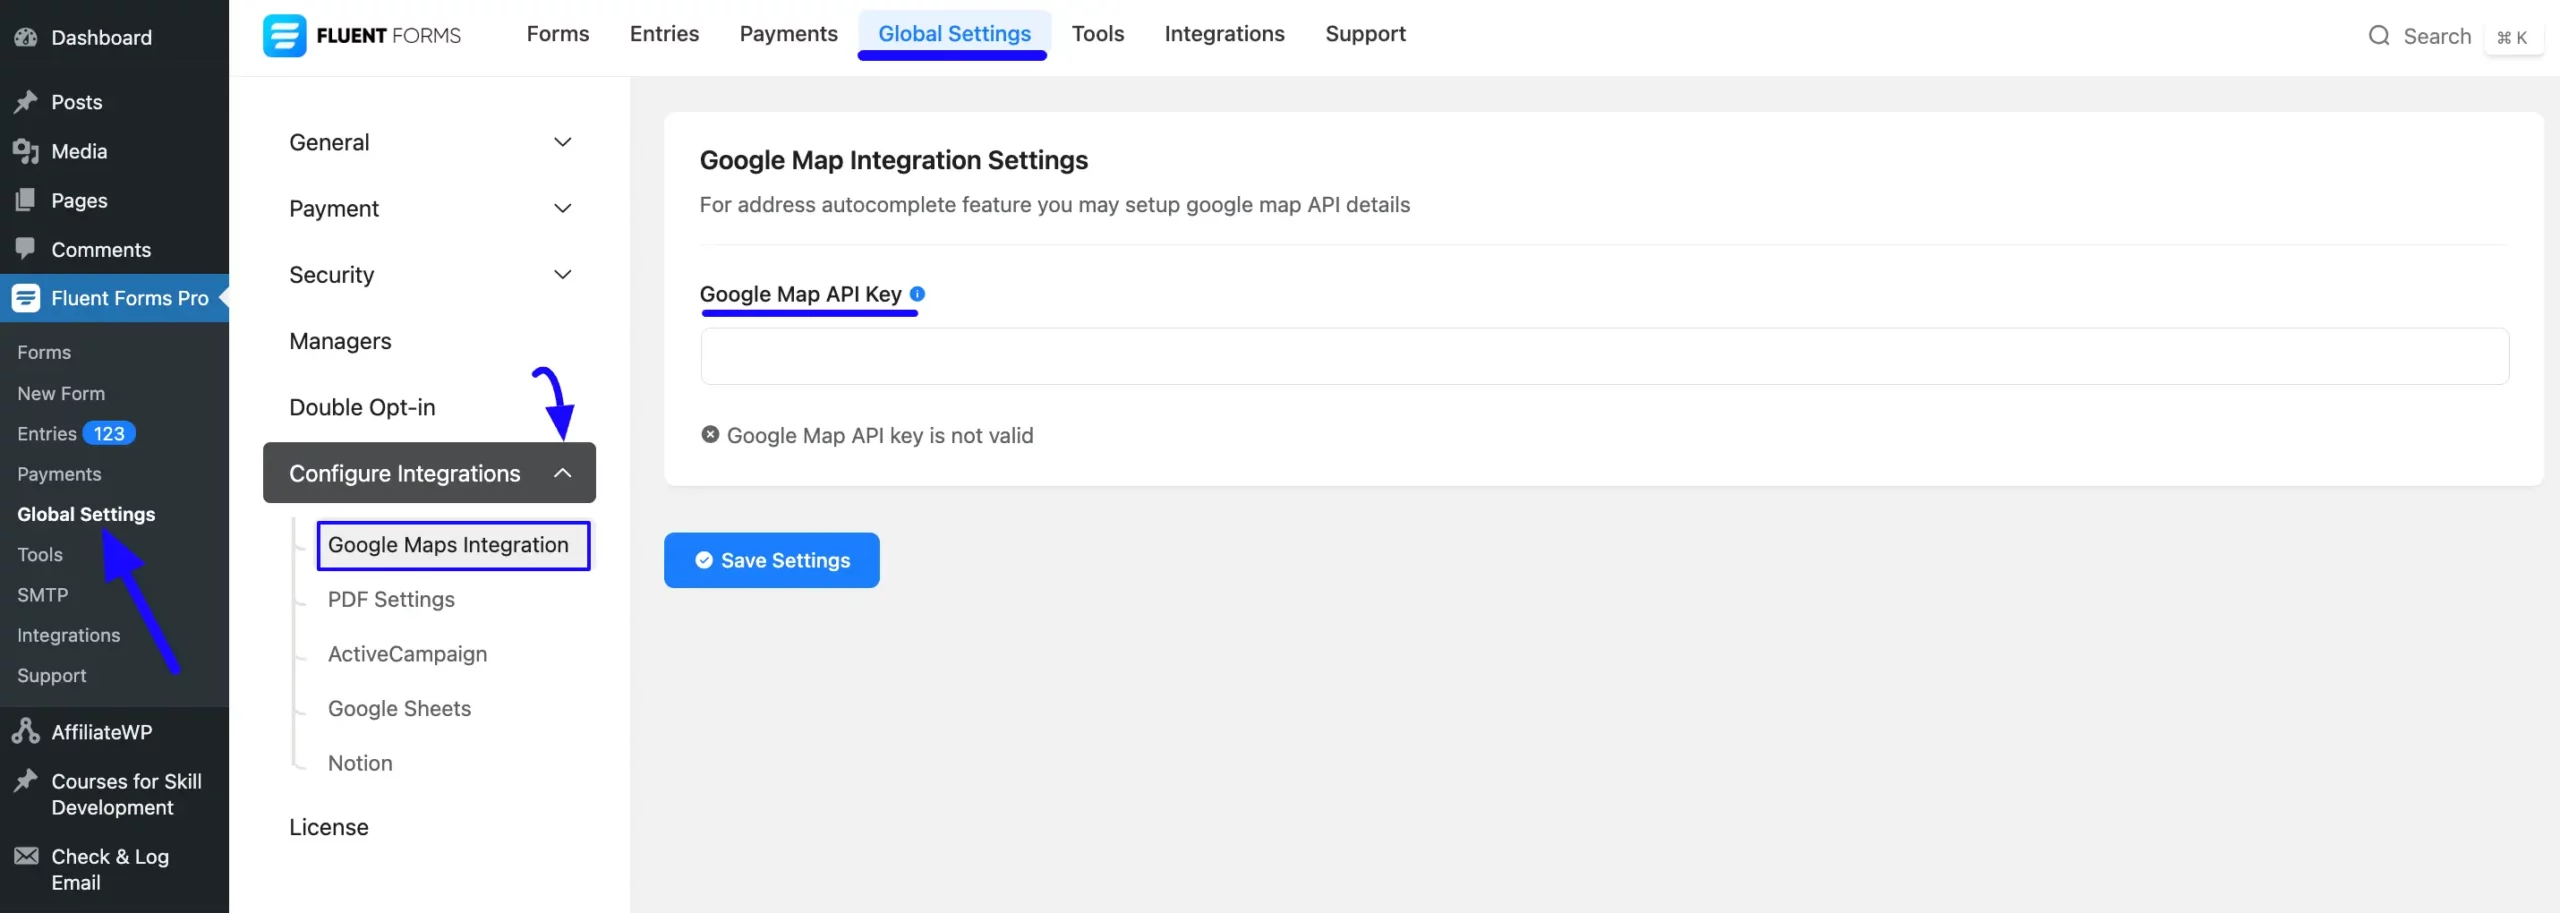
First, go to the Global Settings from the WordPress Left Sidebar or Fluent Forms Navbar, open the Configure Integrations tab in the left menu, and click the Google Maps Integration.
Once you are on the Google Maps Integration Settings, you will be asked for the Google Maps API Key from your Google Account. Then, click the Save Settings button, and Google Maps will be connected to Fluent Forms.
Getting the Google Map API Key #
To learn how to get the Google Map API Key from Google, follow the steps with screenshots below –
First, go to your Google Cloud Console and select an existing project you want to connect with Fluent Forms by clicking the drop-down box in the top left corner.
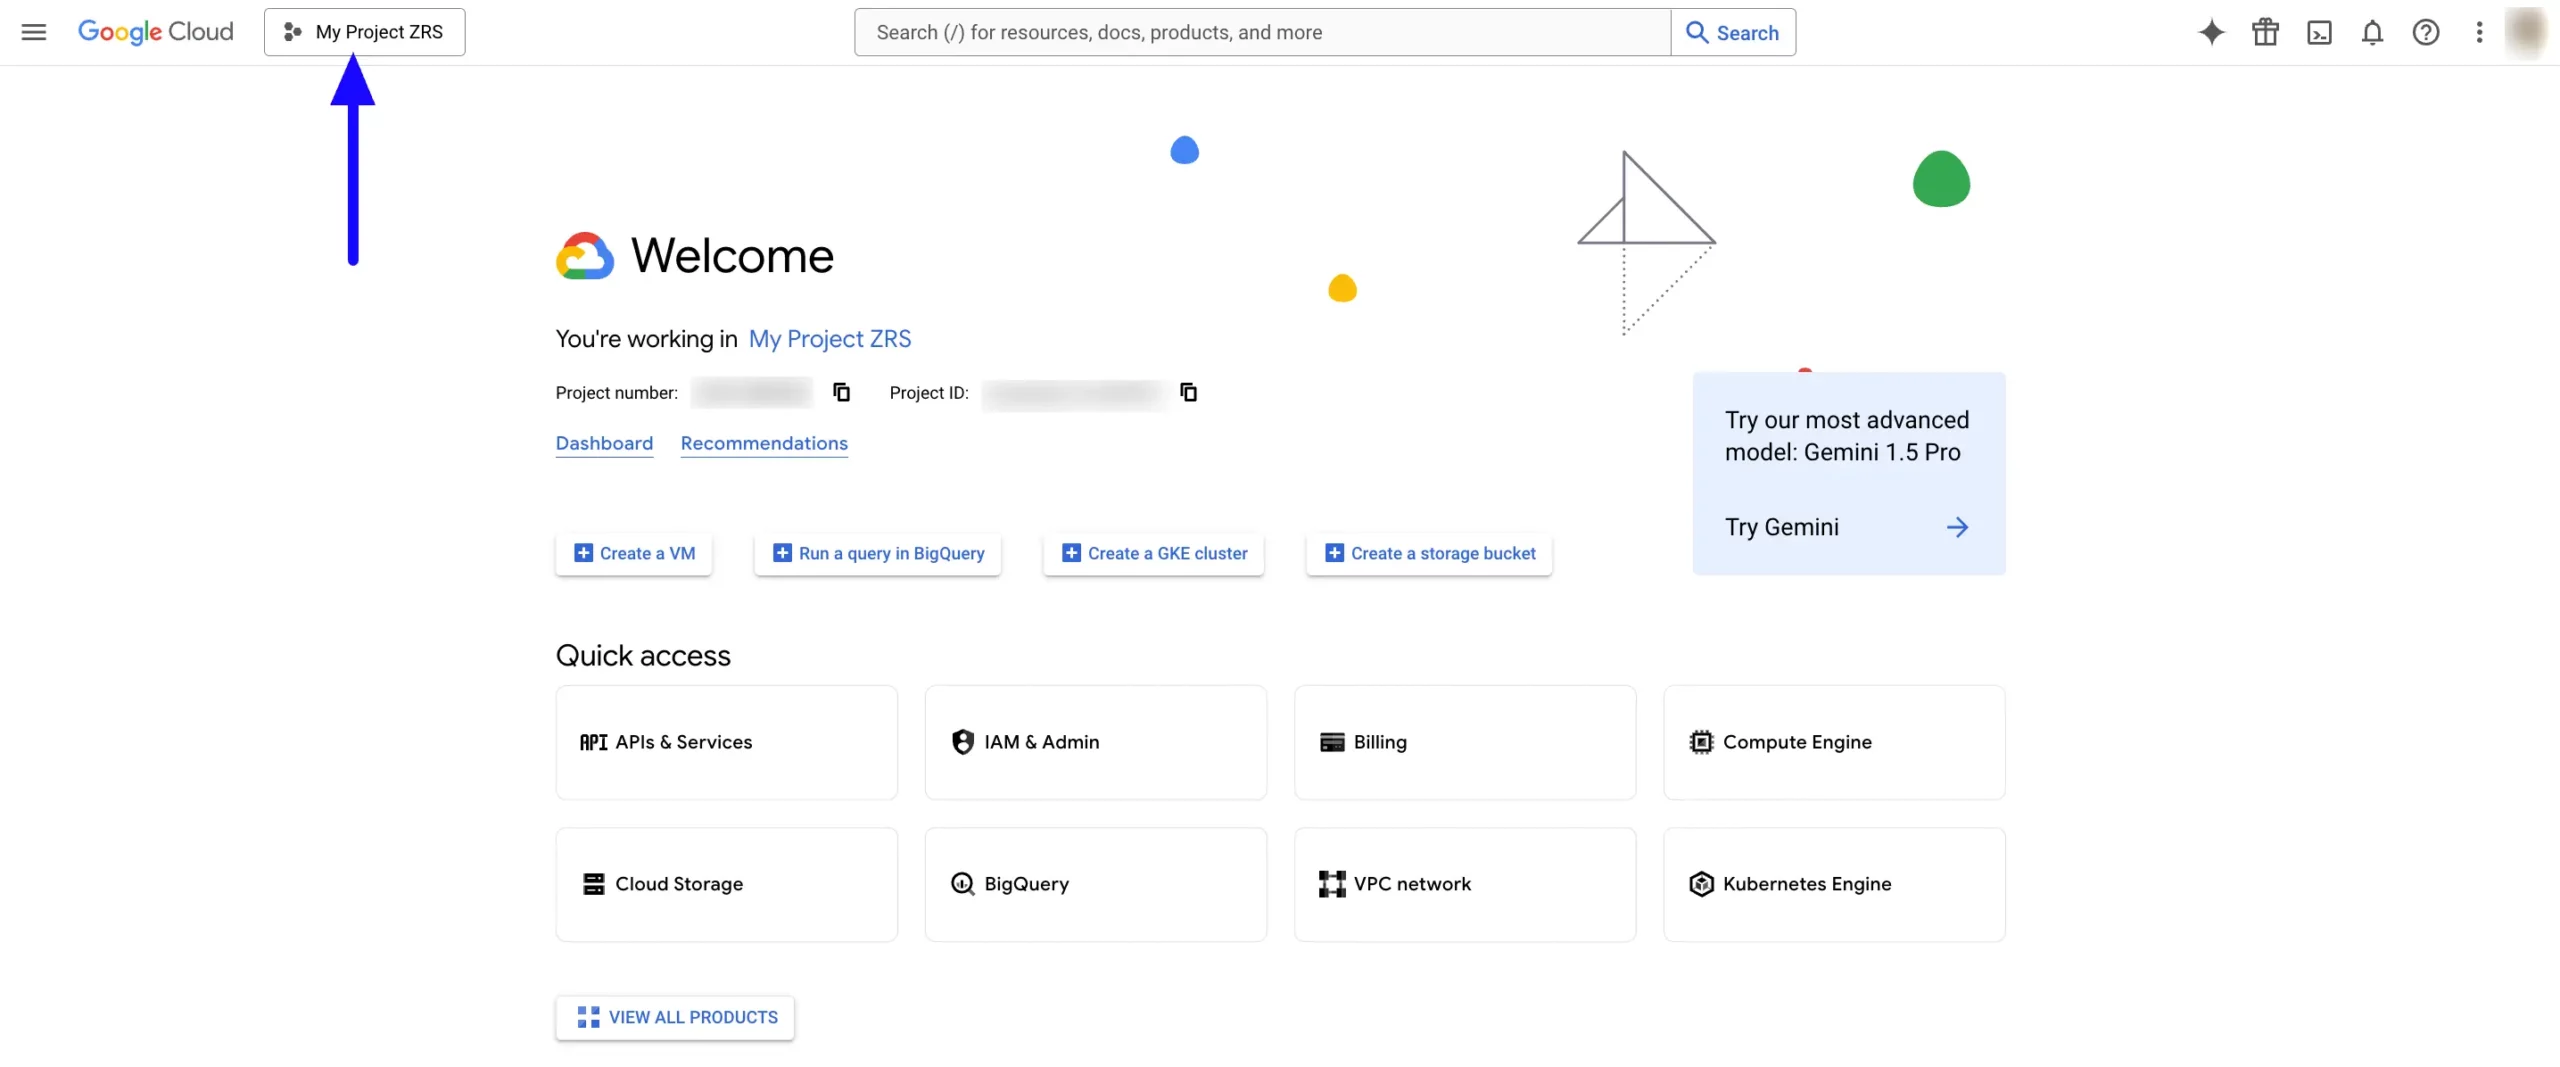
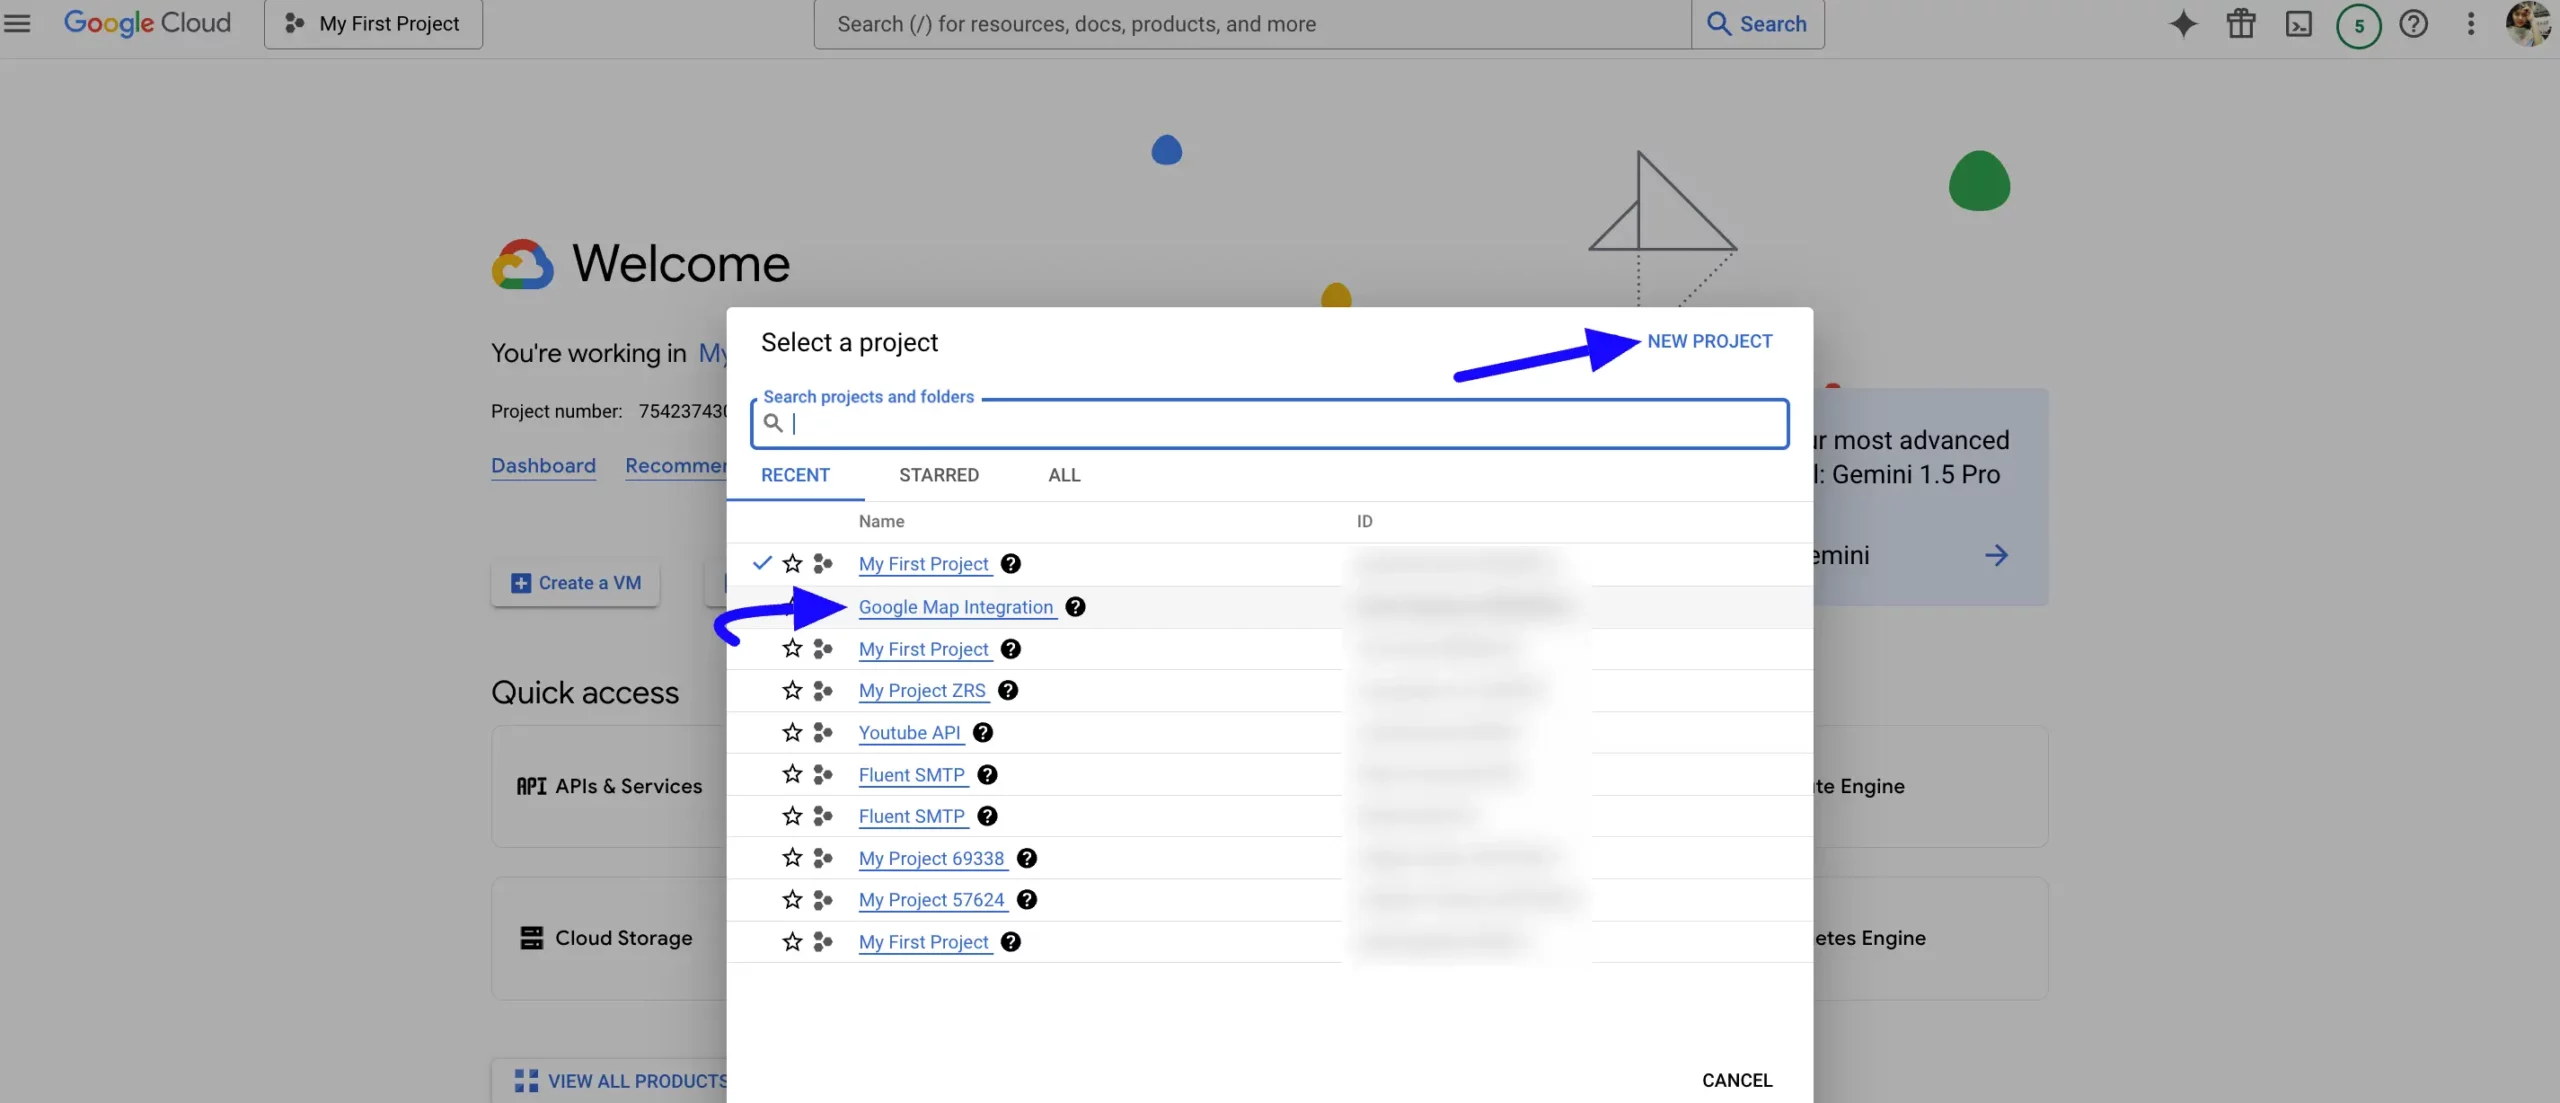
Or, to get the API Key, you can create a new project by clicking the NEW PROJECT button in the top right corner.
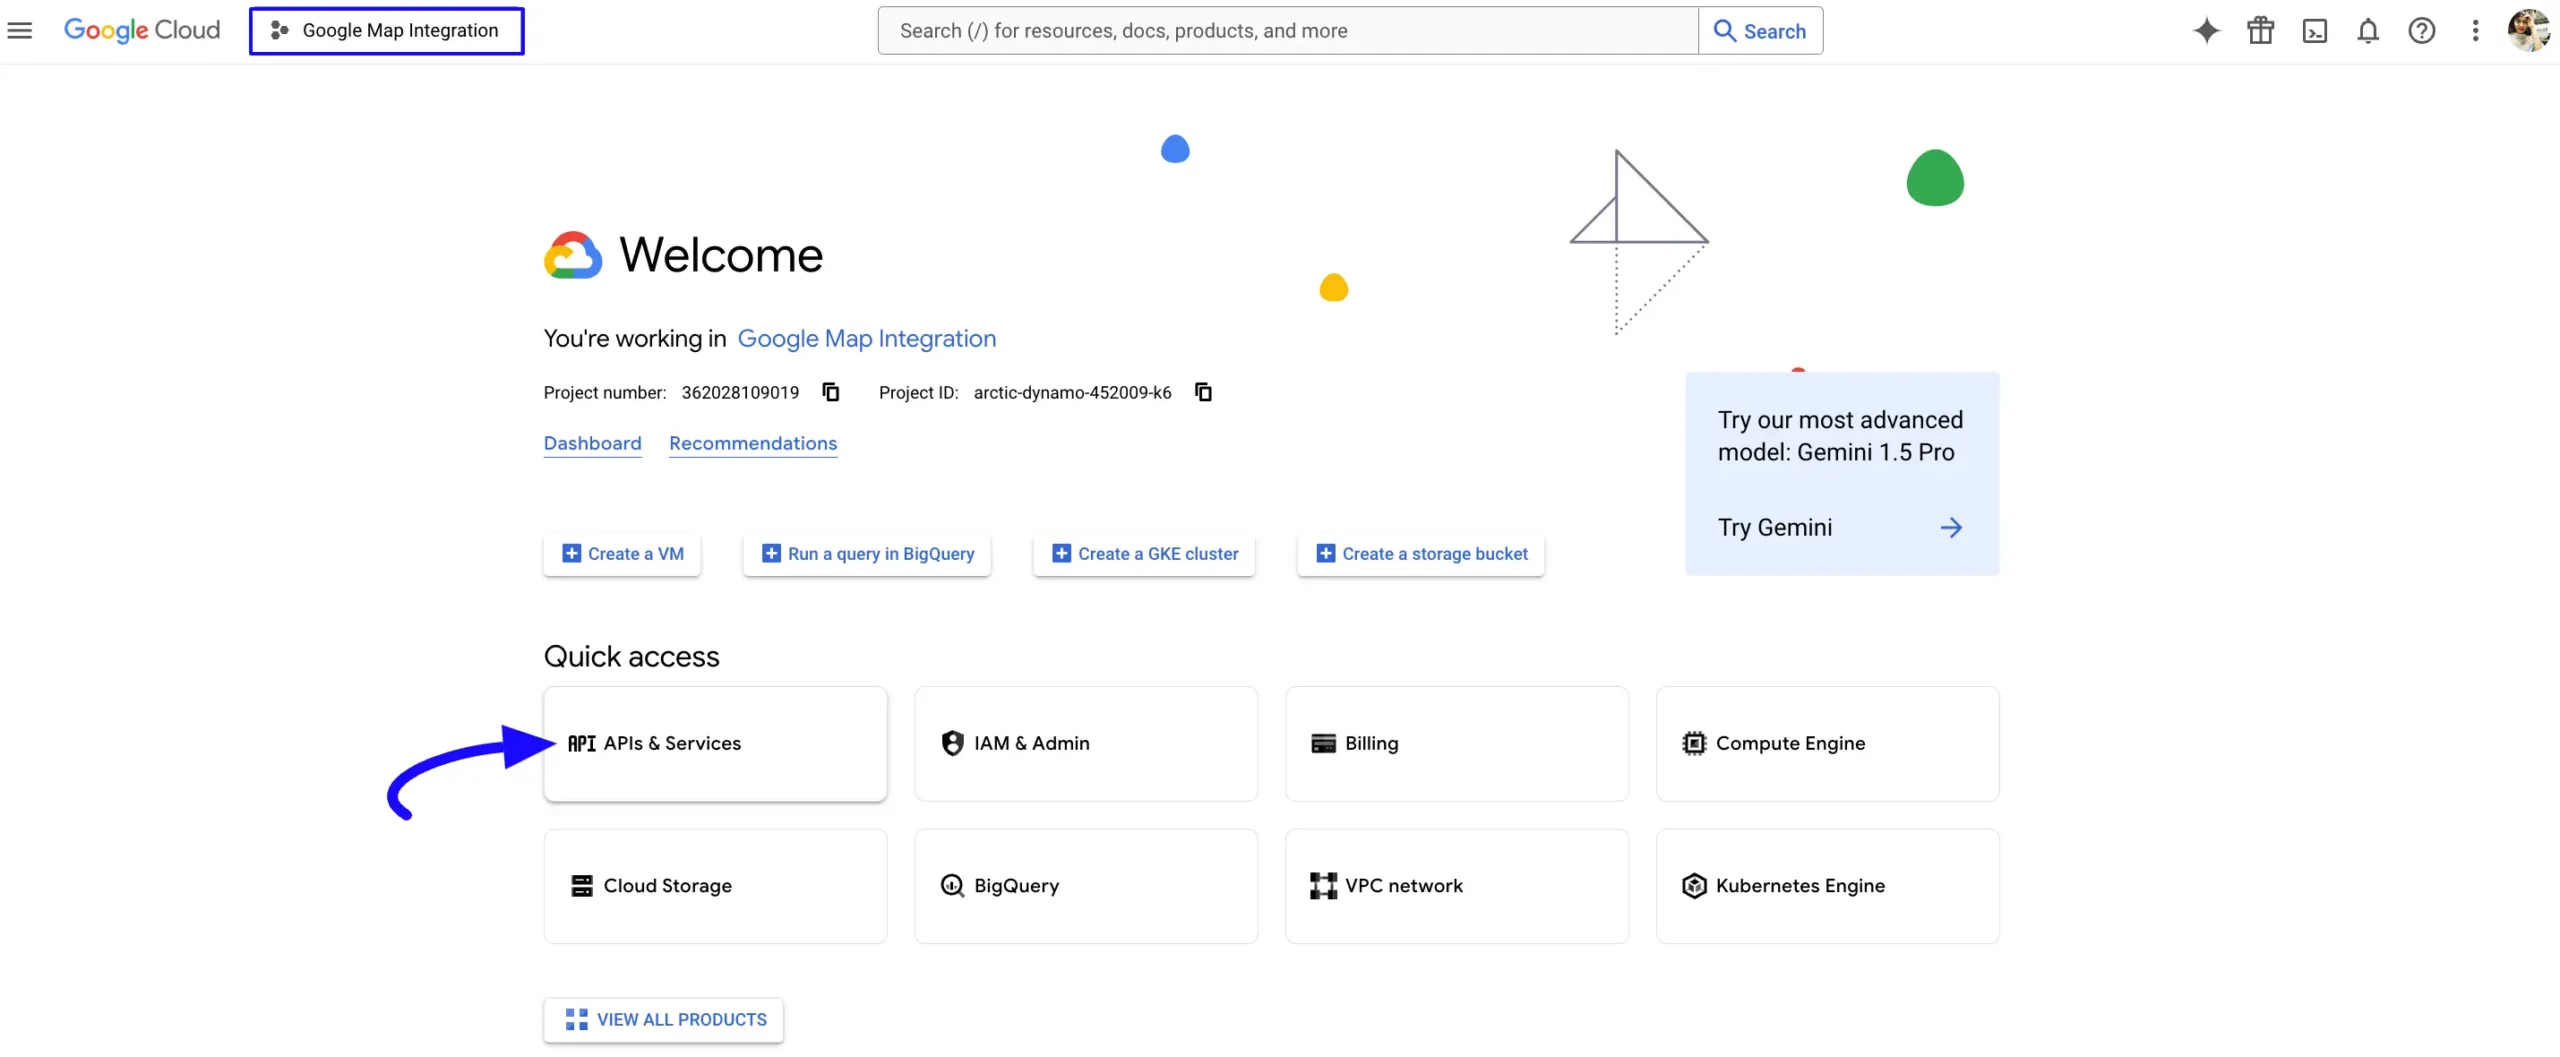
For example, I selected an existing project called Google Map Integration to show you the whole process.
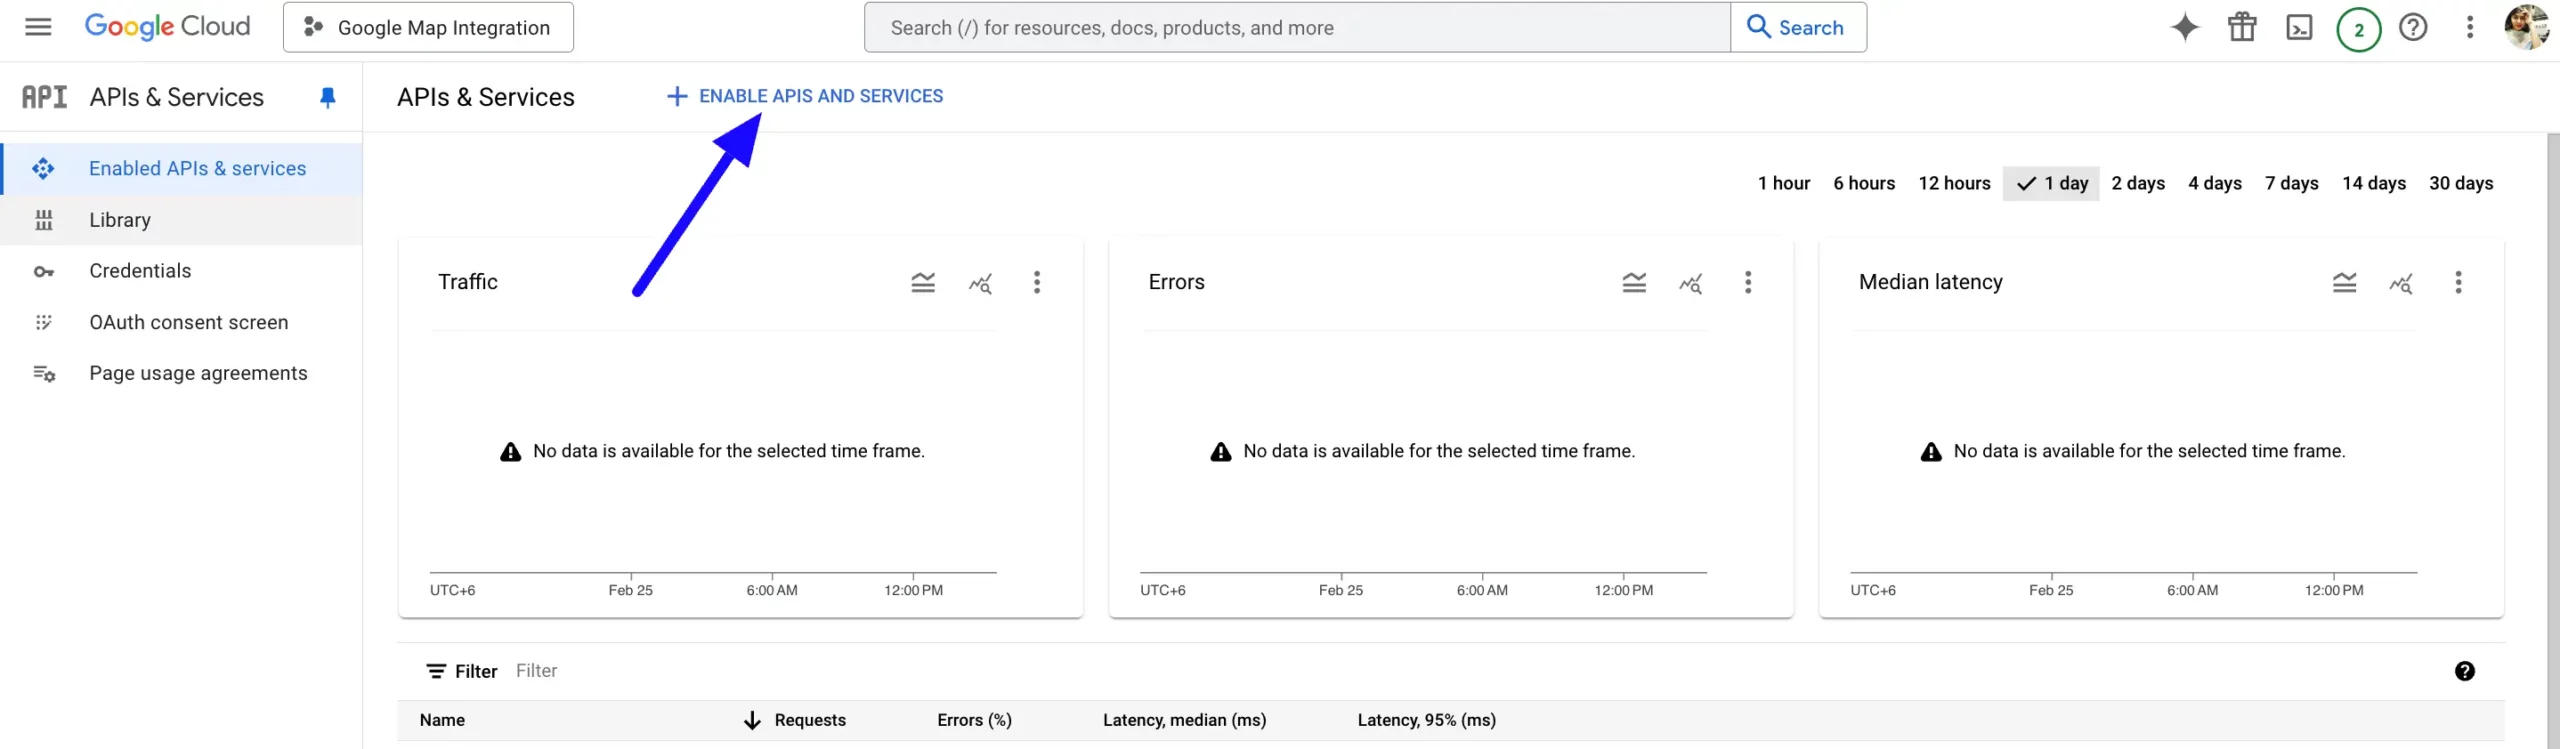
After selecting the project, click the APIs & Services tab.
Now, click the + ENABLE APIS AND SERVICES option at the top.
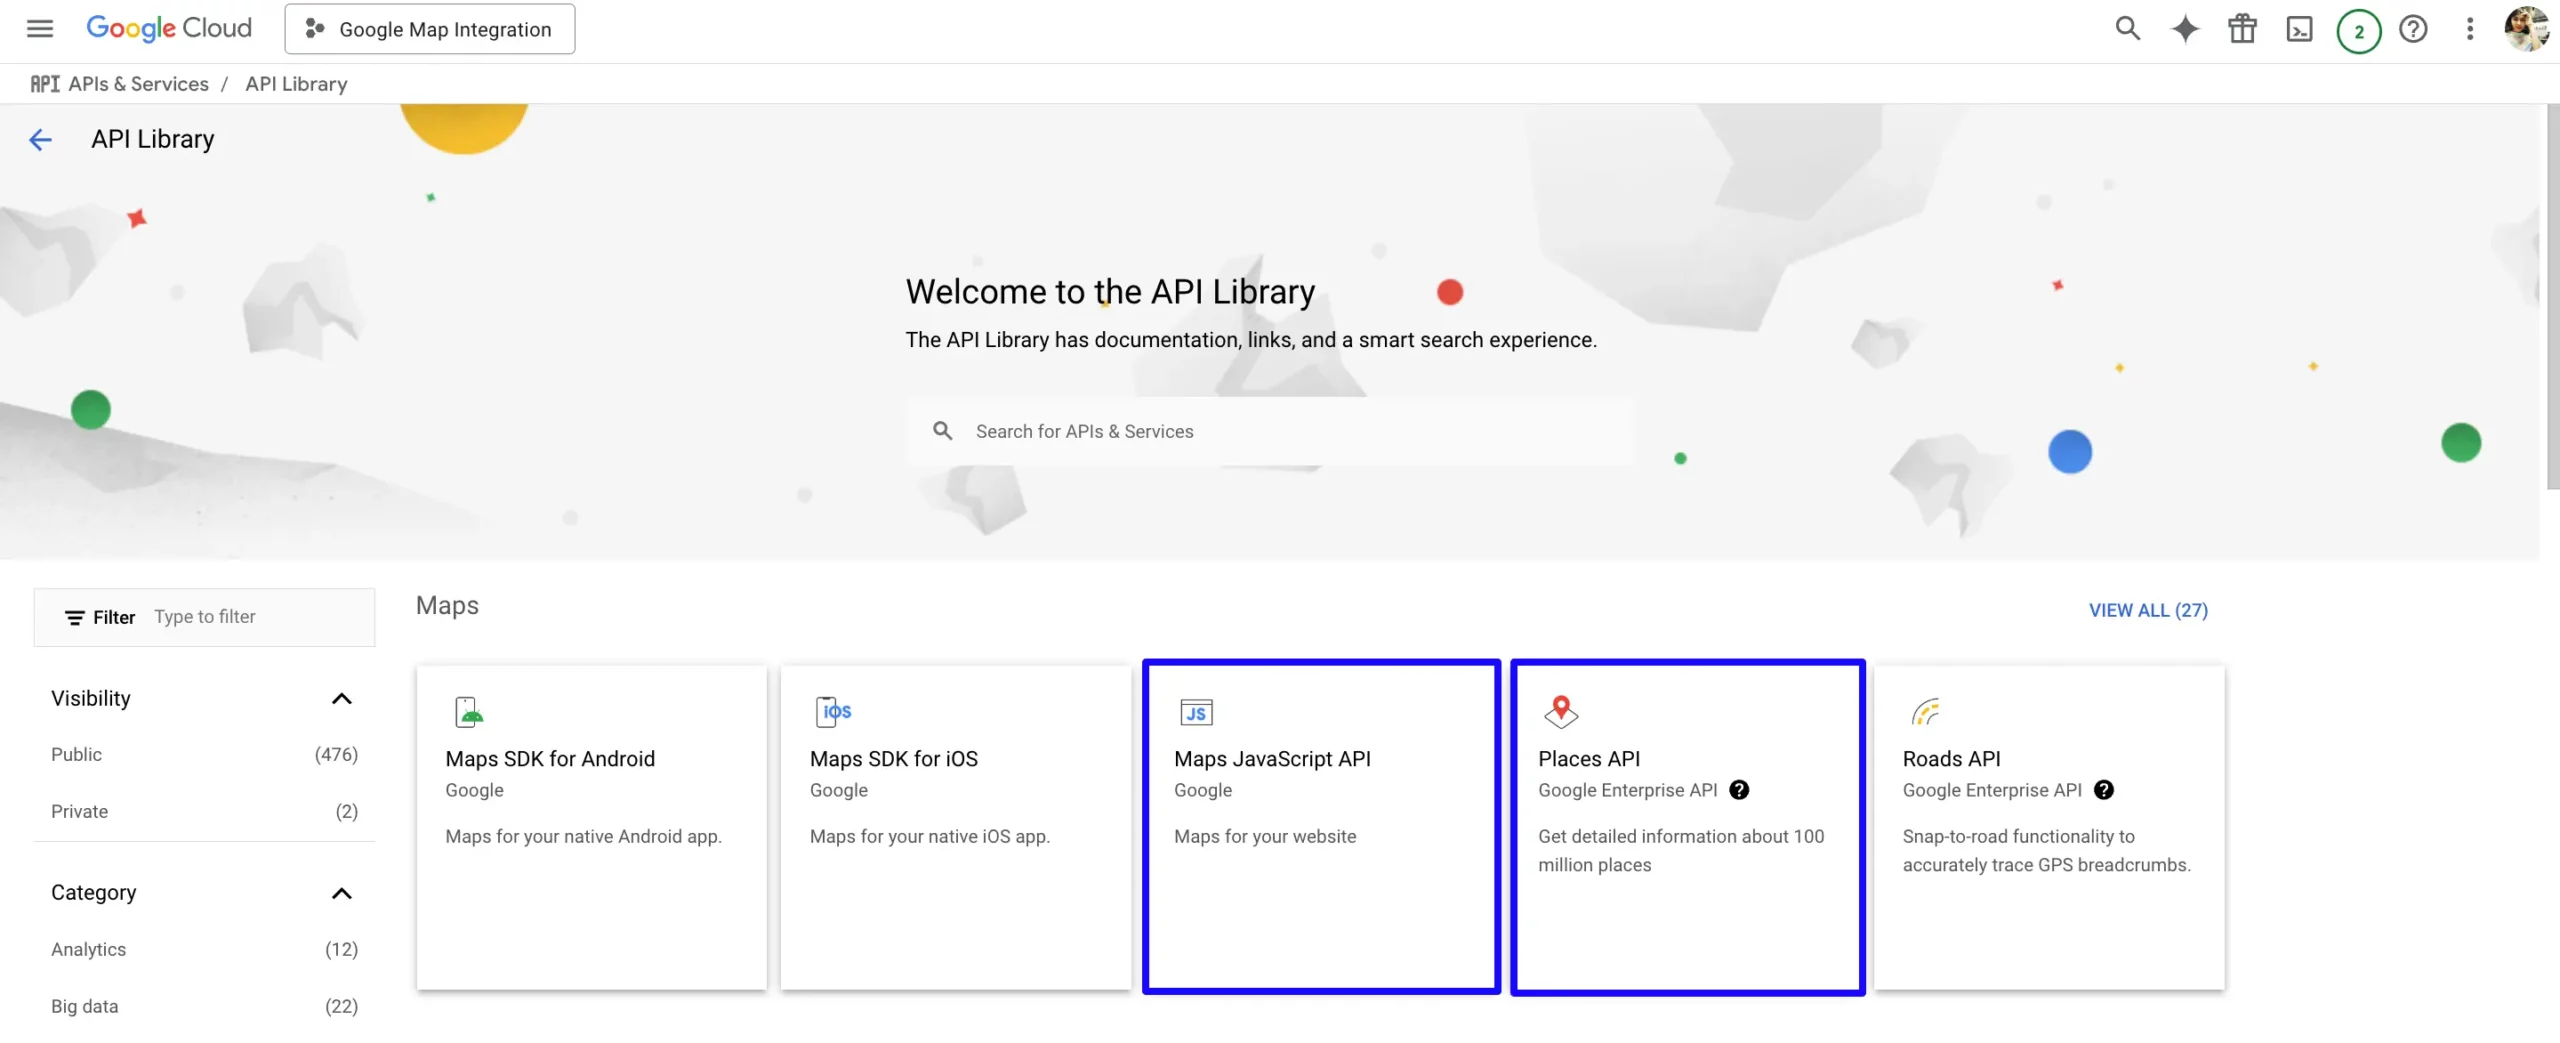
Then, select the Maps JavaScript API and Places API options respectively, and enable them.
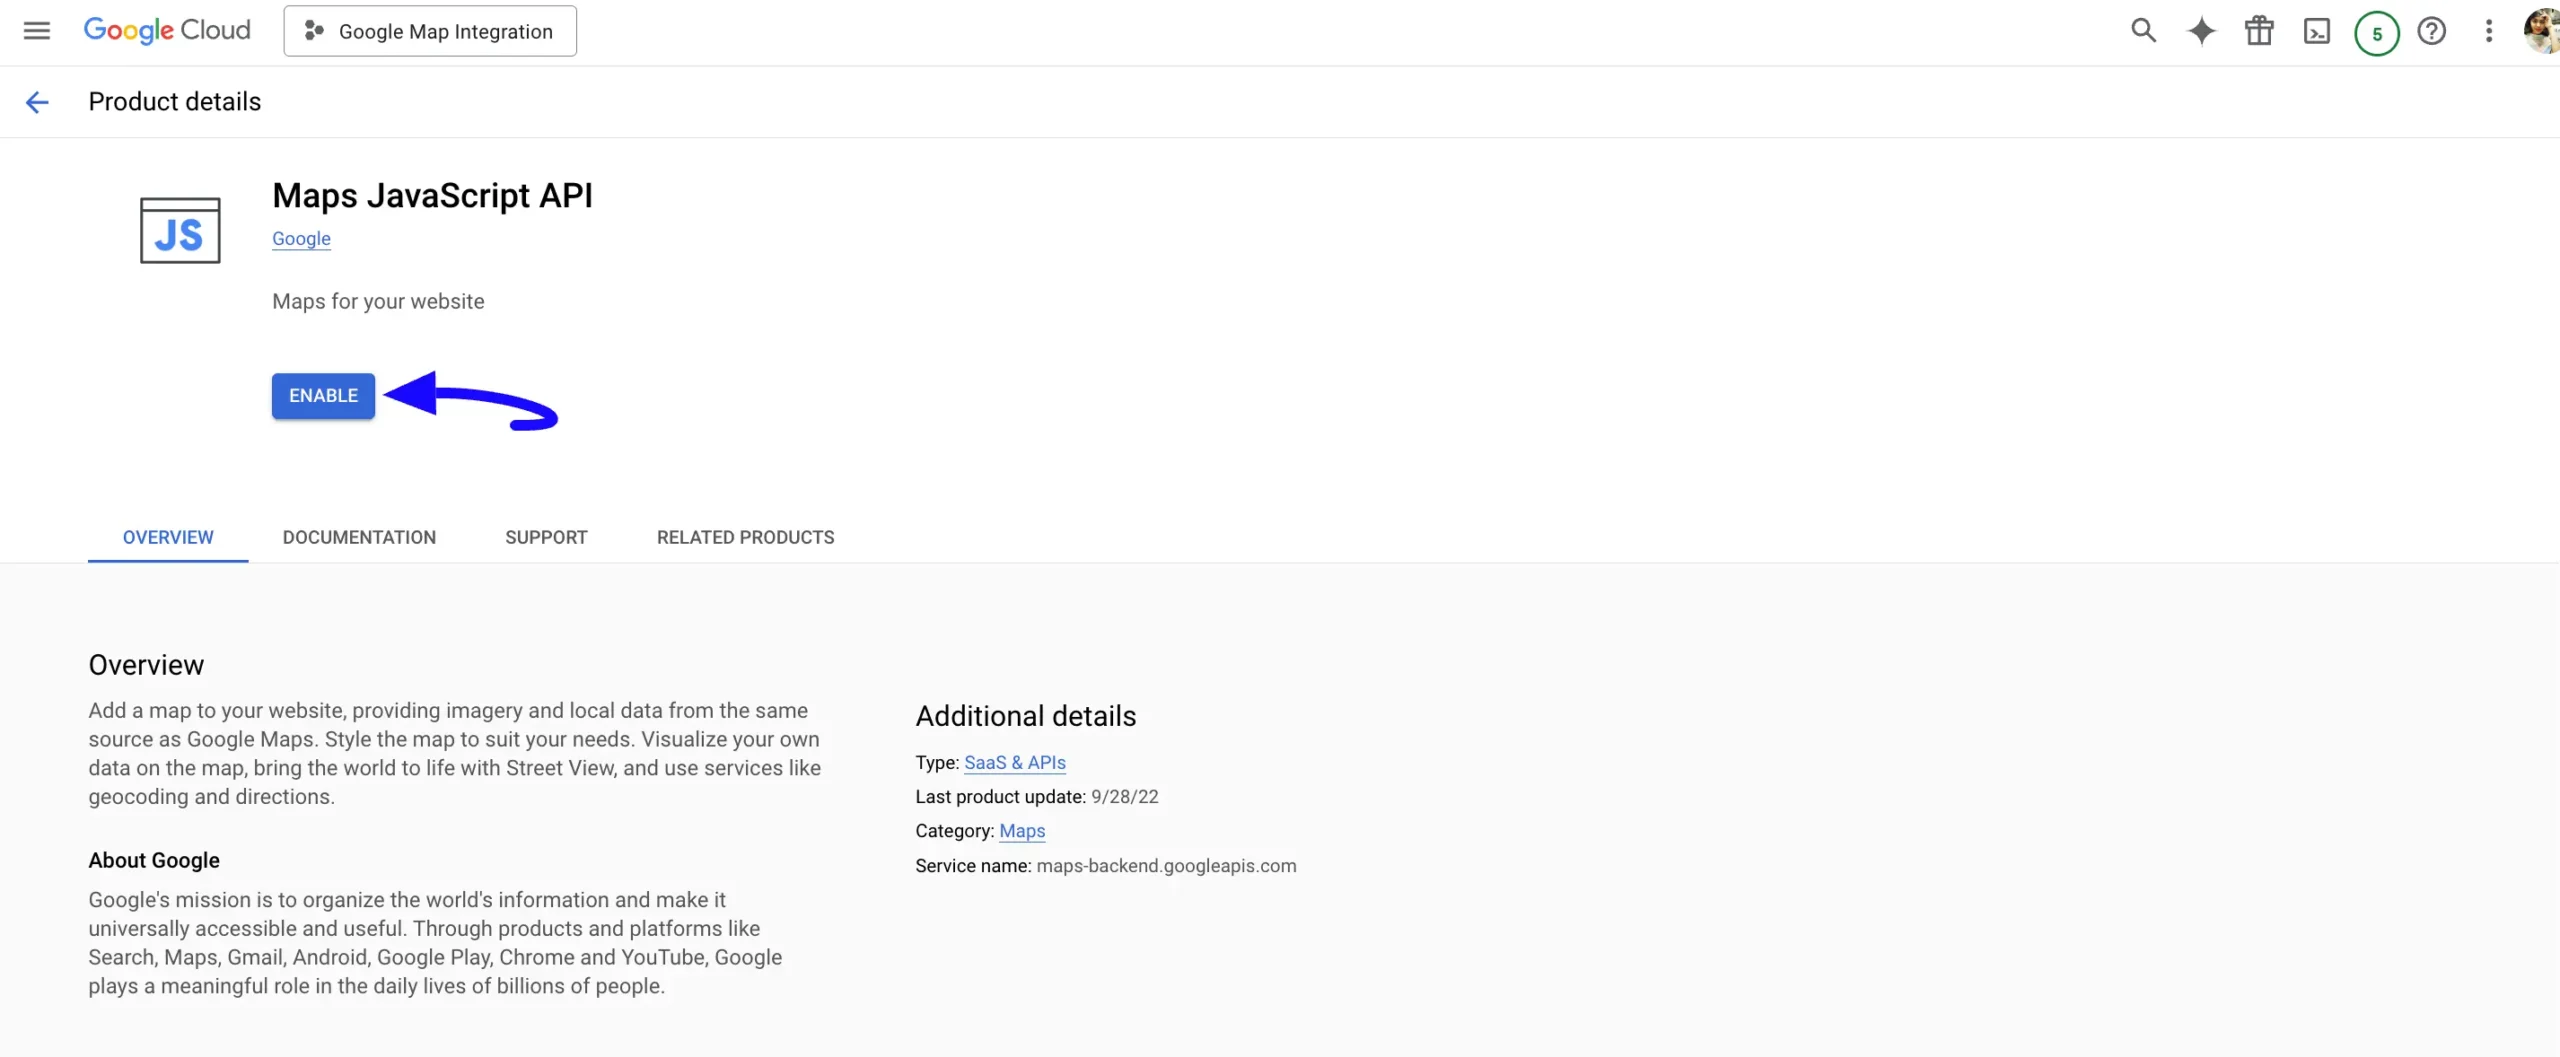
Click the ENABLE button of the Maps JavaScript API.
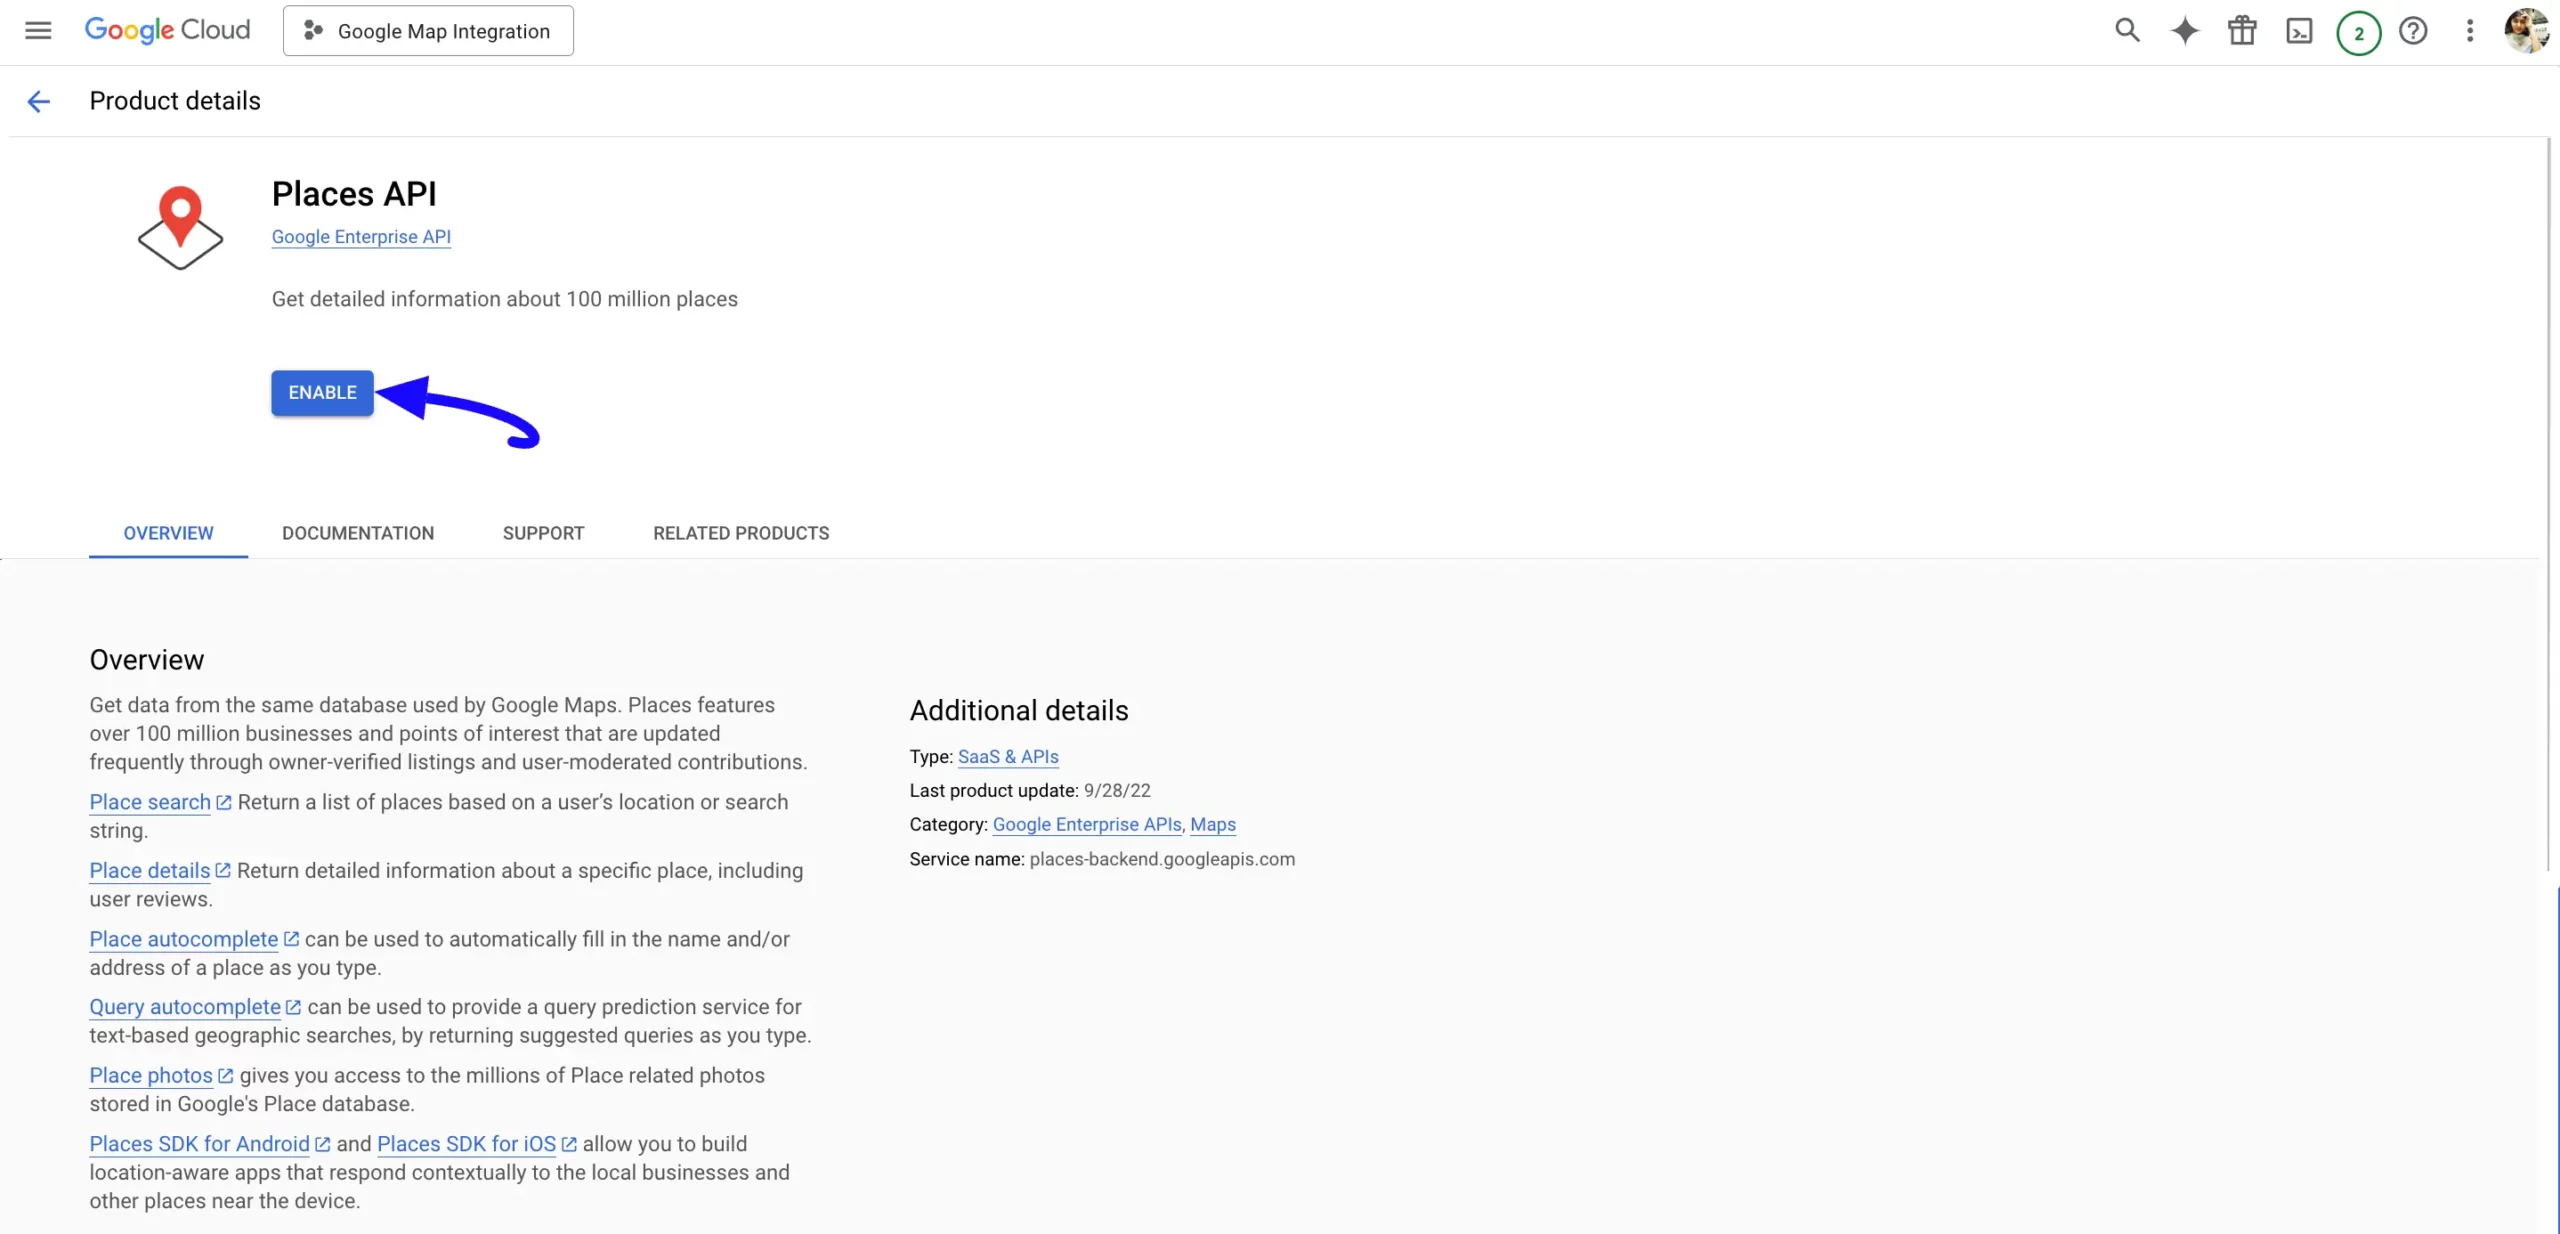
Click the ENABLE button of Places API.
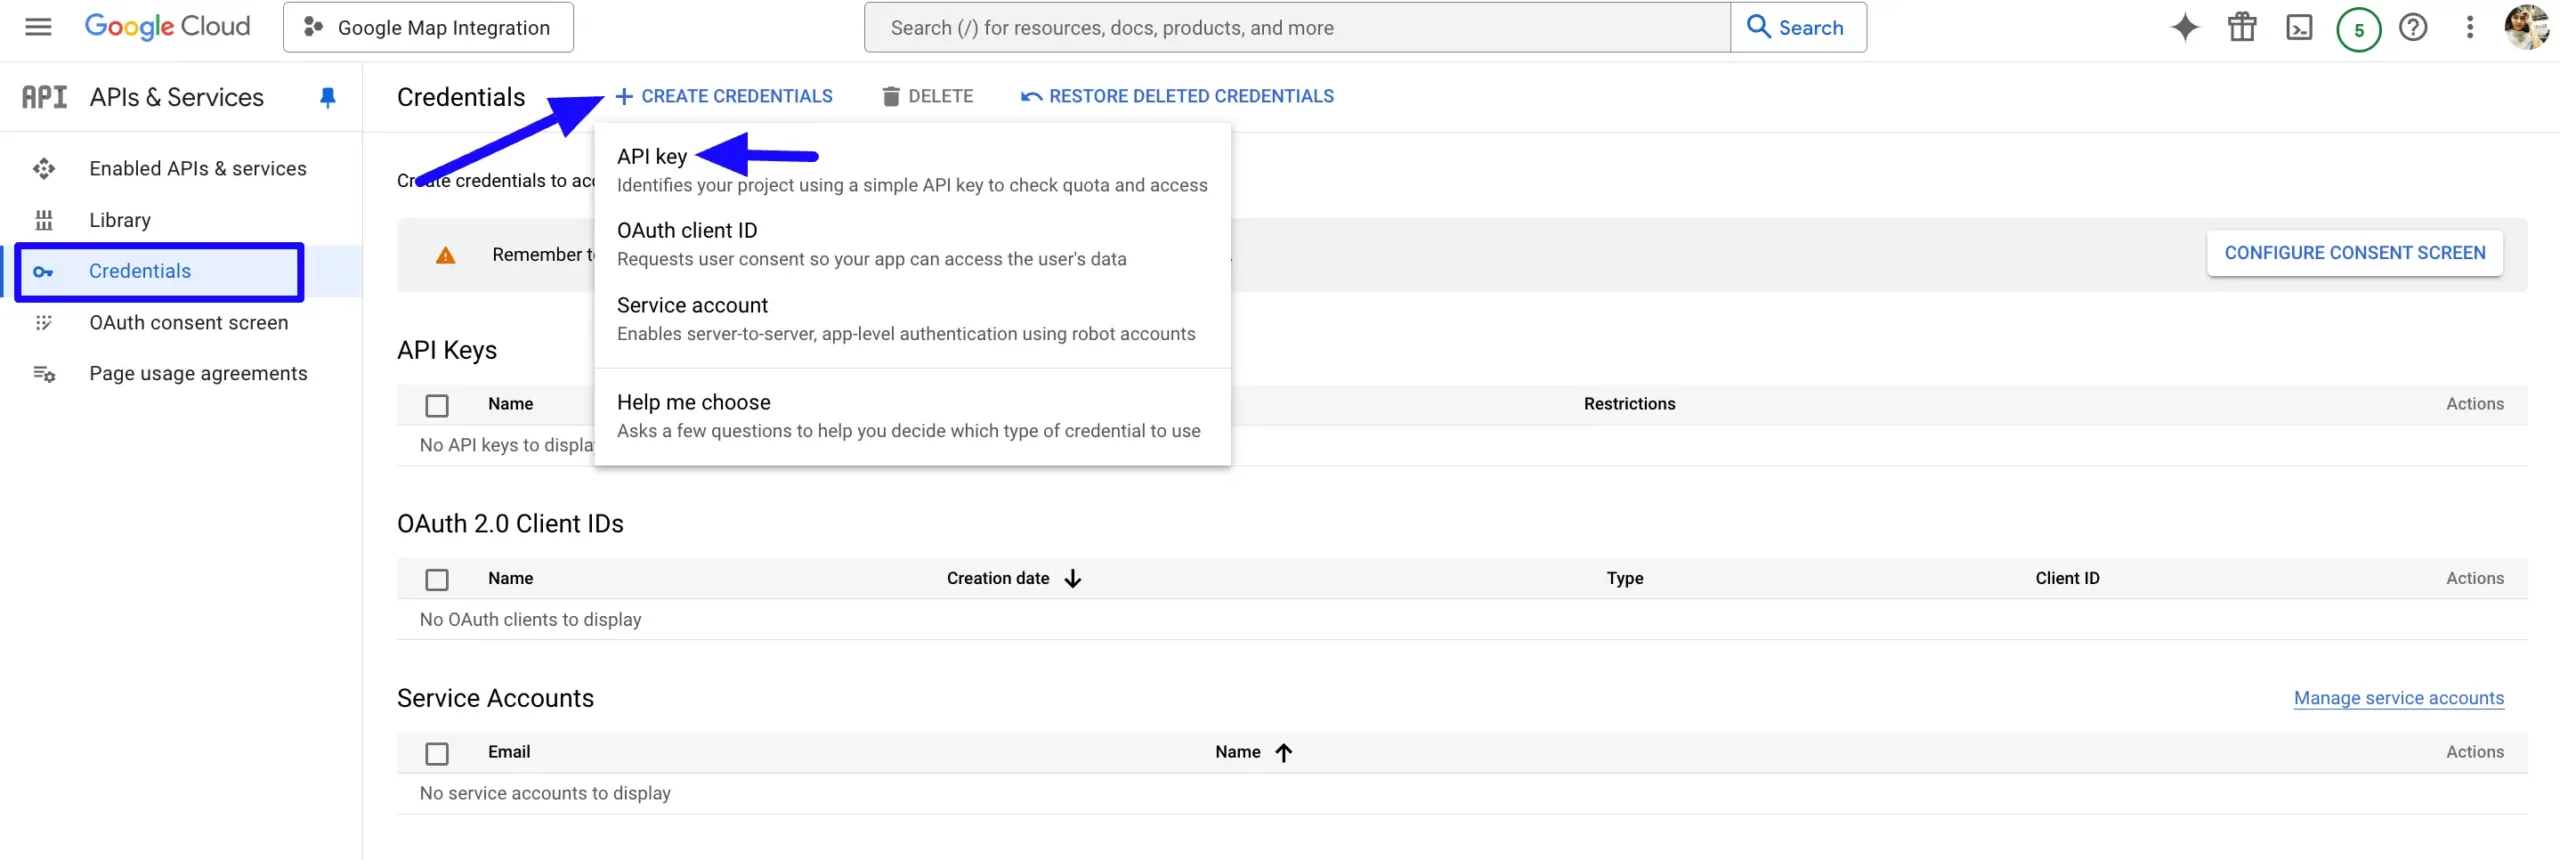
Now, return to the APIs & Services tab, go to the Credentials from the left menu, click the + CREATE CREDENTIALS option at the top, and press the API key button.
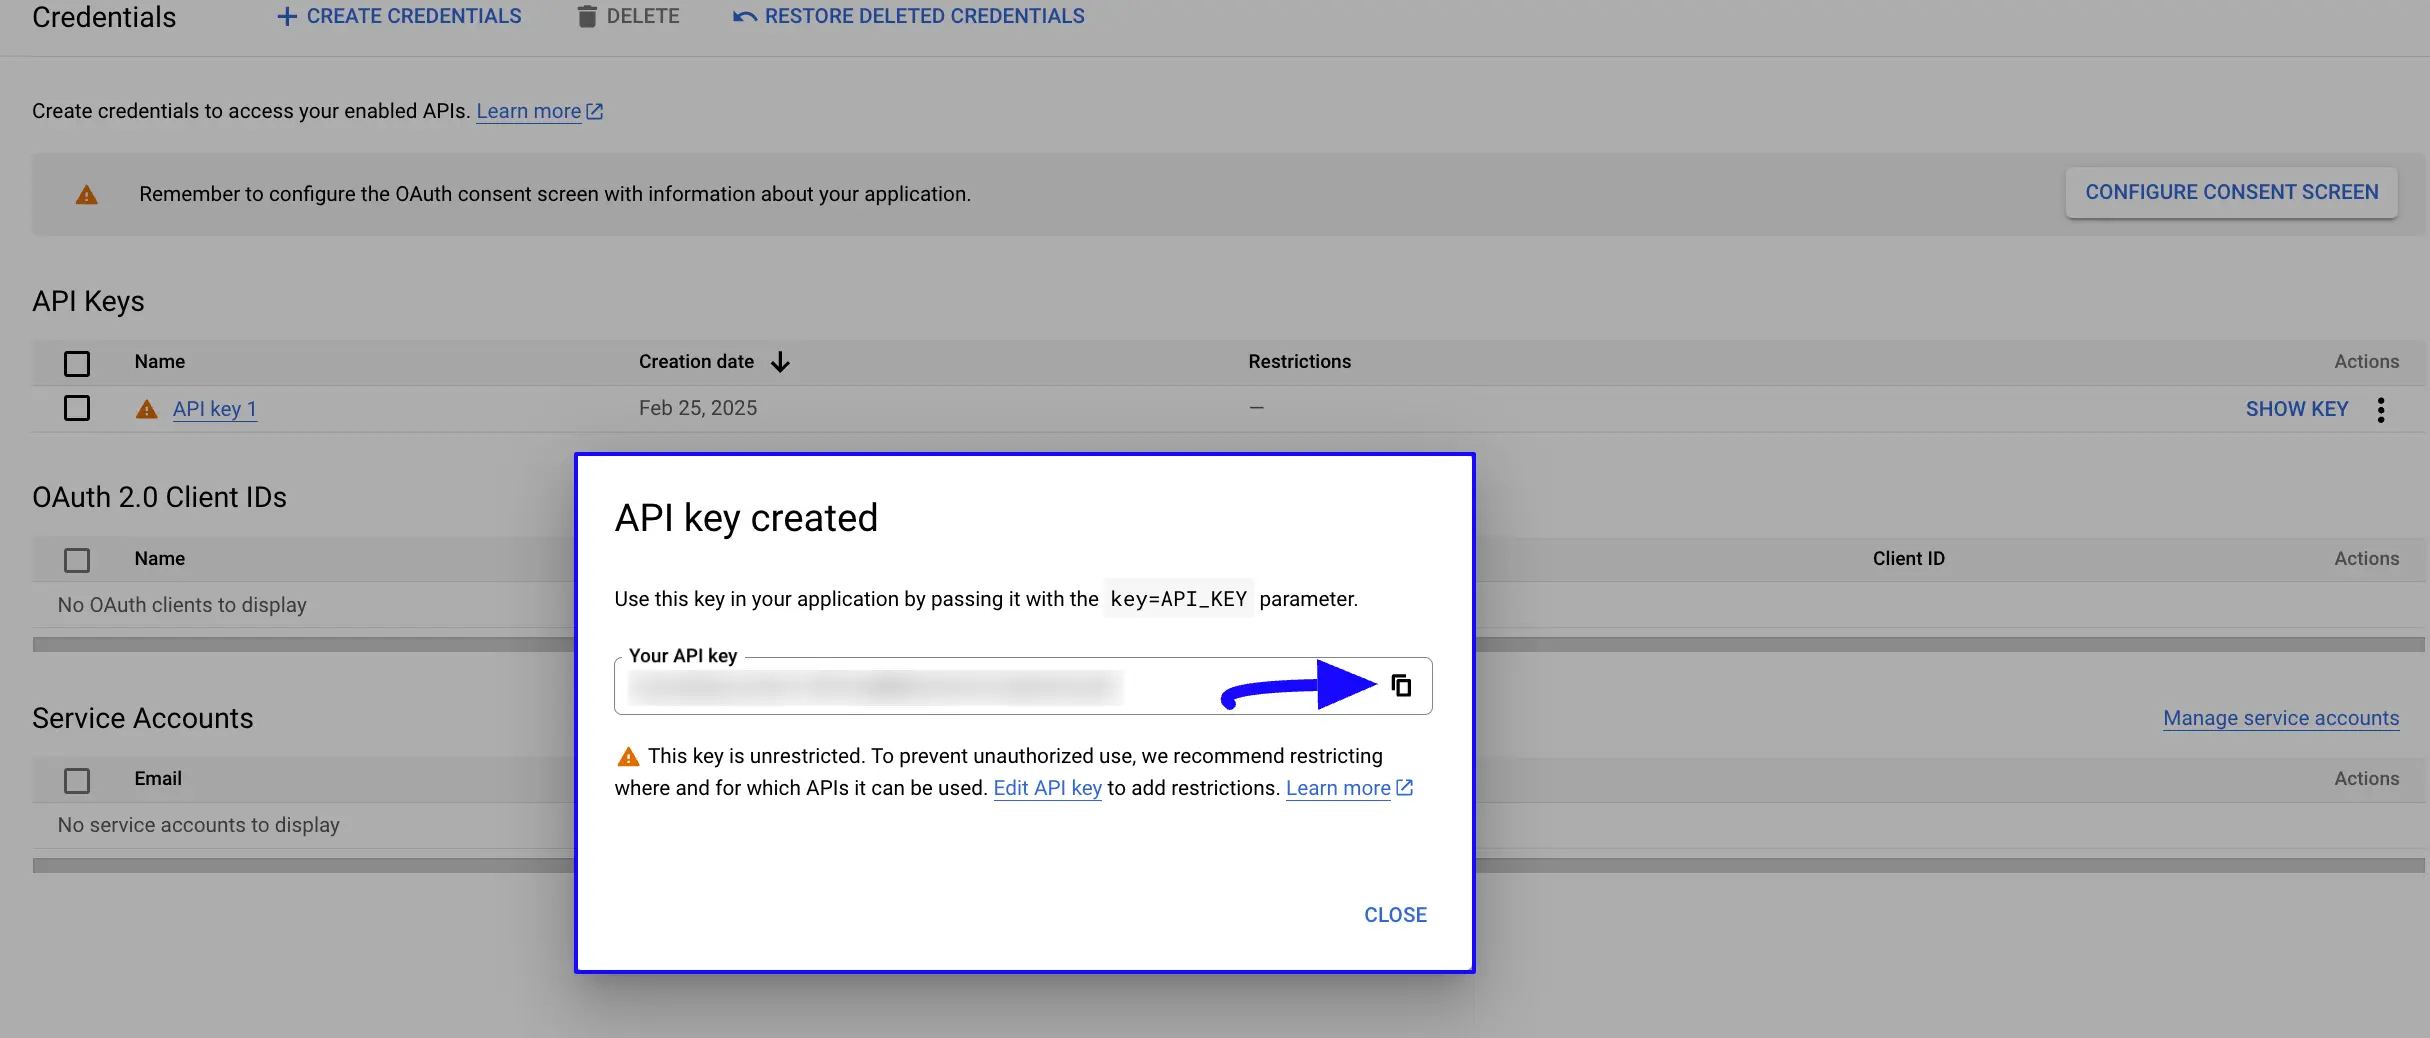
A pop-up box will appear with the Google Map API Key. Simply copy it by clicking the Copy Icon.
Connecting Google Maps with Fluent Forms #
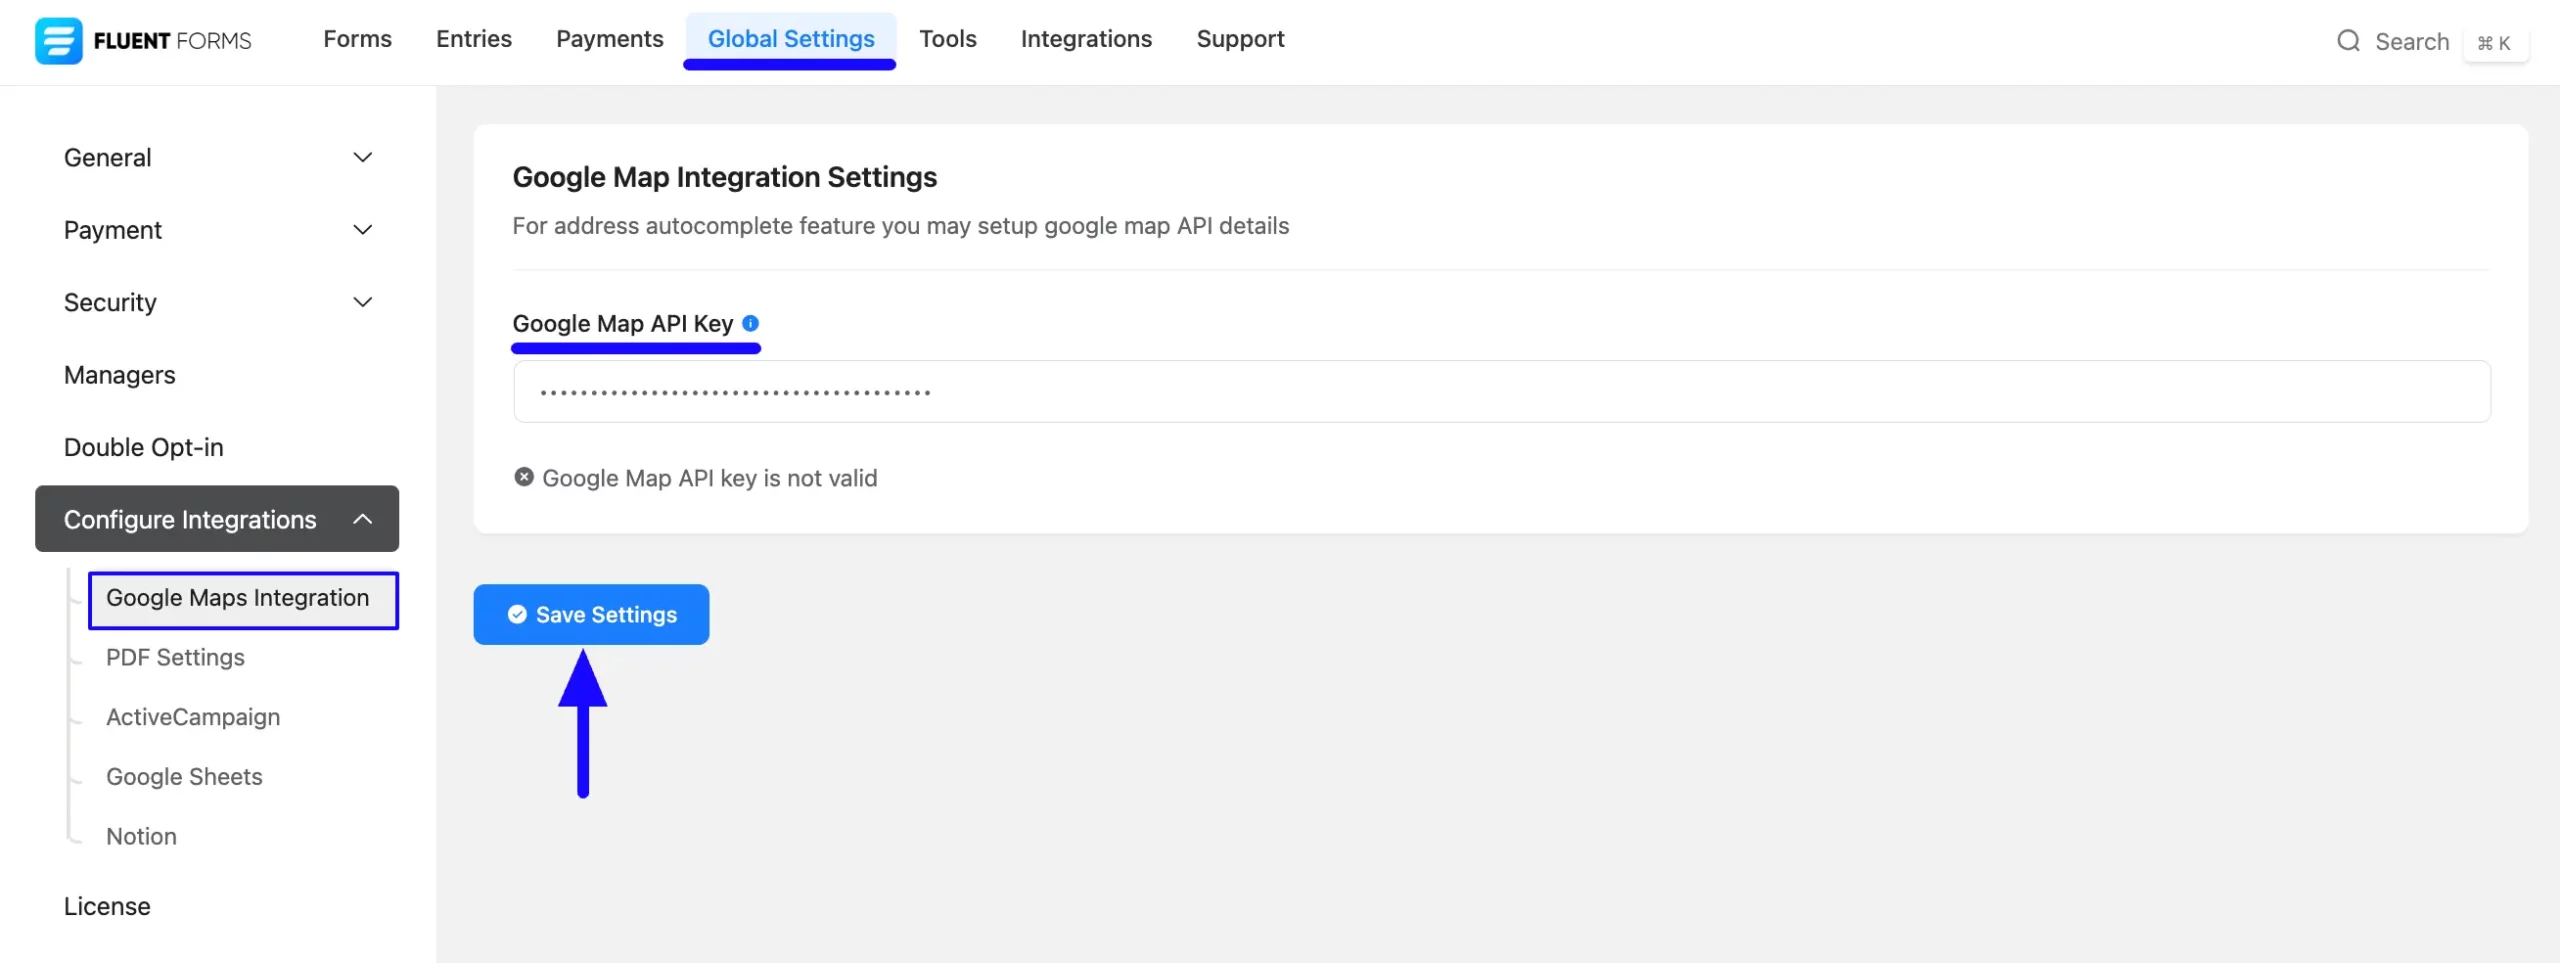
Go back to the Google Maps Integration Settings page under the Configure Integrations tab of the Global Settings section from the Fluent Forms Navbar.
Paste the API Key you copied from Google into the Google Map API Key field.
Finally, press the Save Settings button, and your Google Map Integration module will be enabled.
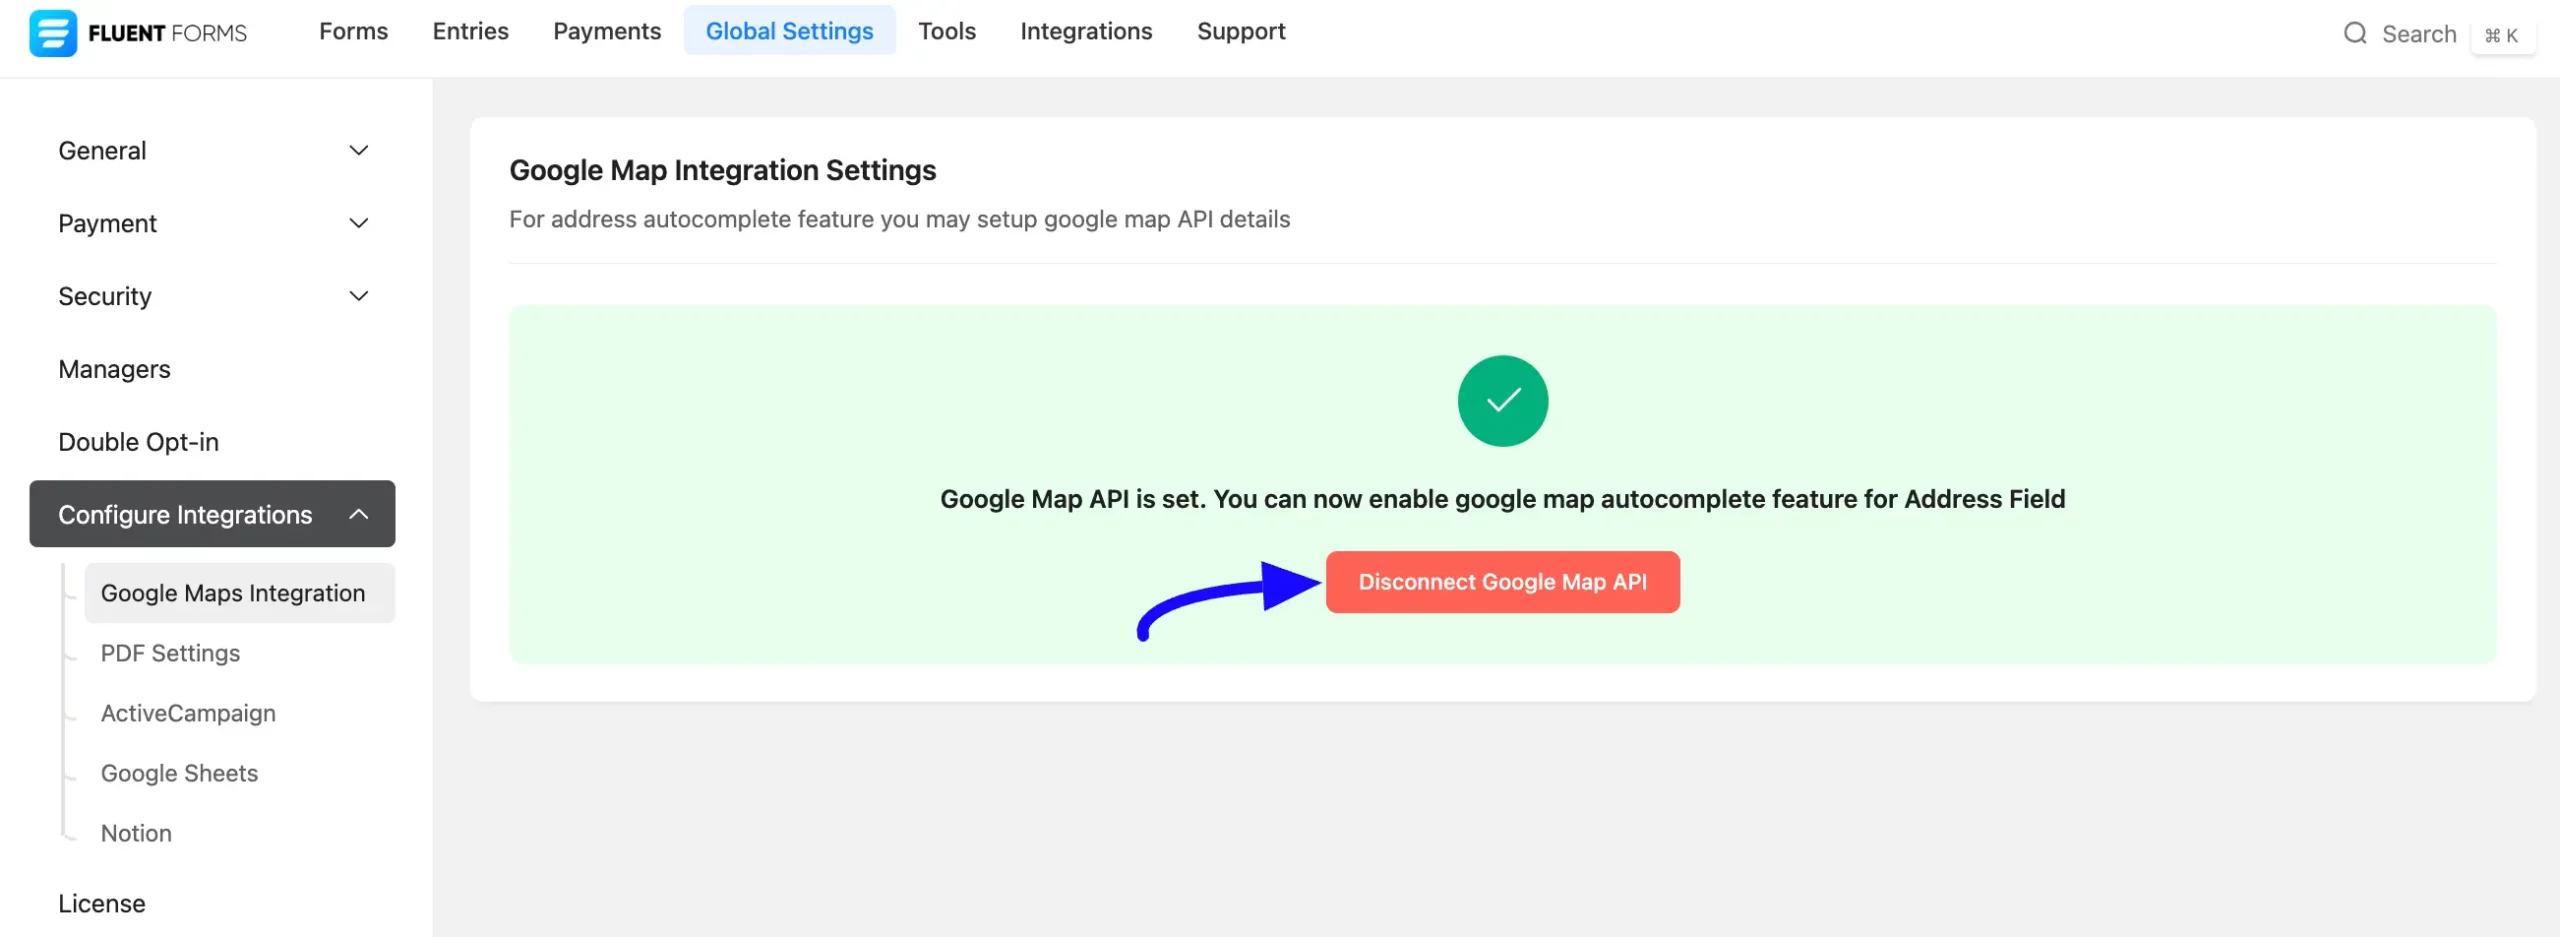
Now, you can see that the Google Map has been successfully connected to your Fluent Forms. You can disconnect it anytime by clicking the Disconnect Google Map API button.
Integrating Google Maps with Address Field #
To learn how to integrate Google Maps into any specific Form in Fluent Forms, follow the steps with the screenshots below –
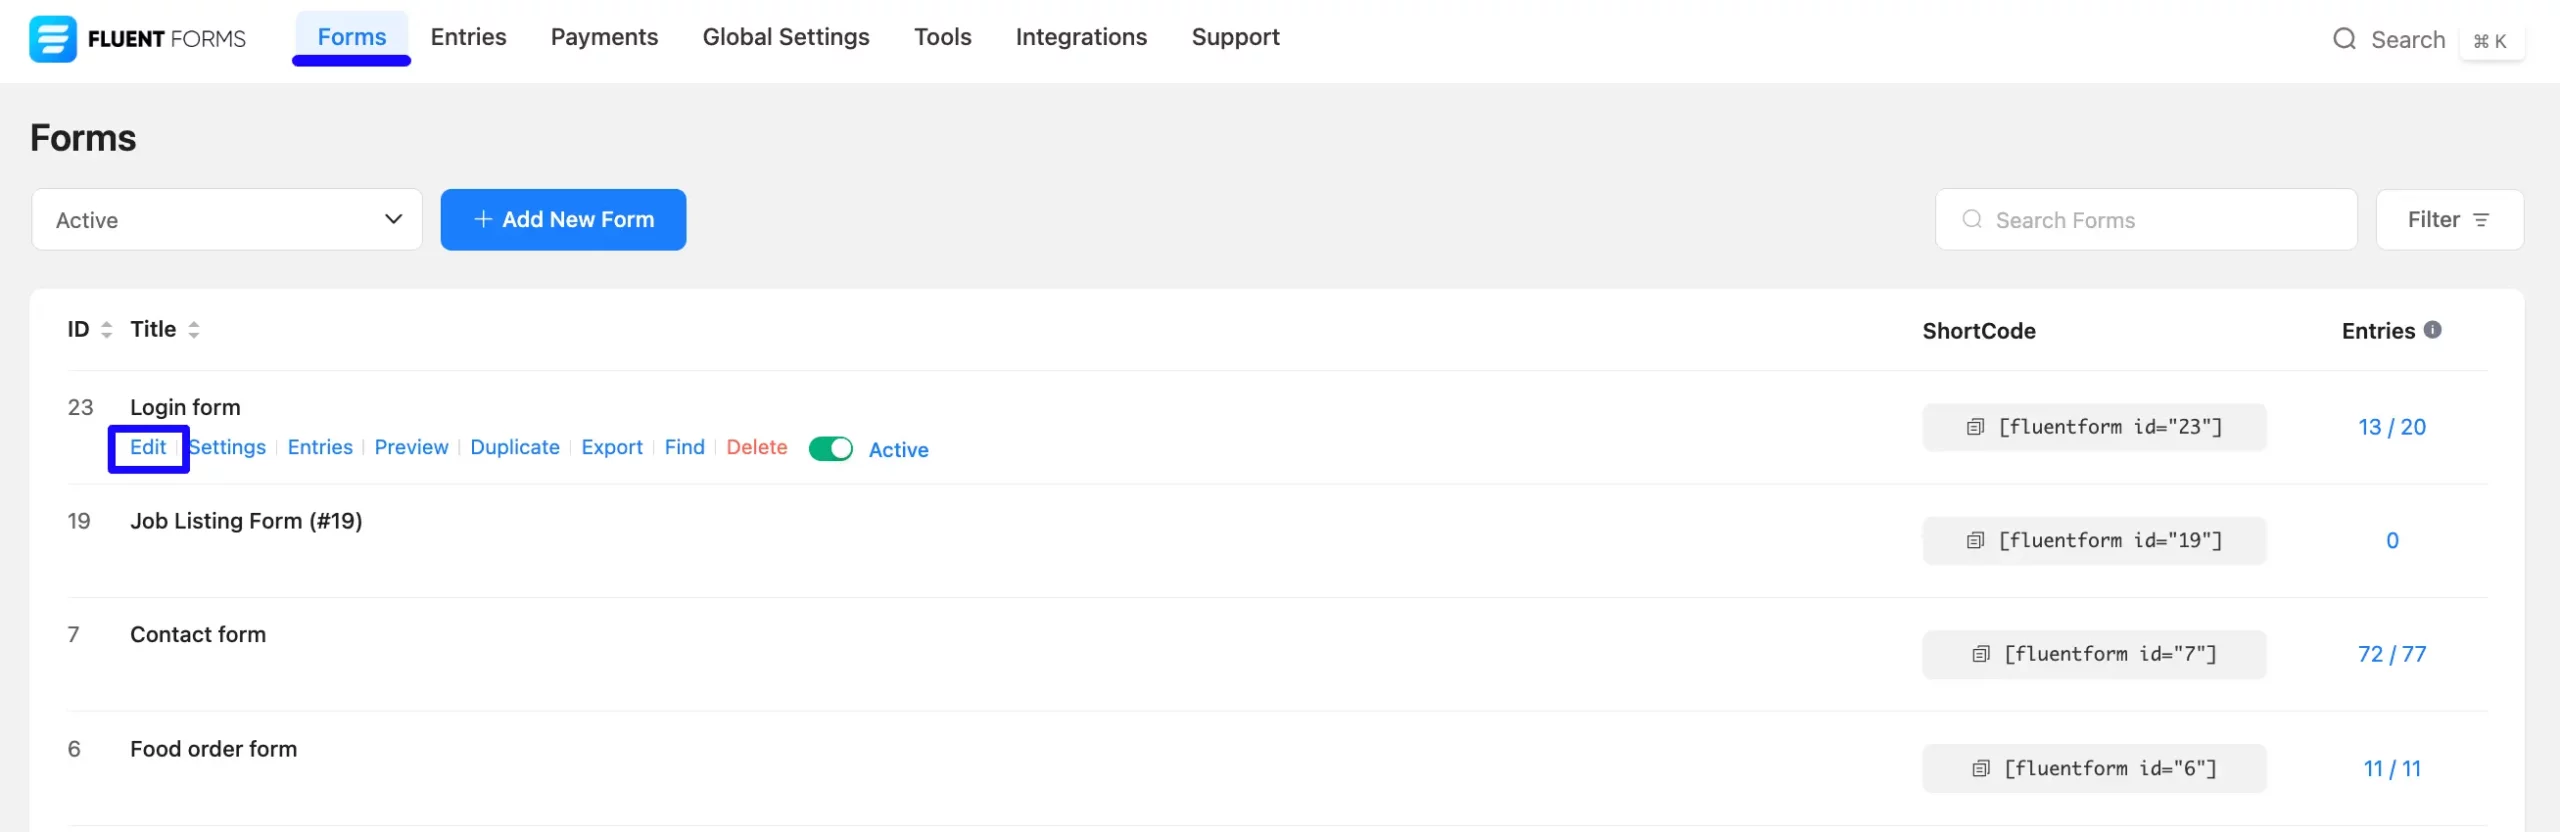
First, go to Forms from the Fluent Forms Navbar, select a Form that has an Address field where you want to integrate your Google Maps, and click the Editor button.
If you do not have any existing forms, read the Create a Form from Scratch or Create a Form using Templates documentation to create a new one. Also to learn more detail about the process of adding and customizing the Address Field, read this Documentation.
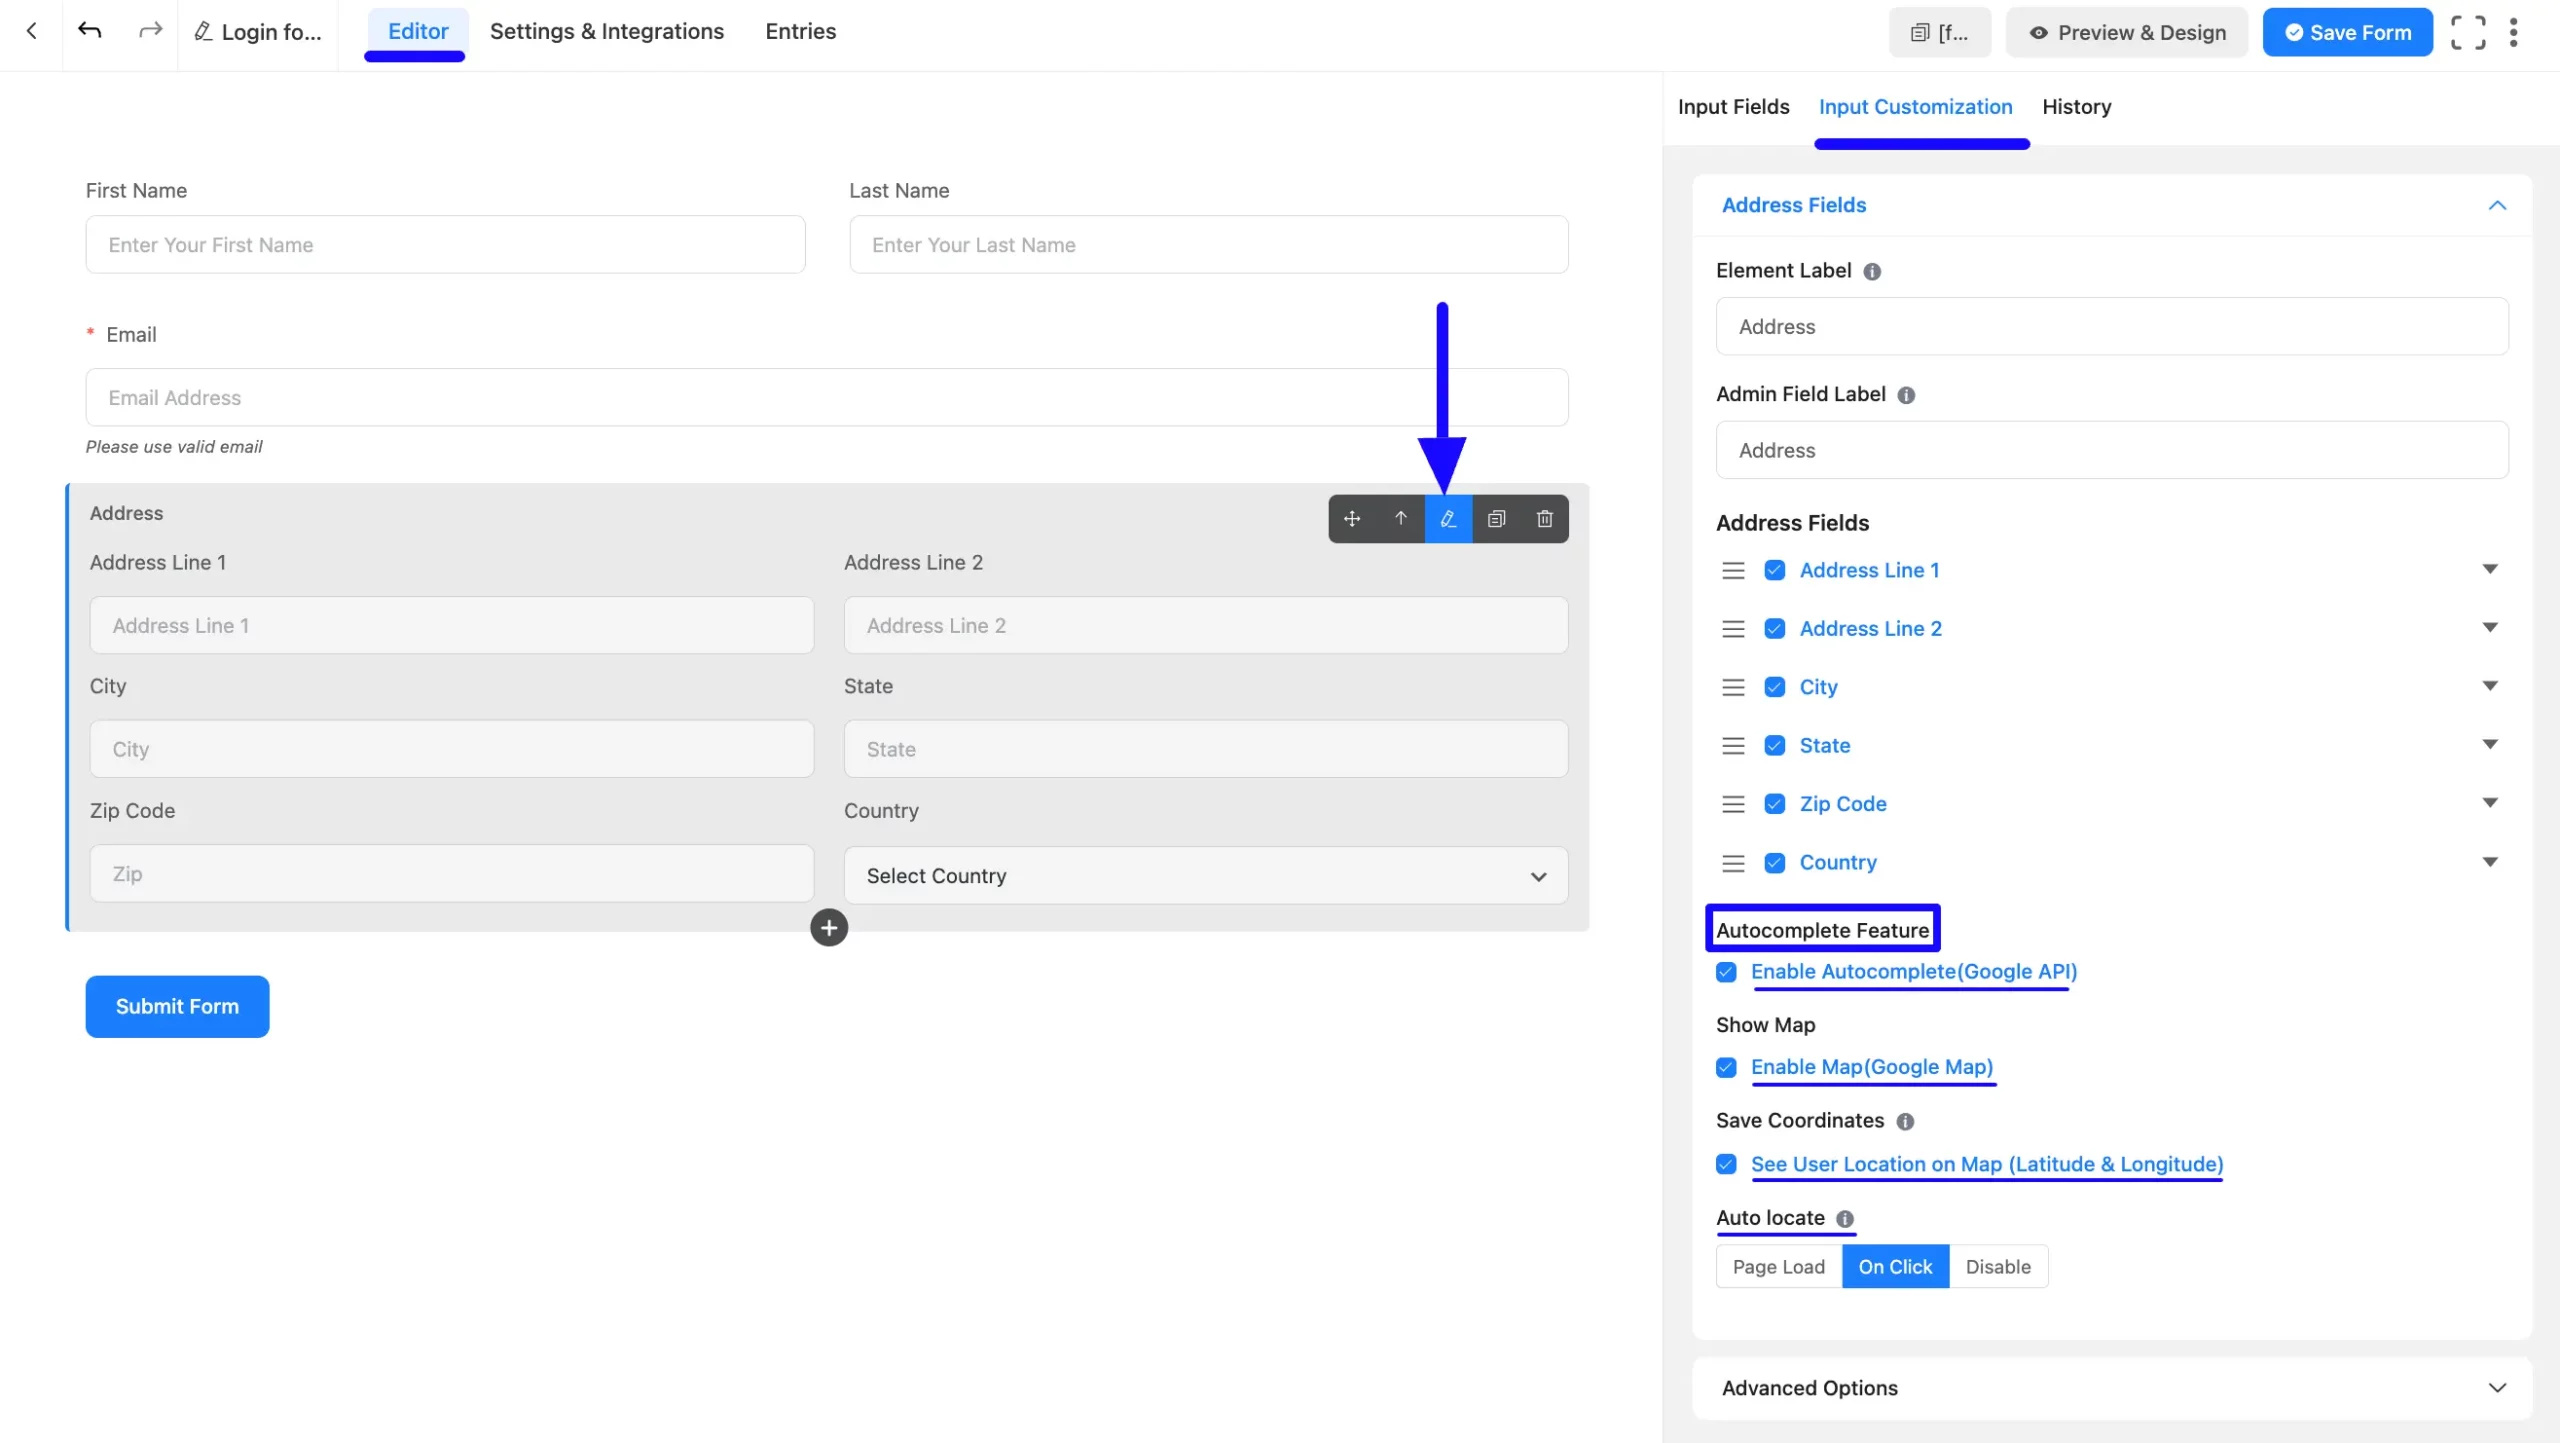
Once you are on the form Editor, go to the Address, hover over it, and click the Pencil Icon.
It will take you to the Input Customization tab on the right side and offer the Autocomplete Feature options for integrating Google Maps into this field.
Simply enable it by checking the Enable Autocomplete (Google API) box, and you will get three more options. These are:
1. Show Map: If you want to show the Google Map option on your Form, check the Enable Map (Google Map) option.
2. Save Coordinates: Enable the See User Location on Map (Latitude & Longitude) option to save your users’ location coordinates. You can view these coordinates later in the form entries.
3. Auto Locate: Using this option, you can define how you want to display the user’s location if someone accesses the form. Three options are available here: Page Load, On Click & Disable.
- Page Load: When you choose this option, the moment the page loads, the user’s location will be immediately detected.
- On Click: If you choose this option, a Click Icon will be next to the Address box. Users’ location will start to be located once they click on that icon.
- Disable: You can select this option if you want to disable the Auto Locate option.
Embedding Form into Frontend #
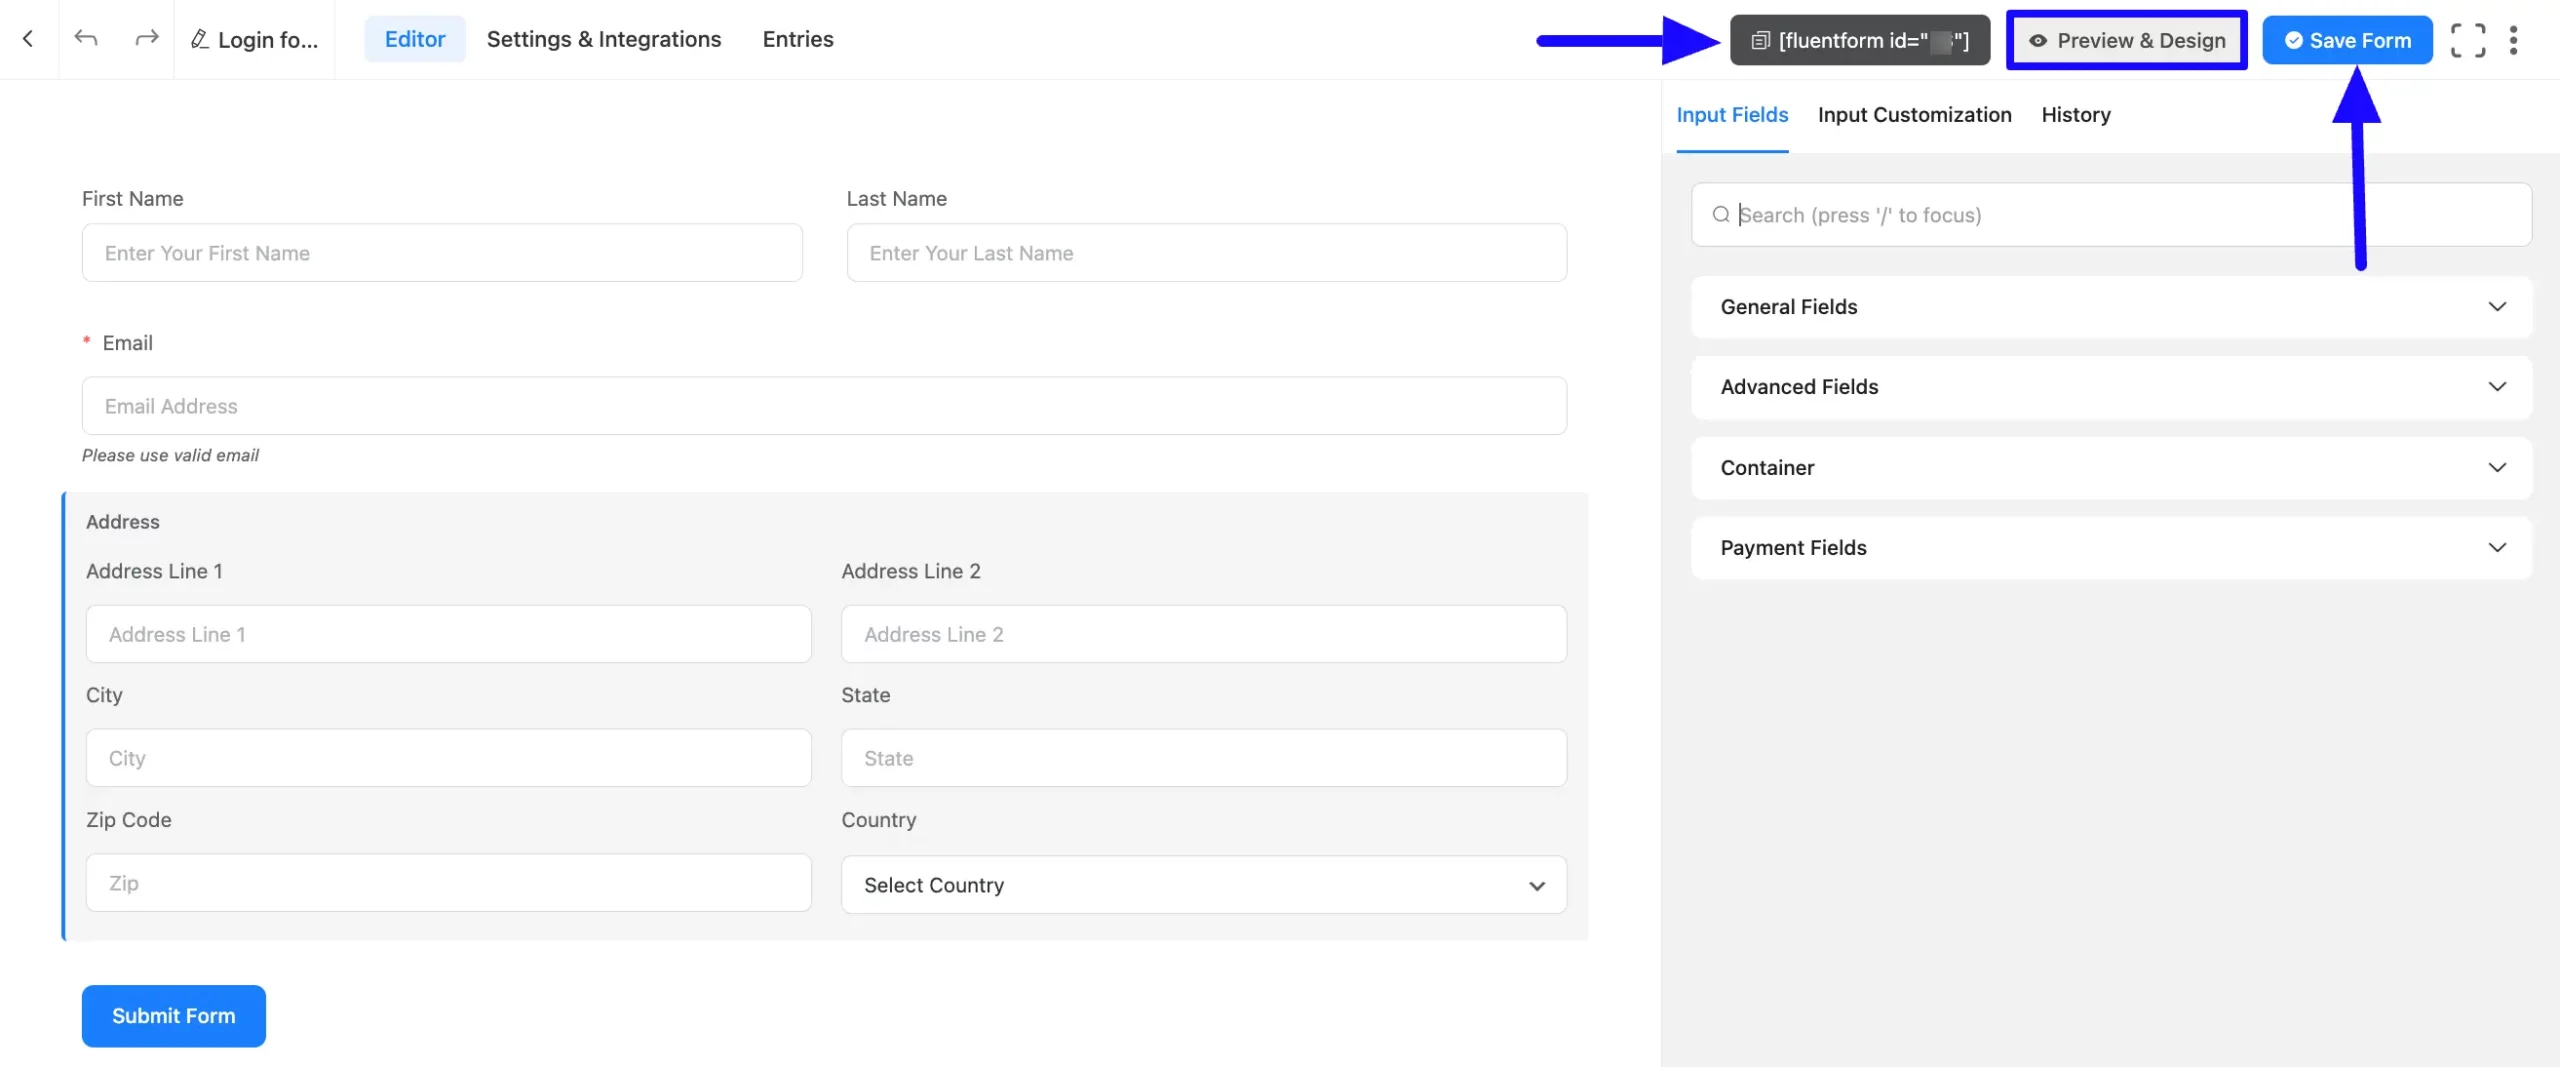
Once you complete the Integration process, click the Save Form button to save all your changes.
To embed and display the form in the front end, copy the Shortcode from the top right side and paste it into your desired Page/Post. Also, to see the form preview, click the Preview & Design button in the middle.
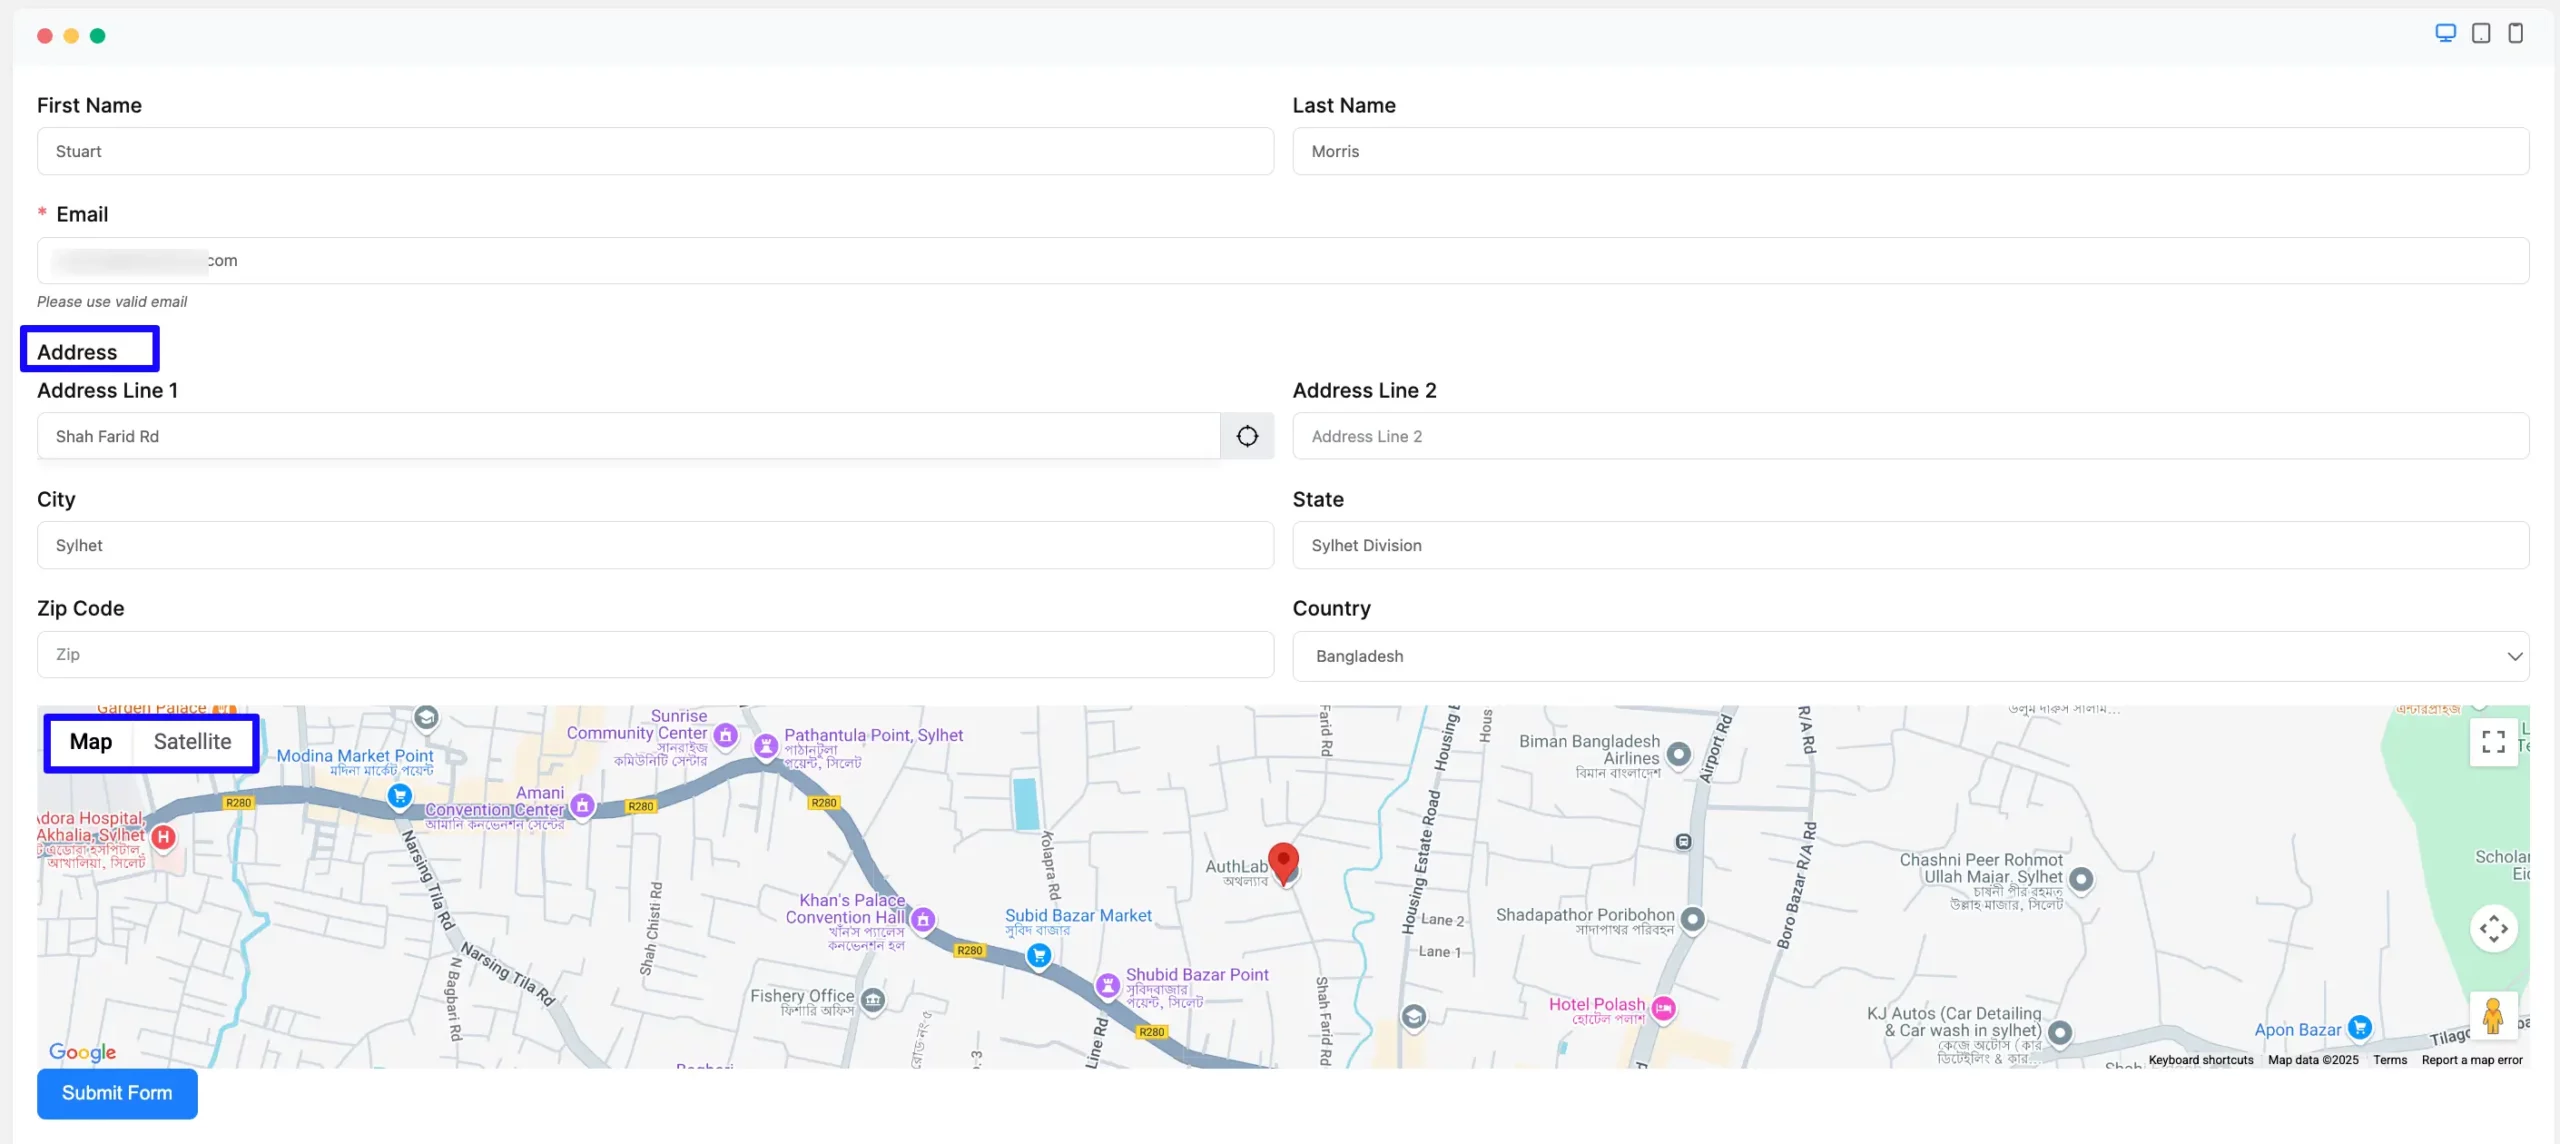
Preview of Integrated Google Maps #
Here, you can see the preview of the integrated Google Maps through the Form Entry based on the Integration.
For example, you can see the Address field is empty and the Click Icon is in the right corner of the Address box.
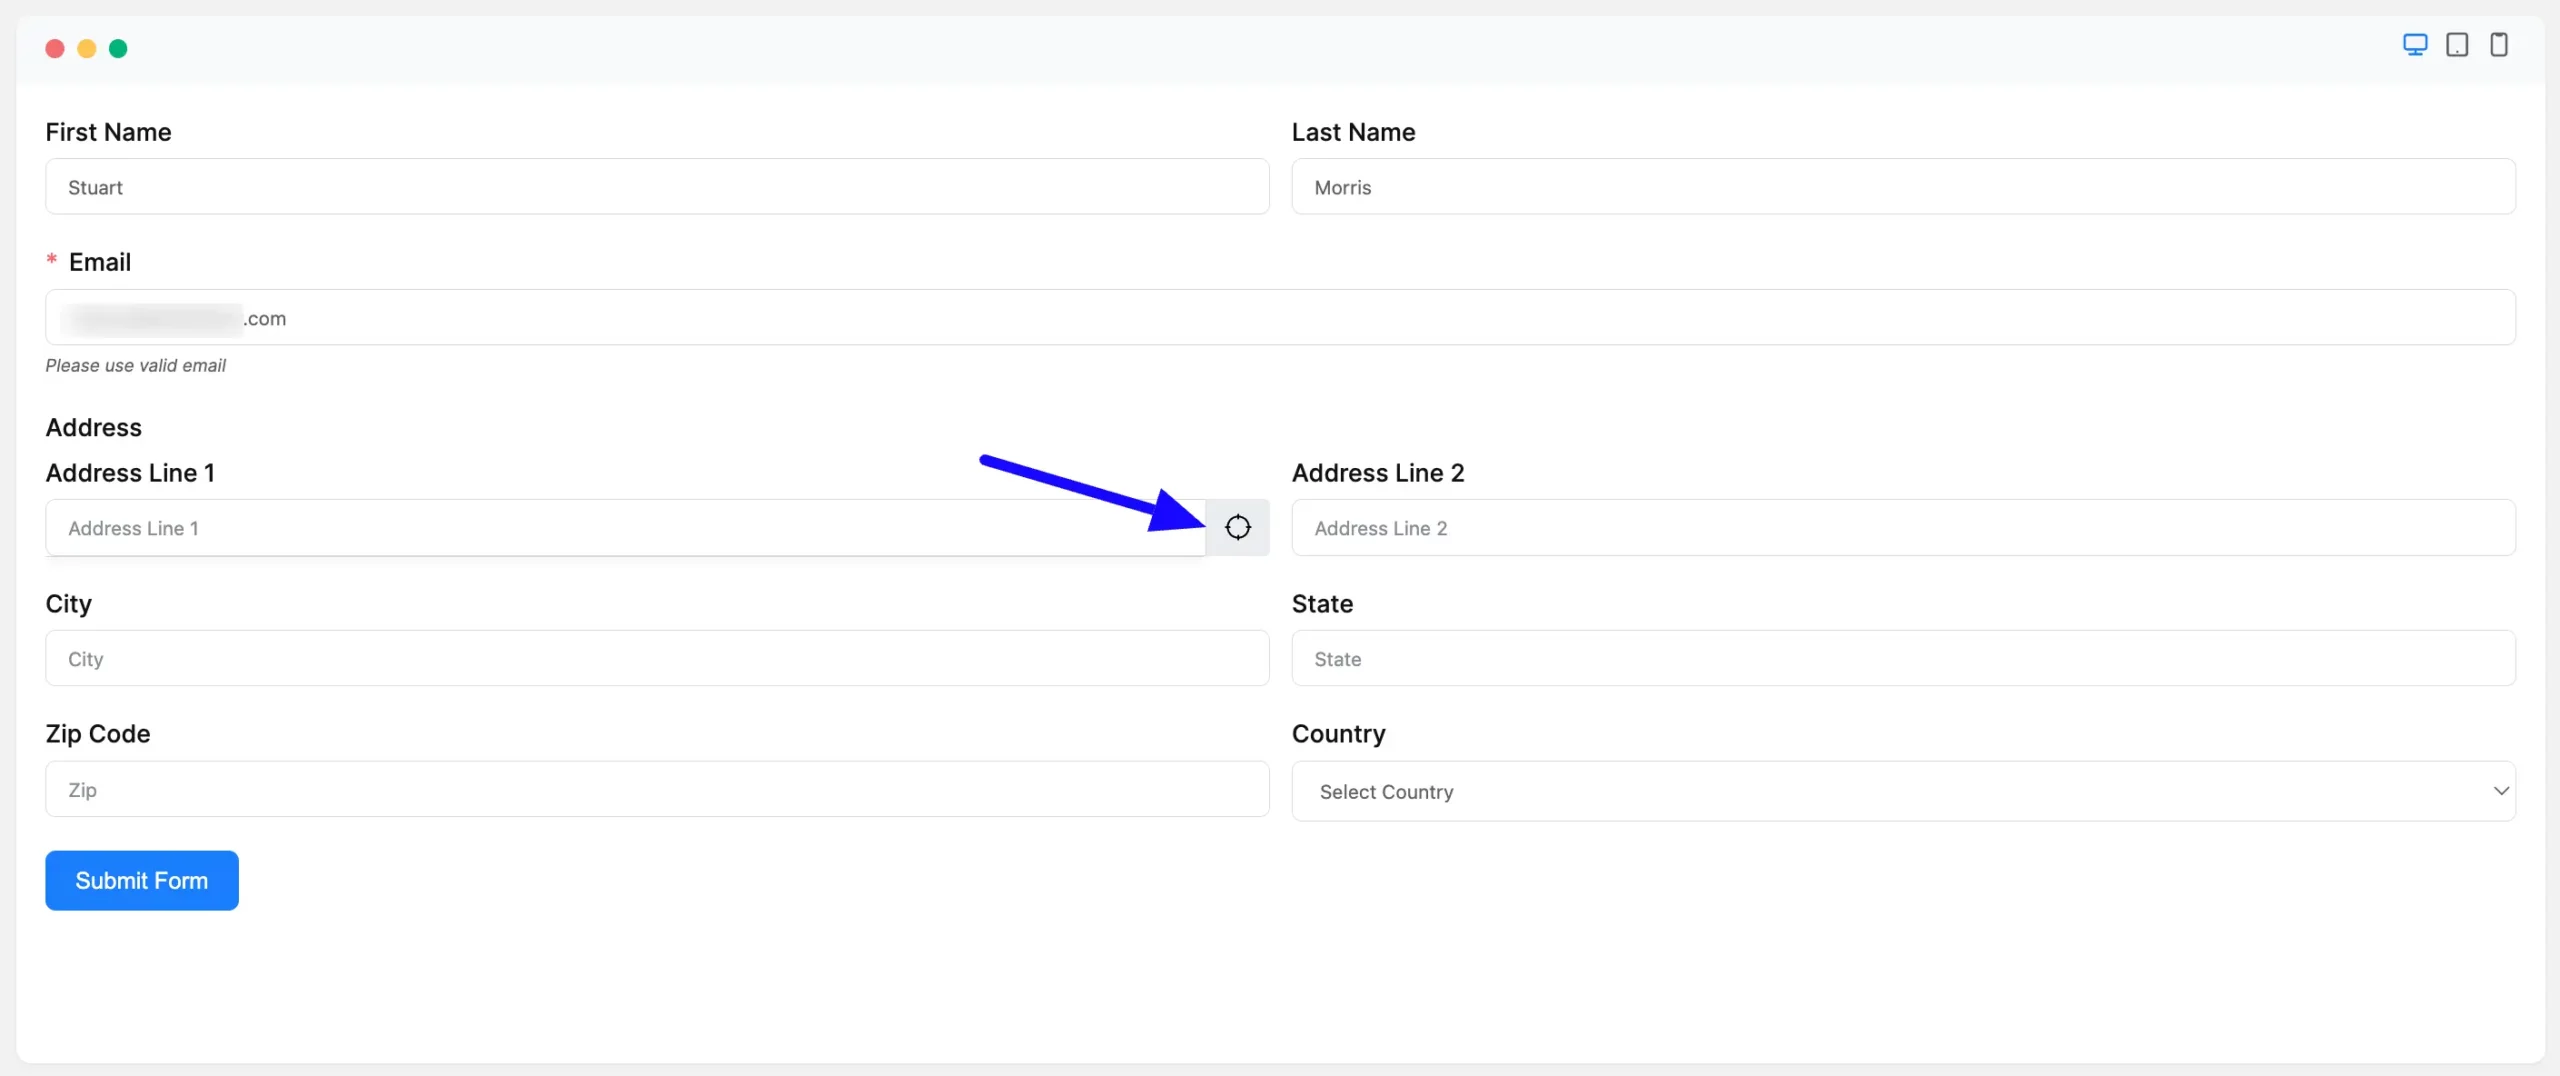
Once you click the Icon, the address field is filled in automatically and the Google Map location also appears below.
This way, you can easily integrate Google Maps with Fluent Forms!
If you have any further questions, concerns, or suggestions, please do not hesitate to contact our support team. Thank you.


