Fluent Forms integrates with Zapier, a user-friendly, cloud-based platform that blends the simplicity of spreadsheets with the functionality of a database to help organize and collaborate on various tasks and projects.
This article will guide you through integrating Zapier with Fluent Forms on your WordPress Site.
Remember, Zapier is the Premium Feature of the Fluent Forms Plugin. So, you need the Fluent Forms Pro plugin to integrate this.
Enabling Zapier Integration #
To learn how to enable Zapier integration, follow the steps with the screenshots below –
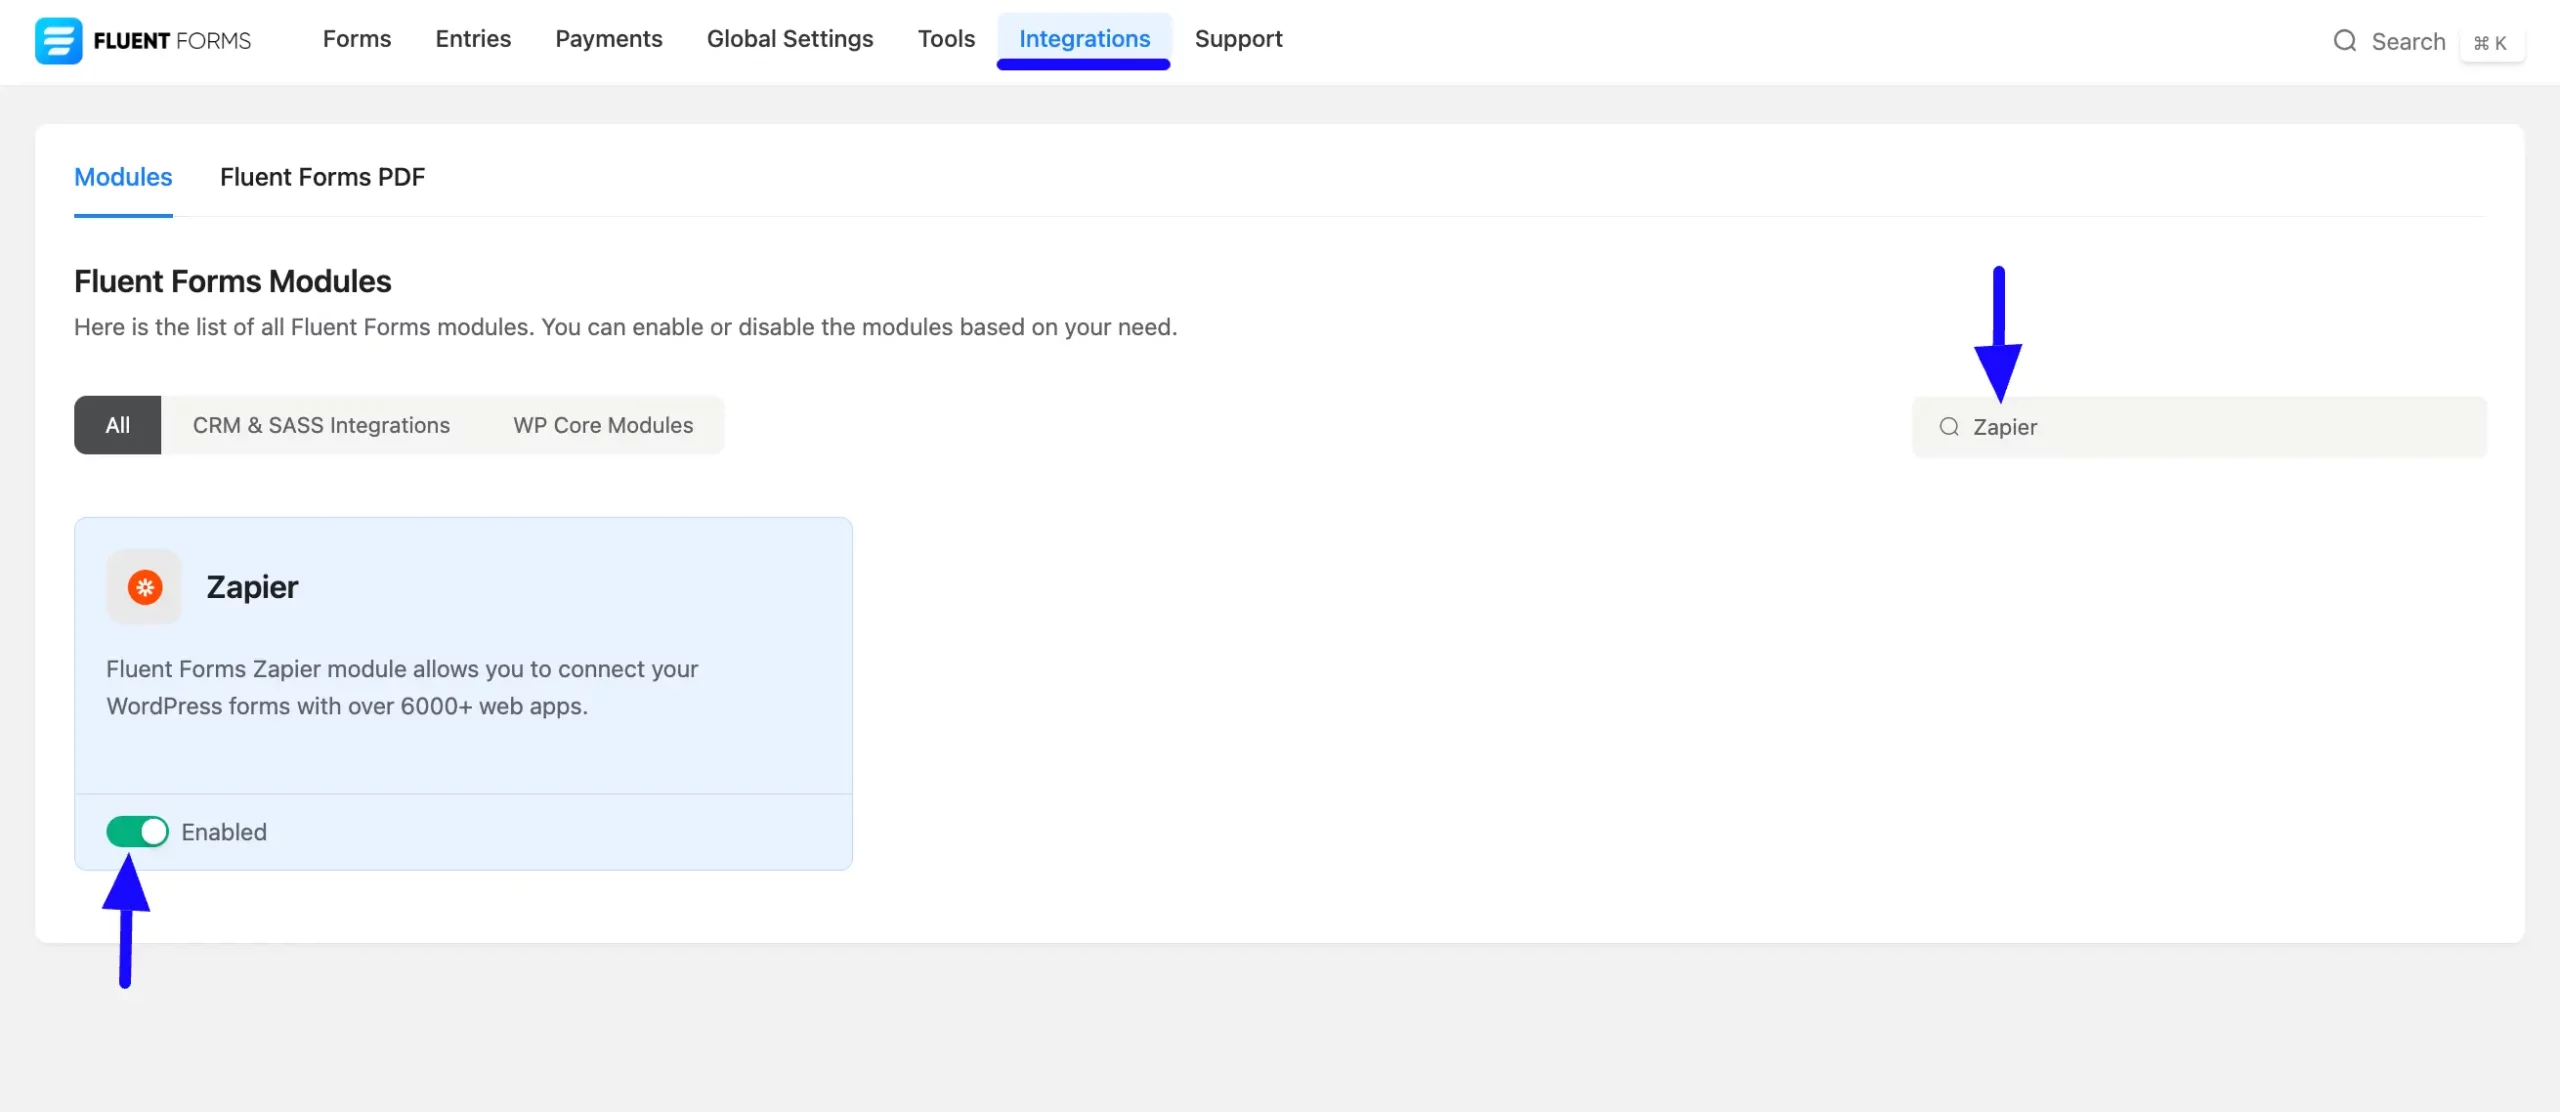
First, go to Integrations from the Fluent Forms Navbar, search for Zapier through the search bar, and enable the Zapier integration module by turning it on the Toggle.
Integrating Zapier with Forms #
To learn how to integrate Zapier into any specific Form in Fluent Forms, follow the steps with the screenshots below –
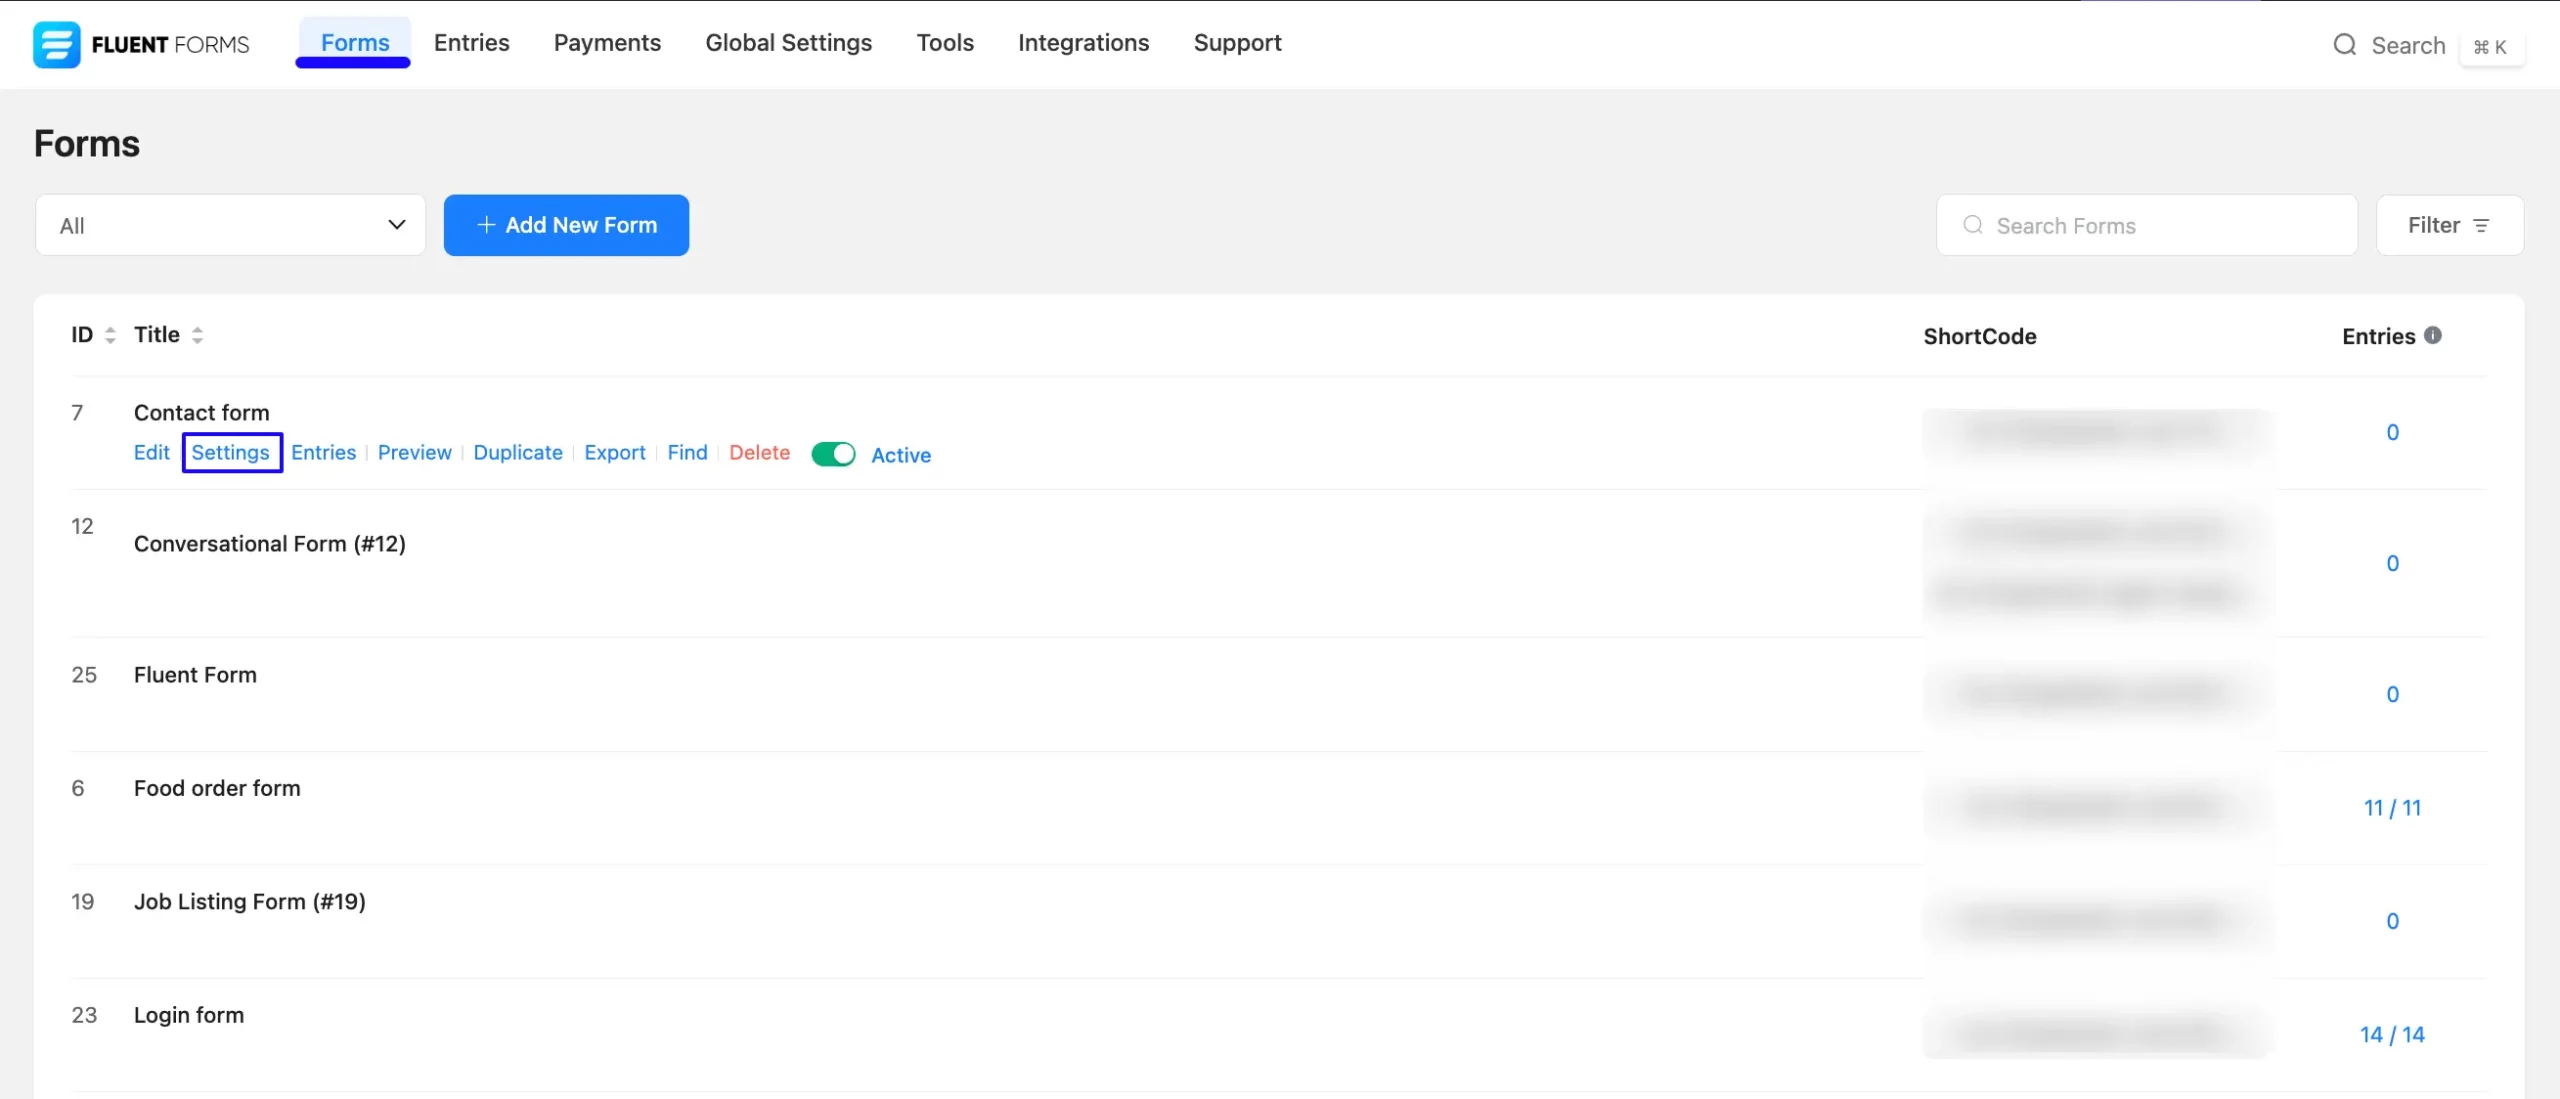
First, go to Forms from the Fluent Forms Navbar, select the Desired Form where you want to integrate your Zapier, and click the Settings button.
If you do not have any existing forms, read the Create a Form from Scratch or Create a Form using Templates documentation to create a new one.
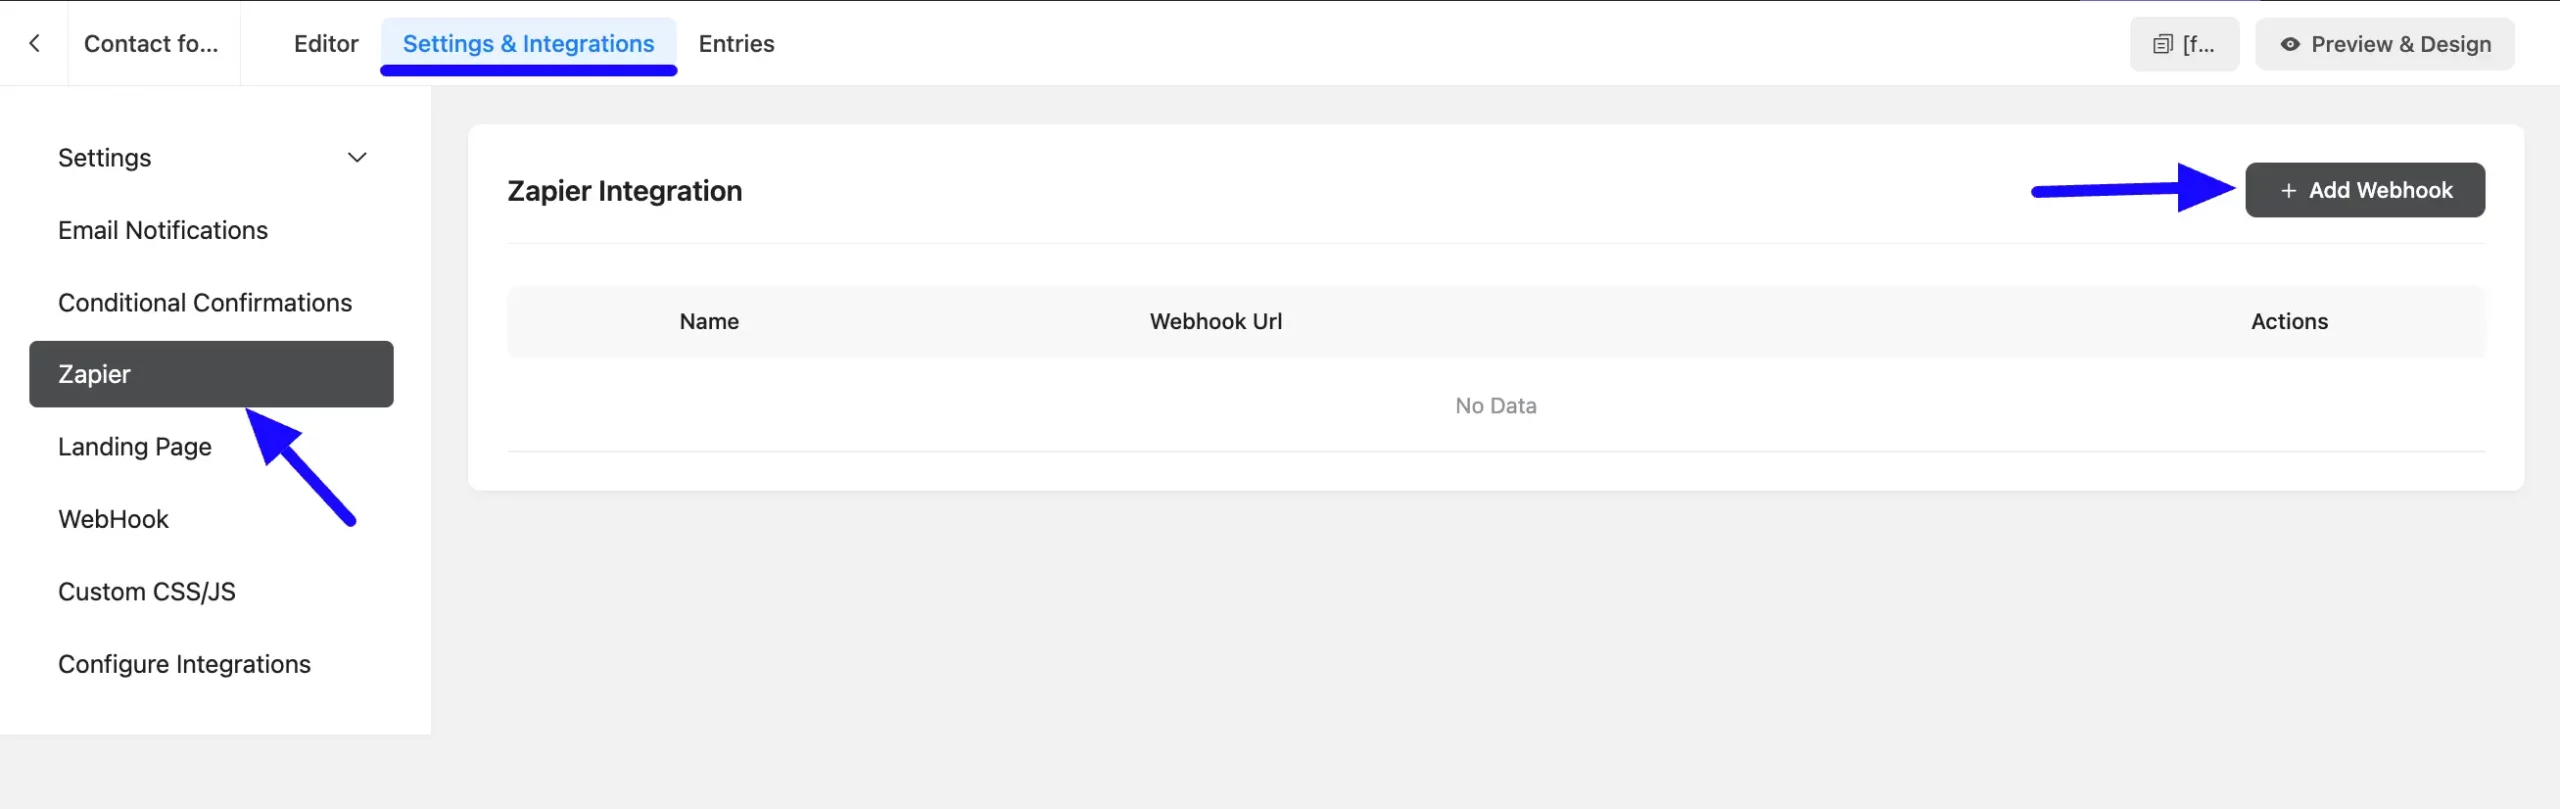
Once you are on Settings & Integrations, go to Zapier from the left menu, and click the + Add Webhook button.
Now, a pop-up page will appear with various settings options for configuring the Zapier.
All the settings options mentioned in the screenshot below are briefly explained:
- Name: Here, you can set a name according to your preference for your feed. This field is required to be filled in.
- Webhook URL: Here, provide the Zapier Webhook URL where you want to send the Fluent Forms submission data. Read this Section to learn how to get the Zapier Webhook URL.
- Conditional Logics: This option allows Webhook integration to function conditionally based on your submission values according to your set conditional logic/s. To learn more, read this Documentation.
Once the setup is done, click the Save Feed button, and your Zapier will be integrated into this specific form!

Getting the Webhook URL from Zapier #
To learn how to get the Webhook URL from Zapier, follow the steps below –
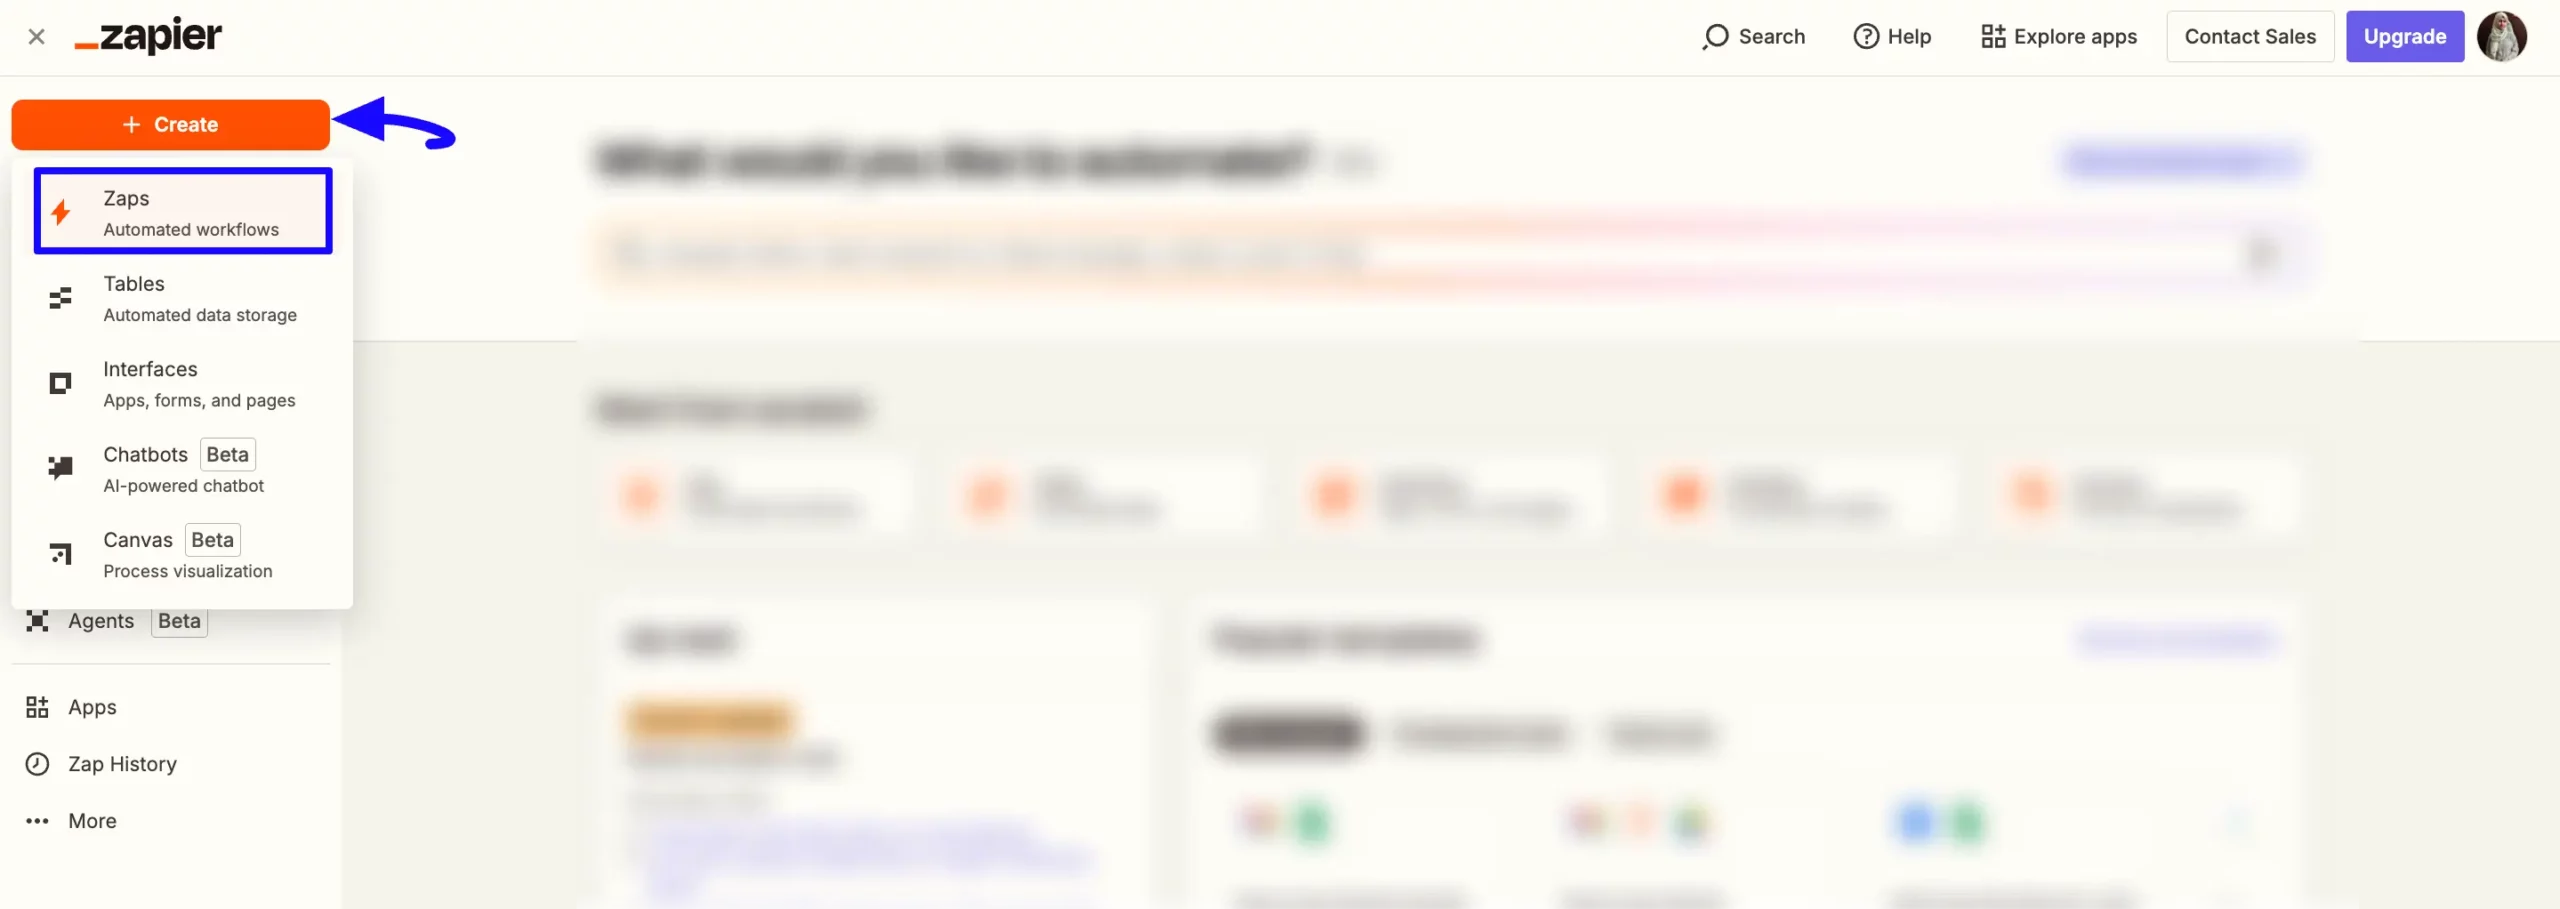
First, go to your Zapier account and log in to the dashboard.
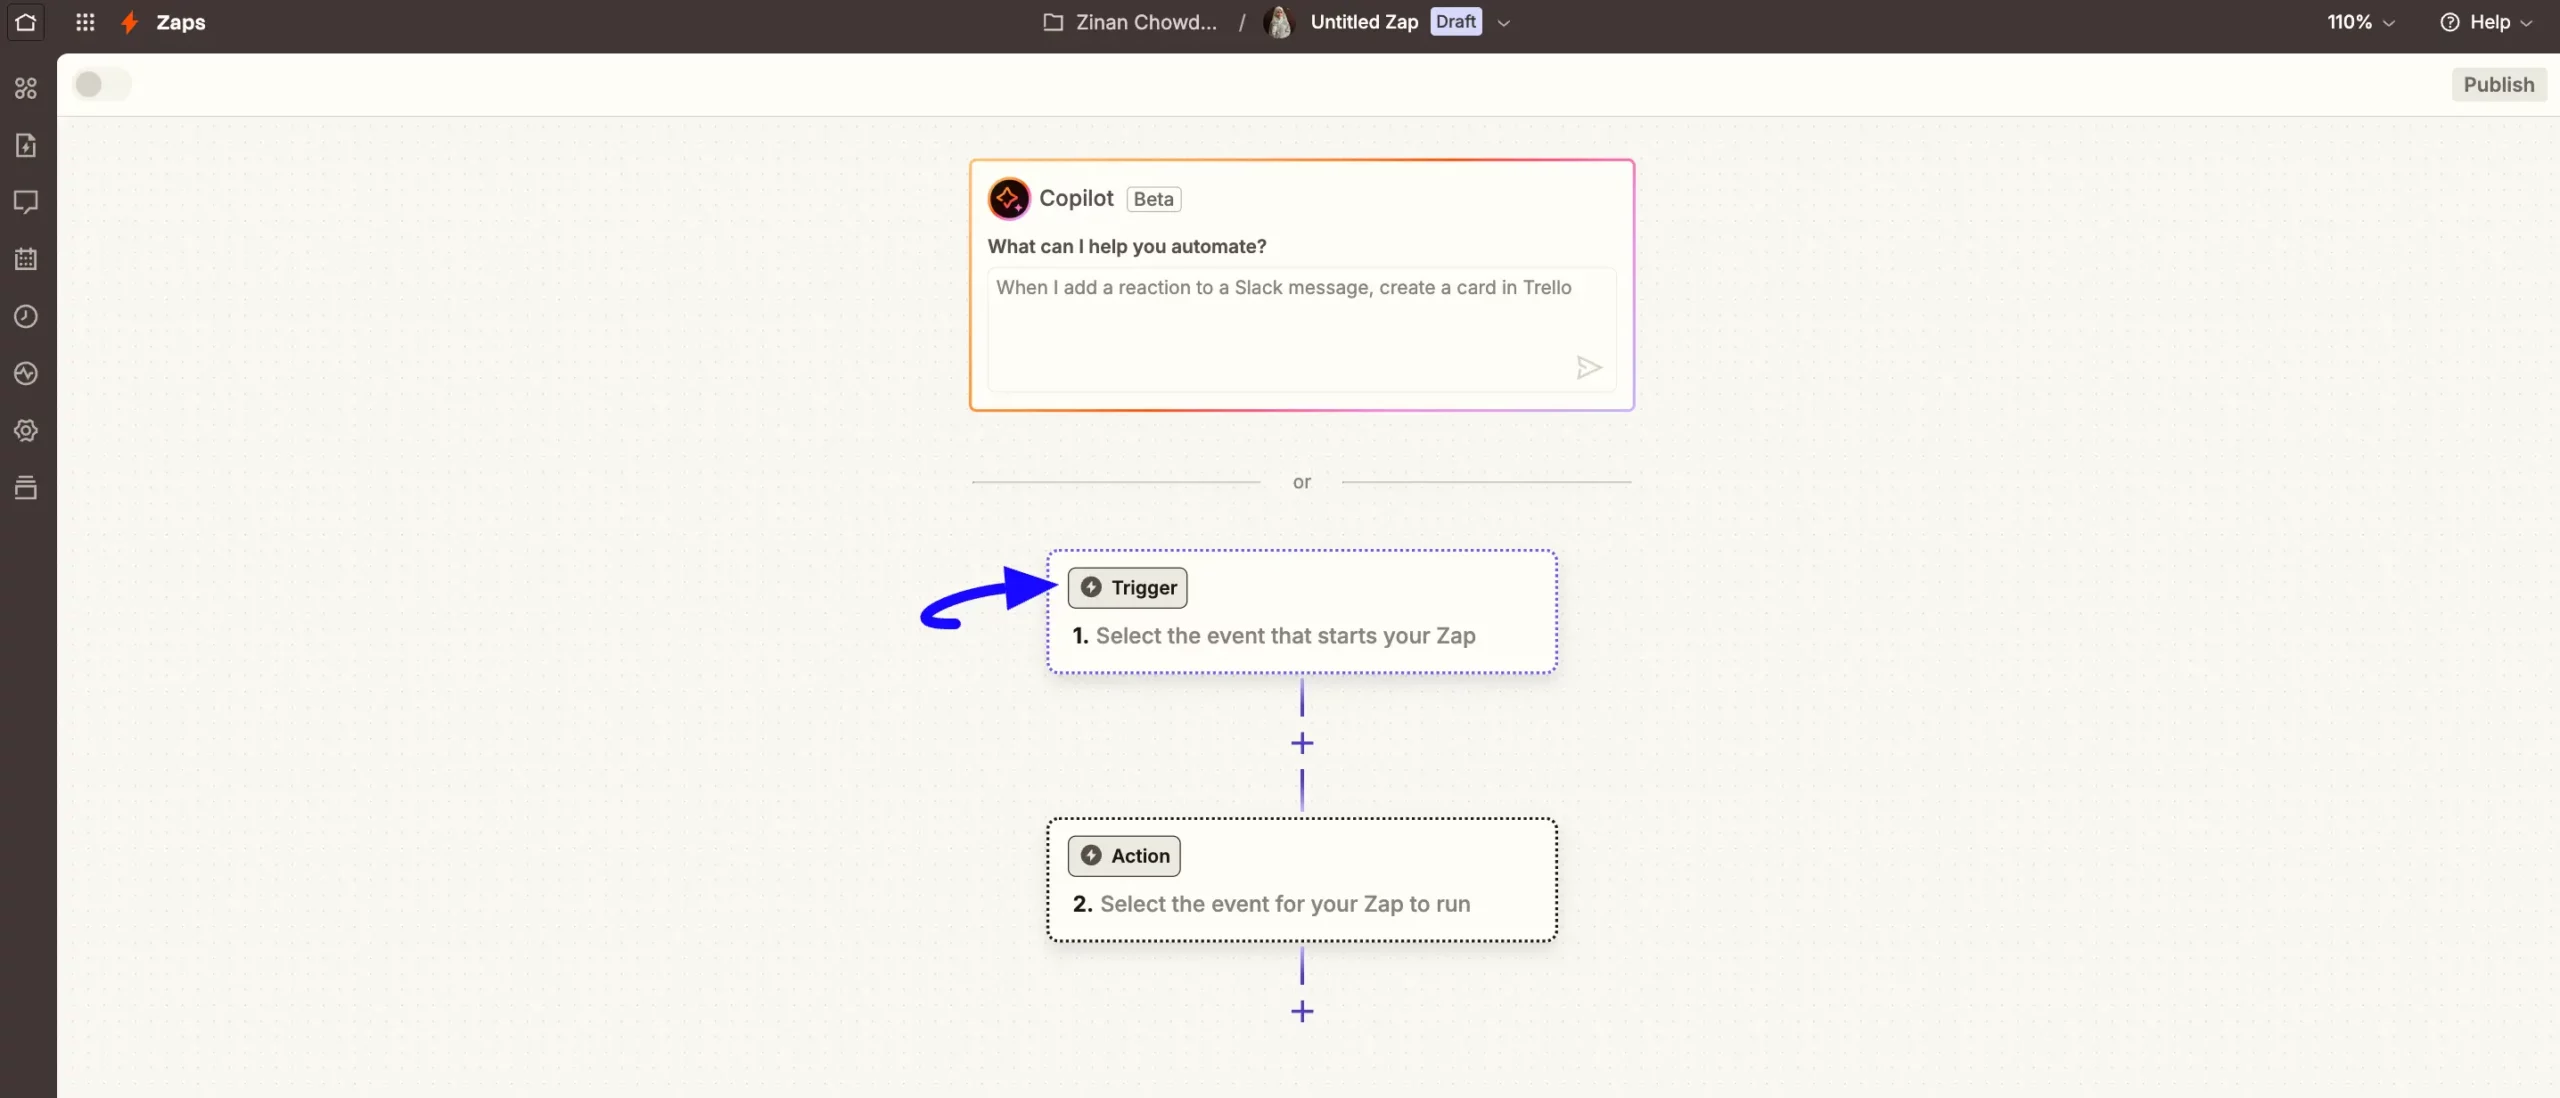
Now, click the + Create button and press the Zaps button to create a new Zap.
Adding Webhook Trigger #
Click the Trigger button to set the trigger
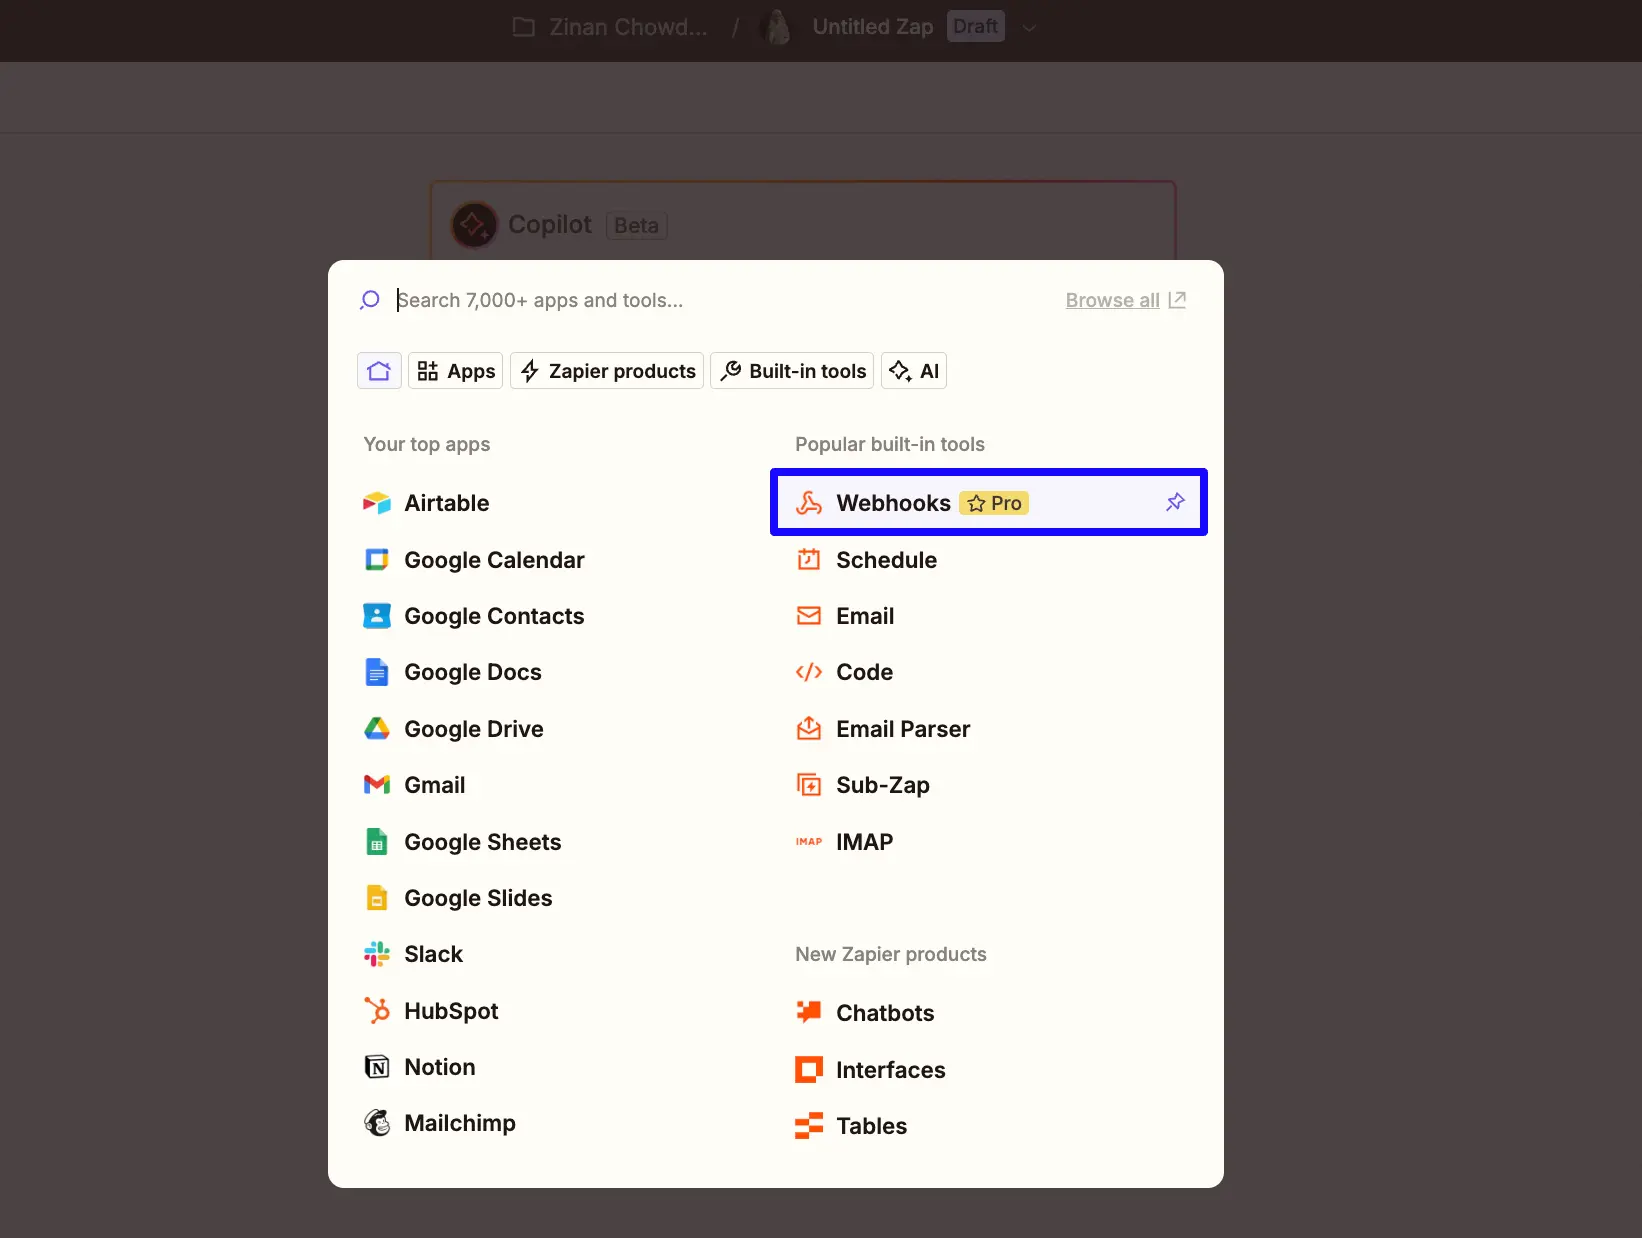
Select Webhooks trigger.
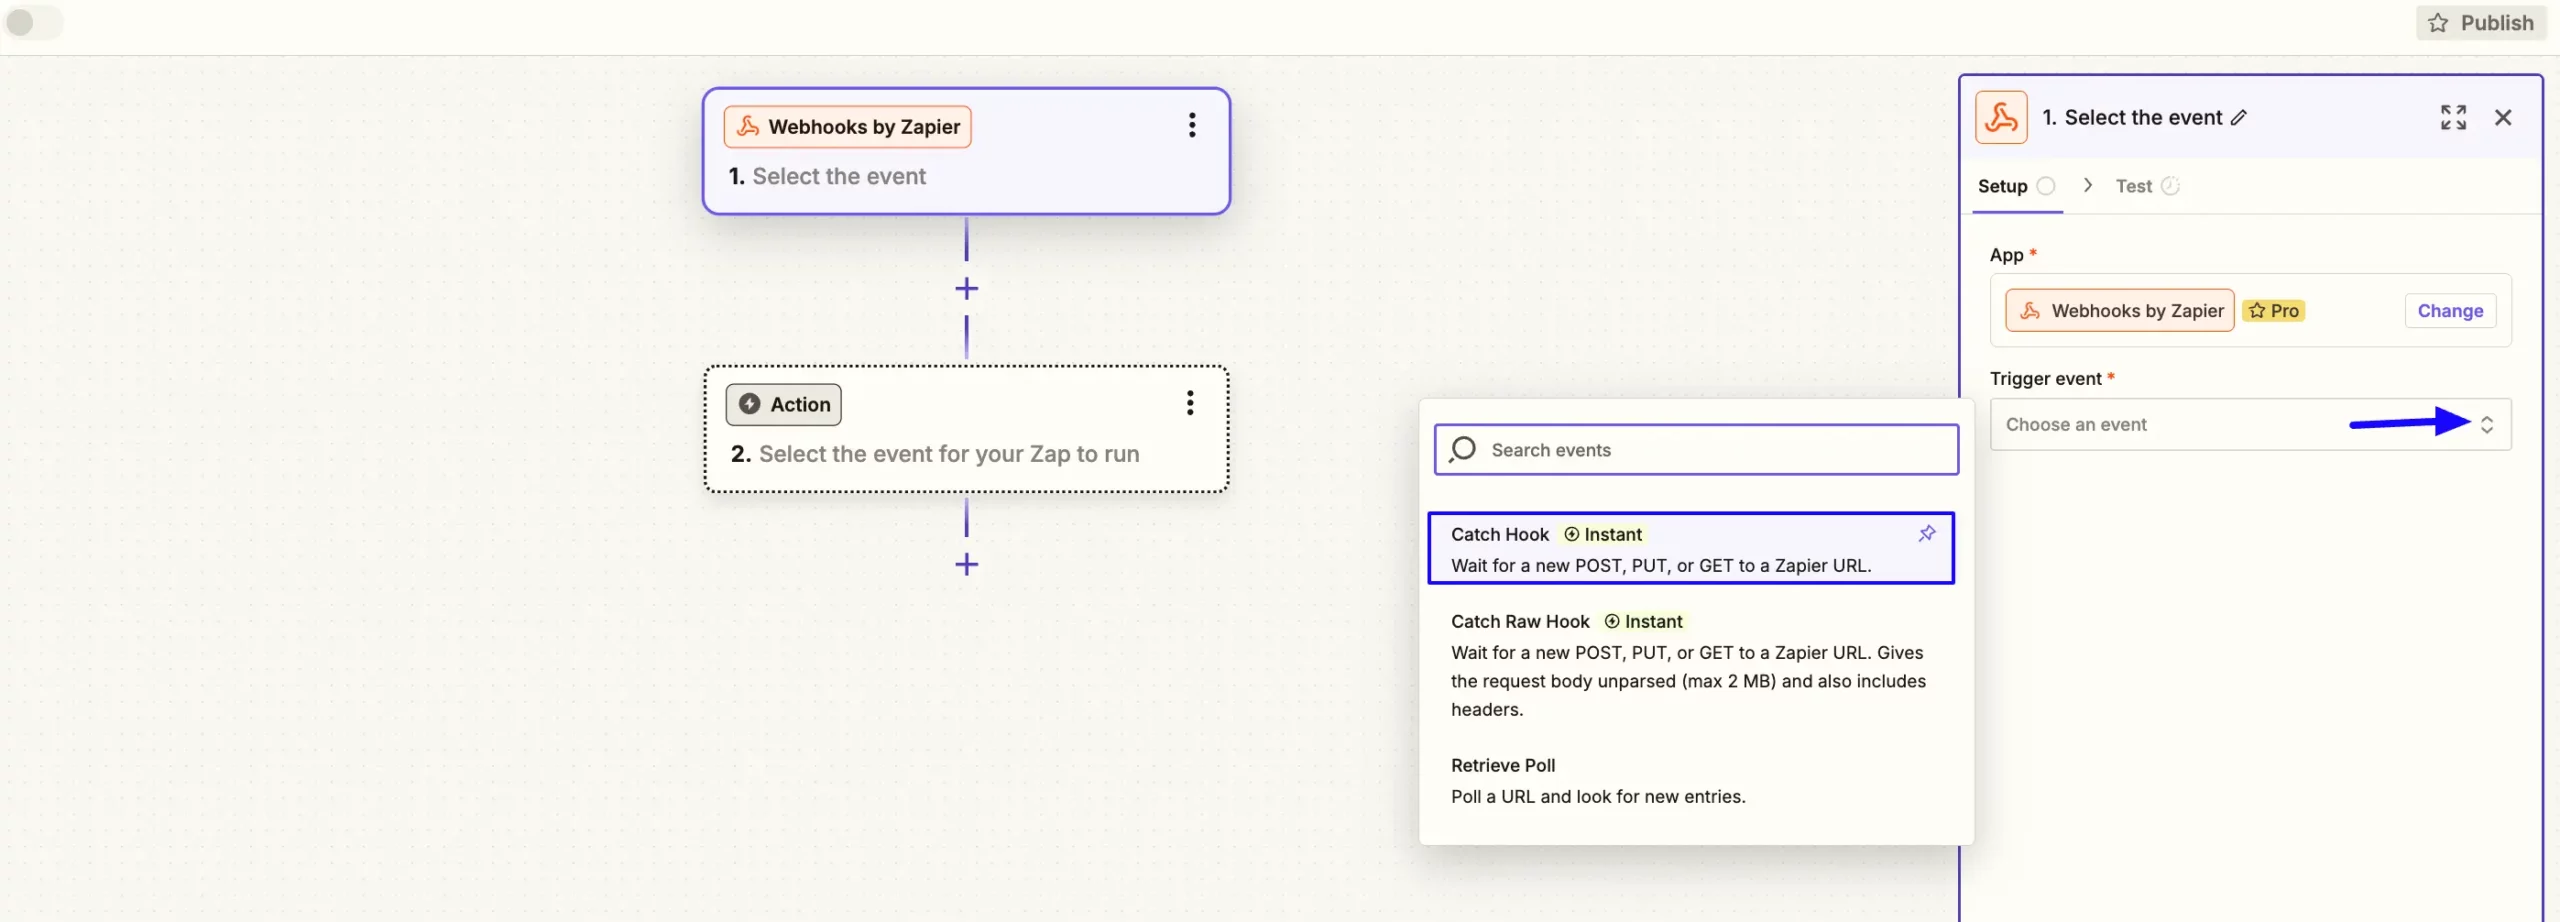
Click on the Choose an event field, and a pop-up will appear to select your Trigger event. Select Catch Hook as a trigger event.
Once you are done with the configuration, click the Continue button.
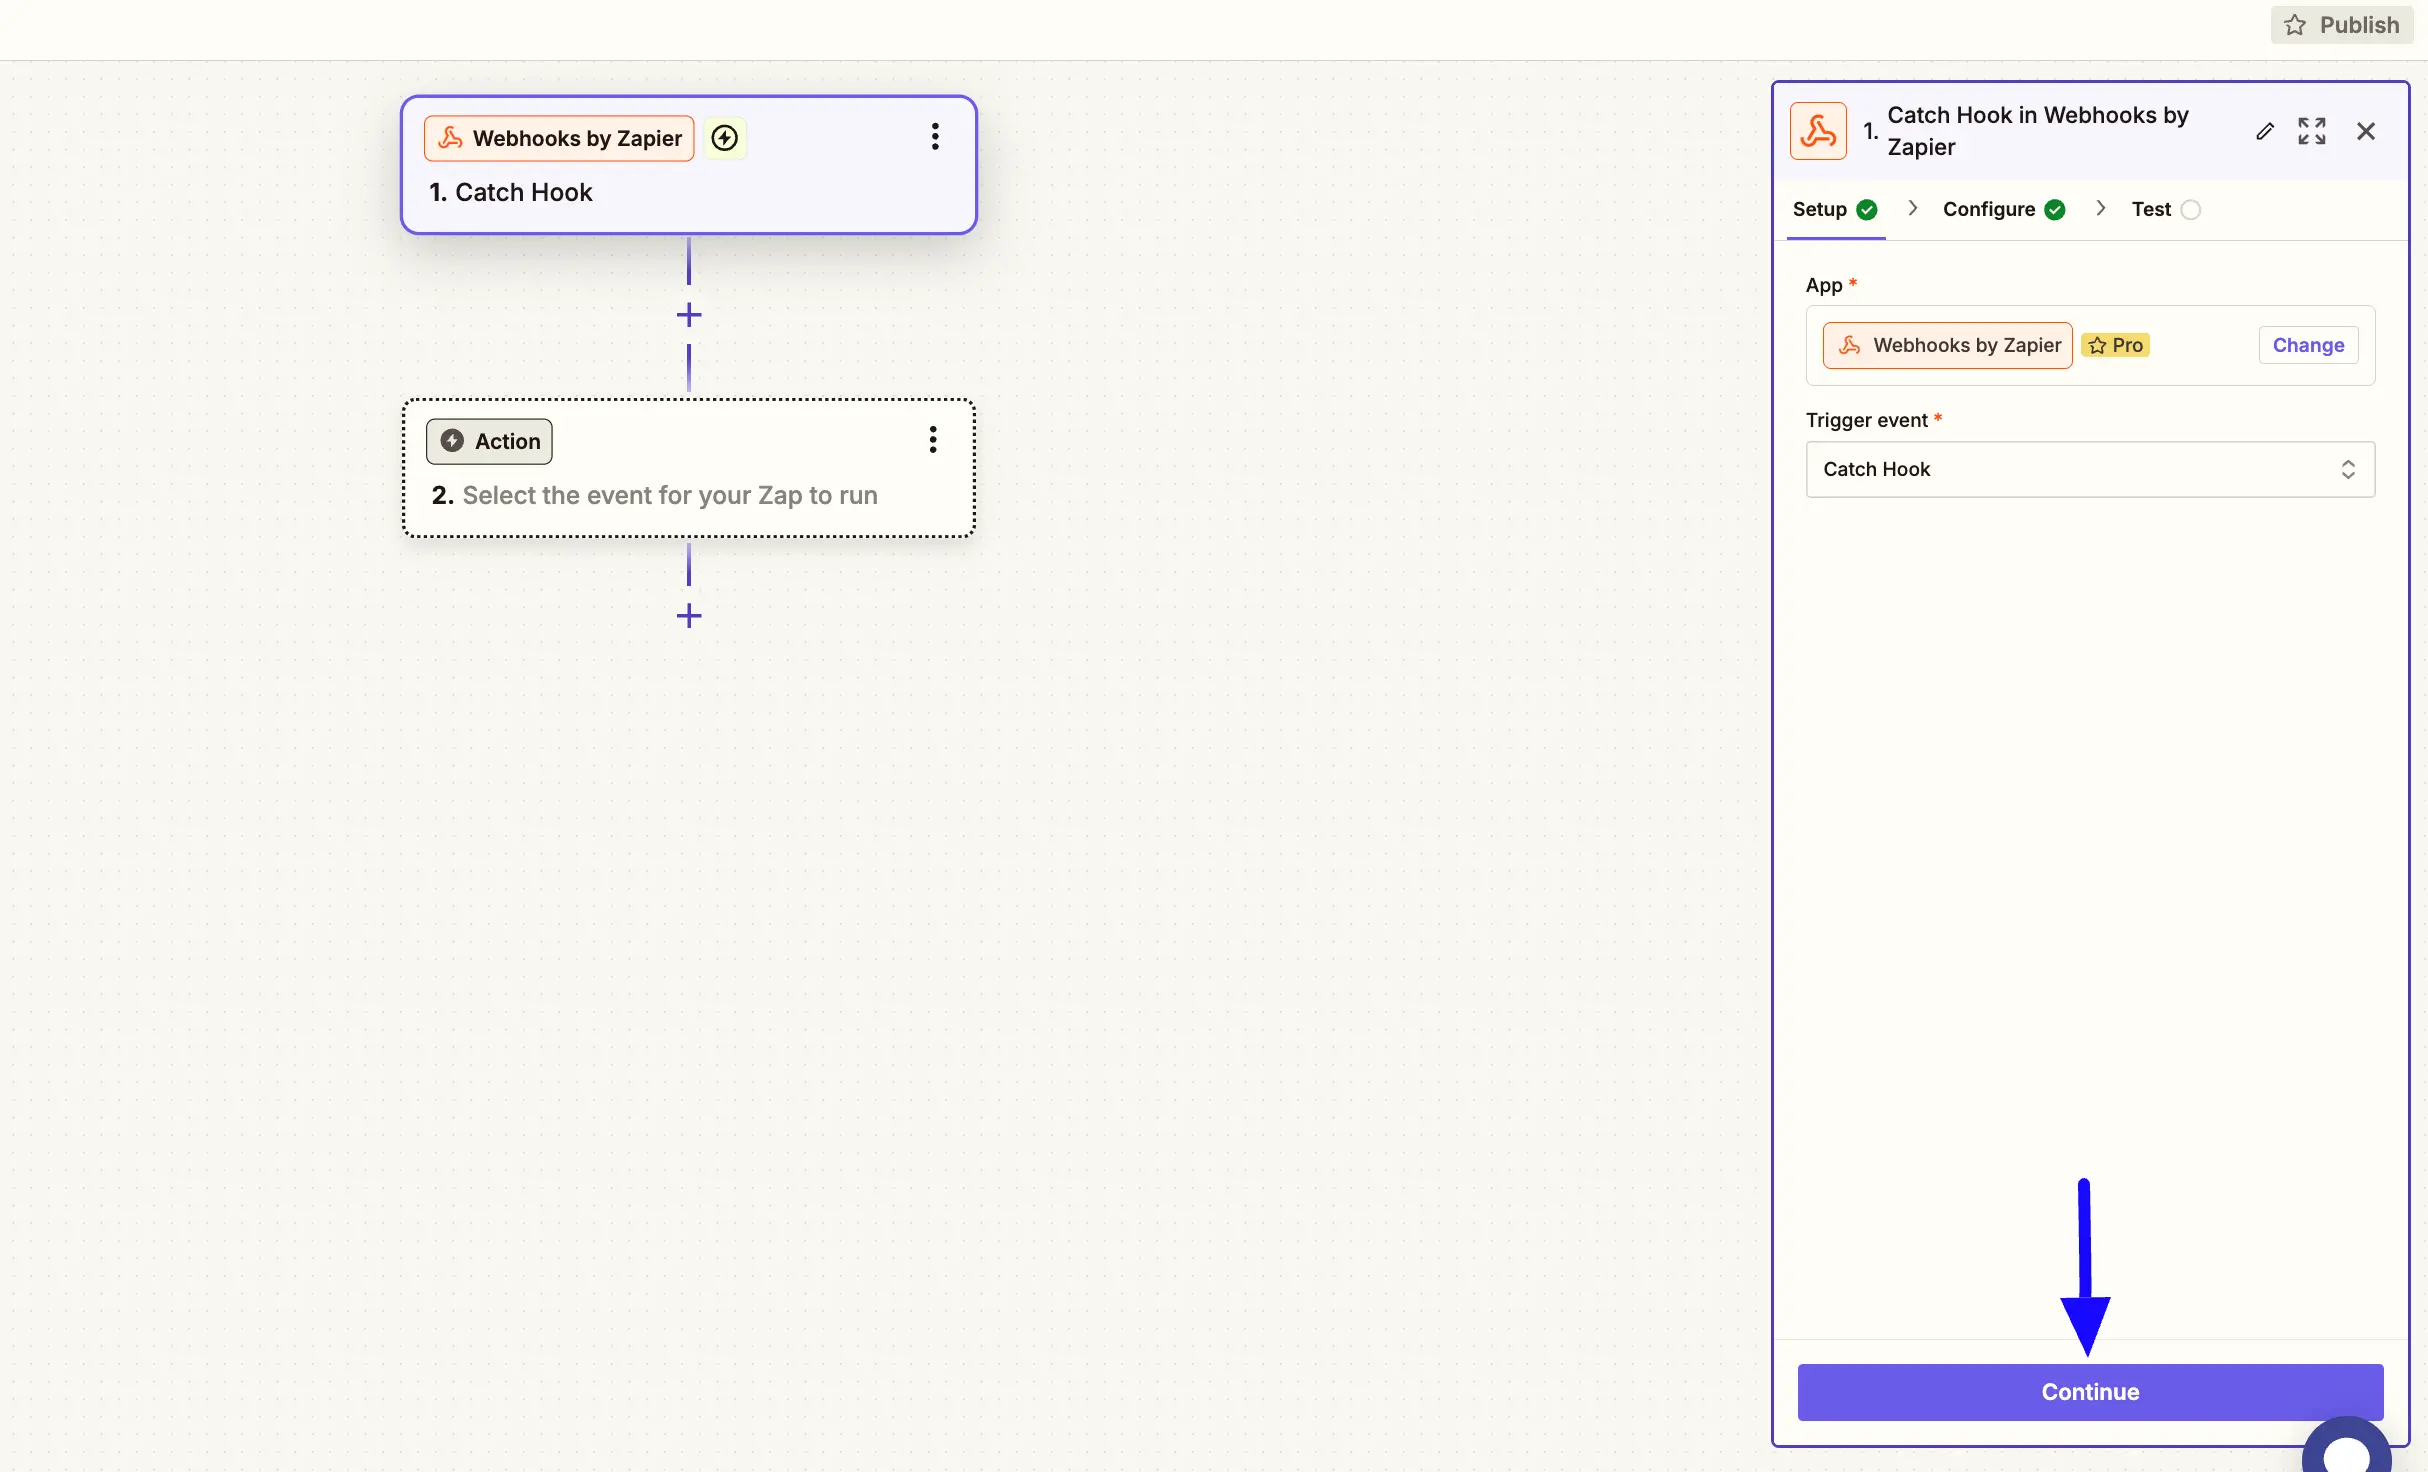
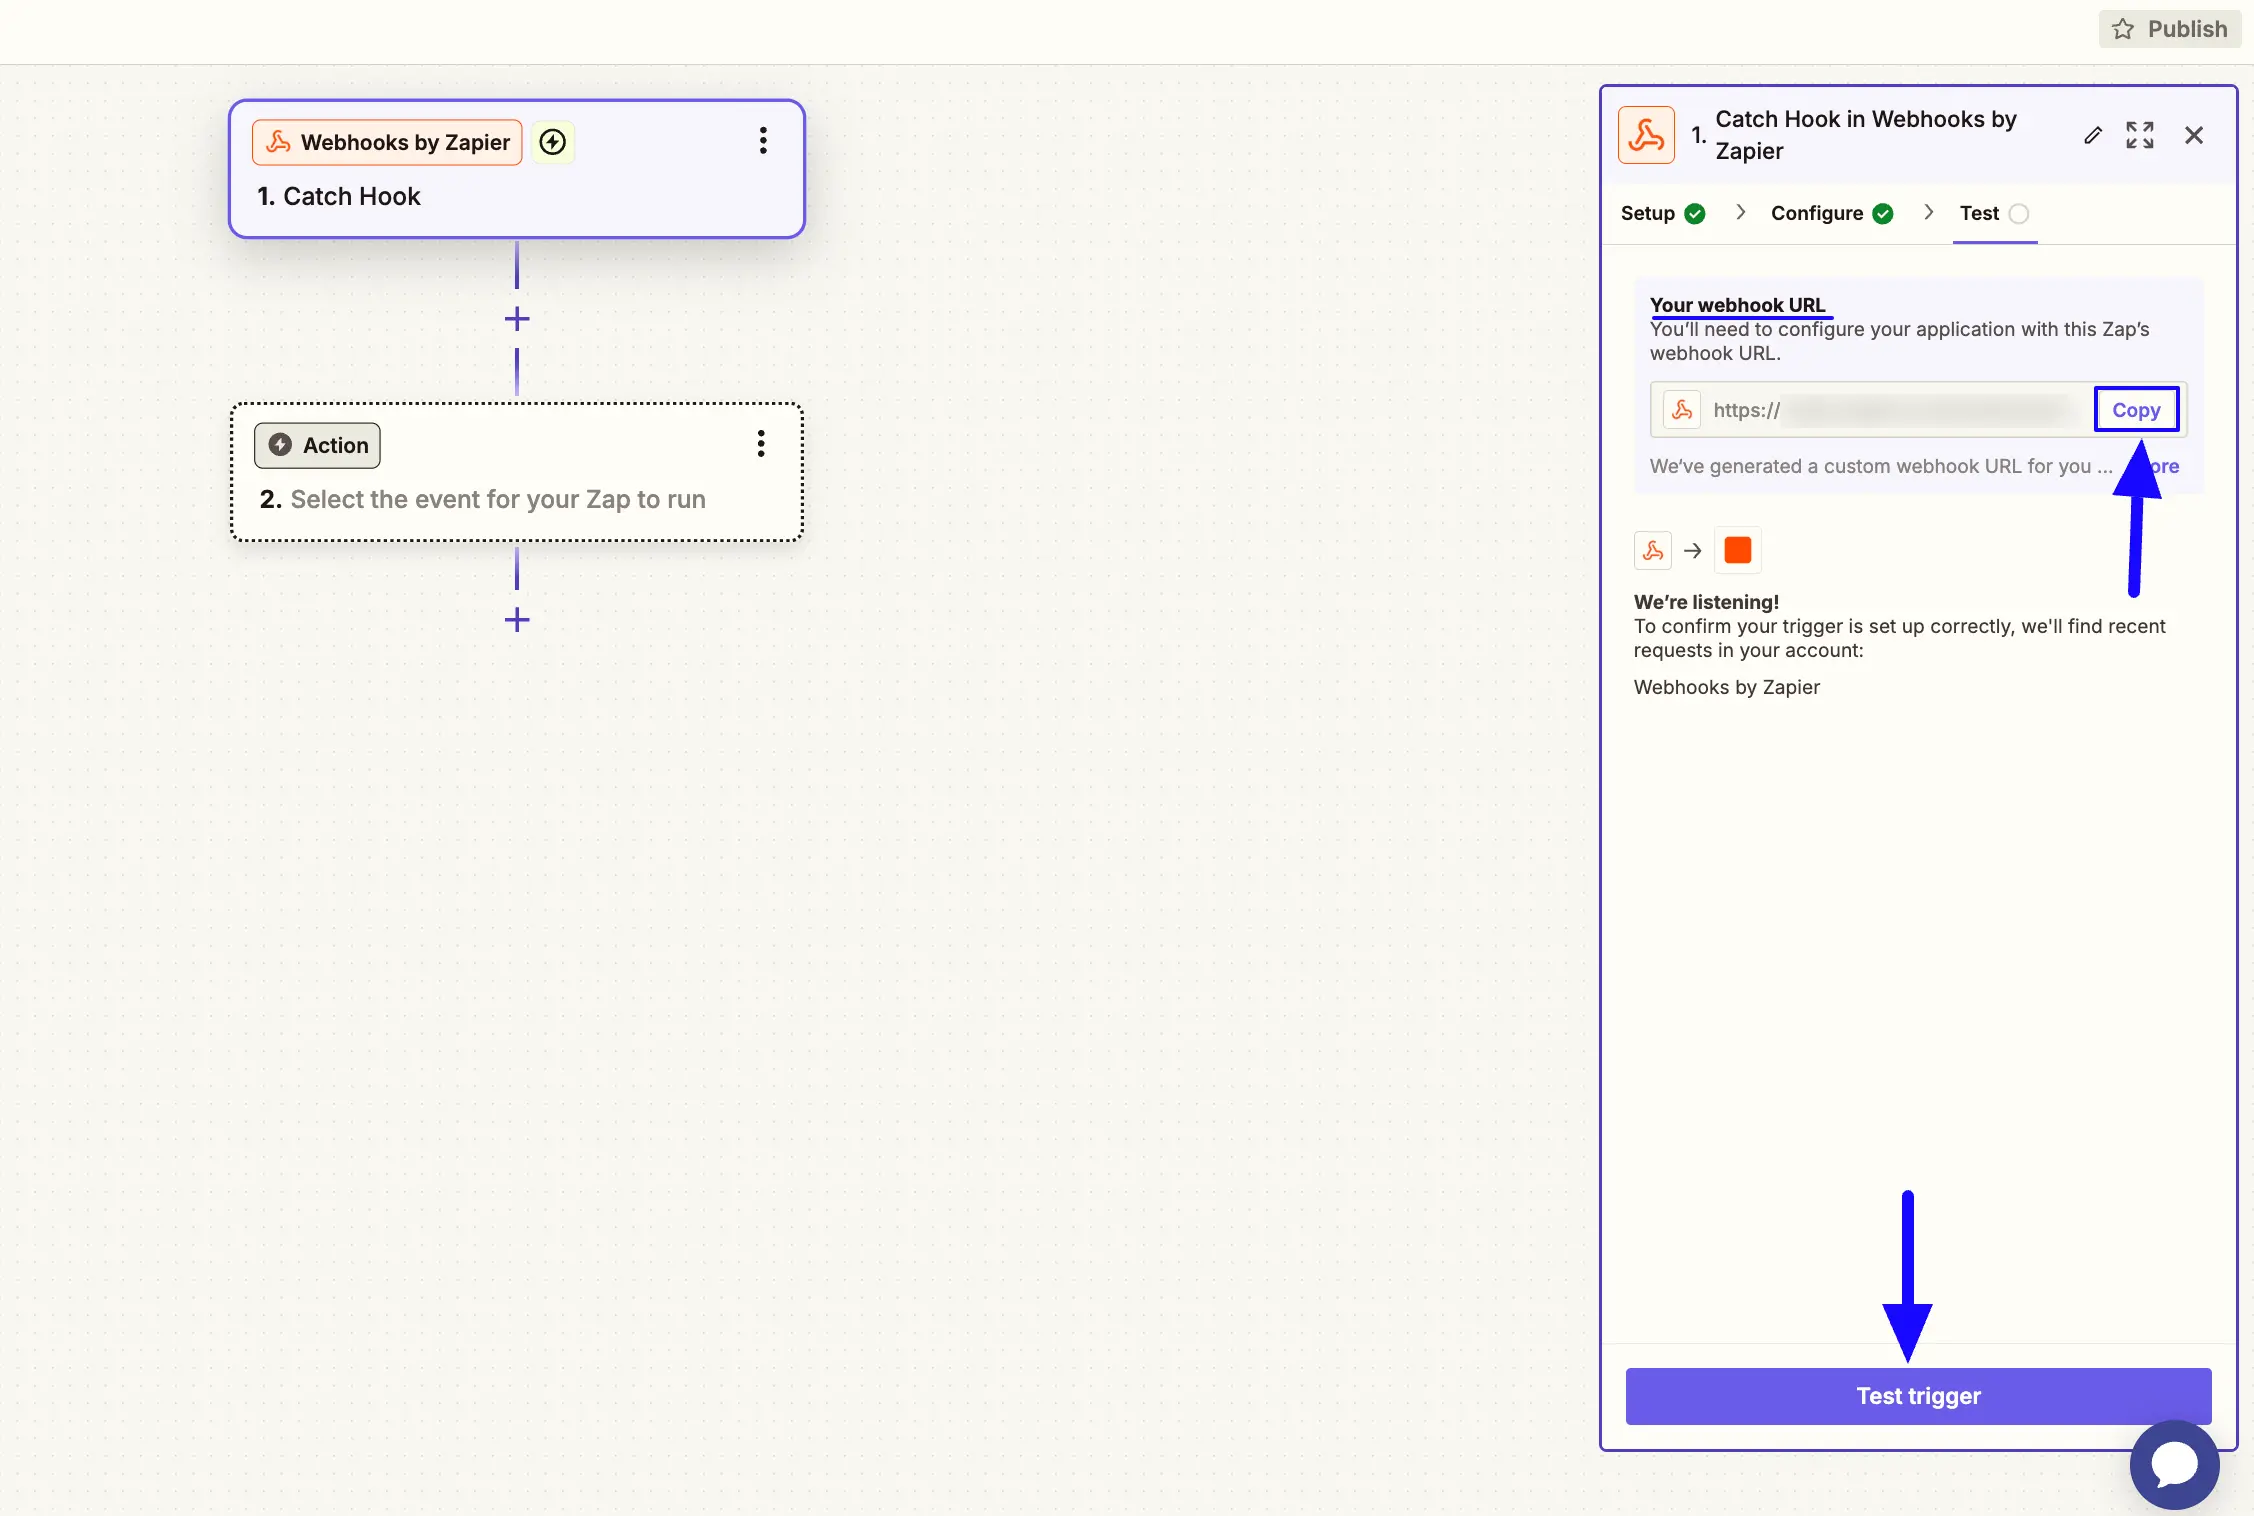
And you will get your Webhook URL. Now, simply copy it by clicking the Copy button.
You can also test the trigger by clicking the Test Trigger button.
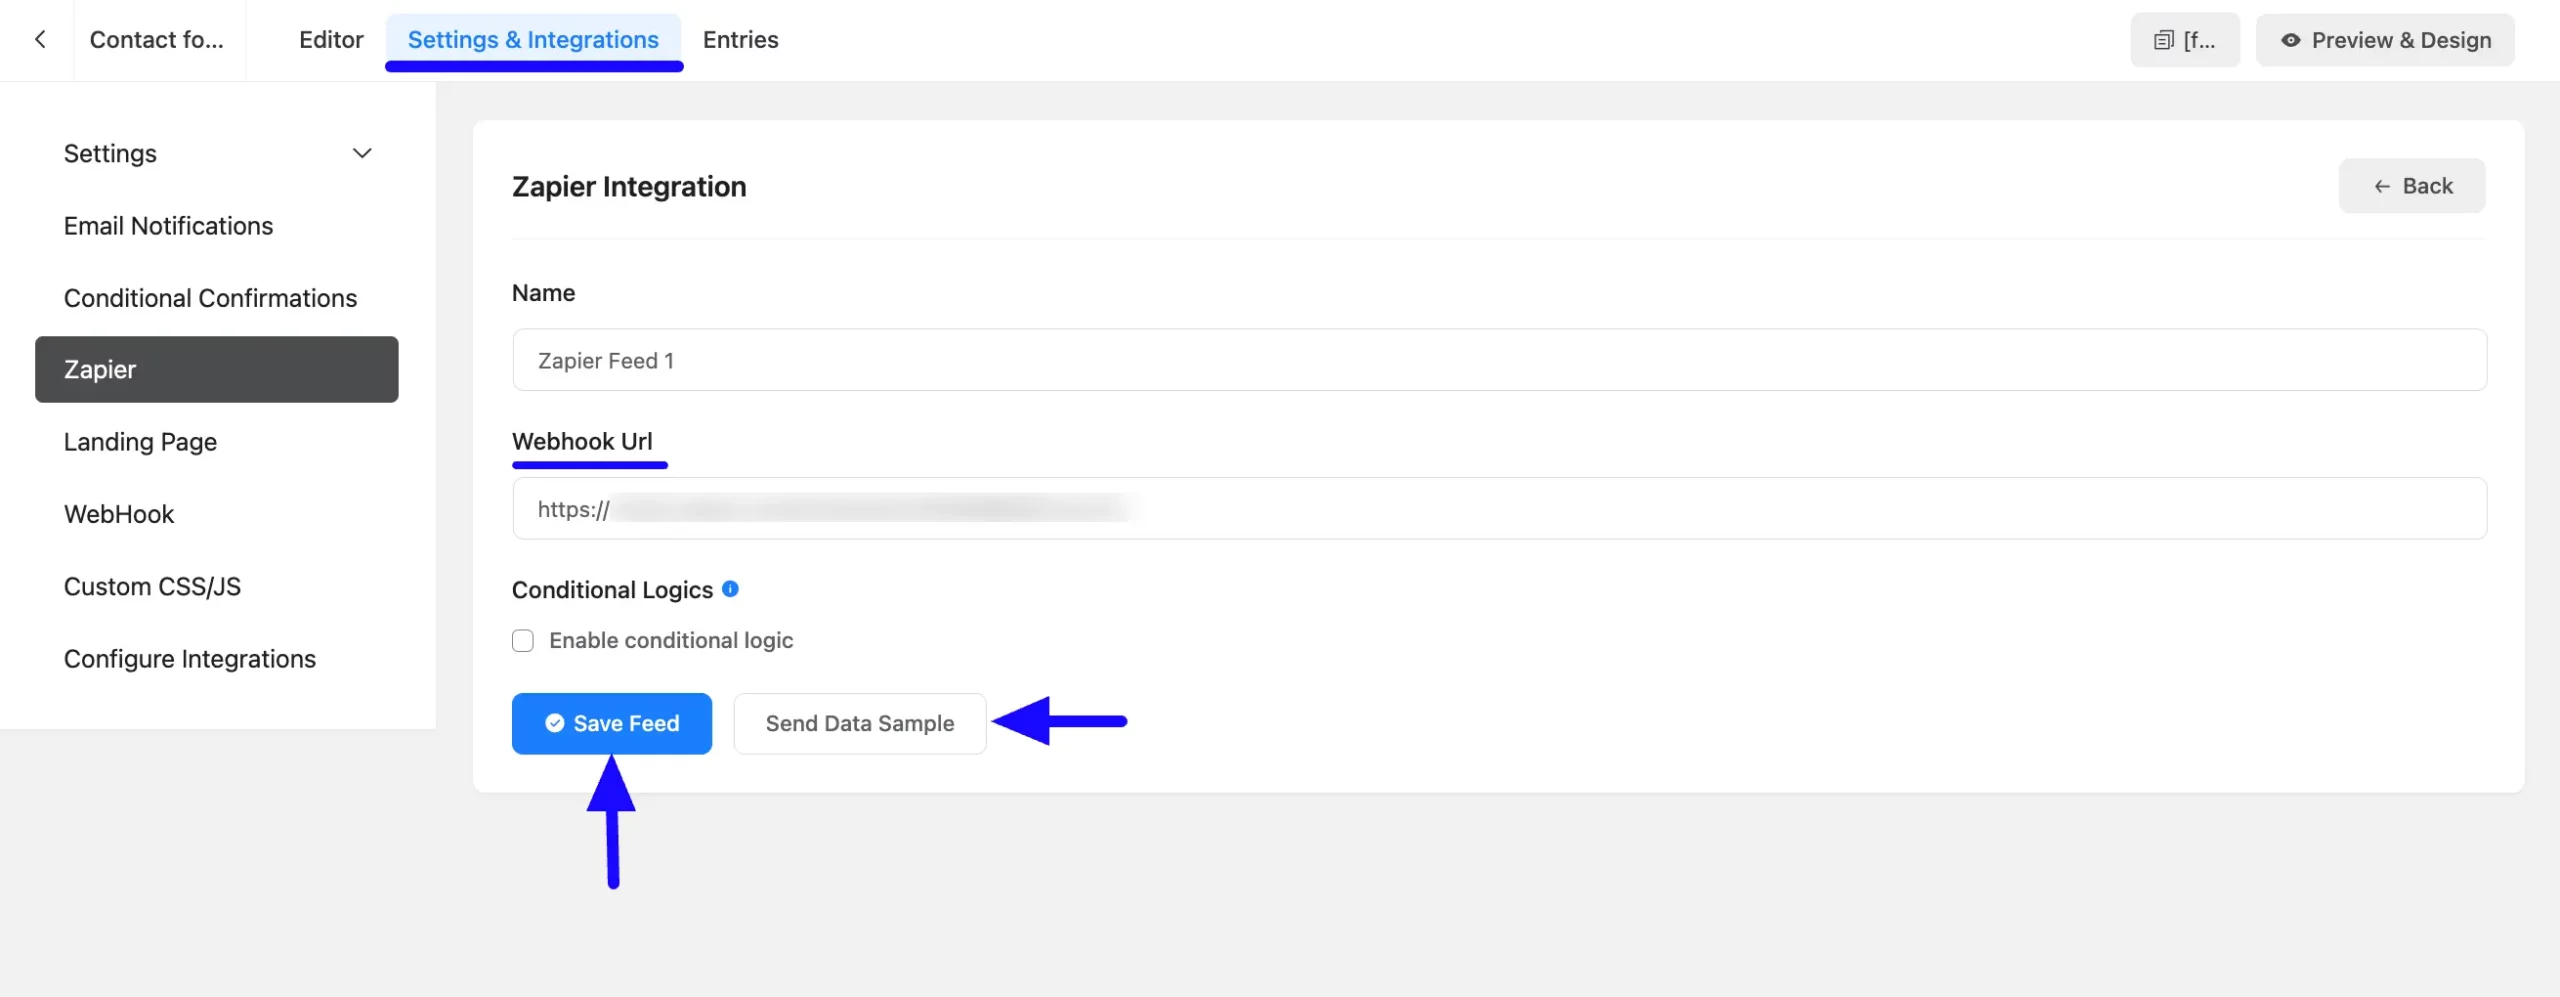
Now, return to the Zapier Integration under the Settings & Integrations tab of the desired Form.
Paste the Webhook URL you copied from Zapier into the Webhook URL field.
Finally, press the Save Feed button to make your Zapier Integration module functional.
You can also test the integration by clicking the Send Data Sample button.
Adding Action #
Once you have successfully integrated Zapier with Fluent Forms, it is better to test the integration by submitting a demo form.
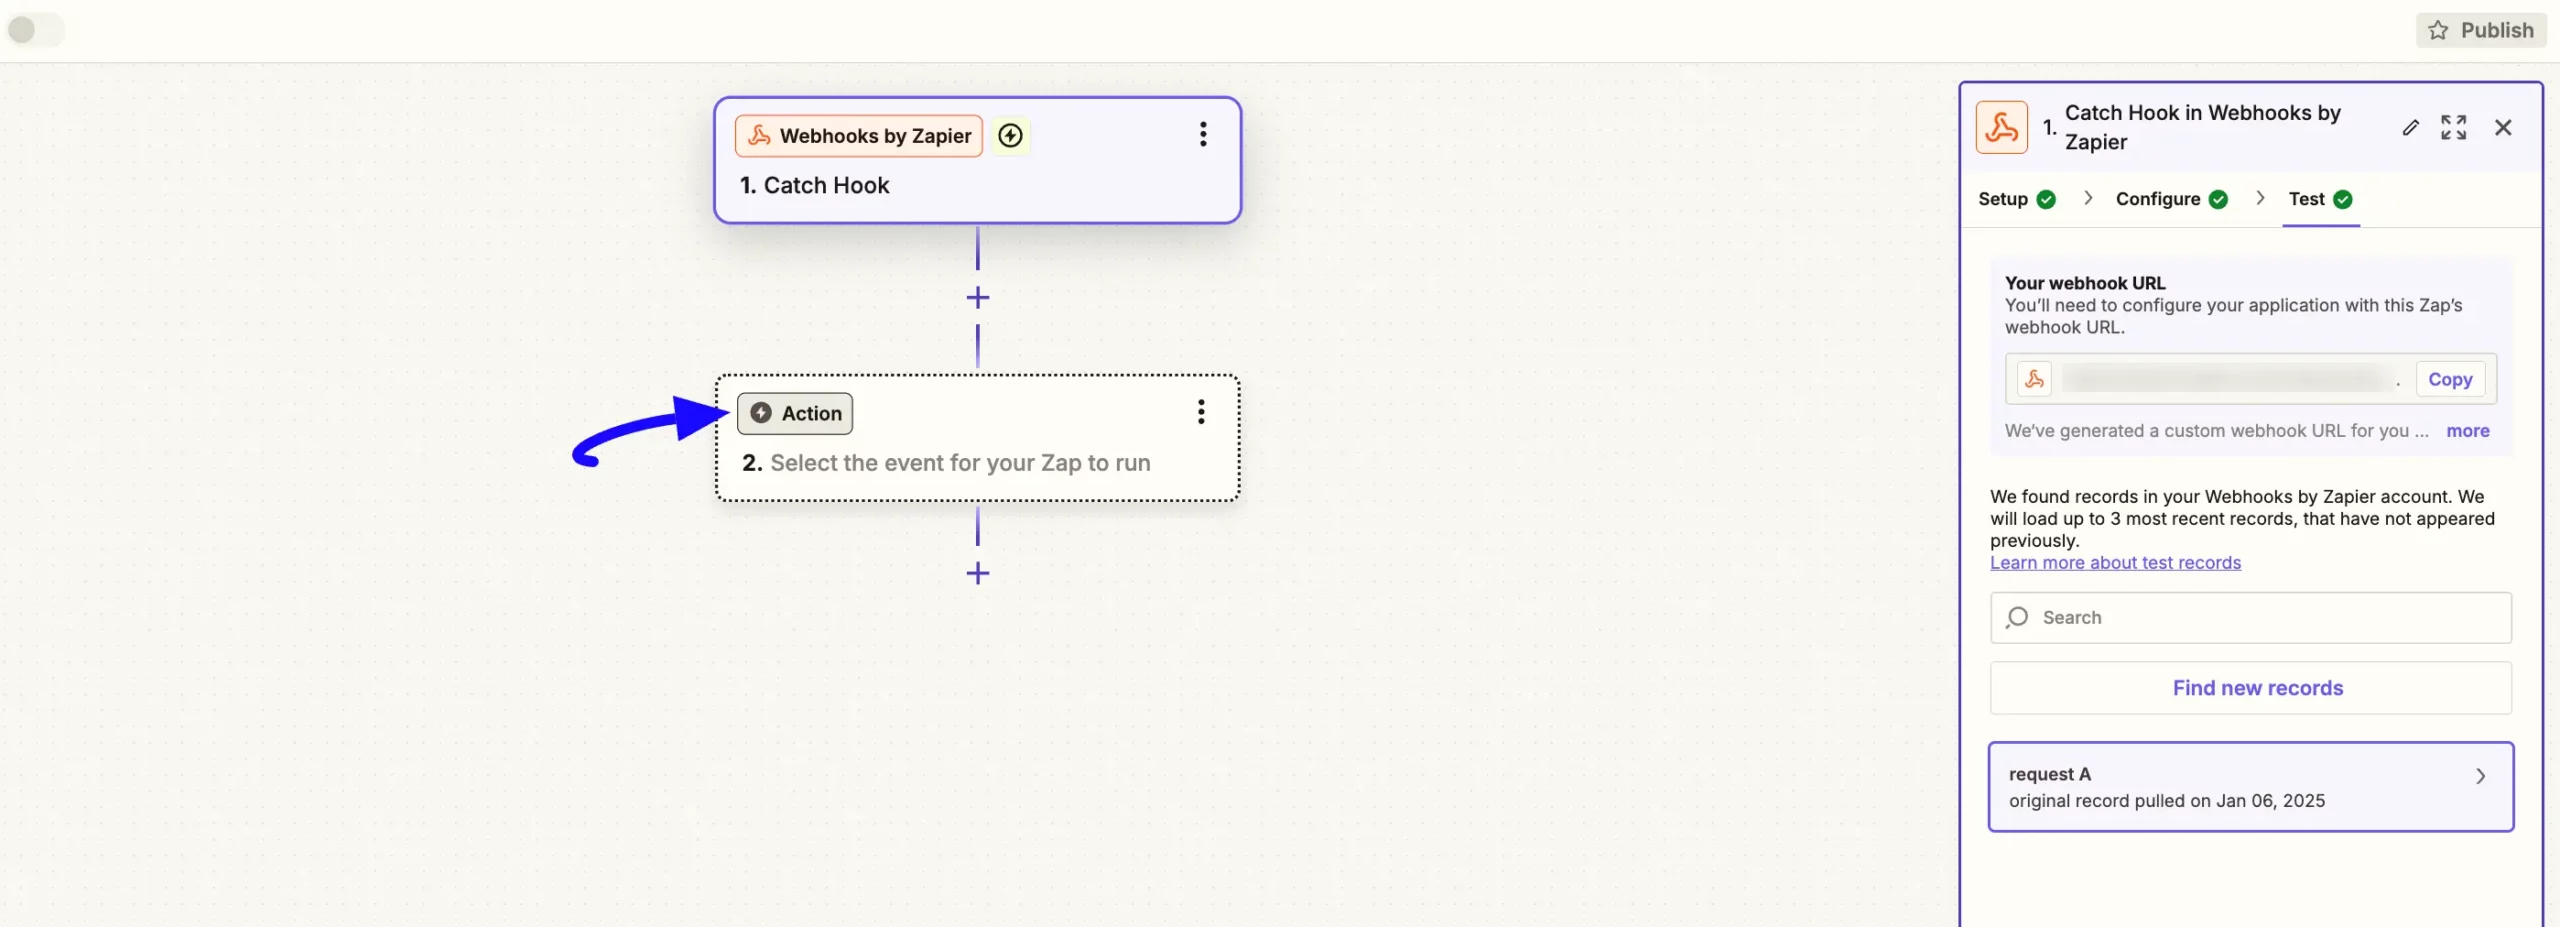
To test the Zapier Integration successfully, you need to add an action to this app.
Click the Action button to set the action for testing the integration.
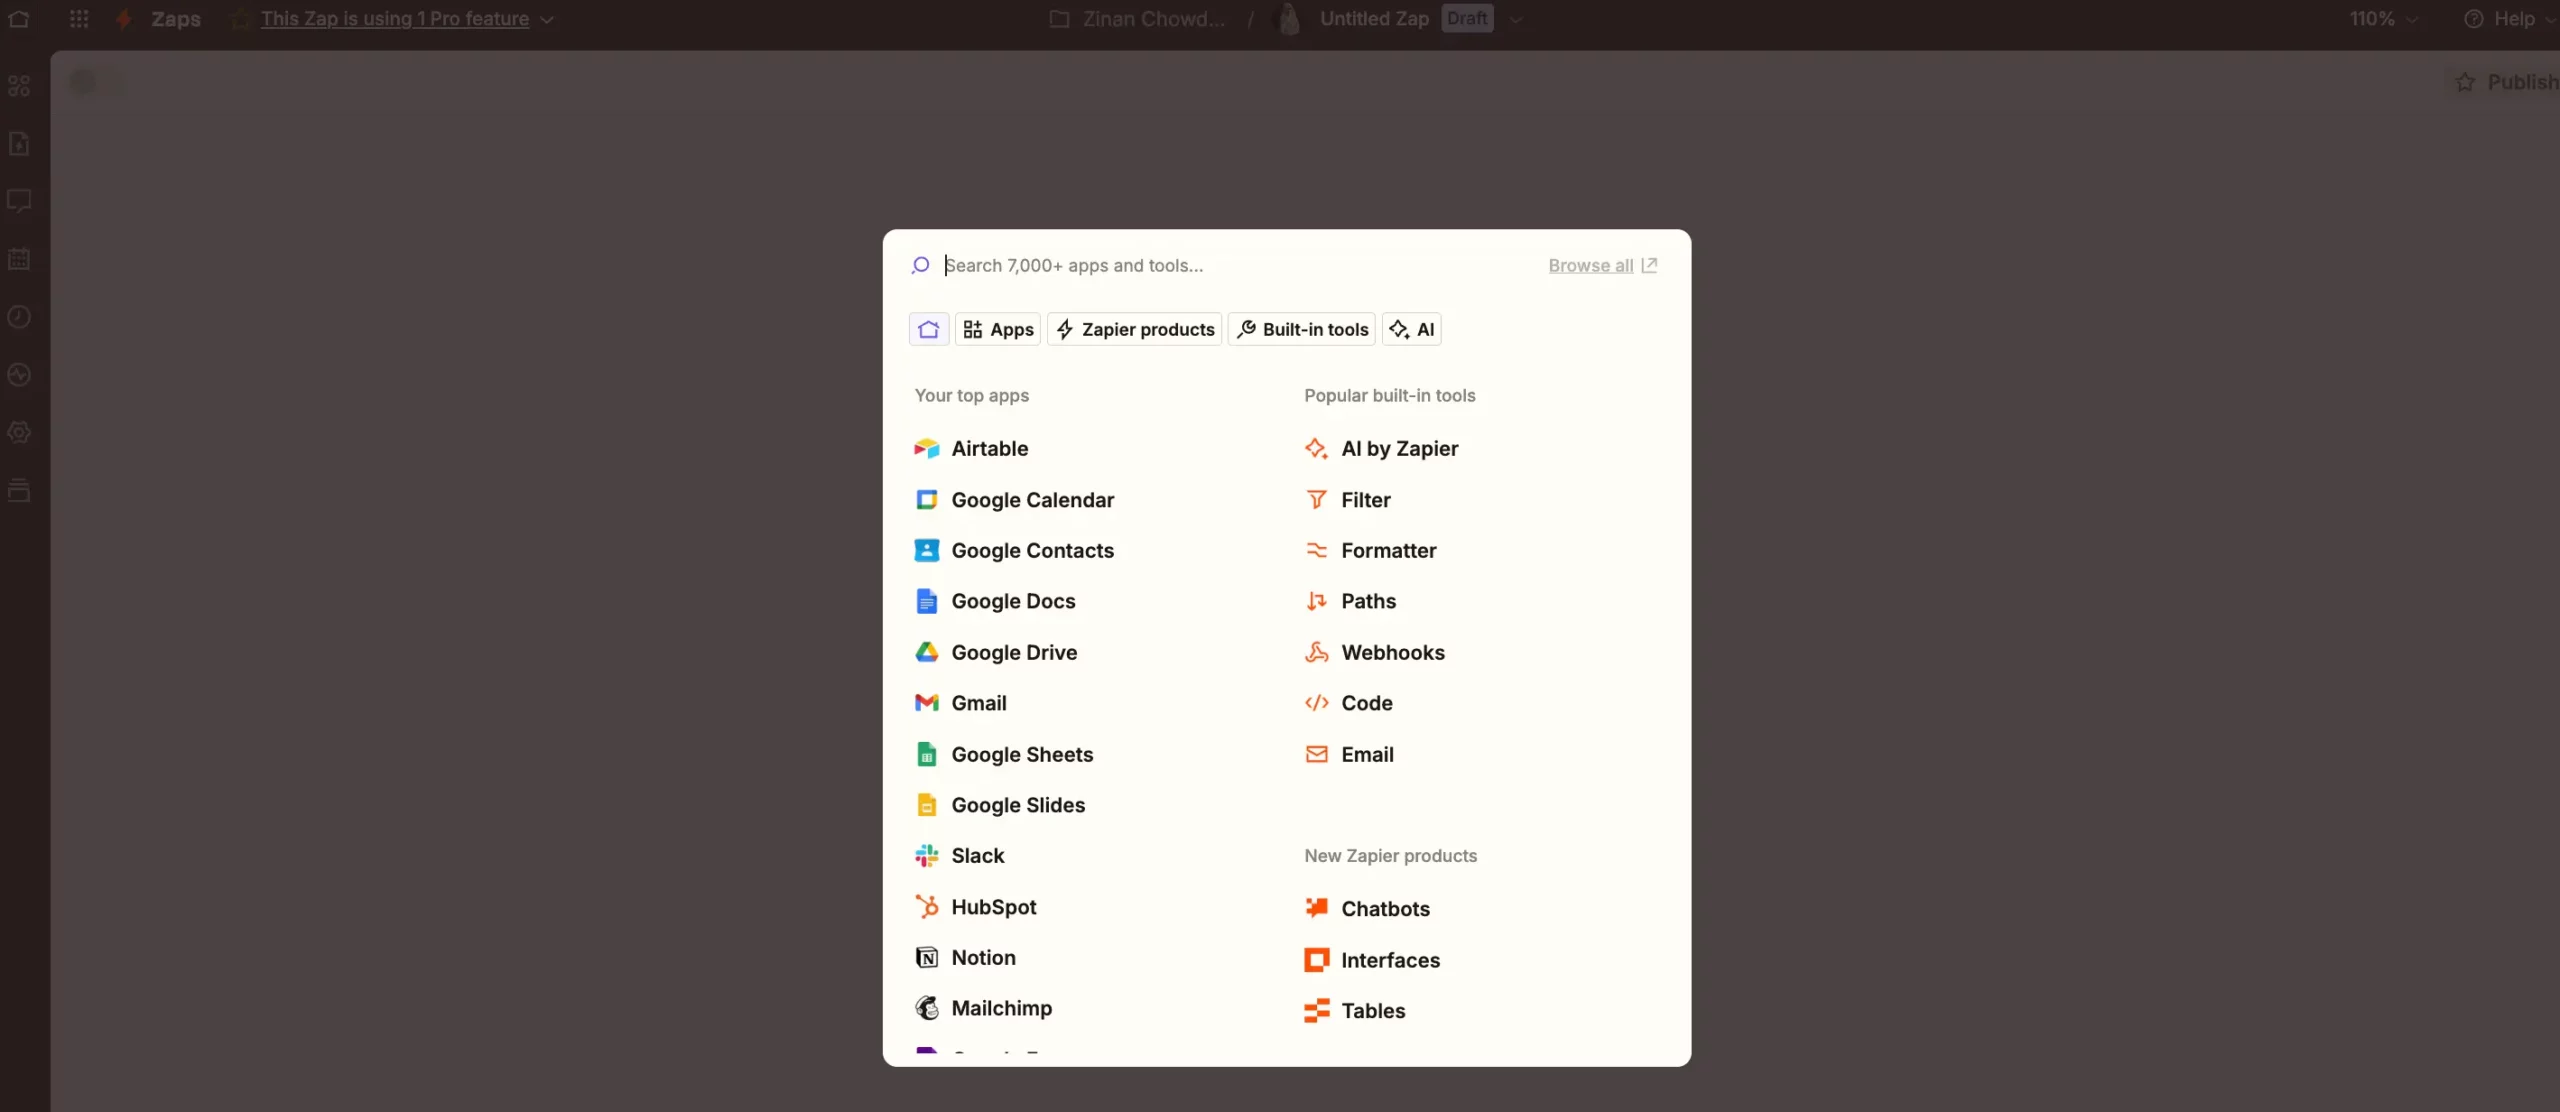
Select an App through which you want to run the action and complete the full configuration process step-by-step.
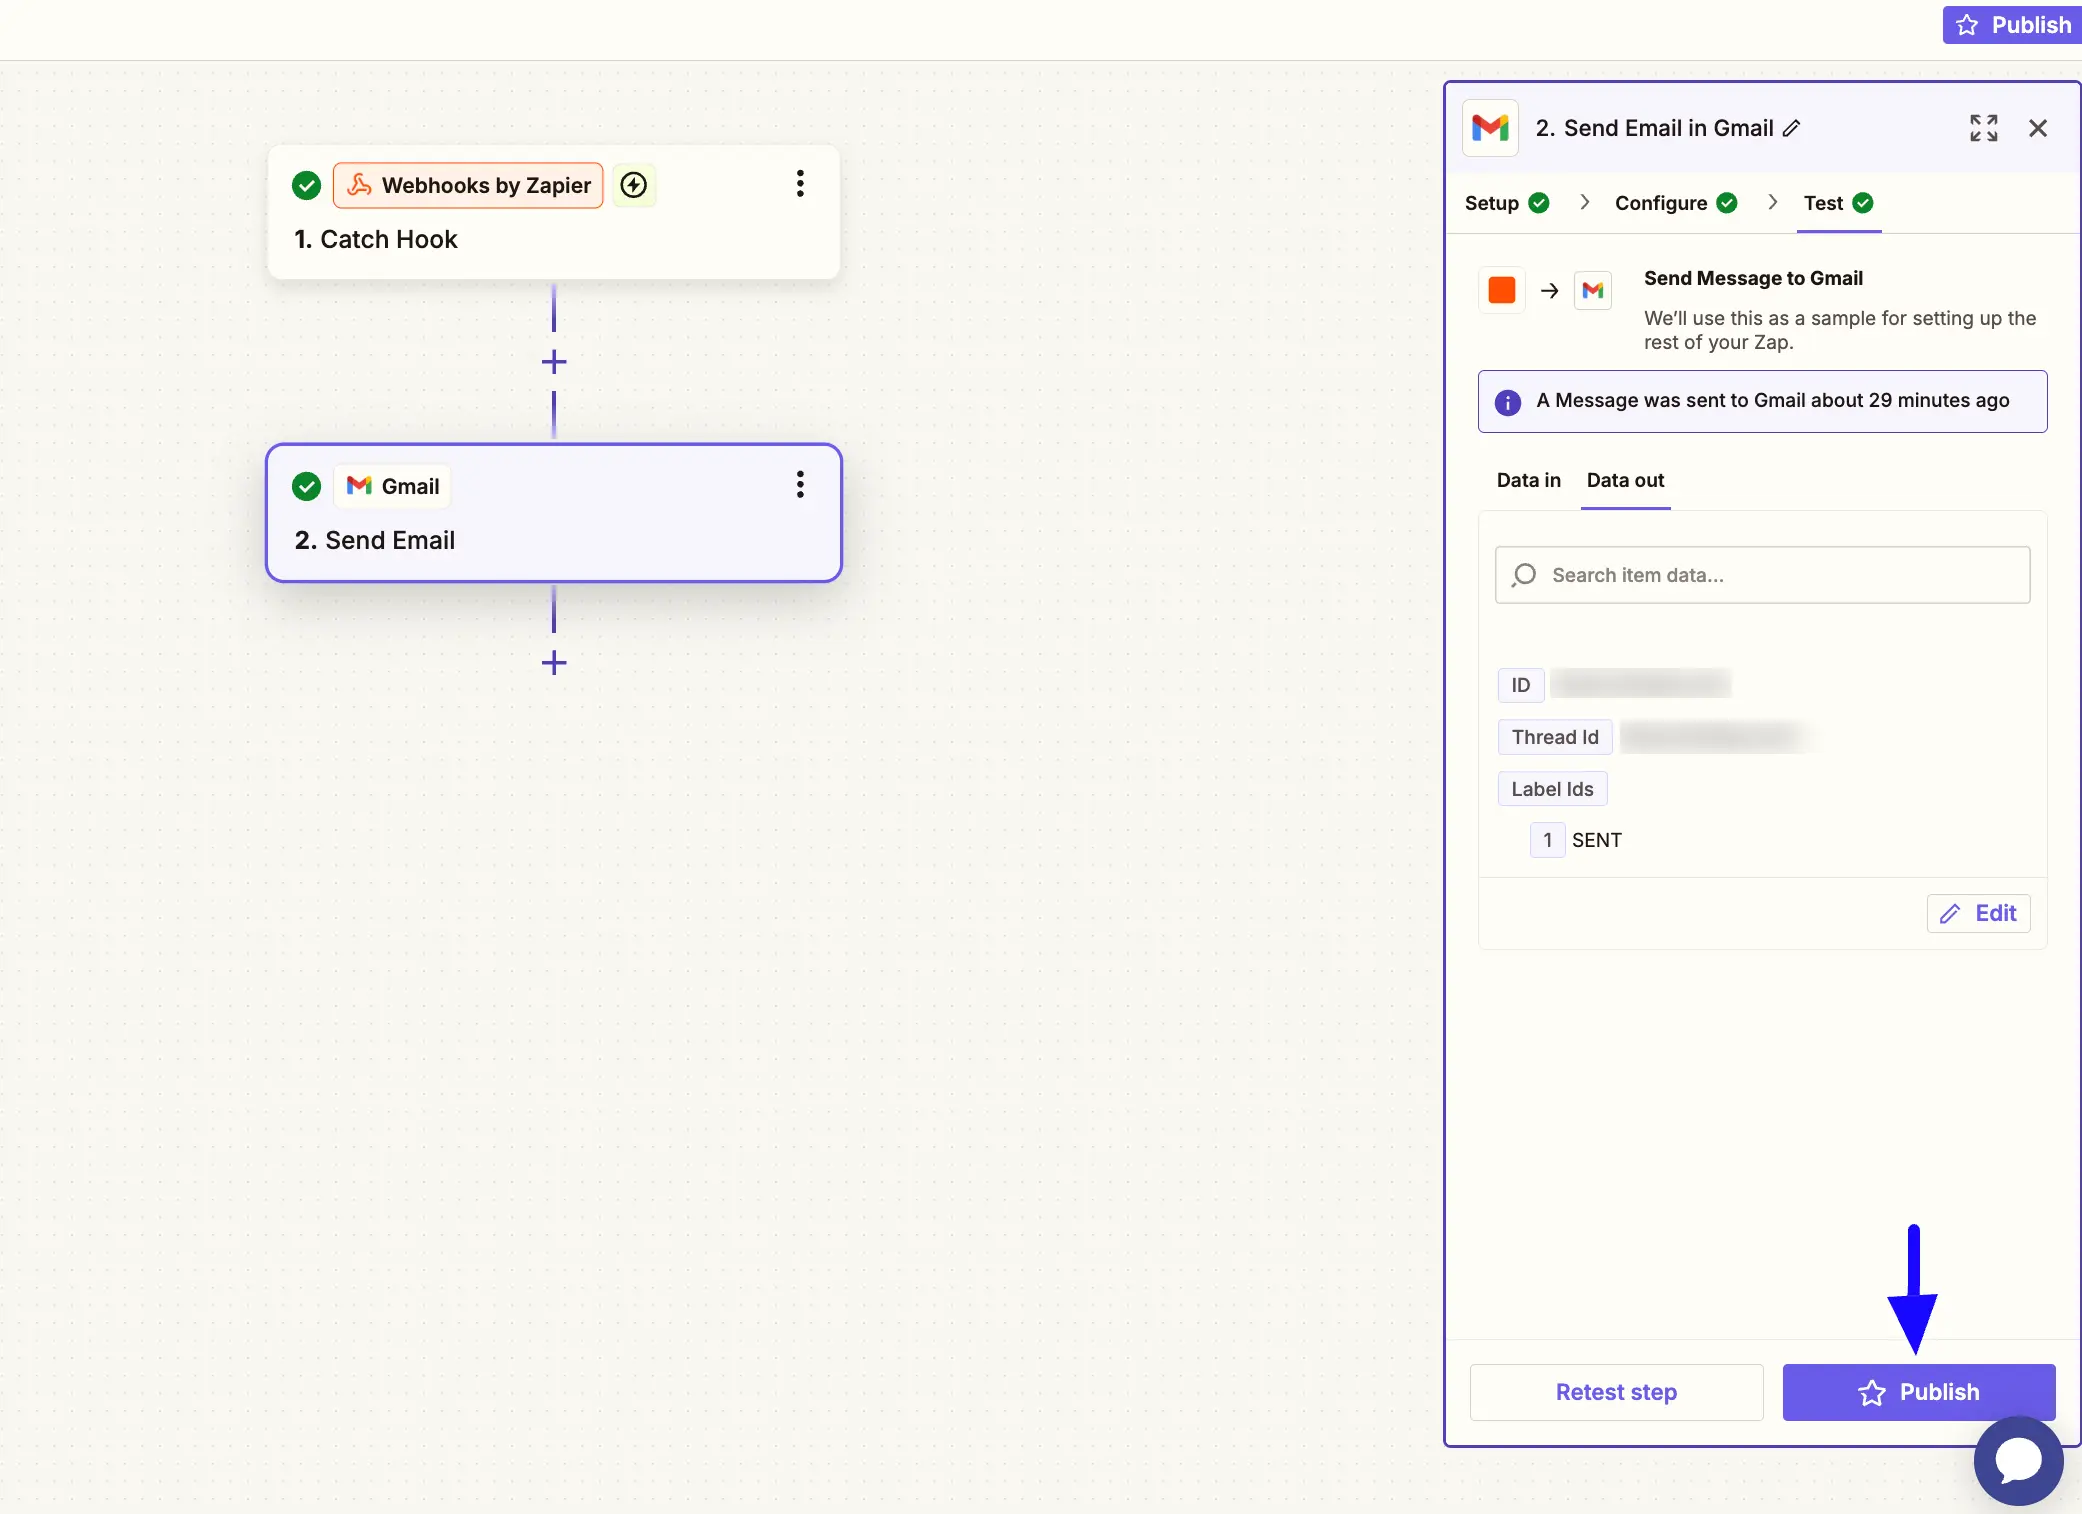
Once you have added the Trigger and Action, publish the Zapier App by clicking the Publish button.
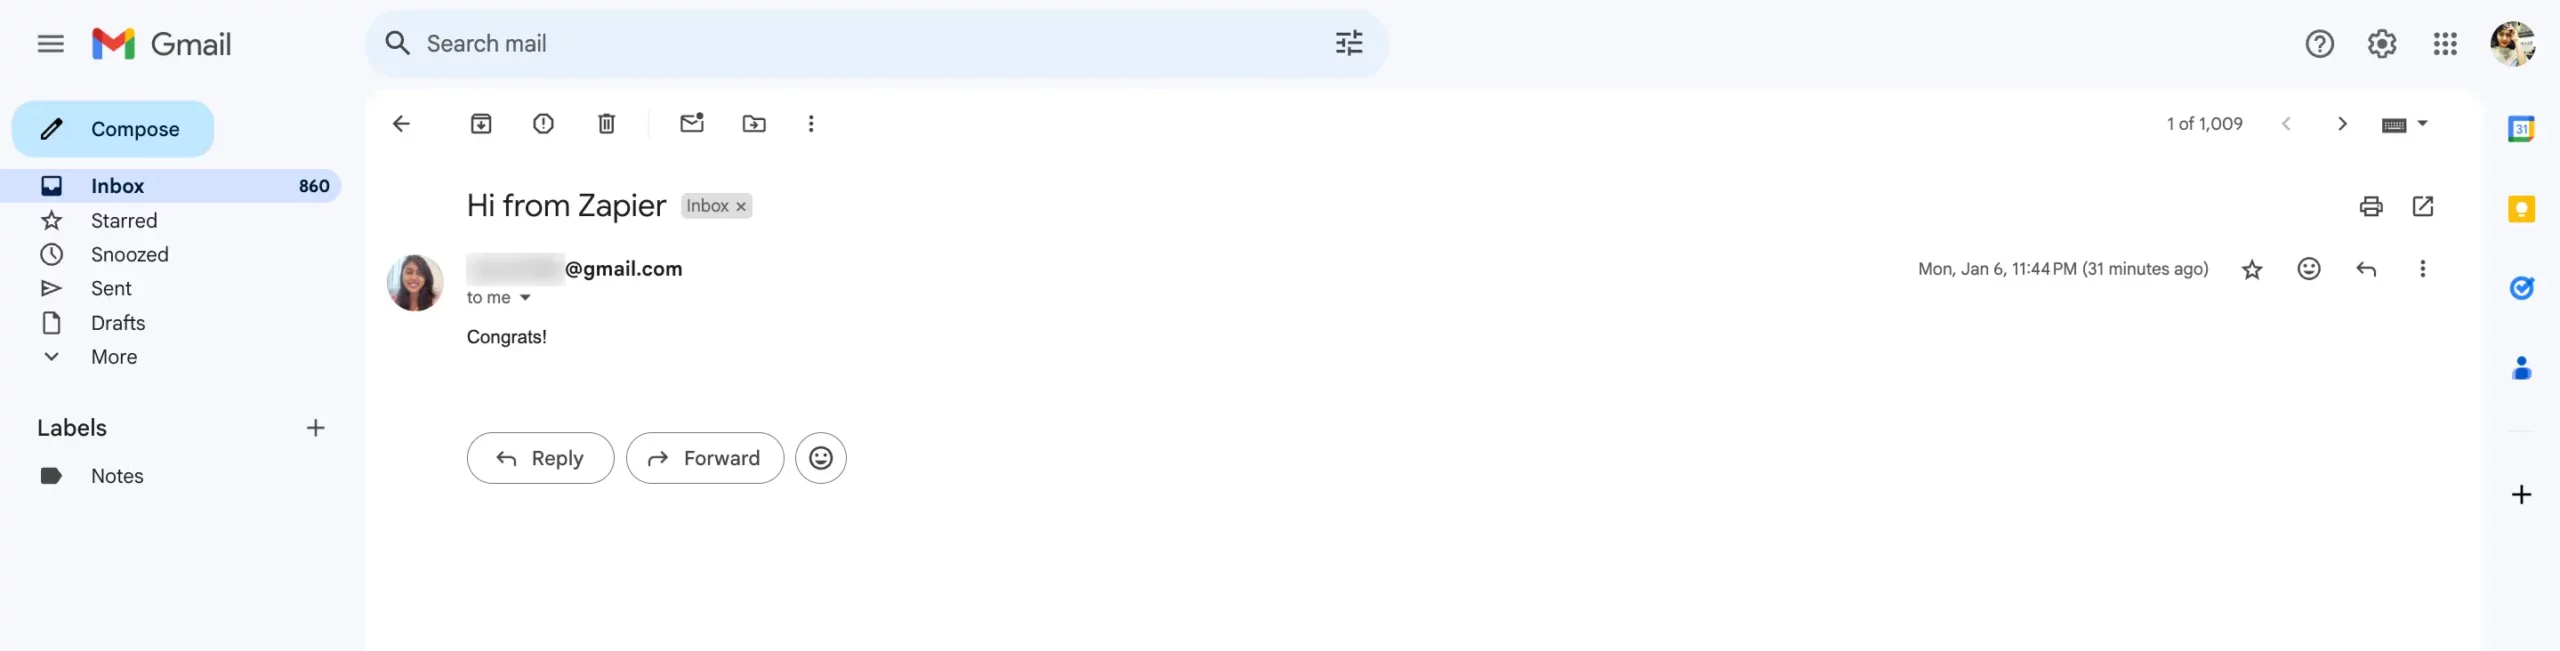
Preview of Integrated Zapier #
Here, you can see the preview of the emails sent through the Form entries that I set up during the integration.
This way you can easily integrate Zapier with Fluent Forms!
If you have any further questions, concerns, or suggestions, please do not hesitate to contact our @support team. Thank you.


