Fluent Forms allows you to send email notifications to the admin and users every time someone fills out a form. You can also inform others besides admin or users (e.g., team members, support agents, moderators, etc.) when the form is filled out.
This article will guide you through the process of setting up the Admin/User Email Notification in Fluent Forms.
Email Notifications for Admin/User #
To learn how to set up admin/user email notifications, follow the steps below –
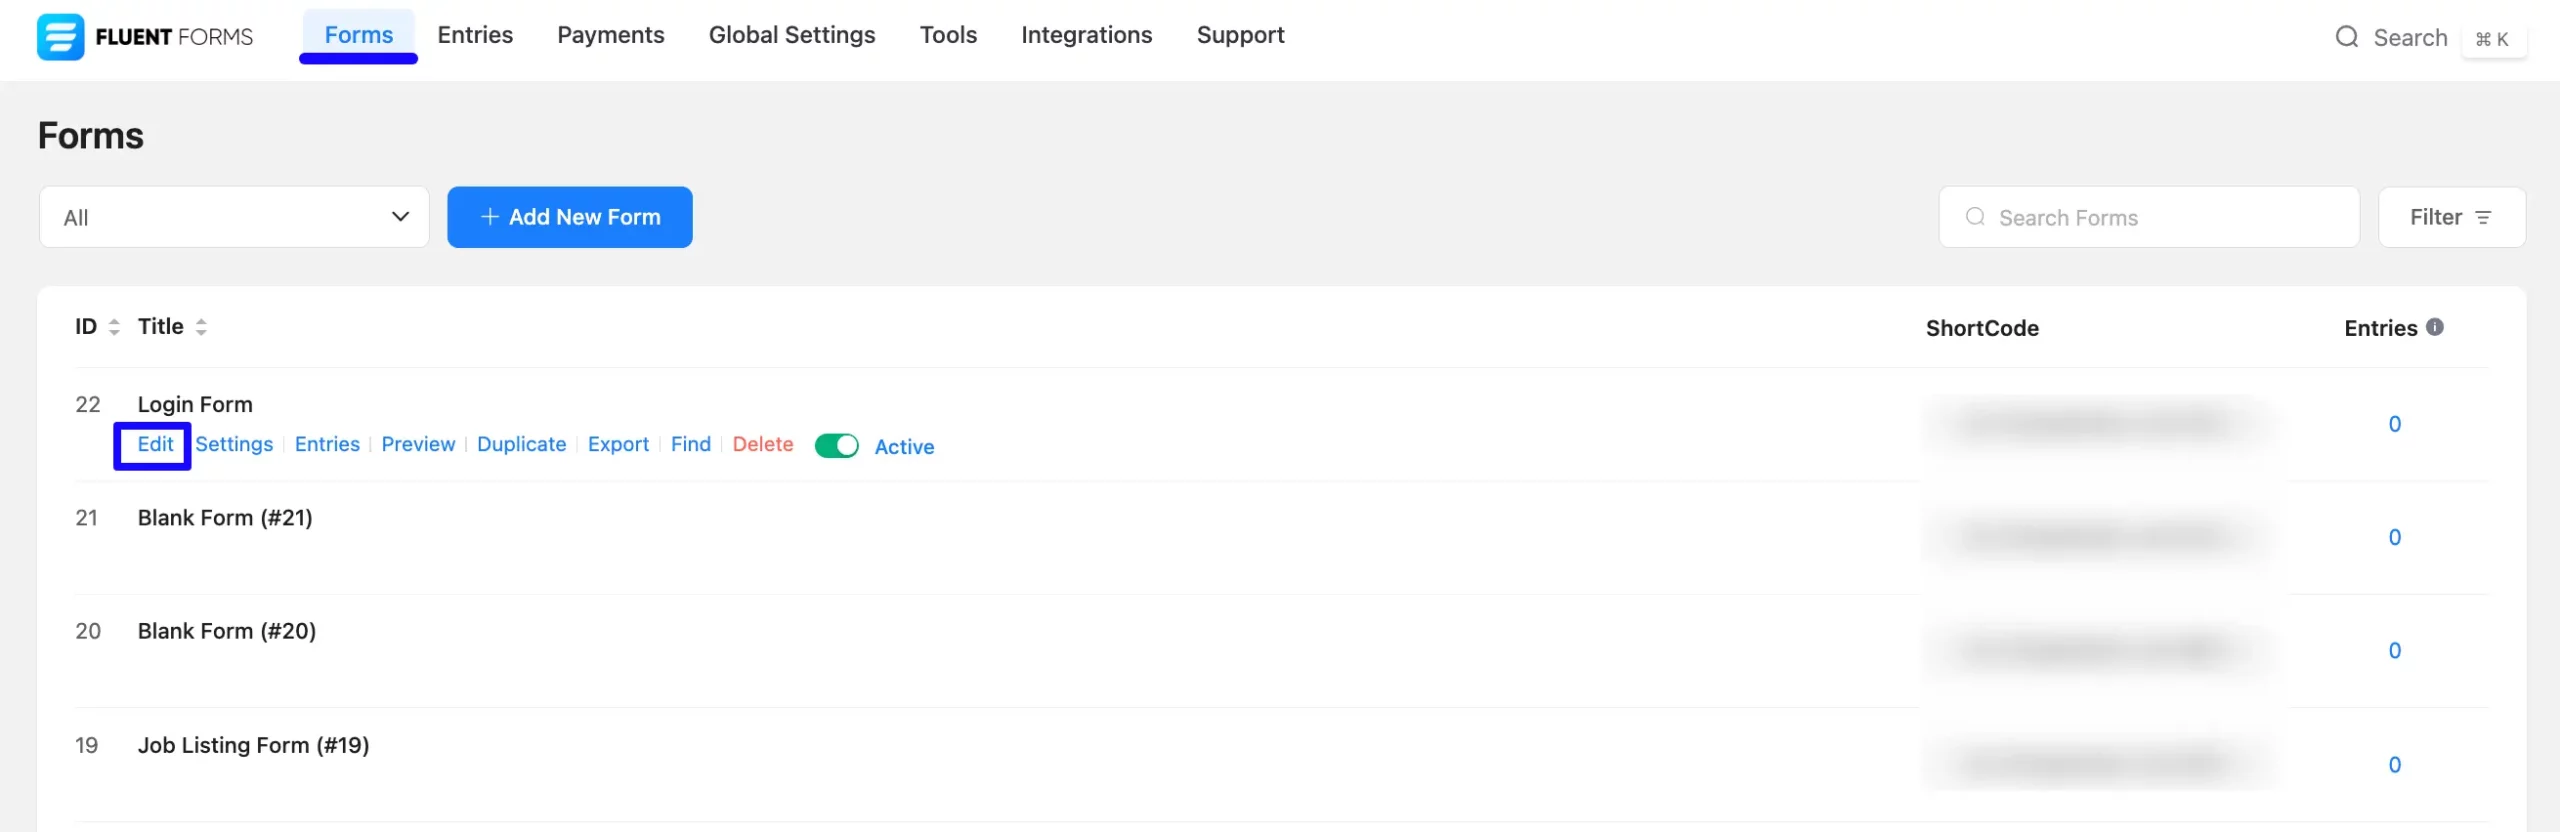
First, go to Forms from the top navbar, and open the Editor page of your desired form by clicking the Edit button where you want to set the Email Notification.
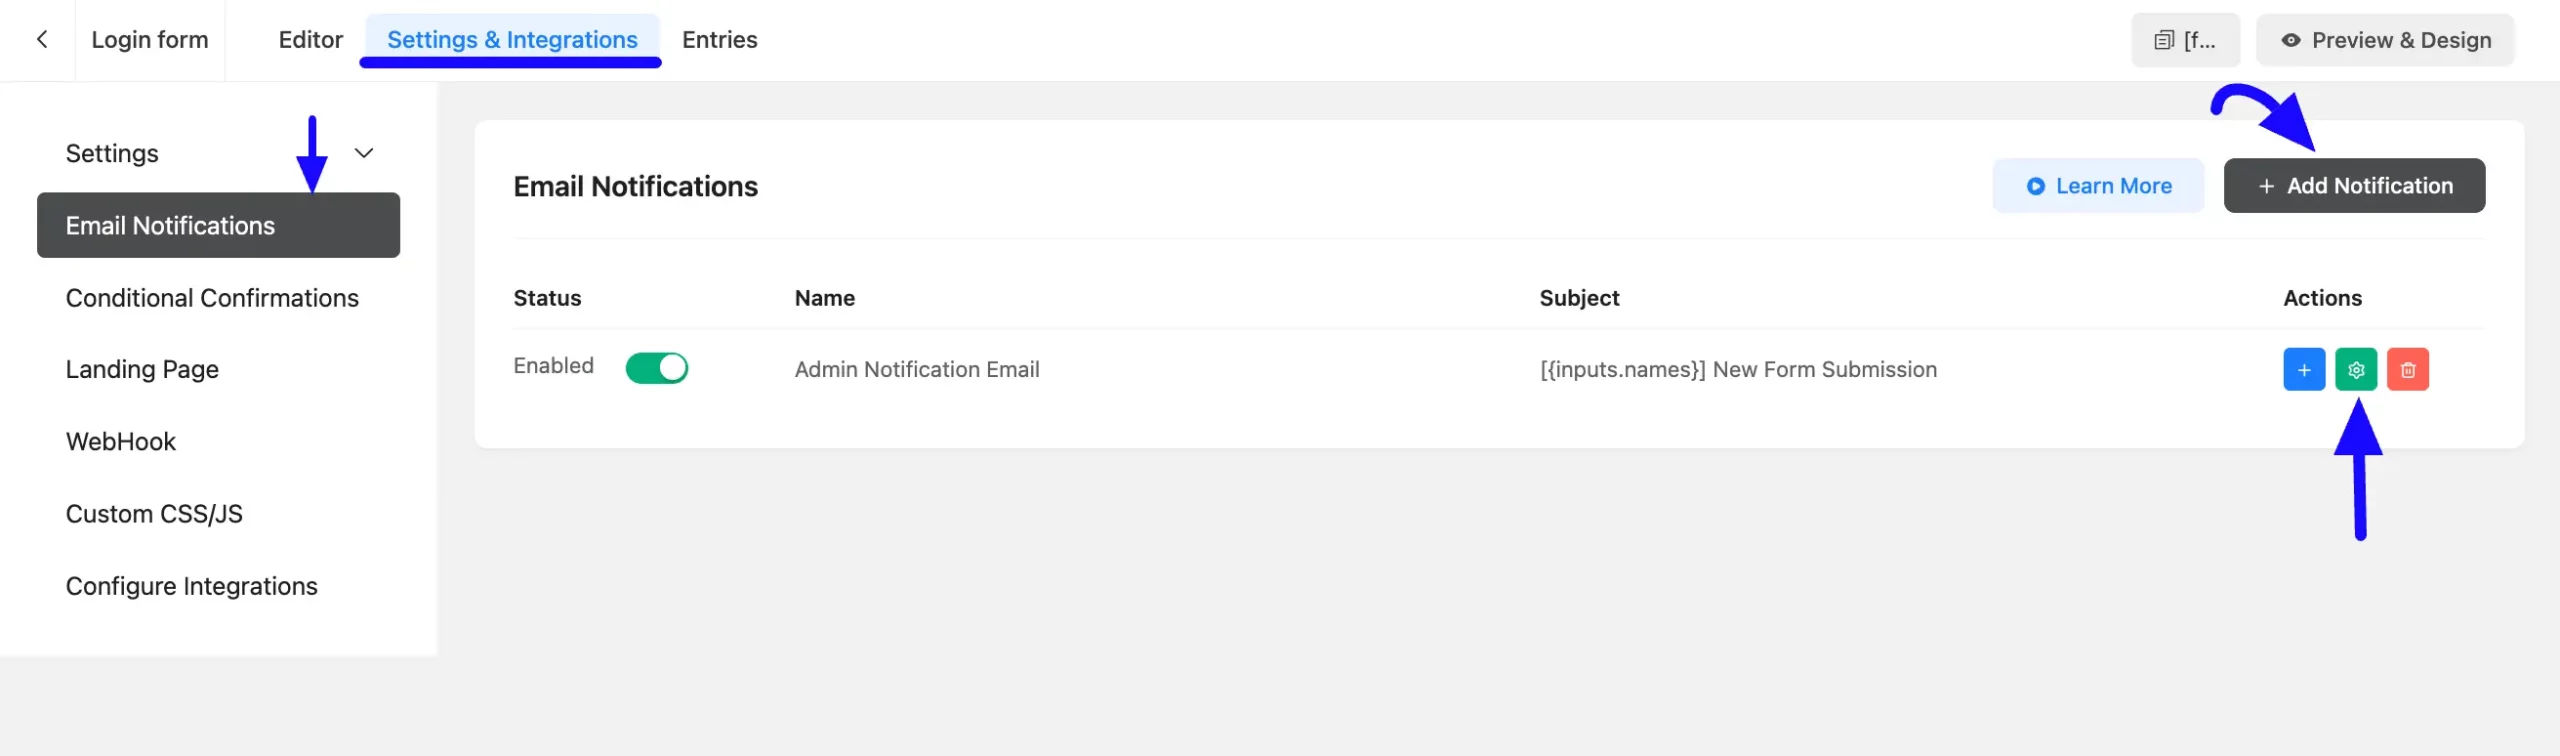
Now, go to Settings & Integrations from the top navbar and open the Email Notifications tab.
Here, you can see one Admin Notification Email is already created by default. You can use it by enabling the toggle button and edit by clicking the Settings Icon.
Or, you can Create a new one by clicking the + Add Notification button. For example, I created a new notification to show you the whole process of adding email notifications for Admin/User.
Once you are on the Email Notifications page, fill in all the necessary settings as per your needs, click the Save Notification button, and your admin/user notification will be set.
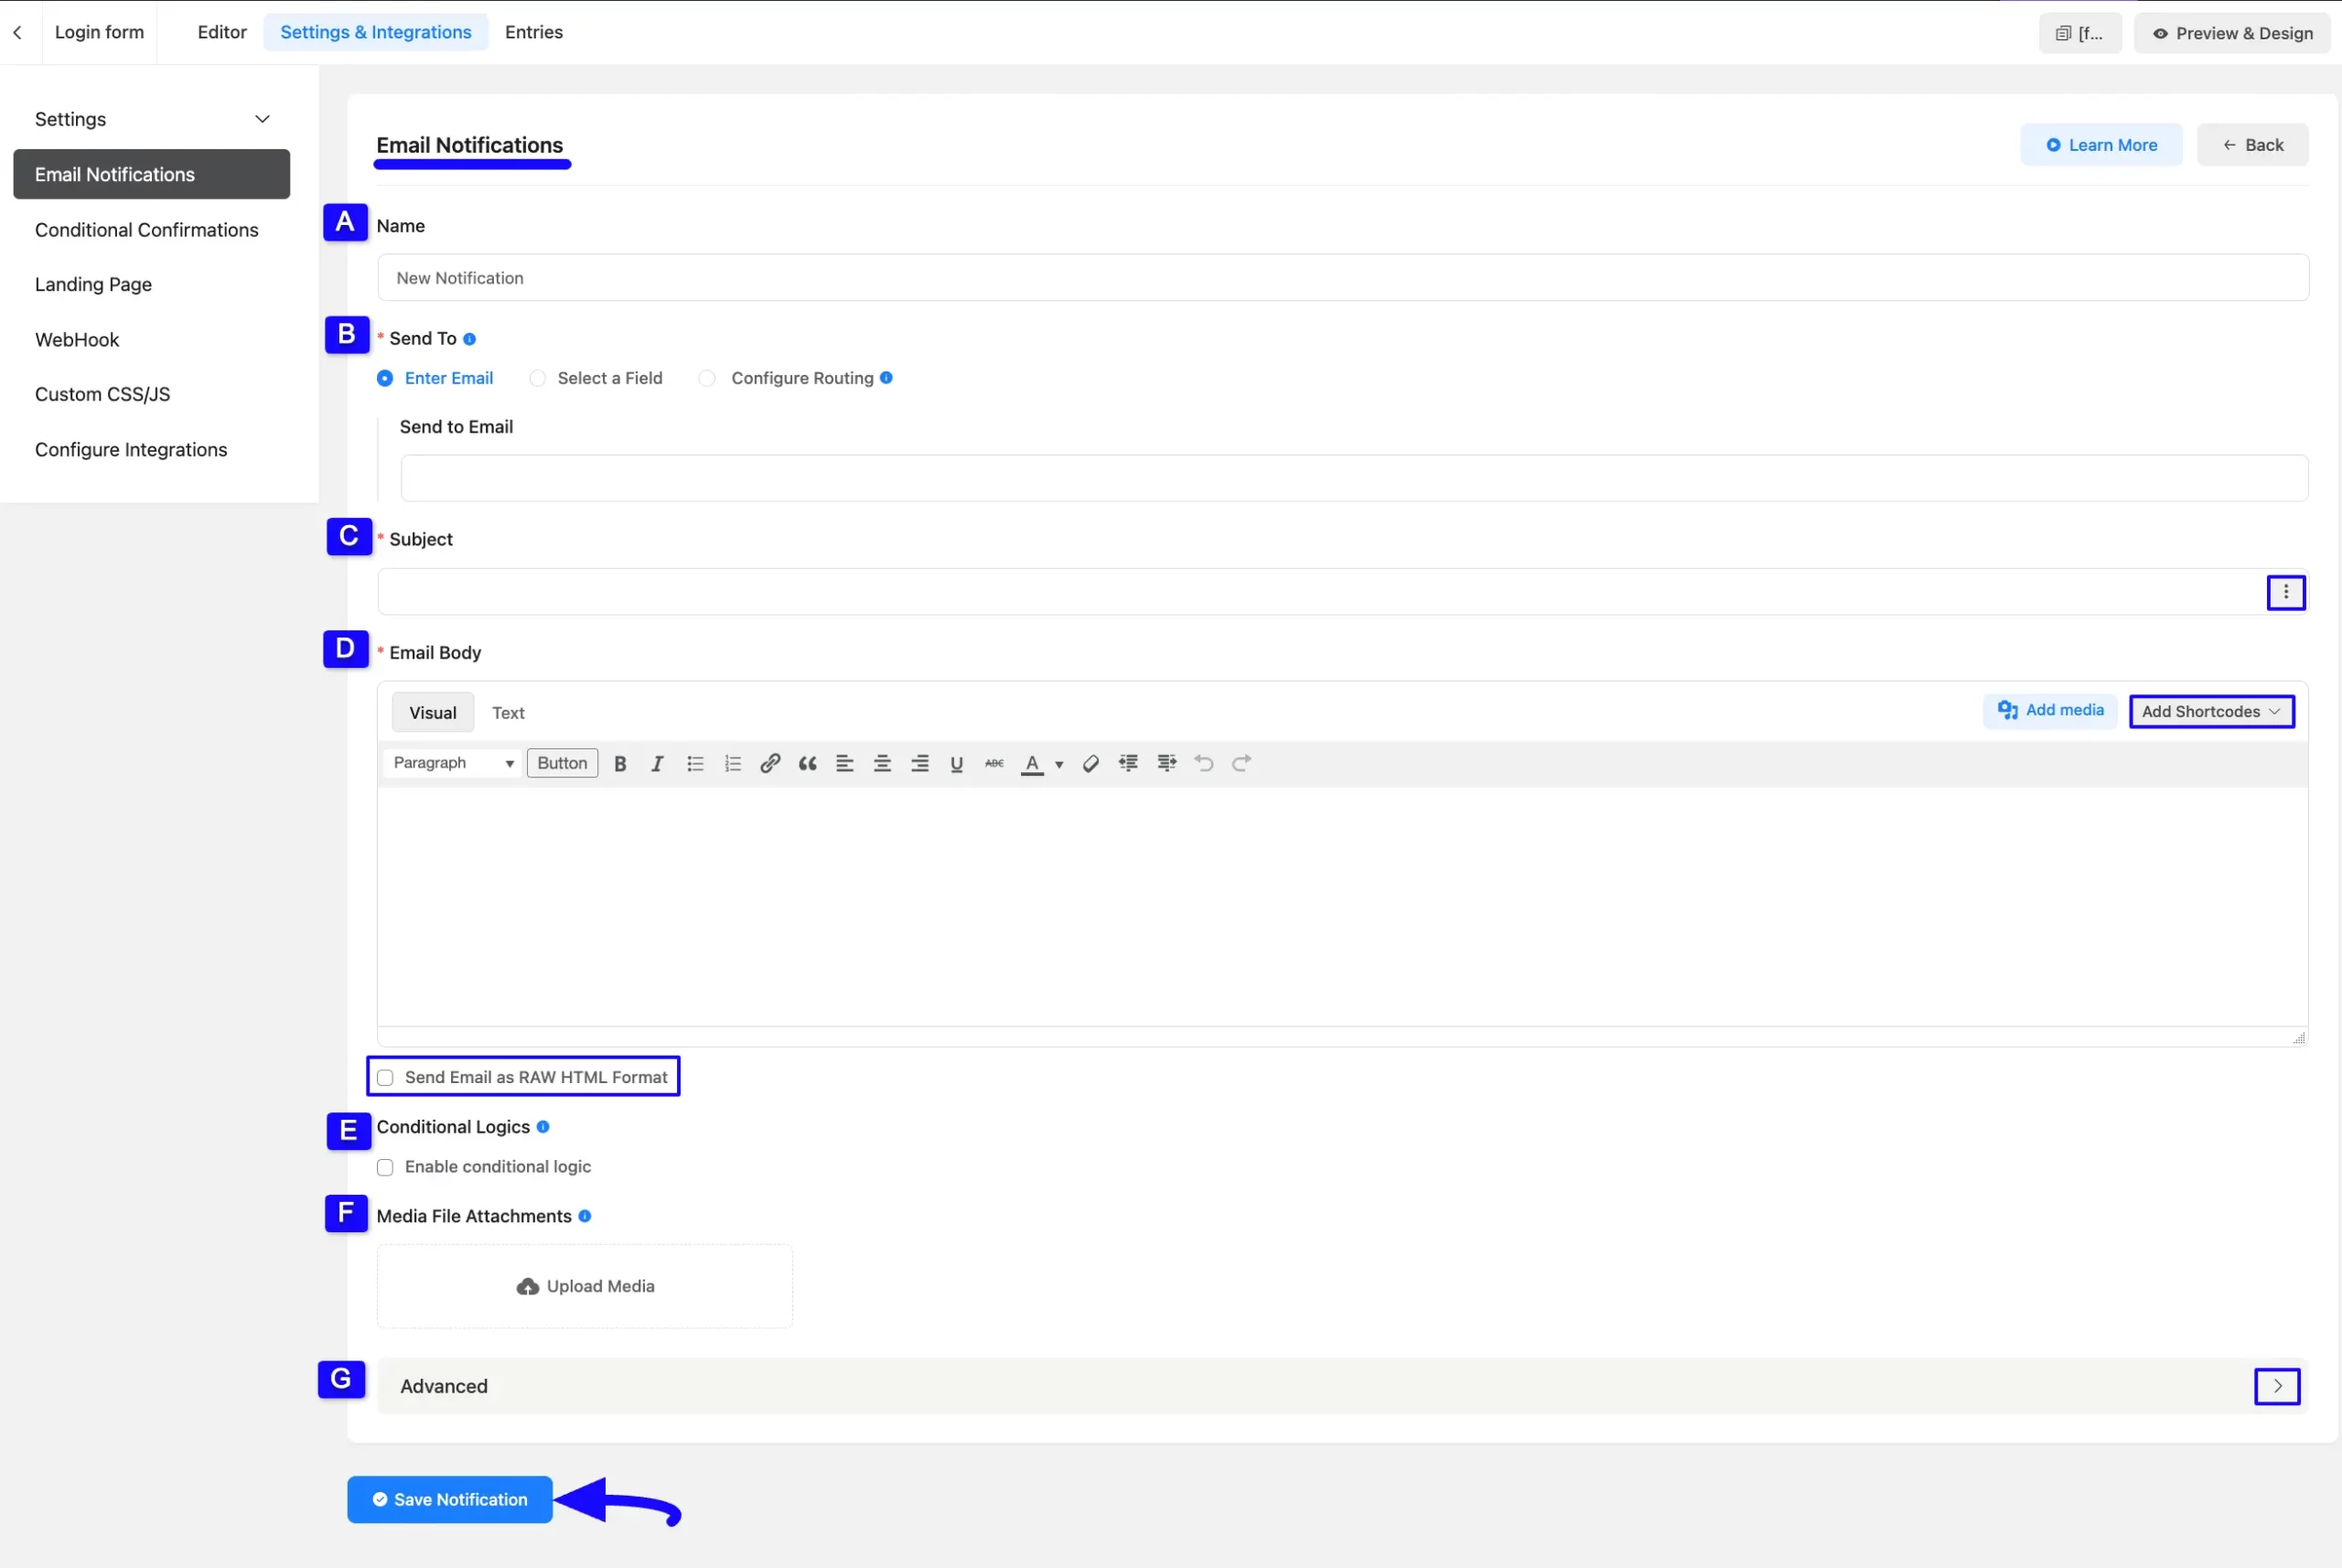
All the settings mentioned above are briefly explained below:
Remember, all the settings option functions the same for both the Admin and User email notifications except the “Send To” setting.
A. Name #
Here, provide a name for your email notification to find it easily later.
B. Send To #
Here, you will get three options for setting up the Email Notification. These are:
- Enter Email: Use this option to set up the email notification for the Admin.
- Select a Field: Use this option to set up the email notification for the Users.
- Configure Routing: Use this set up additional Conditional Email Routing.
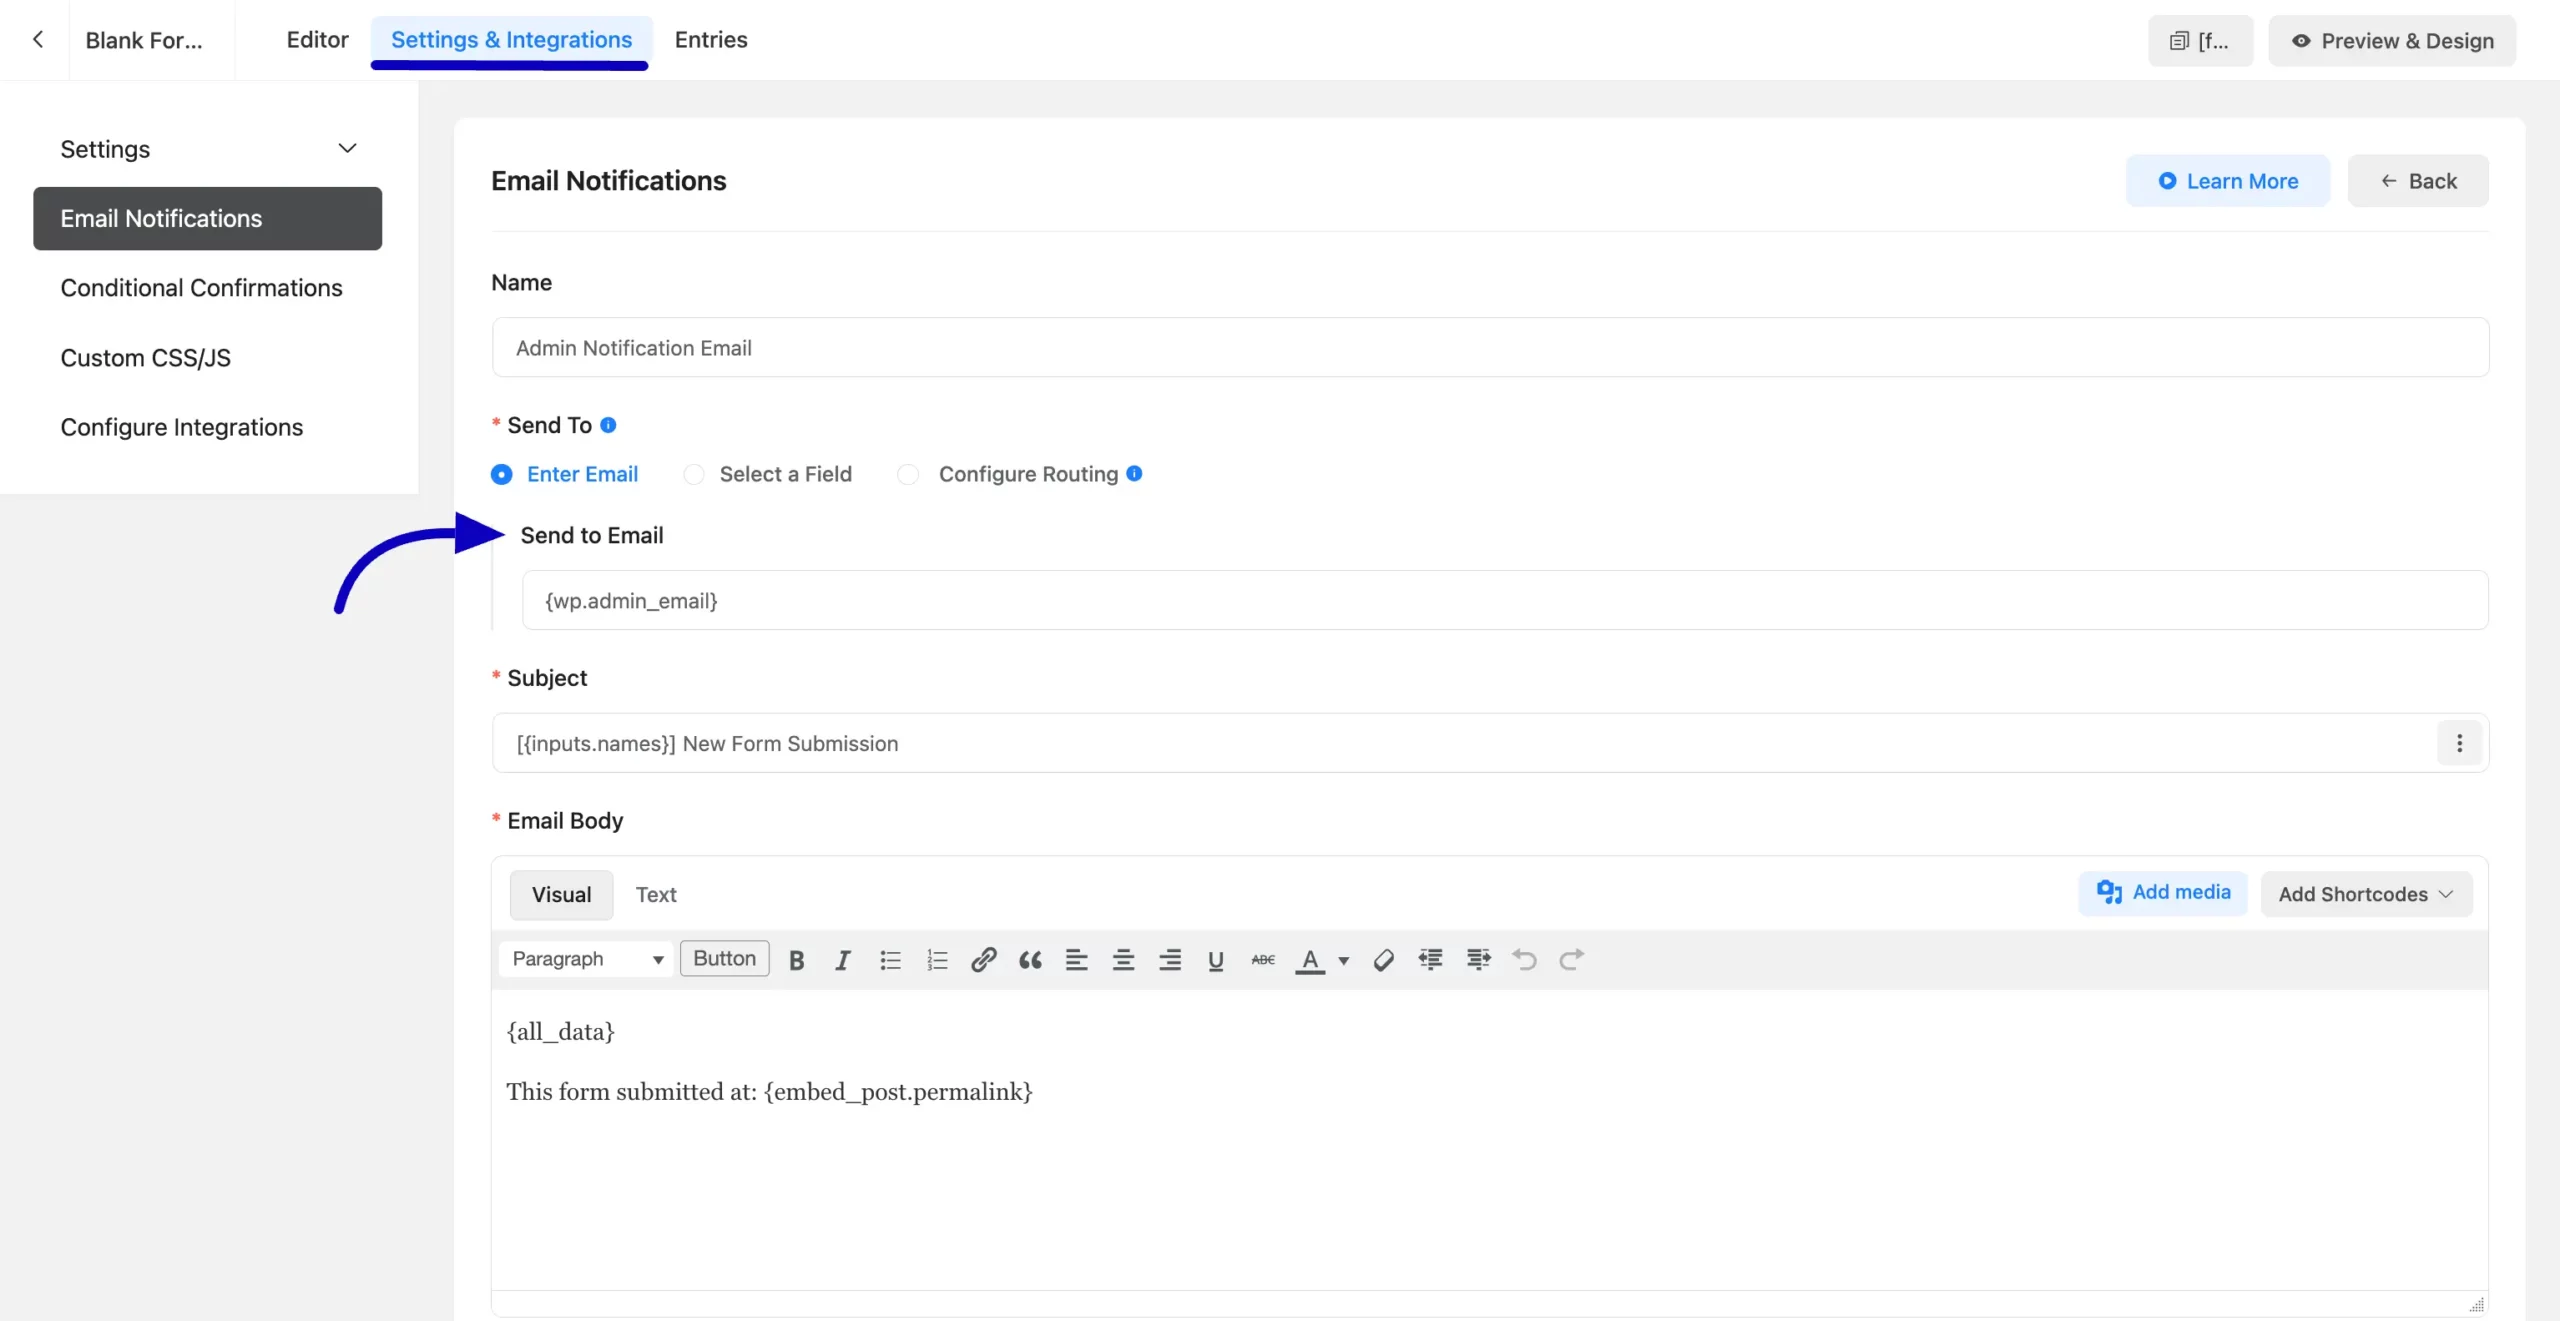
Setup Admin Notification Using Enter Email #
By default, the {wp.admin_email} shortcode is available to send emails to the site admin. This shortcode will automatically use the default admin email set in your WordPress settings.
If you prefer to specify a different admin email manually, choose the Enter Email option in the Send To field and input the desired email address.
You can also send notifications to multiple recipients by separating email addresses with a comma (,).
Setup User Notification Using Select a Field #
Now, select the Select a Field option in the Send To field and define an Email input field in your form whose value will receive the confirmation email.
You can select the Email field by clicking the drop-down arrow beside the Send To Field.

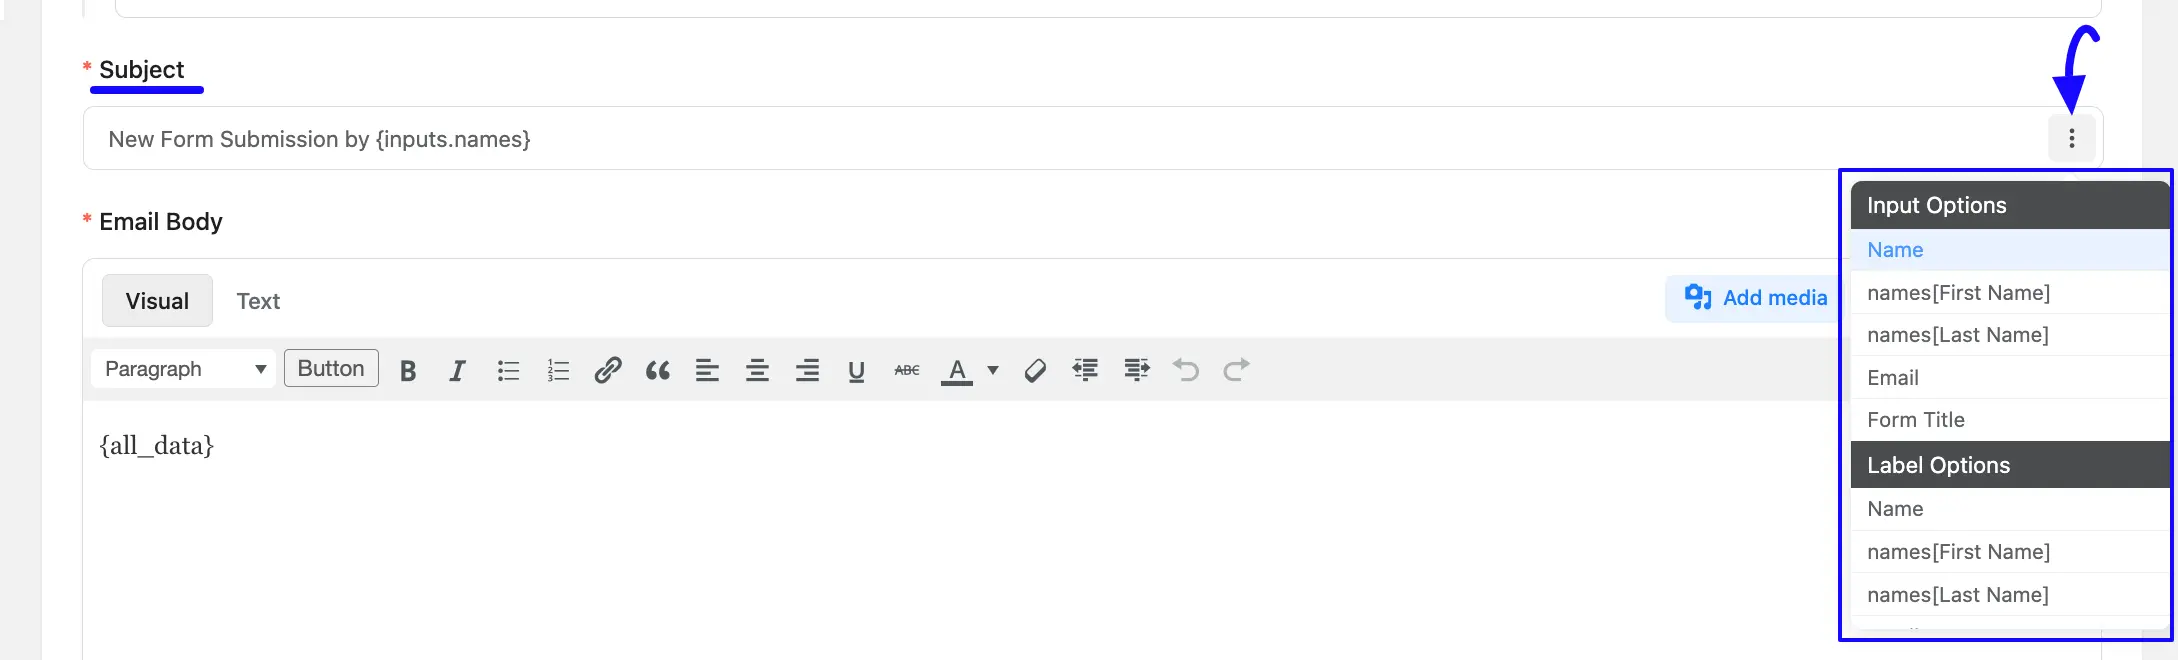
C. Subject #
Here, you can set a subject for your email notification. You can also add data from submitted entries through the input fields using the Three-dot-icon dropdown list in the right corner.
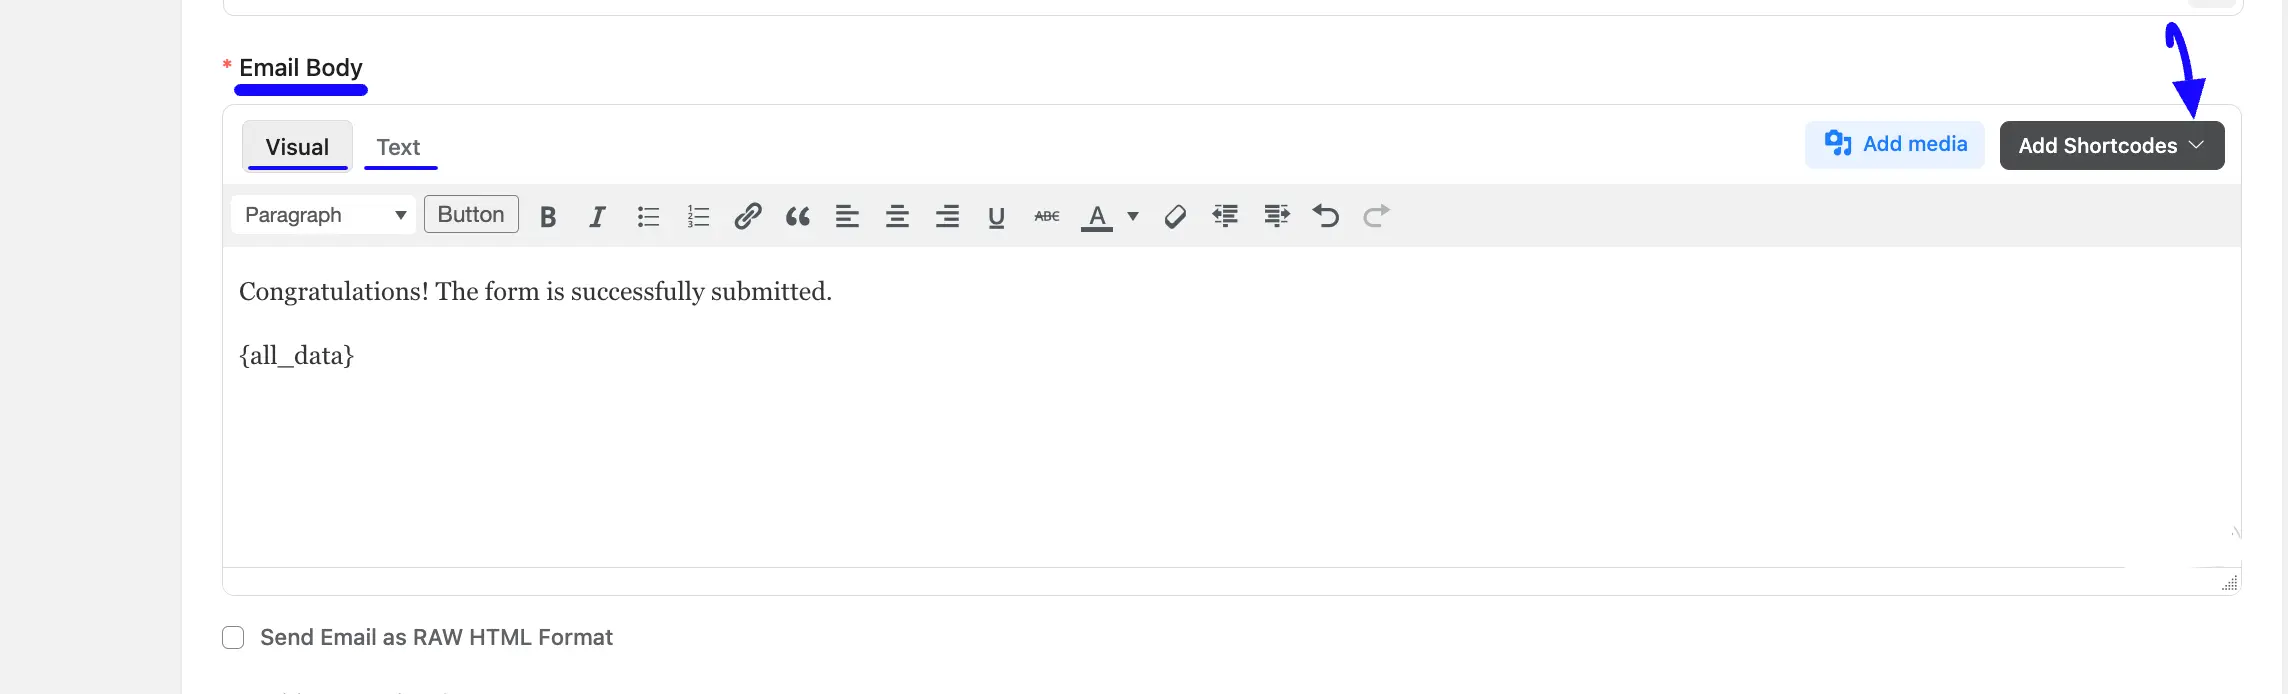
D. Email Body #
Here, you can set the body for your email according to your requirements.
You can use the Add Shortcodes drop-down arrow on the right corner to add dynamic data.
Also for advanced customization, you can edit the email body in HTML Codes through the Text tab.
Send Email as Raw HTML Format #
Similar to the Text tab, this option lets you send the email body in HTML format. Here, click the Note Icon in the right corner to add the desired ShortCode/s.

E. Conditional Logics #
Enabling this option allows you to set specific conditions for sending email notifications to the admin, ensuring notifications are sent only when the conditions are met.
To learn more detail use of this Conditional Logics, read this Documentation.

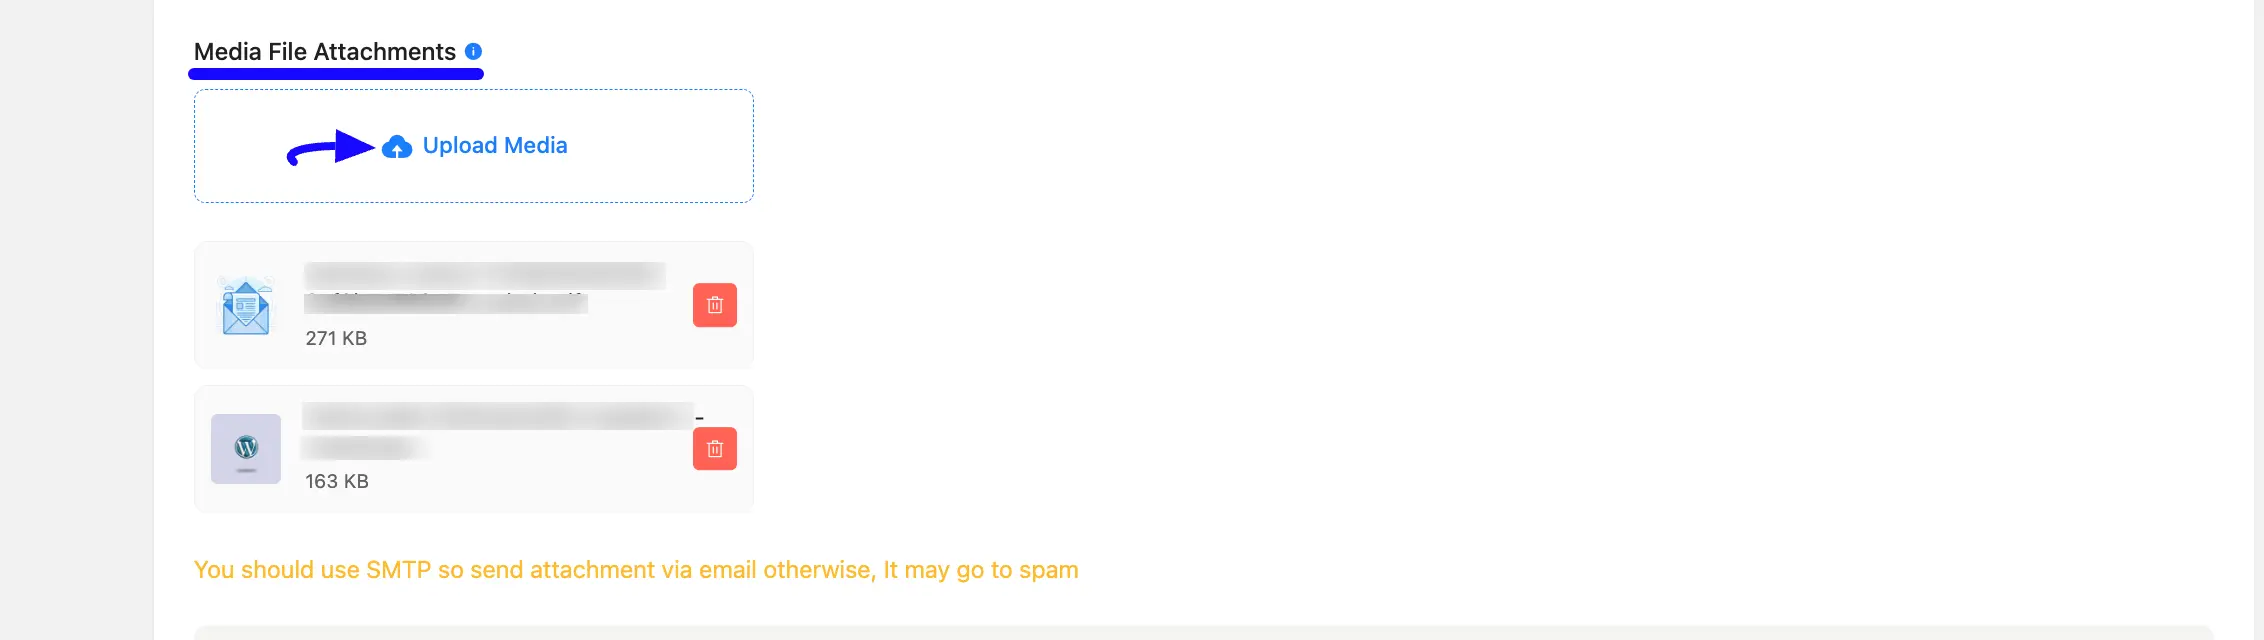
F. Media File Attachments #
Fluent Forms allows you to send PDF/Image Attachment/s to the email notification using the Media File Attachments option. Also, you can delete any file by clicking the Trash Icon anytime if needed.
You should use SMTP so send the attachment via email otherwise, It may go to spam.
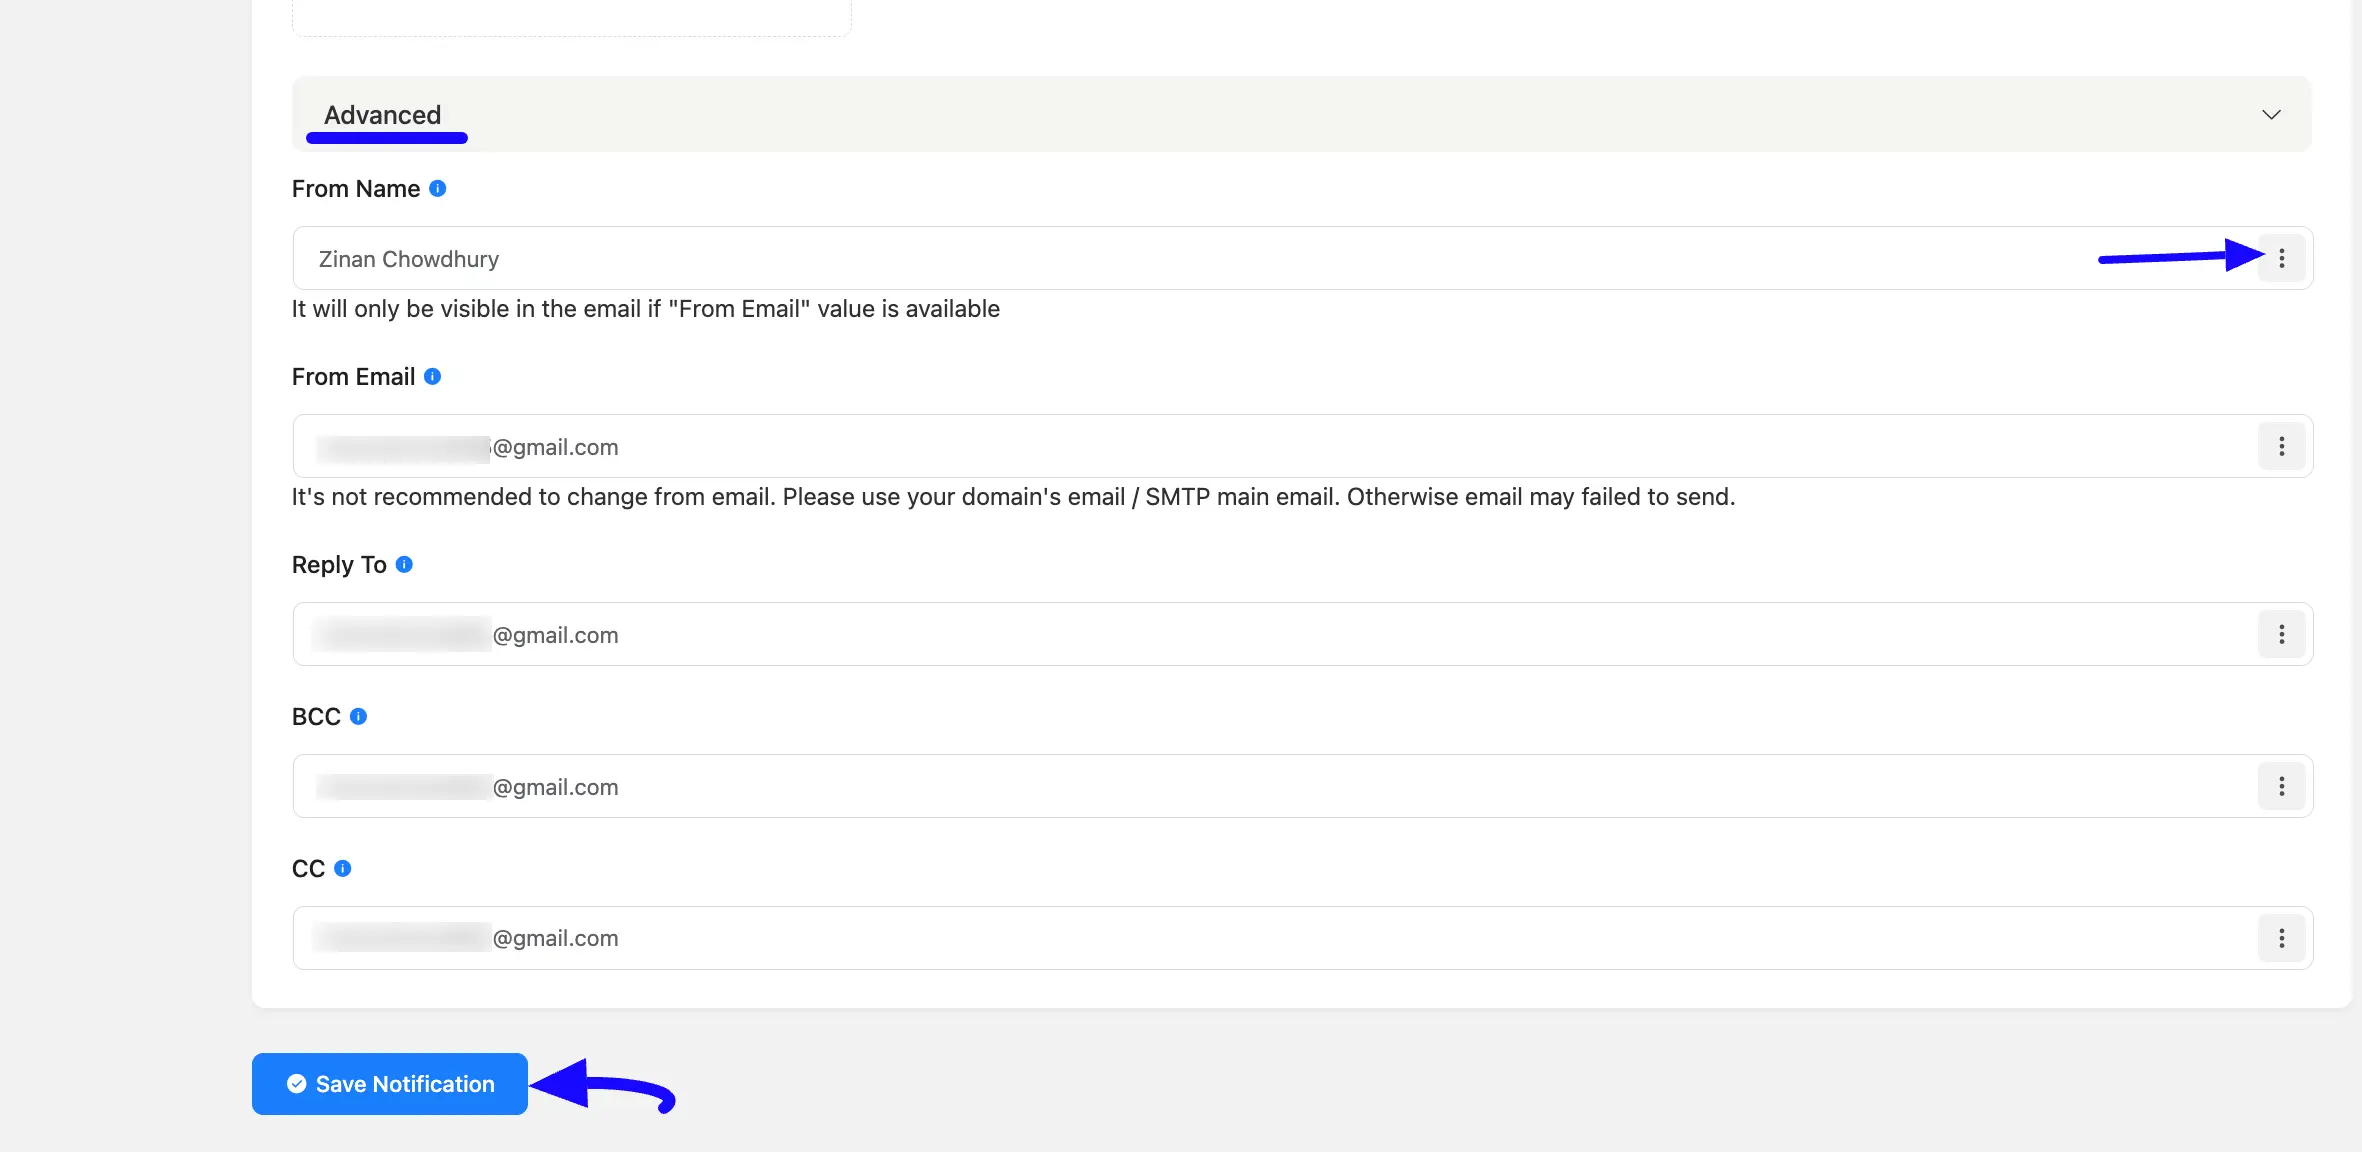
G. Advanced #
Use this setting if you want to configure someone else who also needs to be notified of an entry submission (your teammates, support staff, etc).
- From Name & Email: Here, you can specify the sender name and email in the From Name and From Email fields respectively. Plus, you can add different dynamic data by clicking Shortcode Icon.
- Reply To: Here, you can specify an email address for users to reply to the notification, ensuring you receive their responses. If you leave this field blank, the user reply will be sent to the Default Email you set for your site.
- BCC & CC: Here, you can add an email address in the CC or BCC if you want to send a copy of the email to another person. Use a Comma in between each email address to add more than one receiver.
Finally, click the Save Notification button when you complete all the setup.
If you have any further questions, concerns, or suggestions, please do not hesitate to contact our @support team.


