Fluent Forms brings you an excellent feature, Meta Box plugin integration. Metabox is a free Gutenberg and GDPR-compatible WordPress custom fields plugin and framework that quickly customizes a website with meta boxes and custom fields in WordPress.
This article will guide you on integrating Meta Box Custom Fields with Fluent Forms on your WordPress Site.
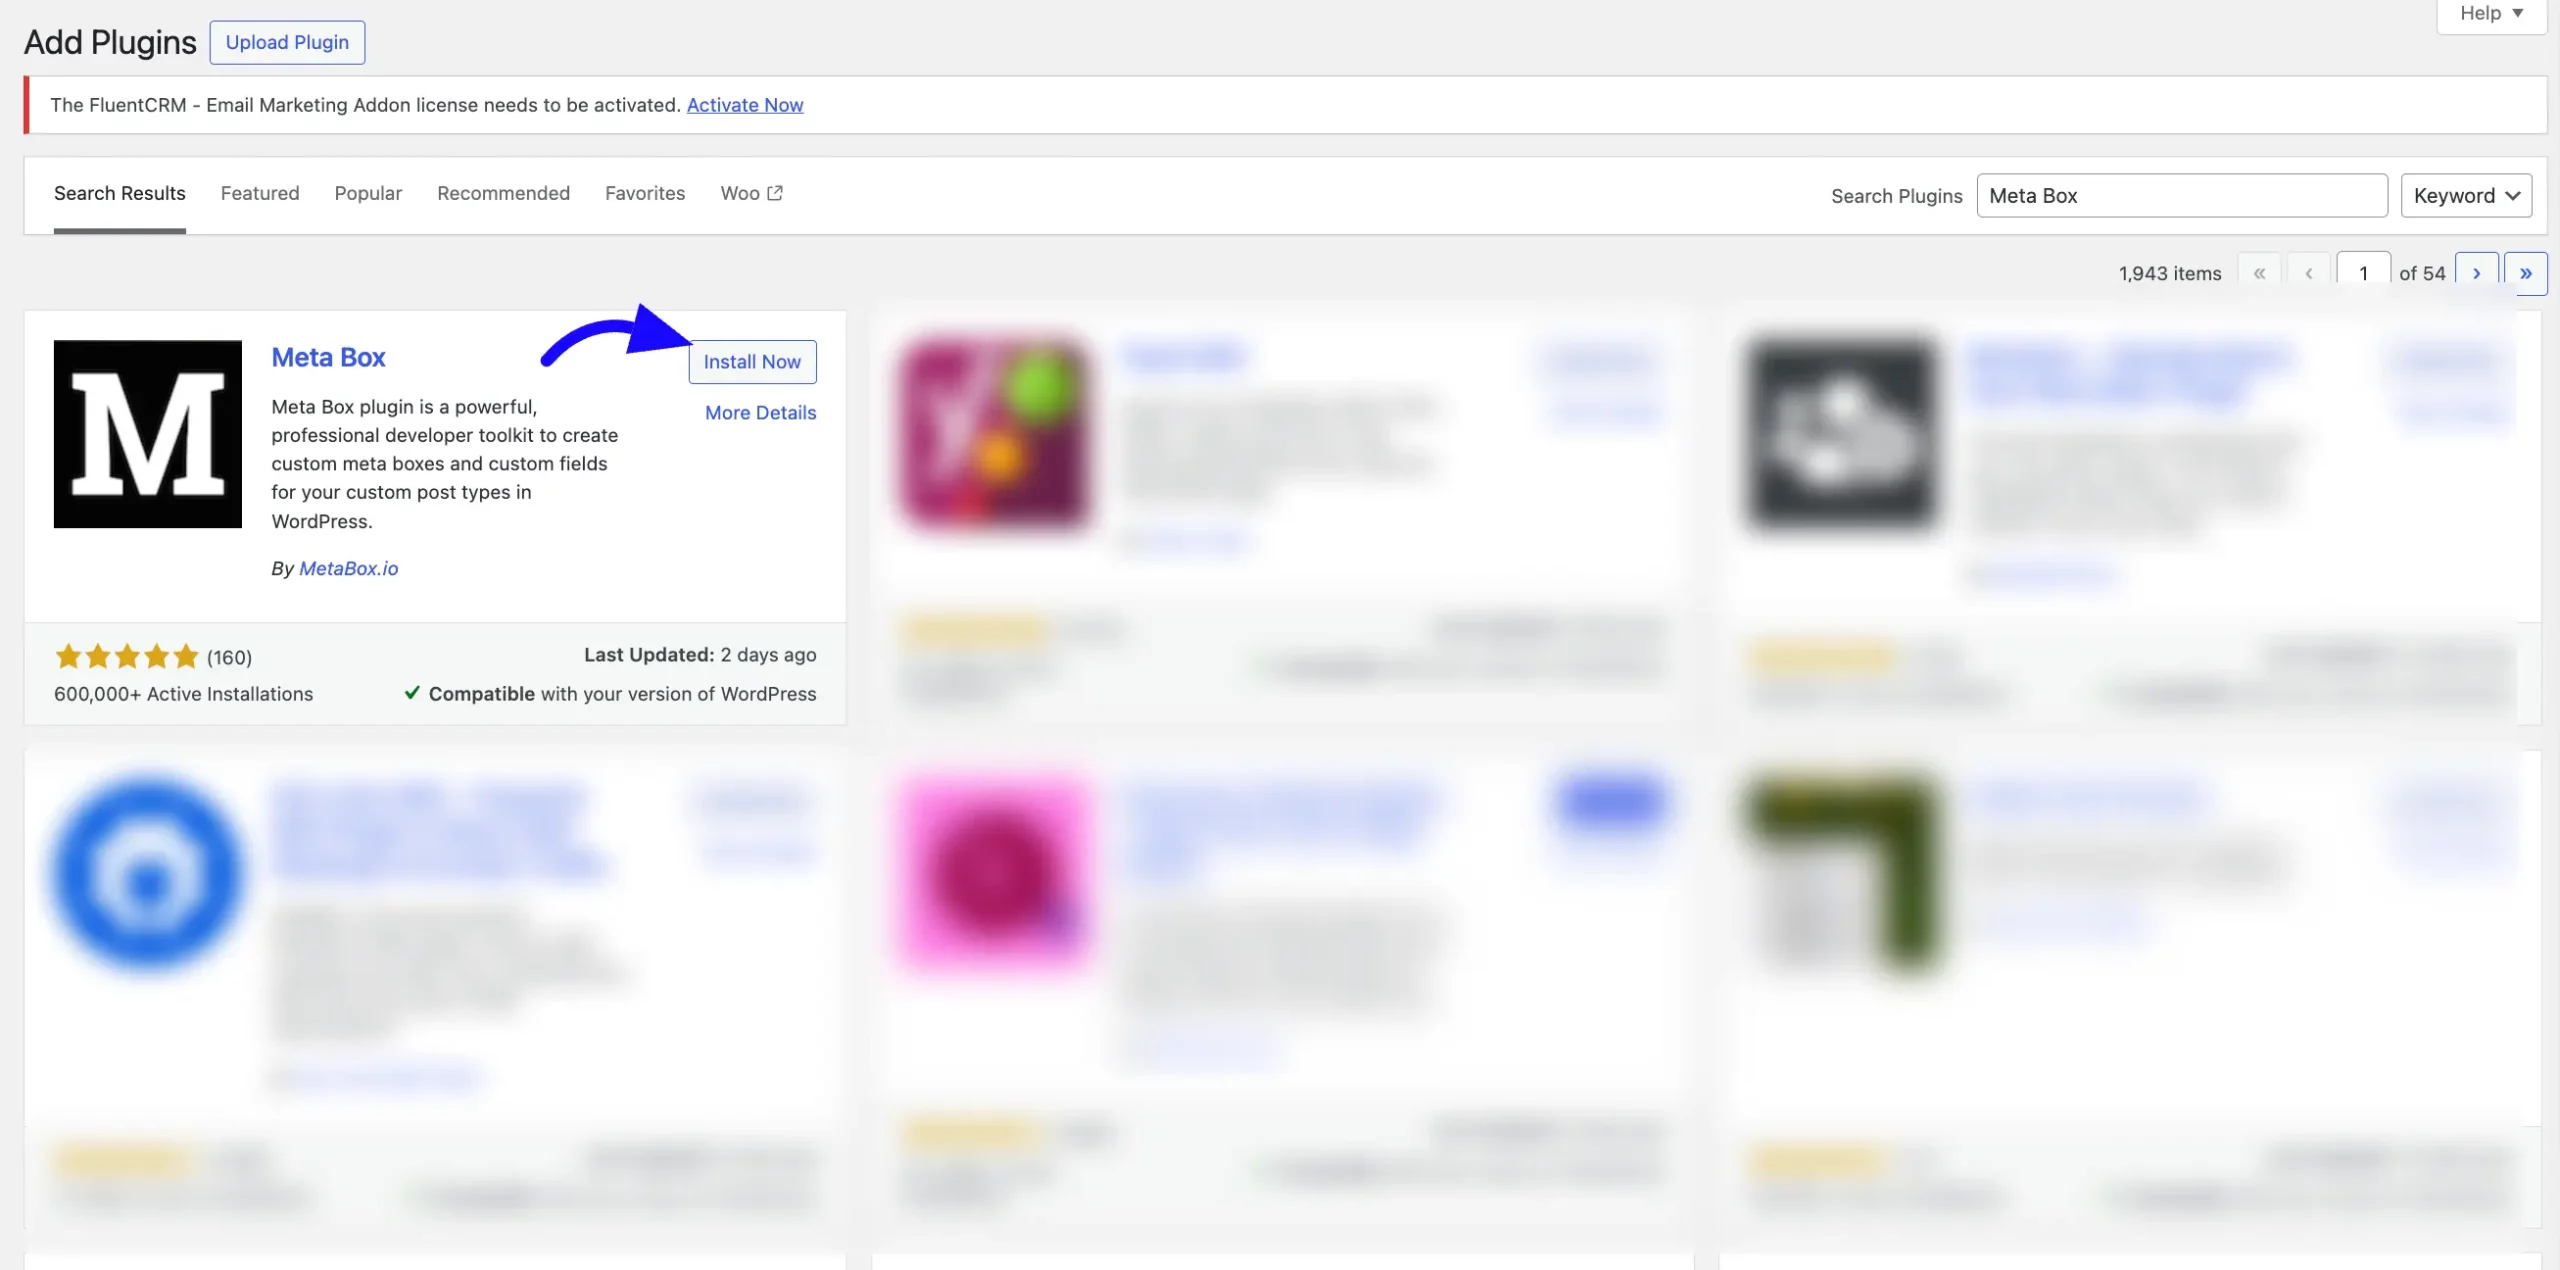
Install Required Plugins #
Meta Box Plugin: Install and activate the Meta Box plugin and the Meta Box Builder plugin to create custom fields.
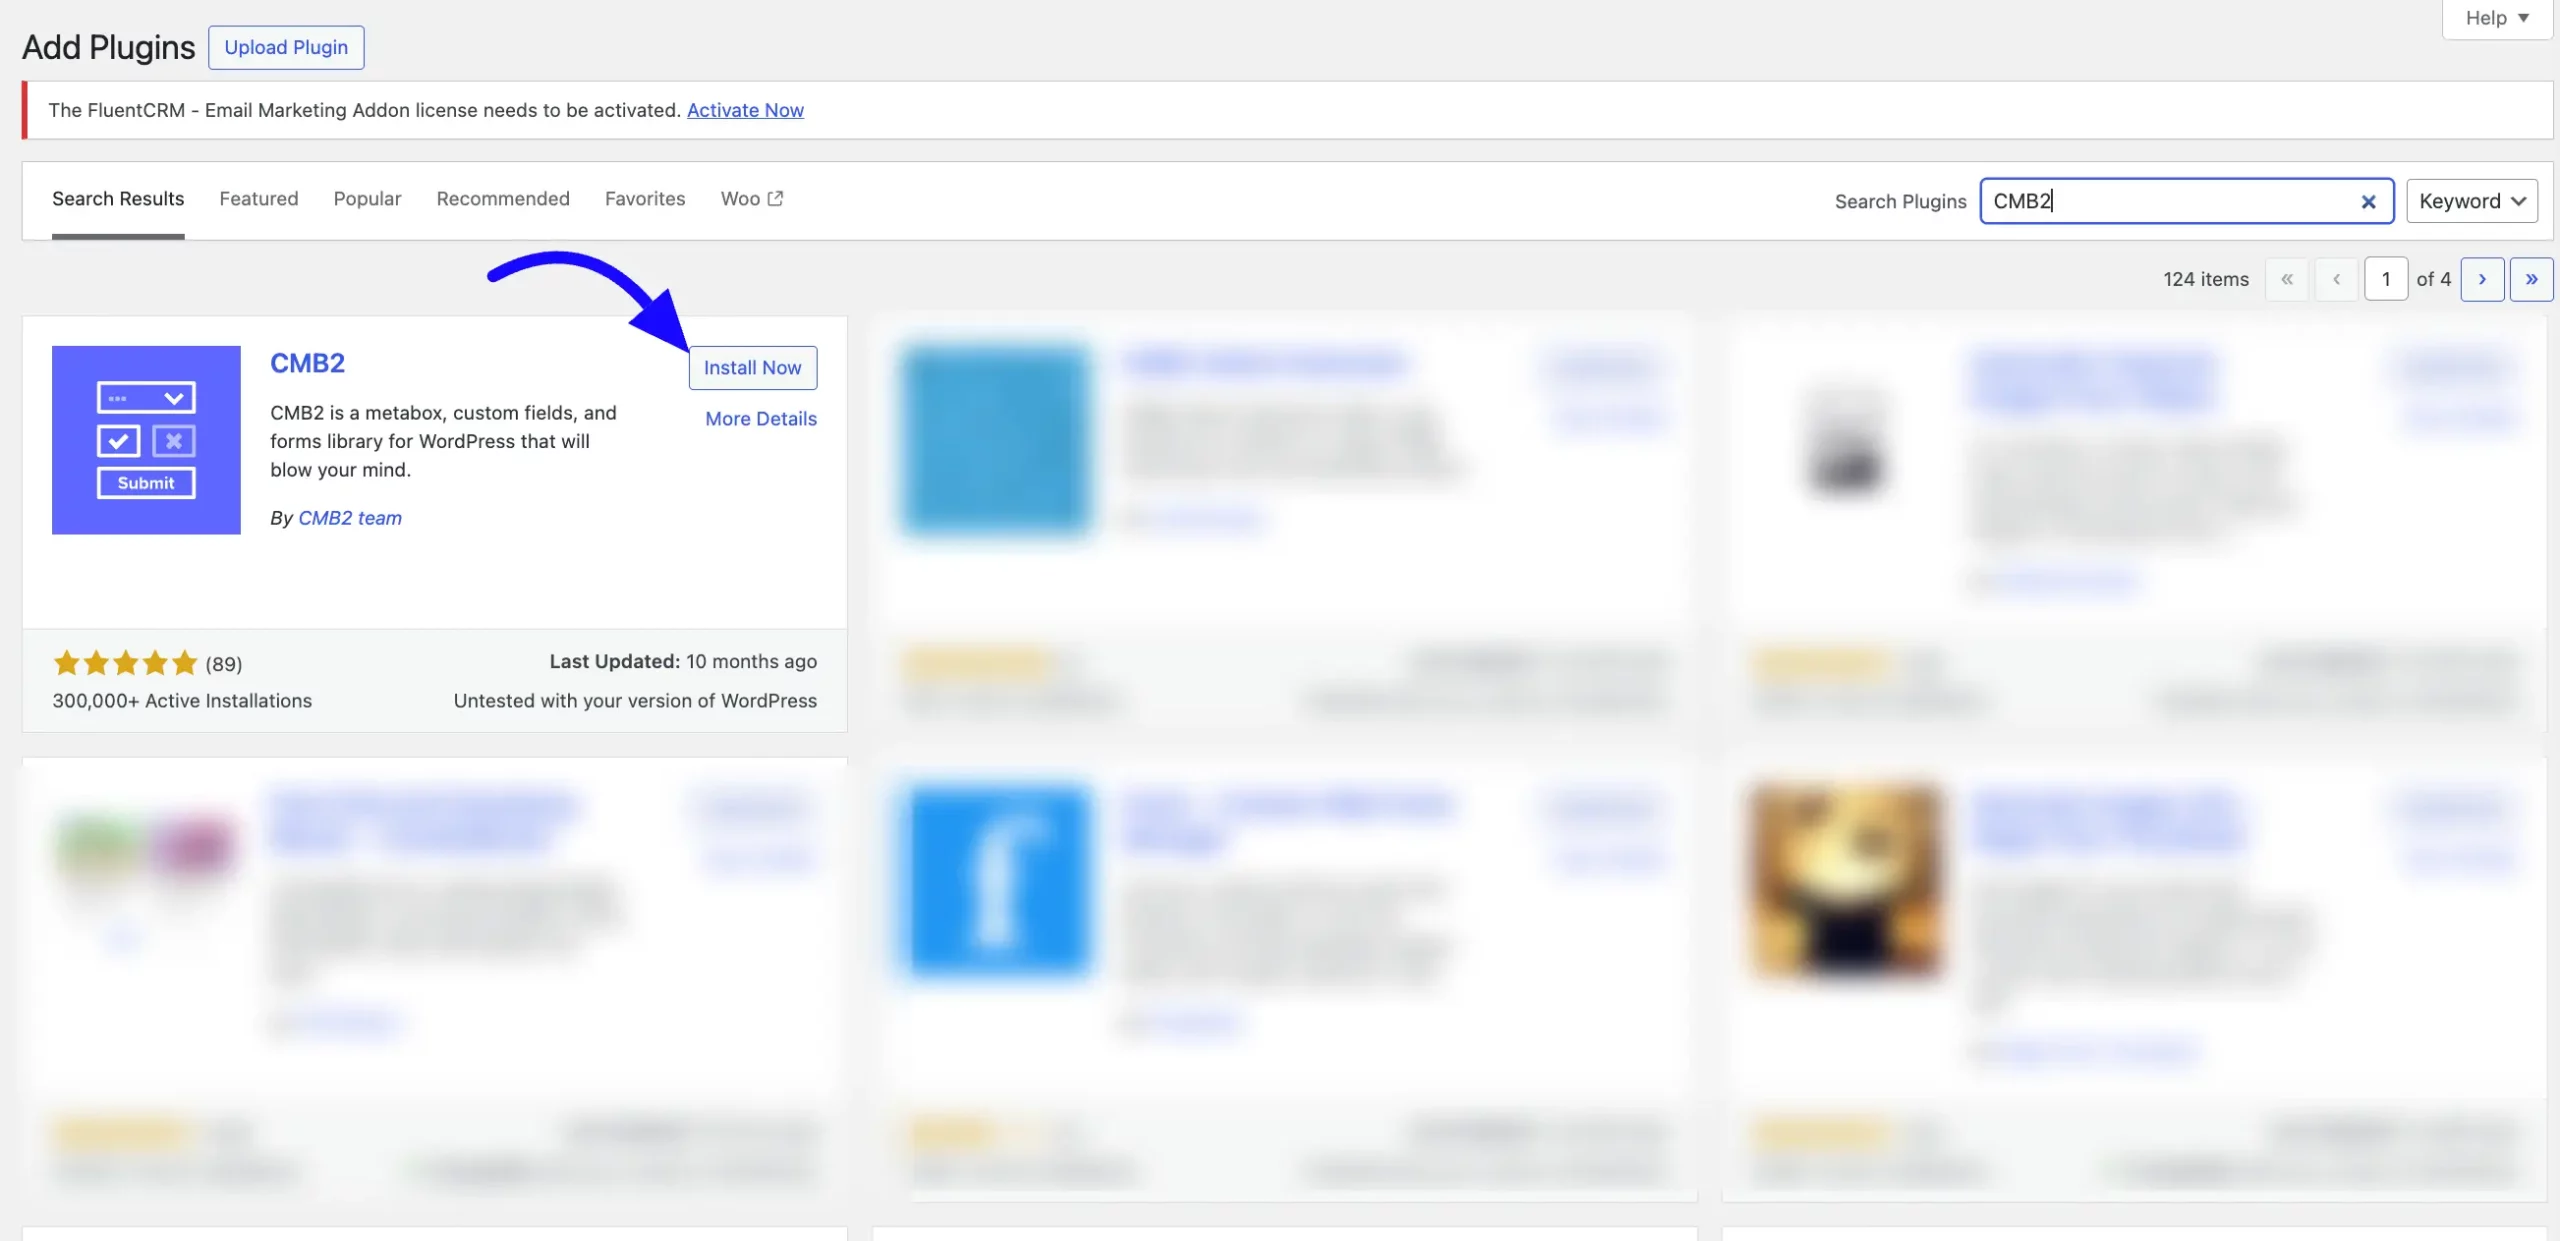
CMB2 Plugin: Ensure this plugin is installed to build custom fields.
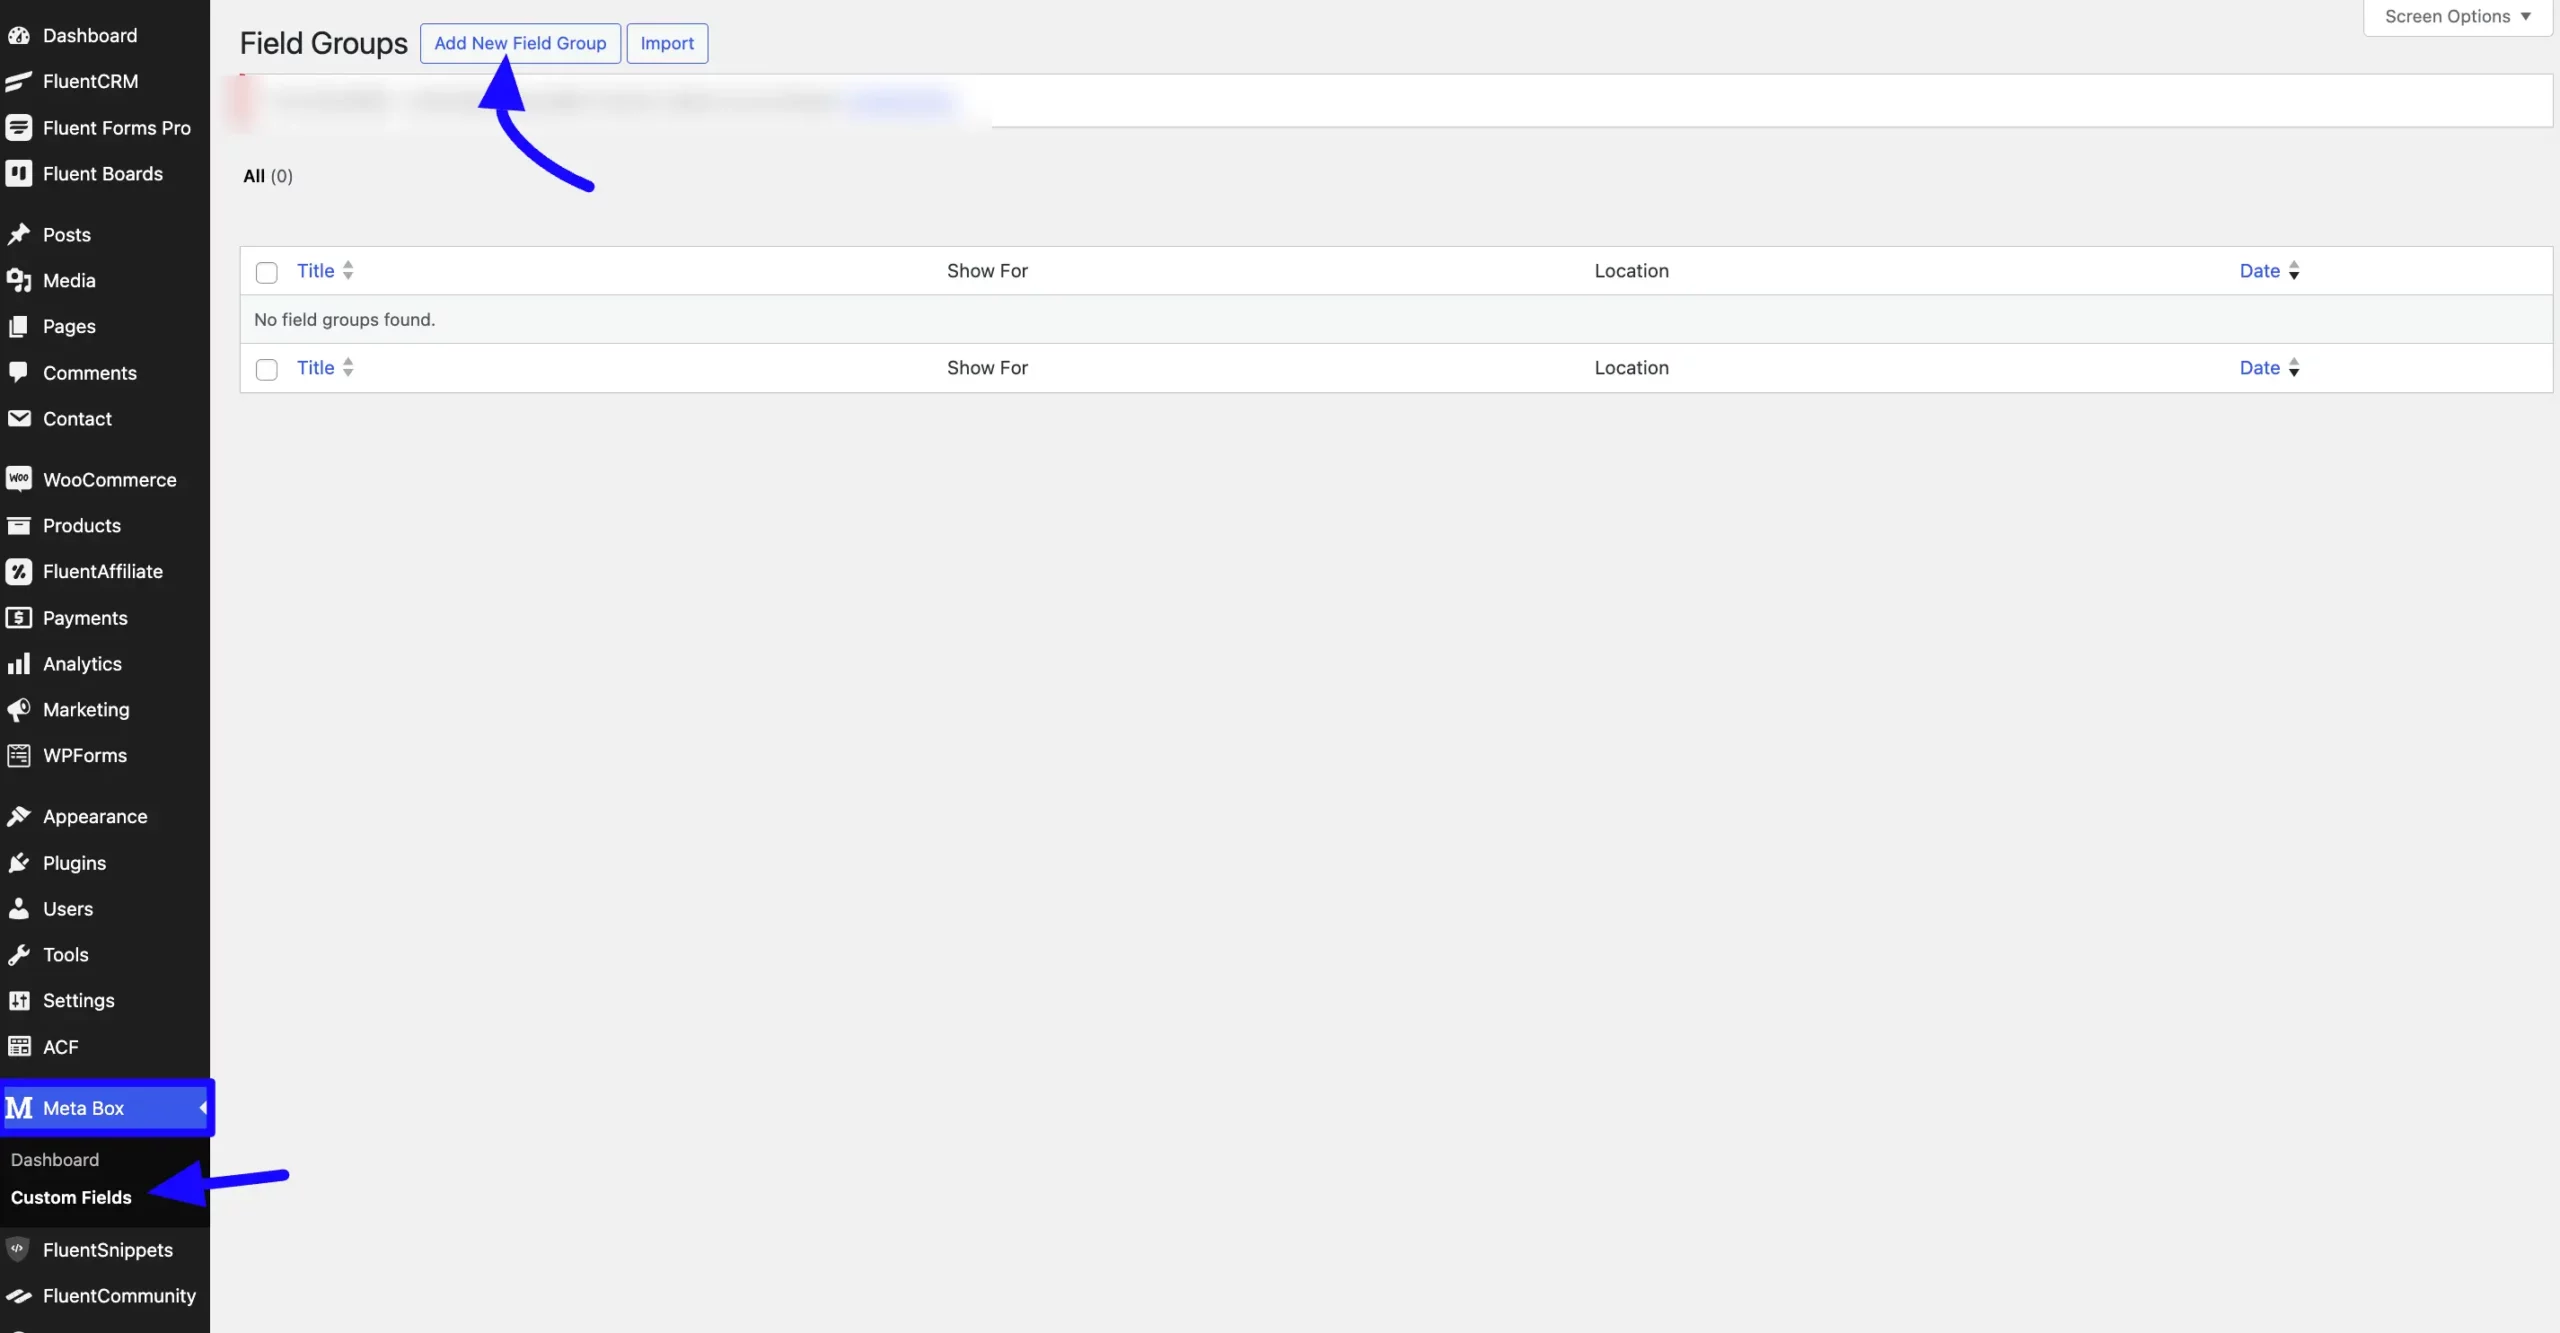
Add Field Groups in Meta Box #
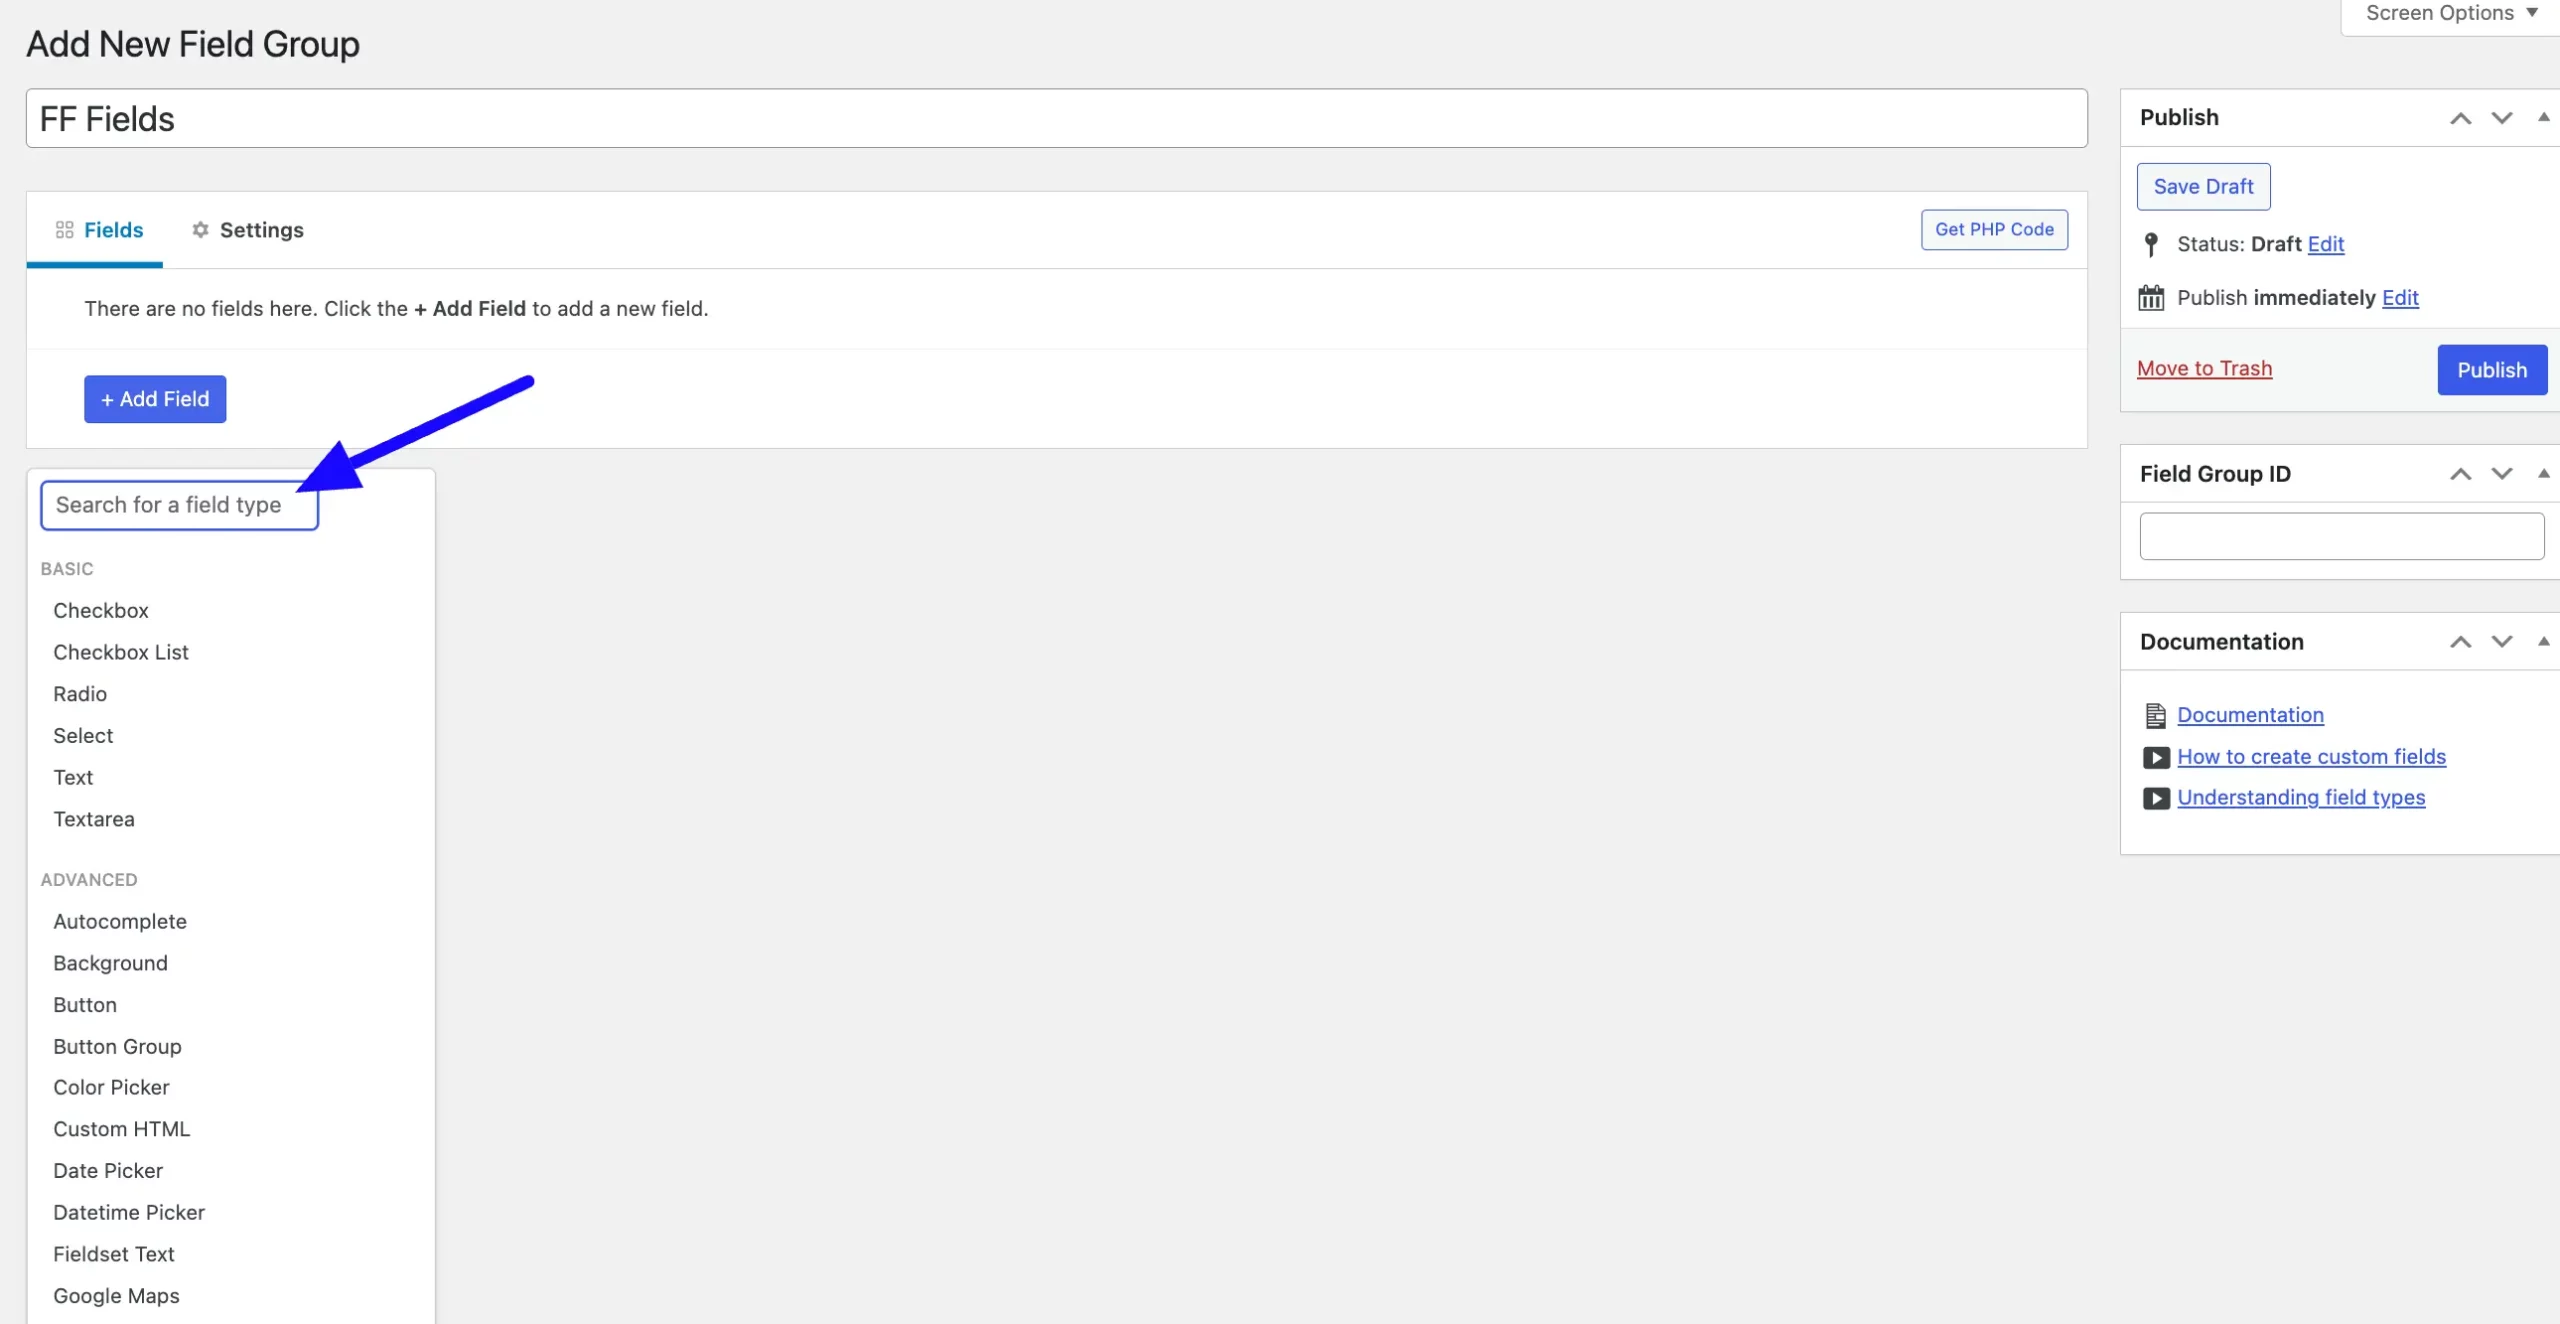
To add field groups in meta box, click the Add New Field Group button on the Meta Box Plugin to create a new Field Group.
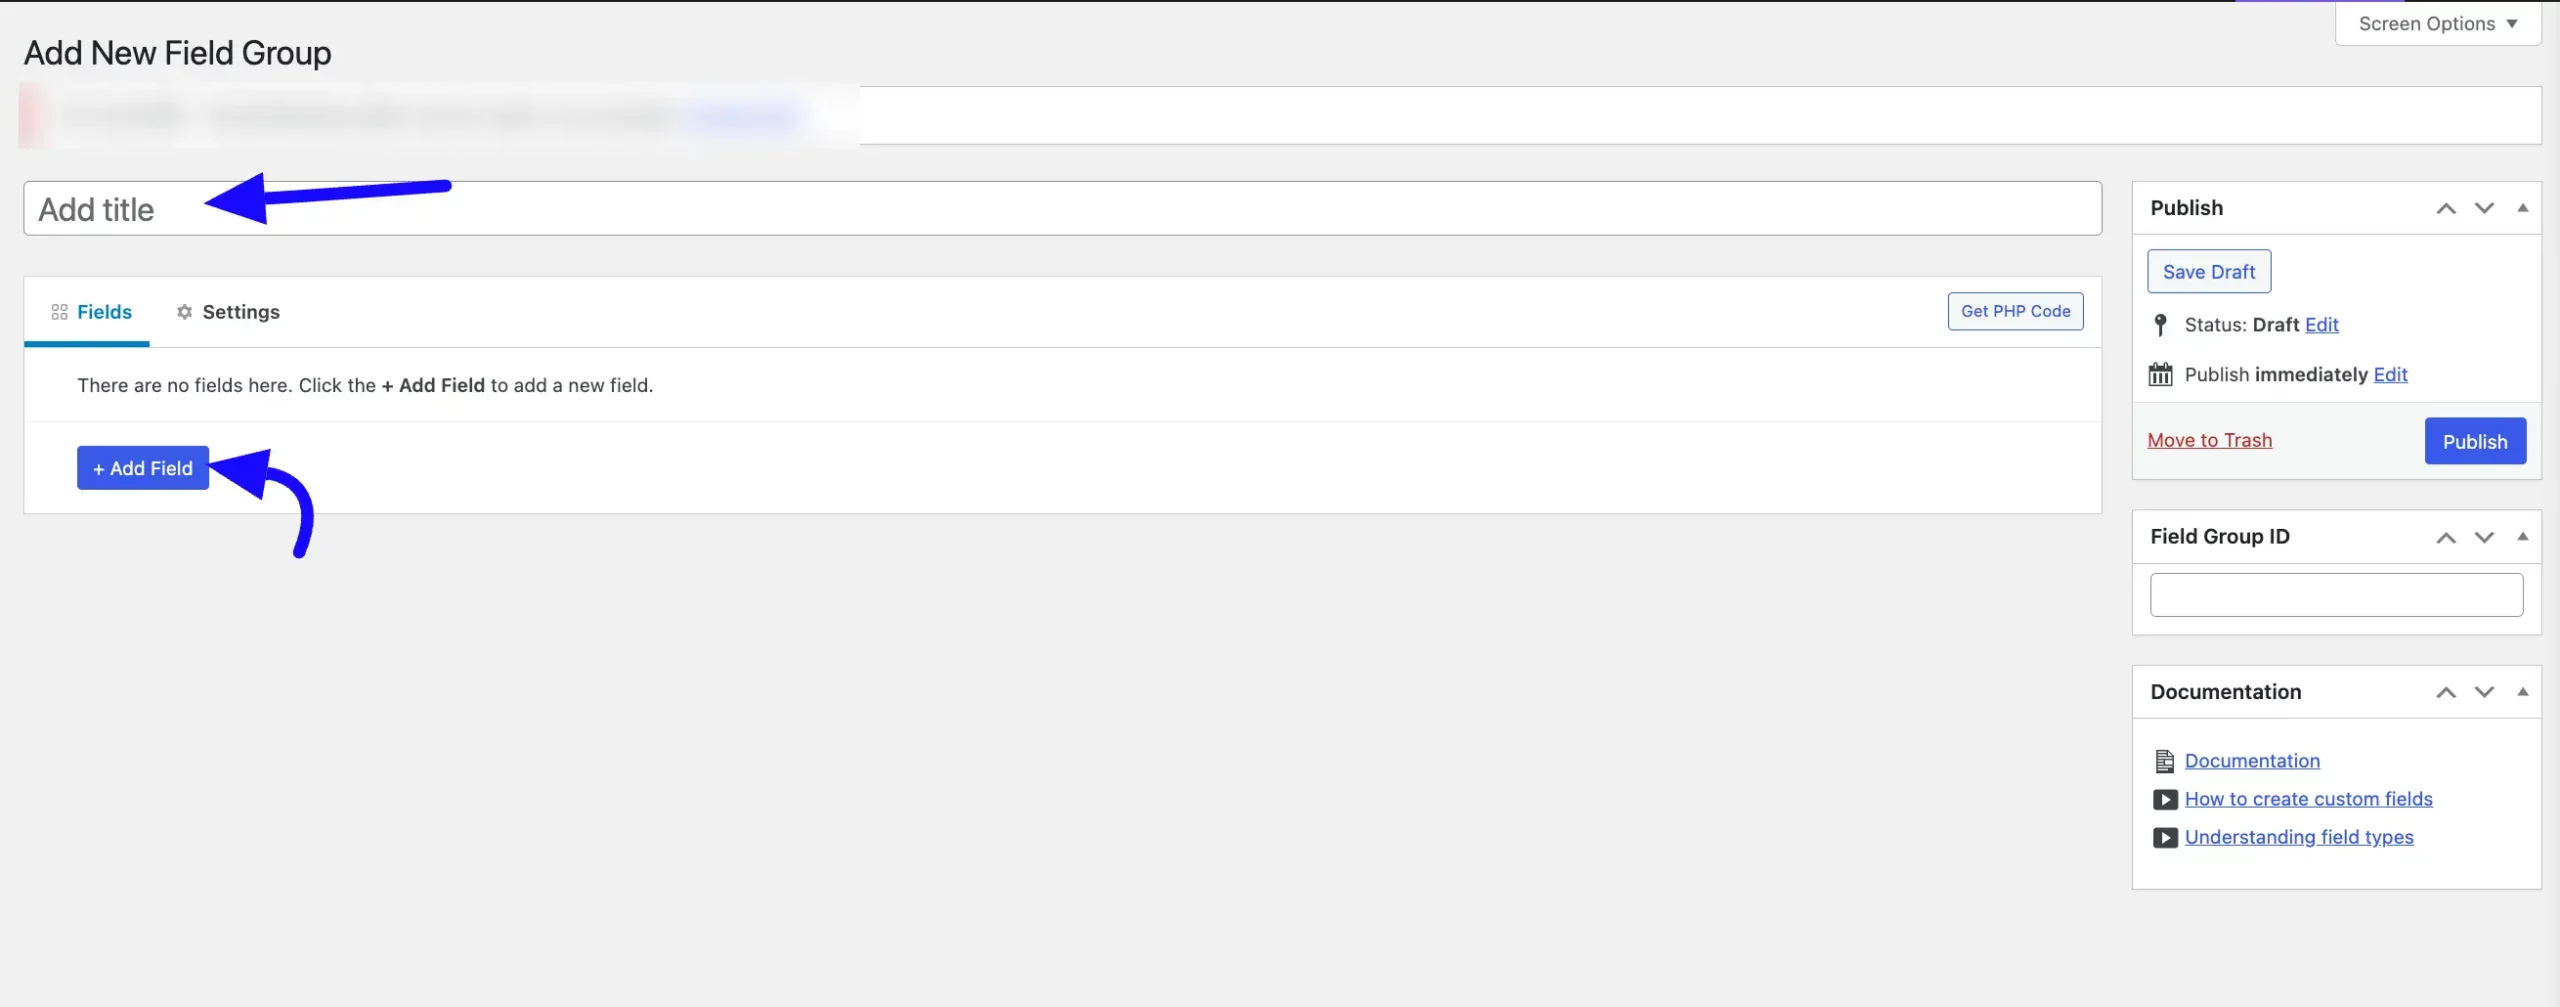
Now, Provide a suitable Title for the field group. Click the +Add Fields button to add custom fields.
After clicking add fields, scroll down to select a field type that meets your requirements, or you can search the field from the search box.
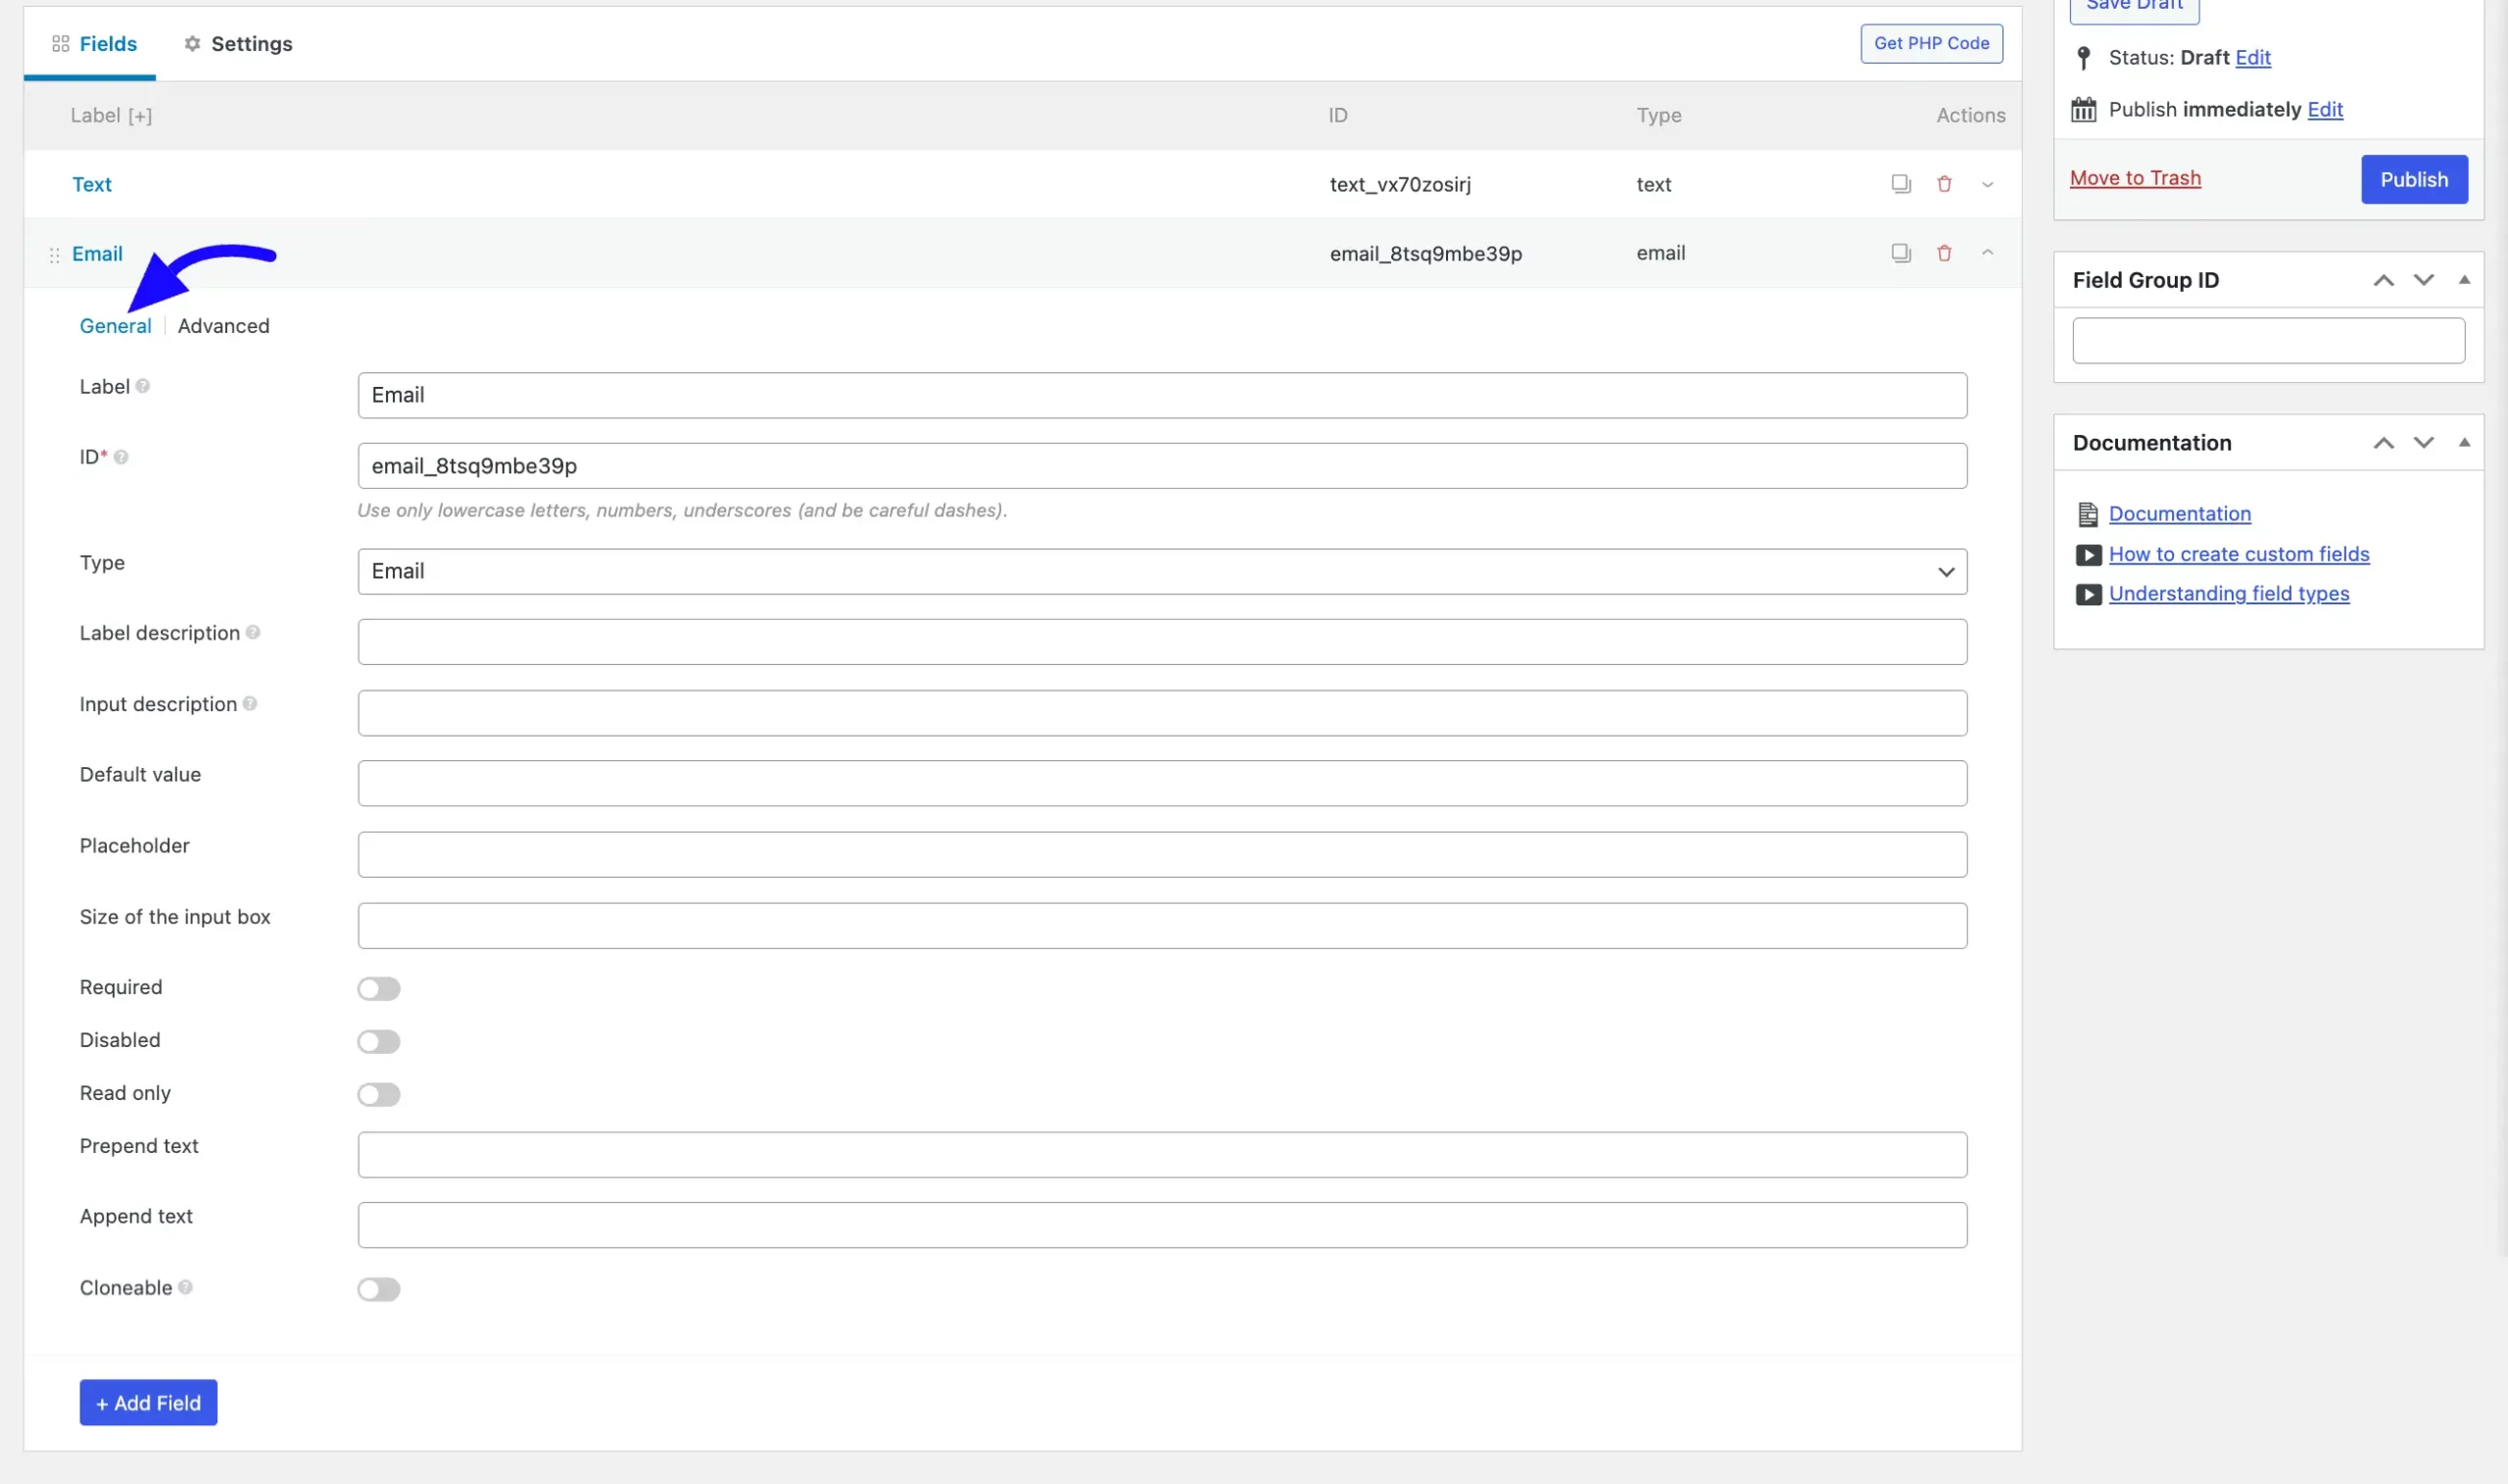
There are two types of tabs available for one field: the General Tab and the Advanced Tab. You can customize each tab option easily.
General Tab #
Label: This is what users will see on the form.
ID: The unique identifier for this field. It will be used for backend reference or in custom integrations.
Type: The data type of the field.
Label Description: An optional description that provides additional details about the field label.
Input Description: Instructions or context for the user when filling out this field.
Default Value: Pre-populates the field with a default email address or text.
Placeholder: Displays a temporary text inside the field (“Enter your email”).
Size of the Input Box: Defines the width or size of the input field.
Required: Toggles whether the field is mandatory. If enabled, users cannot submit the form without completing this field.
Disabled: If you enable this option, you can prevent users from entering data into the field.
Read-Only: If enabled, the field will be non-editable while displaying the value.
Prepend Text: Adds a fixed string at the beginning of the input field ( mailto:).
Append Text: You can add a fixed string at the end of the input field.
Cloneable: Allows this field to be duplicated within the form if necessary.
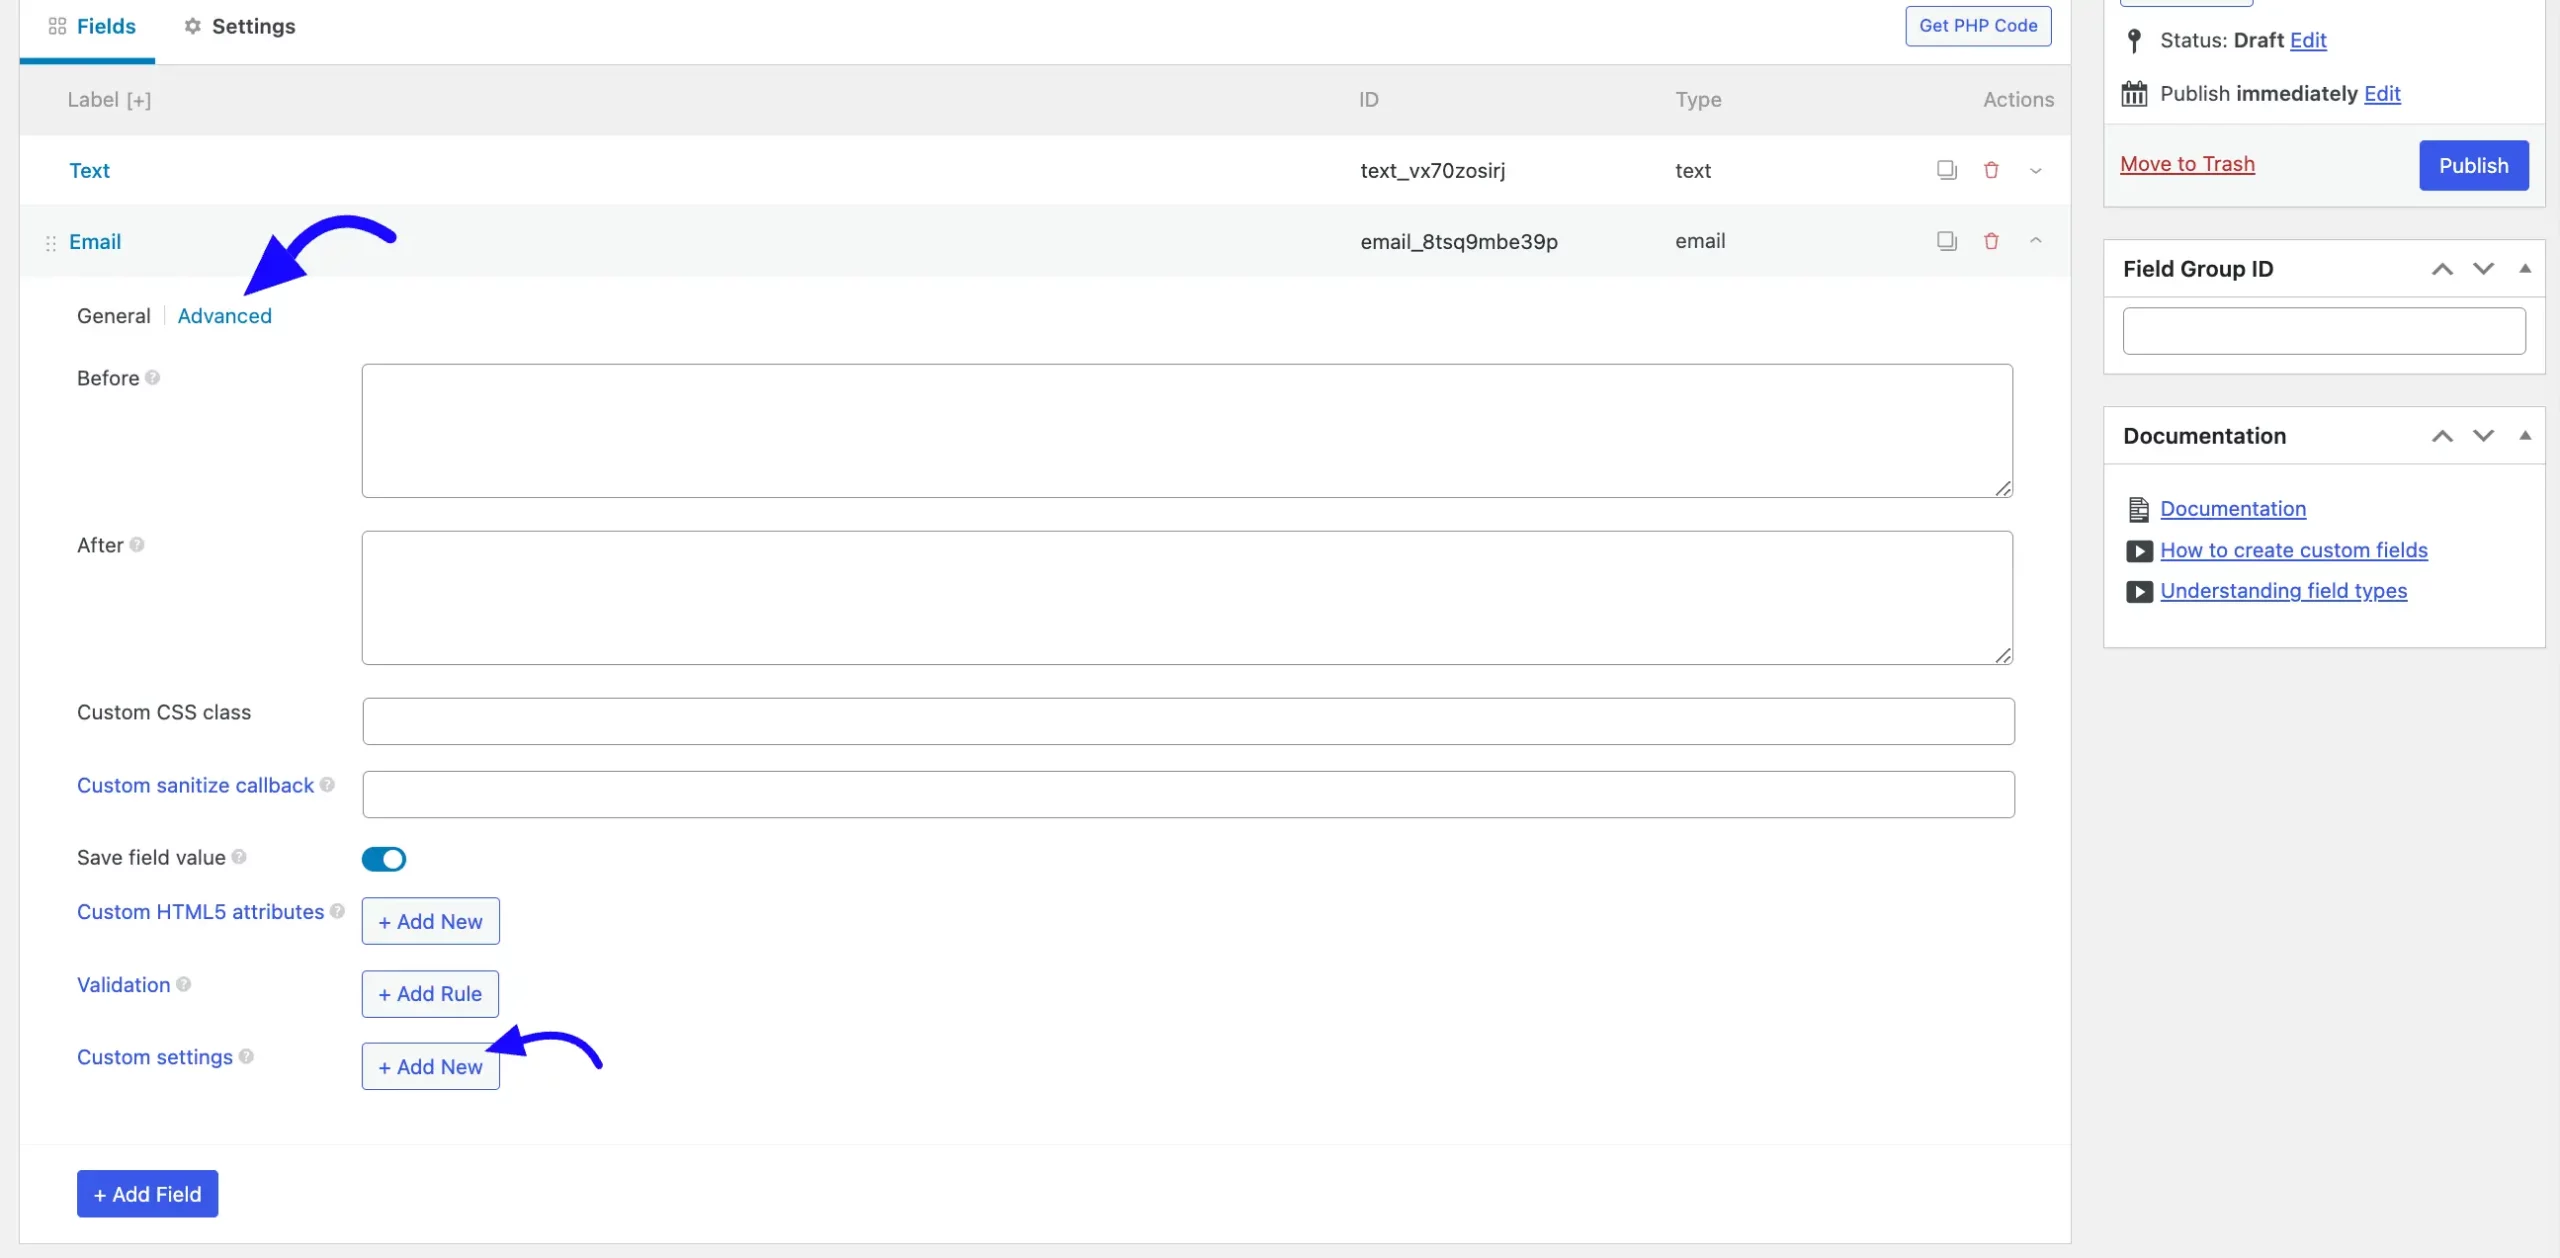
Advanced Tab #
Before: A text or HTML block appearing before the input field. For example, add a description, label, or styling element above the field.
After: A text or HTML block appears after the input field; for example, you can add instructions, error messages, or formatting details below the field.
Custom CSS Class: This allows you to add one or more CSS class names to style this field uniquely. For example, custom-email-class can be used to add specific styles defined in your CSS file.
Custom Sanitize Callback: Specify a custom function to sanitize the input data. This option is very useful for additional email validation or processing before saving.
Save the Field: Toggle to Enable/Disable saving the field’s value to the database.
Custom HTML5 attributes: You can add any custom HTML5 attributes to the field by clicking the +Add New button.
Validation: You can define rules to validate the field input before submission of the form. To do so, click the +Add New button. For example, you could Create a rule for allowed domains ( @example.com) or validate format compliance.
Custom Settings: If you want to add additional configuration options, click the +Add New button under the Custom Settings options.
After that, click the Publish button to save your custom fields.
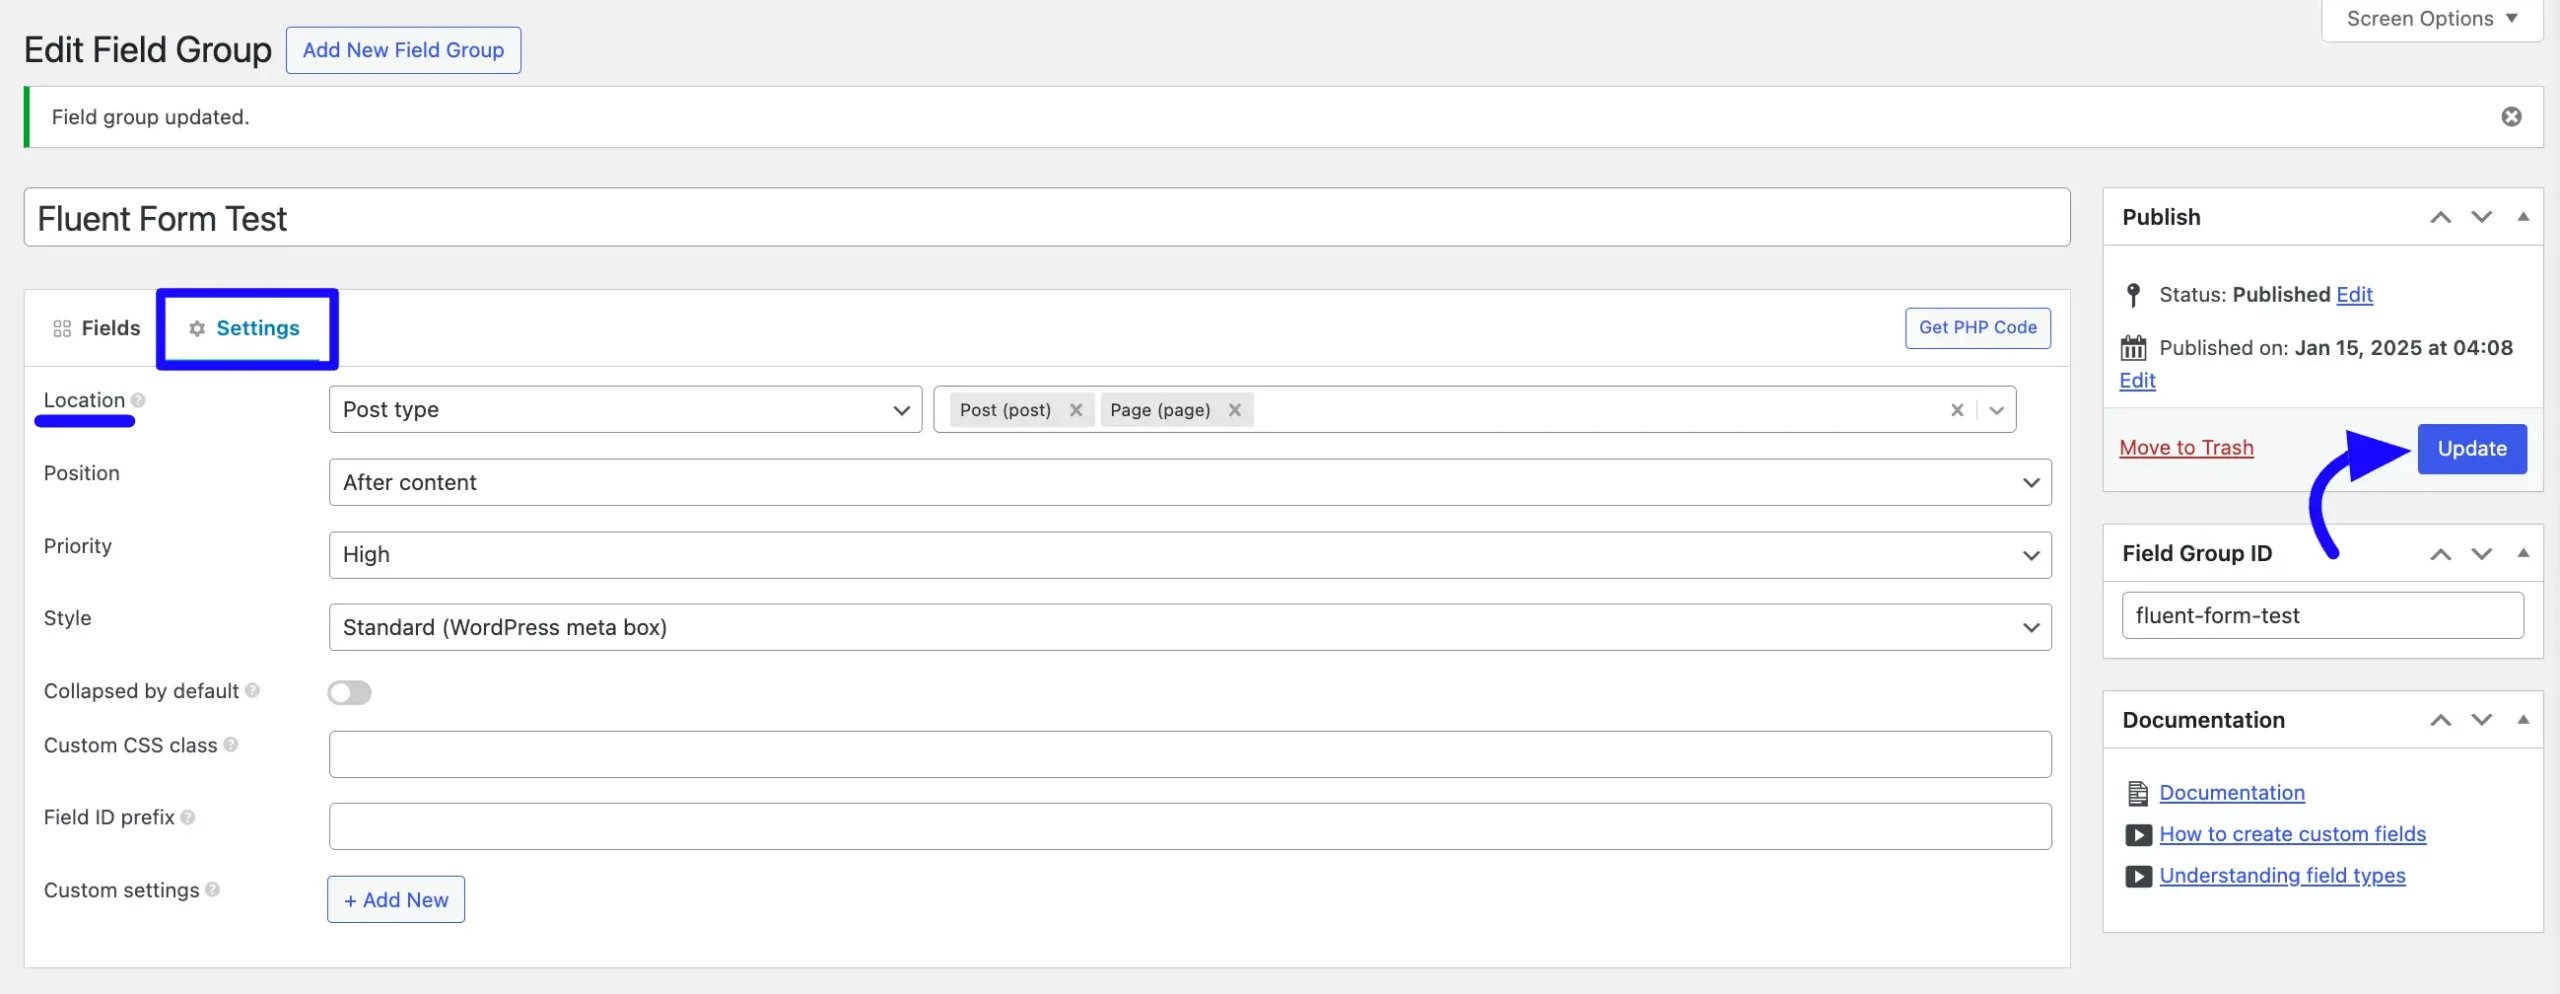
Settings #
Location: Configure the location where the custom fields in this group will appear. Fields will appear for posts and pages (as selected in the dropdown).
Position: You can choose the content position from the dropdown options After Content or Side the content.
Priority: You can set the field priority to High or Low.
Style: This uses the Standard WordPress meta box style. You can also choose no meta style from the dropdown options.
You can add Additional Settings from here as your required options.
After all this is done, click the Update or Publish button.
Enable Post/CPT Module #
To learn how to enable Post/CPT Module, follow the steps with the screenshots below –
First, go to Integrations from the Fluent Forms Navbar, search for Post/CPT through the search bar, and get the Post/CPT module.
Now, turn on the Hubspot Enabled button.
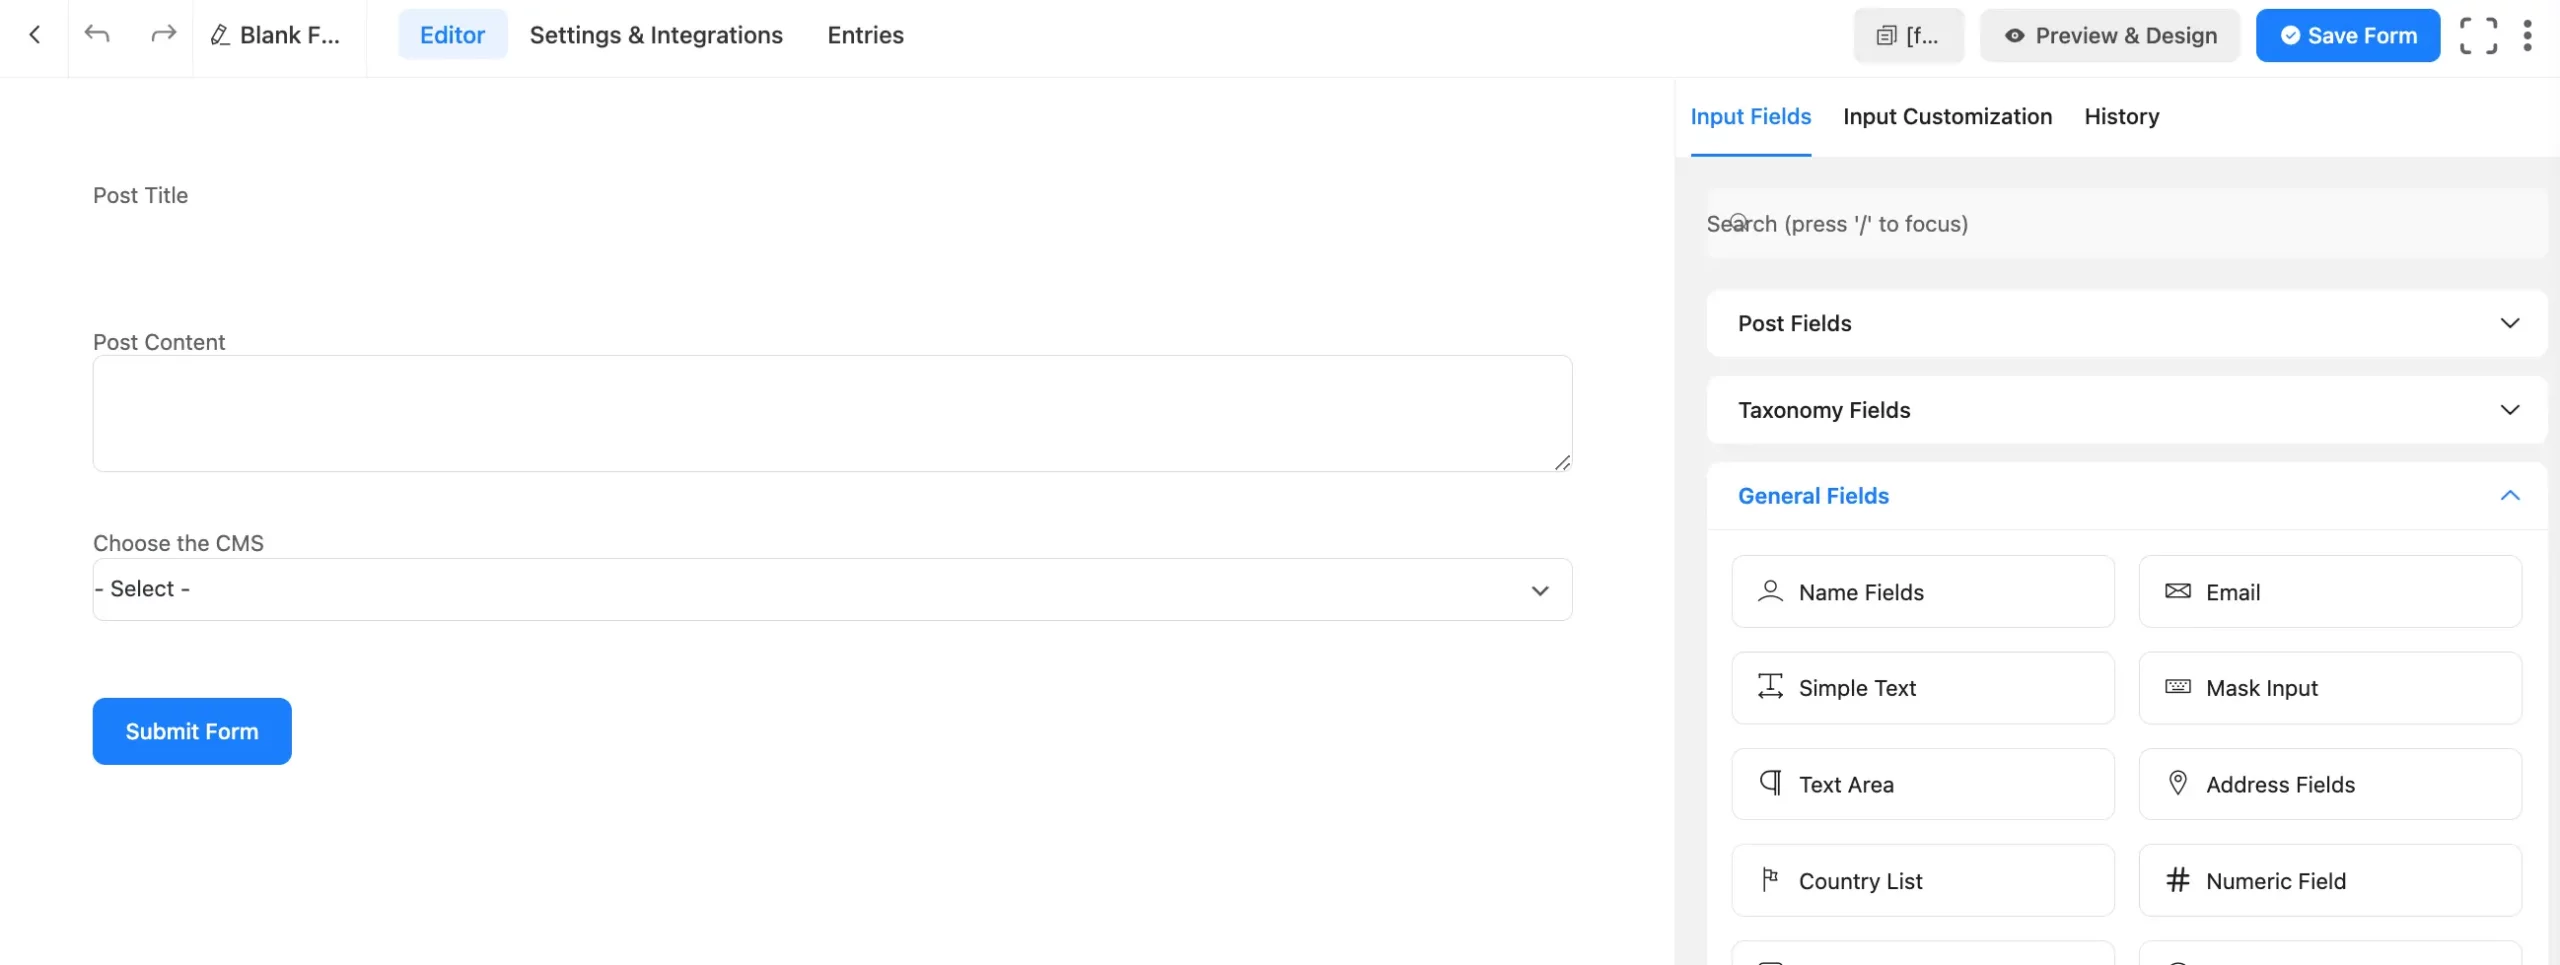
Now, select an existing Post Form from the Fluent Forms dashboard or create a new one.
Map Meta Box Custom Fields #
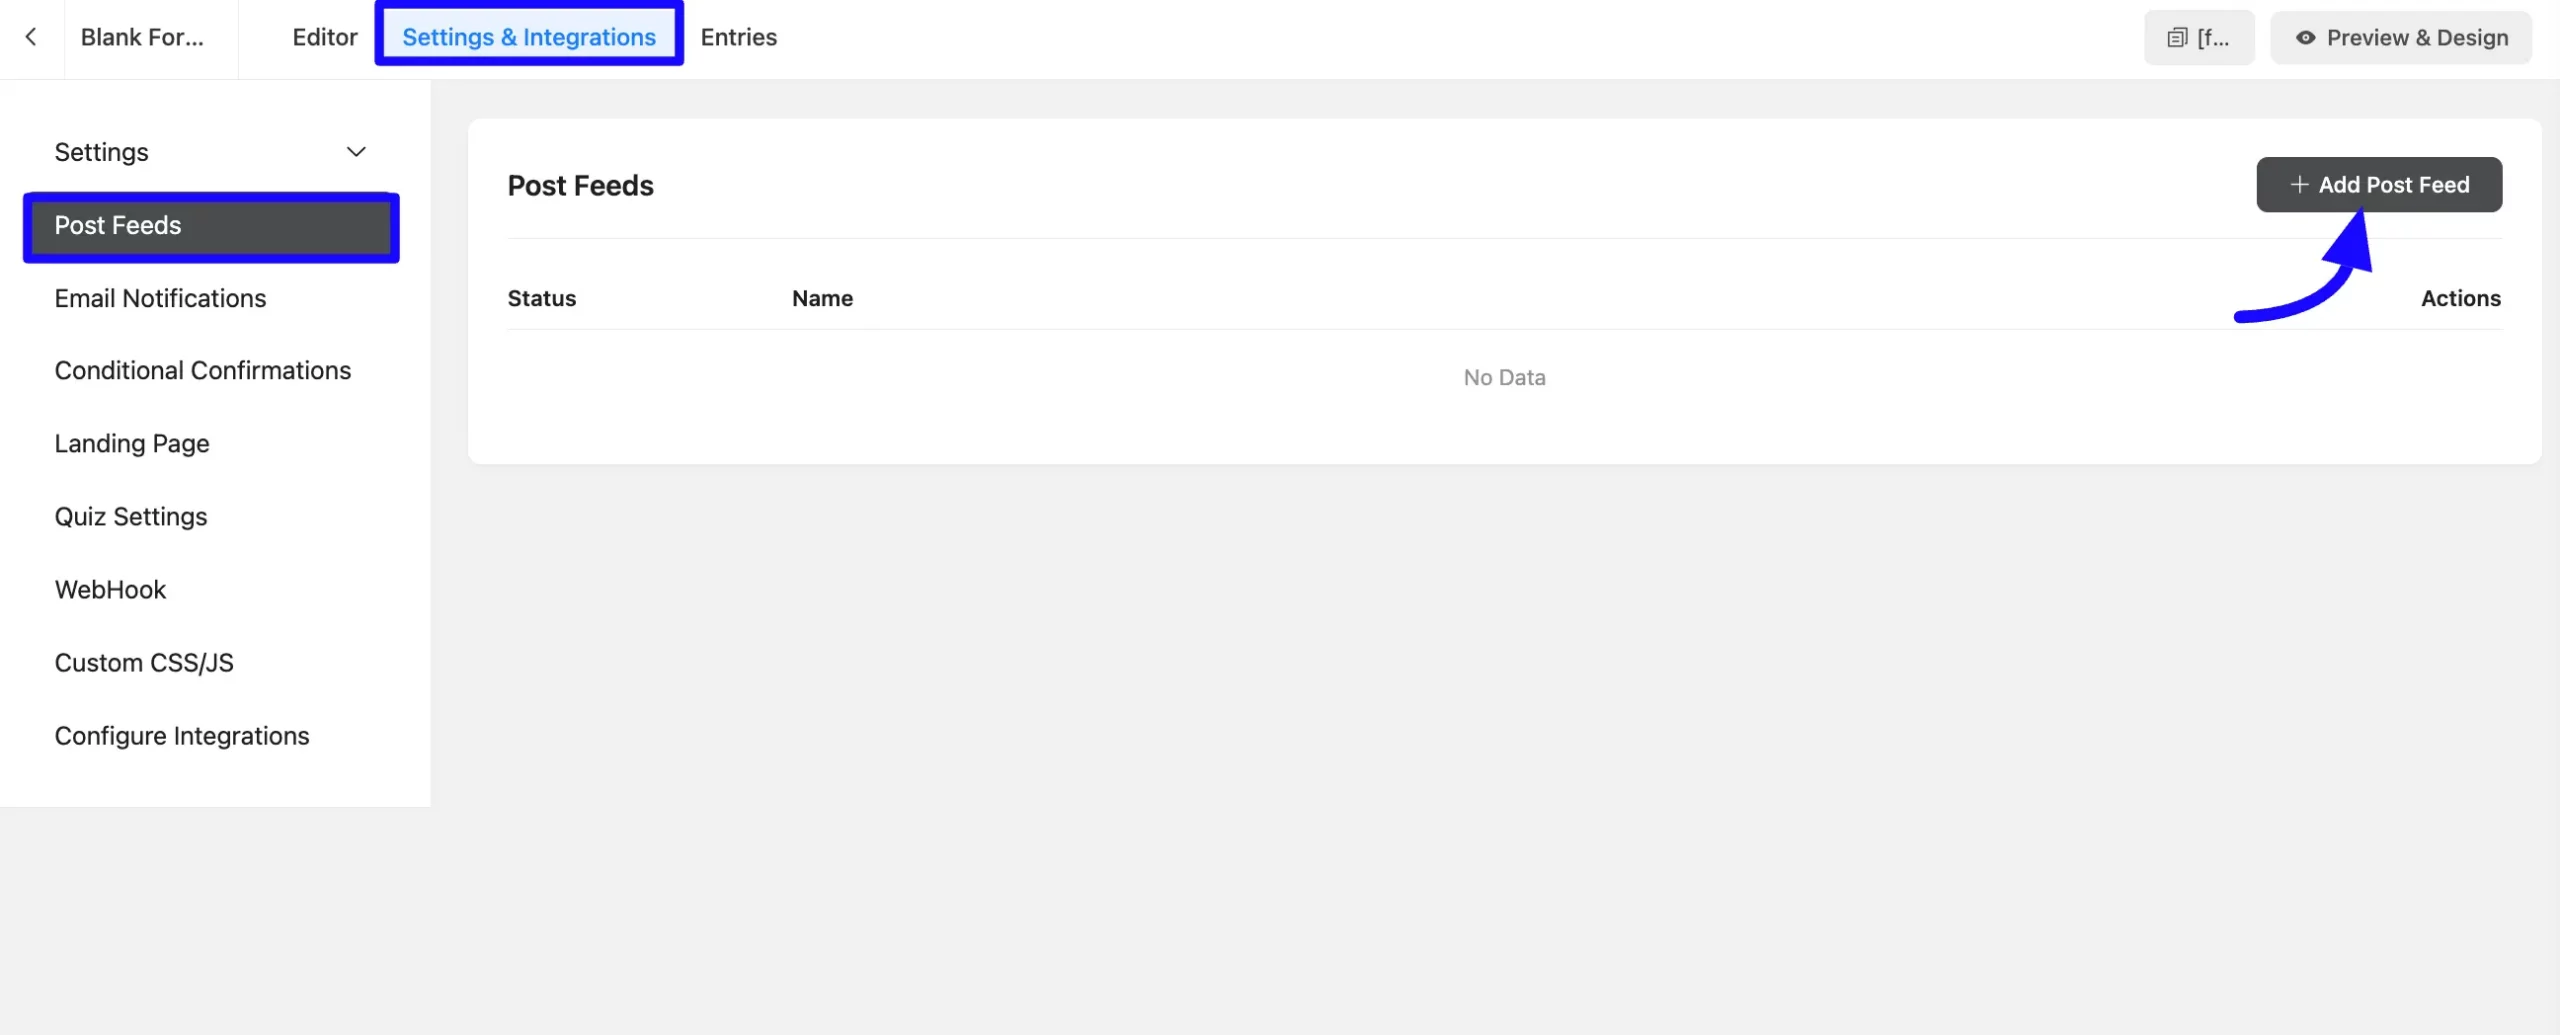
Now, navigate to Settings & Integration in the post form settings. Go to the Post Feed page and click the +Add New Post button. Scroll down to the Meta Box Plugin Mapping section.
Create a New Feed #
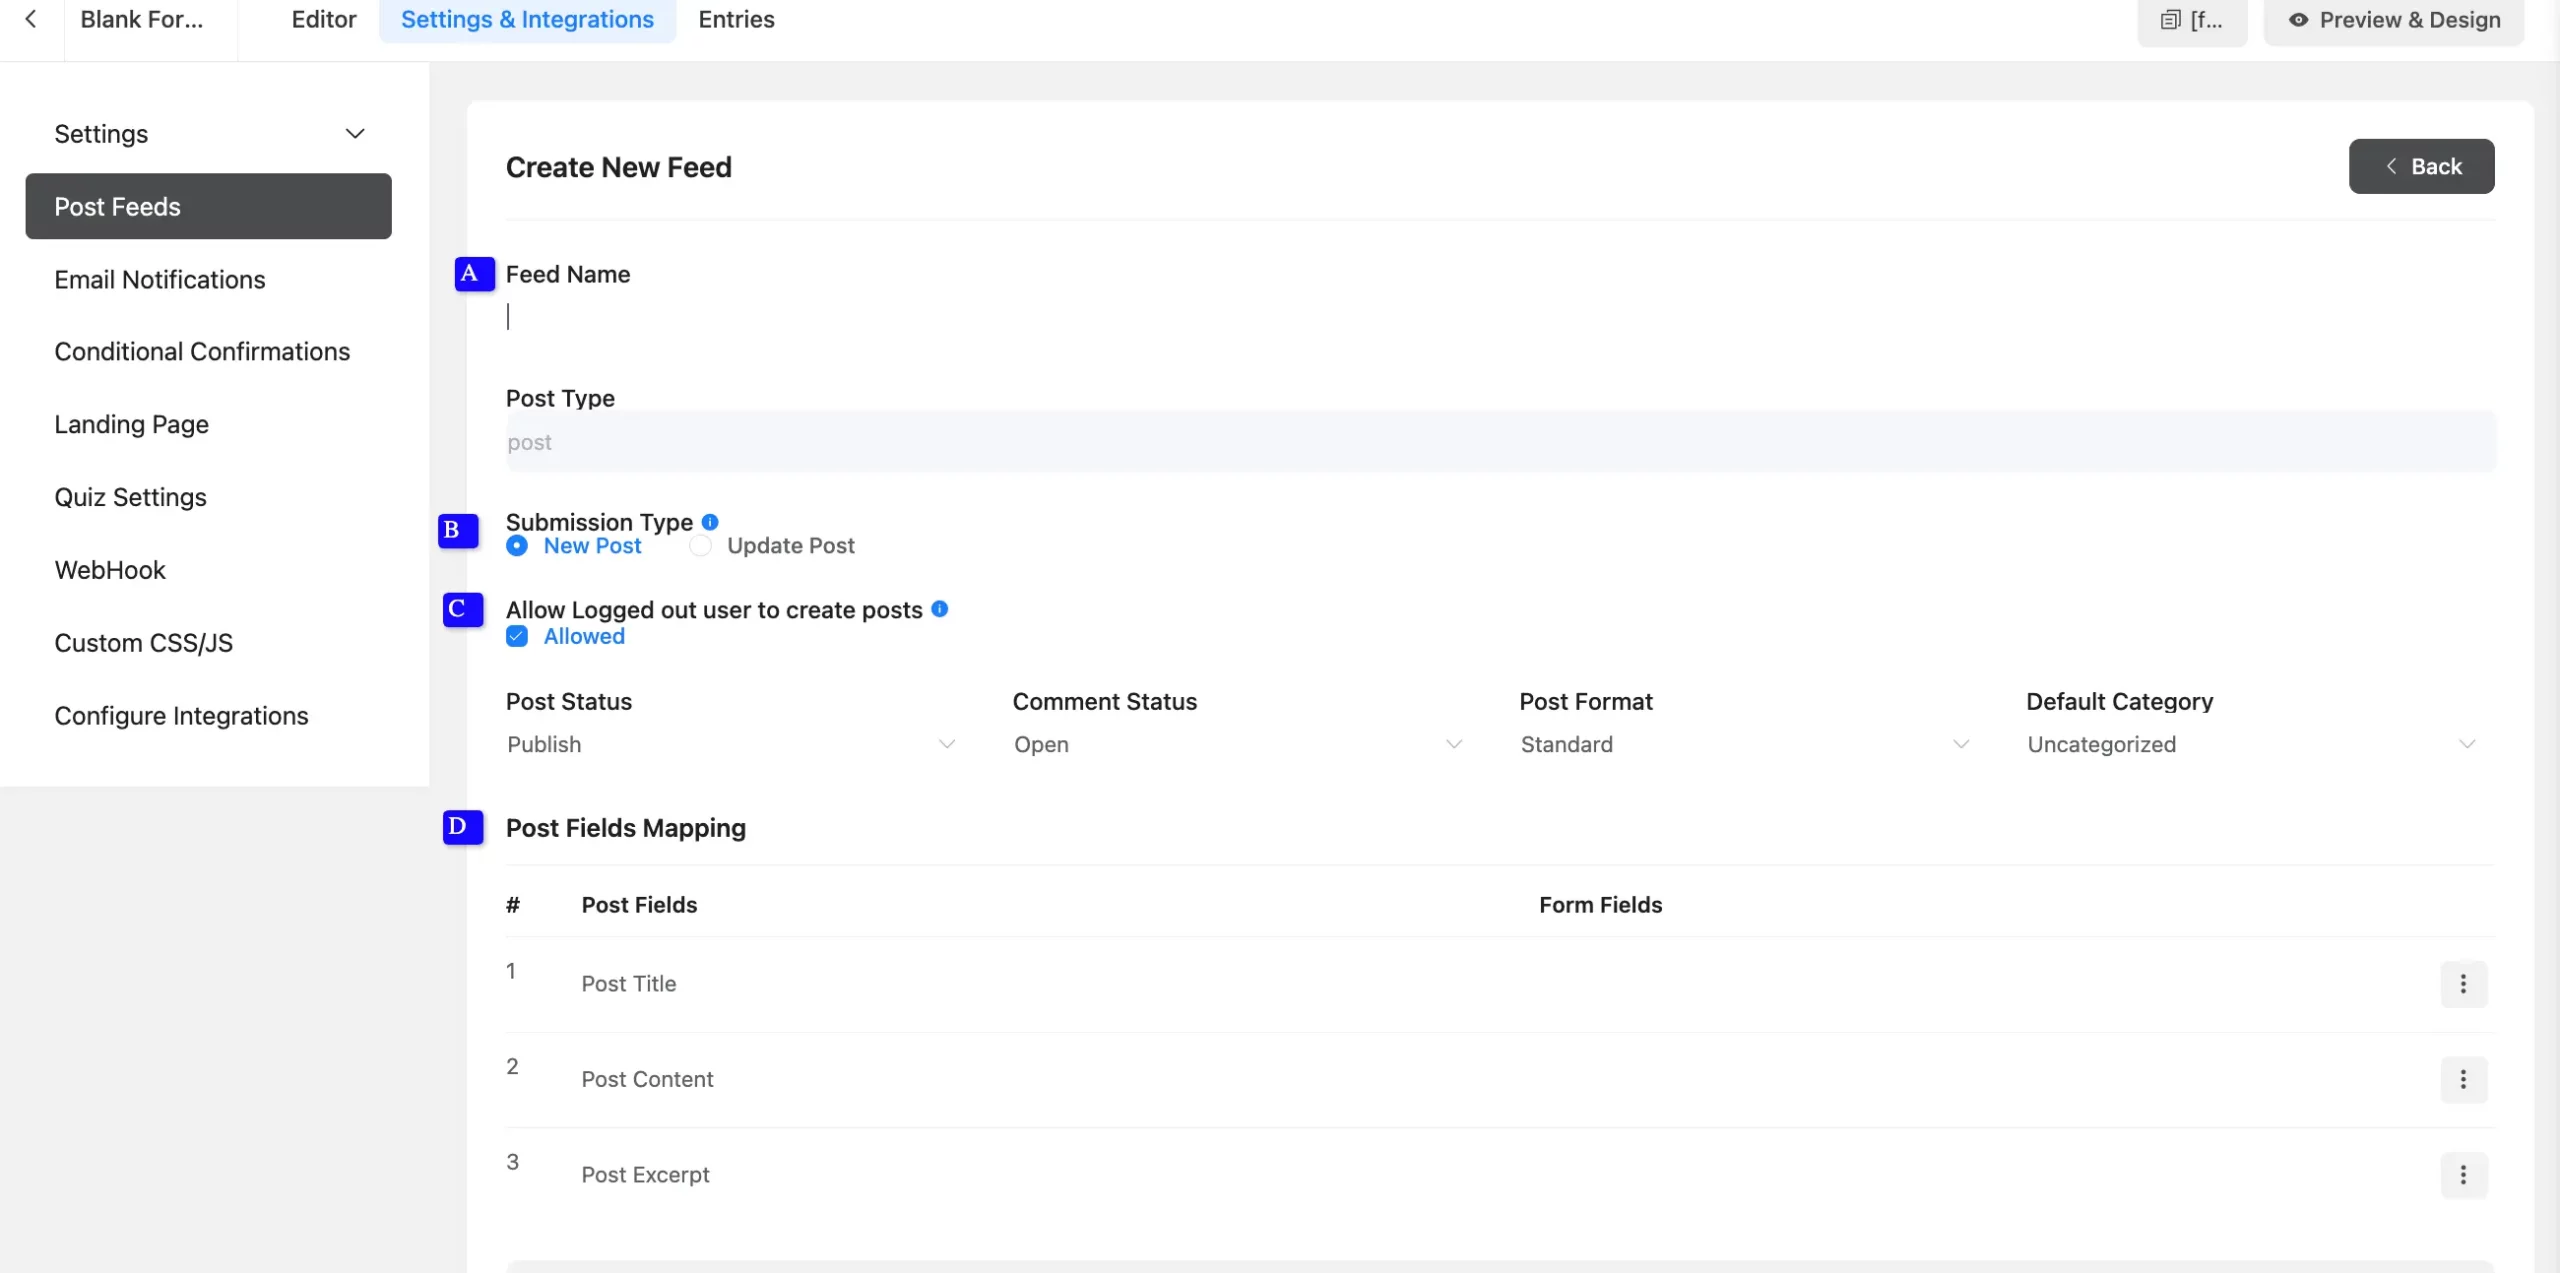
A. Feed Name: Enter a unique name that identifies your feeds.
B. Submission Type: Click the Radio button to select the New Post option for creating a new post or the Update option for updating an old post.
C. Allow Logged-out users to create posts: Checking the Allowed button enables non-logged-in users to submit posts.
Or if you uncheck the Allowed button, it limits post submission to logged-in users only.
Post Status: In the post status section you can set the posts where it is saved. There are three options include-
- Draft: Save submissions for manual review before publishing.
- Publish: Automatically make posts live upon submission.
- Pending Review: Requires admin approval before publication.
Comment Status: Choose the comment Status dropdown options.
- Open: Allows visitors to comment on the submitted post.
- Closed: Disables comments for the post.
Post Format: Based on the type of content, choose the post format, such as Standard, Gallery, or Video.
D. Post Fields Mapping: Now, map the form fields to WordPress post fields (Post Title and Post Content).
- Post Title: Input from the form field mapped to the post title.
- Post Content: Main content submitted by the user.
- Post Excerpt: Optional; used as a summary or teaser for the post.
Taxonomies (like tags or categories) and featured images will also map automatically if present in the form.
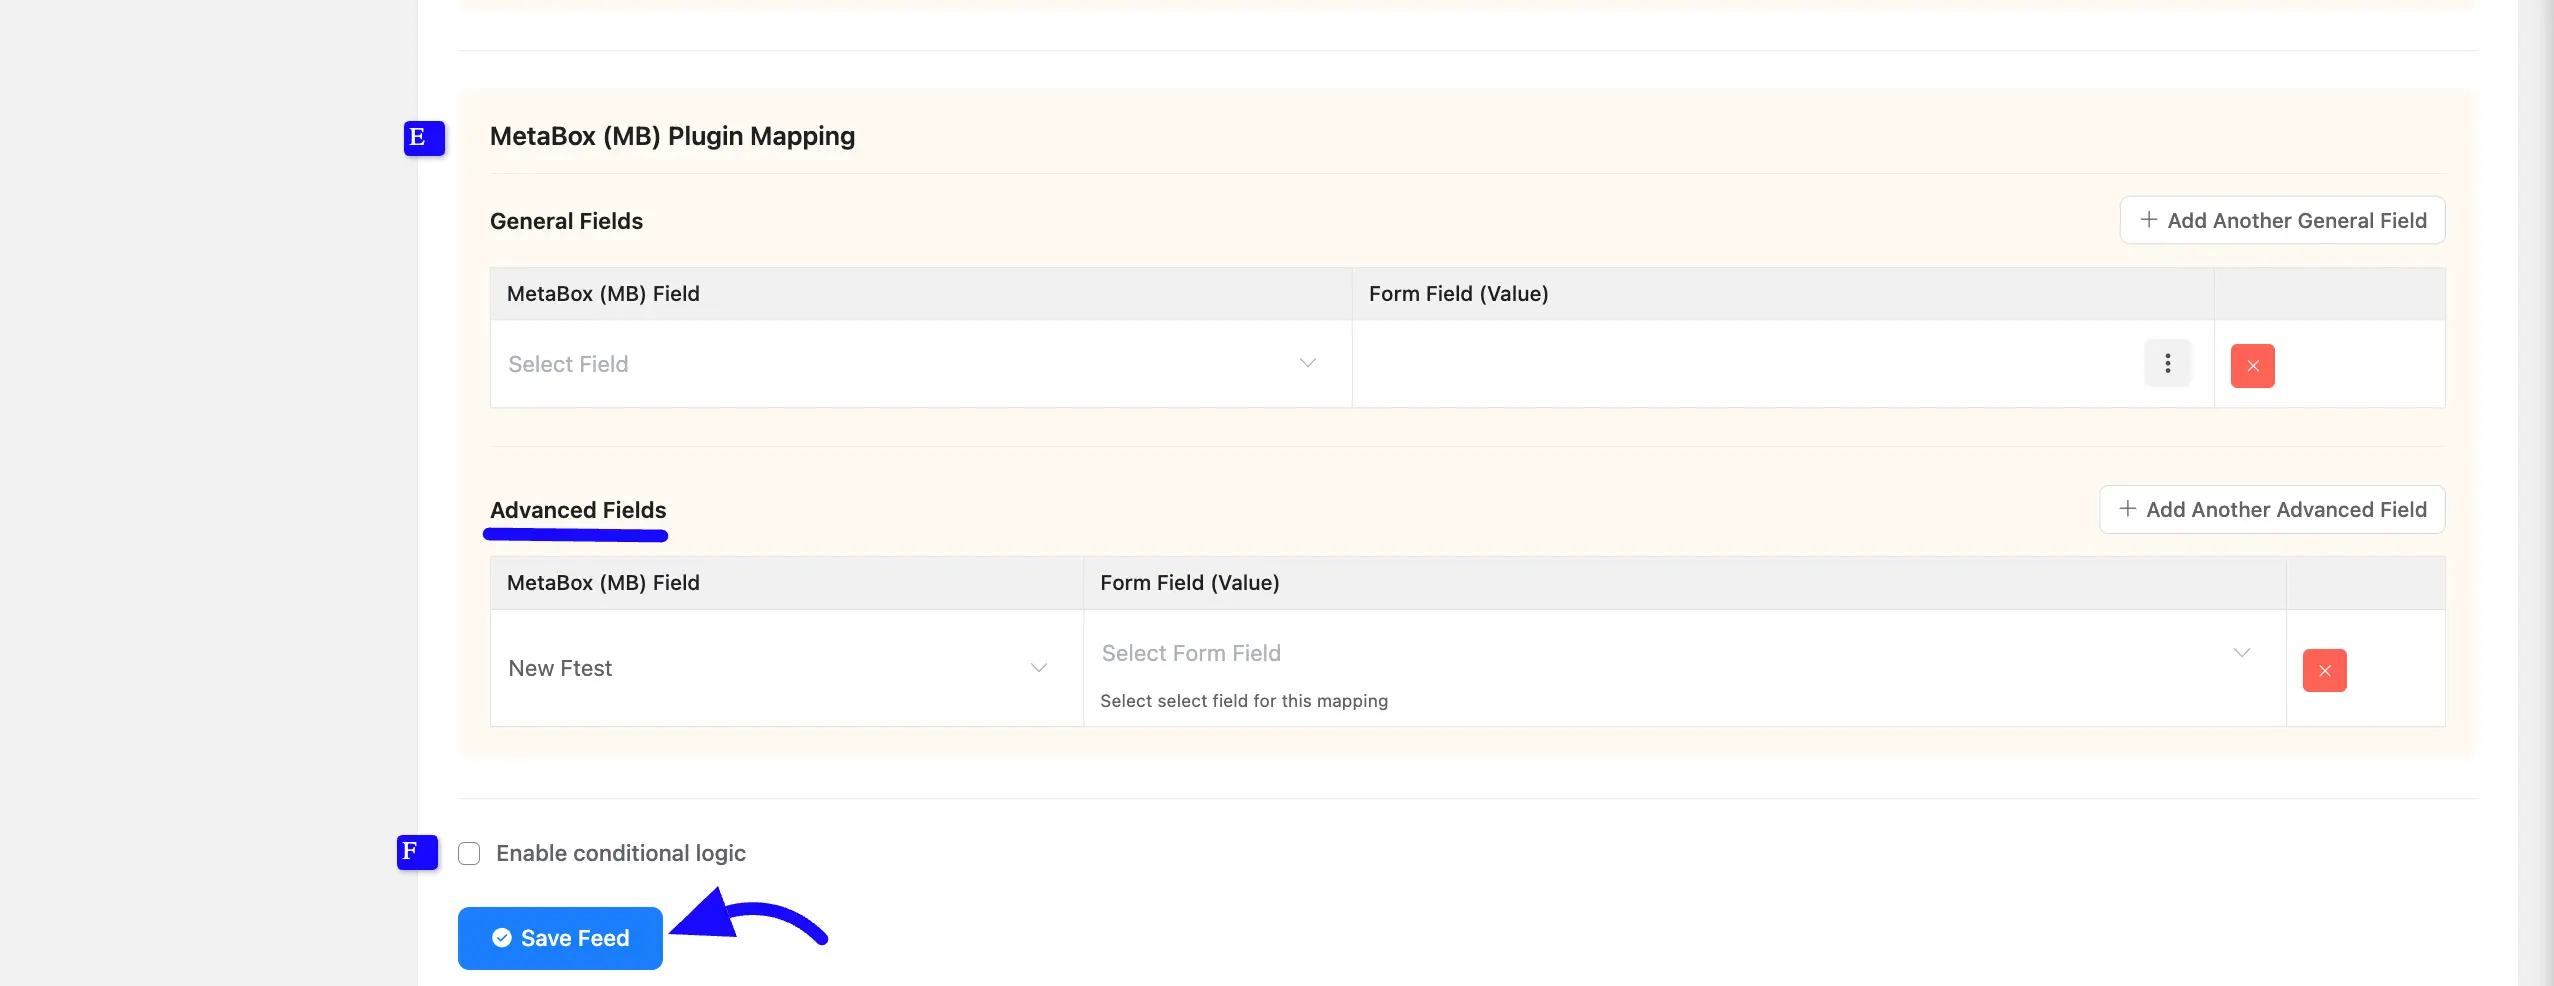
E. MetaBox (MB) Plugin Mapping: Now scroll down to the Meta Box Plugin Mapping section.
In the Advanced Fields section, select the custom field from Meta Box in the dropdown on the left. Choose the corresponding Form field from the dropdown on the right.
F. Enable Conditional Logic: If you want to allow MetaBox Post conditionally based on your submission values, then Enable Conditional Logic options. To learn more about this conditional logic, read the article.
Once all done, click the Save Feed button.
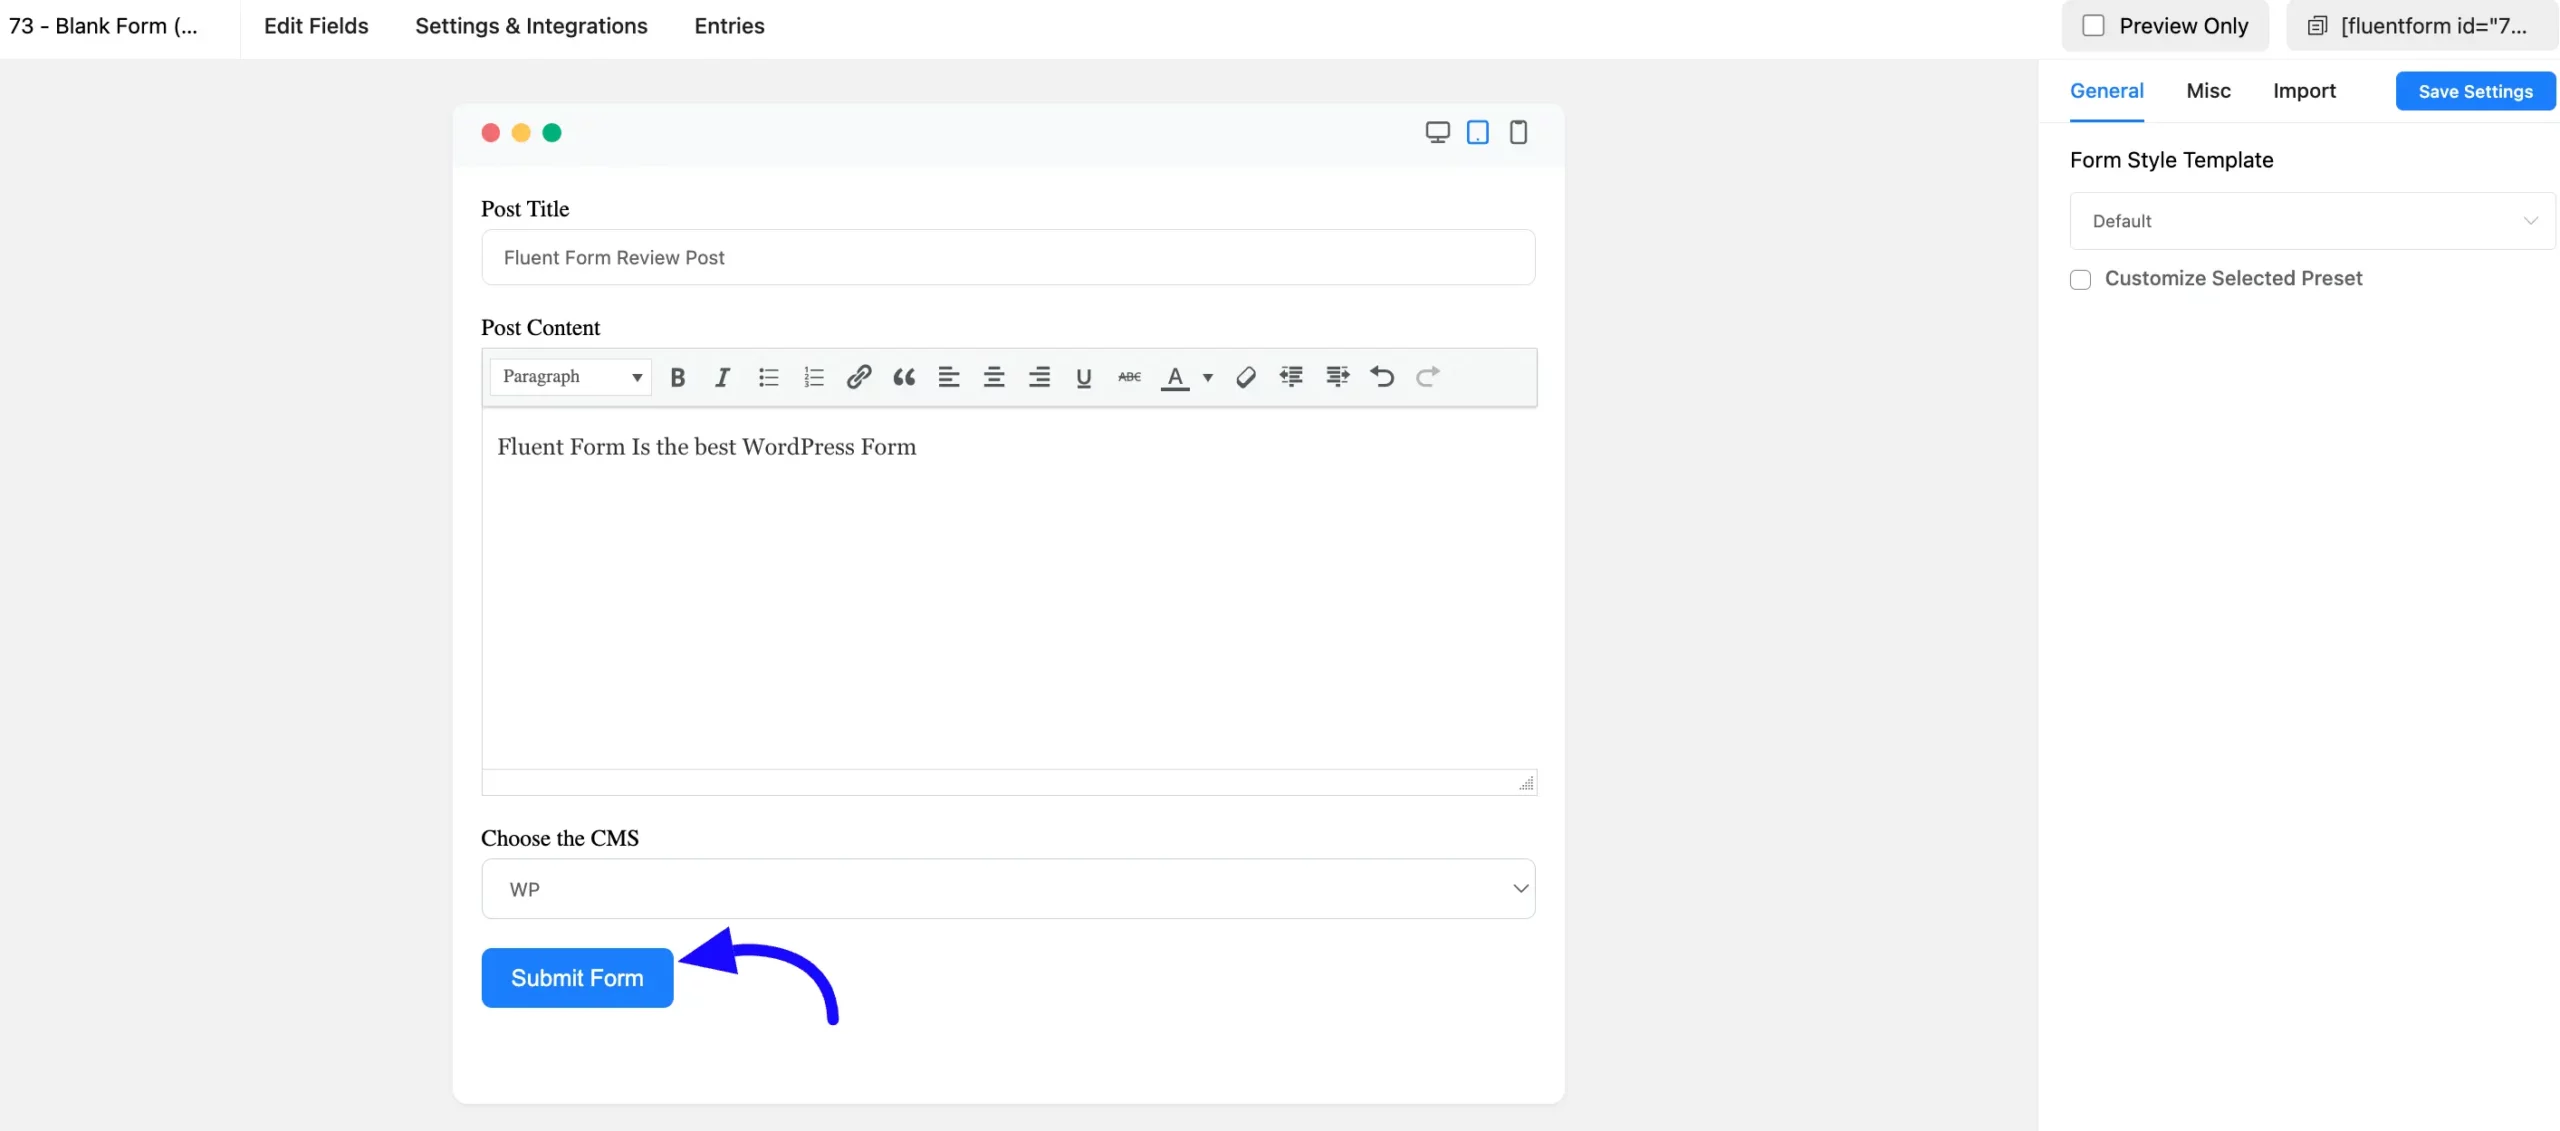
Go to the Preview Page and add some data to the form. When you’re done, click the Submit Form button.
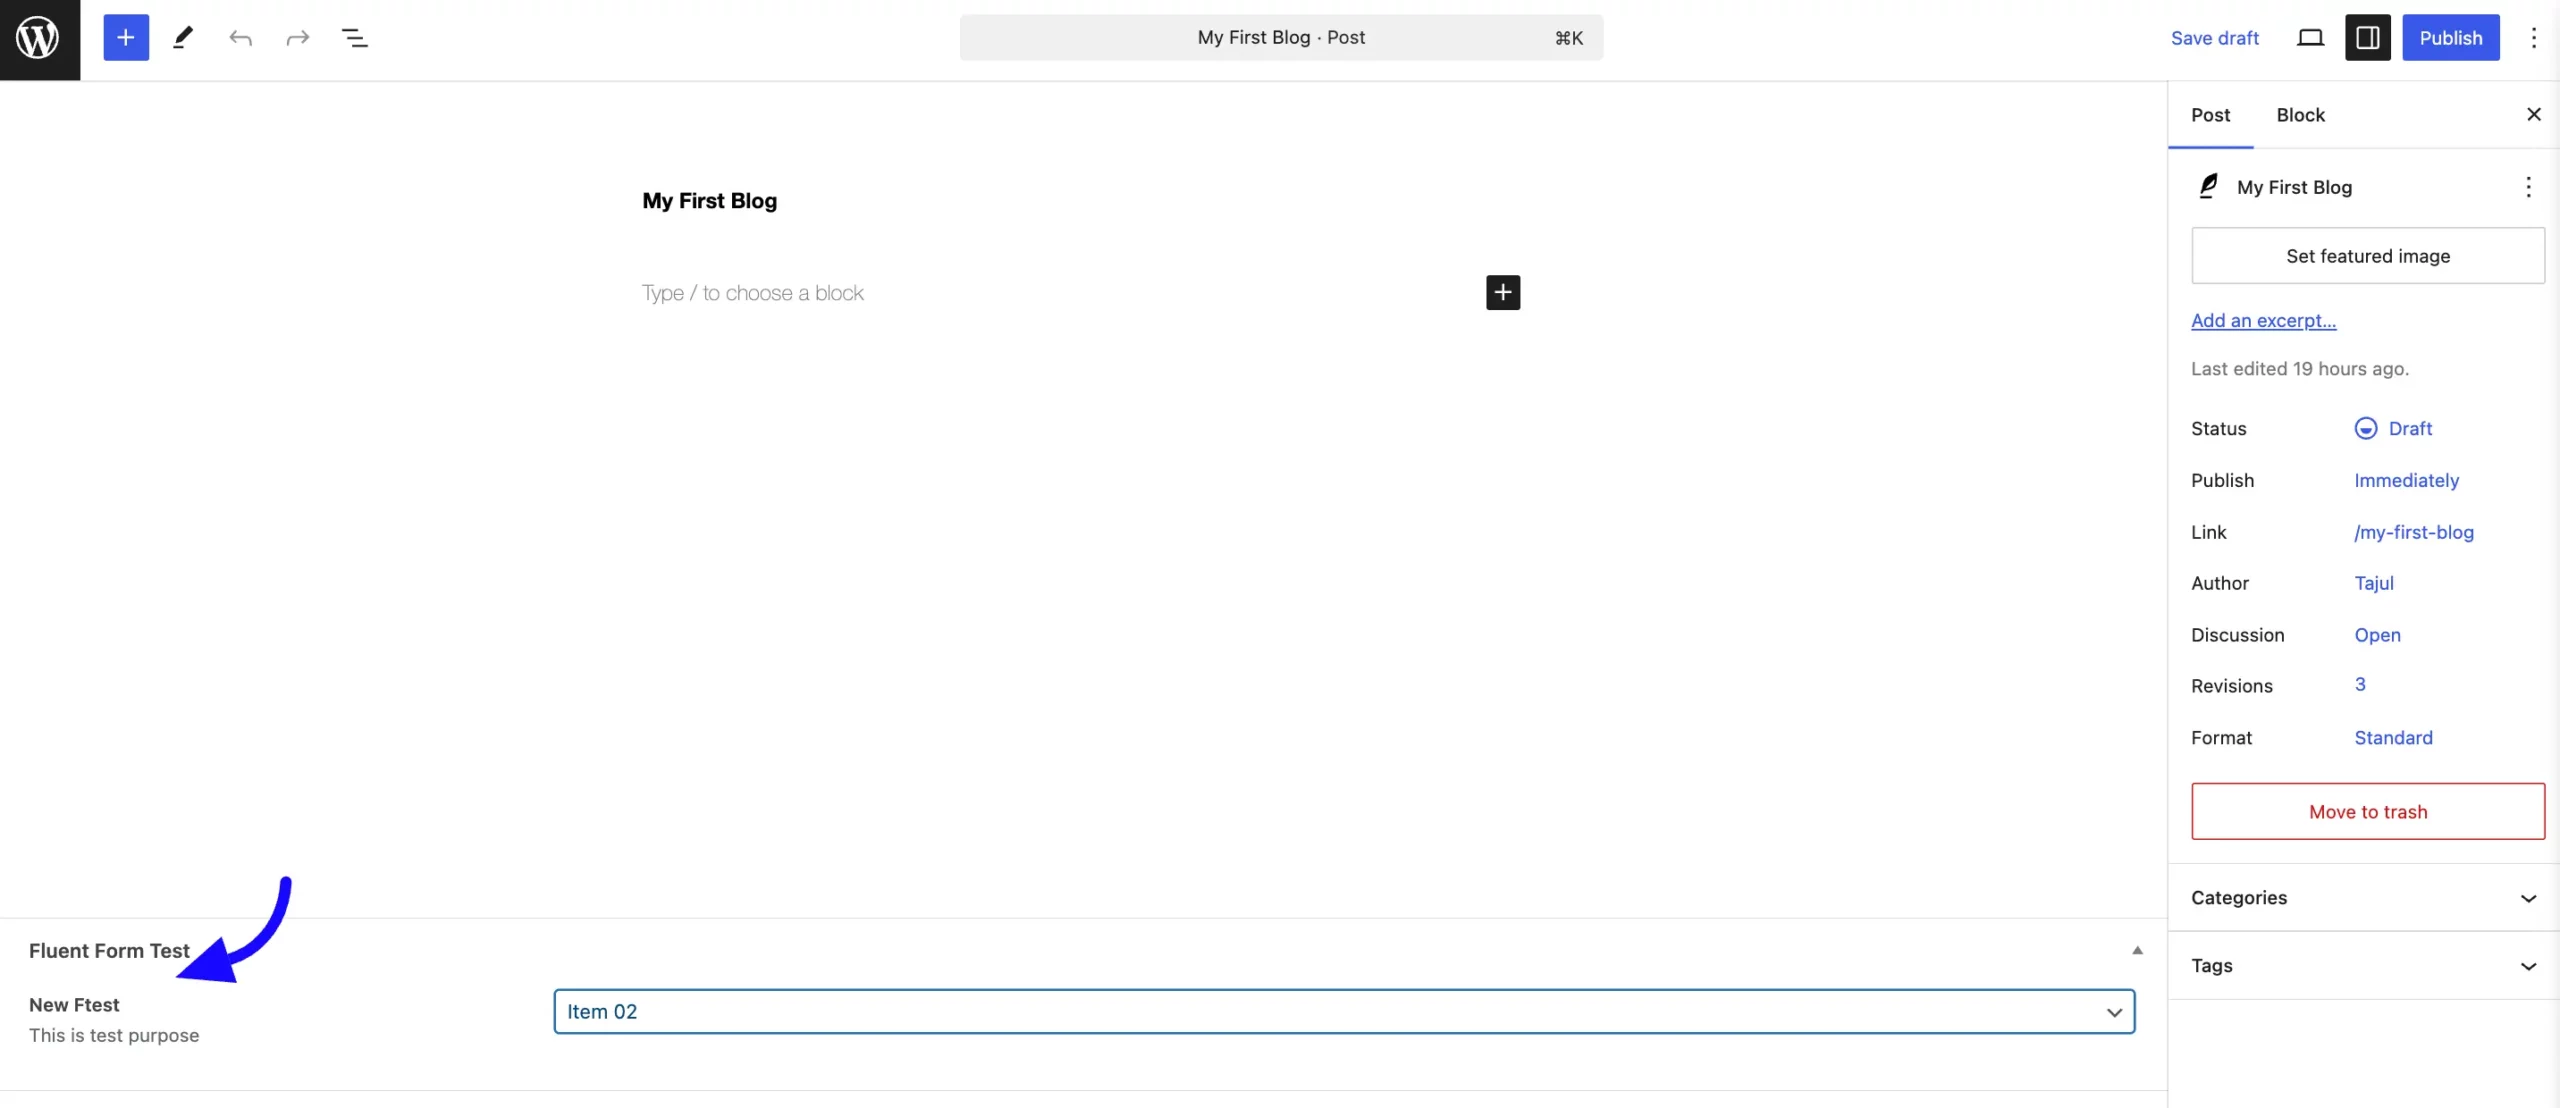
Next, go to the Posts page to check out your submitted post. Click on the Edit option of your Post.
You’ll notice the Metabox custom field on the Post page and the value at the bottom. This is how you can apply custom fields using Fluent Forms.
Following this guide, you can easily integrate Meta Box custom fields with Fluent Forms, enhancing your post-creation process with custom data tailored to your needs.
If you have further questions, don’t hesitate to contact our support team.


