Fluent Forms allows you to send a Default/Customized Confirmation Message after each form submission to let the users know their form was submitted successfully. This article will guide you through setting up the Confirmation Message in Fluent Forms.
Confirmation Settings #
To set up a customized form submission confirmation message, follow the steps below –
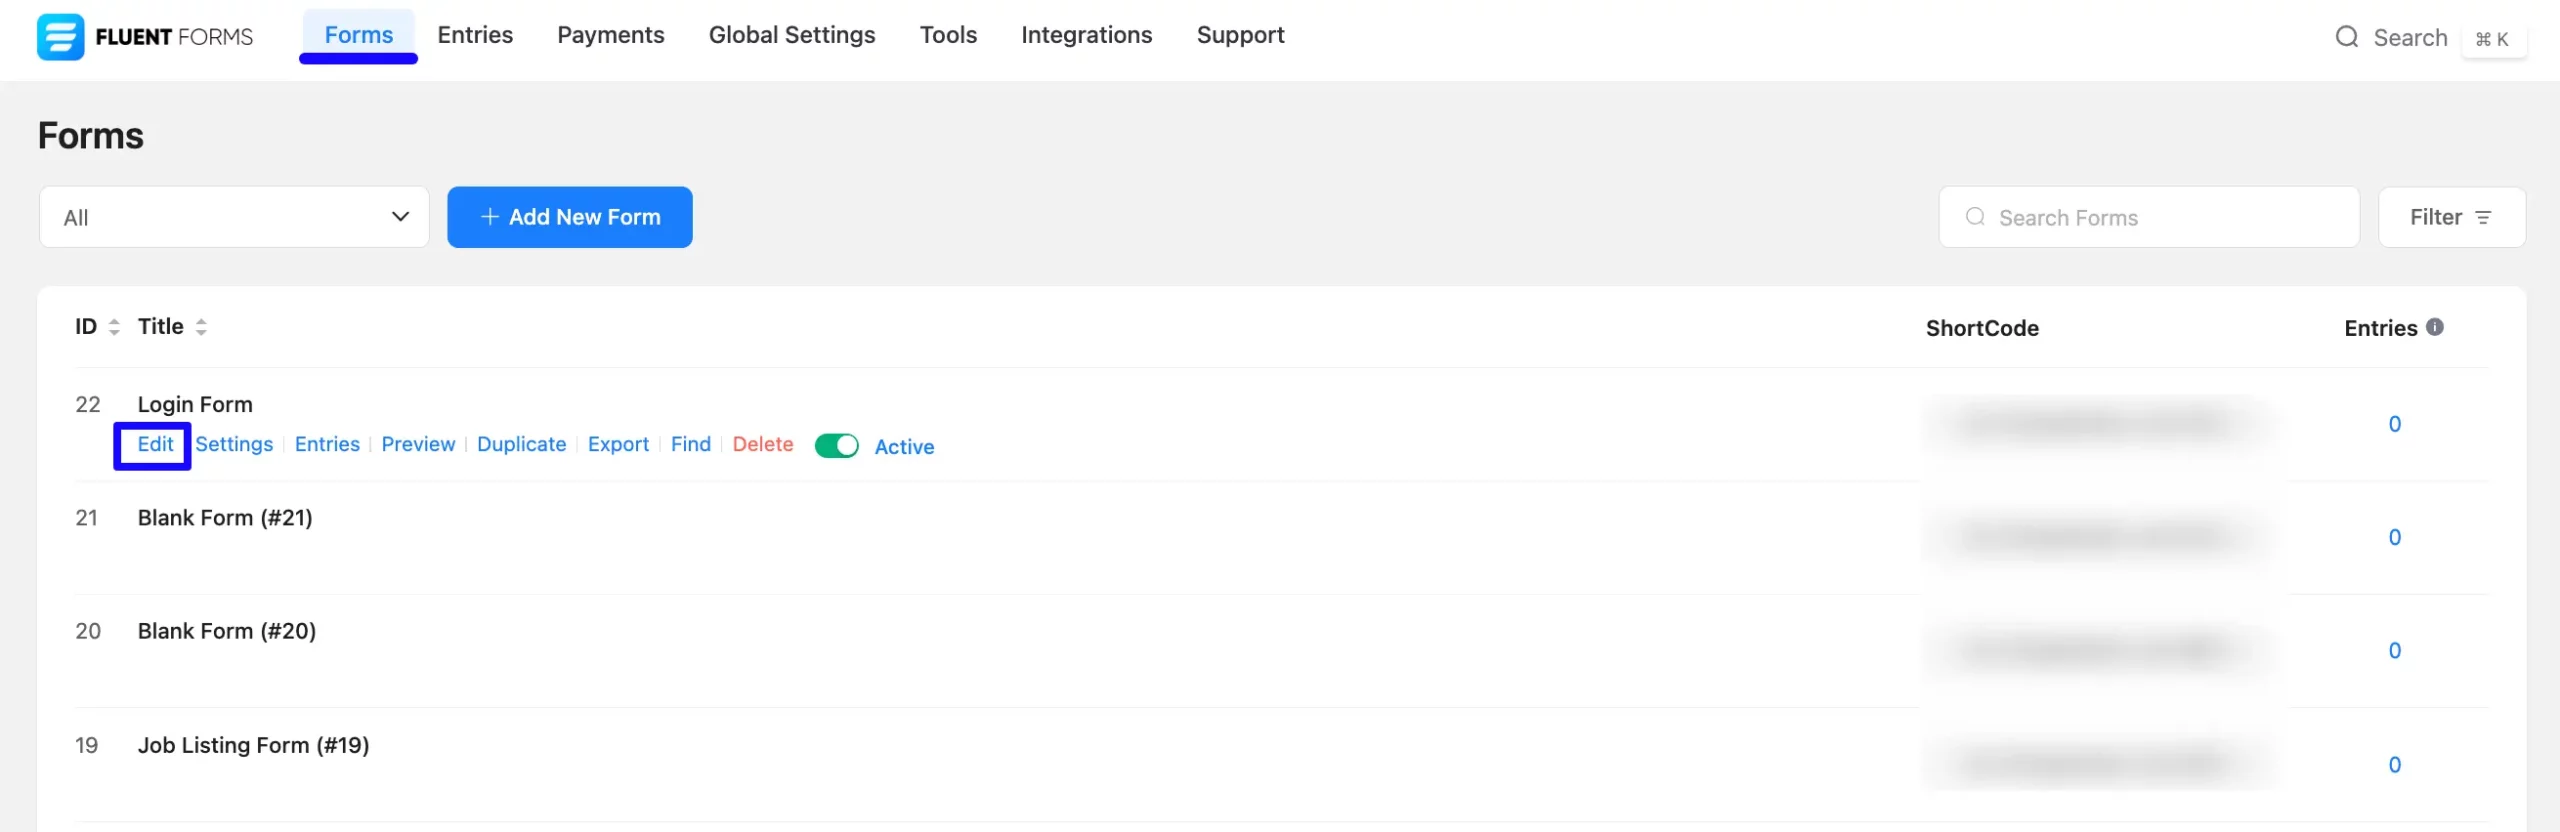
First, go to Forms from the top navbar, and open the Editor page of your desired form by clicking the Edit button where you want to set the notifications, or you can create a new form.
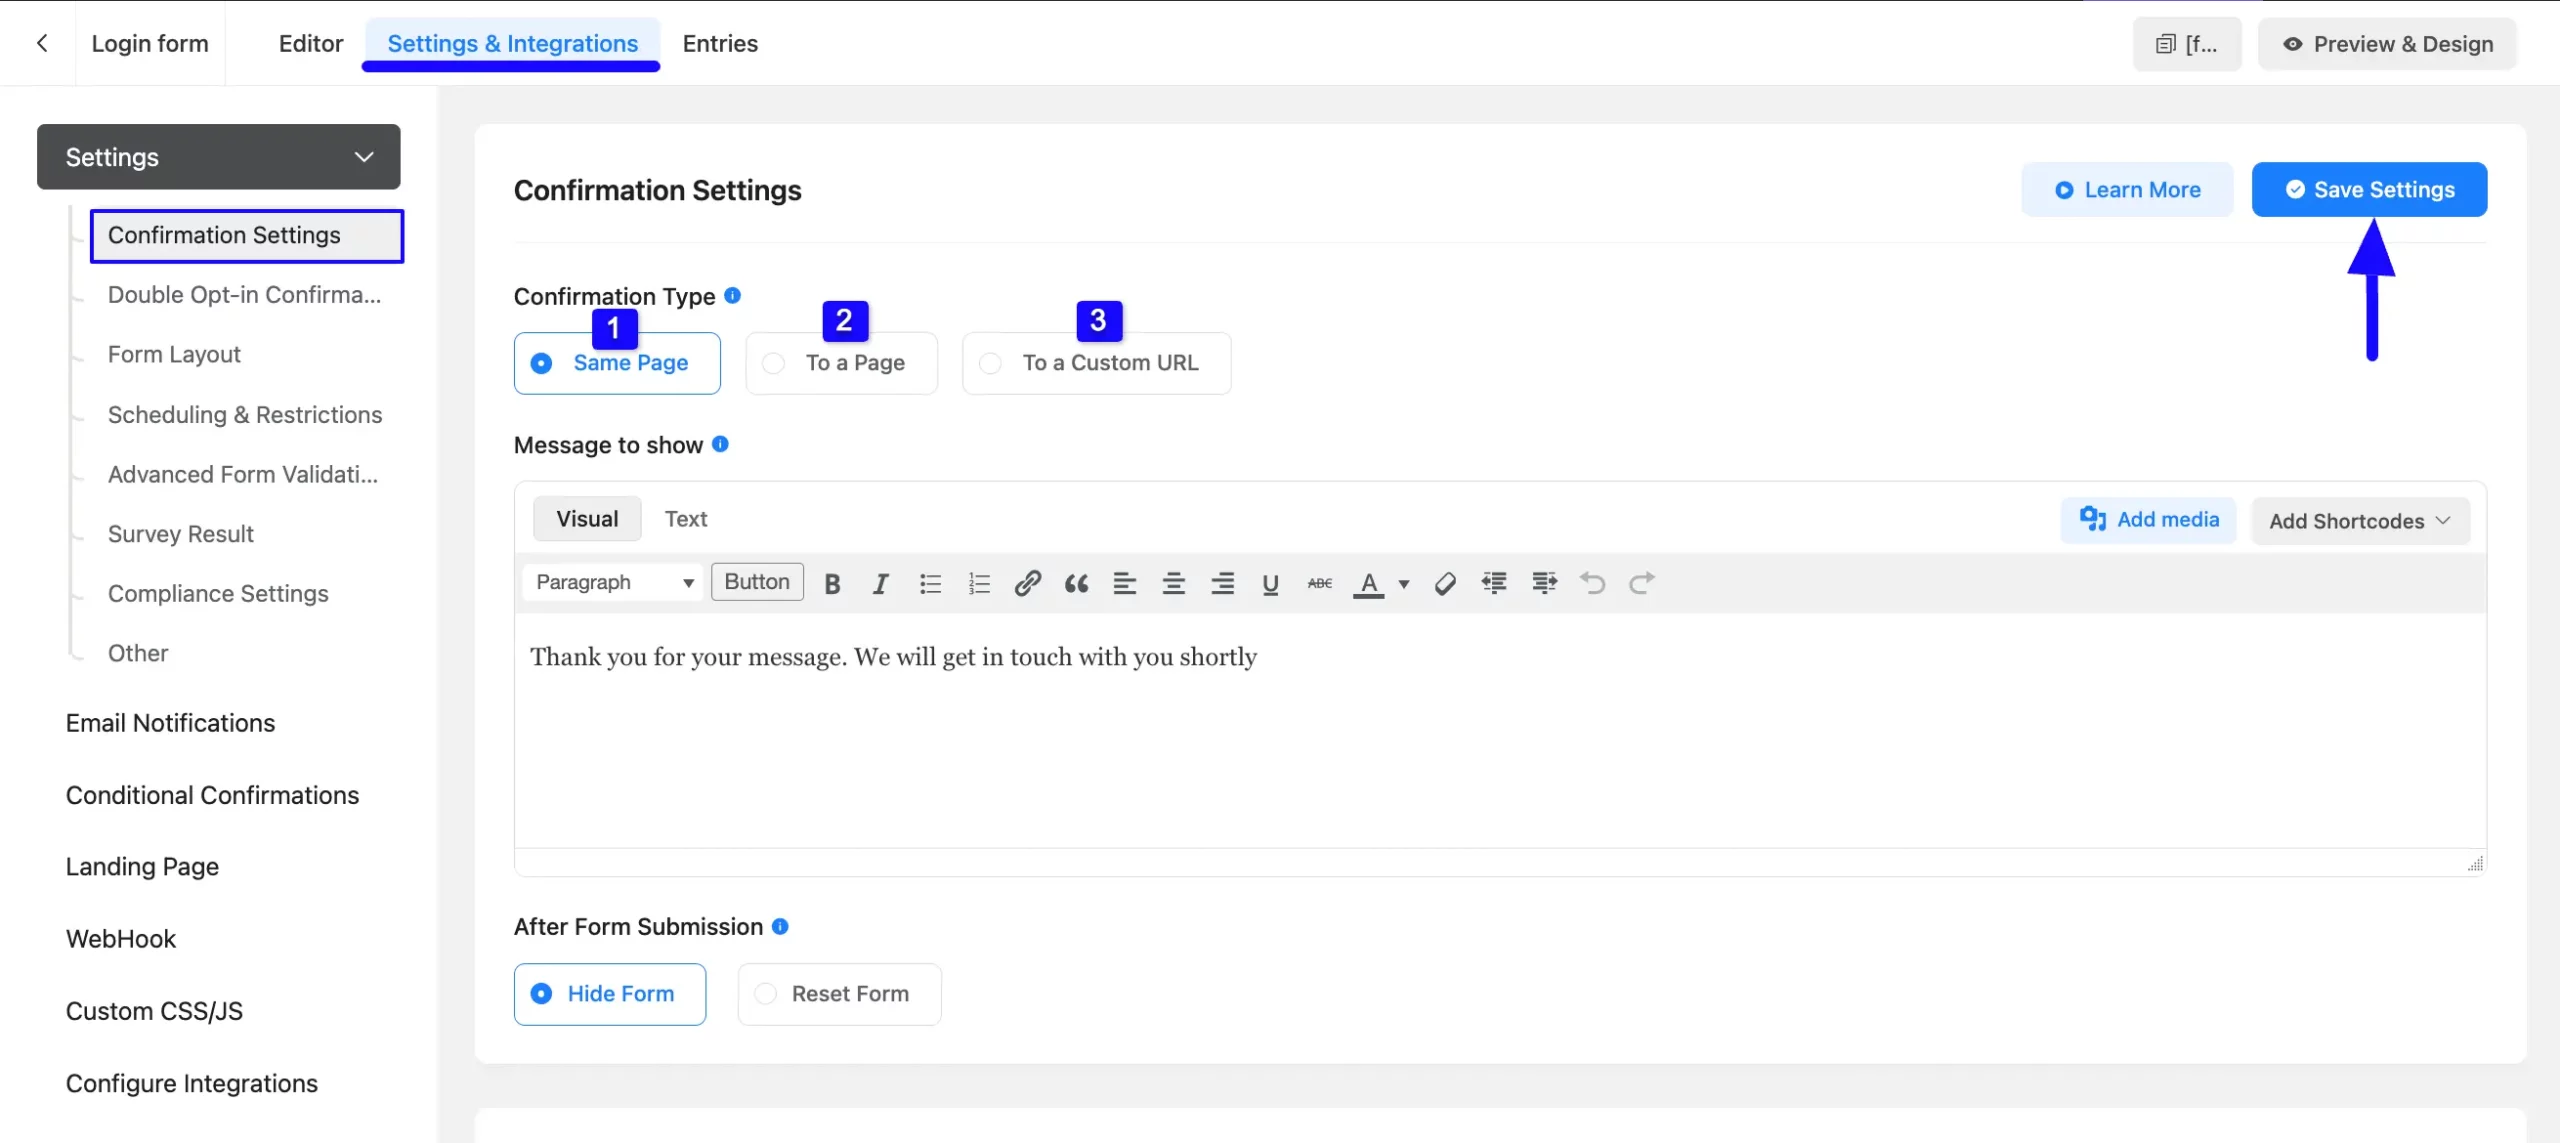
Now, go to Settings & Integrations from the top navbar and open the Confirmation Settings tab under the Settings option.
Here, you can see three Confirmation Types for setting up the Confirmation Message. These are:
- Same Page
- To a Page
- To a Custom URL
Once you complete the setup, click the Save Settings button to save all your changes.
All three confirmation types mentioned above are briefly explained below:
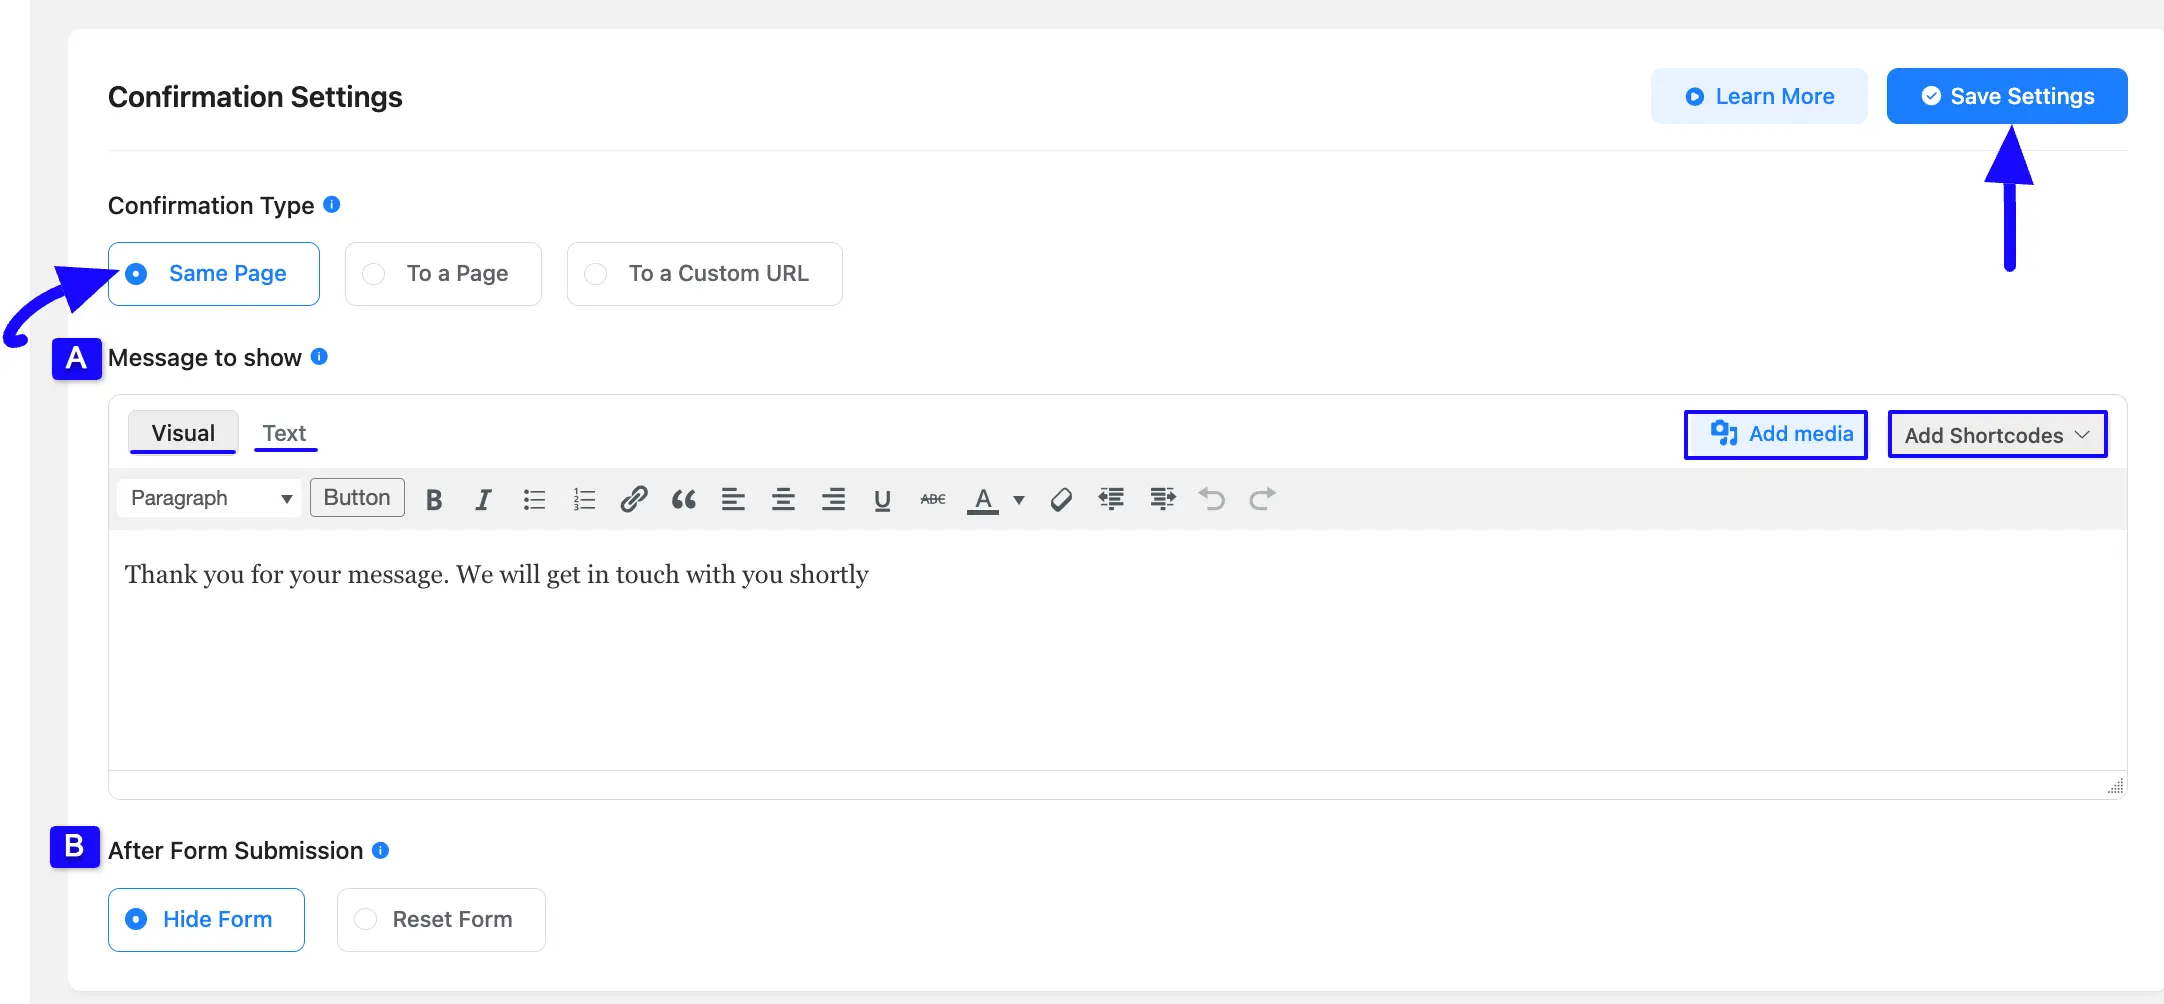
1. Same page #
This option is selected by default. It enables you to show the confirmation message on the same page where the form is embedded.
A. Message to show: Here, you can see a default confirmation message. You can keep it or customize it as per your needs. You can also add Shortcode/s and Media/s in your confirmation message by using the Add Media and Add Shortcodes button in the right corner. Also for advanced customization, you can edit the message in HTML Codes through the Text tab.
B. After Form Submission: Here, you can select whether you want to Hide or Reset the Form after each form submission.
Finally, click the Save Settings button to save all your changes.
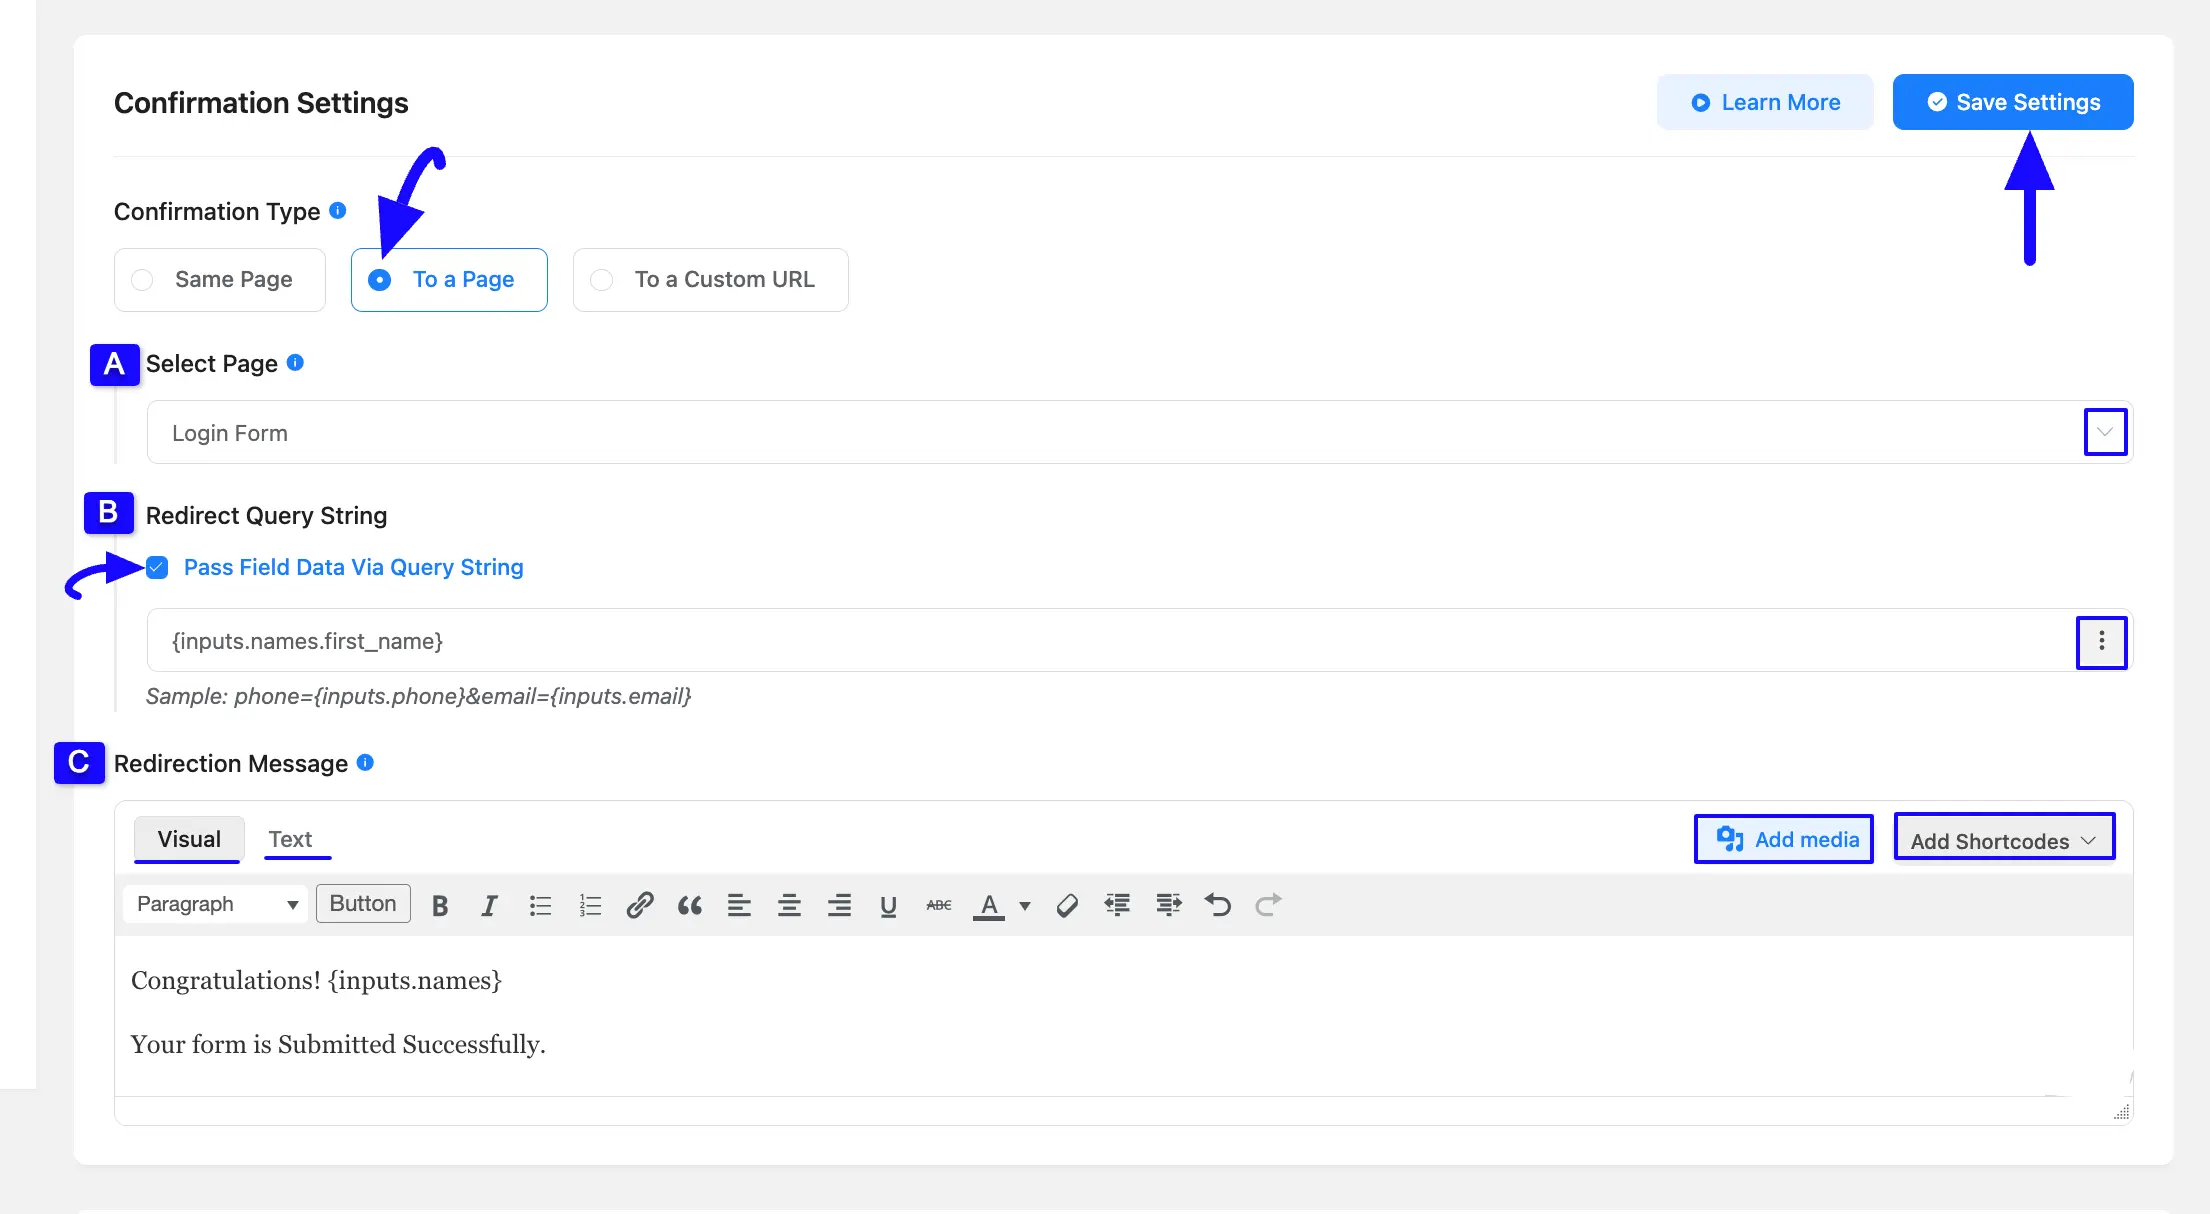
2. To a Page #
The option allows you to redirect your subscribers to a designated page on your website after they submit the form, enhancing their experience by guiding them to relevant content or further actions. This could be a Customized Welcome Page, your Home Page, or Any Other Page on your site.
A. Select Page: Here, choose the desired page you want your subscriber to be redirected to after form submission by clicking the Arrow Icon. Here you will find your website’s all pages in this dropdown list.
B. Redirect Query String: Enabling this option allows you to pass the field data via a query string (checkbox, currently unchecked). Here also you can redirect queries through Shortcode by clicking the Three-dot Icon in the right corner.
C. Redirection Message: Here, you can customize the message displayed after form submission. You can also add Shortcode/s and Media/s in your confirmation message by using the Add Media and Add Shortcodes button in the right corner. Also for advanced customization, you can edit the message in HTML Codes through the Text tab.
Once you are done, click the Save Settings button to save all your changes.
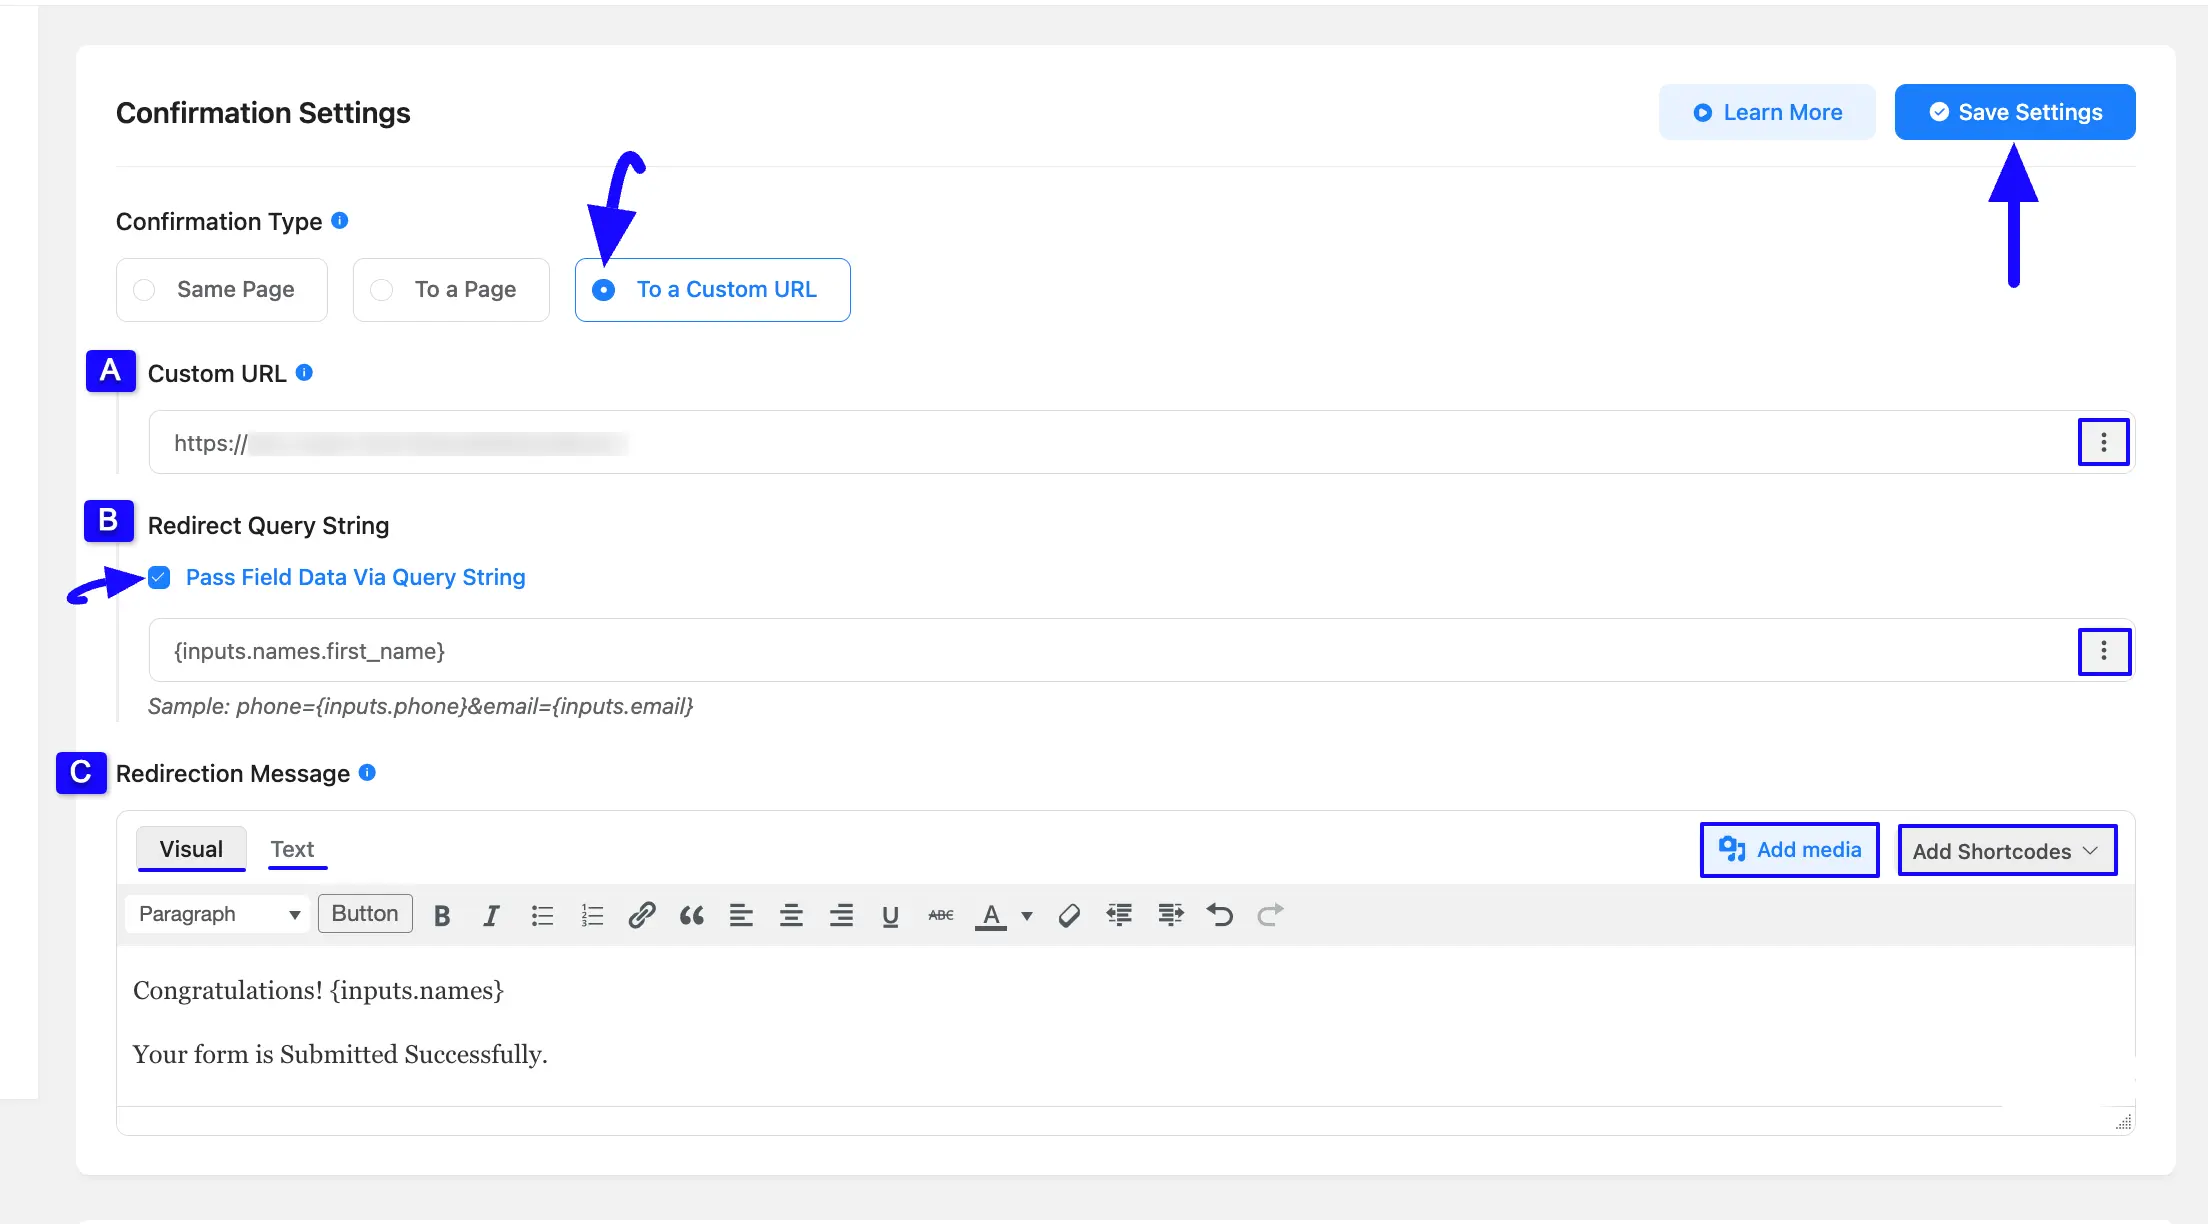
3. To a Custom URL #
This confirmation type allows you to redirect your subscriber to a page/website that is not in your domain through a custom URL.
A. Custom URL: Here, put the desired Outbound URL where you want your subscriber redirected after form submission. Here you can also add Shortcode/s by clicking the left side three-dot-icon.
B. Redirect Query String: Enabling this option allows you to pass the field data via a query string (checkbox, currently unchecked). Here also you can redirect queries through Shortcode by clicking the Three-dot Icon in the right corner.
Suppose you have a form with a field like Name. If you enable Pass Field Data via Query String, after the form submission, the URL could look like: https://yourwebsite.com/thank-you/?name=JohnDoe
- Here, ‘name=JohnDoe’ is passed through the query string.
- You can then use this information on the next page for personalization or tracking.
C. Redirect Message: Here, you can customize the message displayed after form submission. You can also add Shortcode/s and Media/s in your confirmation message by using the Add Media and Add Shortcodes button in the right corner. Also for advanced customization, you can edit the message in HTML Codes through the Text tab.
If you want to pass data using a query string and automatically populate form fields on the redirected page, follow this documentation.
Once you are done, click the Save Settings button to save all your changes.
If you have any further questions, concerns, or suggestions, please do not hesitate to contact our @support team.


