
Fluent Forms offers a Form Layout feature for the basic customization of your form’s outlook (e.g., the position of the input field label, default help message placement, default error message placement, and asterisk marker position for required fields).
This article will guide you through setting up the Form Layout in Fluent Forms.
Form Layout Settings #
To learn how to set up form layout individually, follow the steps below –
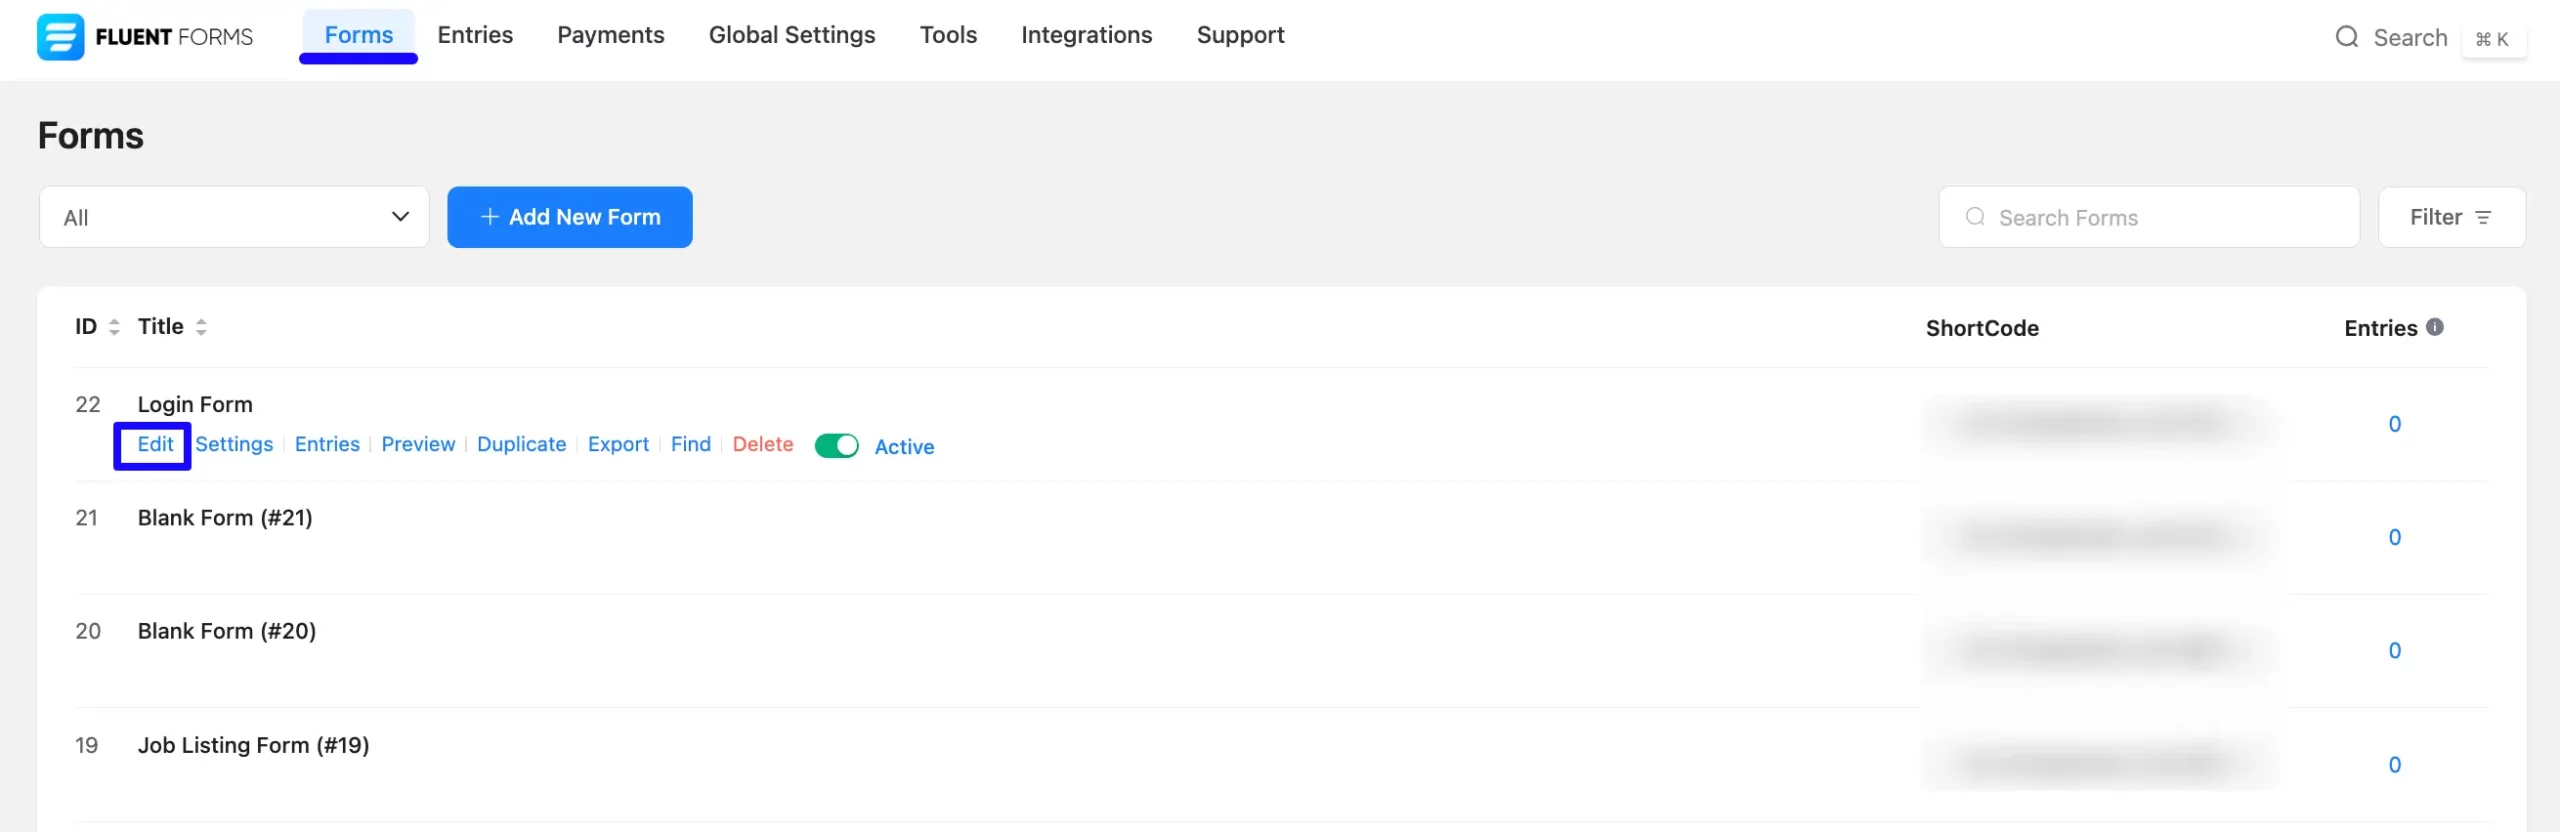
First, go to Forms from the top navbar, and open the Editor page of your desired form by clicking the Edit button where you want to set the conditions.
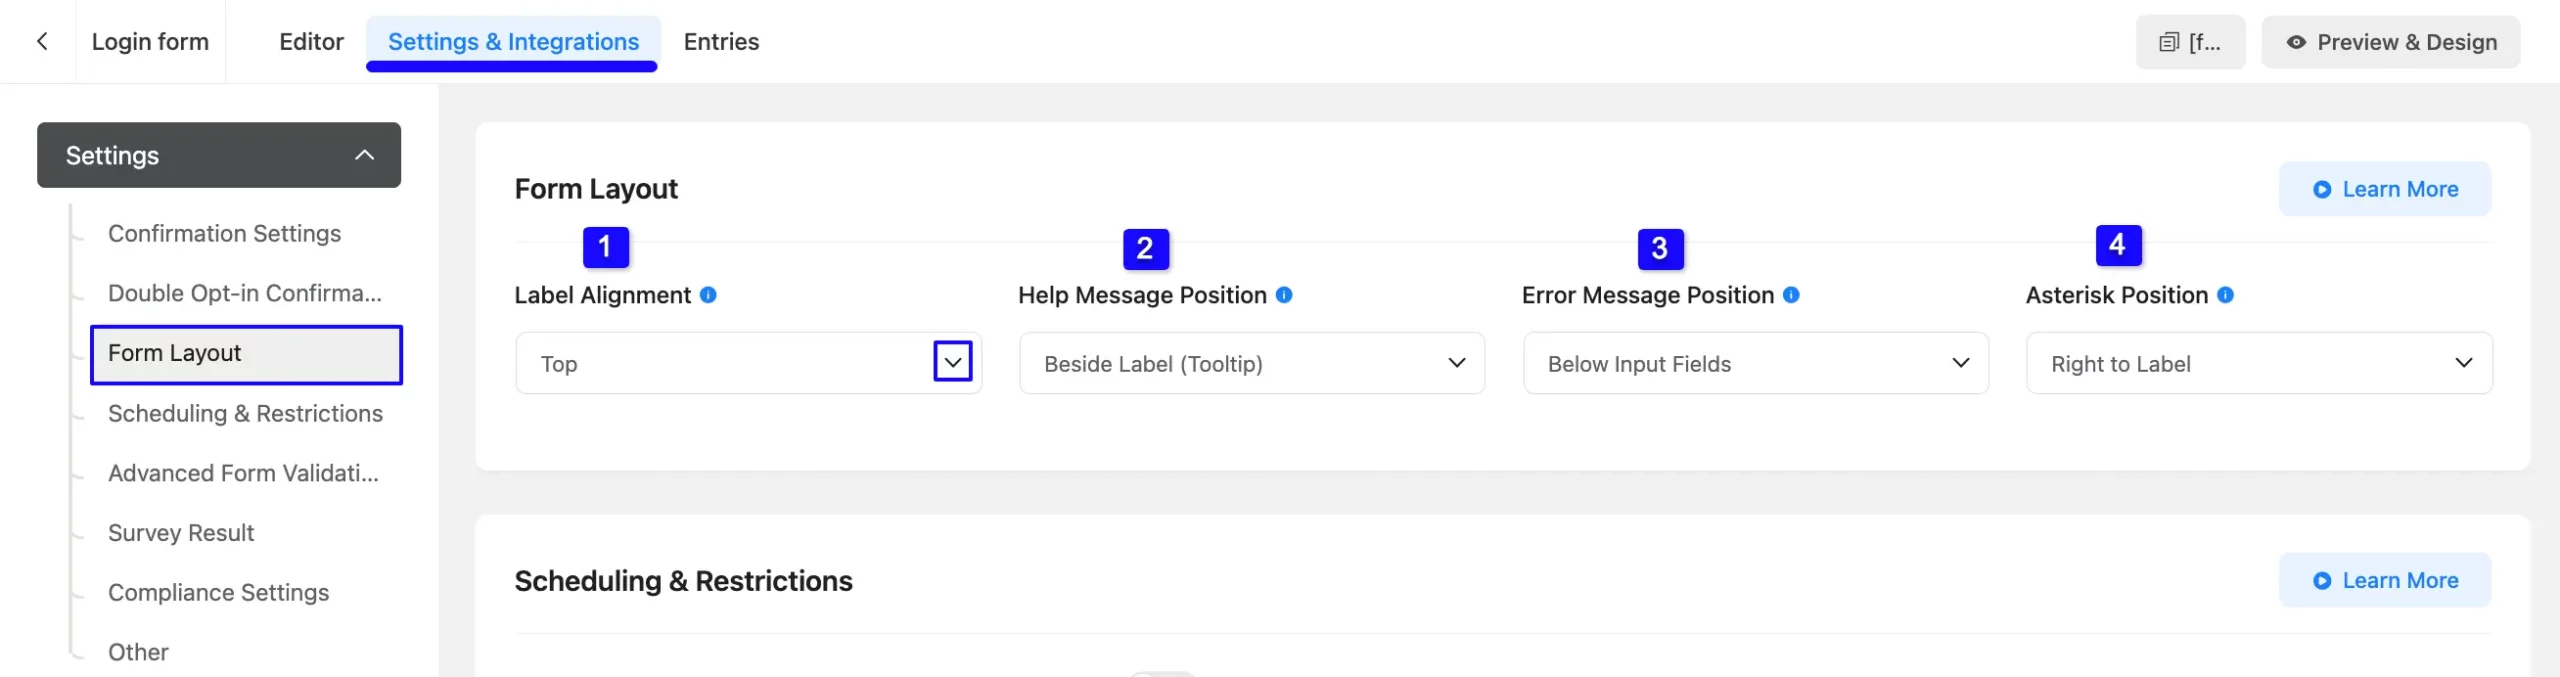
Once you are on the Editor Page, go to Settings & Integrations from the top navbar and open the Form Layout tab under the Settings option.
Here, you will get Four options to customize the basic layout of your form. These are:
- Label Alignment
- Help Message Position
- Error Message Position
- Asterisk Position
Once you complete the setup, click the Save Settings button to save all your changes.
All the settings mentioned above are briefly explained below:
1. Label Alignment #
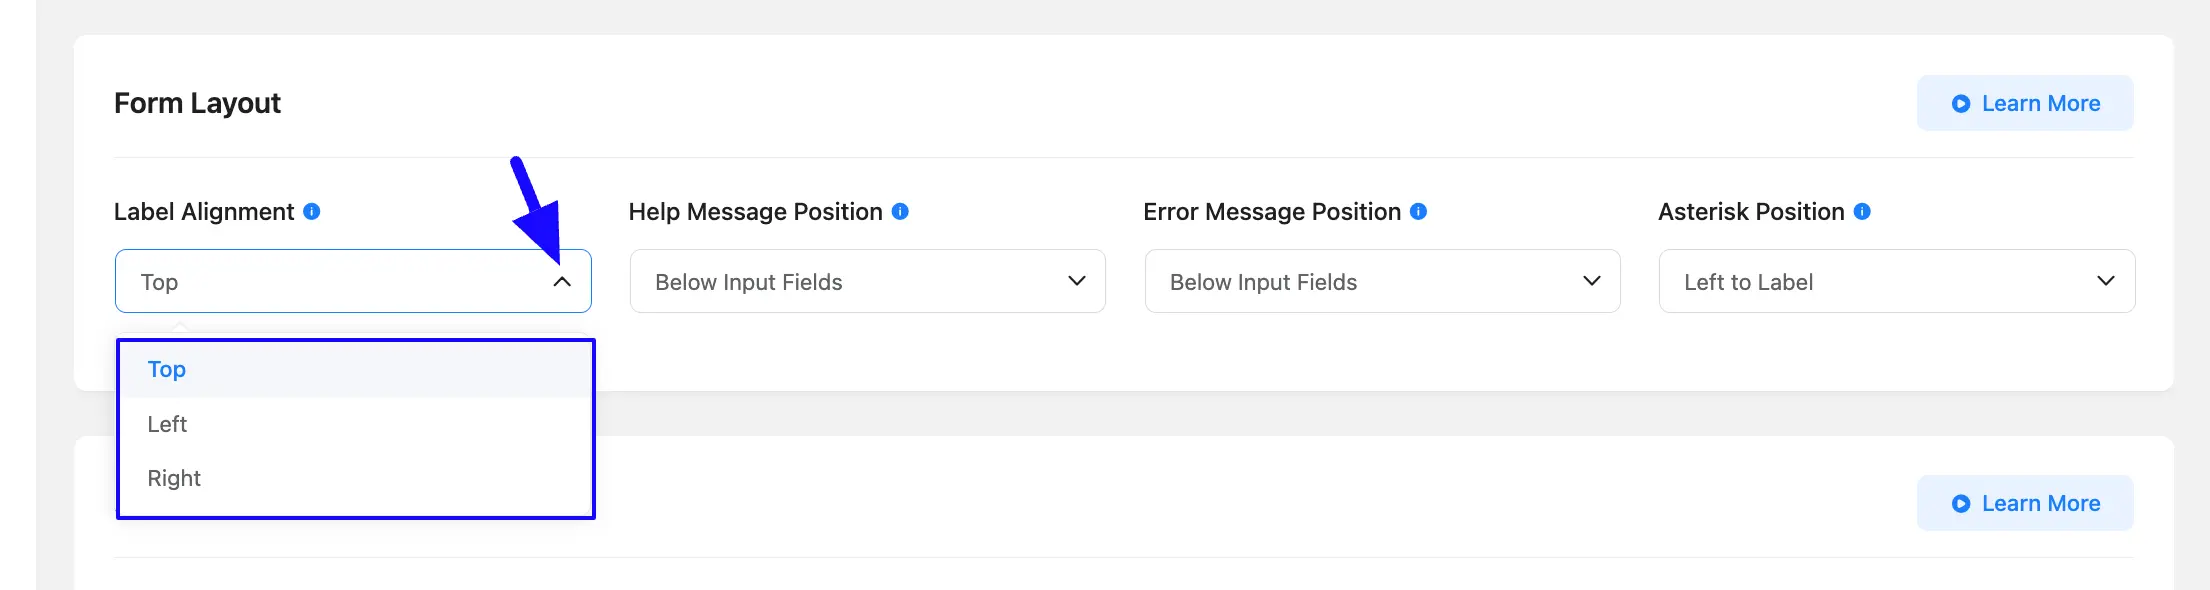
With this option, you can define the alignment position for the Label of your Input Fields.
Clicking the Arrow Icon will provide three options for setting the Placement of the Field Label. These are:
- Top: Select this option to align the label’s position to the top/above the input field.
- Left: Choose this option to set the label’s placement to the left of an input field.
- Right: Choose this to set the label’s placement to the right of an input field.
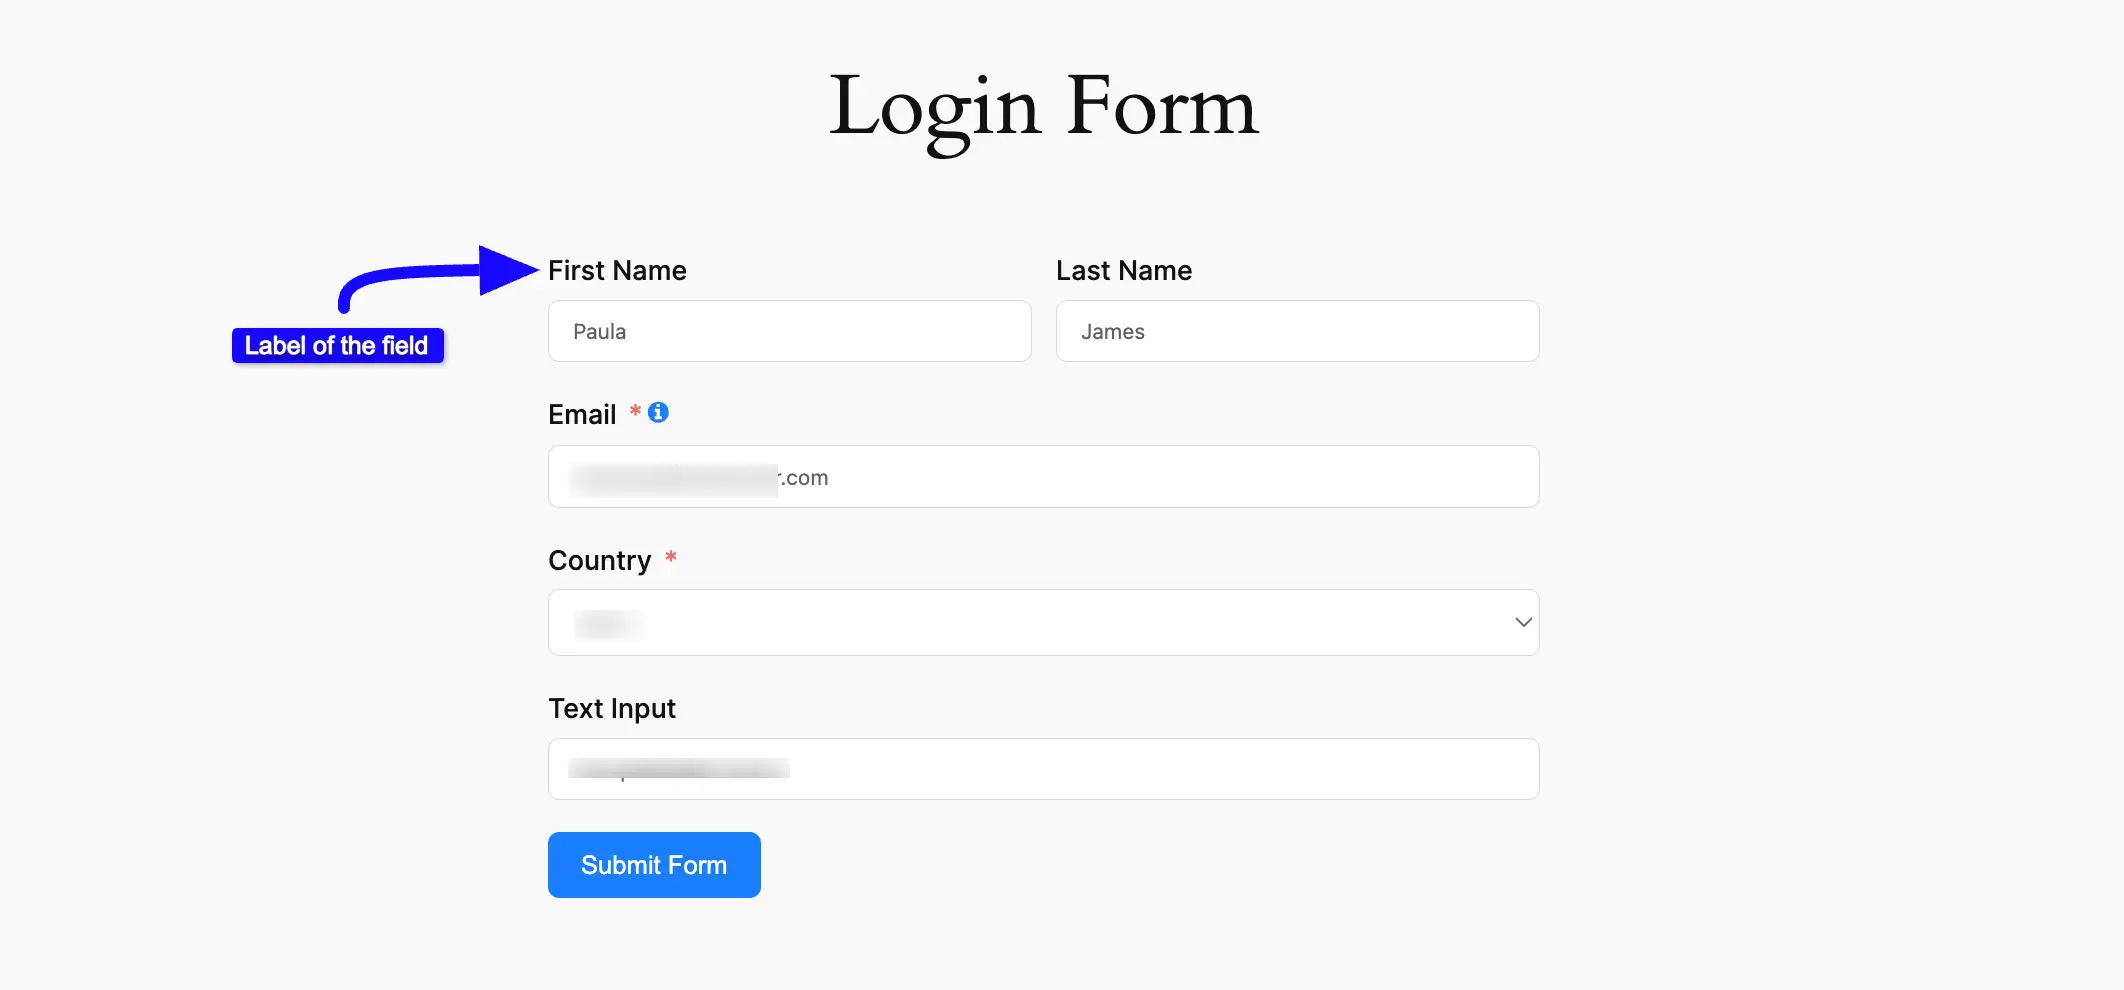
For example, I selected the “Top” alignment for the input fields. You can see that all the Field Labels are placed on the top of the fields.
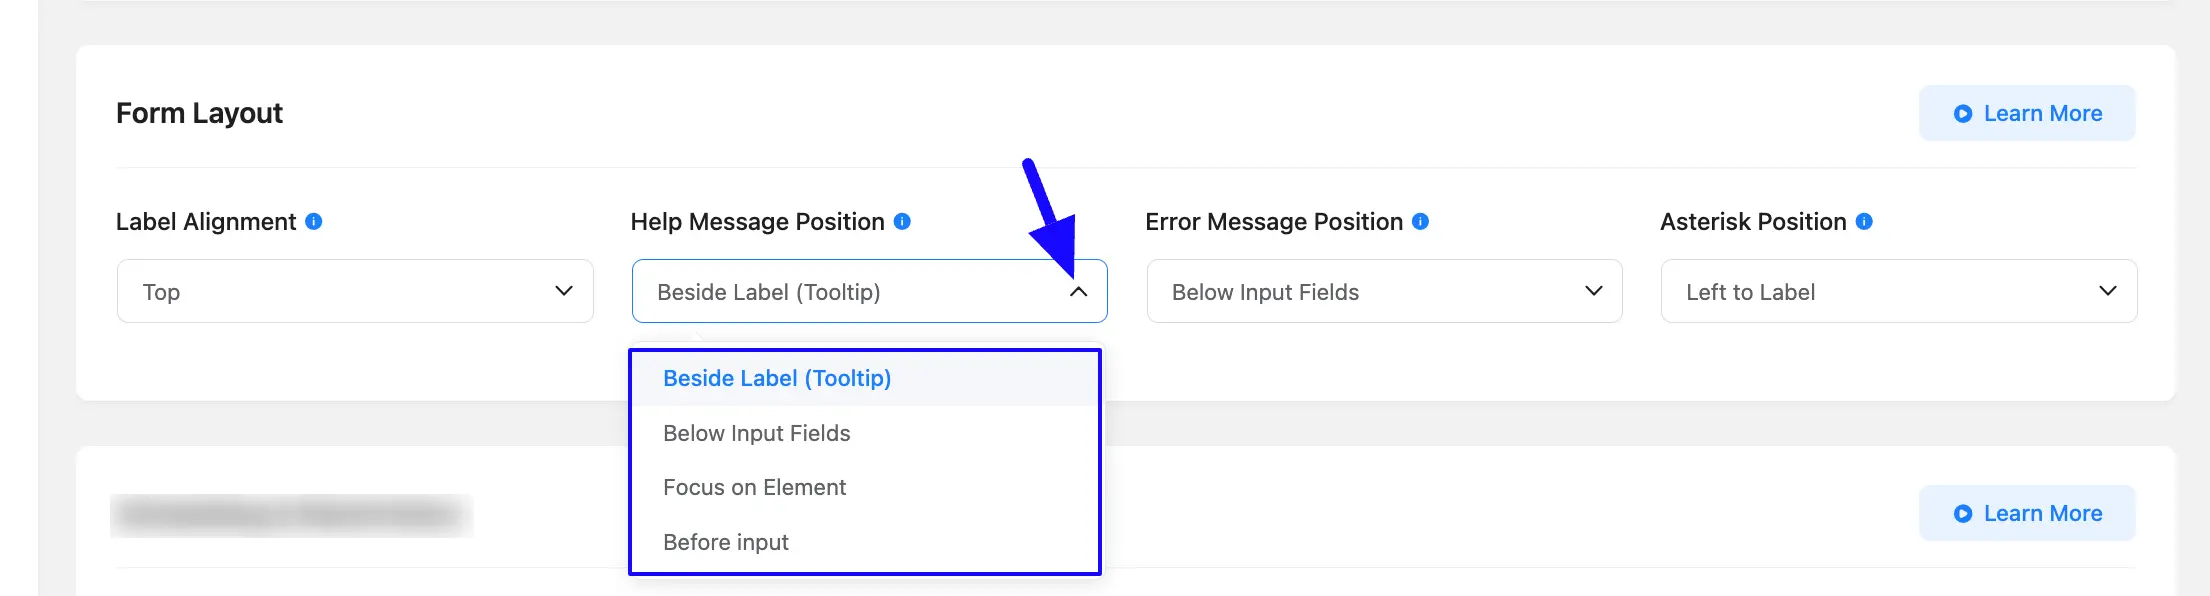
2. Help Message Position #
With this option, you can define the Placement for the Help Message of your Input Fields.
Clicking the Arrow Icon will provide four options for setting the Placement of the Help Message. These are:
- Beside Label (Tooltip): Select this option to align the Help Message’s position right next to the Field Label as a Tooltip.
- Below Input Fields: Choose this option to set the Help Message’s placement below the input field.
- Focus on Element: Choose this to set the label’s placement to the right of an input field.
- Before input: Choose this to set the Help Message’s placement before the input field.
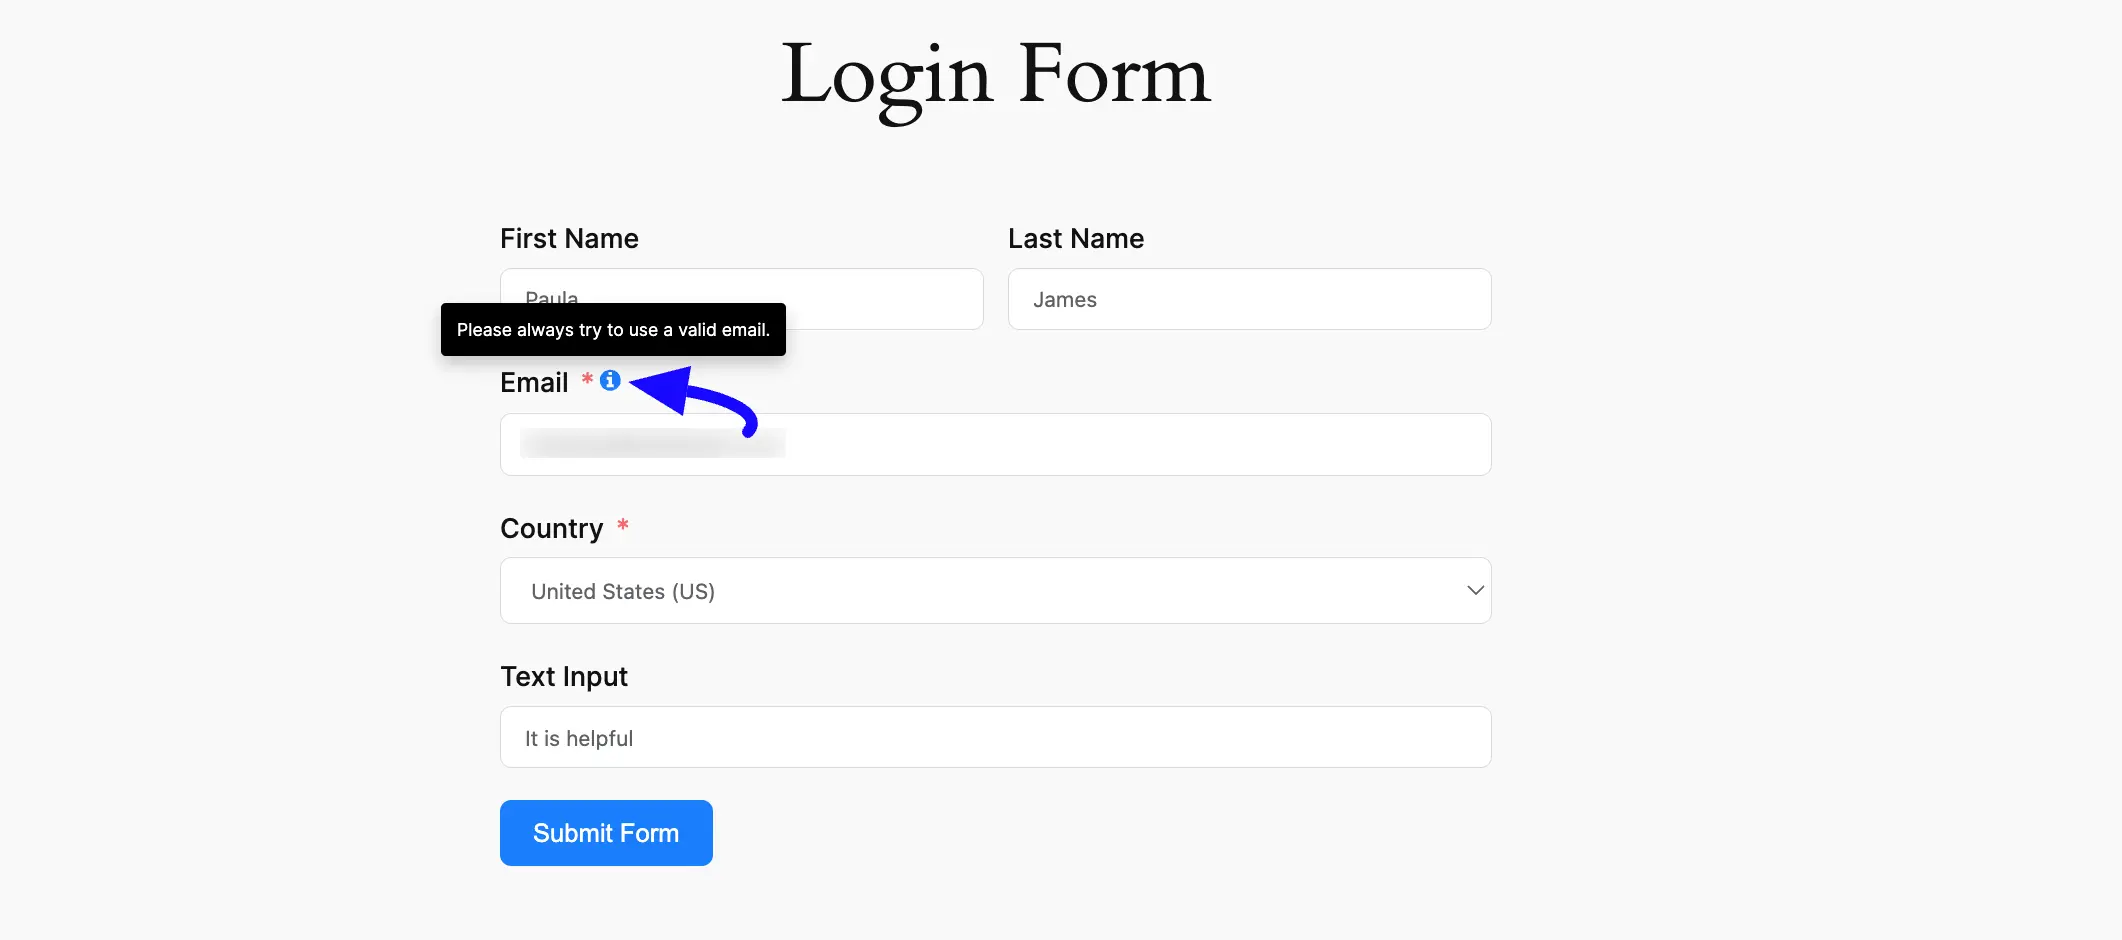
For example, I selected the “Beside Label (Tooltip)” position for the Help Message.
You can see that the Help Message of the Email Field is placed beside the Field Label as a Tooltip.
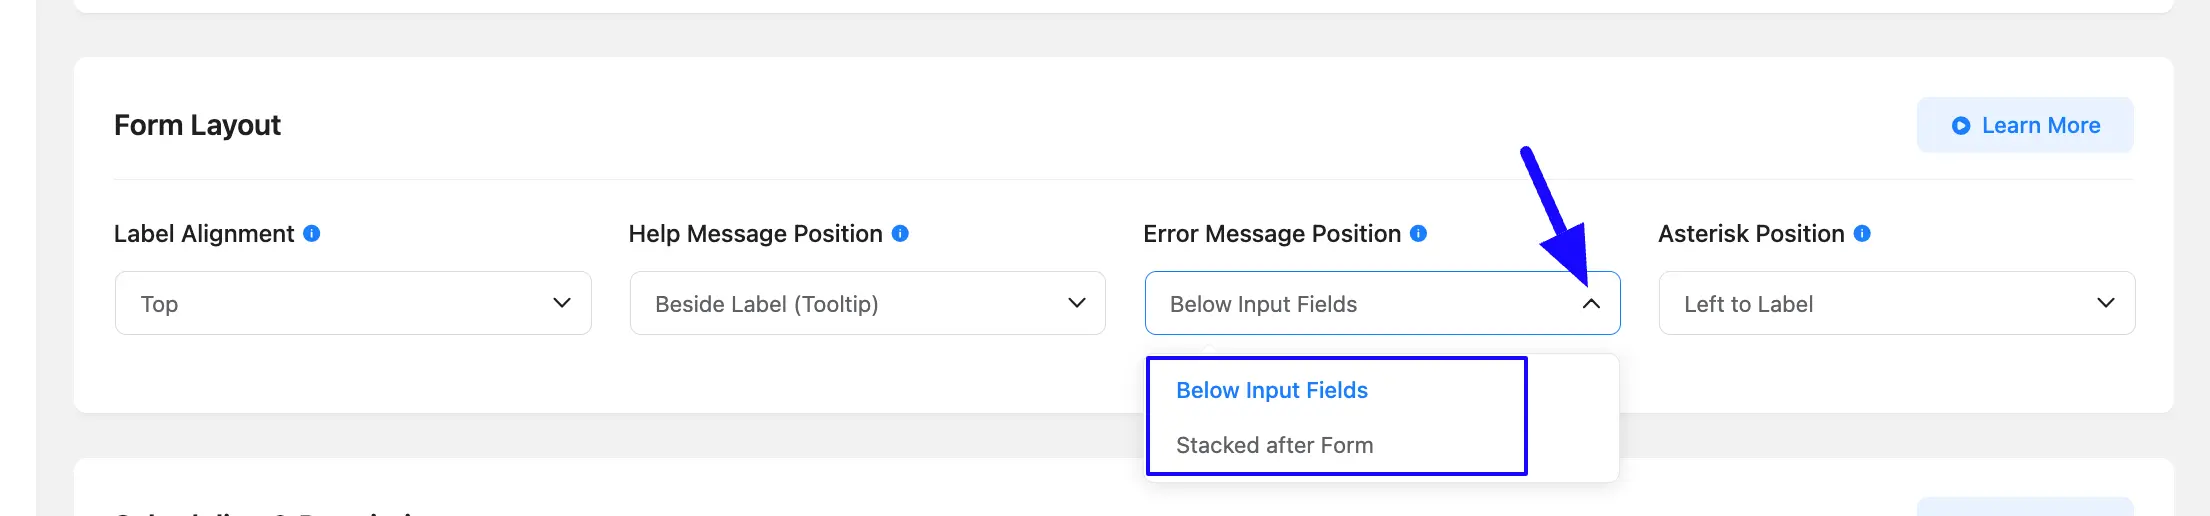
3. Error Message Position #
With this option, you can define the Placement for the Error Message of your Input Fields.
Clicking the Arrow Icon will provide two options for setting the Placement of the Error Message. These are:
- Below Input Fields: Choose this option to place the Error Message below the input fields.
- Stacked after Form: Choose this option to place the Error Message stacked after the form submit button.
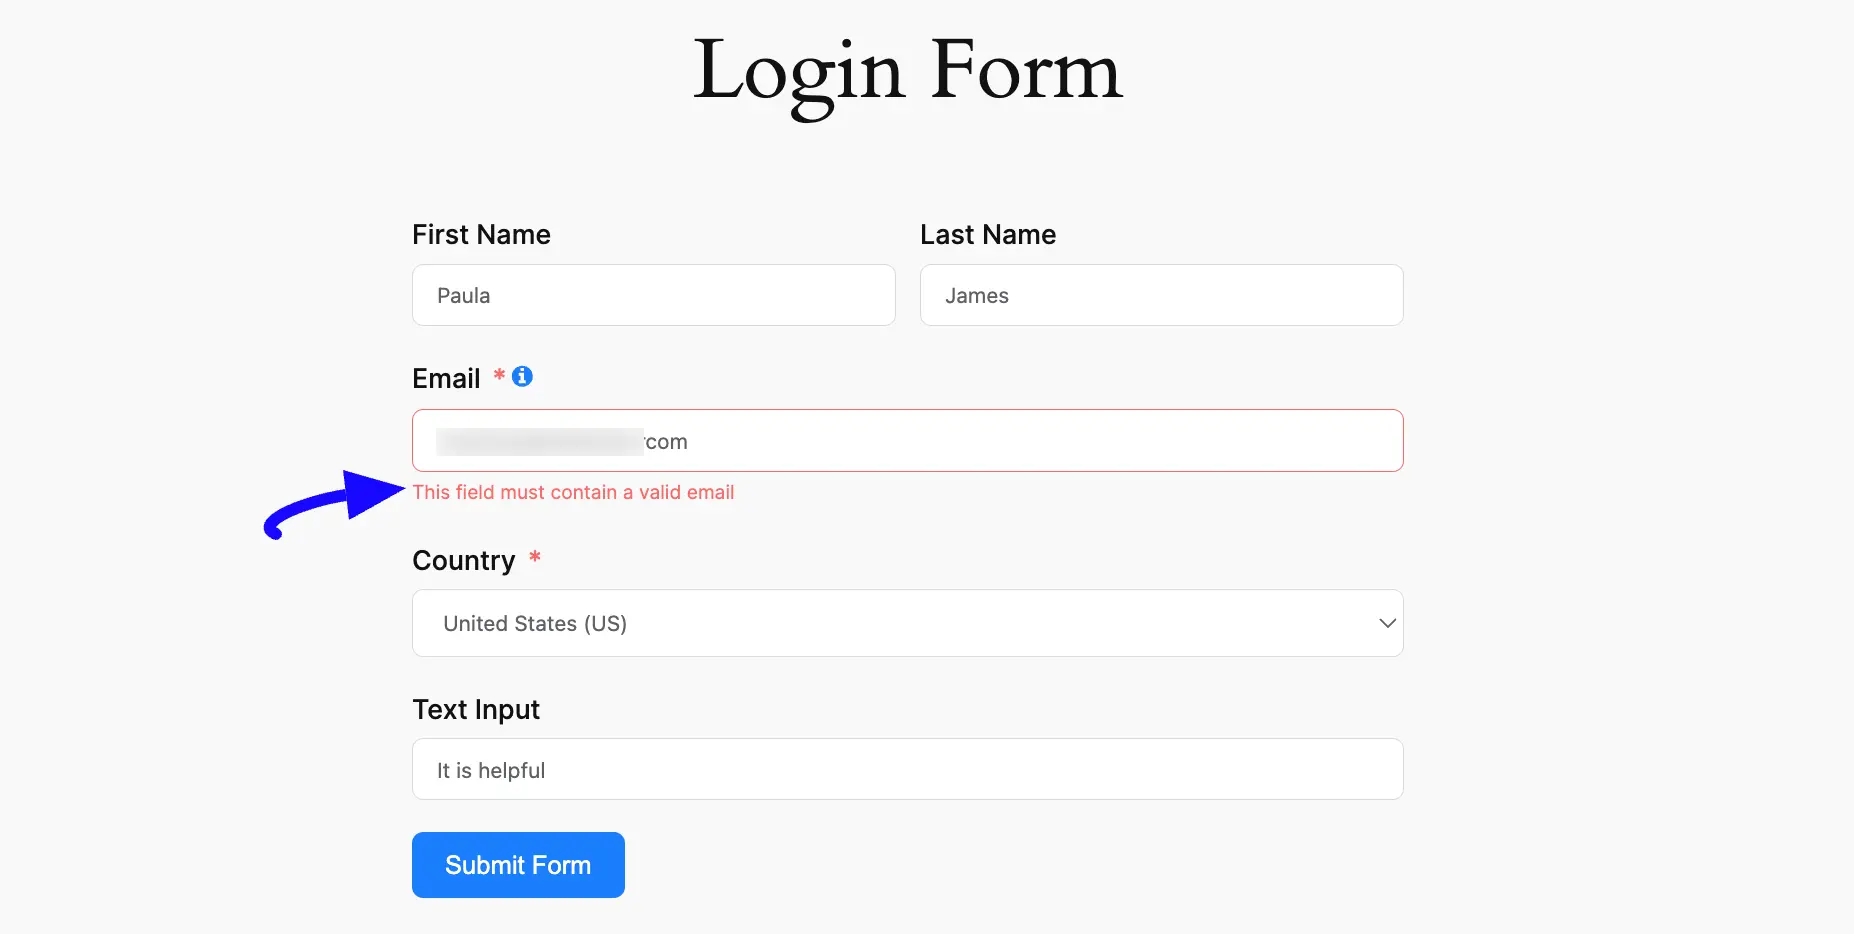
For example, I selected the “Below input Fields” position for the Error Message.
You can see that the Error Message is displayed below the Email Field due to an invalid email address.
4. Asterisk Position #
With this option, you can define the Asterisk Marker Position for the Required Input Fields.
Clicking the Arrow Icon will provide three options for setting the Placement of the Asterisk Marker. These are:
- None: Select this option if you don’t want to display Asterisk Marker for the required input fields.
- Left to Label: Choose this option to place the Asterisk Marker to the left of the Required Field Labels.
- Right to Label: Choose this option to place the Asterisk Marker to the right of the Required Field Labels.
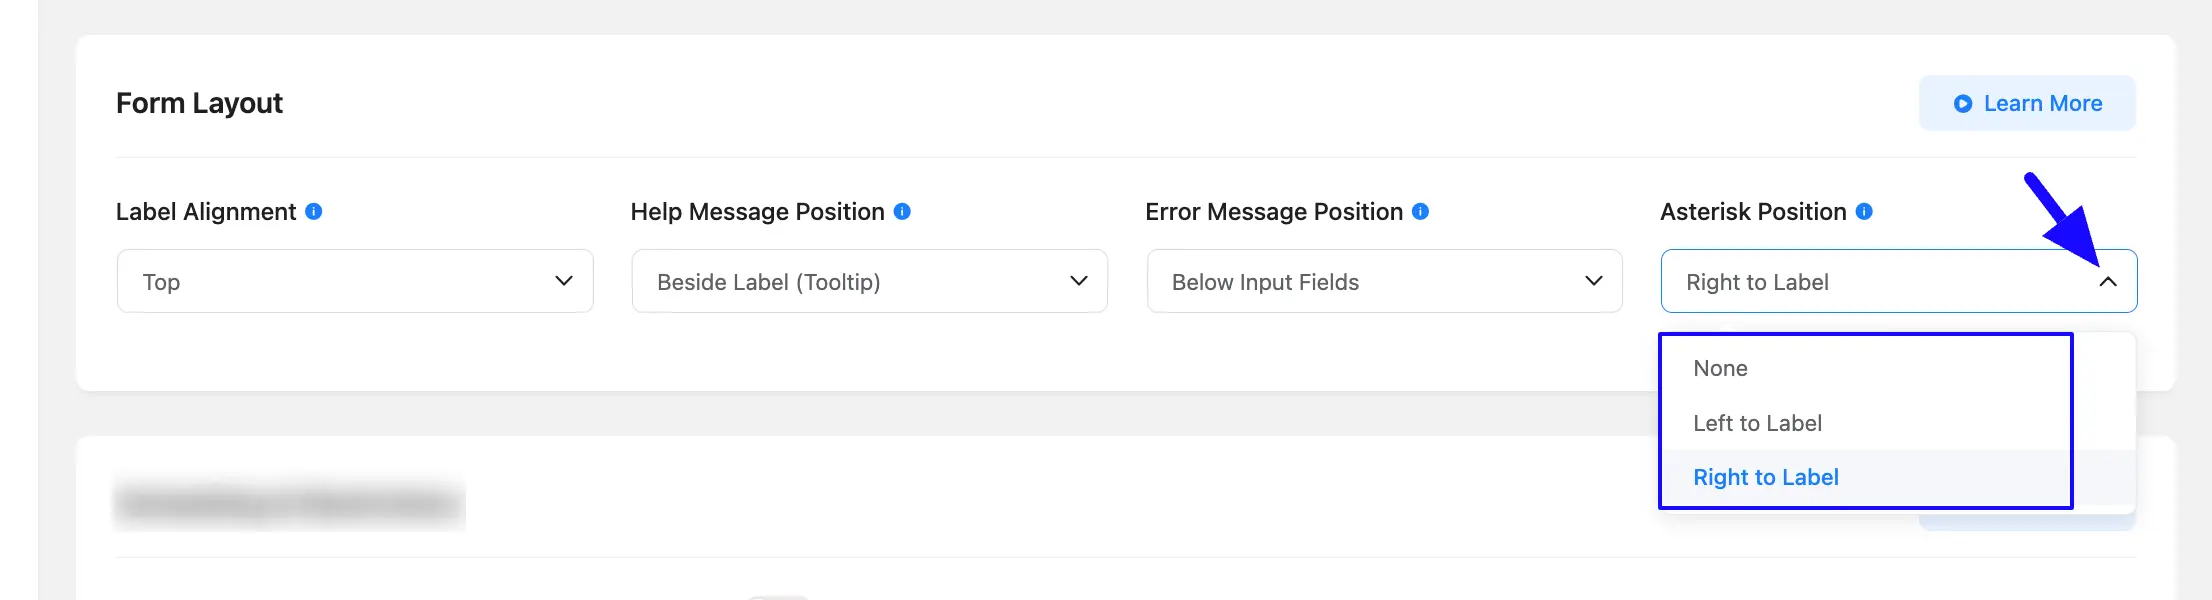
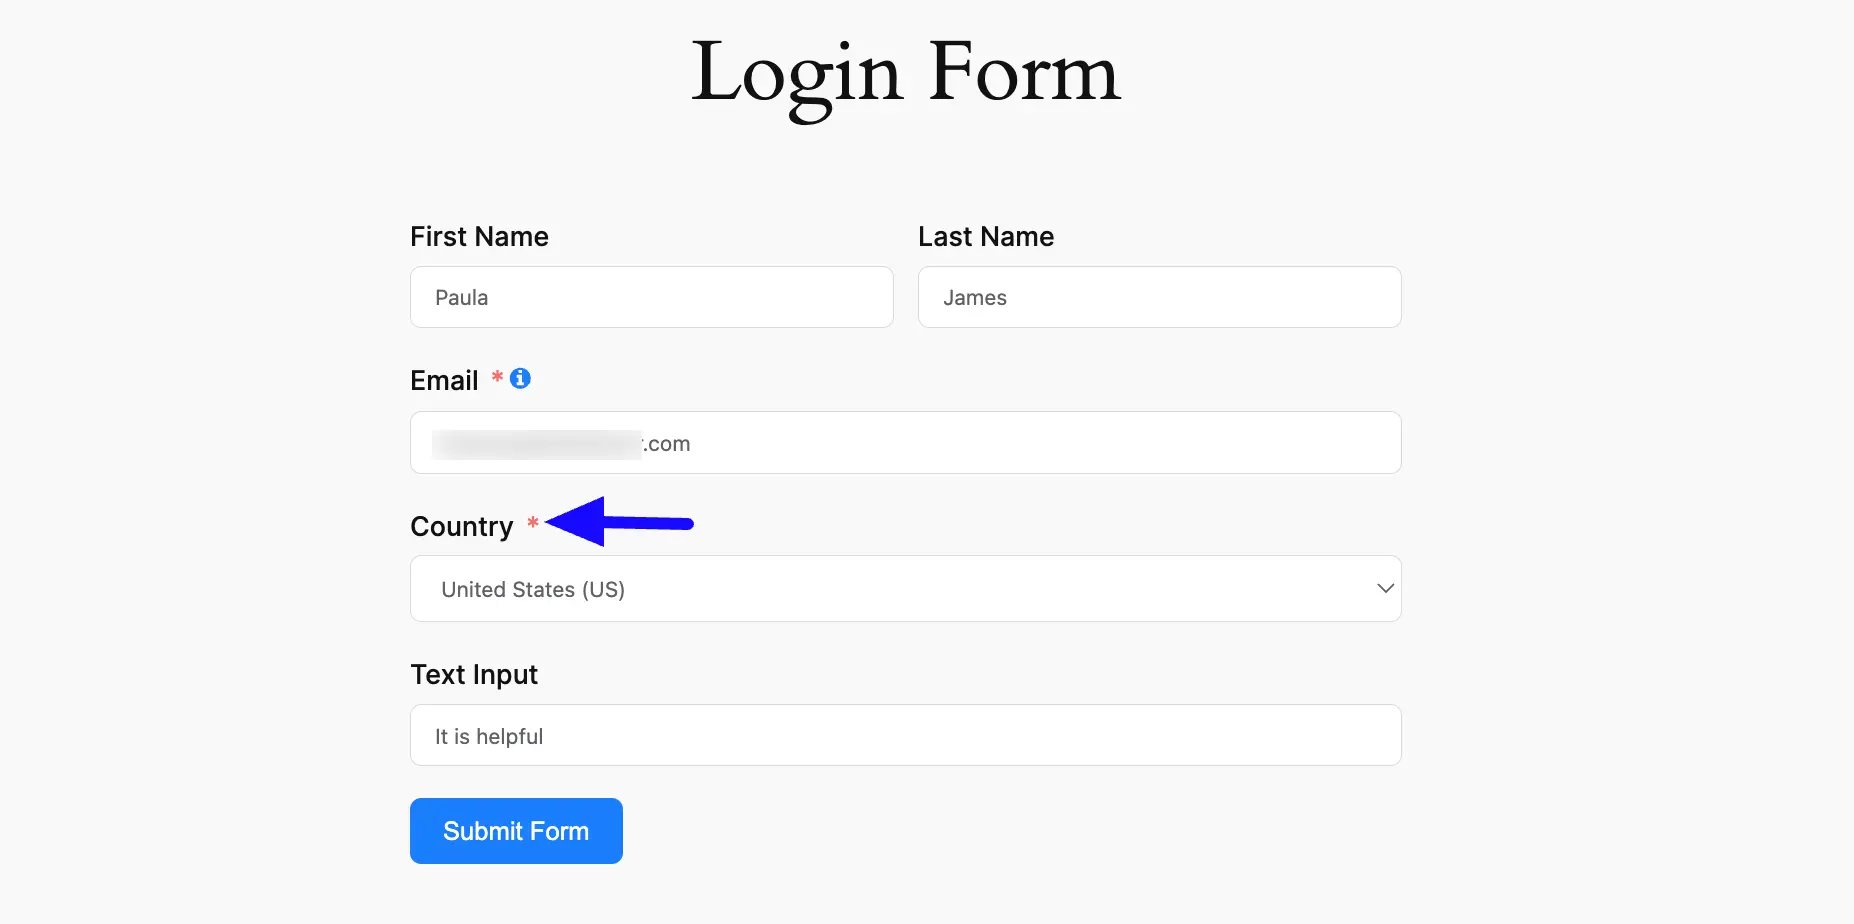
For example, I selected the “Right to Label” position for the Asterisk.
You can see that the Asterisk ( * ) is displayed right next to the Required Fields (e.g., Email and Country as both are the required fields ).
If you have any further questions, concerns, or suggestions, please do not hesitate to contact our support team.


