FluentCRM is a self-hosted Email Marketing Automation Plugin for WordPress. Manage your leads and customers, email campaigns, automated email sequencing, monitor user activities, and many more in one place!
FluentCRM’s WebHooks feature allows you to transfer leads collected through Fluent Forms on one domain to FluentCRM on another.
This article will show you how to collect leads of Fluent Forms from one domain with FluentCRM to another domain.
Create a WebHook in FluentCRM #
If you want to collect user information from one domain to another, you can use FluentCRM’s WebHooks feature. First, navigate to the domain from which you want to transfer the leads.
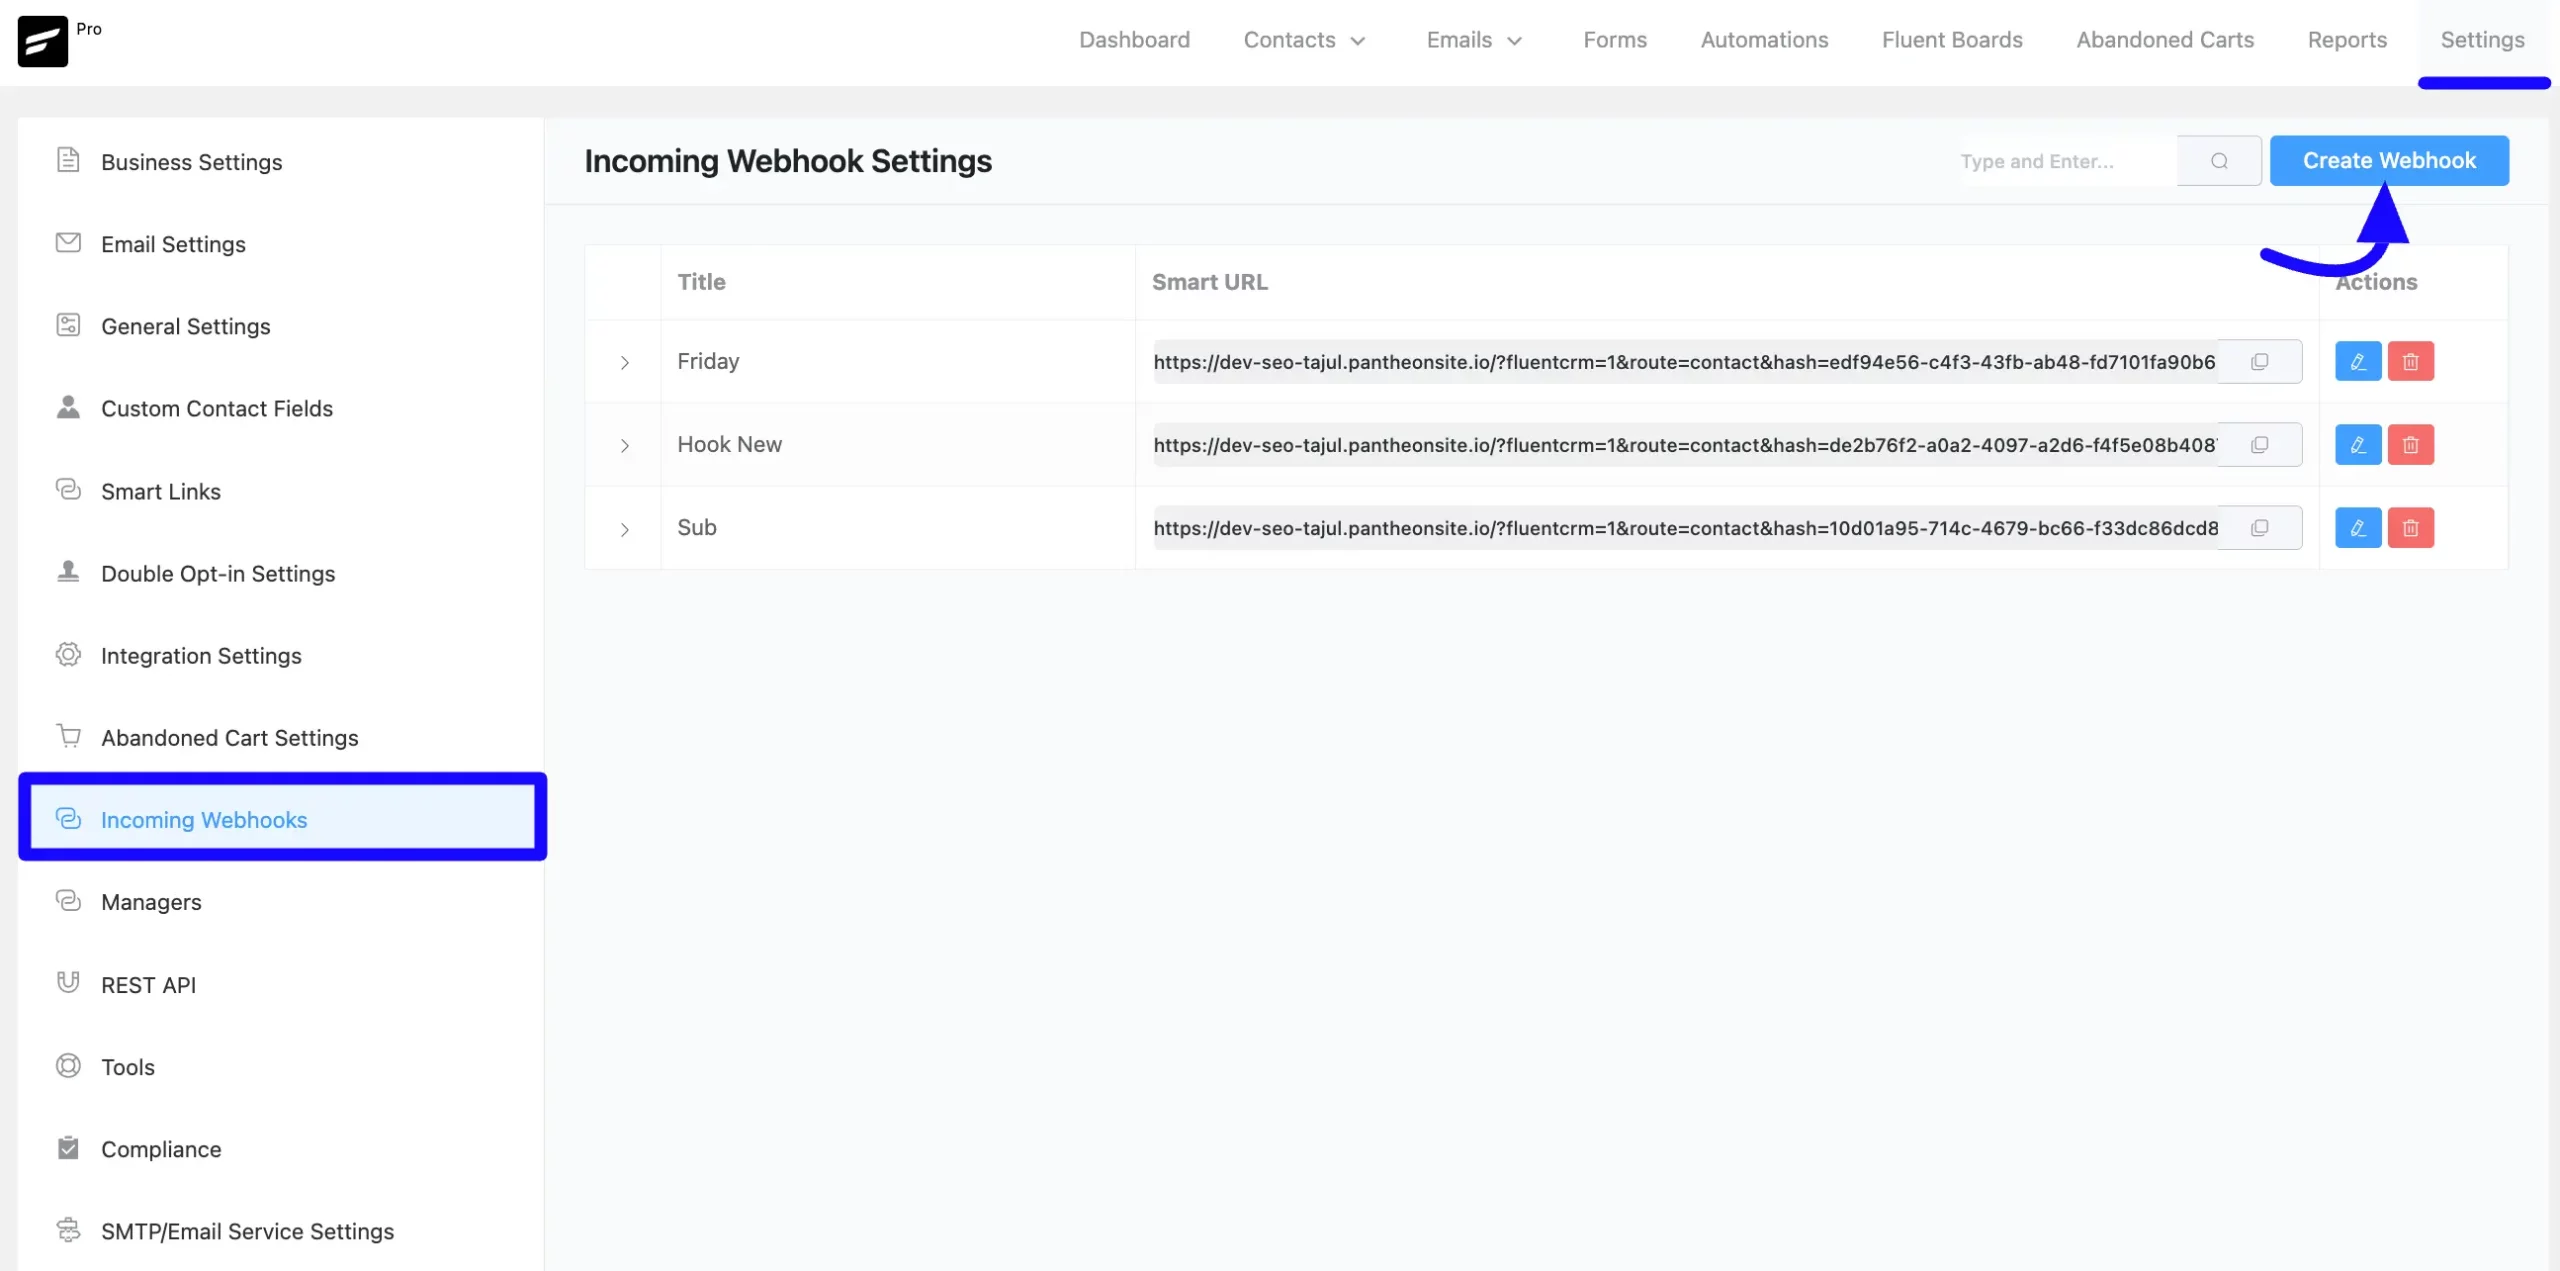
Go to the FluentCRM dashboard of the domain where FluentCRM is installed. Now, navigate to Settings sections and click the Incoming WebHooks options.
Then click on Create Webhook to make a new WebHook.
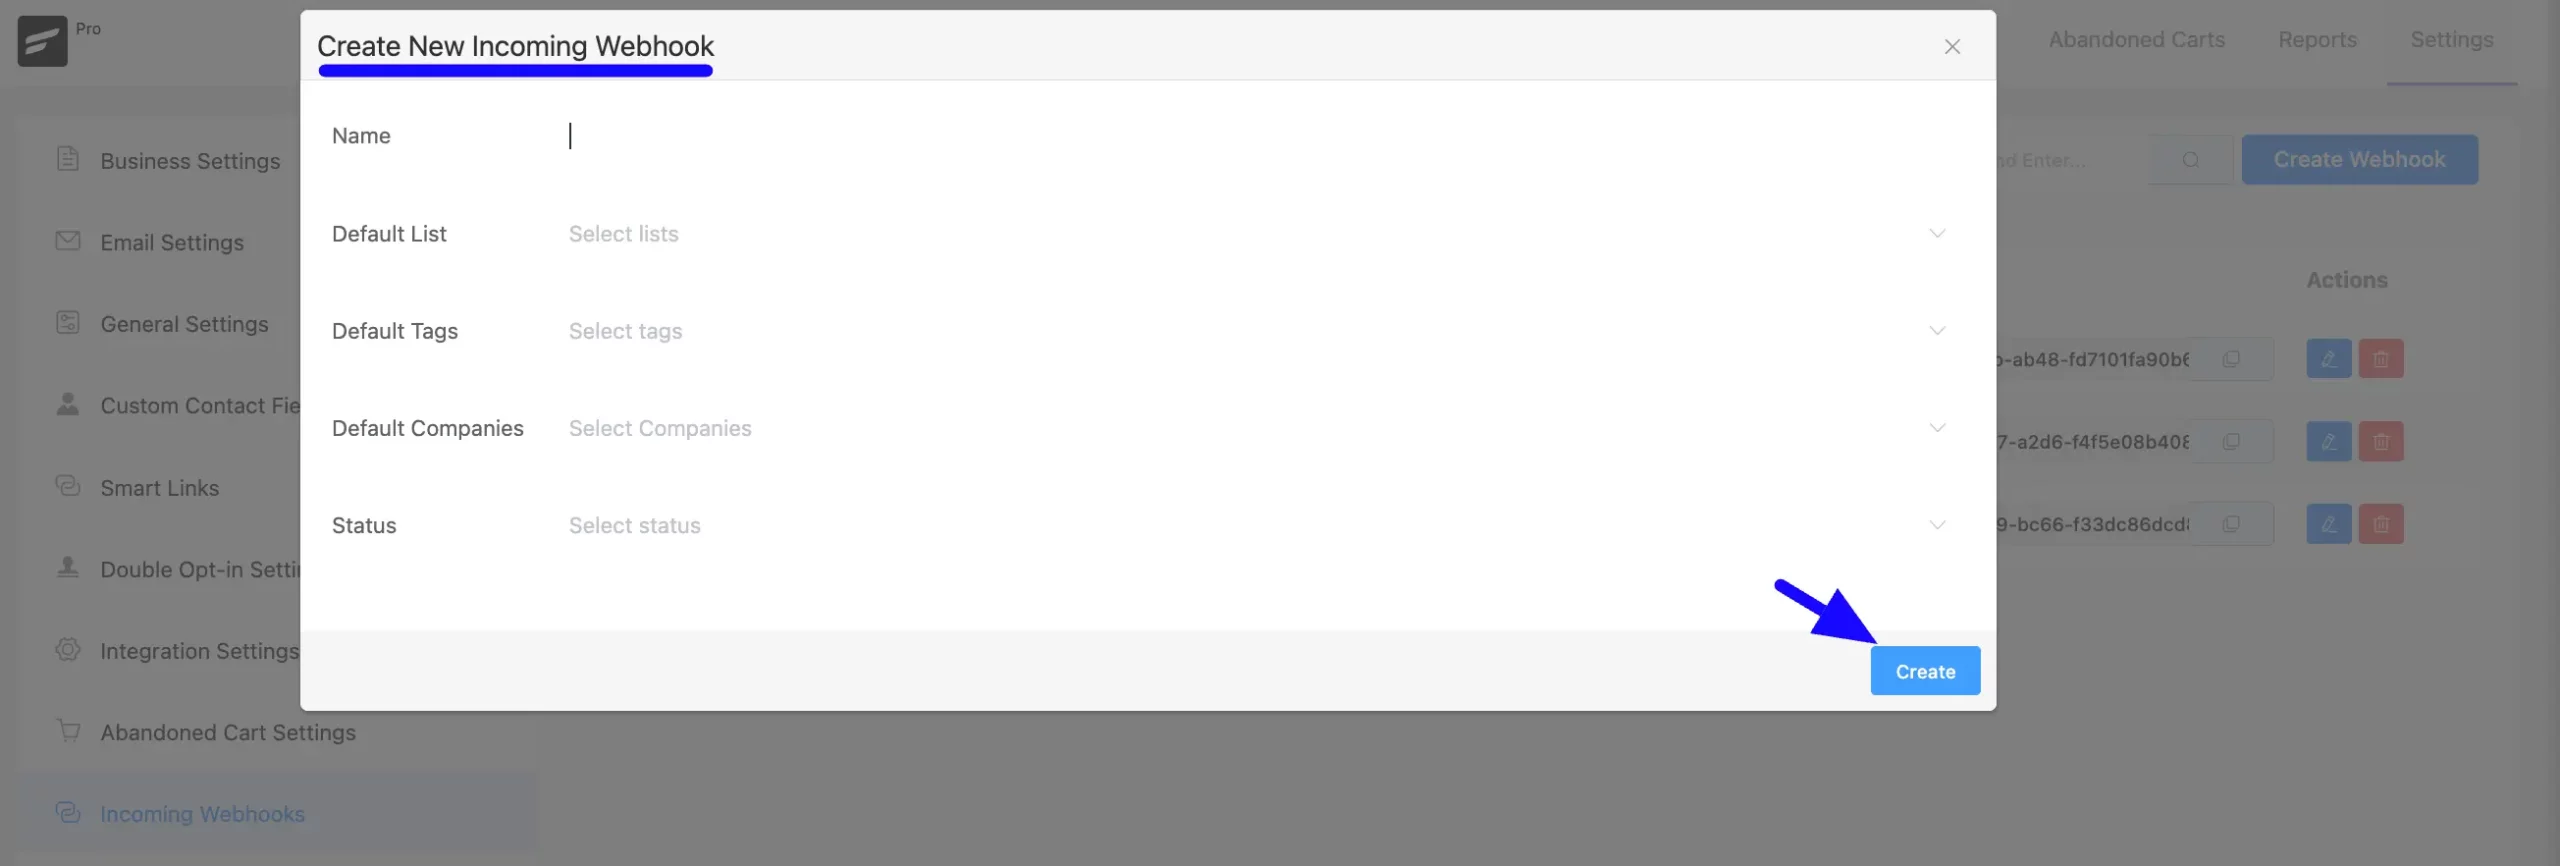
A popup will appear. Now you will fill in the fields details-
- Name: Assign a descriptive name for the WebHook.
- List: Select a subscriber list where the leads will be added.
- Tags: Assign tags to categorize these leads.
- Status: Set the WebHook status to Active.
After That, click on the Create button like the example given below. This is how the WebHook gets generated.
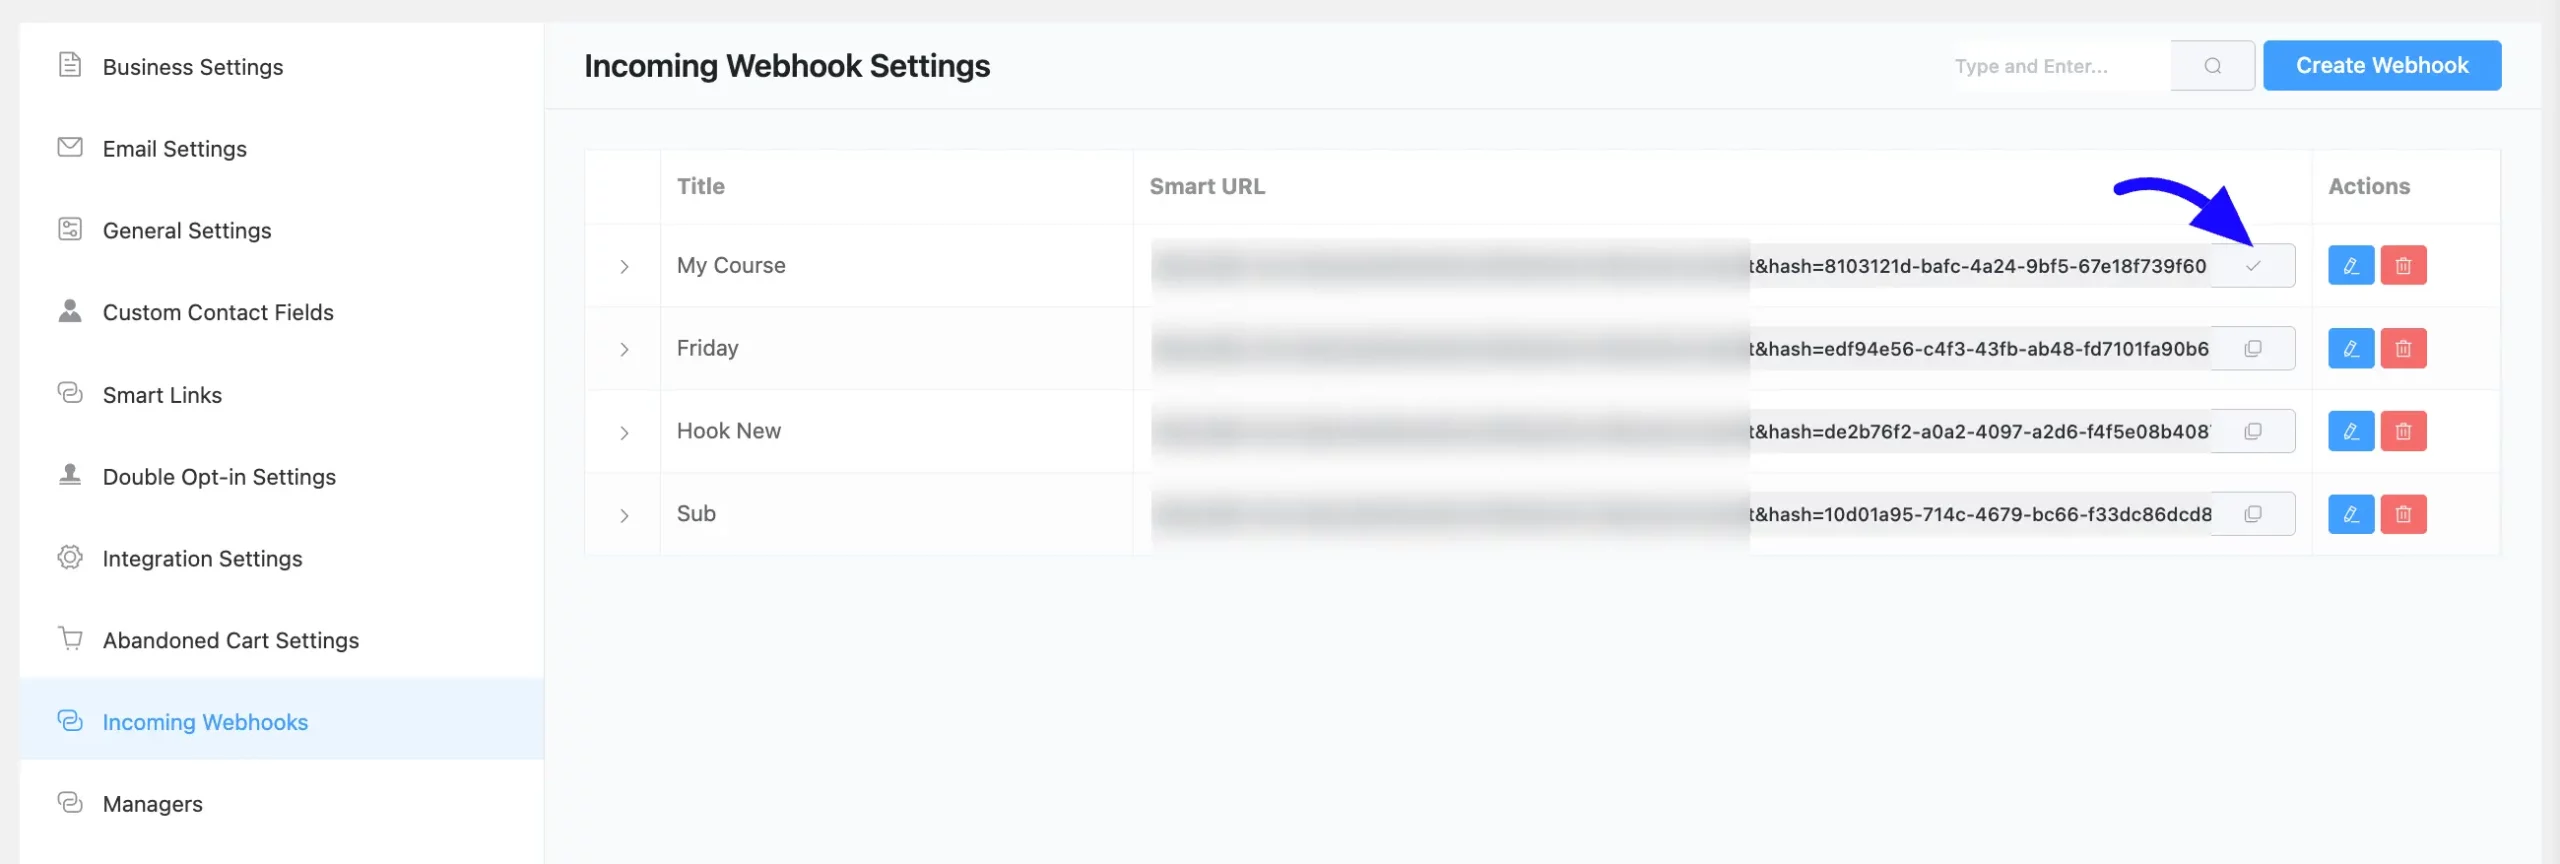
After creation, copy the WebHook URL. This will be used to link Fluent Forms to FluentCRM.
Set Up Fluent Forms on the Source Domain #
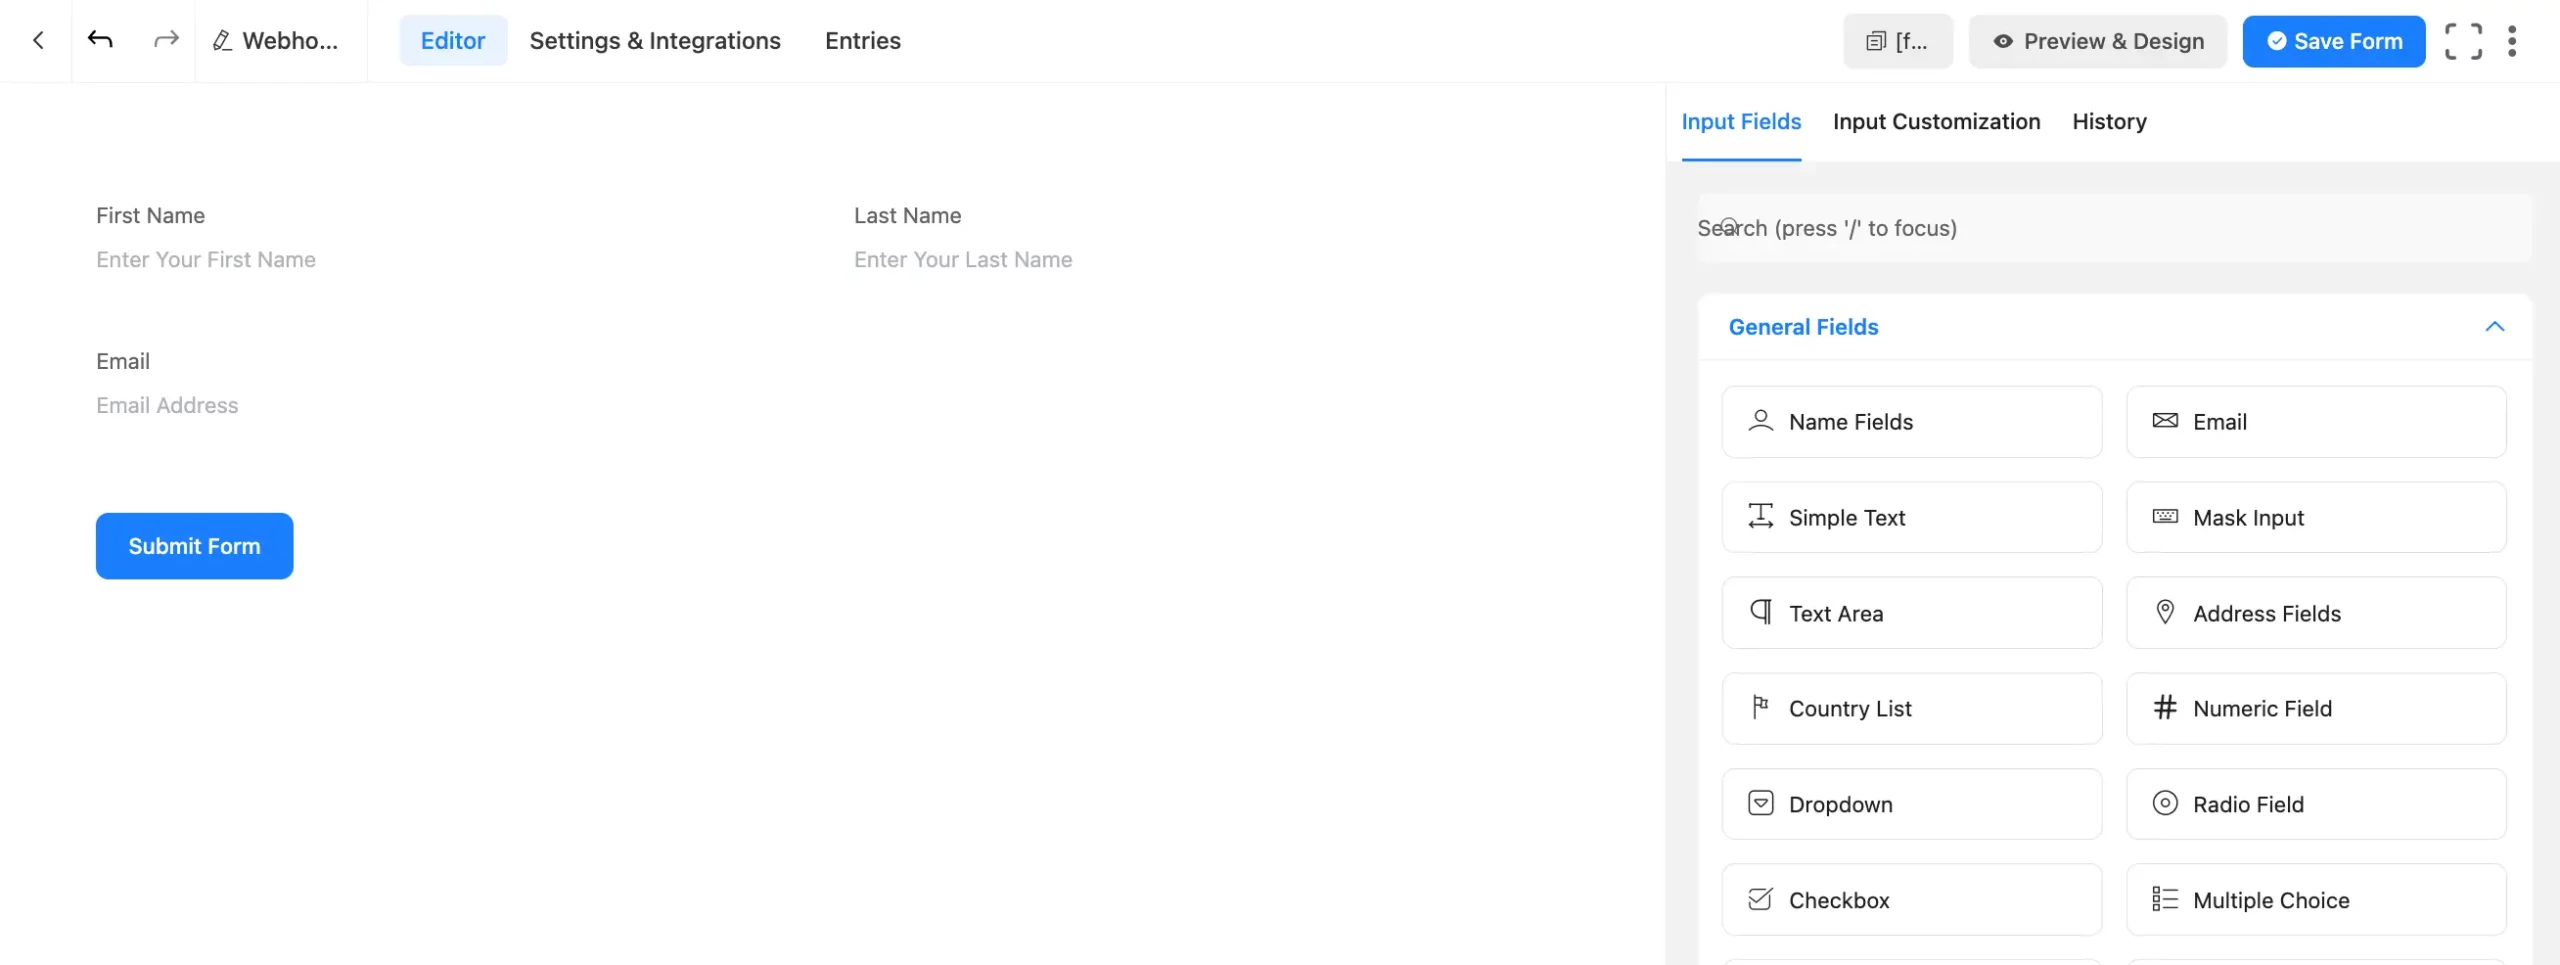
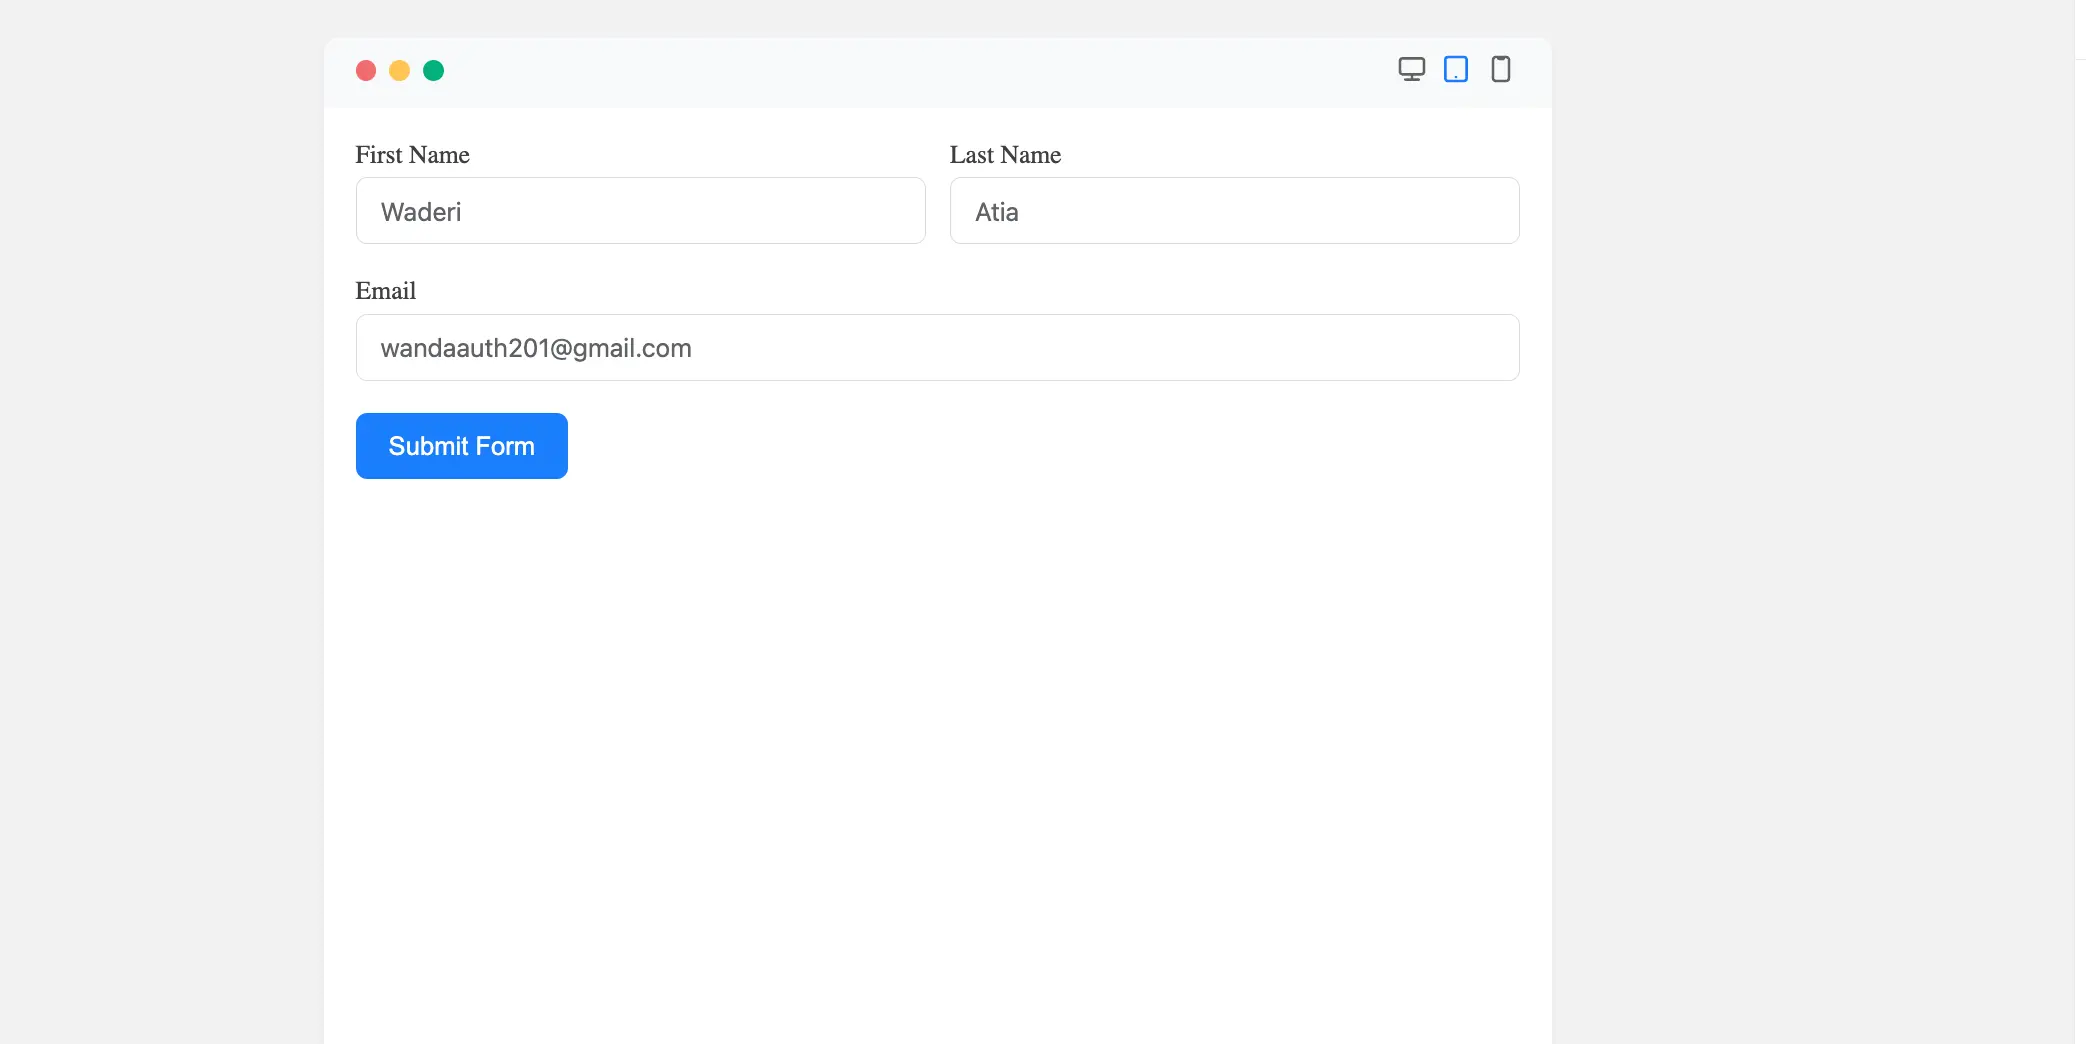
Now, go to the Fluent Forms dashboard on the domain where the forms are installed. Create a new form or use an existing one with fields like Name and Email.
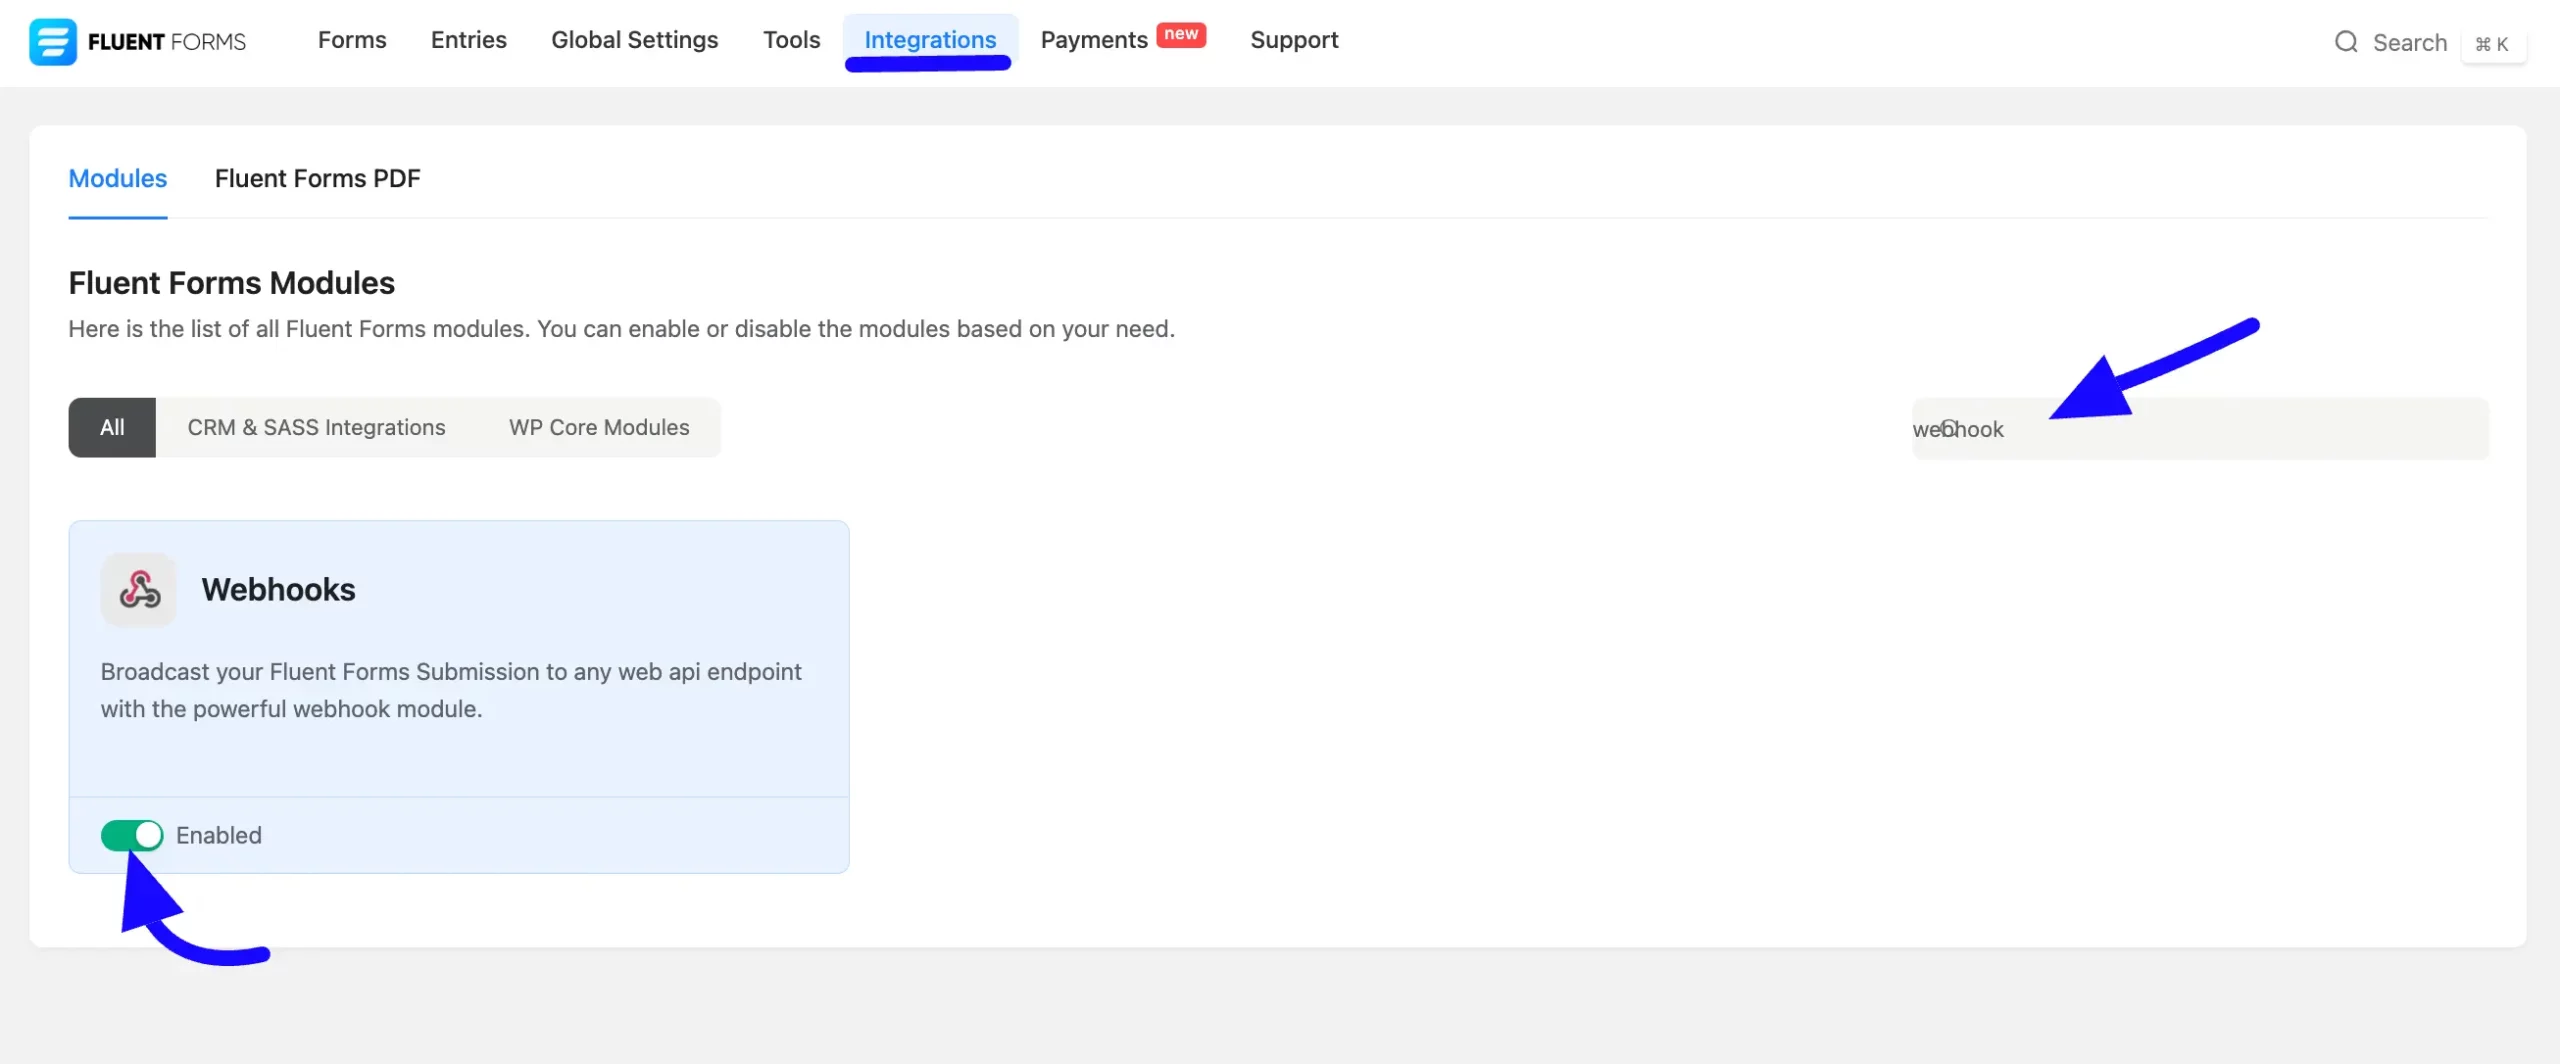
Then, go to Integrations from the Fluent Forms Navbar, search for Webhook in the search bar, and download the Webhook integration module.
Now, turn on the Toggle to enable the Webhook module.
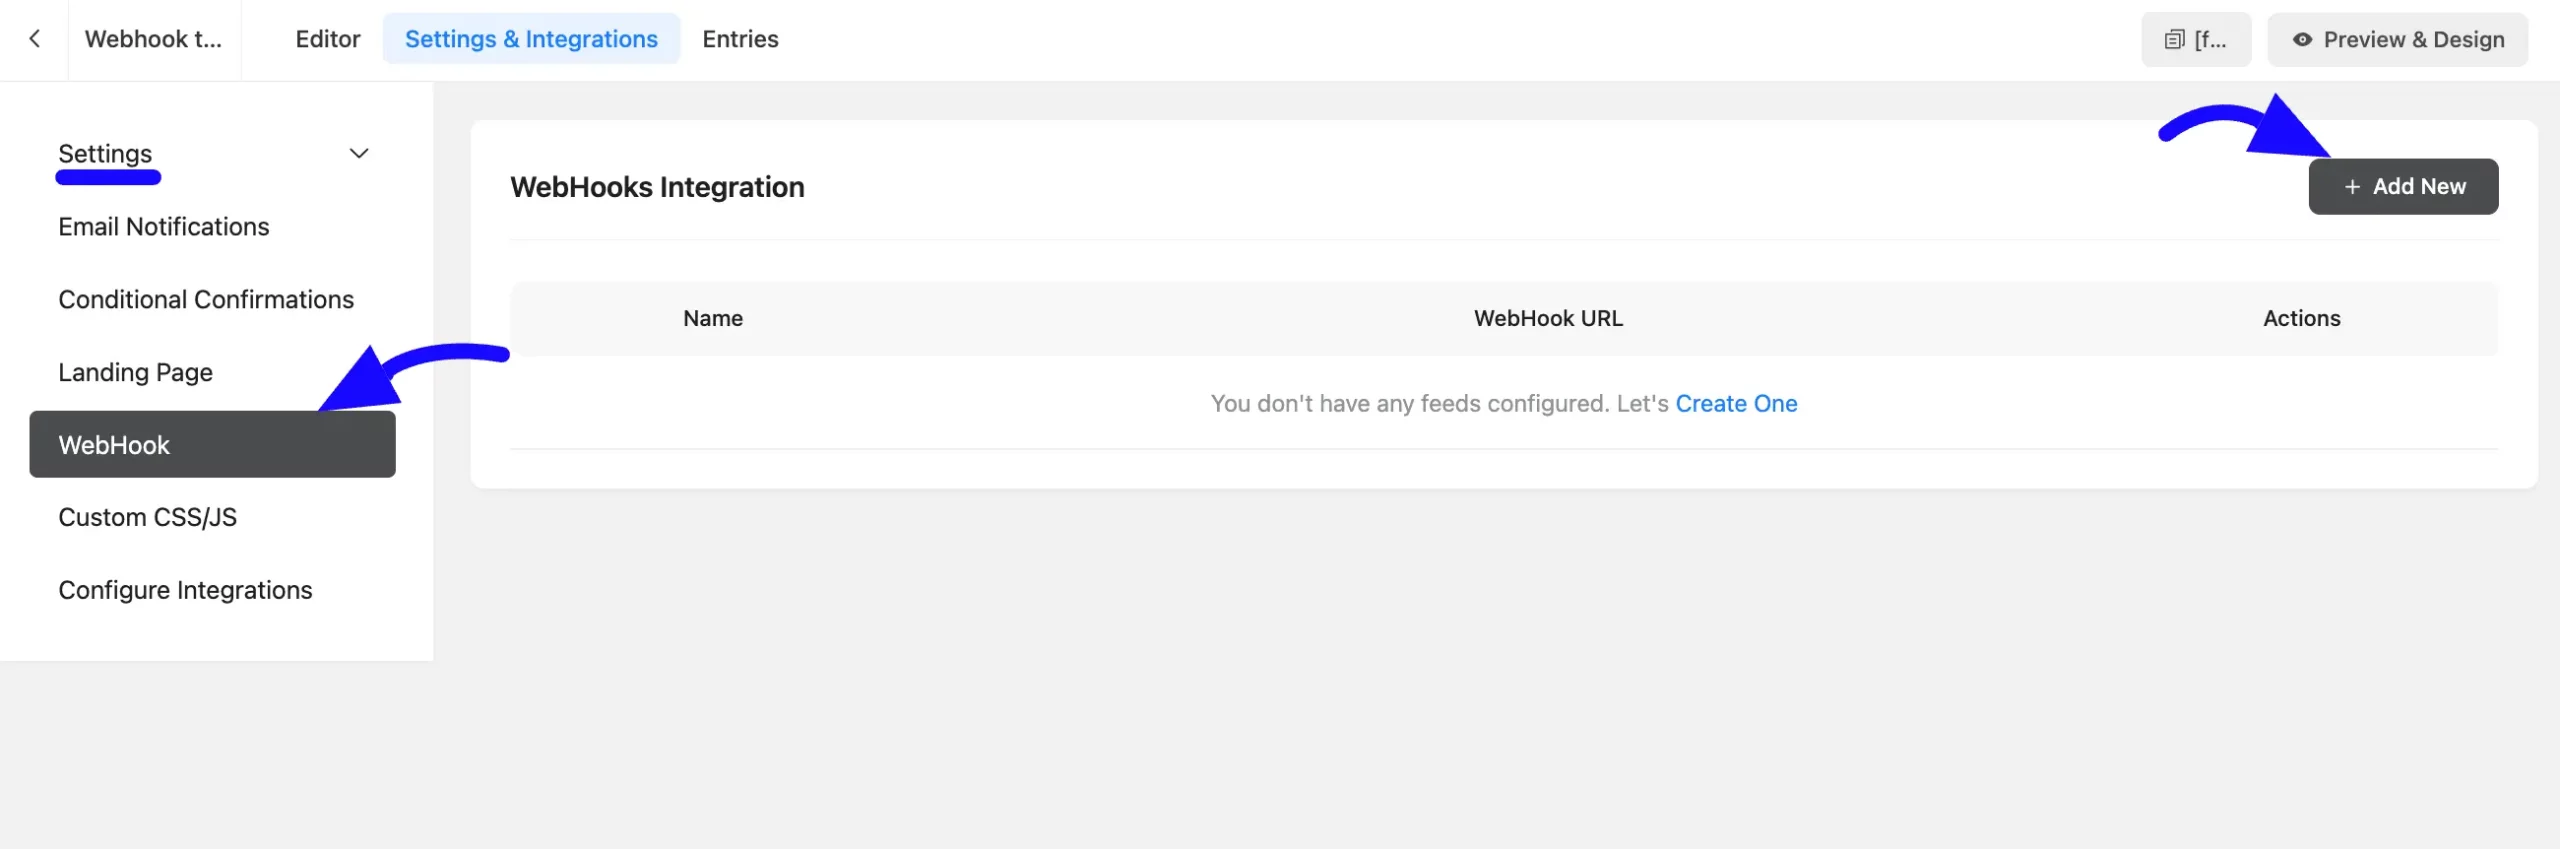
Now, go back to the form you’ve created. To configure the WebHook Integration, click the Webhook options from the forms Settings tab. Next, click the Add New button to set up a new Webhook feed.
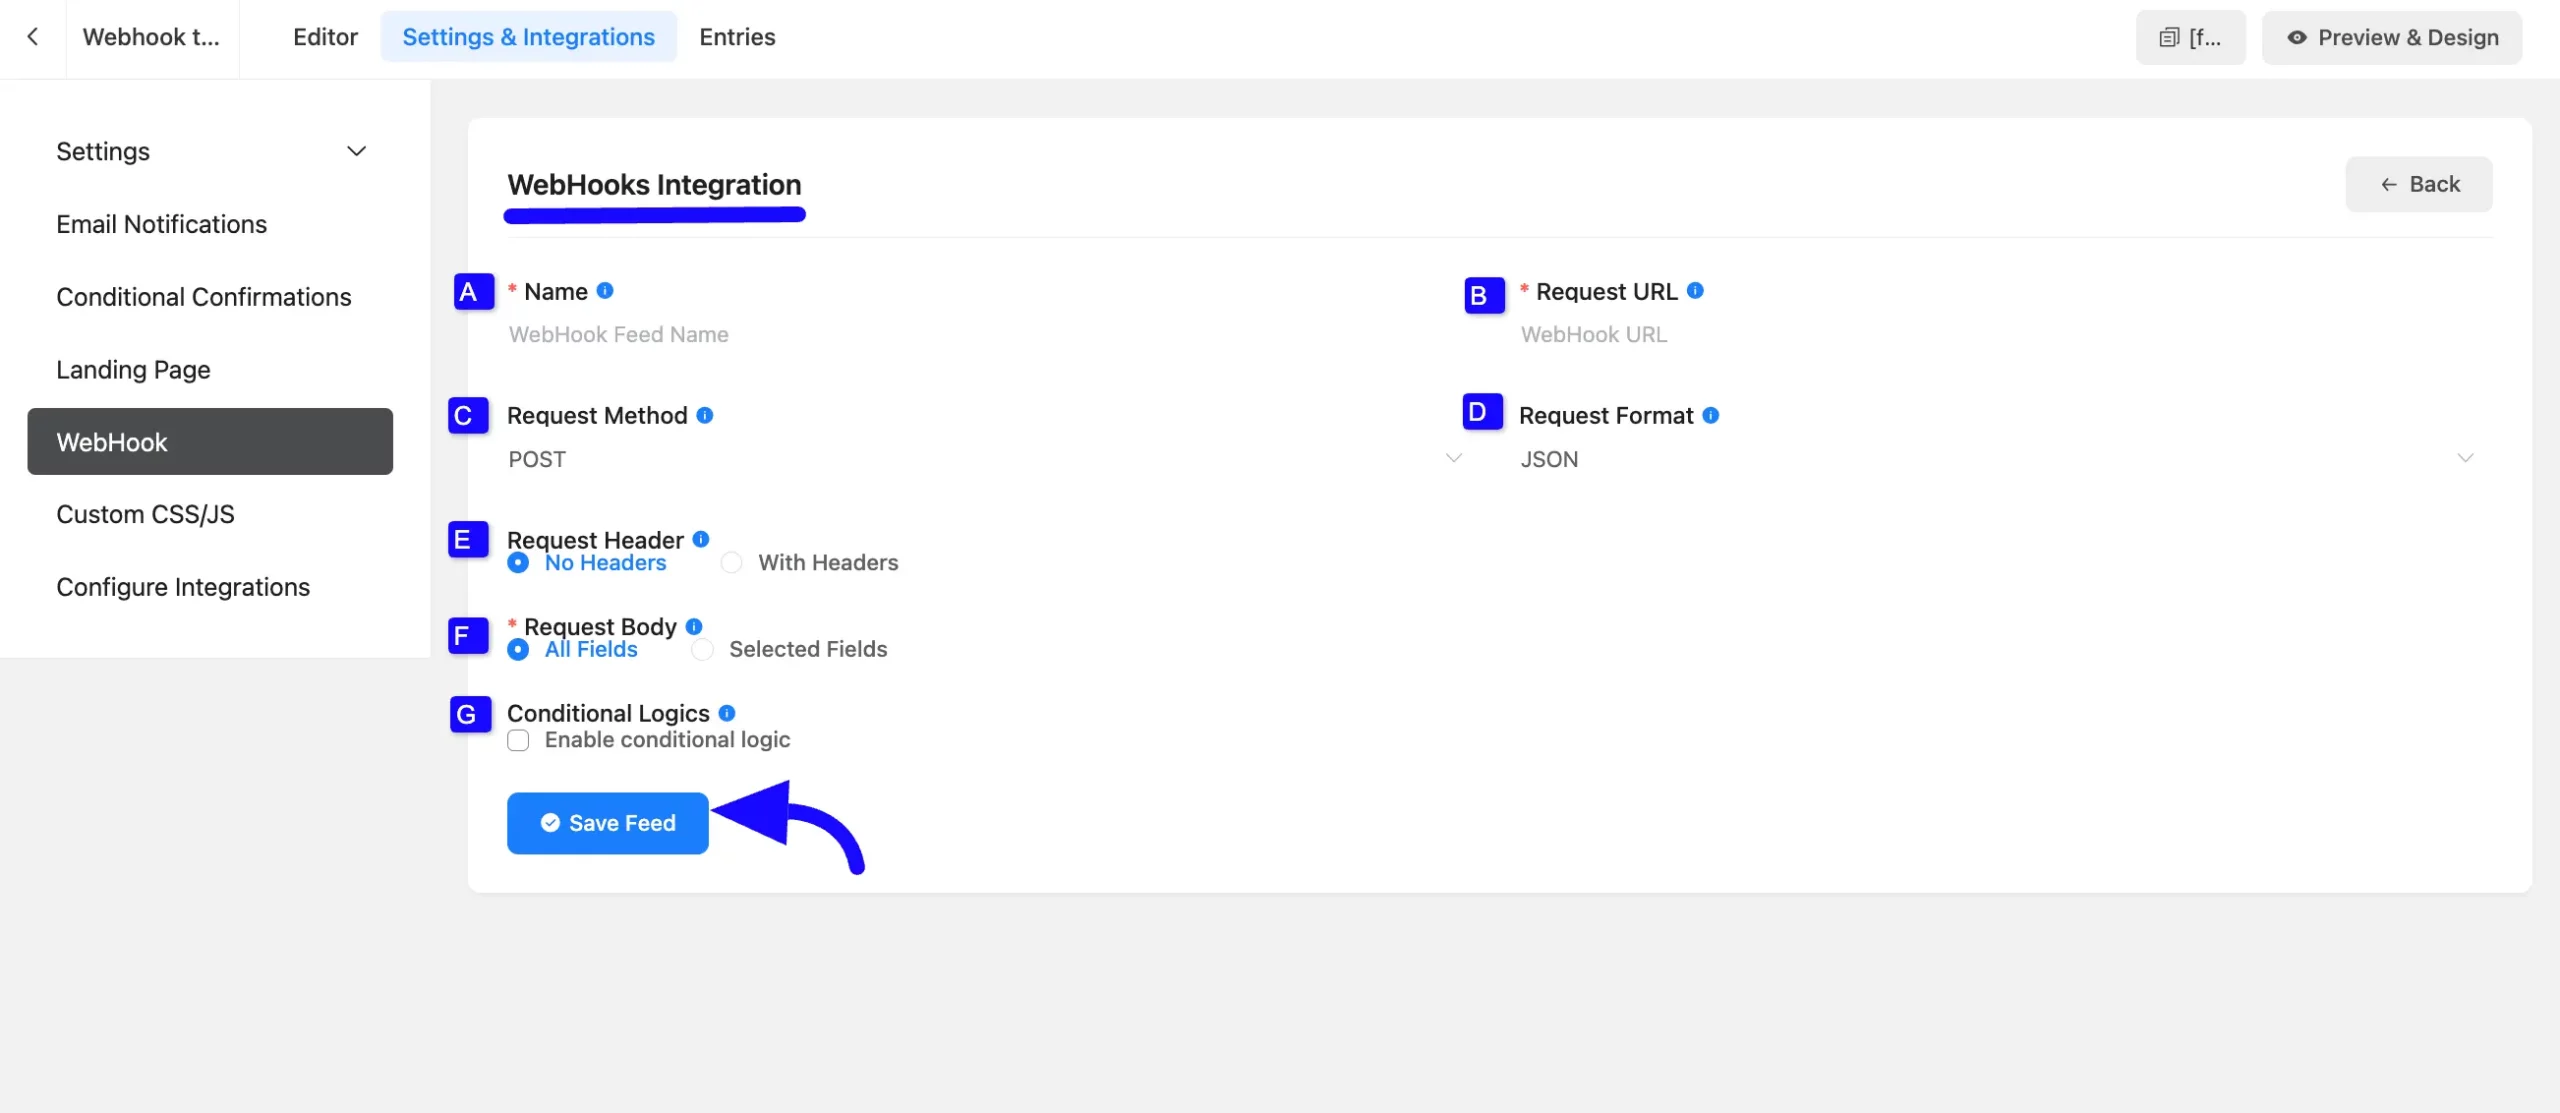
Here appears a new window. Now you will fill in the details.
A. Name: Enter a unique name to the integration setup.
B. Request URL: Paste the WebHook URL copied from FluentCRM.
C. Request Method: Set to POST from the dropdown.
D. Request Format: Select JSON from the dropdown options.
E. Request Headers: Leave as No Headers (default).
F. Request Body: Choose Selected Fields in the Request Body section.
Map the form fields (Name, Email) to the corresponding WebHook keys by copying the key values from FluentCRM and pasting them into the Value field.
G. Conditional Logic: If you want to allow Webhook integration conditionally based on your submission values, then Enable Conditional Logic options. To know more about this conditional logic, read the article.
After completing all the fields, click the Save Feed button to save the setup.
Make sure the second domain doesn’t have FluentCRM installed.
Now, enter test data in the form on the source domain and submit it.
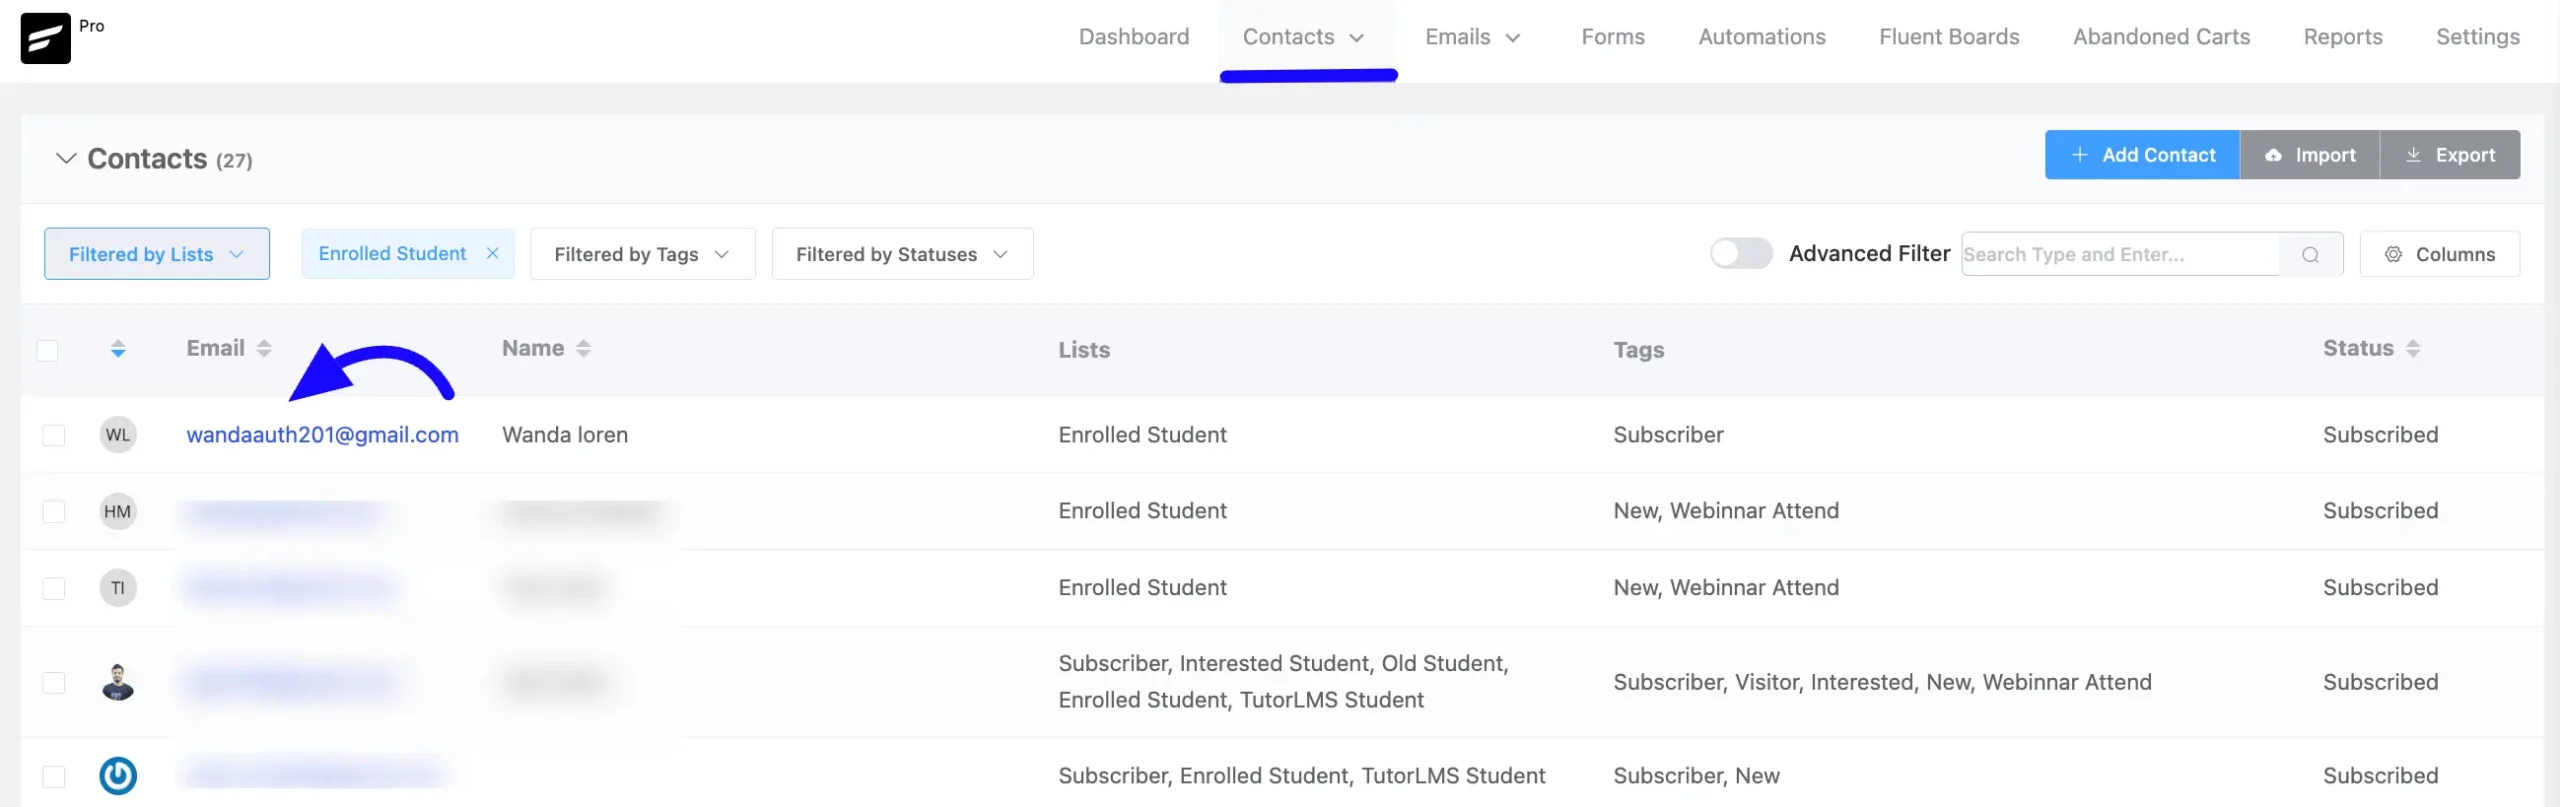
After that, go to FluentCRM on the destination domain and refresh the Contacts page. The submitted data should now appear in the contacts list.
Using Fluent Forms and WebHooks, you can create as many WebHooks as required and collect leads from multiple domains into a centralized FluentCRM database.
If you have any further questions, concerns, or suggestions, please do not hesitate to contact our @support team. Thank you.


