Integrating CleverReach with Fluent Forms allows you to grow your CleverReach Subscriber list through the users of Fluent Forms. This article will guide you through integrating CleverReach with Fluent Forms on your WordPress Site.
Remember, CleverReach is the Premium Feature of the Fluent Forms Plugin. So, you need the Fluent Forms Pro plugin to integrate this.
Enable CleverReach Integration #
To learn how to enable CleverReach integration, follow the steps with the screenshots below –
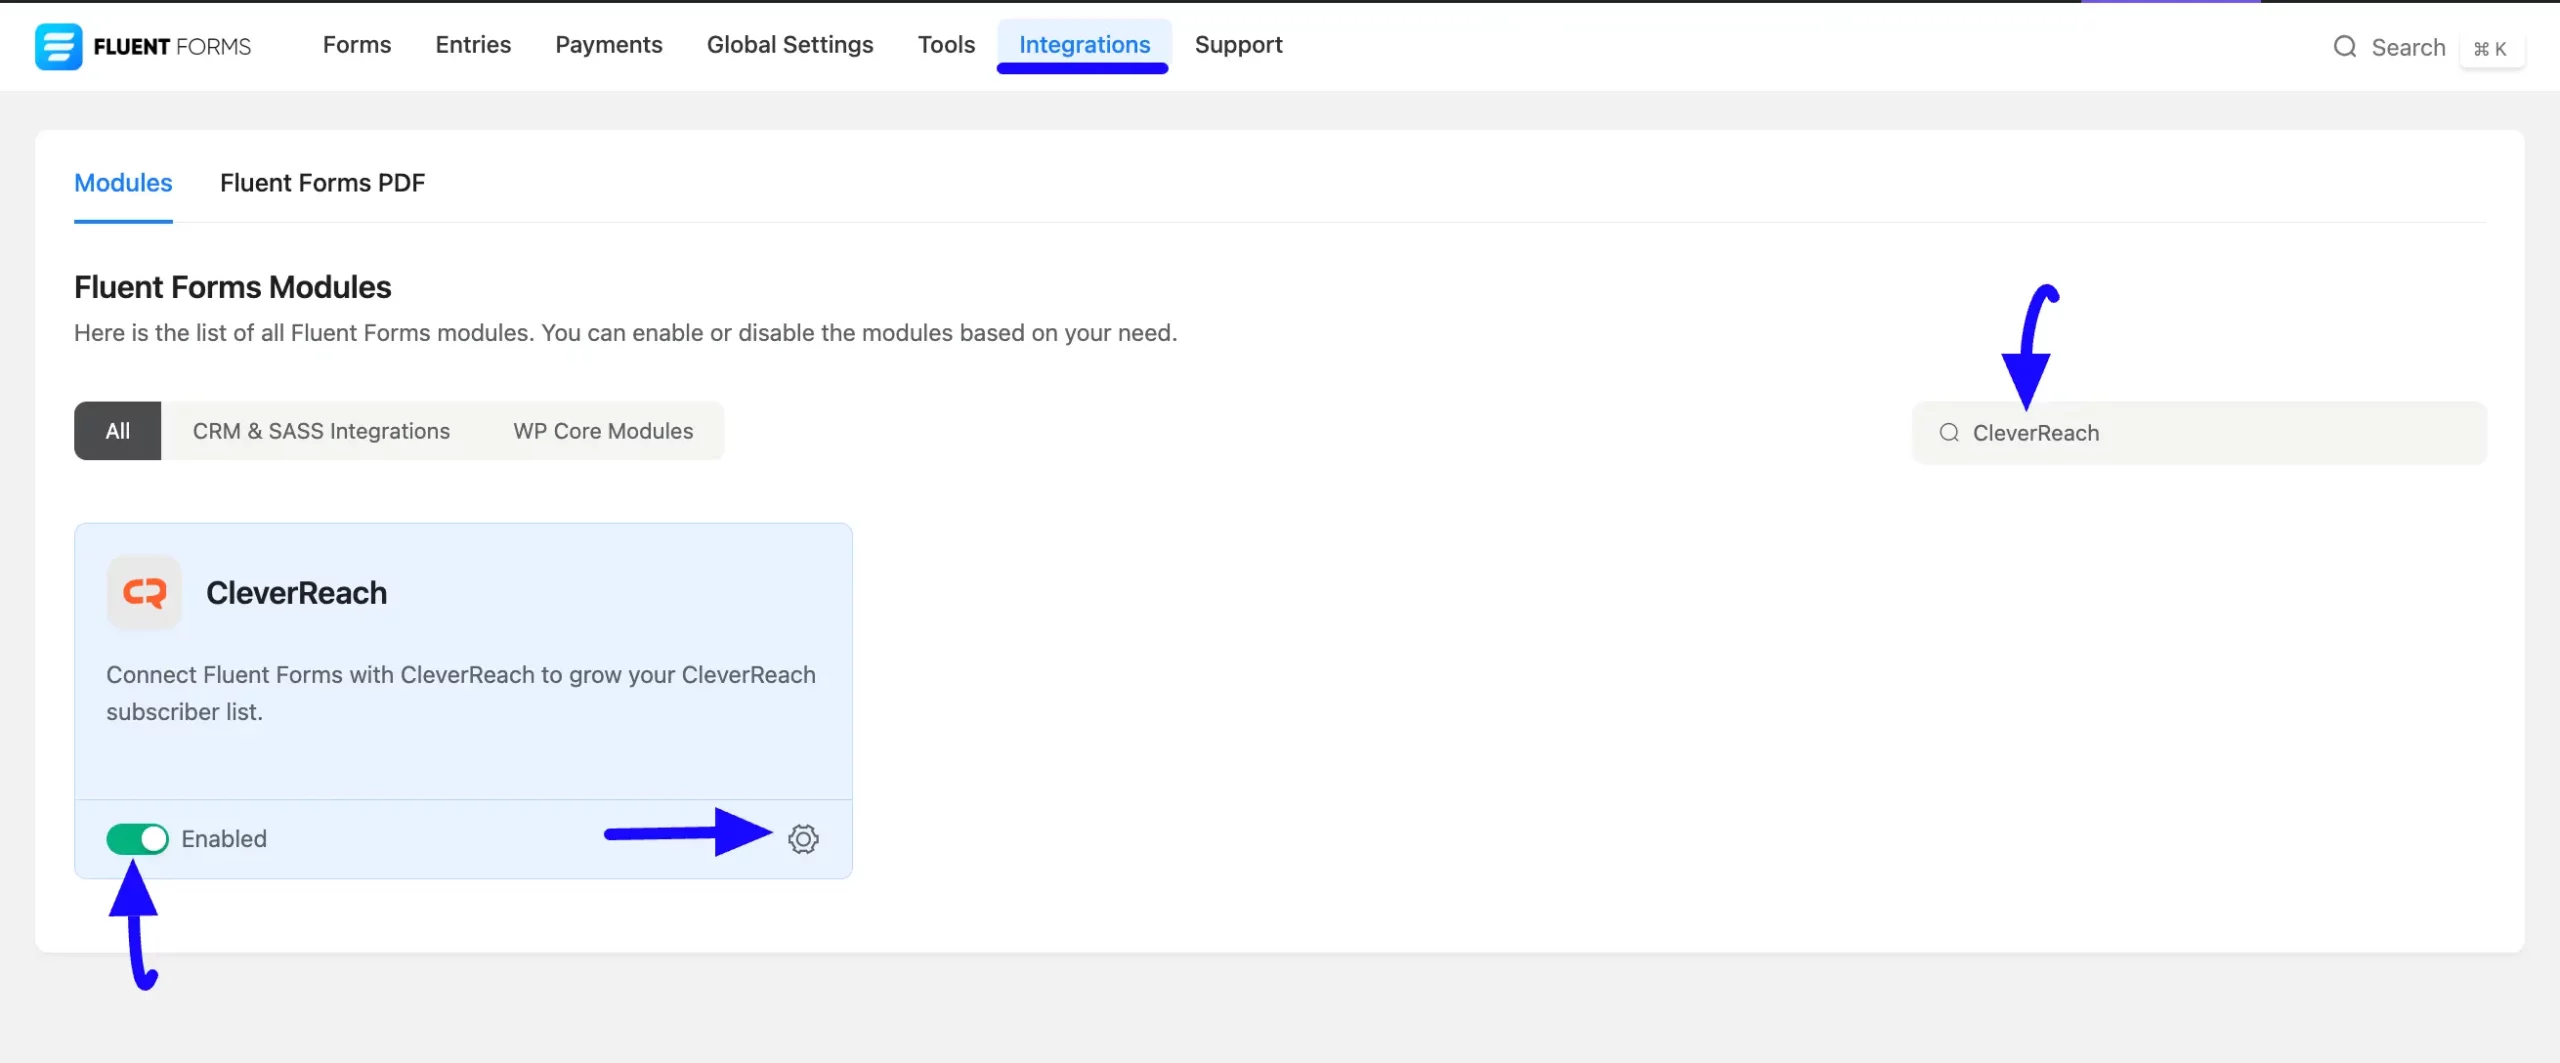
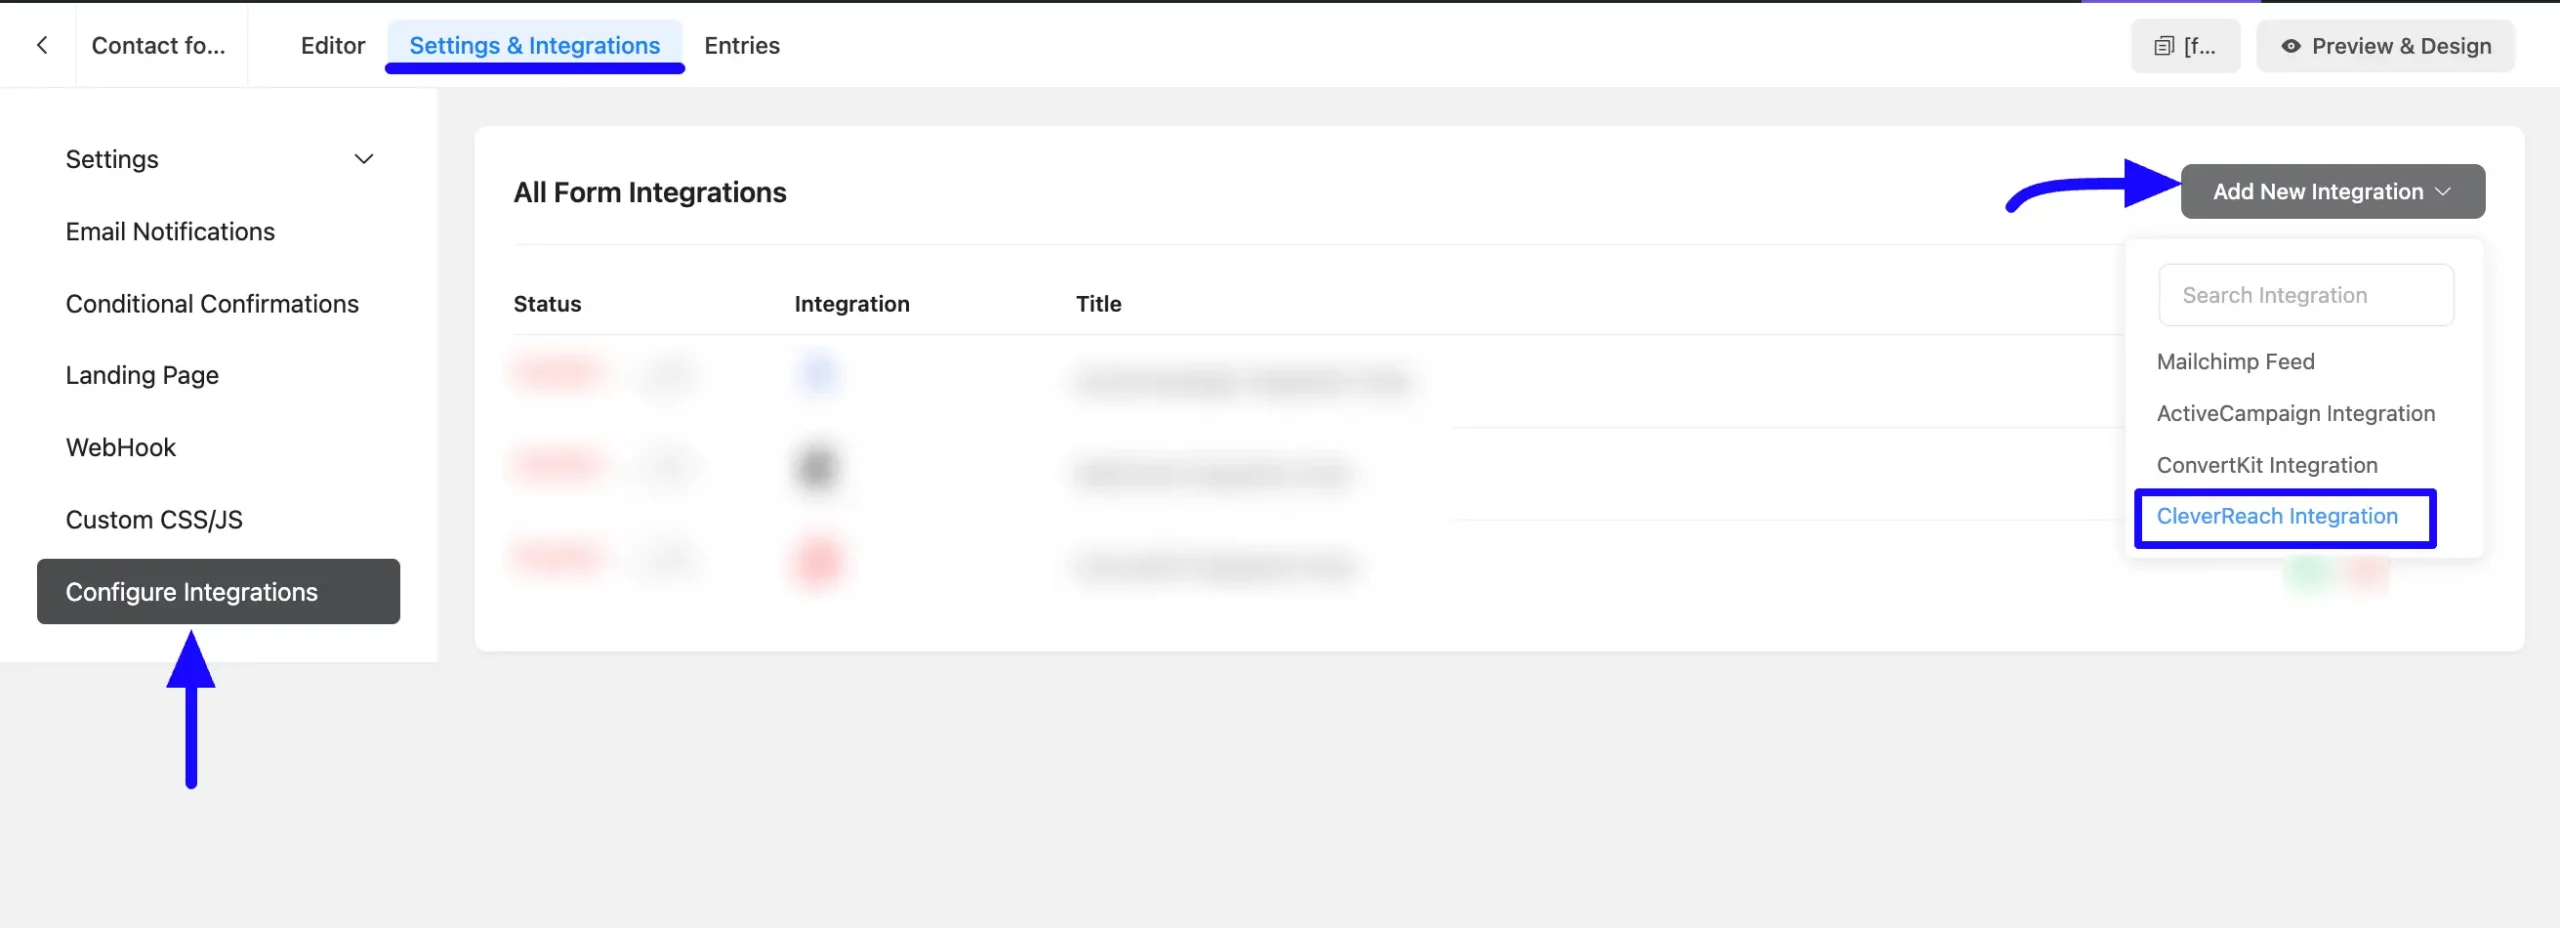
First, go to Integrations from the Fluent Forms Navbar, search for CleverReach through the search bar, and get the CleverReach integration module.
Now, turn on the Toggle to enable the CleverReach.
Then, you will see the CleverReach’s Settings Icon on the right side, click on it.
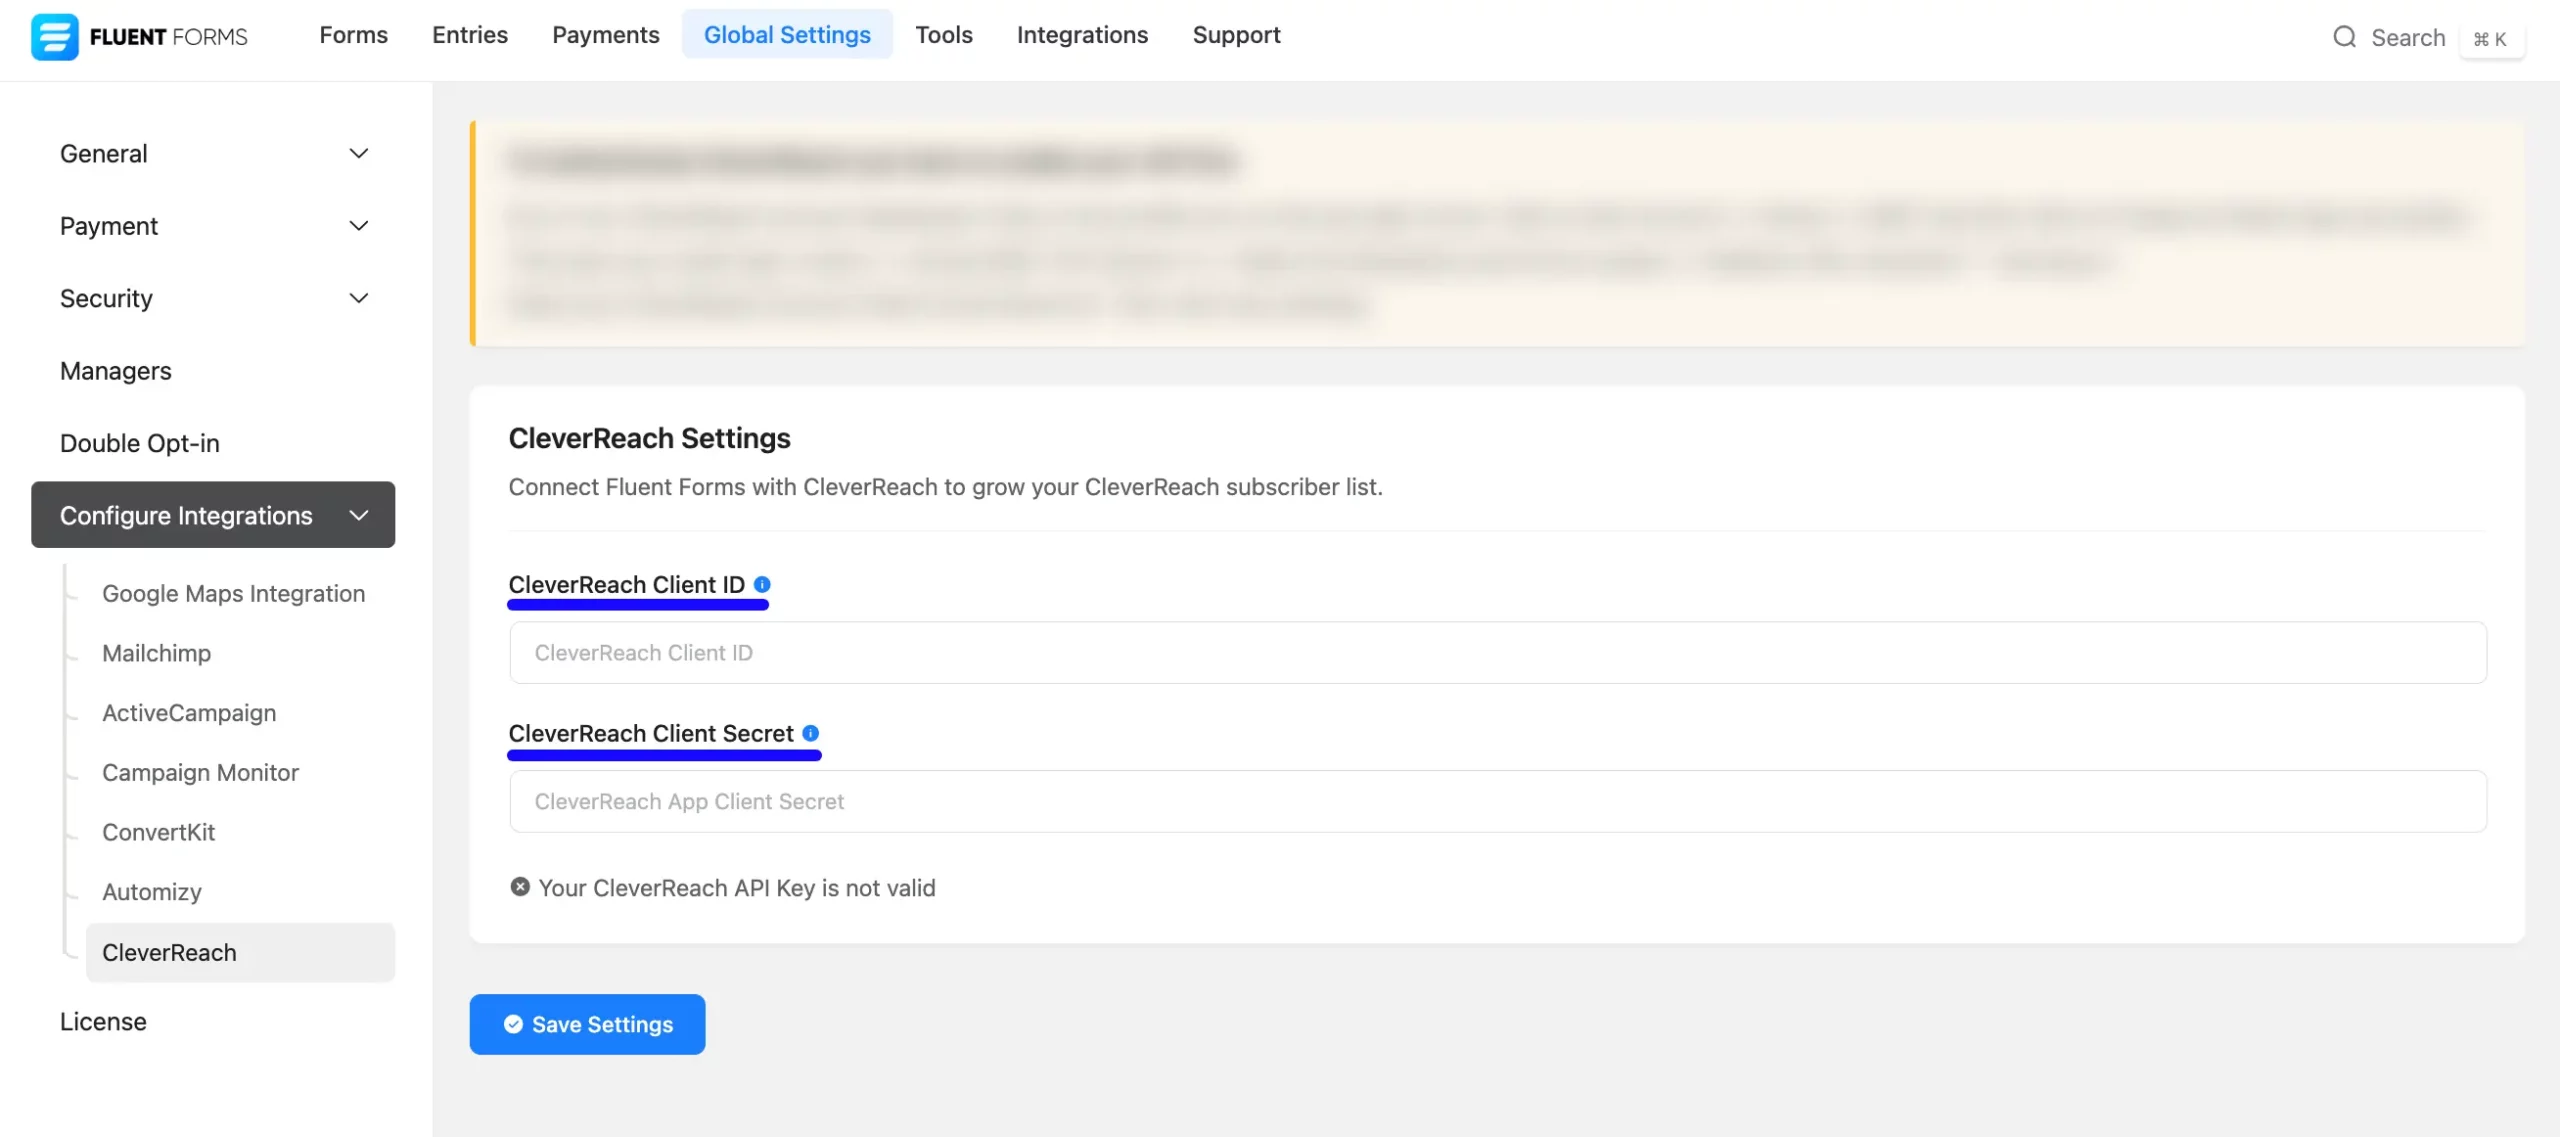
Once you enable CleverReach, you will be asked for the CleverReach Client ID and CleverReach Client Secret of your CleverReach Account.
Get the CleverReach Client ID and Secret #
To learn how to get the CleverReach Client ID and CleverReach Client Secret from CleverReach, follow the steps with screenshots below –
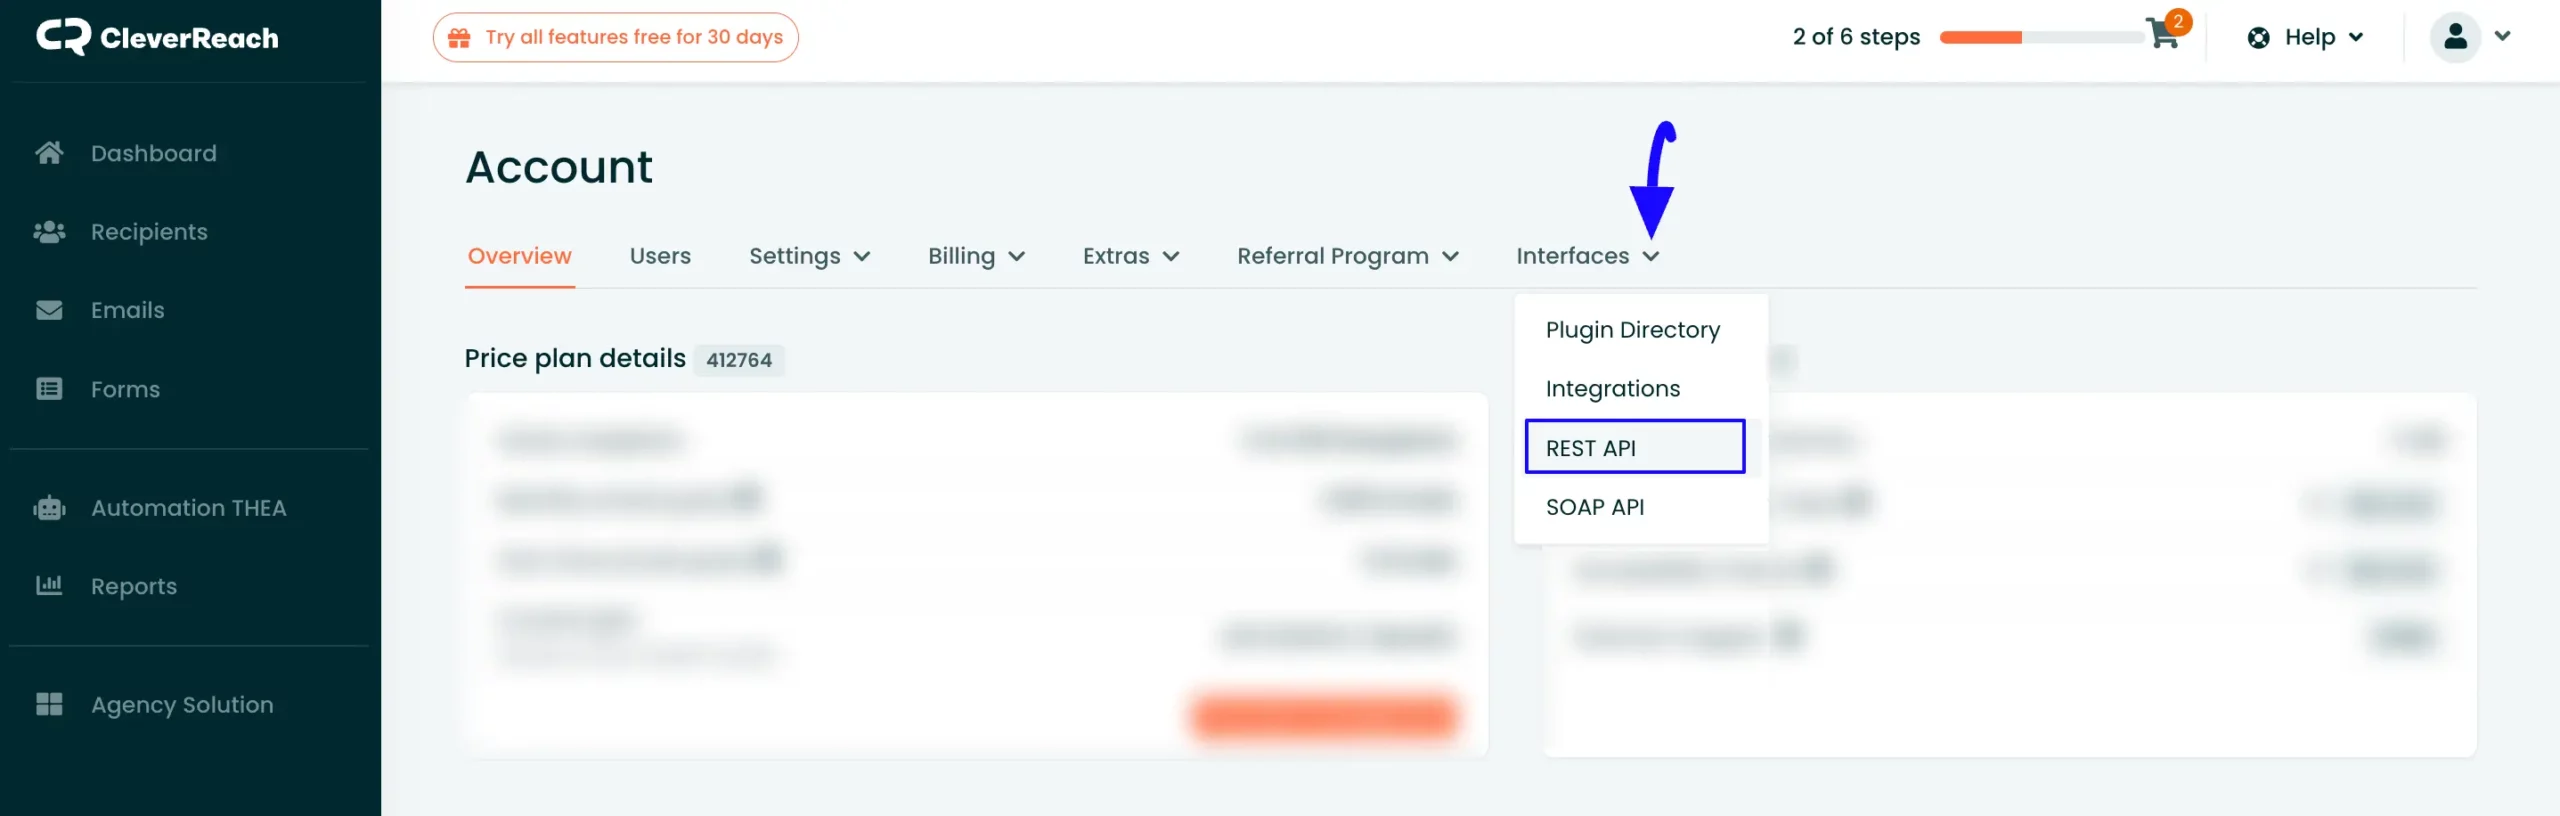
First, log in to your CleverReach Account, go to Profile from the top right corner, and click the My Account button.
Now, open the Interfaces dropdown list and go to the Rest API option.
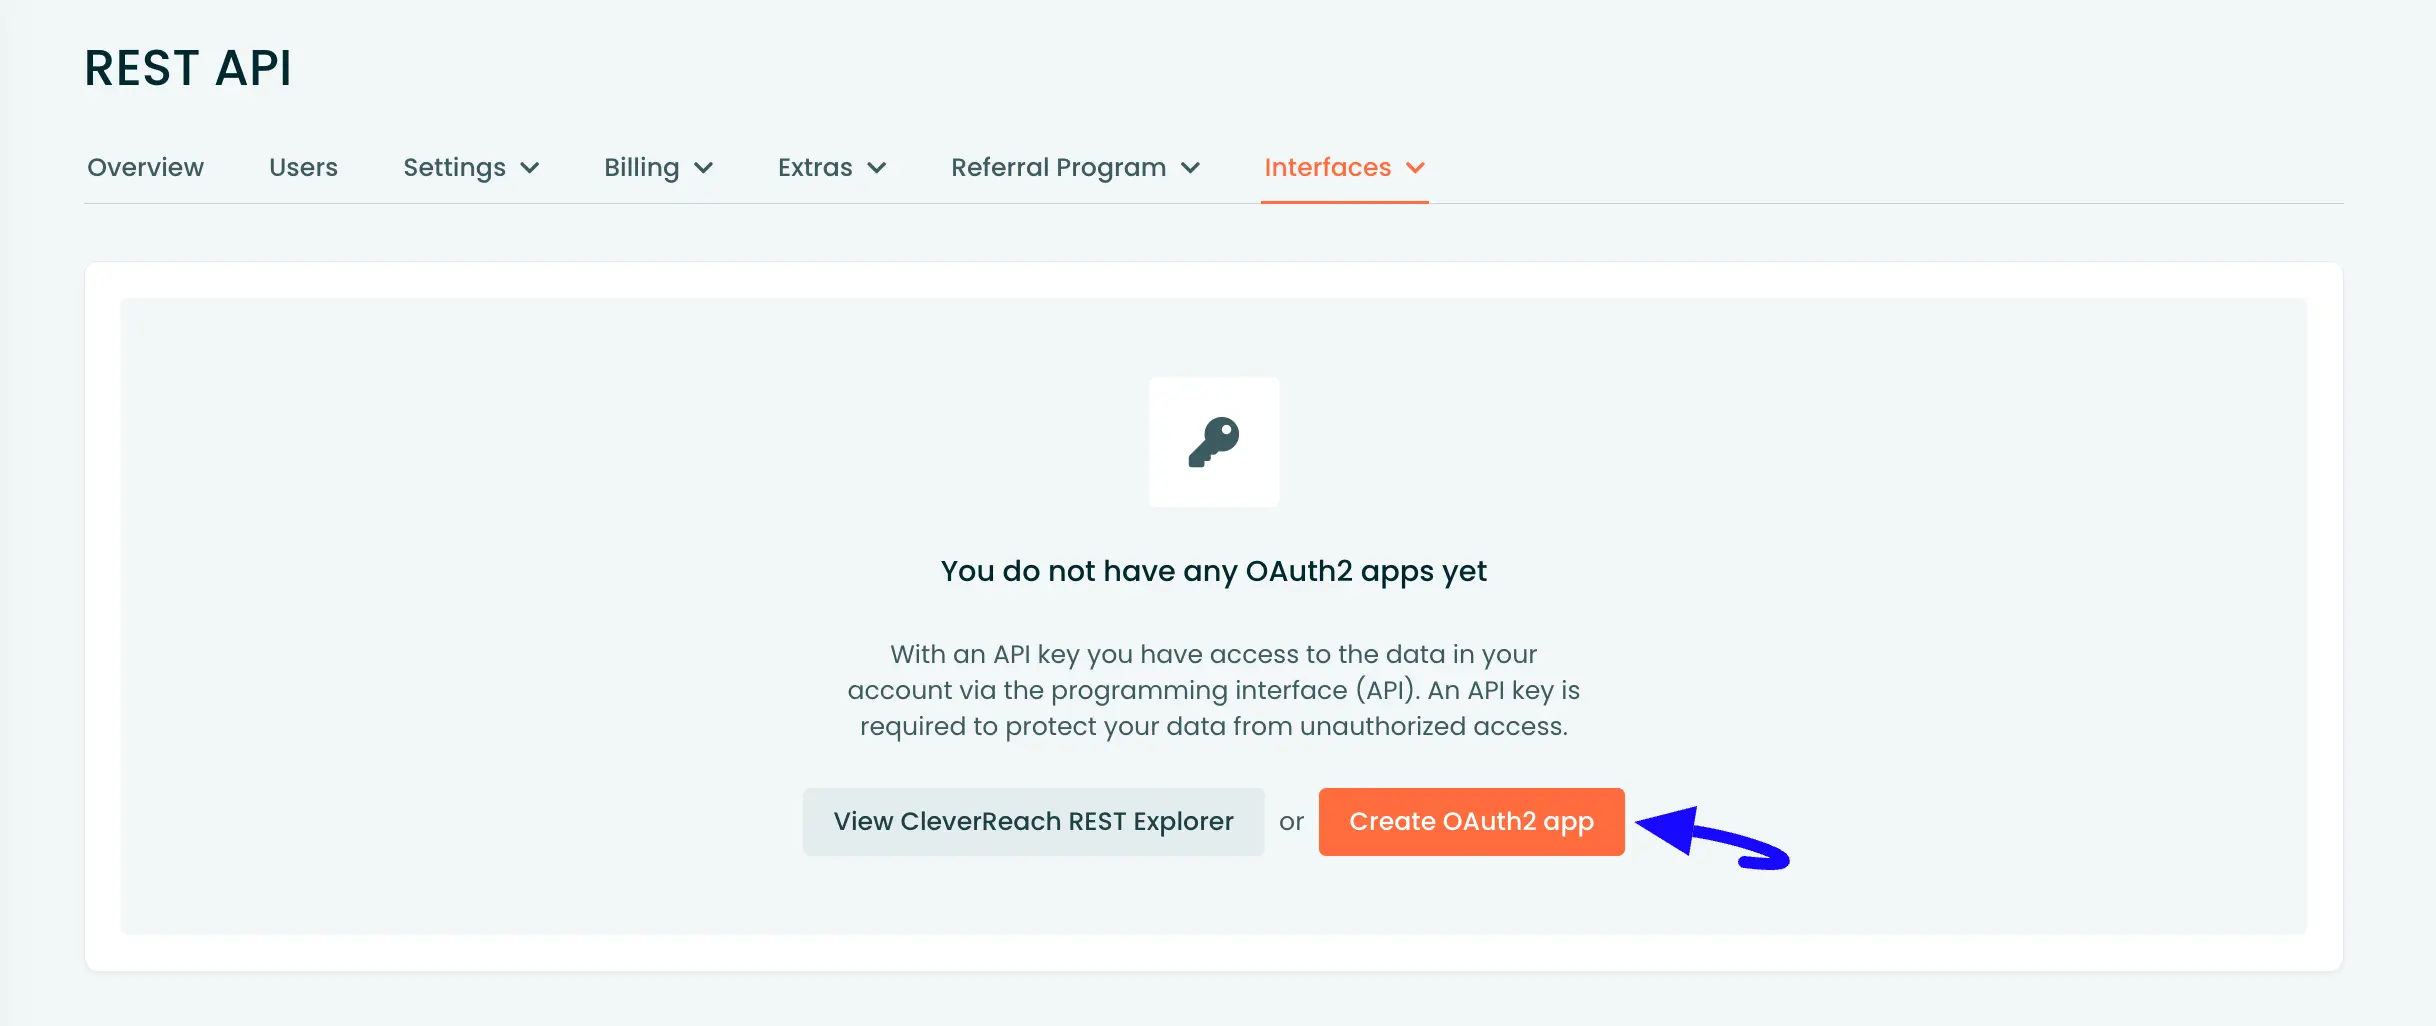
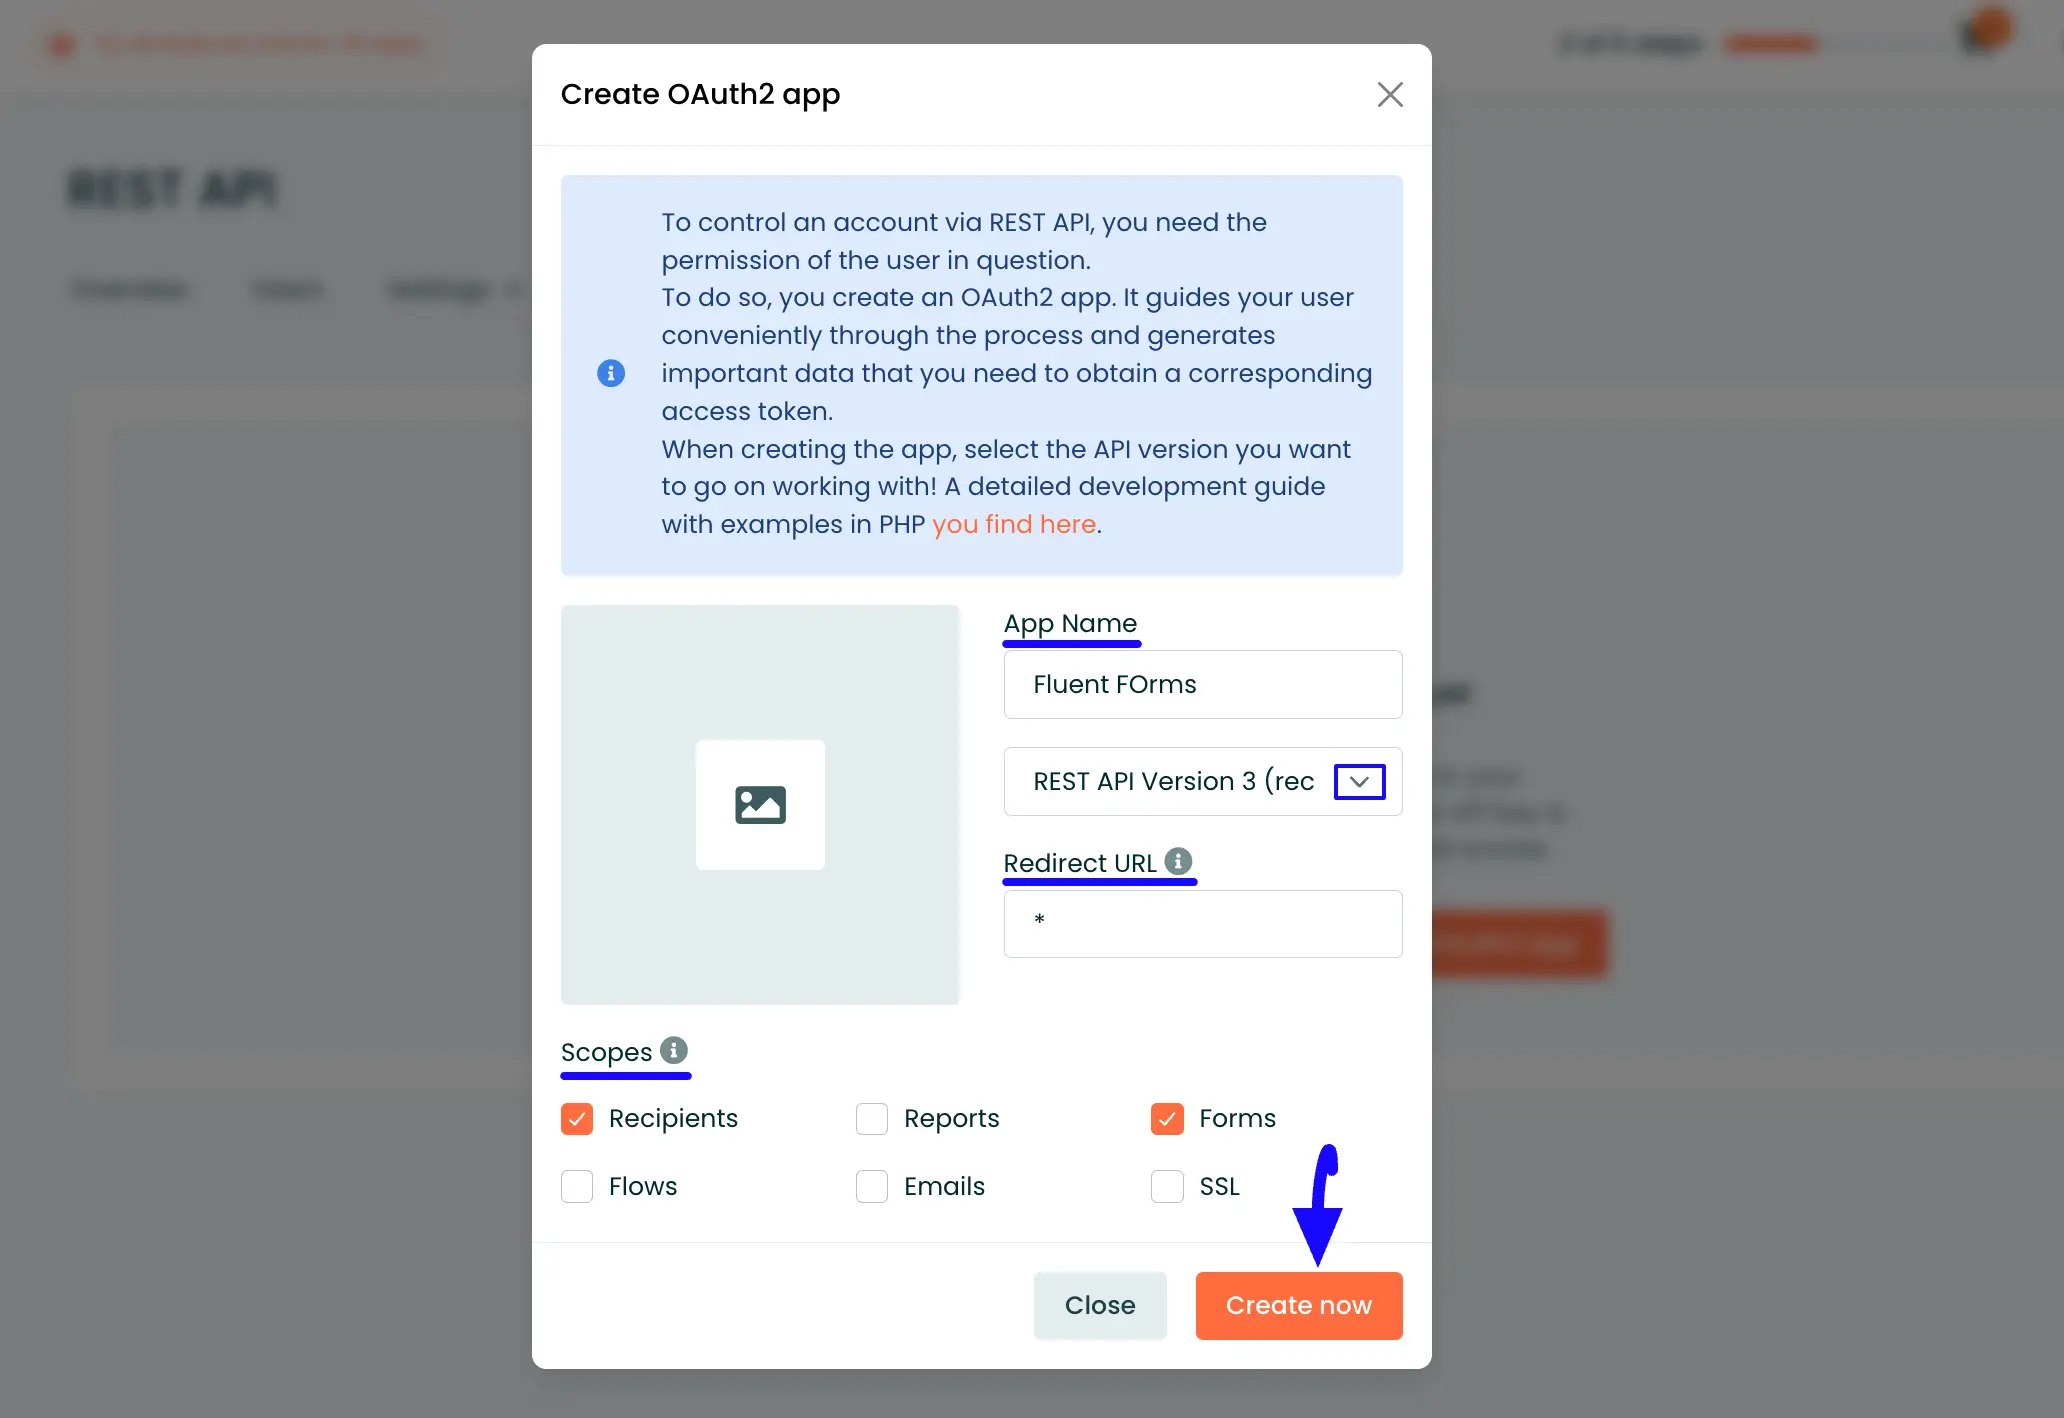
Click the Create OAuth2 app button.
Then give your OAuth App a Name, choose REST API Version 3 from the dropdown list, keep the Redirect URL ( * ), select the Scopes as Recipients and Forms, and press the Create Now button.
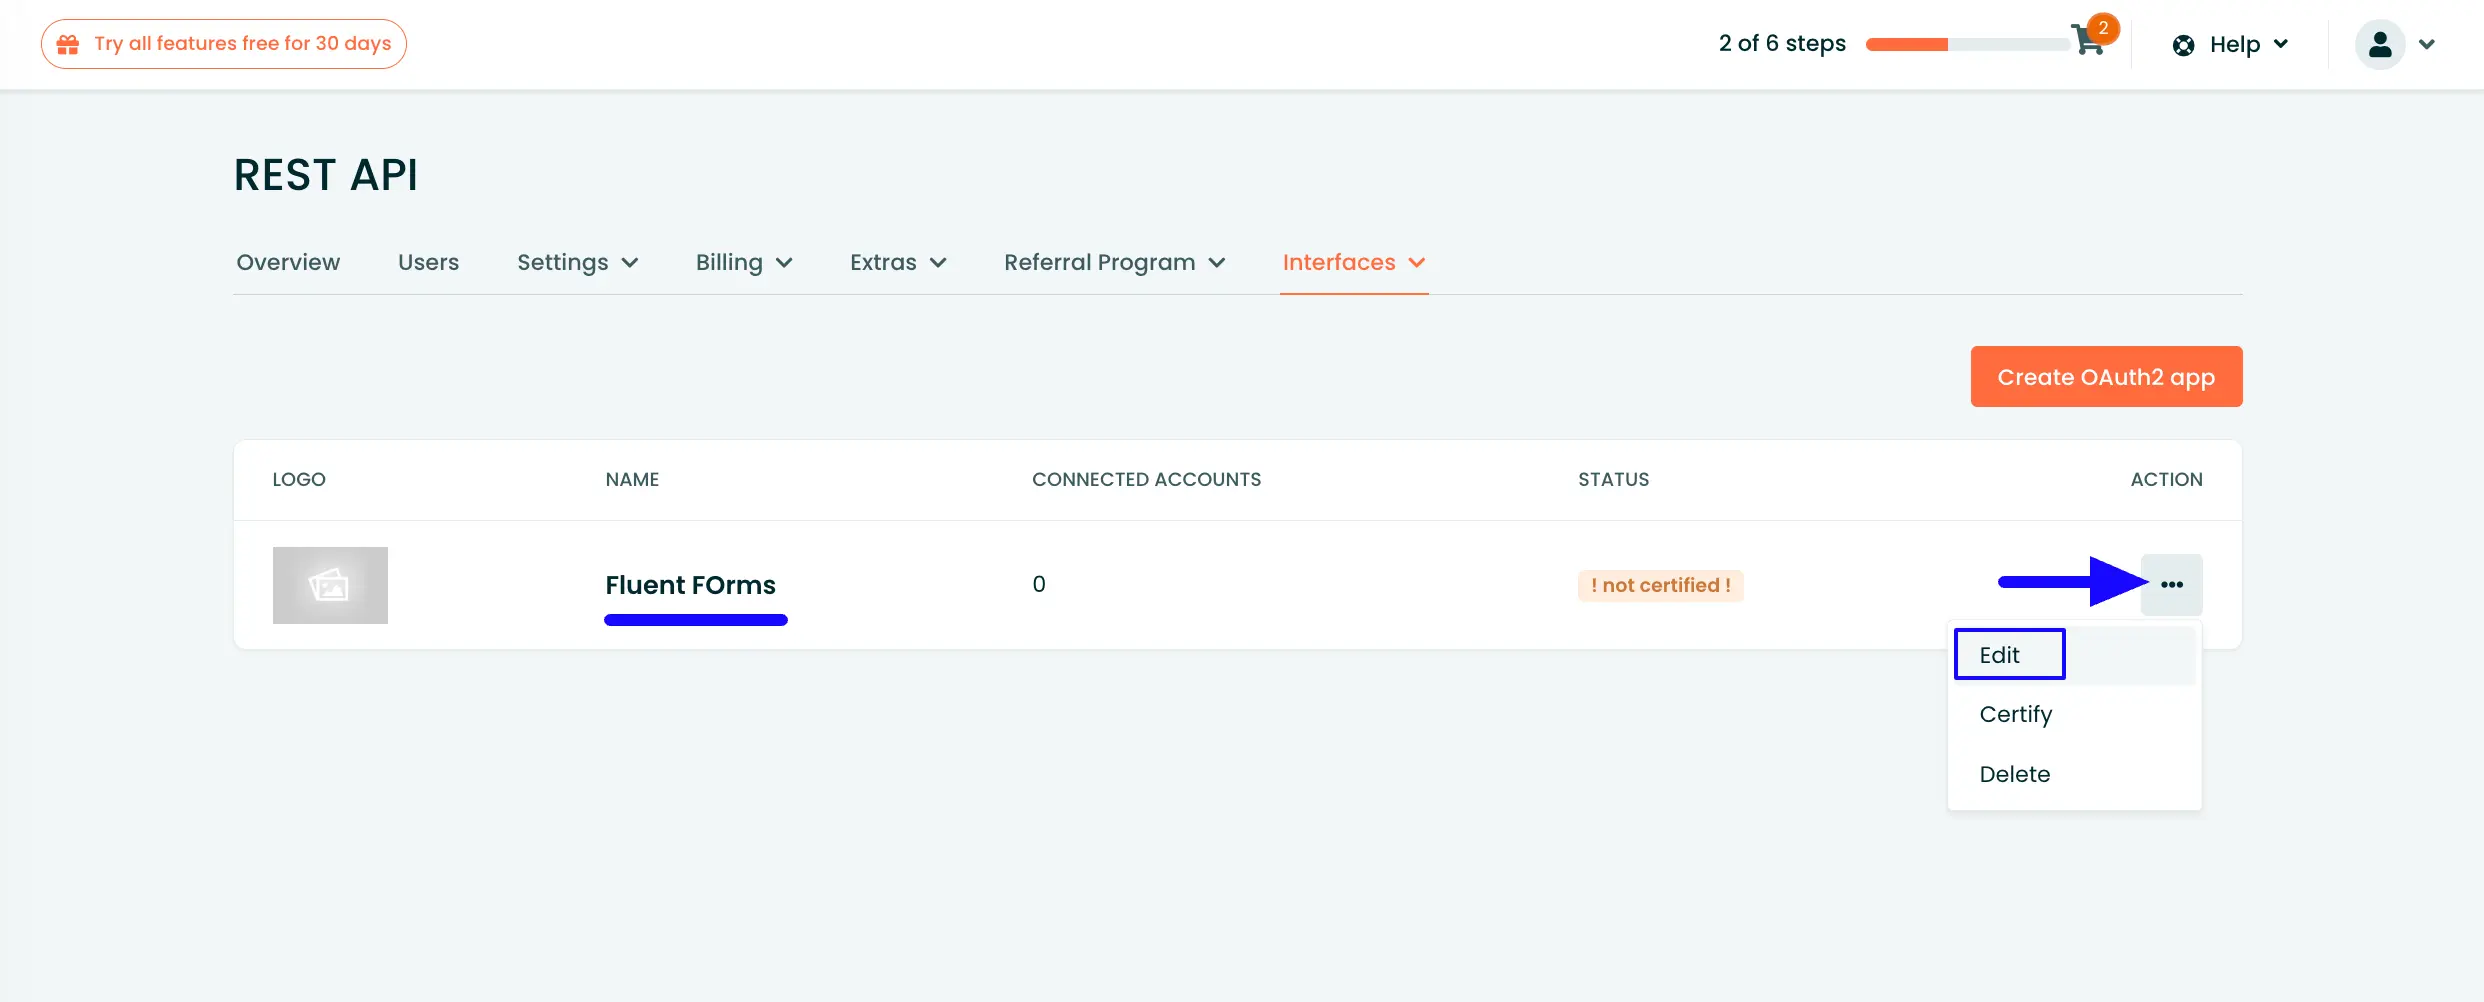
Once you created the OAuth2 app, click the Three-dot Icon in the right corner, and go to the Edit page of that app.
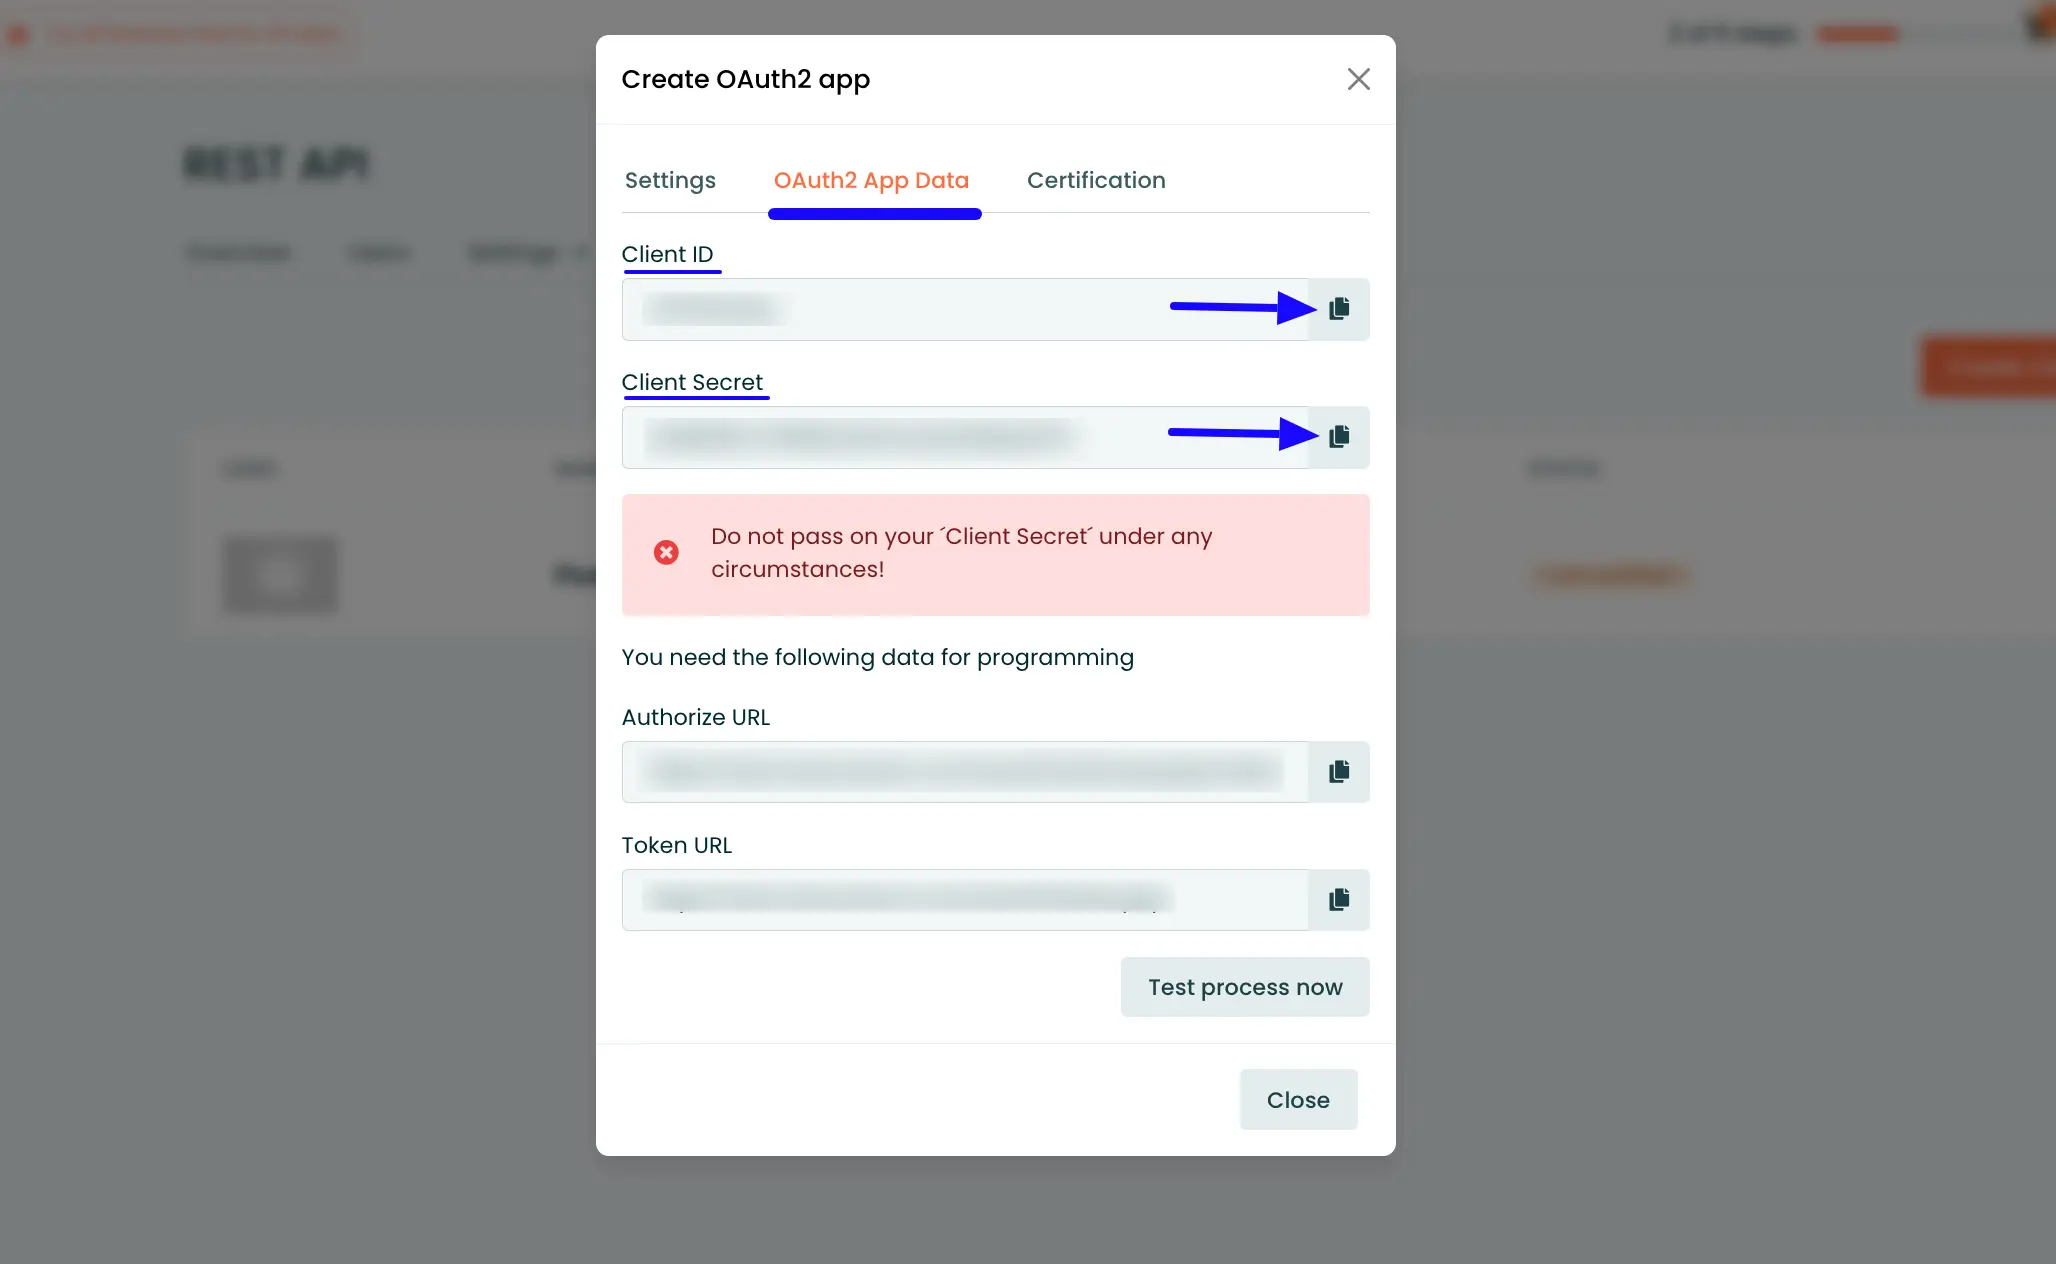
Now go to the Oauth2 App Data tab and copy the Client ID and Client Secret by clicking the Copy Icon.
Connect CleverReach with Fluent Forms #
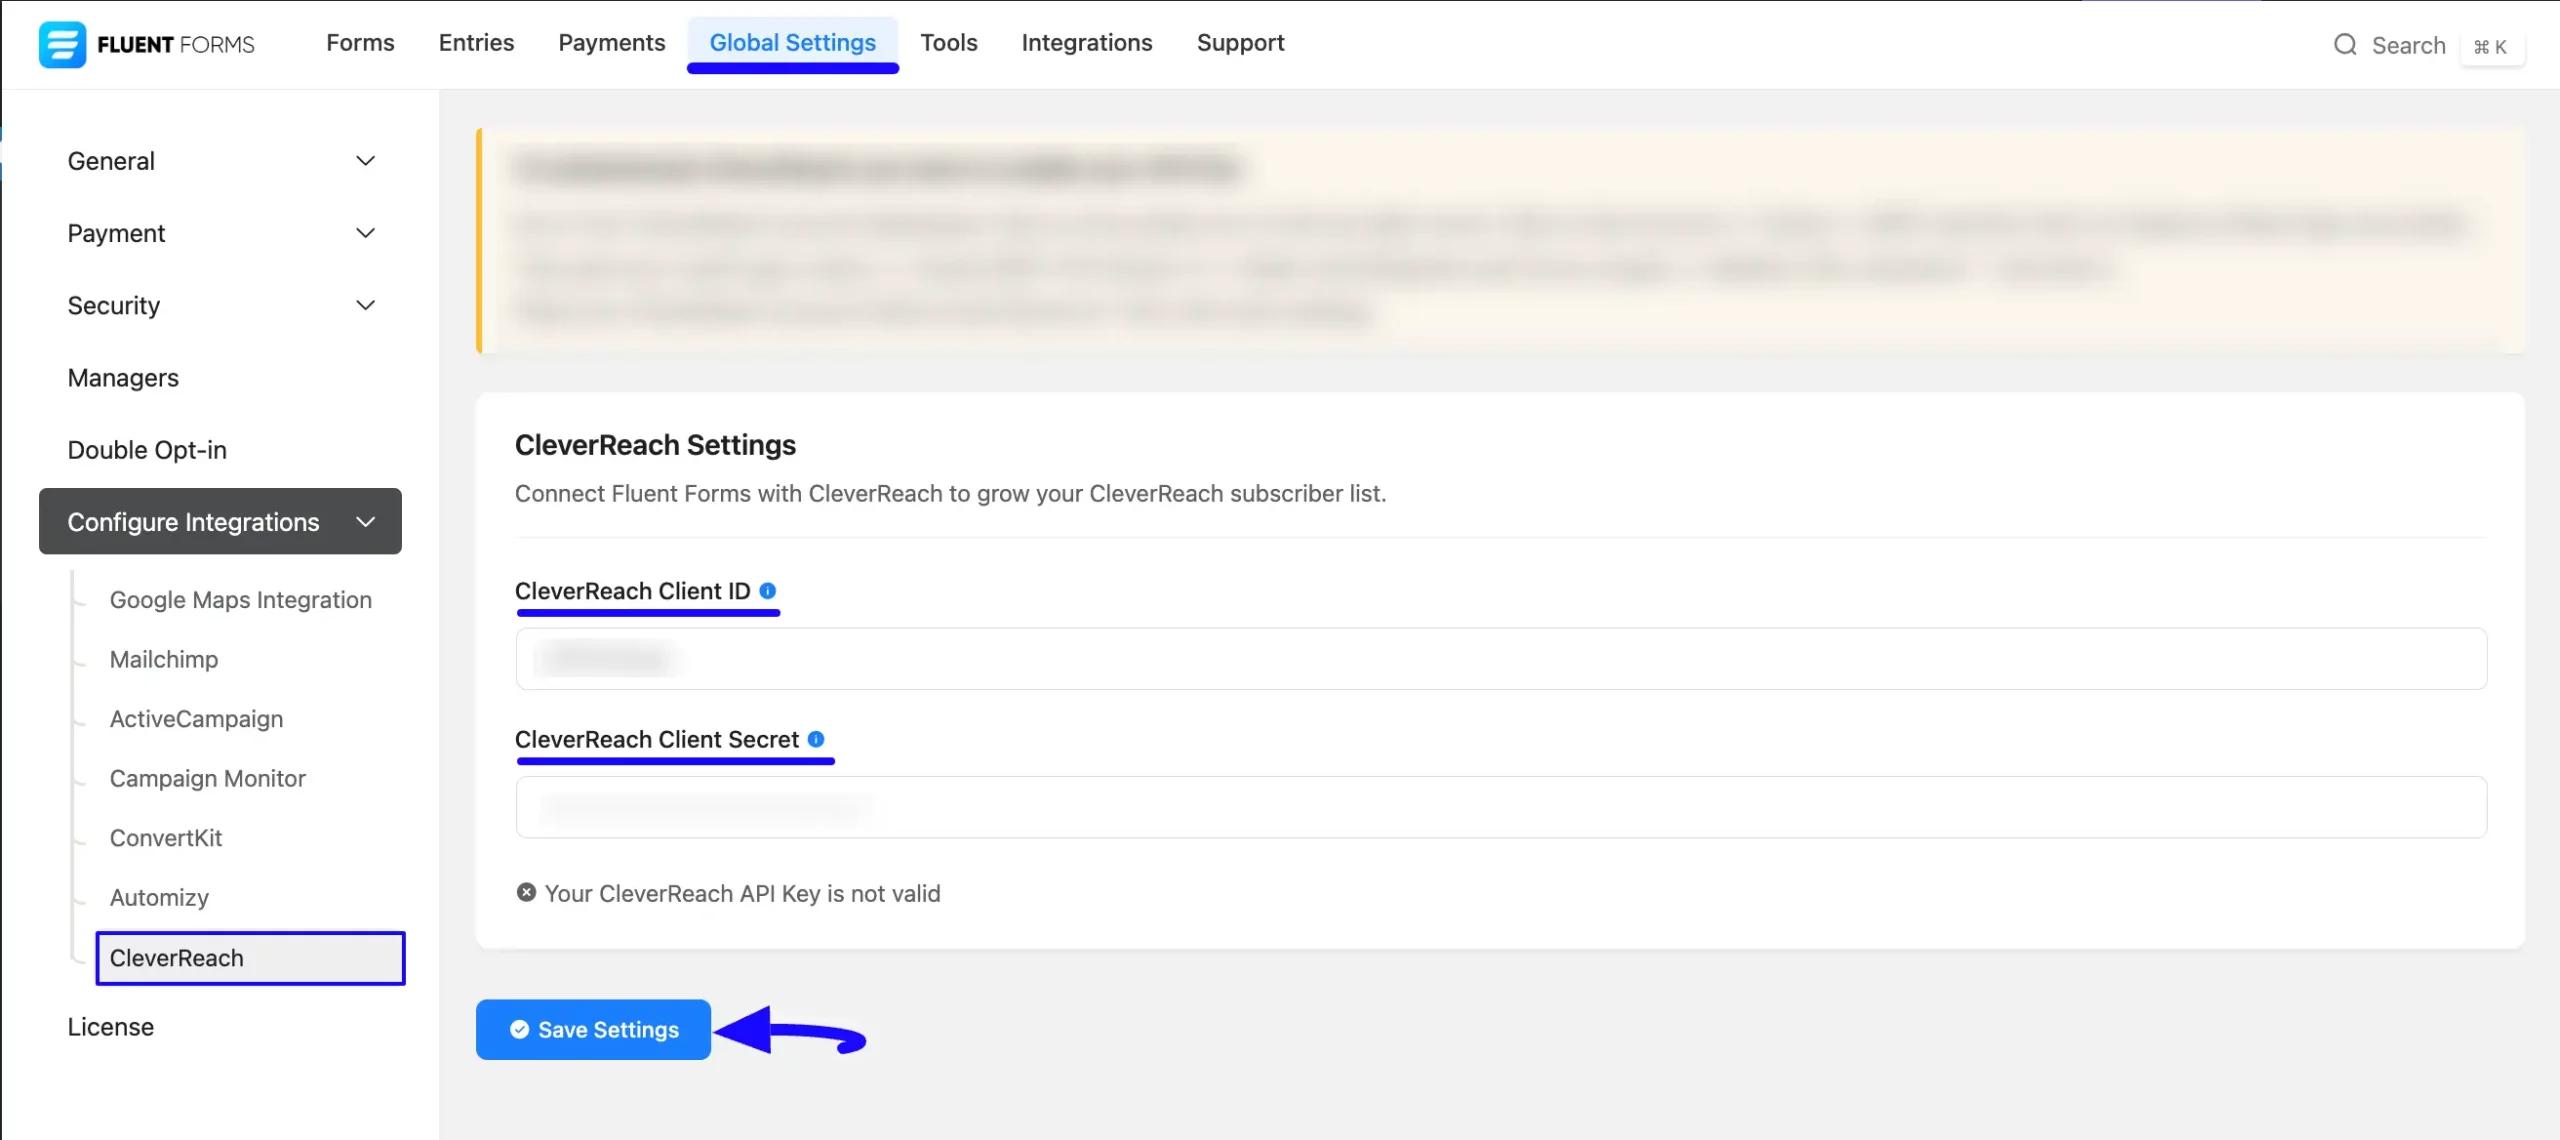
Then, return to the CleverReach Settings page under the Configure Integrations tab of the Global Settings section from the Fluent Forms Navbar.
Paste the Client ID and Client Secret you copied from CleverReach into the CleverReach Client ID and CleverReach Client Secret fields respectively.
Finally, press the Save Settings button to save your all changes.
Once you click the Save Settings, it will redirect you to the CleverReach Login Portal again to connect it with Fluent Forms and make the integration functional.
Now, provide your Login Information (Customer ID, User Name, and User password), and click the login now & connect the Fluent Forms button.
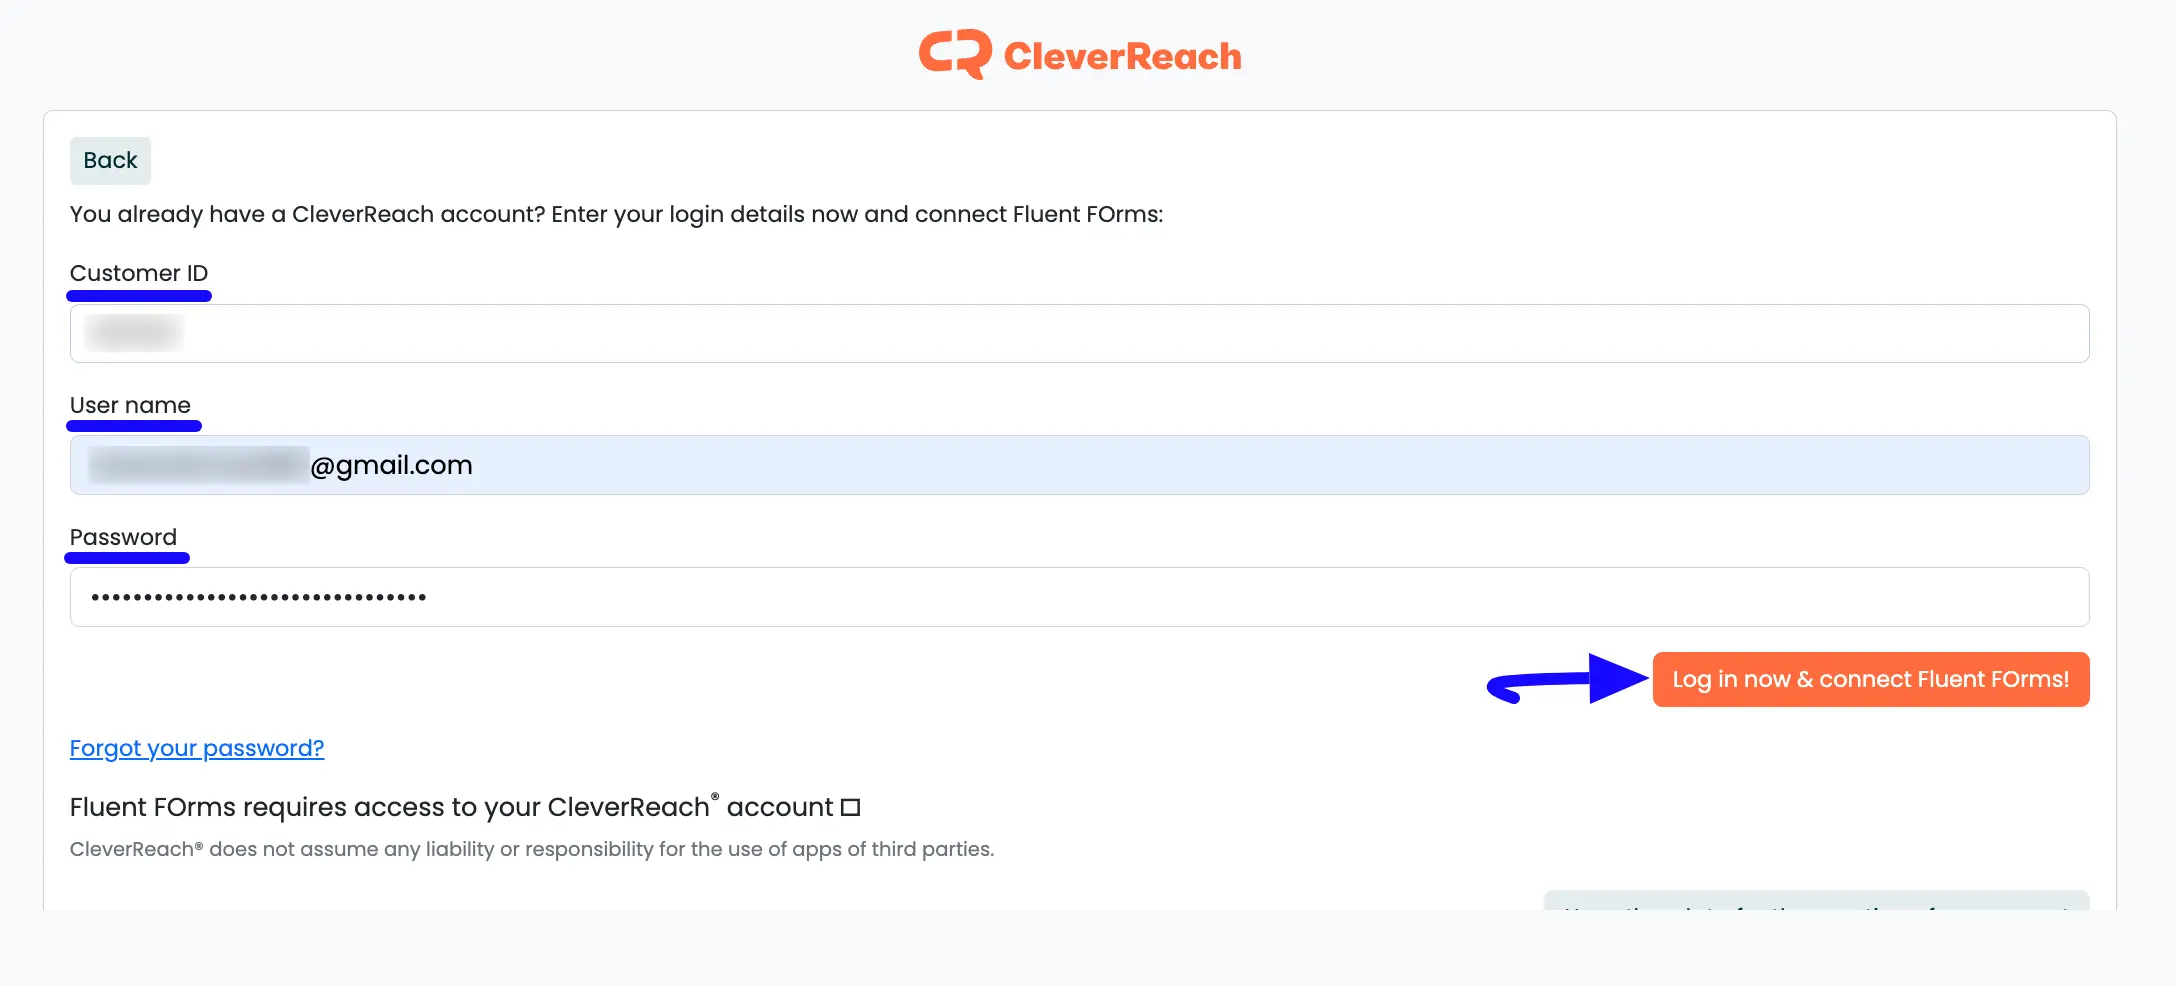
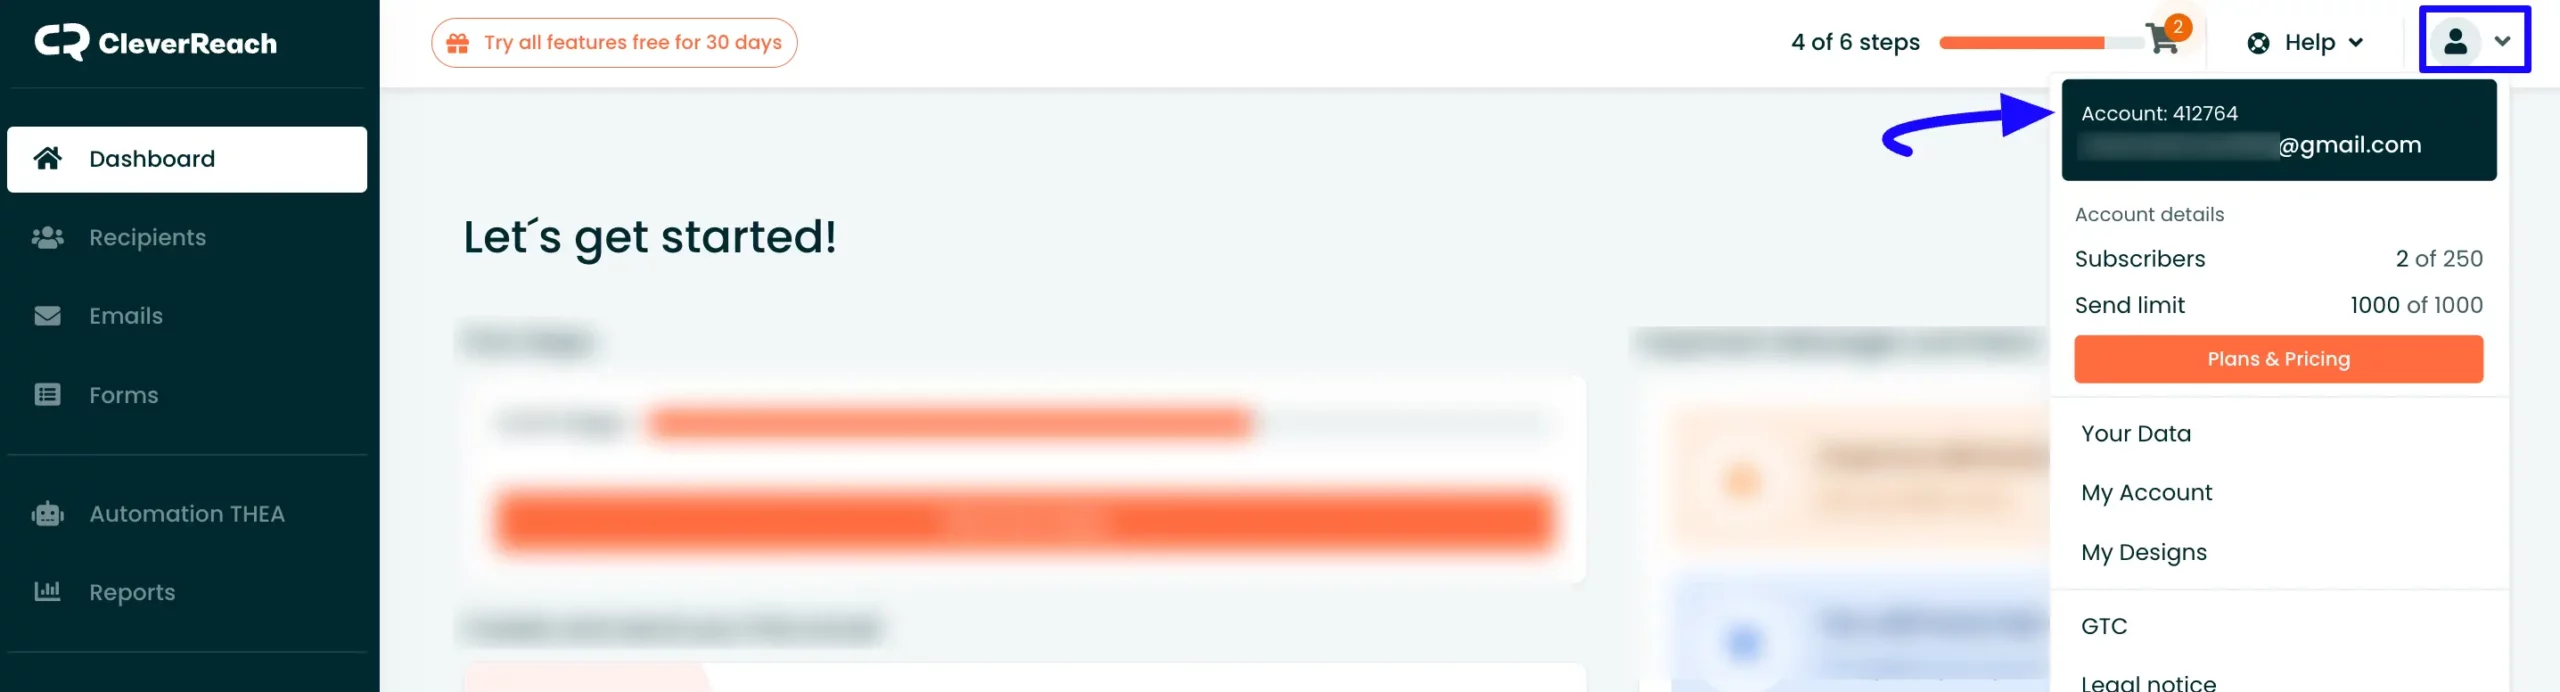
You can find your CleverReach Customer ID under the Profile Menu beside the Account option.
Now, you can see, your CleverReach is connected to your Fluent Forms successfully.
You can verify/disconnect it anytime by clicking the Verify Connection Again/Disconnect CleverReach buttons if needed.

Integrate CleverReach into Fluent Forms #
To learn how to integrate CleverReach into any specific Form in Fluent Forms, follow the steps with the screenshots below –
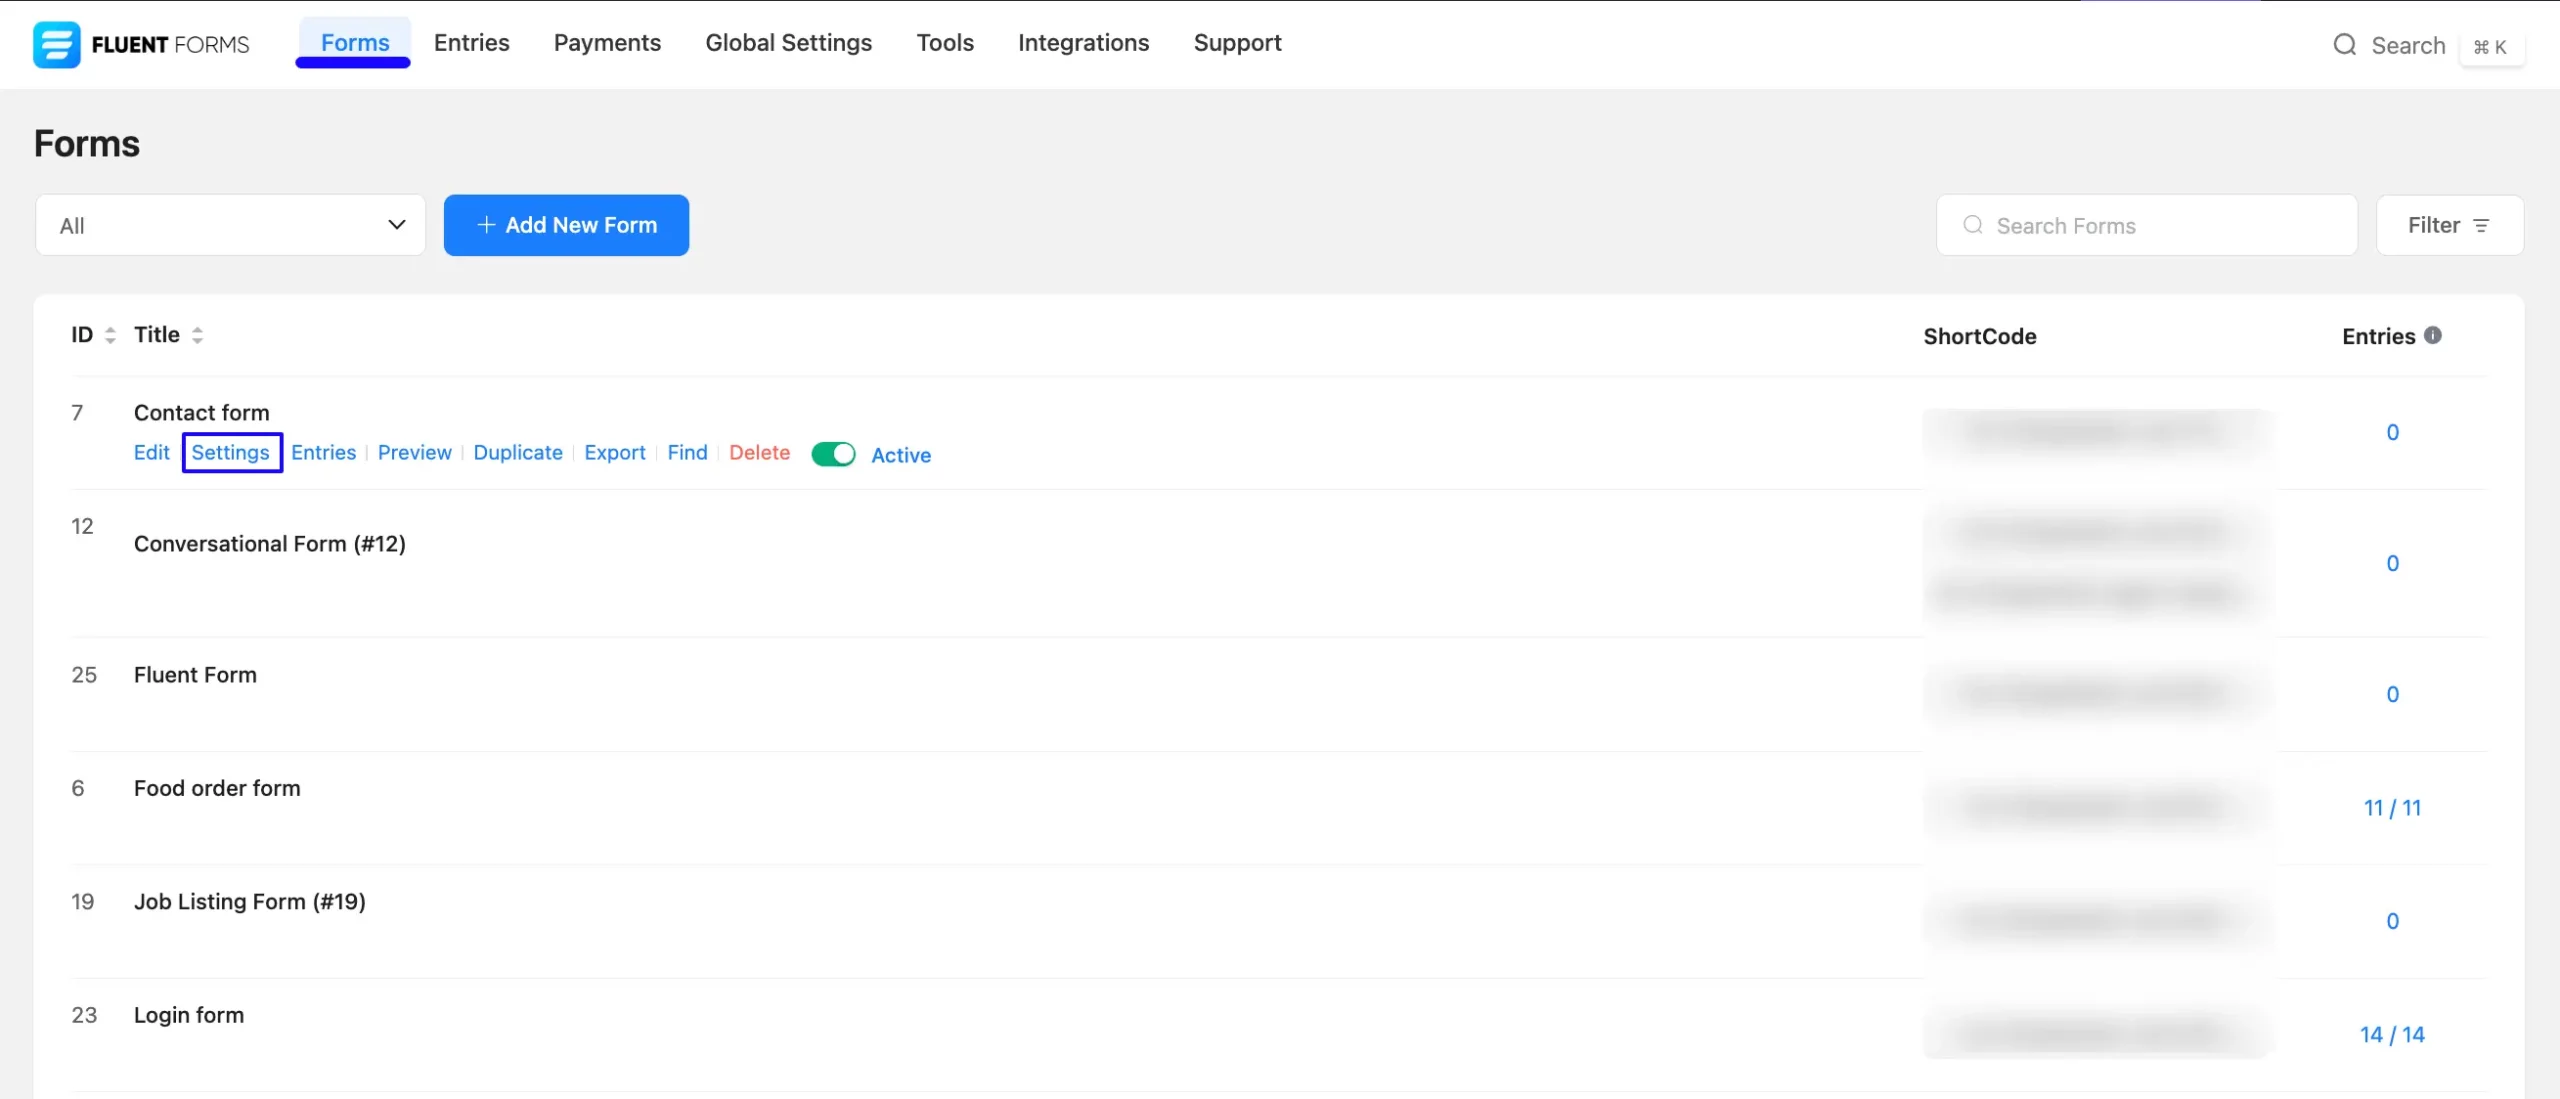
First, go to Forms from the Fluent Forms Navbar, select the Desired Form where you want to integrate your CleverReach, and click the Settings button.
If you do not have any existing forms, read the Create a Form from Scratch or Create a Form using Templates documentation to create a new one.
Once you are on the Settings & Integrations, go to the Configuration Integrations tab, click the Add New Integration button, and select CleverReach Integration feed from the dropdown list.
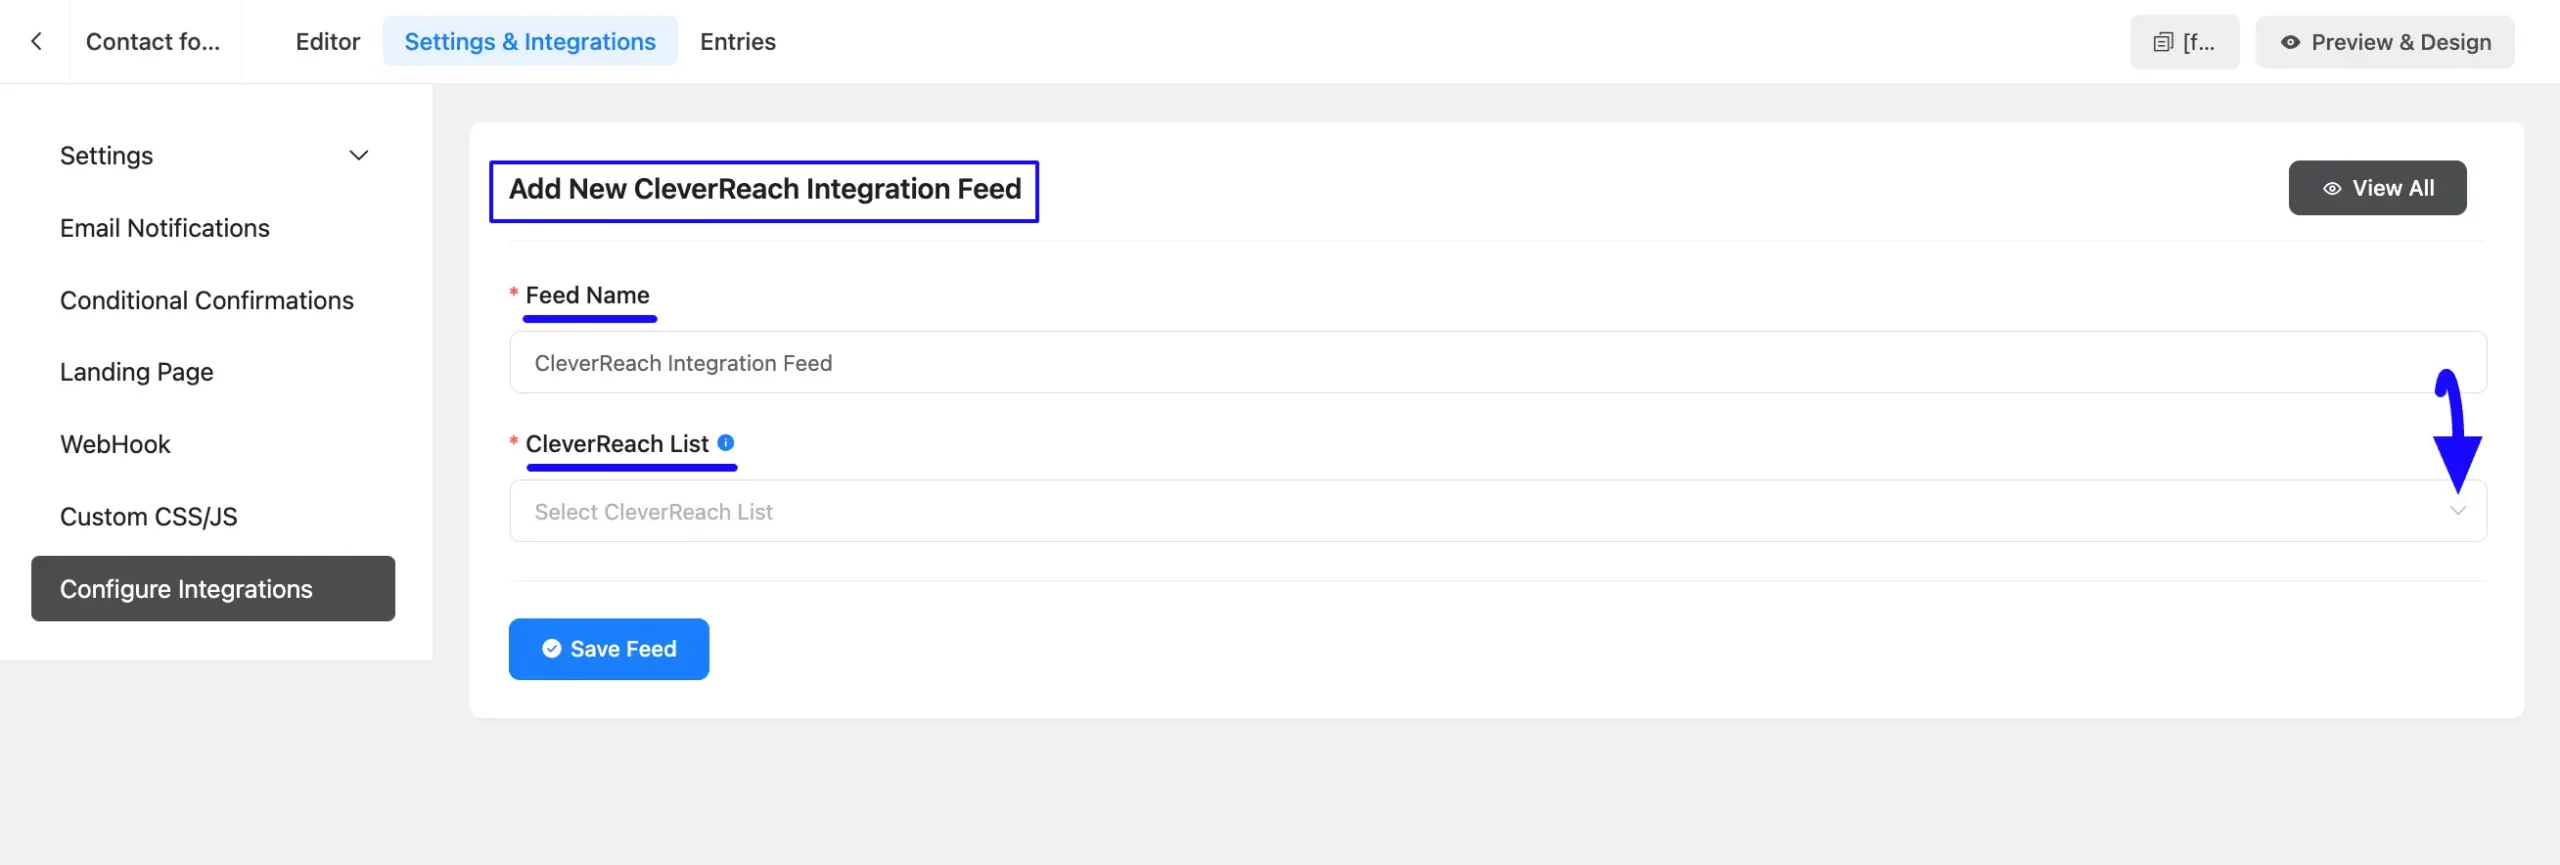
Here, you will find a required field to set a Name for your integration feed according to your preference.
Also, you need to select the CleverReach List from the dropdown where you want to send the submitted form data.
Once you select the form, a pop-up page will appear with various settings options for configuring the CleverReach.
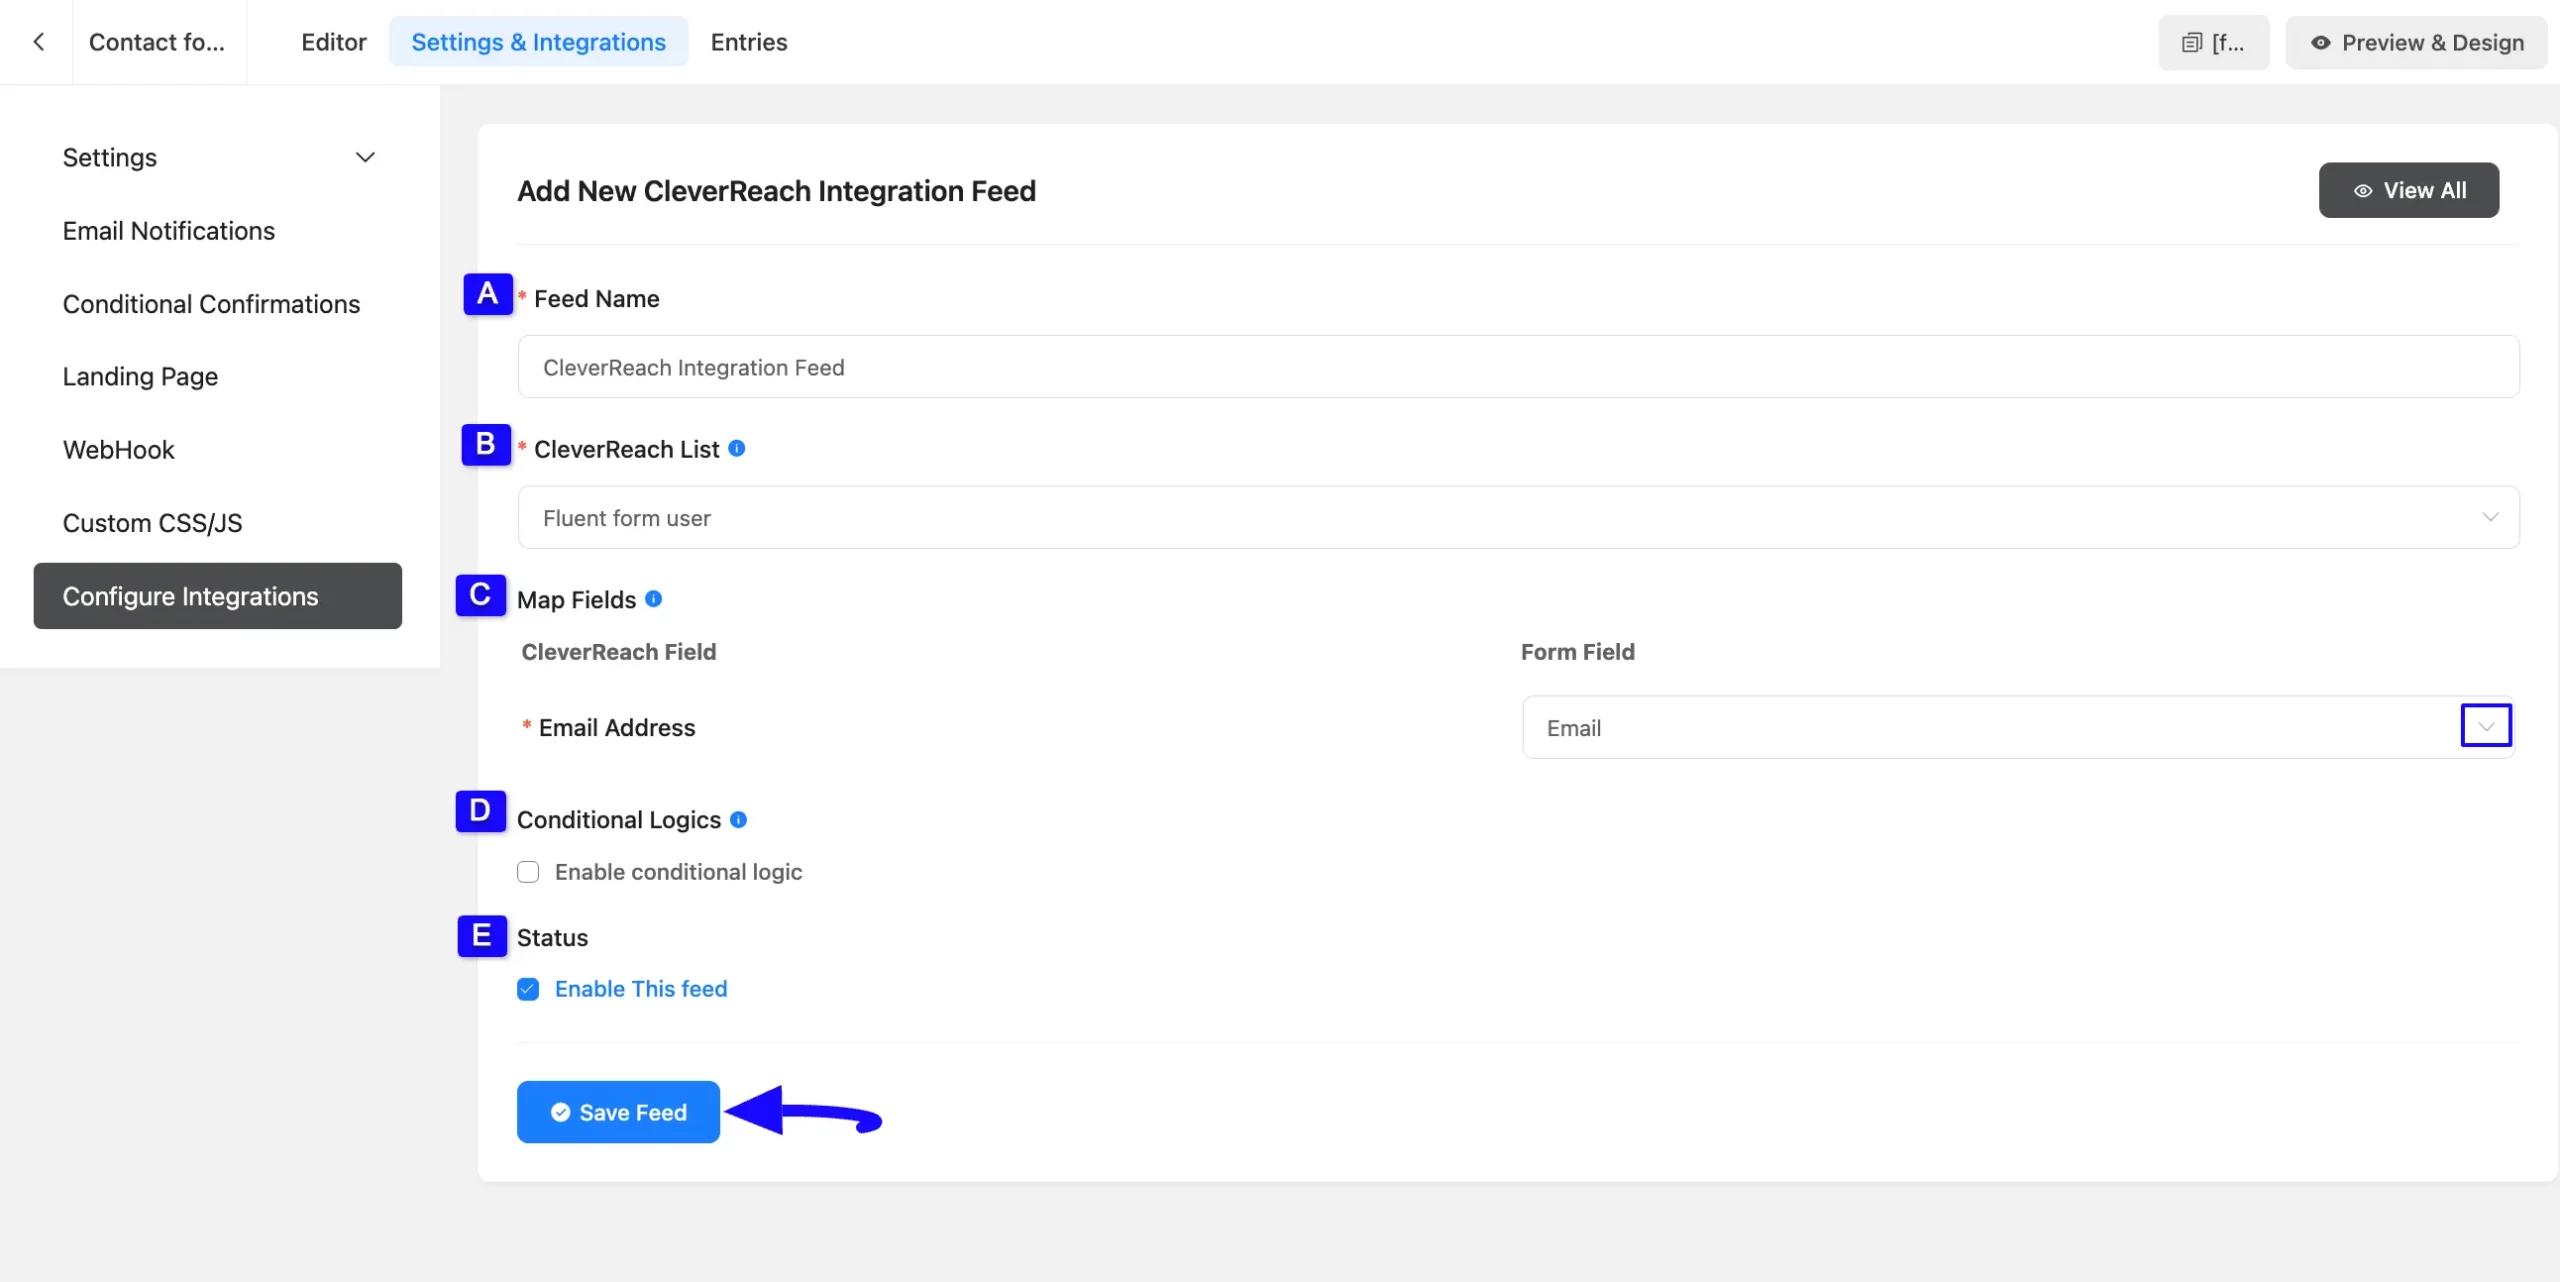
All the settings options mentioned in the screenshot below are briefly explained:
- Name: From here, you can change the name anytime if needed.
- CleverReach List: From here, you can change the CleverReach List anytime if needed.
- Map Fileds: Use this option to properly link your CelverReach Field with the Form Field. You can easily select the value for the Form field based on the CelverReach Field using the Shortcode Arrow.
- Conditional Logics: This option allows CleverReach integration to function conditionally based on your submission values according to your set conditional logic/s. To learn more, read this Documentation.
- Enable This Feed: Check this option, to ensure this integration feed remains enabled, and all the actions of this feed function properly.
Once the setup is done, finally, click the Save Feed button.
And, your CleverReach will be integrated into this specific form!
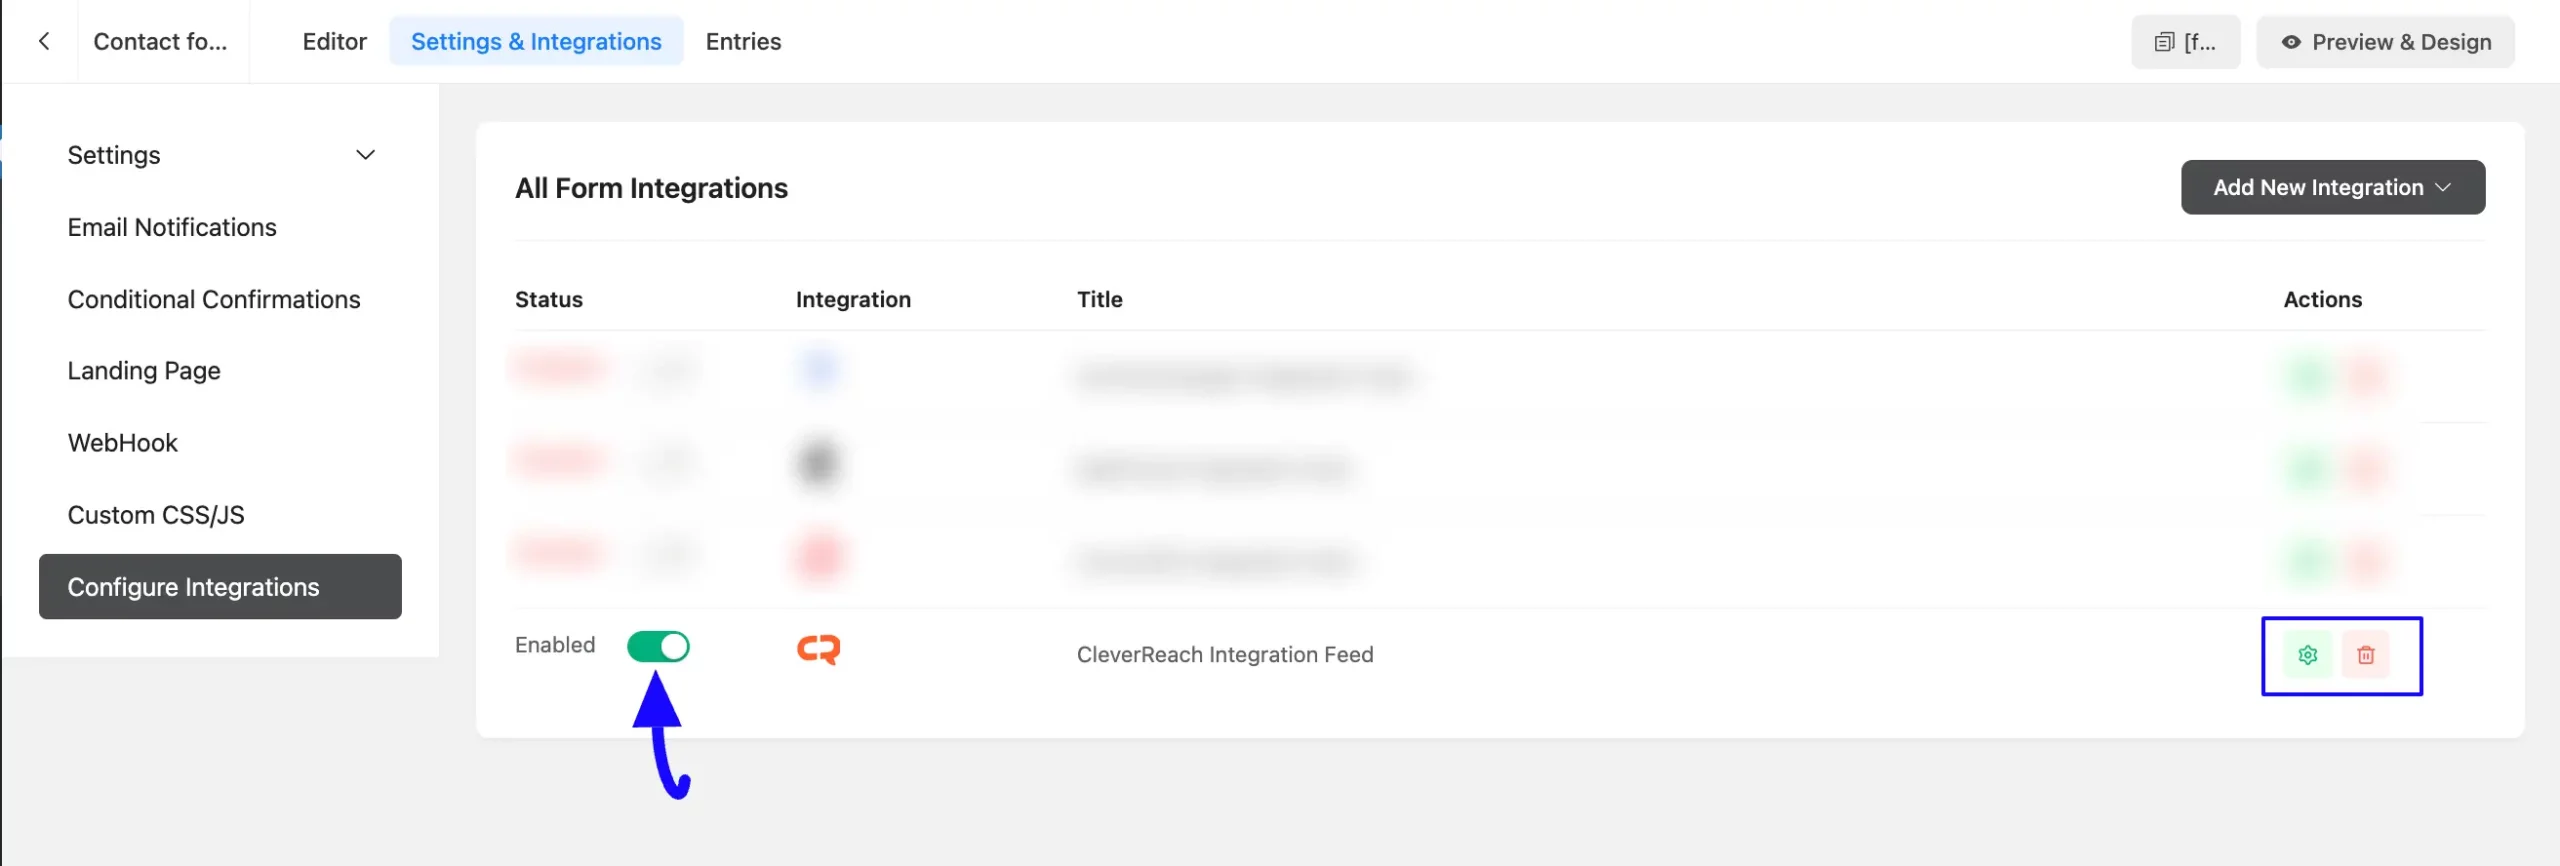
After successful integration, now you will see that your CleverReach Integration Feed has been added here.
You can modify your feed anytime by clicking the Settings Icon and delete it by clicking the Trash Icon.
Also, you can disable or enable this feed anytime by turning off the Toggle if needed.
This way you can easily integrate CleverReach with Fluent Forms!
If you have any further questions, concerns, or suggestions, please do not hesitate to contact our @support team. Thank you.


