
Fluent Forms integrates reCAPTCHA, a CAPTCHA system developed by Google, to protect websites from spam bots and automated abuse. It utilizes machine learning to ensure that a user is human.
This article will guide you through configuring reCAPTCHA in your WordPress Site through Fluent Forms.
Configuring reCAPTCHA Integration #
To learn how to configure reCAPTCHA integration, follow the steps with screenshots below –
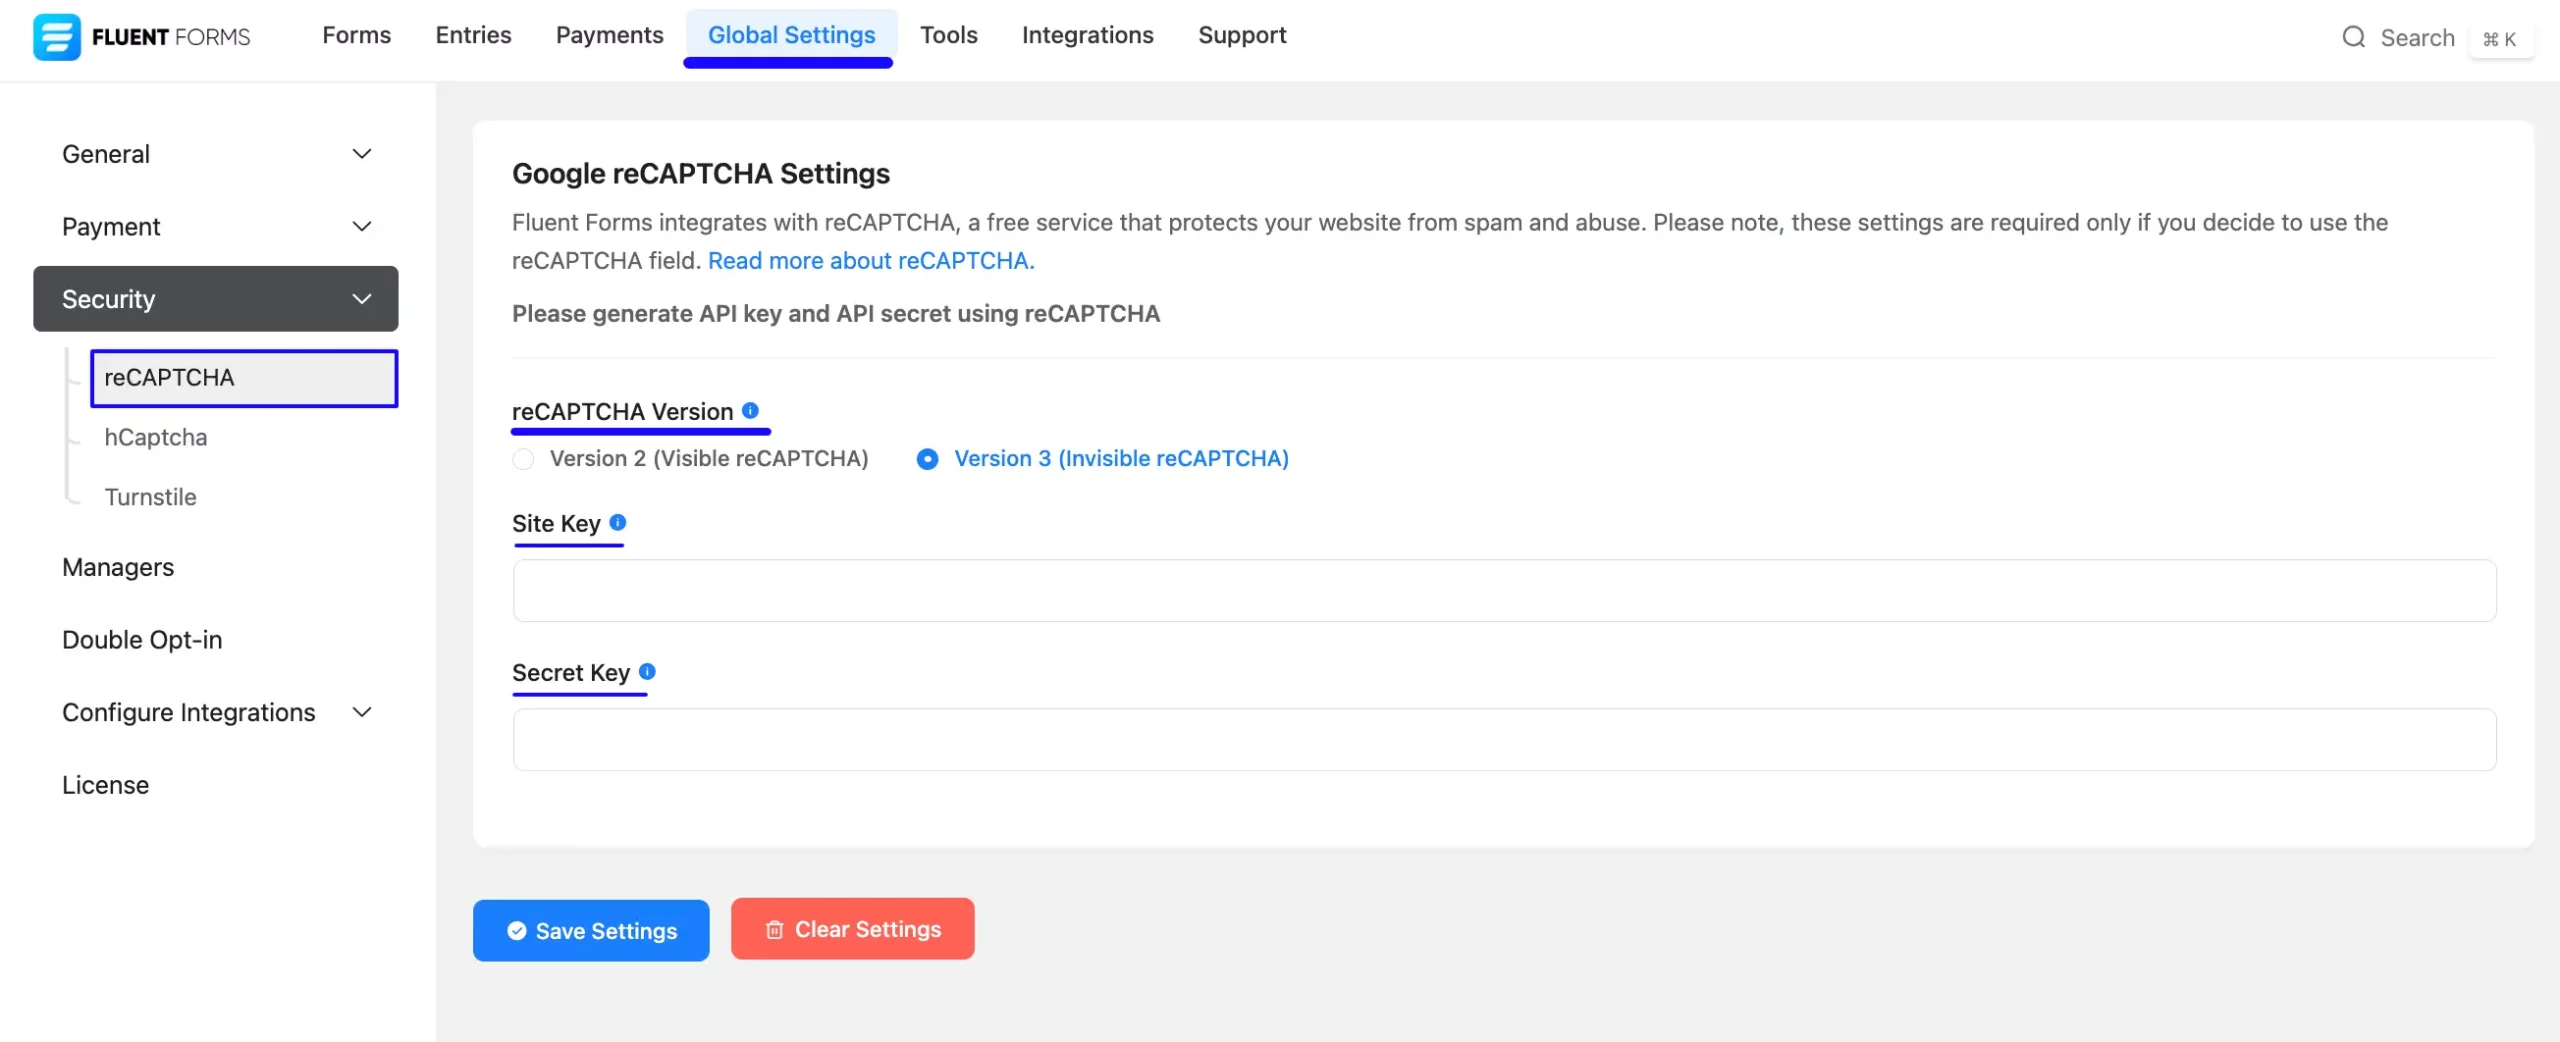
First, go to Global Settings from the FluentForms Navbar, open the Security tab from the left sidebar, click the reCAPTCHA option, and two options appear. These are:
- Version 2 (Visible reCAPTCHA): This requires users to check a box indicating they are not a robot, i.e., it verifies the request with a challenge.
- Version 3 (Visible reCAPTCHA): This operates in the background and scores the user’s interaction to determine if they are a bot, i.e., it verifies the request with a score.
Now, select the desired Version of reCAPTCHA and provide the Site Key and Secret Key of your chosen reCAPTCHA version. For example, I chose V3 to show the process.
Get the reCAPTCHA Site and Secret Key #
To learn how to get the reCAPTCHA Site and Secret keys, follow the steps with the screenshots below –
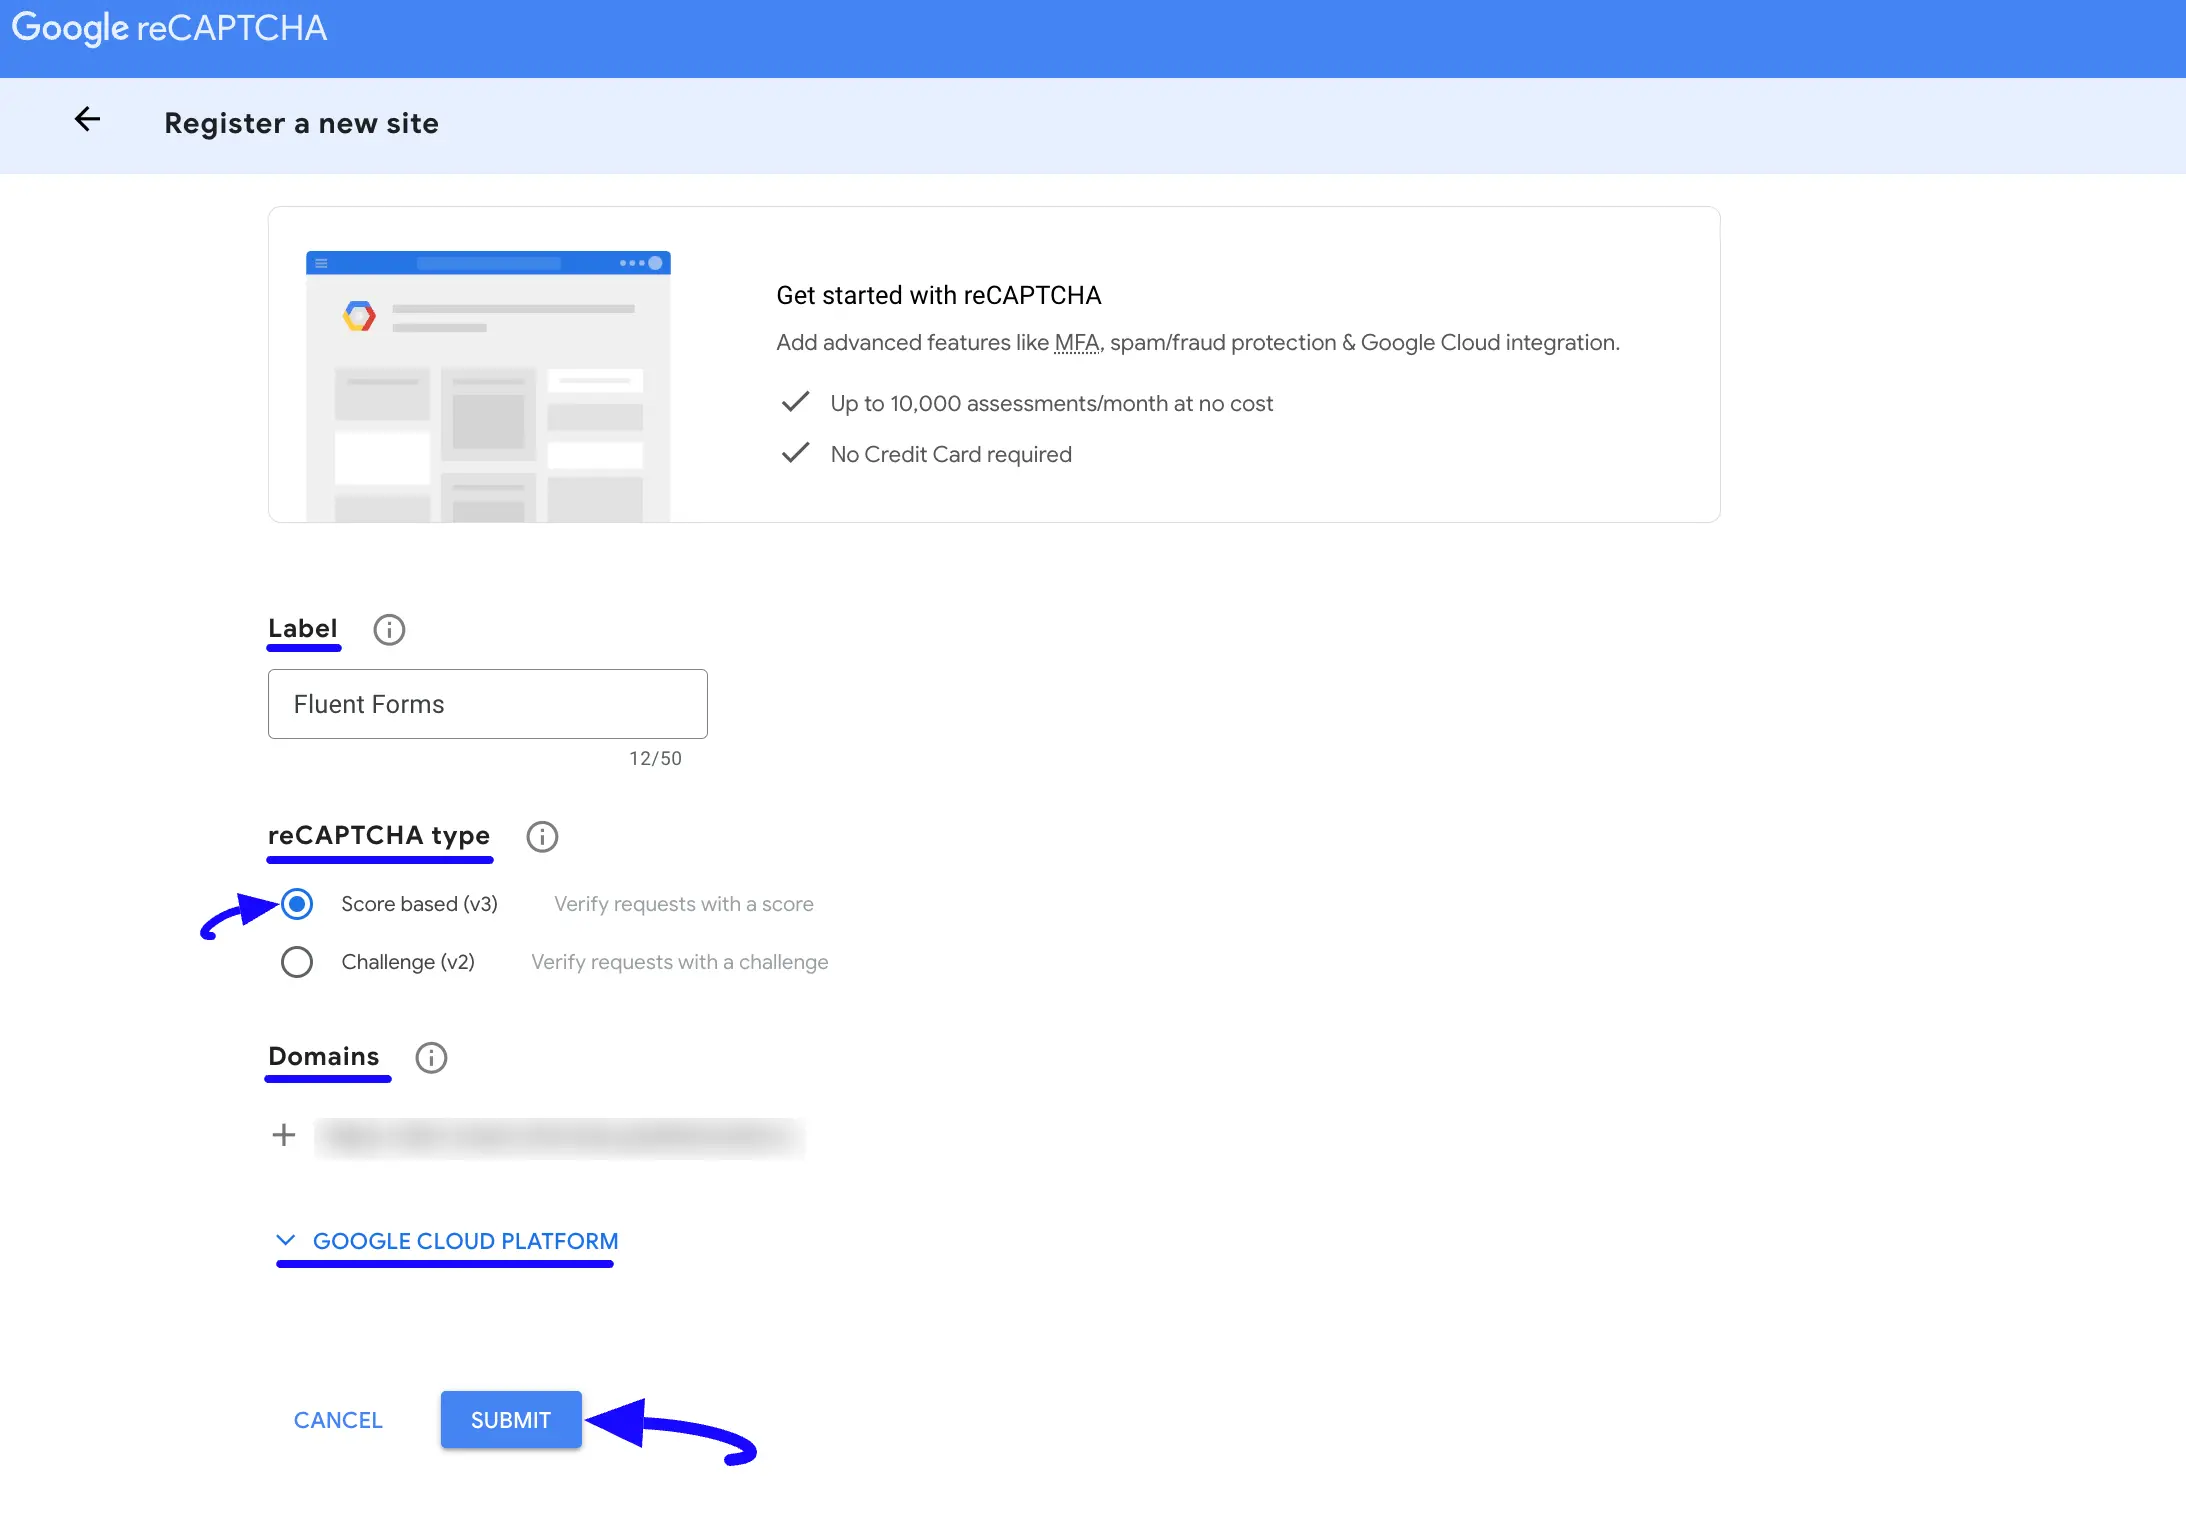
First, go to the Google reCAPTCHA Site, and click the Plus Icon.
Now, put a Name into the Label field to identify your website in the future and choose the reCAPTCHA type you prefer (v2 or v3). For example, I have chosen reCAPTCHA V3.
Then, enter your website/s address in the Domains field to register your domain for a reCAPTCHA verification. Also, you can choose your project from the Google Cloud Platform dropdown.
Once you provide all the necessary information, click the Submit button, and you will get your desired Site key and Secret key.
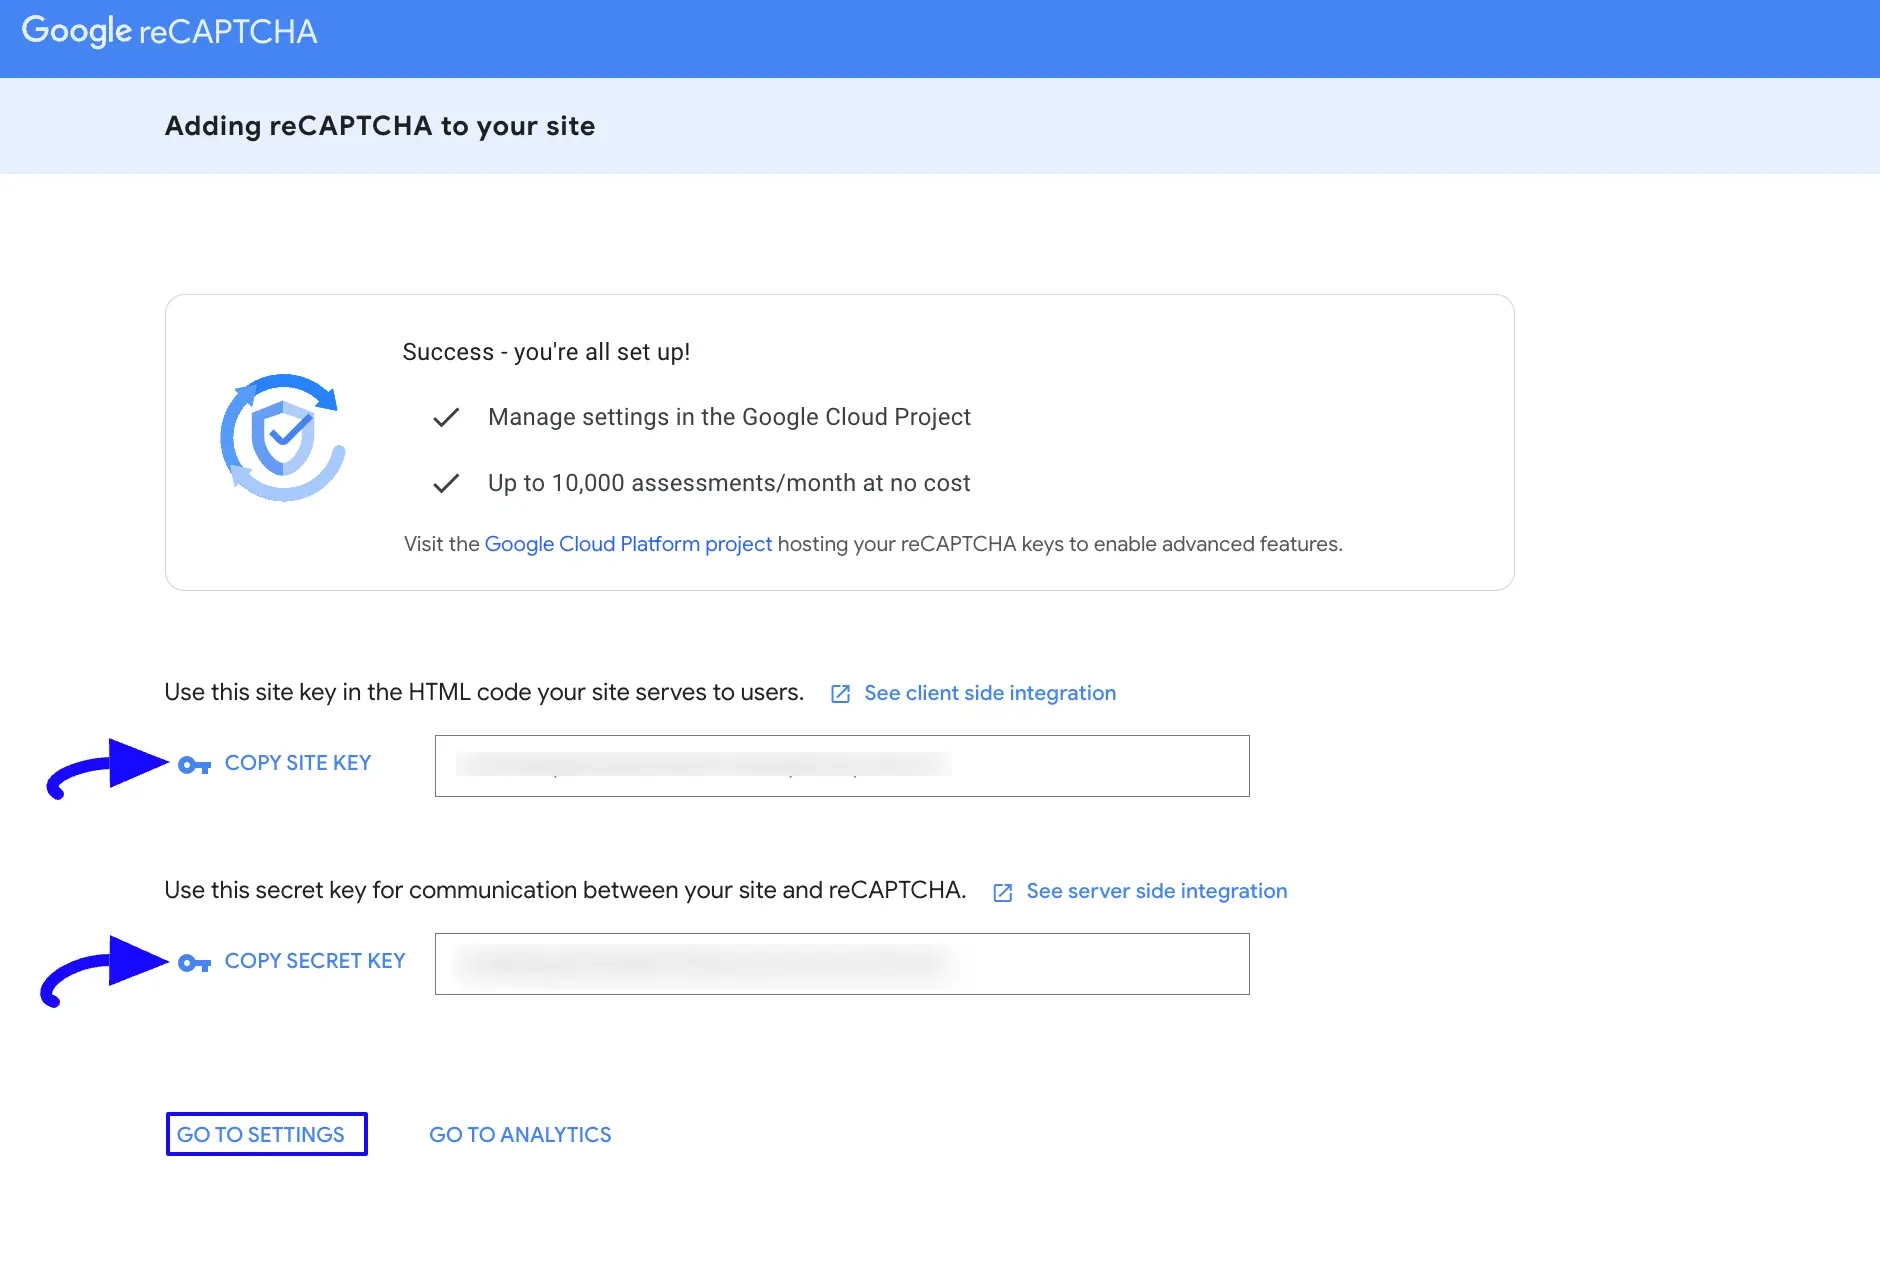
Here, you will get your desired Site key and Secret key. Simply, copy them by clicking the Copy Site Key and Copy Secret Key buttons.
For additional settings, click the Go To Settings button, and the settings page will appear.
Connecting reCAPTCHA with Fluent Forms #
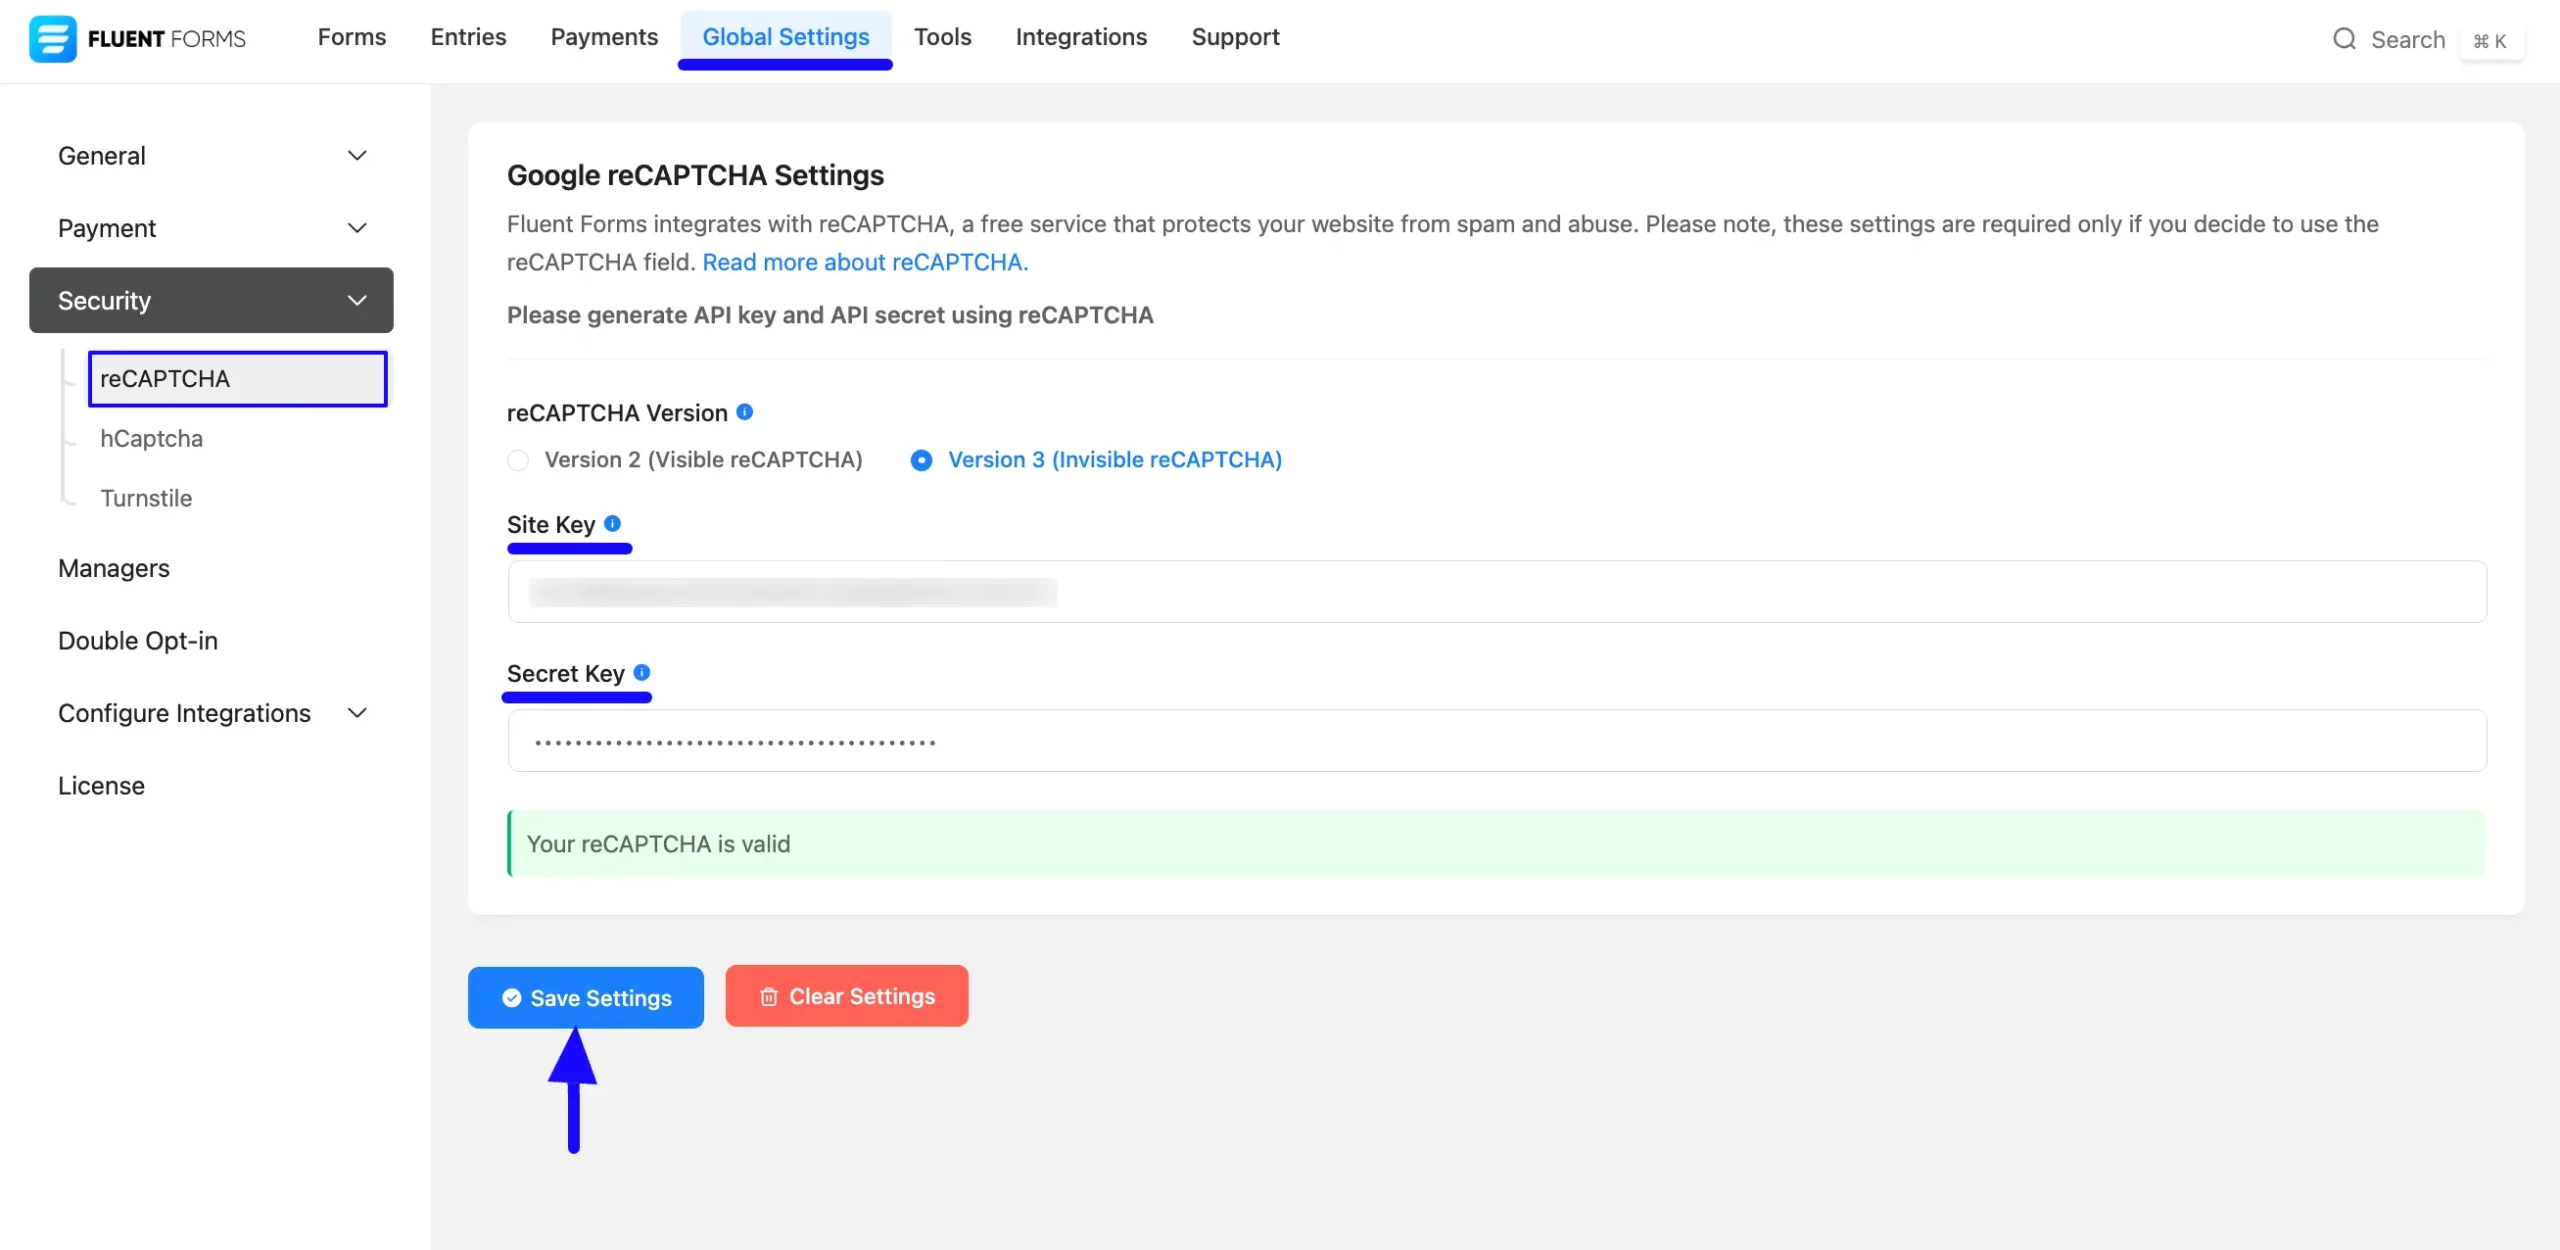
Return to the Global Settings from the FluentForms Navbar, open the Security tab from the left sidebar, and click the reCAPTCHA.
Now, paste the Keys you copied from the Google reCAPTCHA Site into the Site Key and Secret Key fields respectively.
Finally, press the Save Settings button to make your reCAPTCHA Integration functional.
Integrating reCAPTCHA with Forms #
To learn the process of integrating the reCAPTCHA in a specific form, follow the steps with screenshots below –
First, go to Forms from the top navbar, and open the Editor page of your desired form by clicking the Edit button where you want to set this reCAPTCHA protection.
If you do not have any existing forms, read the Create a Form from Scratch or Create a Form using Templates documentation to create a new one.

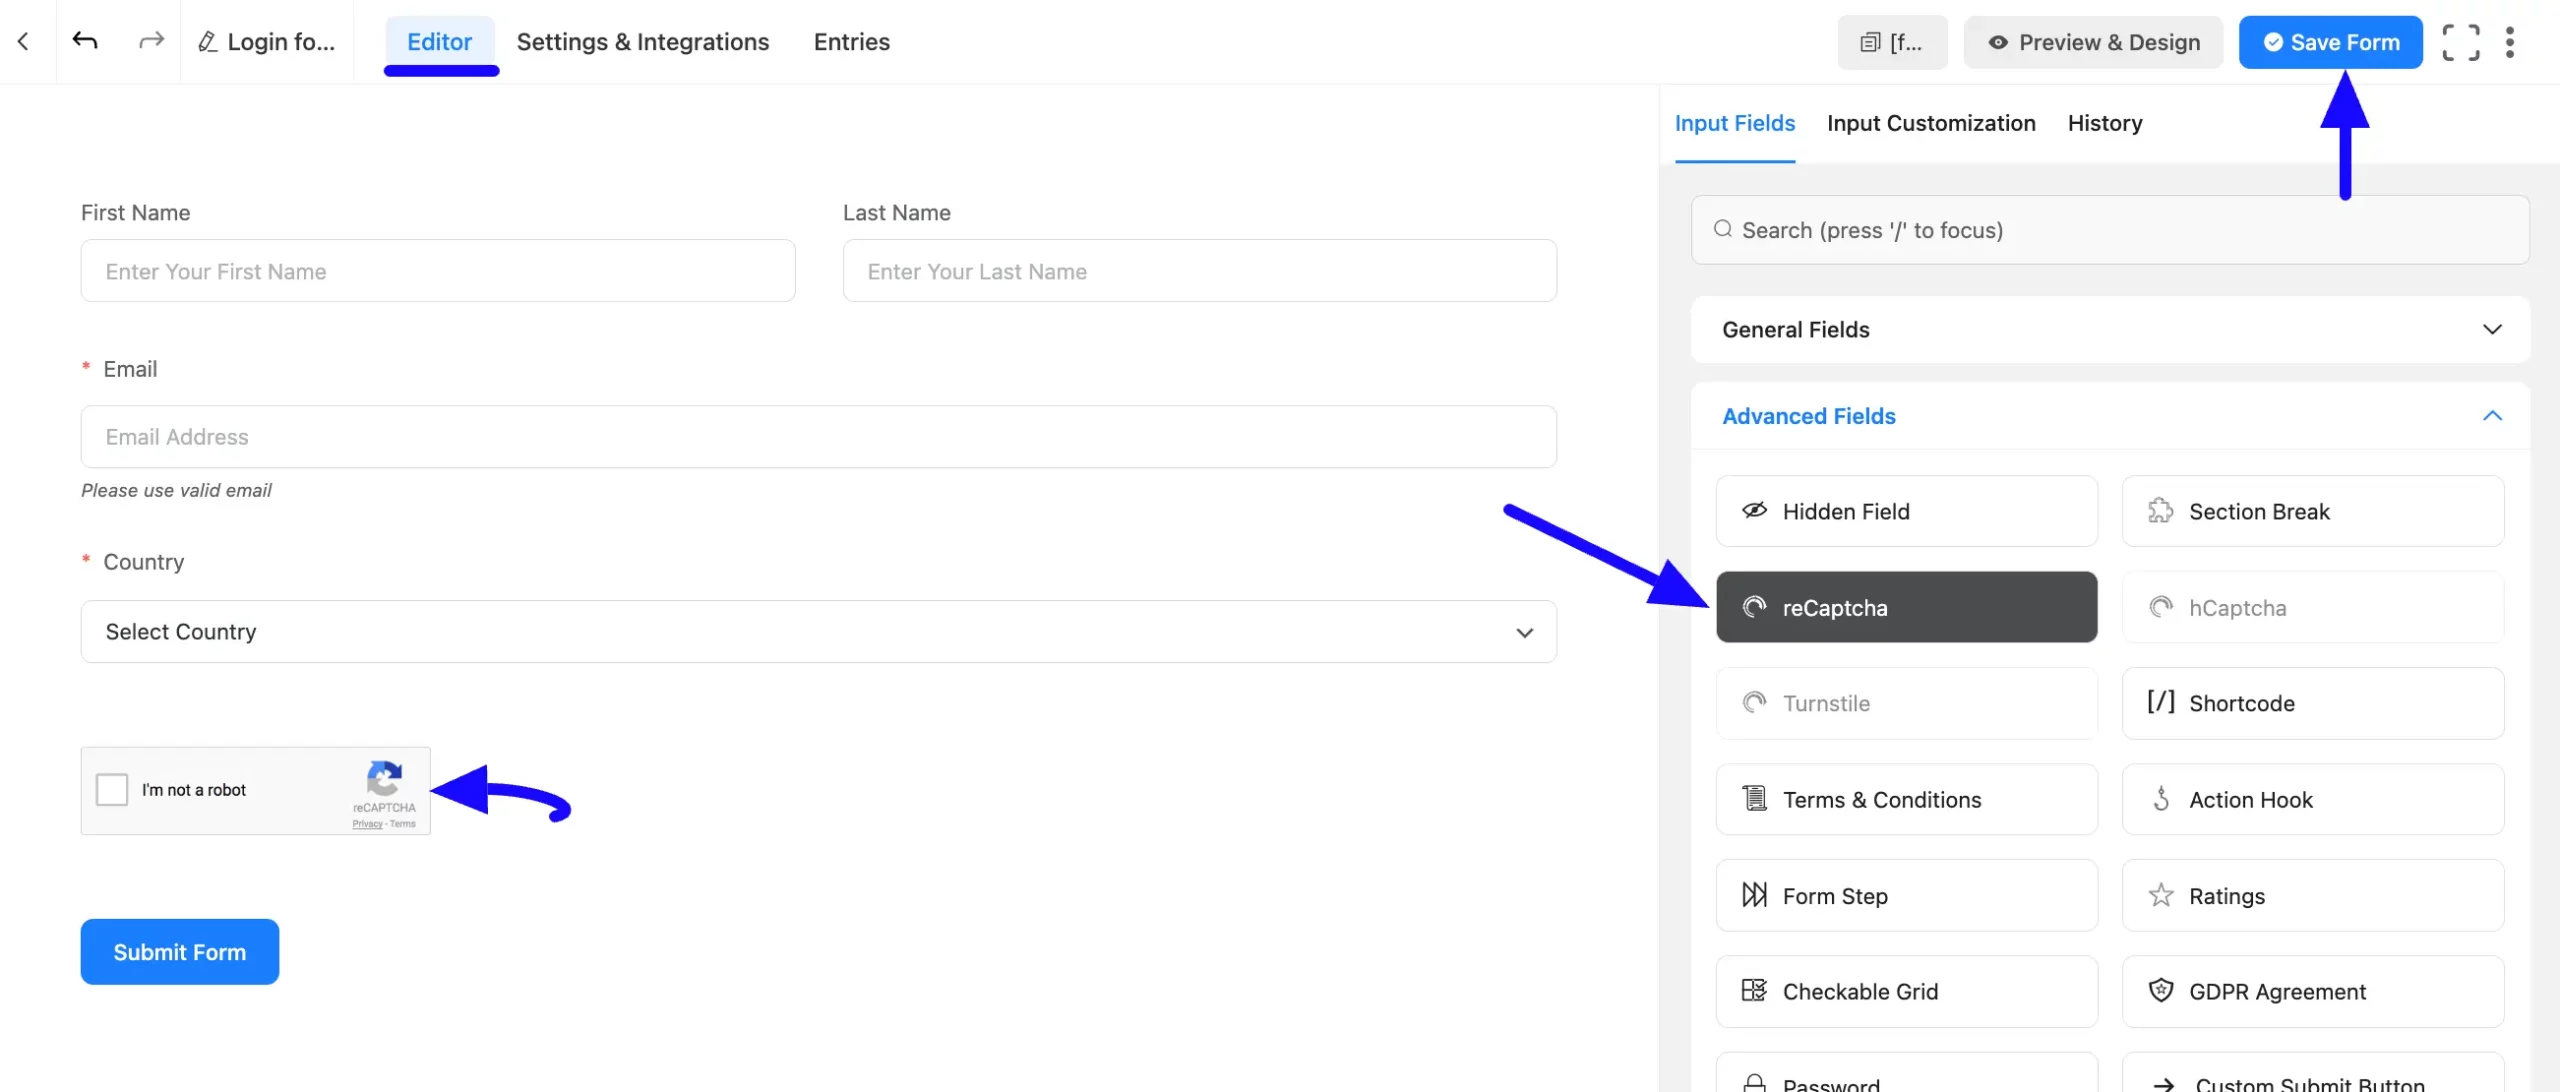
Once you are on the Editor page, go to the Input Fields on the right side, open the Advanced Fields dropdown list, and click the reCAPTCHA input field.
Finally, click the Save Form button to integrate your configured reCAPTCHA into this form.
Remember, you can not add the reCaptcha field for a specific form if you already enabled it globally for all forms.
If you have any further questions, concerns, or suggestions, please do not hesitate to contact our @support team. Thank you.


