How to Add a Dynamic Payment Summary in WordPress
If you’re collecting payments through your WordPress site, your customers need to see exactly what they’re paying before they hit submit. A dynamic payment summary shows a live, calculated total that updates as users fill out the form.
The challenge is to build a fully functional payment summary form using just a handful of built-in fields requiring no custom code, no third-party scripts, and no ongoing maintenance headaches. You can simply do that using the proper form builder for WordPress, such as Fluent Forms.
In this tutorial blog, I’ll guide you through the steps, following which you can implement a no-code payment summary in your WordPress site.
TL;DR
- A dynamic payment summary shows a real-time calculated total inside your WordPress form
- Payment summary is a great feature for eCommerce stores, nonprofits, service businesses, event organizers, and anyone who collects payment on their website
- You simply need four fields to make a dynamic payment summary: a two-column container, a payment item, an item quantity, and a payment summary
- You can apply the payment summary without any custom code, by using Fluent Forms
What is a dynamic payment summary
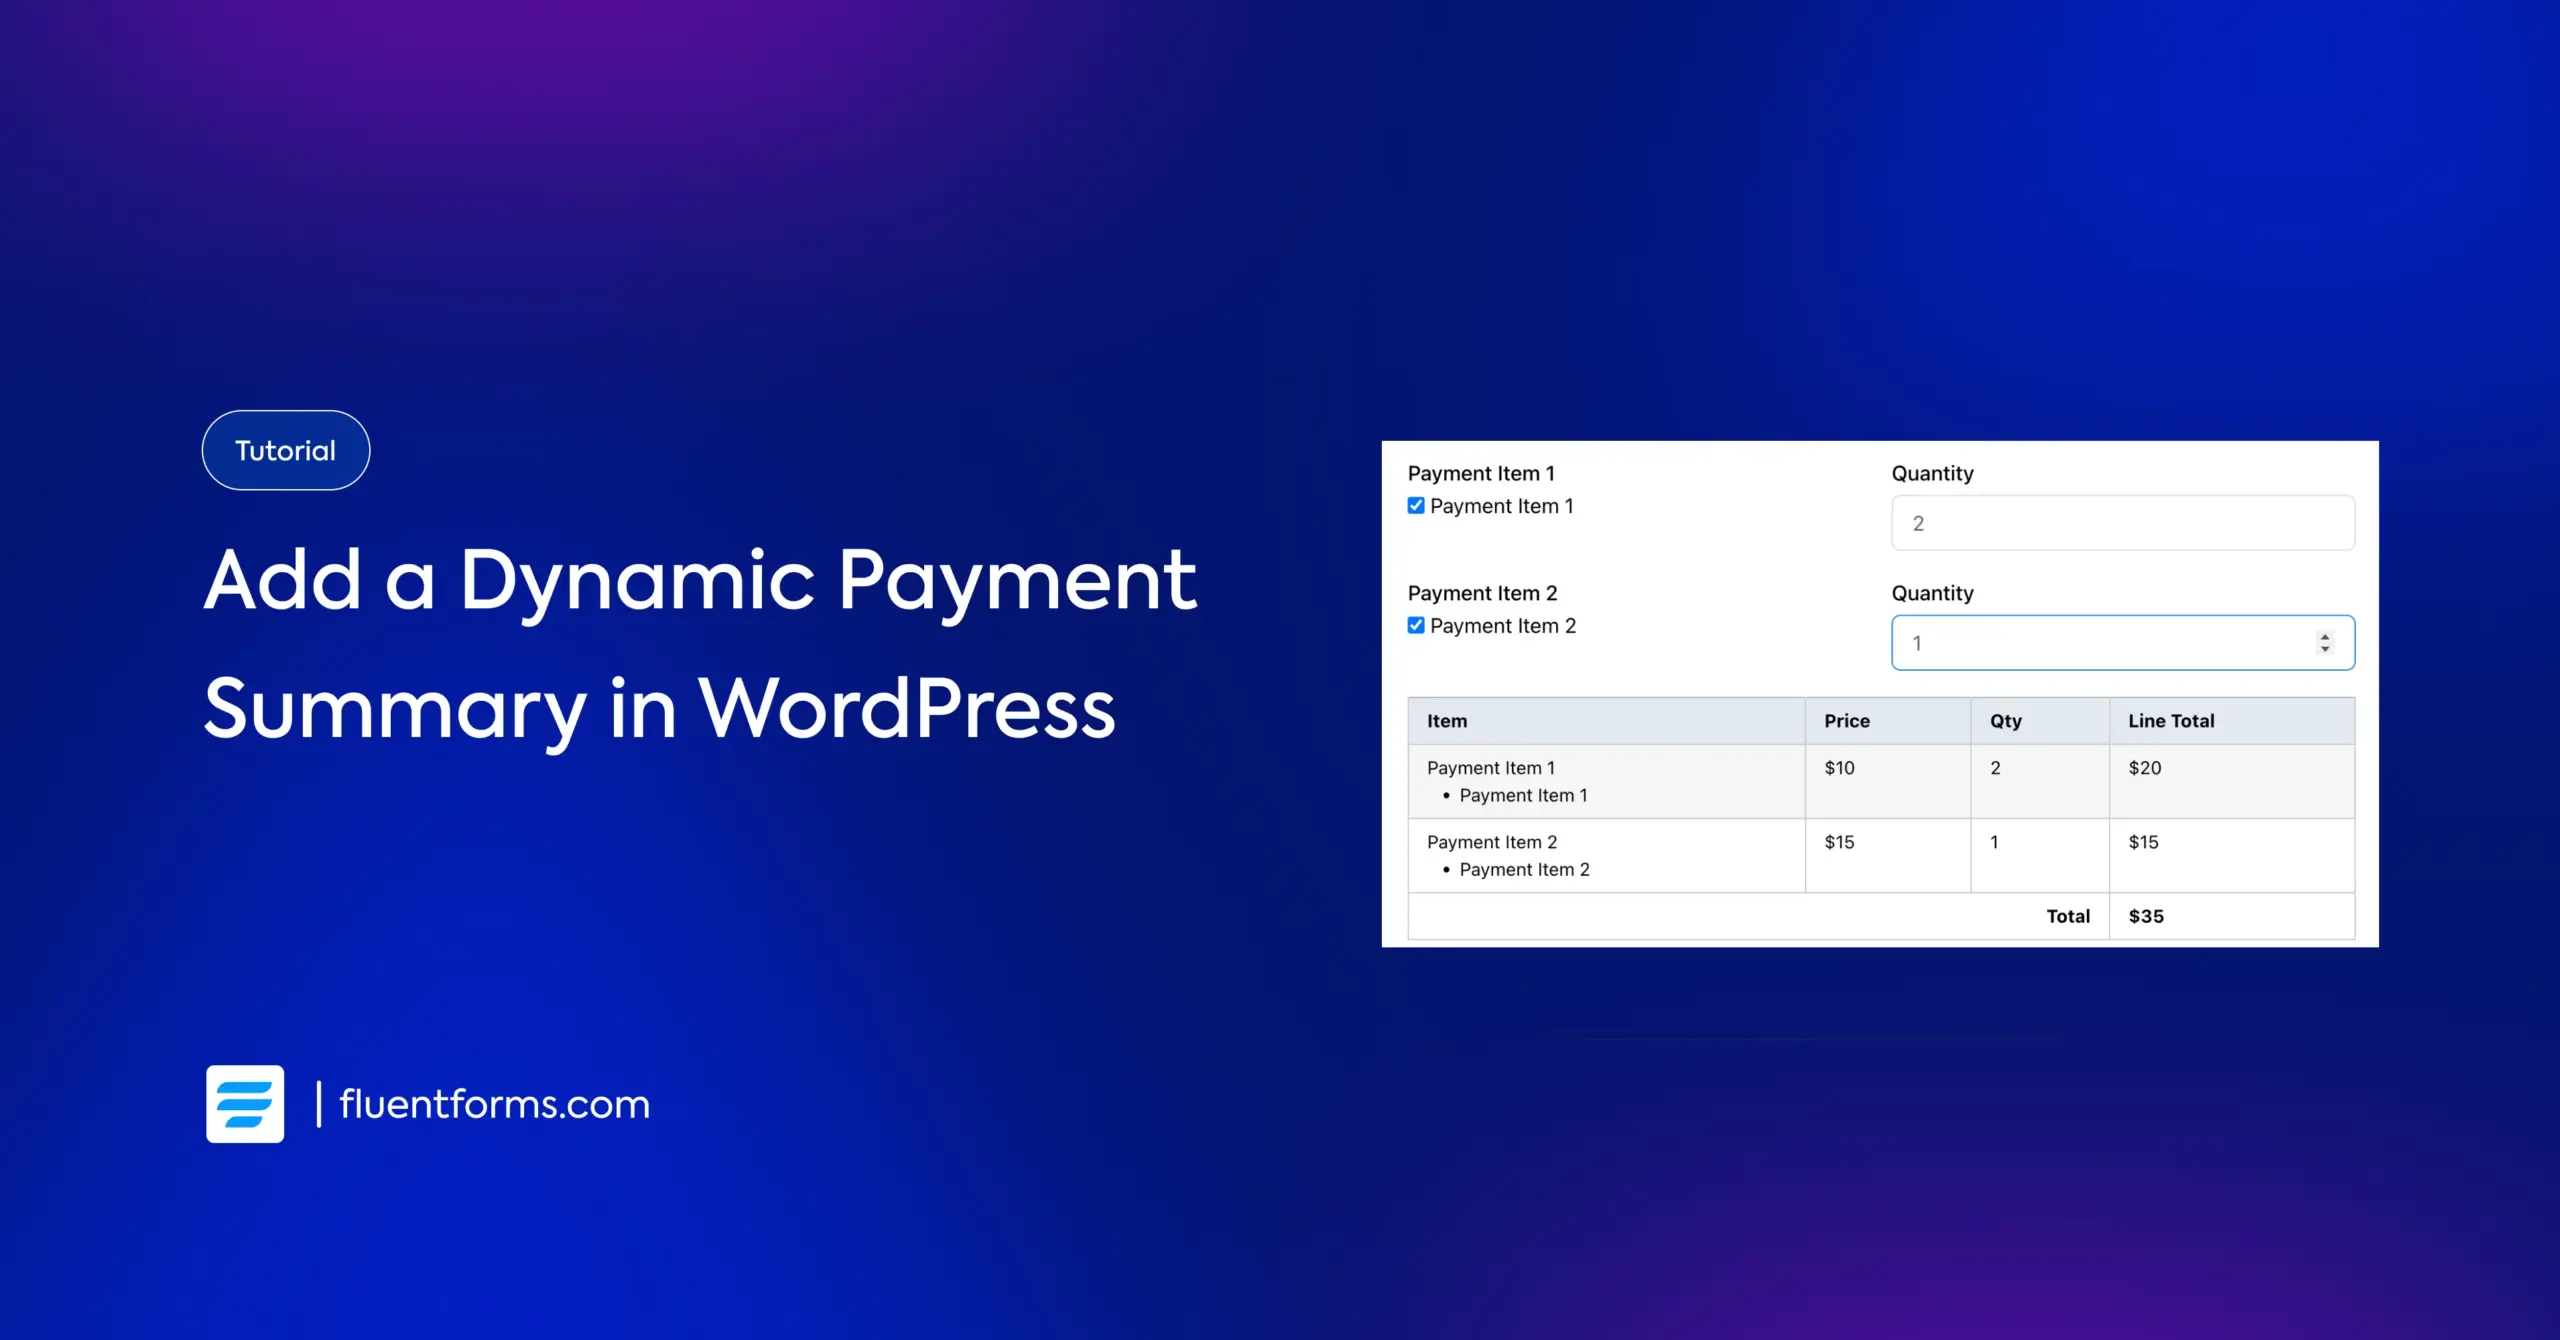
A dynamic payment summary is a section within a form that calculates and displays the total cost in real time as the user interacts with the form. When someone selects a product, enters a quantity, or picks an optional add-on, the summary updates instantly to reflect the running total.
This differs from a static order summary, which typically requires a page reload or a separate checkout step to display the final amount. With a dynamic summary, the calculation happens right inside the form, no waiting, no guessing, no friction.
Think of it like a mini shopping cart embedded directly in your order or contact form. Users see exactly what they’re committing to before they submit, which reduces hesitation and builds trust.
Where this is useful:
- eCommerce stores selling physical or digital products with variable quantities
- Nonprofits running tiered donation forms (e.g., $25, $50, or a custom amount)
- Service businesses that price based on quantity or scope, such as cleaning companies, event caterers, and print shops
- Event organizers selling tickets with multiple types or pricing tiers
- Online courses or workshops with different attendance or access levels
Fluent Forms fields for a dynamic payment summary
Before jumping into the setup, here’s what you actually need. One of the best things about Fluent Forms is that you don’t need a complicated configuration. Just four input fields handle the entire calculation:
1. Two-column container
This is a layout field, not a data-capture field. It splits a section of your form into two side-by-side columns. It’s the cleanest way to display payment items next to their quantities. It keeps the form organized and makes it easy for users to scan what they’re ordering at a glance.
2. Payment item field
This is where you define what’s being sold. You set a name and a fixed price for a product or service, and users select it from the form. Fluent Forms uses this field as the base value for any price calculation that follows.
3. Item quantity field
This field lets users specify how many units they want. Fluent Forms automatically multiplies the quantity by the price from the linked Payment Item field. The calculation runs in the background without you writing a single line of code.
4. Payment summary field
This is the field that ties everything together. It aggregates all payment item values in the form and displays the running total to the user. As they adjust quantities or select different items, this field updates in real time without page reload or coded calculation.
You can browse the full list of Fluent Forms features to see everything available, but for a dynamic payment summary, this four-field setup is genuinely all you need.
Steps to add a dynamic payment summary in WordPress
Adding a dynamic payment summary in WordPress is easier using Fluent Forms. You will need the minimum number of fields and the simplest customization. Let’s dive into the practical steps and clarify the process.
Step 1: add a new form
From the dashboard of Fluent Forms, you can select Add New Form. From there, you can:
- Start from scratch, entering a New Blank form
- Choose a Template
- Create Conversational Form
- Create Using AI
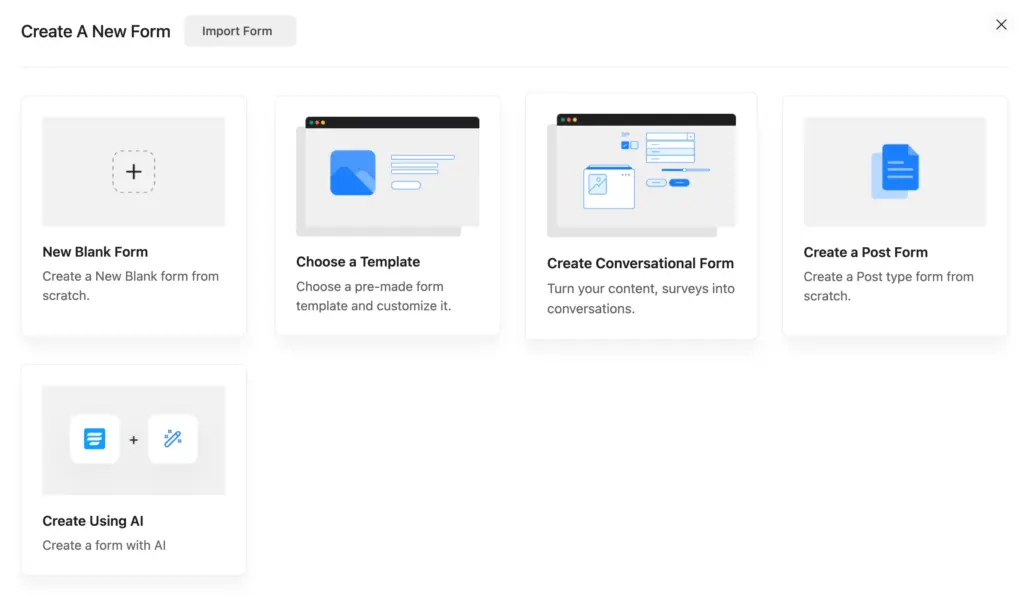
Here, I’ll show you the simplest way to add a payment summary in a Fluent Forms form by choosing the ‘New Blank Form’ option.
You can then go to the editor page, where you can find the Input Fields.
Step 2: choose and add the required fields
In Fluent Forms, you can easily find the fields on the right side. The fields are categorized and also accessible through the search bar.

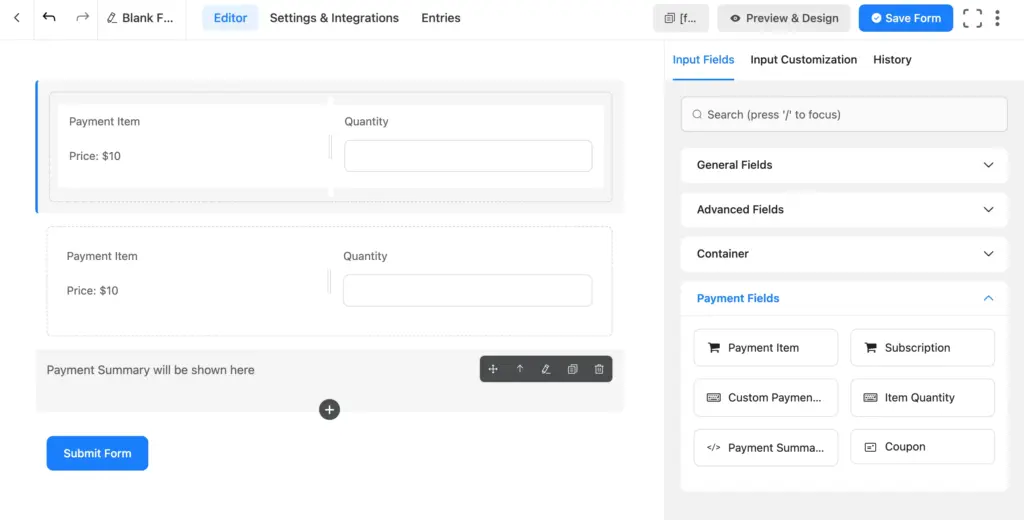
As I mentioned above, you will need a form for the Payment Item and Item Quantity fields, and a two-column container to contain these fields. And finally, the payment summary field.
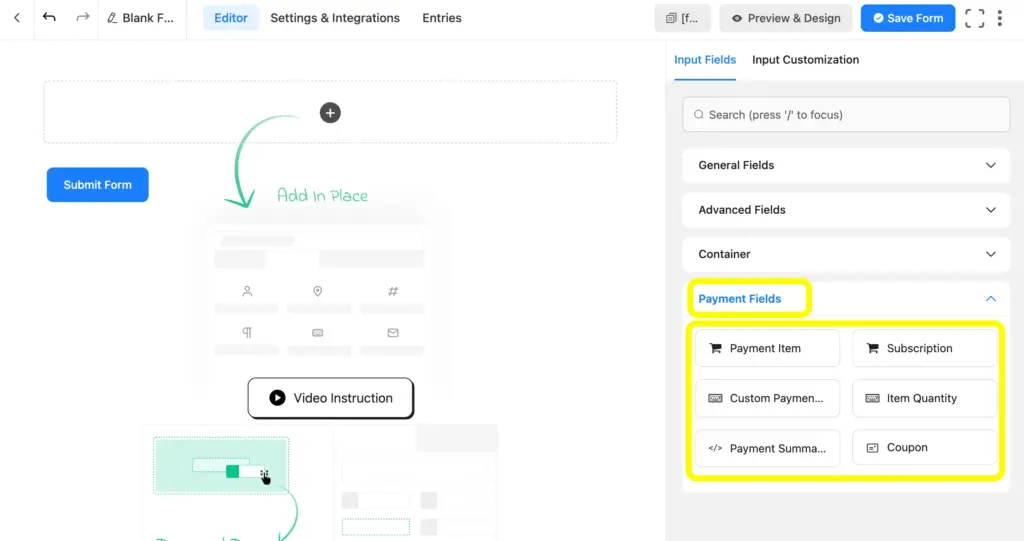
So, I will choose a couple of two-column container fields for the payment item and item quantity fields, and a payment summary field.
Step 3: customize the fields for calculation
The payment summary is all about customizing the payment item and quantity. These customizations eventually ensure dynamic results.
First of all, you need to customize the Payment Item field. There are two simple steps in customizing the payment item field. As you can see here, I have put the same name in the Element Label and Admin Field label; I have chosen the Product Display Type as a checkbox for a better user experience.
In the Payment Items, you can see a box on the right side in which I have put the price.
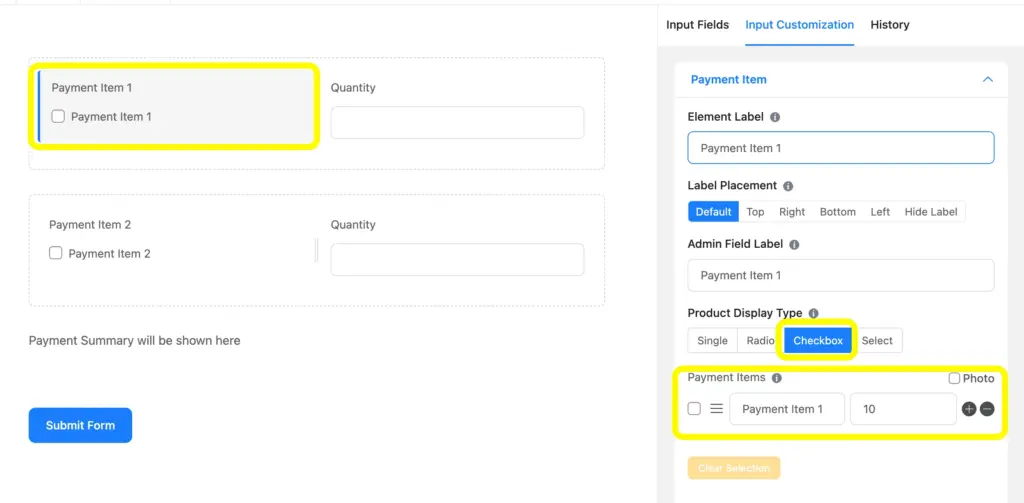
Now, I will just change the Name Attribute from the Advanced Options. As I have put two Payment Item fields, I am keeping the name attribute as payment_input_1, following the Element Label. (The second one will be named as Payment Item 1 (payment_item_2).

So, the customization of Payment Item 1 is done, now I’ll go for editing the Item Quantity field.
Basically, there is nothing much to change, either. I have just changed the Label Placement, which is not required, but I preferred to. And the Product Field Mapping is the main fact here, which should be proper. The item quantity should be matched with the proper payment item; that’s all.

Now, you must be thinking what you should customize in the payment summary, right?
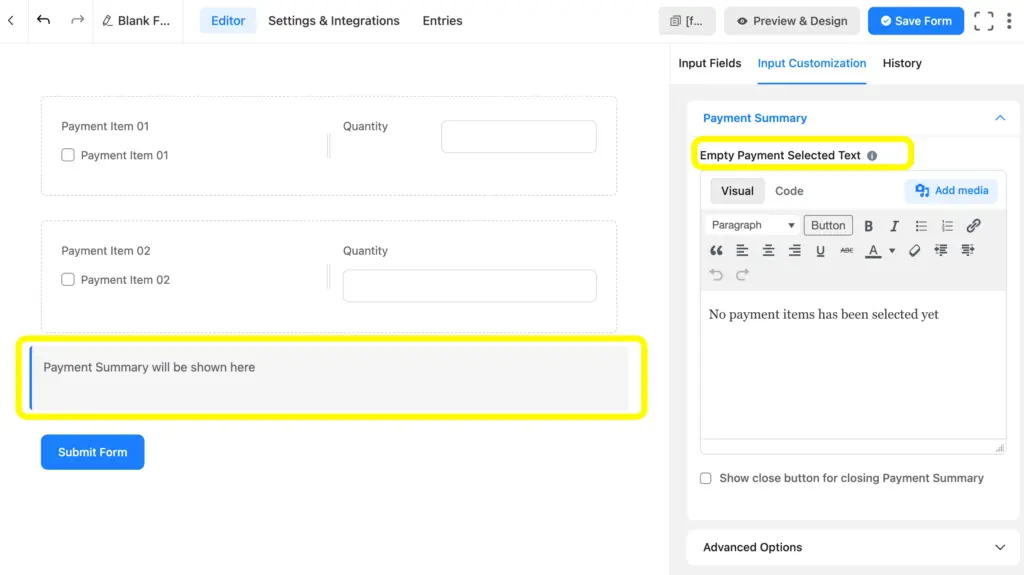
My honest answer is that you literally need to customize nothing in the payment summary field.
Anyway, you can change the Empty Payment Selected Text if you want to.
Step 4: check preview and test the calculation
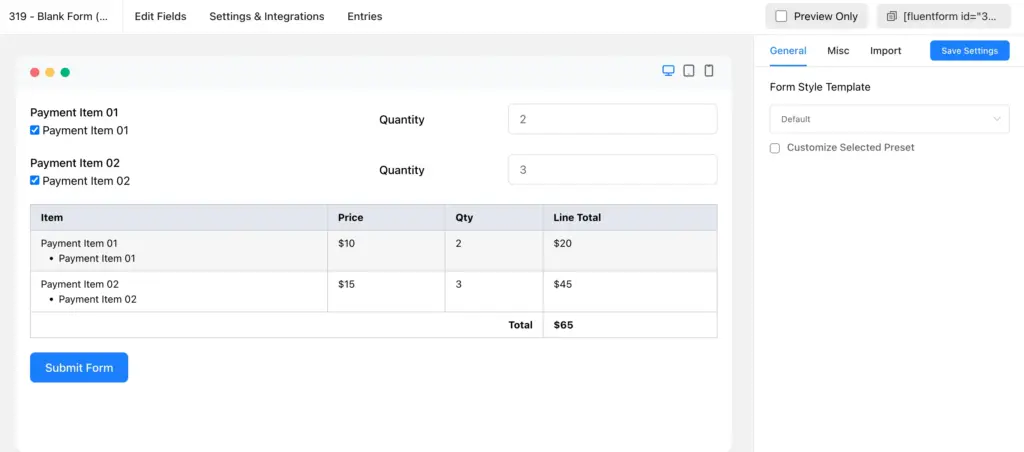
Once you are done with the customization, you can now check the preview and run a calculation for testing purposes.
Now you can check the result of the dynamic payment summary yourself.
One user experience I would share with you is that you need to defocus your cursor after input and tap/click somewhere else, except the quantity field.
Now, you can publish the form using the shortcode.
Related features worth knowing
Once your payment summary form is live, these Fluent Forms features can take it further without adding any technical complexity.
Conditional logic
Conditional logic lets you show or hide fields based on what a user selects. For payment forms, this opens up a lot of possibilities. You can reveal an add-on field only when a specific product is selected, show a custom amount input only when “Other” is chosen, or display a promo code field for returning customers.
Export entries
After collecting payments, you need a clear record of what came in. Fluent Forms lets you export form entries to CSV or Excel in a few clicks, requiring no third-party tools.
Every submission, including itemized payment details and quantities, is stored in your WordPress database and accessible from the Fluent Forms dashboard. Useful for reconciling orders, sharing data with your accounting team, or importing records into another system.
Inventory module
If you’re selling physical products or anything with limited availability, the inventory module prevents overselling without any manual intervention on your end.
You set a stock limit for each payment item, and once it hits zero, the field is automatically disabled in the form. No one can select it, no one can order more than you have. For event ticketing, limited-seat workshops, or physical merchandise, this keeps operations clean and avoids awkward refund conversations.

Hi, this is Aparup. I am a Literature postgraduate, mixing my creative thoughts with my experience in the tech industry to surpass AI. Professionally, I am a content marketer seeking solutions to users’ problems regarding WordPress.


Leave a Reply