
Fluent Forms, one of WordPress’s most powerful form builders, allows seamless integration with Google Analytics (GA4) through Google Tag Manager (GTM). This helps track user form engagements and improve conversions.
This document applies to the latest Google Analytics: GA4.
Notice: This method works for both classic and conversational forms.
Overview #
This guide will show you how to set up tracking for your website’s forms. The goal is simple: we want to know two main things:
- How many people see your form.
- How many people actually fill it out and submit it.
Knowing this is incredibly helpful because it helps you stop guessing. You can finally get answers to questions like, “Is my contact form too long and complicated?” or “Are people even finding my signup form?”
With this setup, you can:
- See the real problem: Find out if a lot of people are viewing a form but then giving up without submitting it.
- Make smart changes: Test new ideas, like removing a field or changing your “Submit” button’s text, and see if it actually helps more people finish the form.
- Get better results: Use what you learn to get more contacts, signups, or quotes from your website.
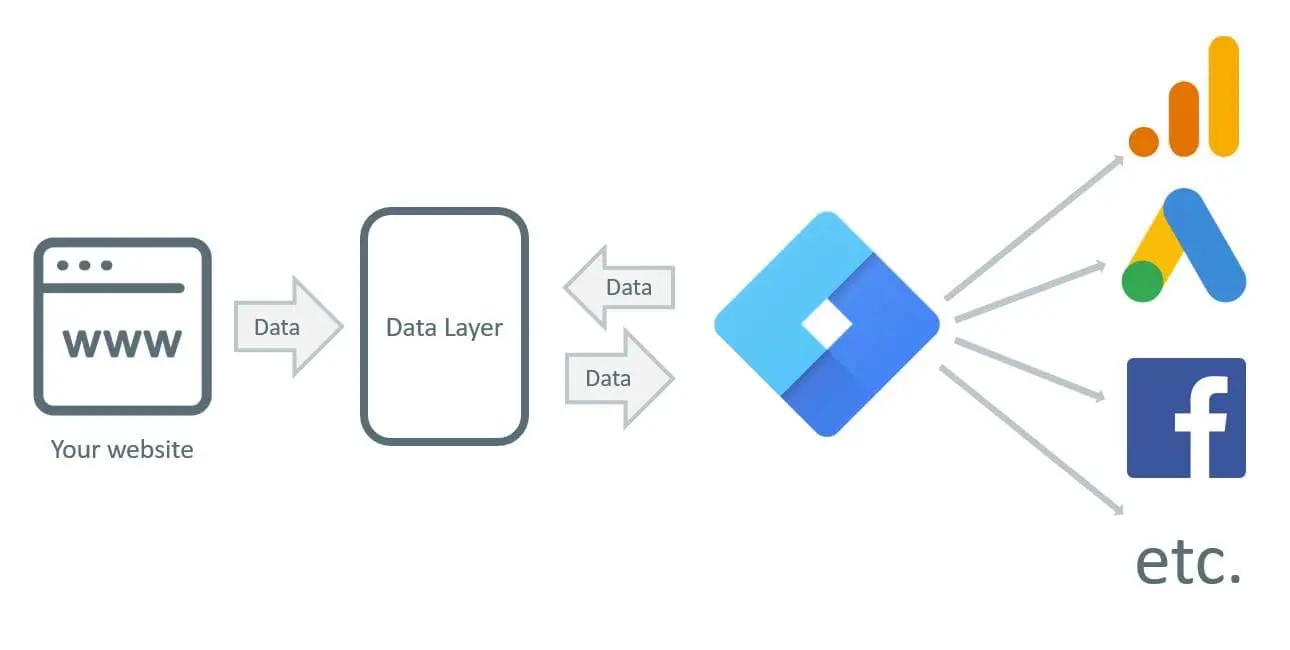
How the Three Tools Work Together
To make this happen, we use three tools that work together as a team:
- Fluent Forms: This is simply the form on your WordPress site. When someone sees the form or submits it, Fluent Forms sends out a little signal.
- Google Tag Manager (GTM): Think of this as the helpful “middleman” or a post office. Its job is to catch those signals from Fluent Forms. It grabs the important information, like the form’s name and the action (whether it was viewed or submitted).
- Google Analytics 4 (GA4): This is your main dashboard where you see all the results. GTM sends a neat, organized report over to GA4. This allows you to log in and easily see things like, “100 people saw the ‘Request a Quote’ form this week, and 10 people submitted it.”
GTM Elements for Fluent Forms Events #
| Tags | Triggers | Variables | |
| 2 | 1 | 3 (2 Required, 1 Optional) | |
| Type | cHTML, GA 4 Configuration | Custom Event | 2 Data Layer, 1 JavaScript |
Types of Tags, Triggers, and Variables:
- Tags: Custom HTML, GA4 Configuration
- Triggers: Custom Event
- Variables: 2 Data Layer Variables, 1 JavaScript Variable
A built-in variable [Event] will be used to identify the type of Fluent Forms events.
1. Creating Fluent Forms Variables #
Variables are Data Types to define the properties and their values that come or are pushed from the website.
First, navigate to the Variables tab in your Google Tag Manager workspace. From there, find the User-Defined Variables area and click the New button to create a new variable.
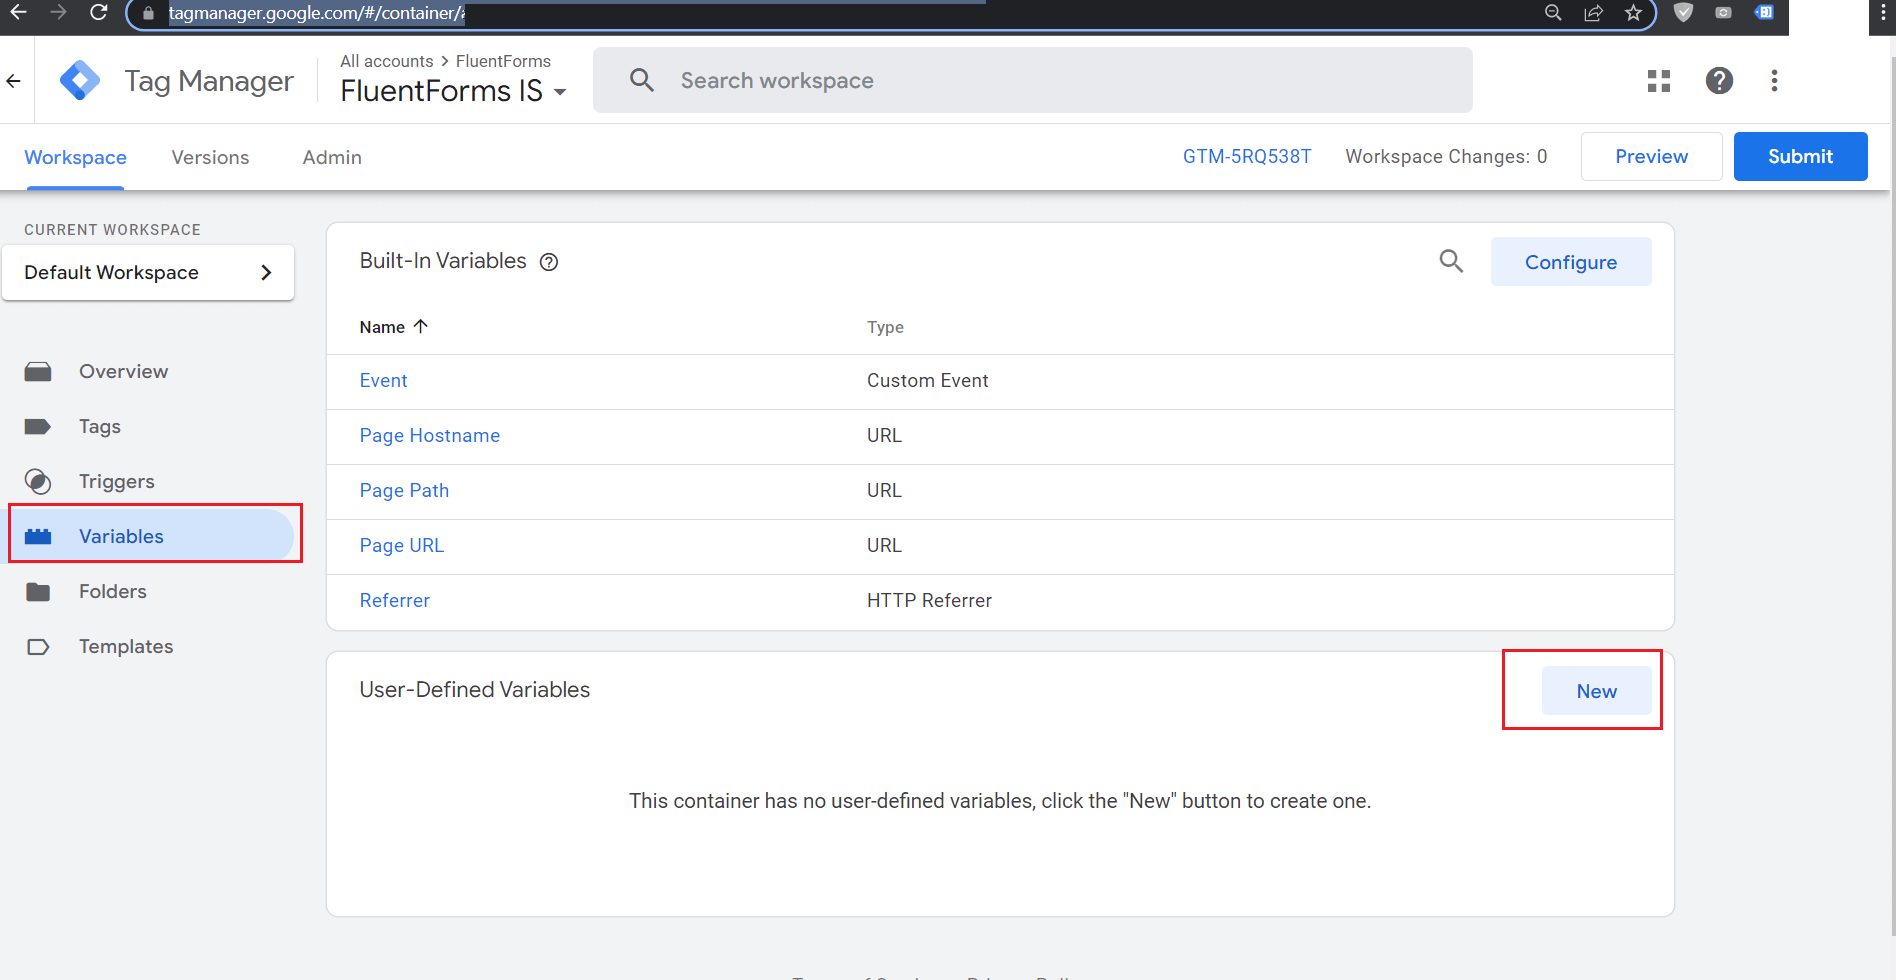
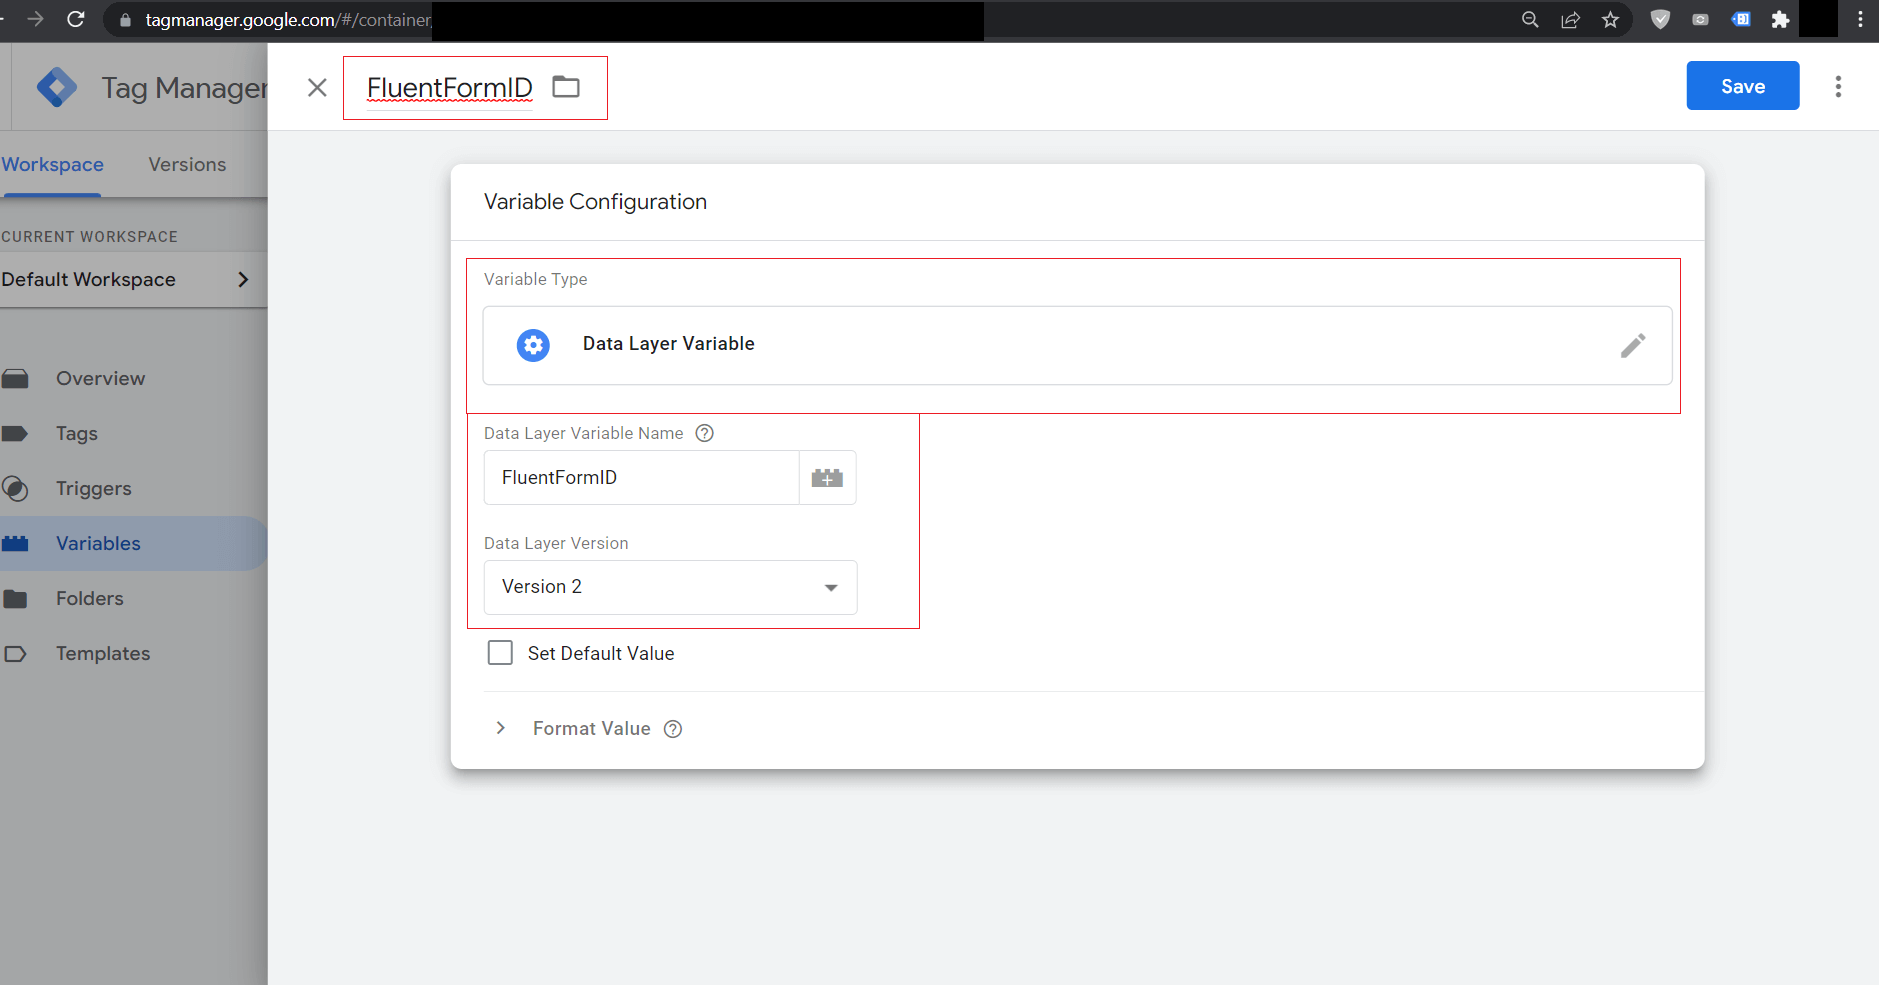
Your Variable properties should be like this:
| Title | FluentFormID |
| Variable Type | Data Layer Variable |
| Data Layer Variable Name | FluentFormID |
| Data Layer Version | Version 2 |
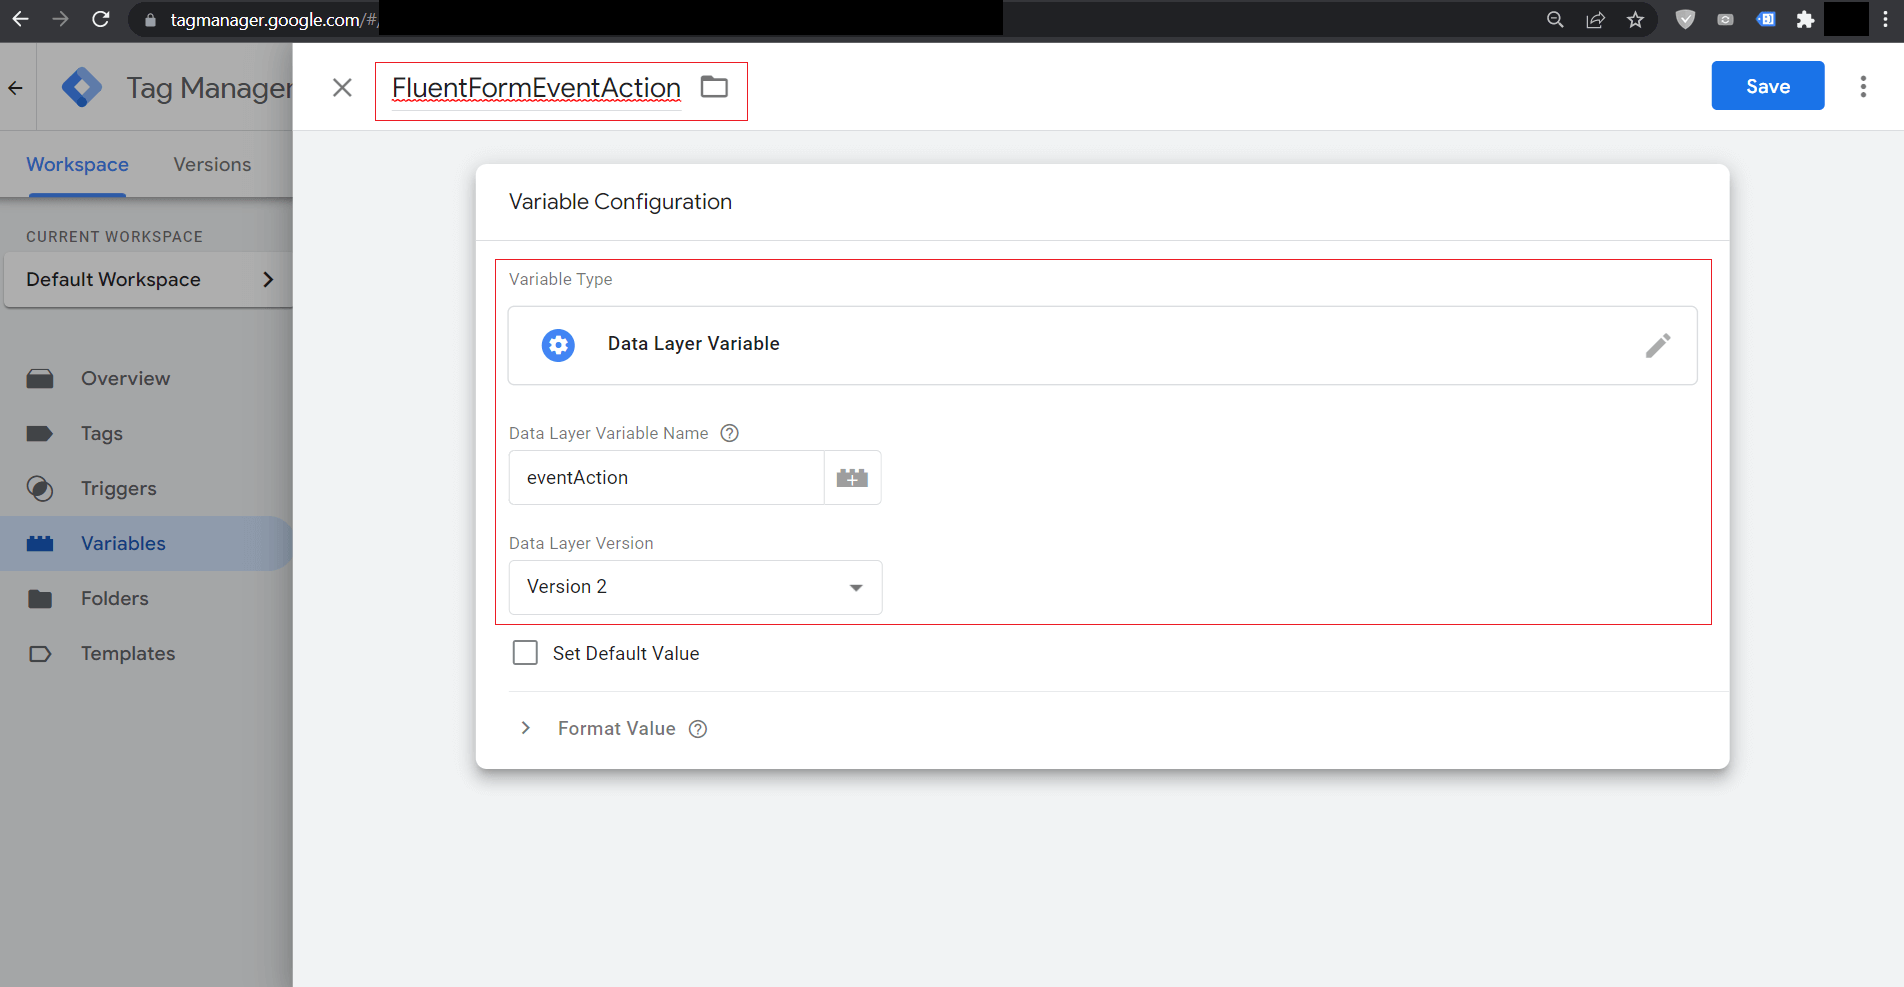
Create Another Variable using the following configuration:
| Title | FluentFormEventAction |
| Variable Type | Data Layer Variable |
| Data Layer Variable Name | eventAction |
| Data Layer Version | Version 2 |
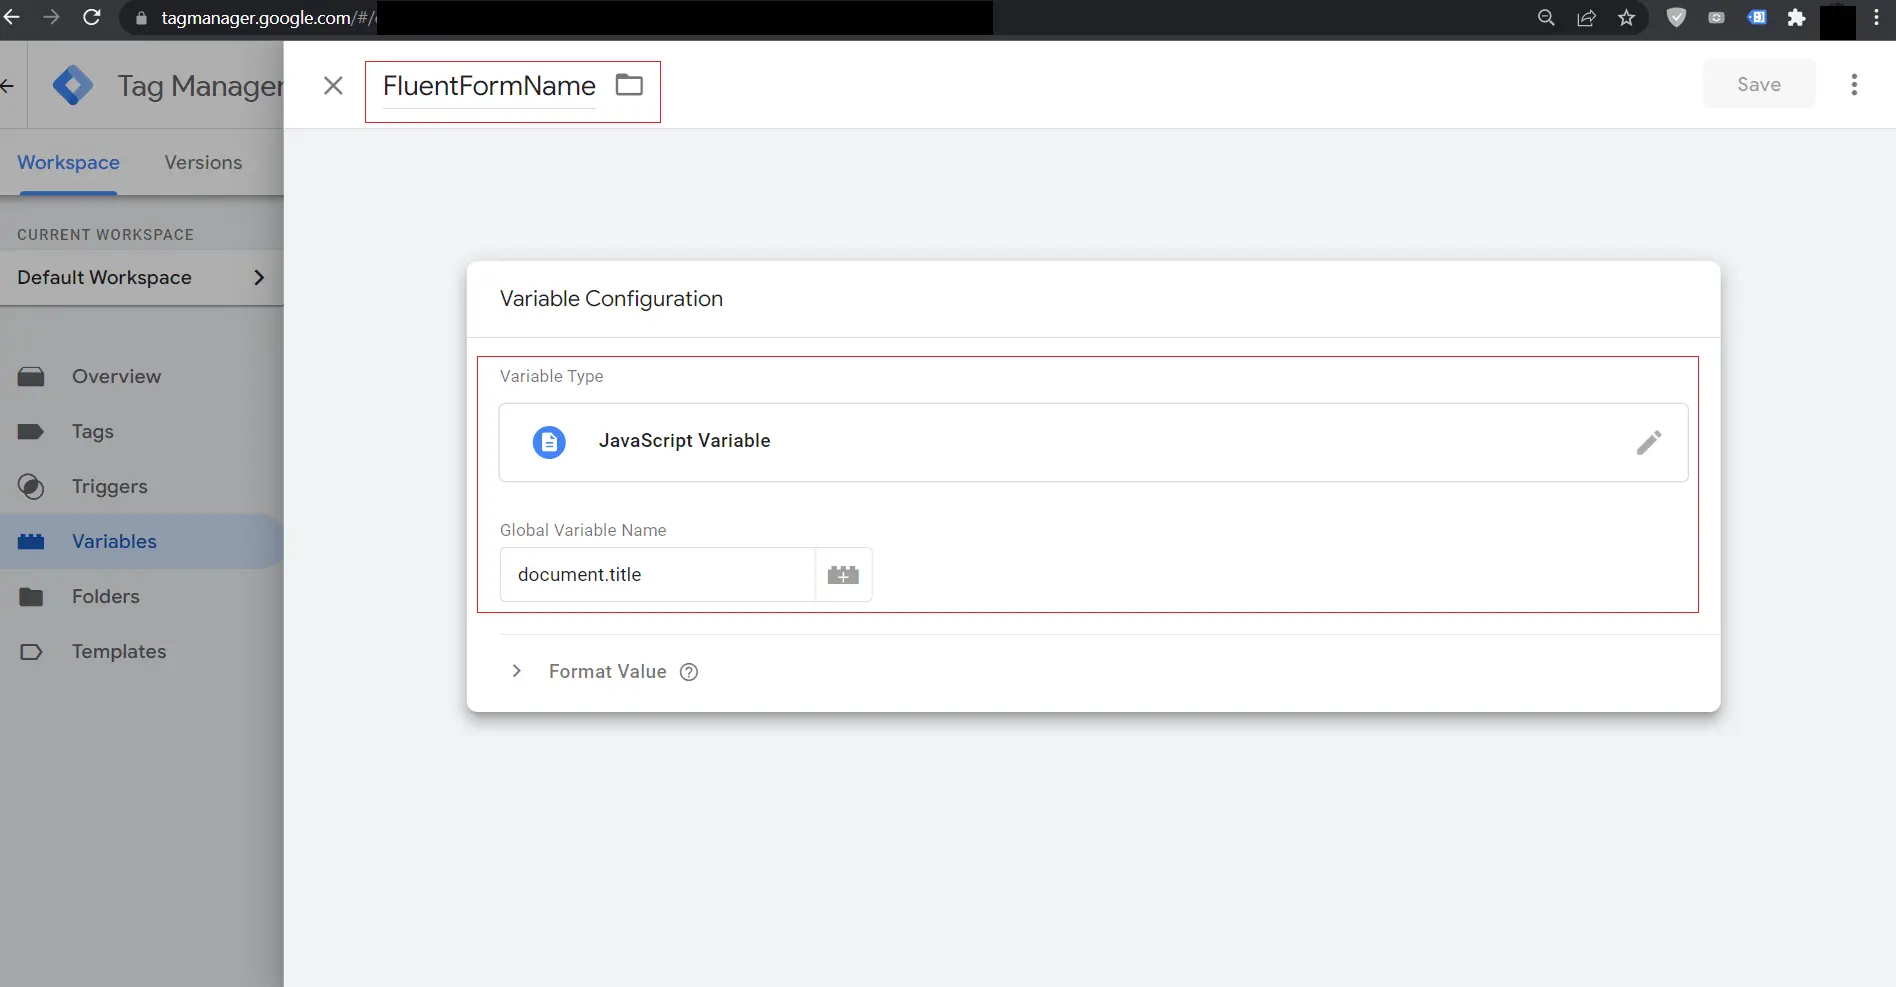
[Optional] Create Another Variable using the following configuration to display the Form Page Title:
2. Creating Fluent Forms Trigger: #
In Google Tag Manager, a Trigger defines the specific conditions that cause a Tag to fire. For this setup, we need to create a custom trigger that activates when it detects a Fluent Forms event, such as a form view or submission.
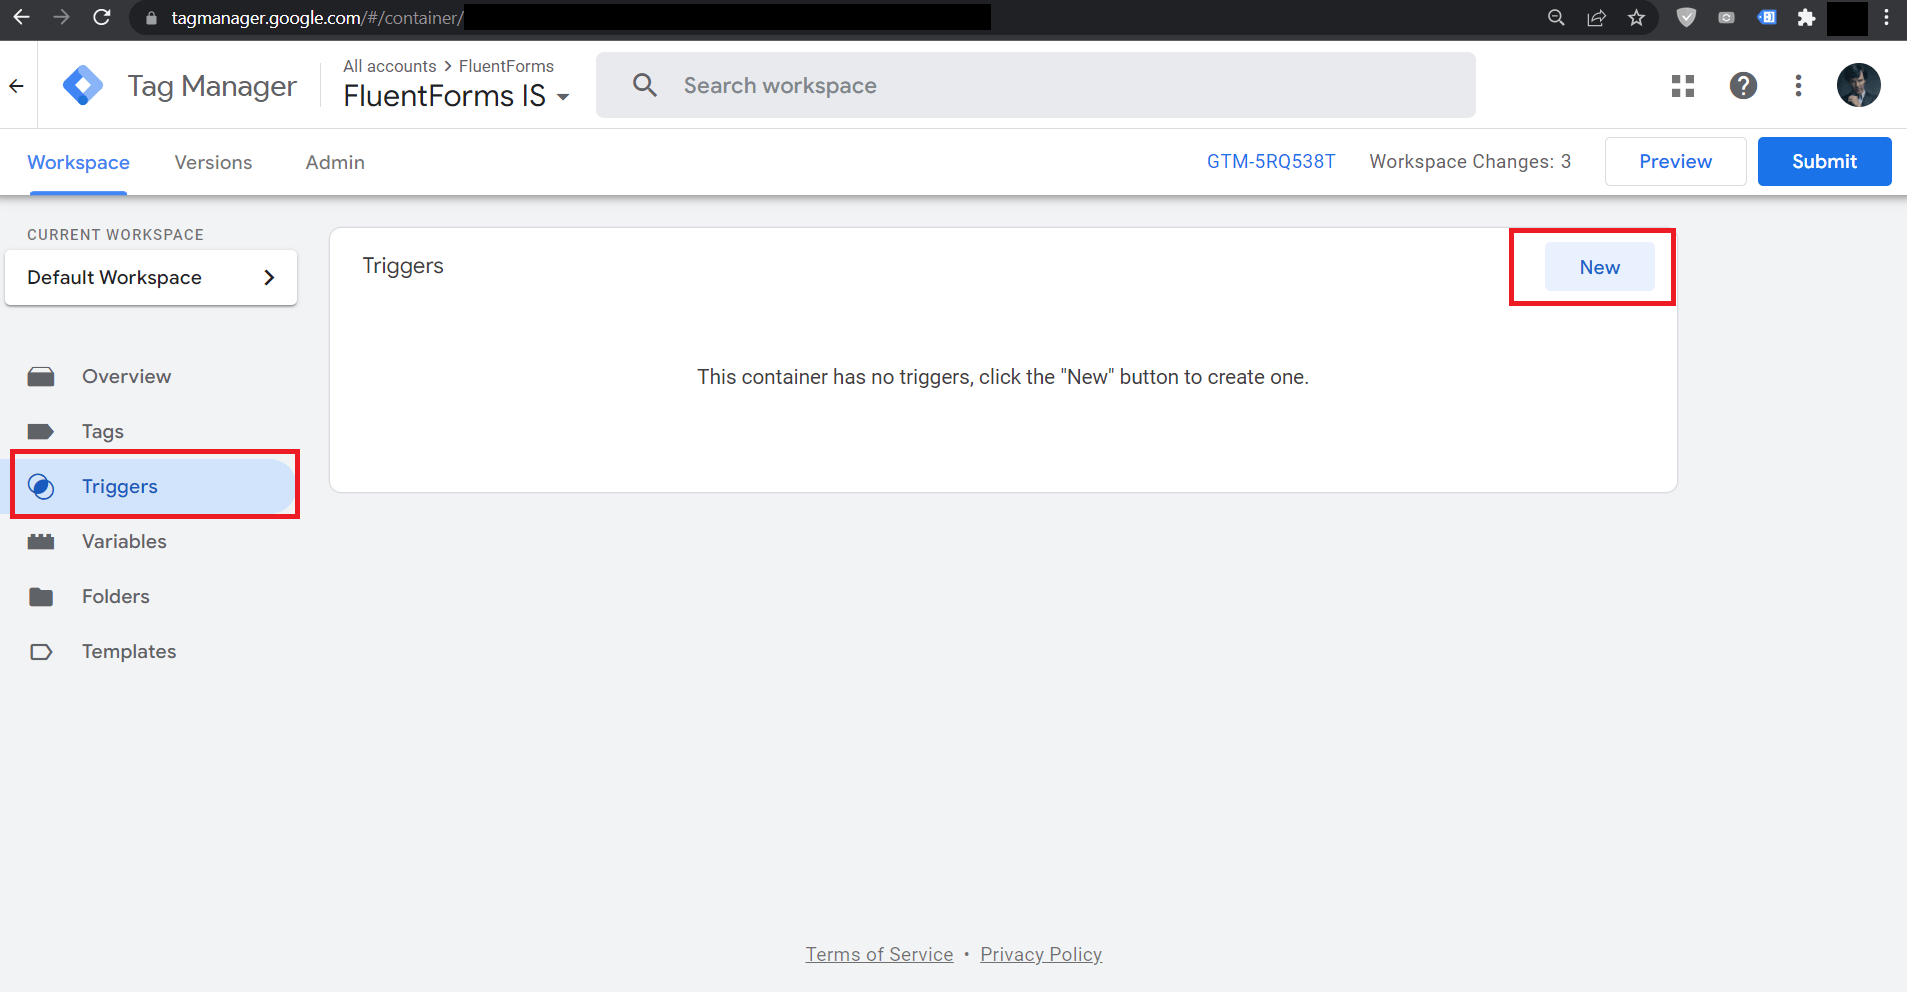
To do this, go to the Triggers section in your GTM workspace and click the New button to open the trigger editor.
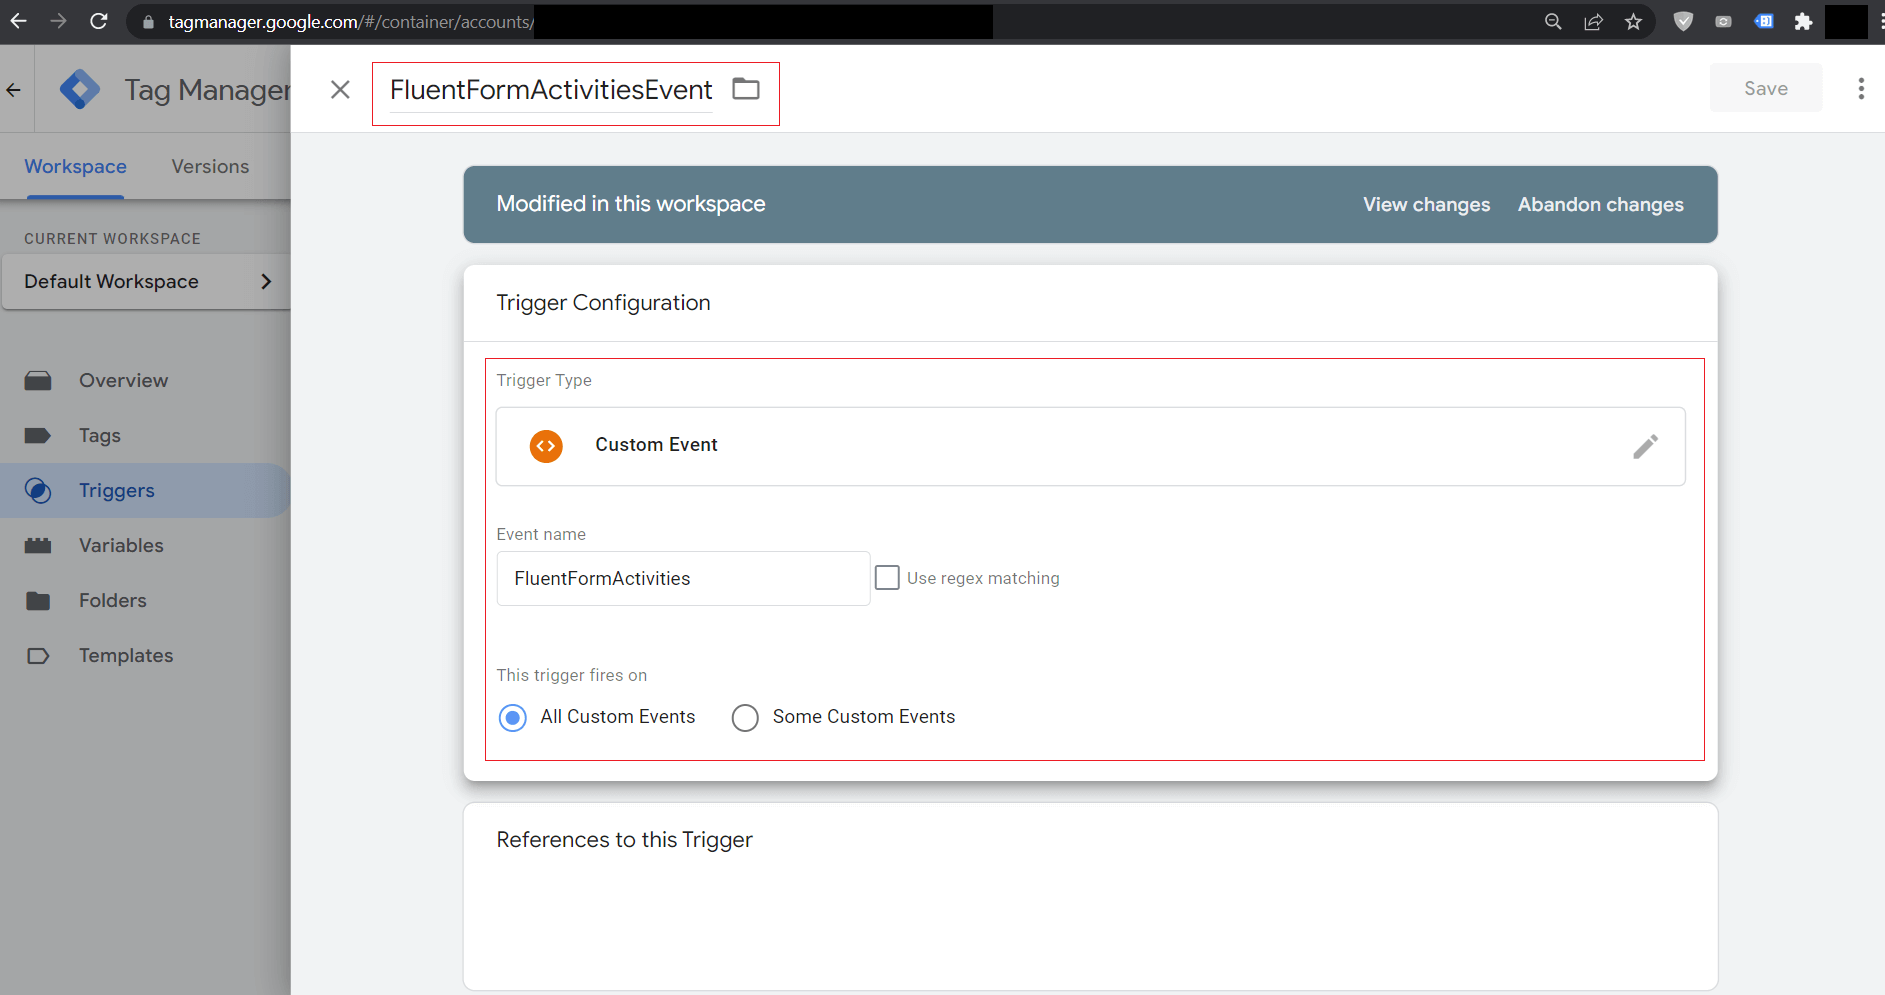
Now follow the data below to create the trigger:
| Title | FluentFormActivitiesEvent |
| Event Type | Custom Event |
| Event Name | FluentFormActivities |
| Trigger Fires on | All Custom Events |
3. Creating Fluent Forms Tags: #
Now that we have our “when” (the Trigger), it’s time to set up the “what” – the Tag. A Tag is the actual task or job that Google Tag Manager performs when a trigger is activated. For this project to work correctly, we will create a team of two different tags that work together.
We will be using a Google Analytics: GA4 Configuration type of Tag and then pass the form events data from the website using a Custom JavaScript Snippet attached to webpages, and also by the Google Tag Manager itself, by another Custom HTML type Tag.
Let’s create the Custom HTML Tag first as below:
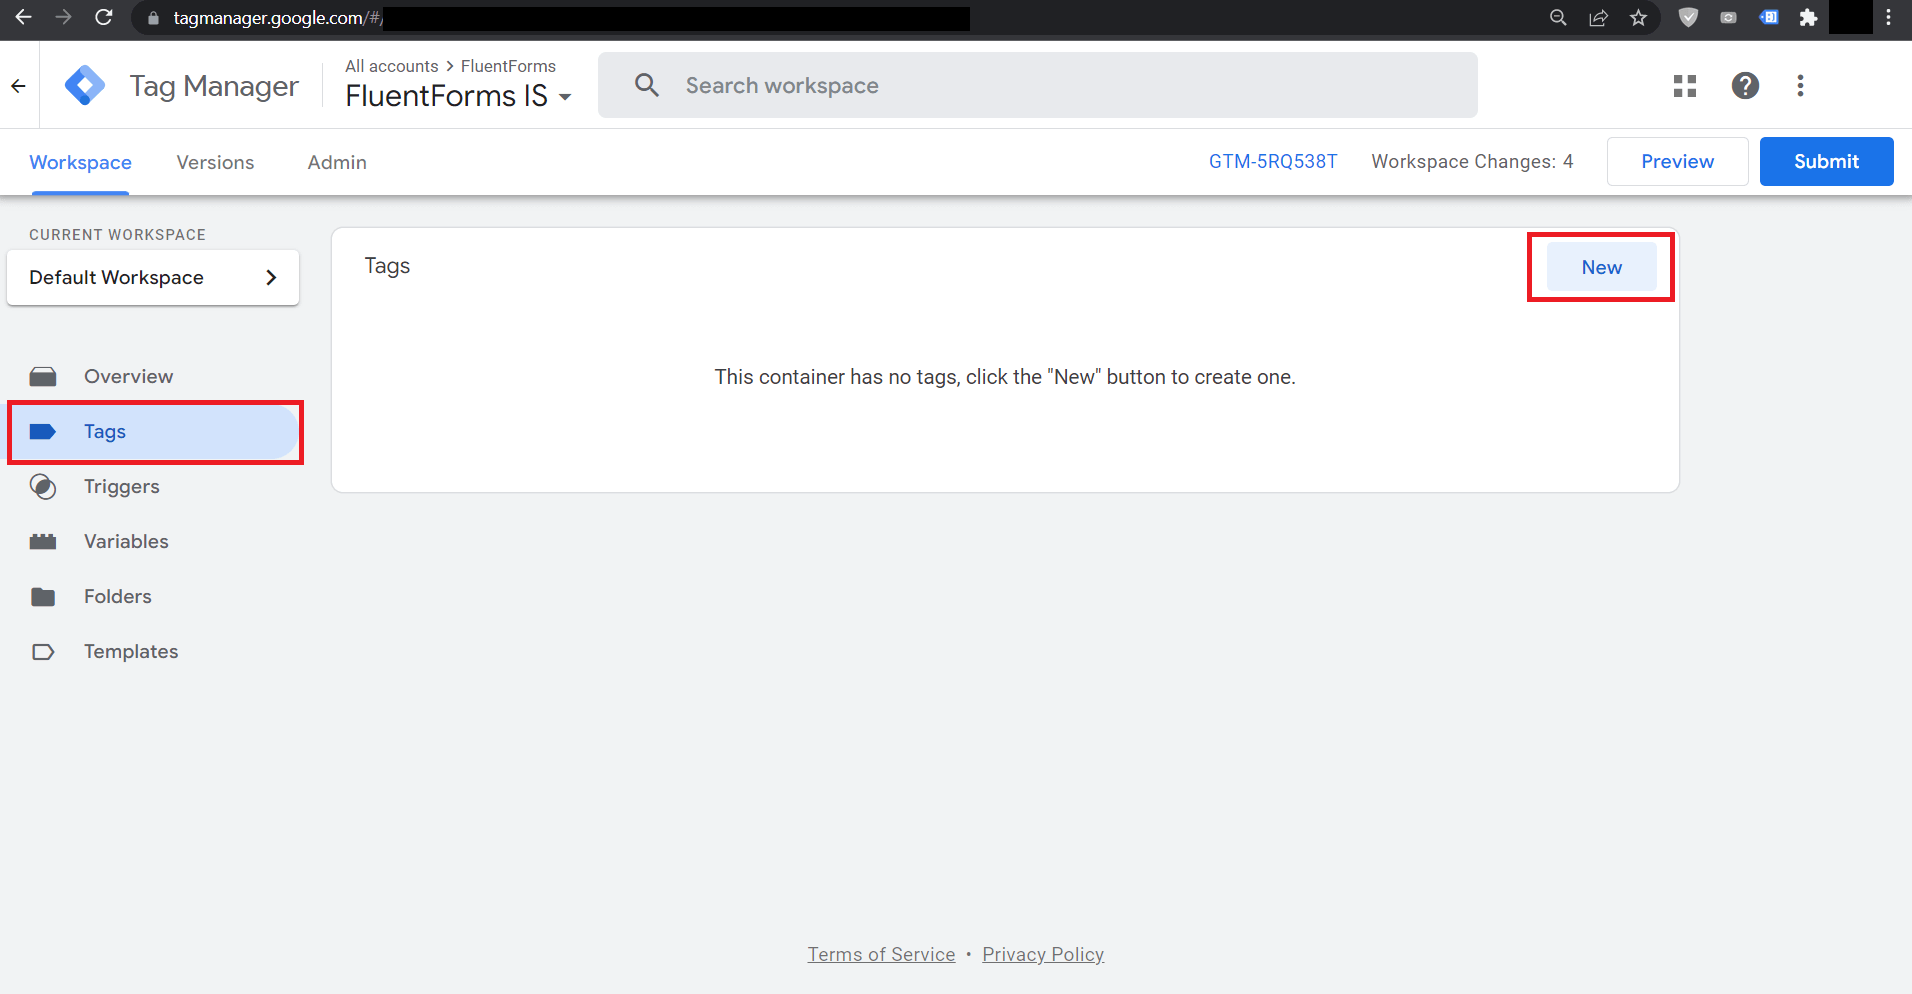
Go to Tags and click New
Then select Tag Type as Custom HTML and put the Custom Code provided below inside the GTM Code Editor with the provided data:
| Title | cHTML – FluentFormsDataPush |
| Tag Type | Custom HTML |
<script>
(function($){
  var fluentForms = $('.frm-fluent-form');
  fluentForms.each(function() {
    var $form = $(this);
    var formId = $form.attr('data-form_id');
    dataLayer.push({
      'event': 'FluentFormActivities',
      'eventCategory': 'FluentForm',
      'eventAction': 'FormView',
      'FluentFormID' : formId
    });
    $form.on('fluentform_submission_success', function() {
      dataLayer.push({
        'event': 'FluentFormActivities',
        'eventCategory': 'FluentForm',
        'eventAction': 'FormSubmitted',
        'FluentFormID' : formId
      });
    });
  });
})(jQuery);
</script>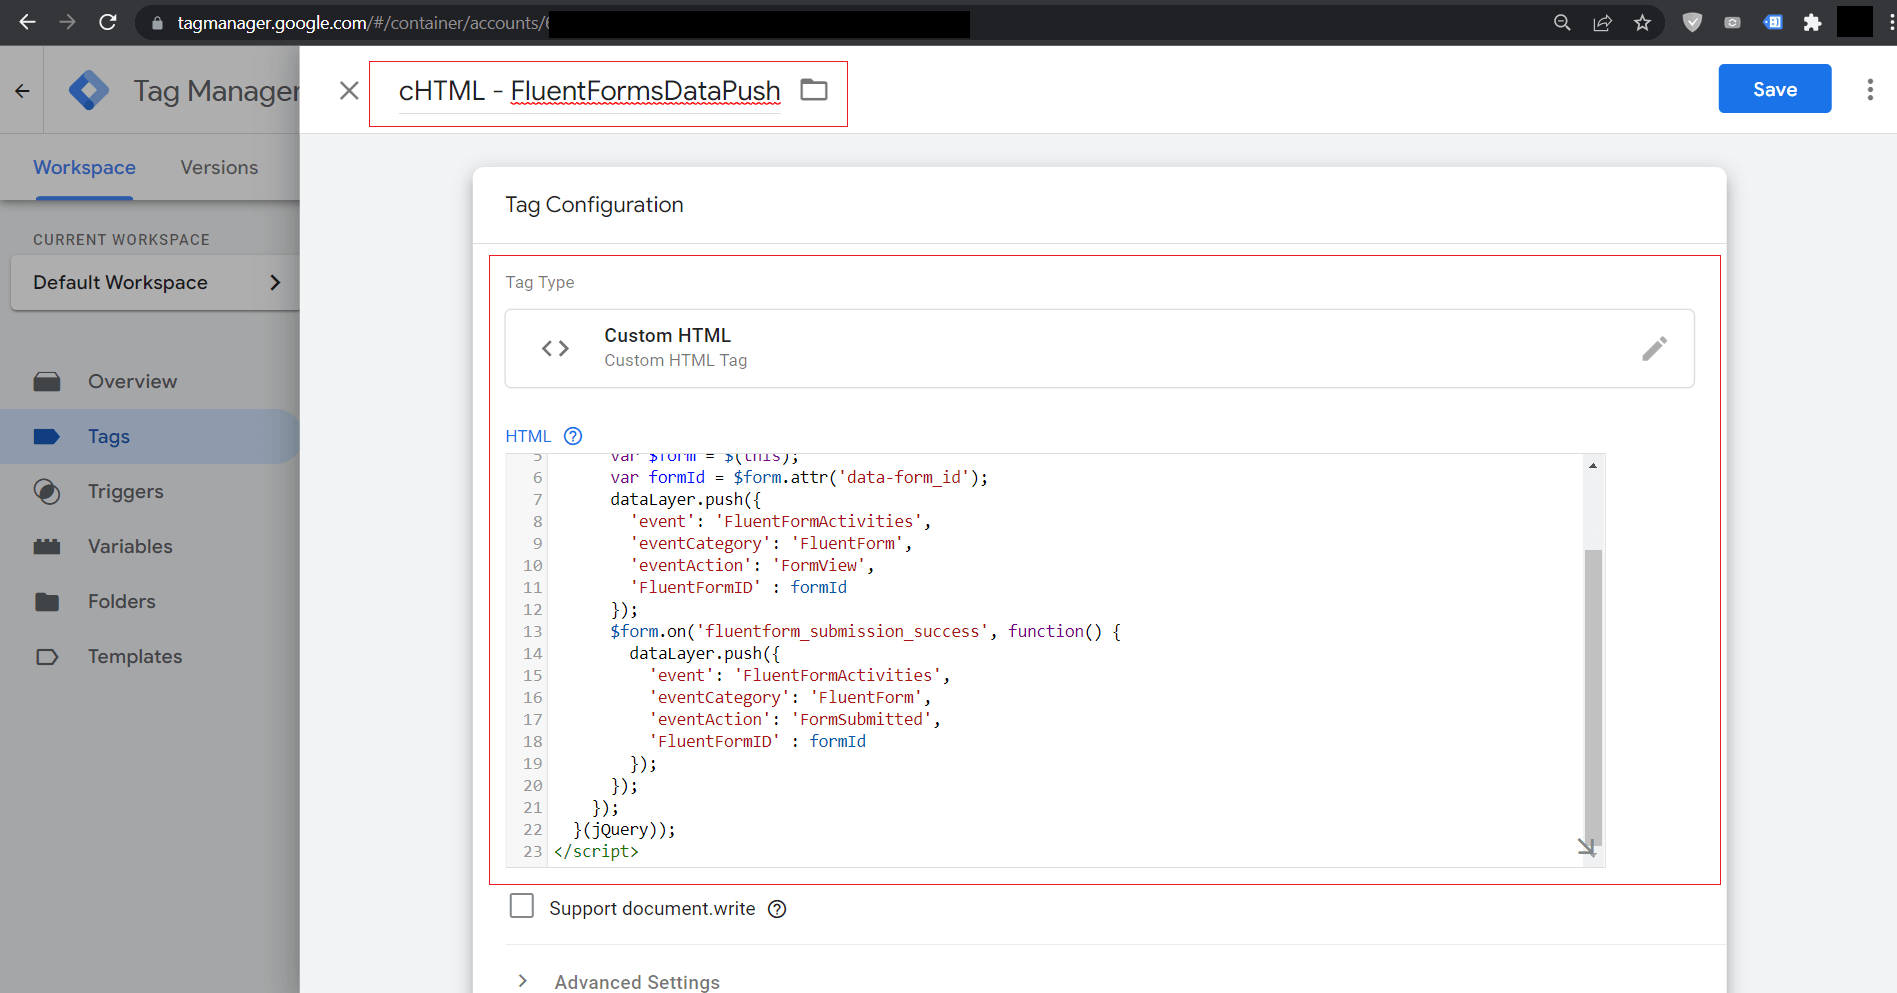
When that code is inserted, please click anywhere inside the Triggering Field and select Firing Triggers as Page View [ All Pages] as below:

Now we are almost close to achieving our target and need to create one last Tag which will fetch the event data and then forward it to Google Analytics. We will also format the properties that will be sent to Google Analytics.
Again, go to Tags and select Google Tag as below:

Now, here you have to give Google Analytics 4 Measurement ID and then configure the settings variable.
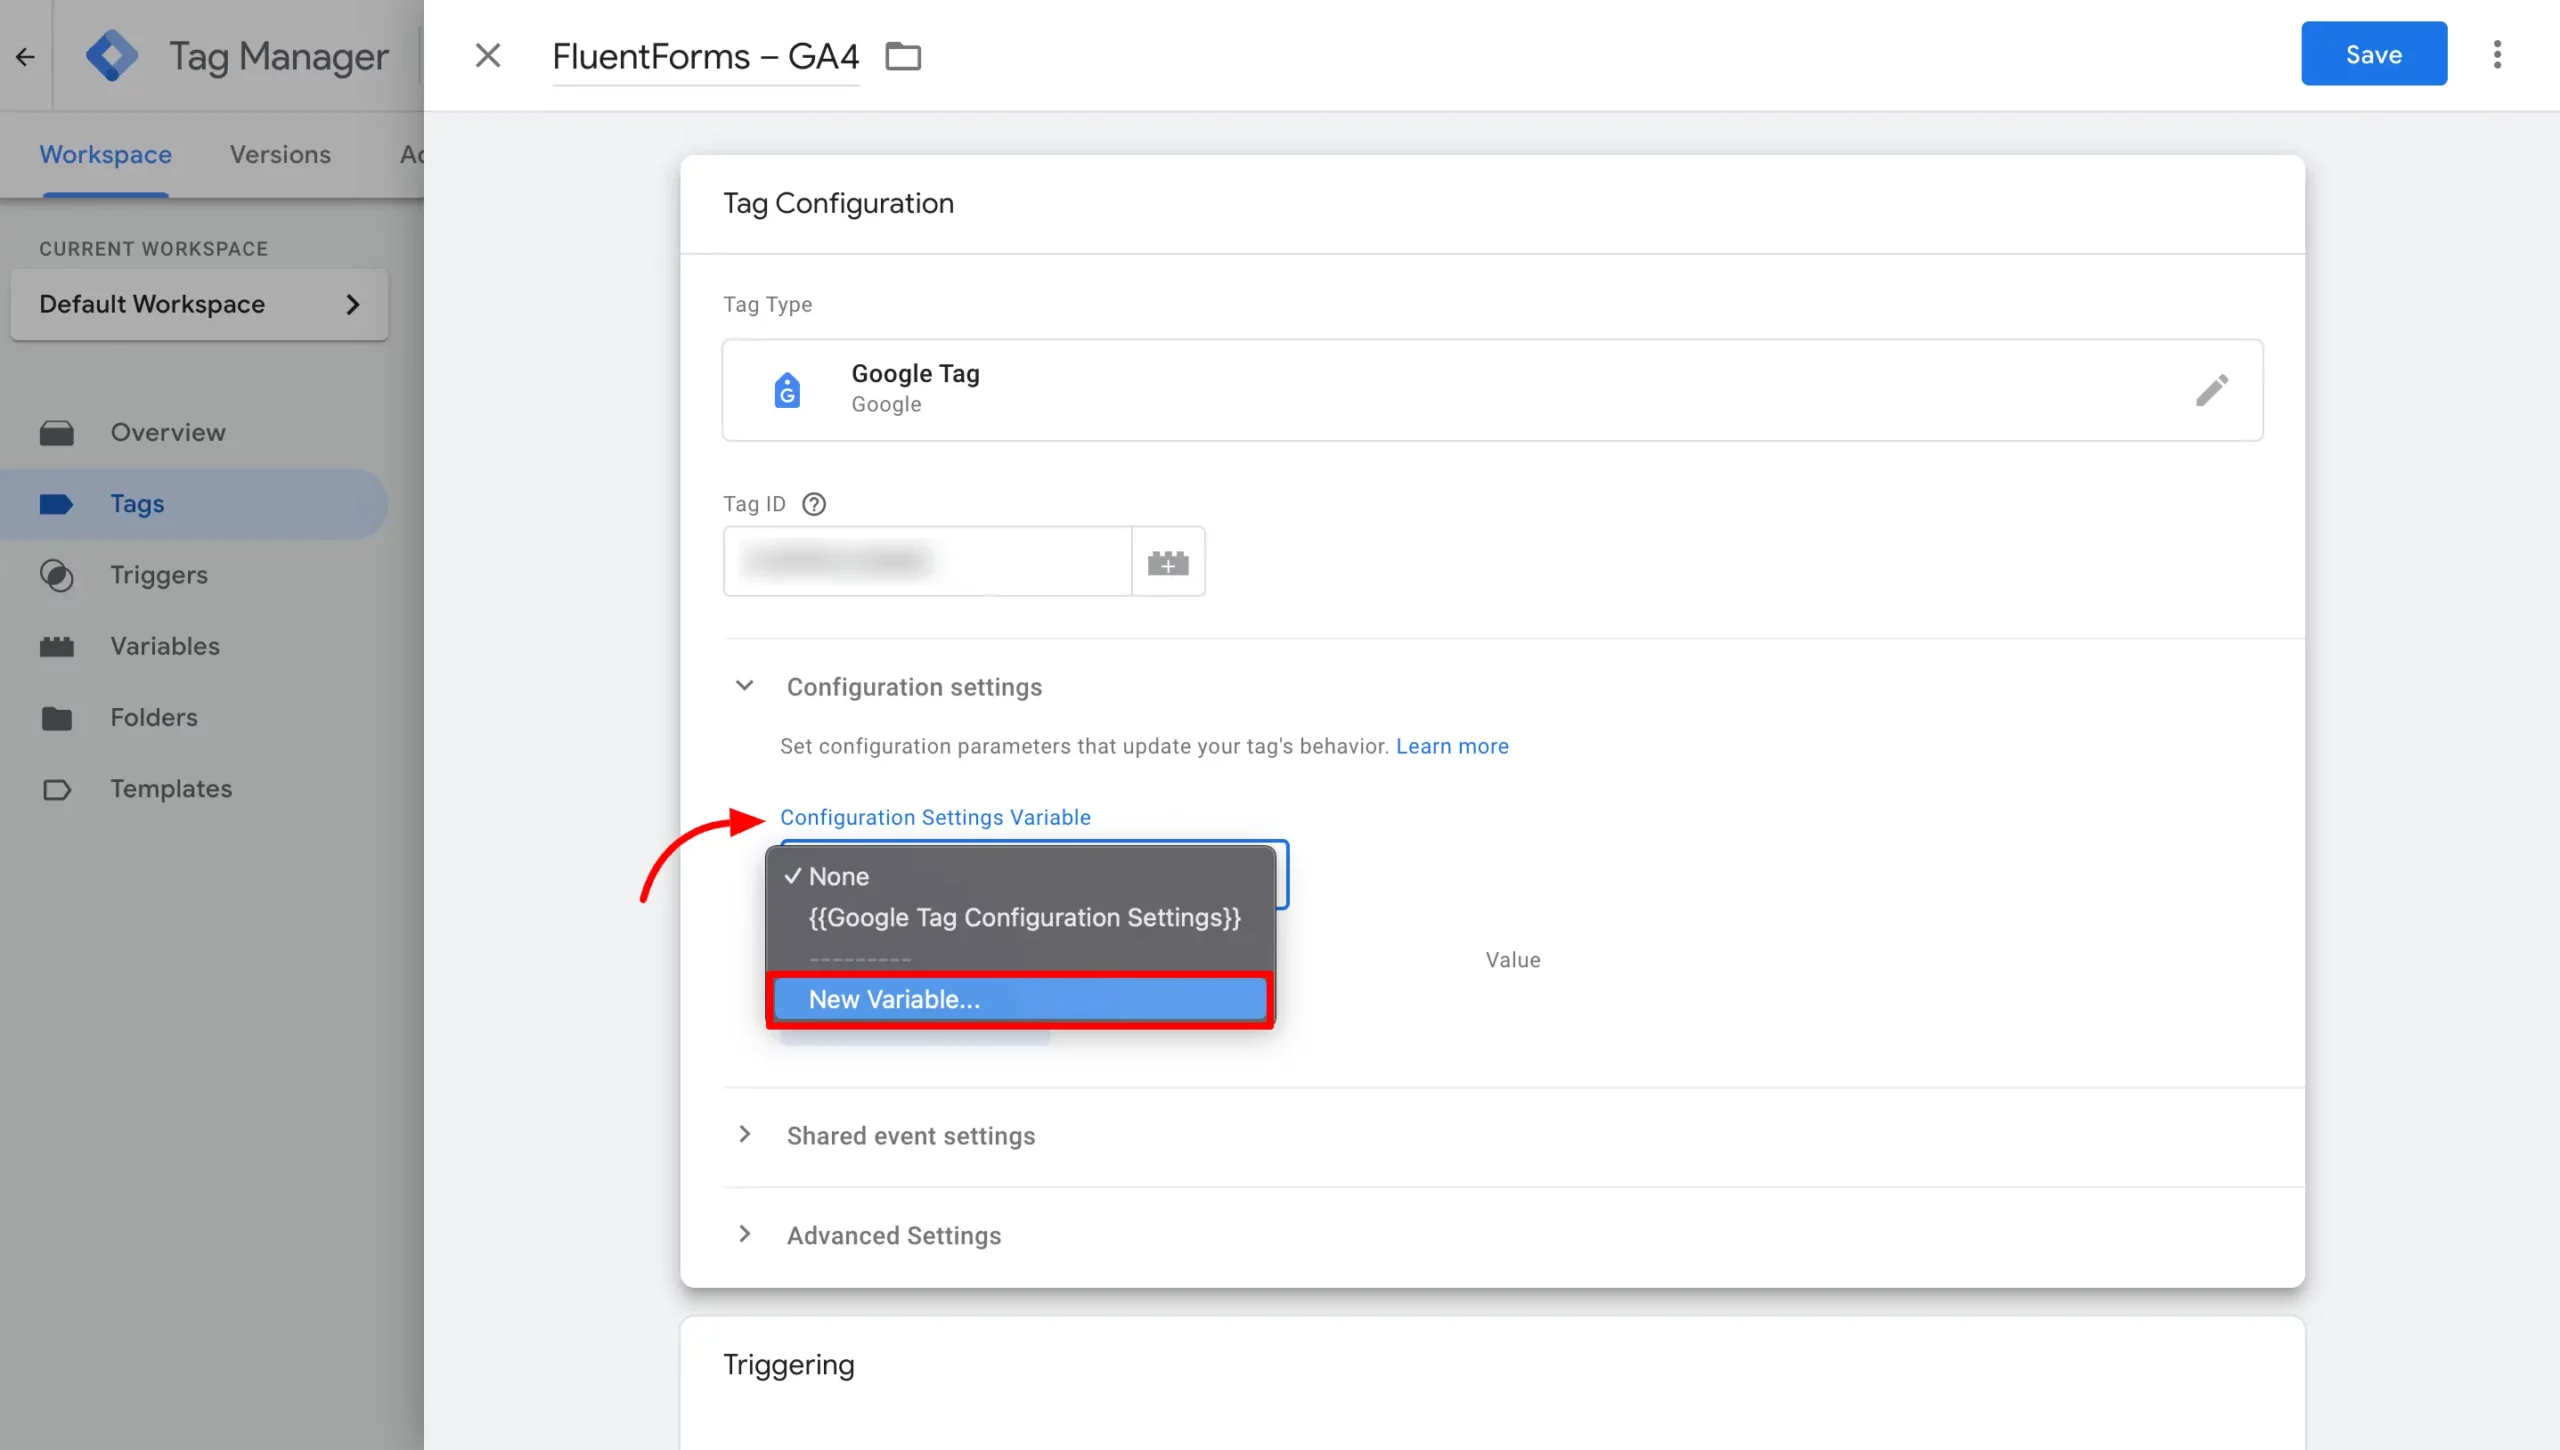
| Title | FluentForms – GA4 |
| Tag Type | Google Analytics: GA4 Configuration |
| Measurement ID | G-XXXXXXXX [Follow instructions below to grab this code] |
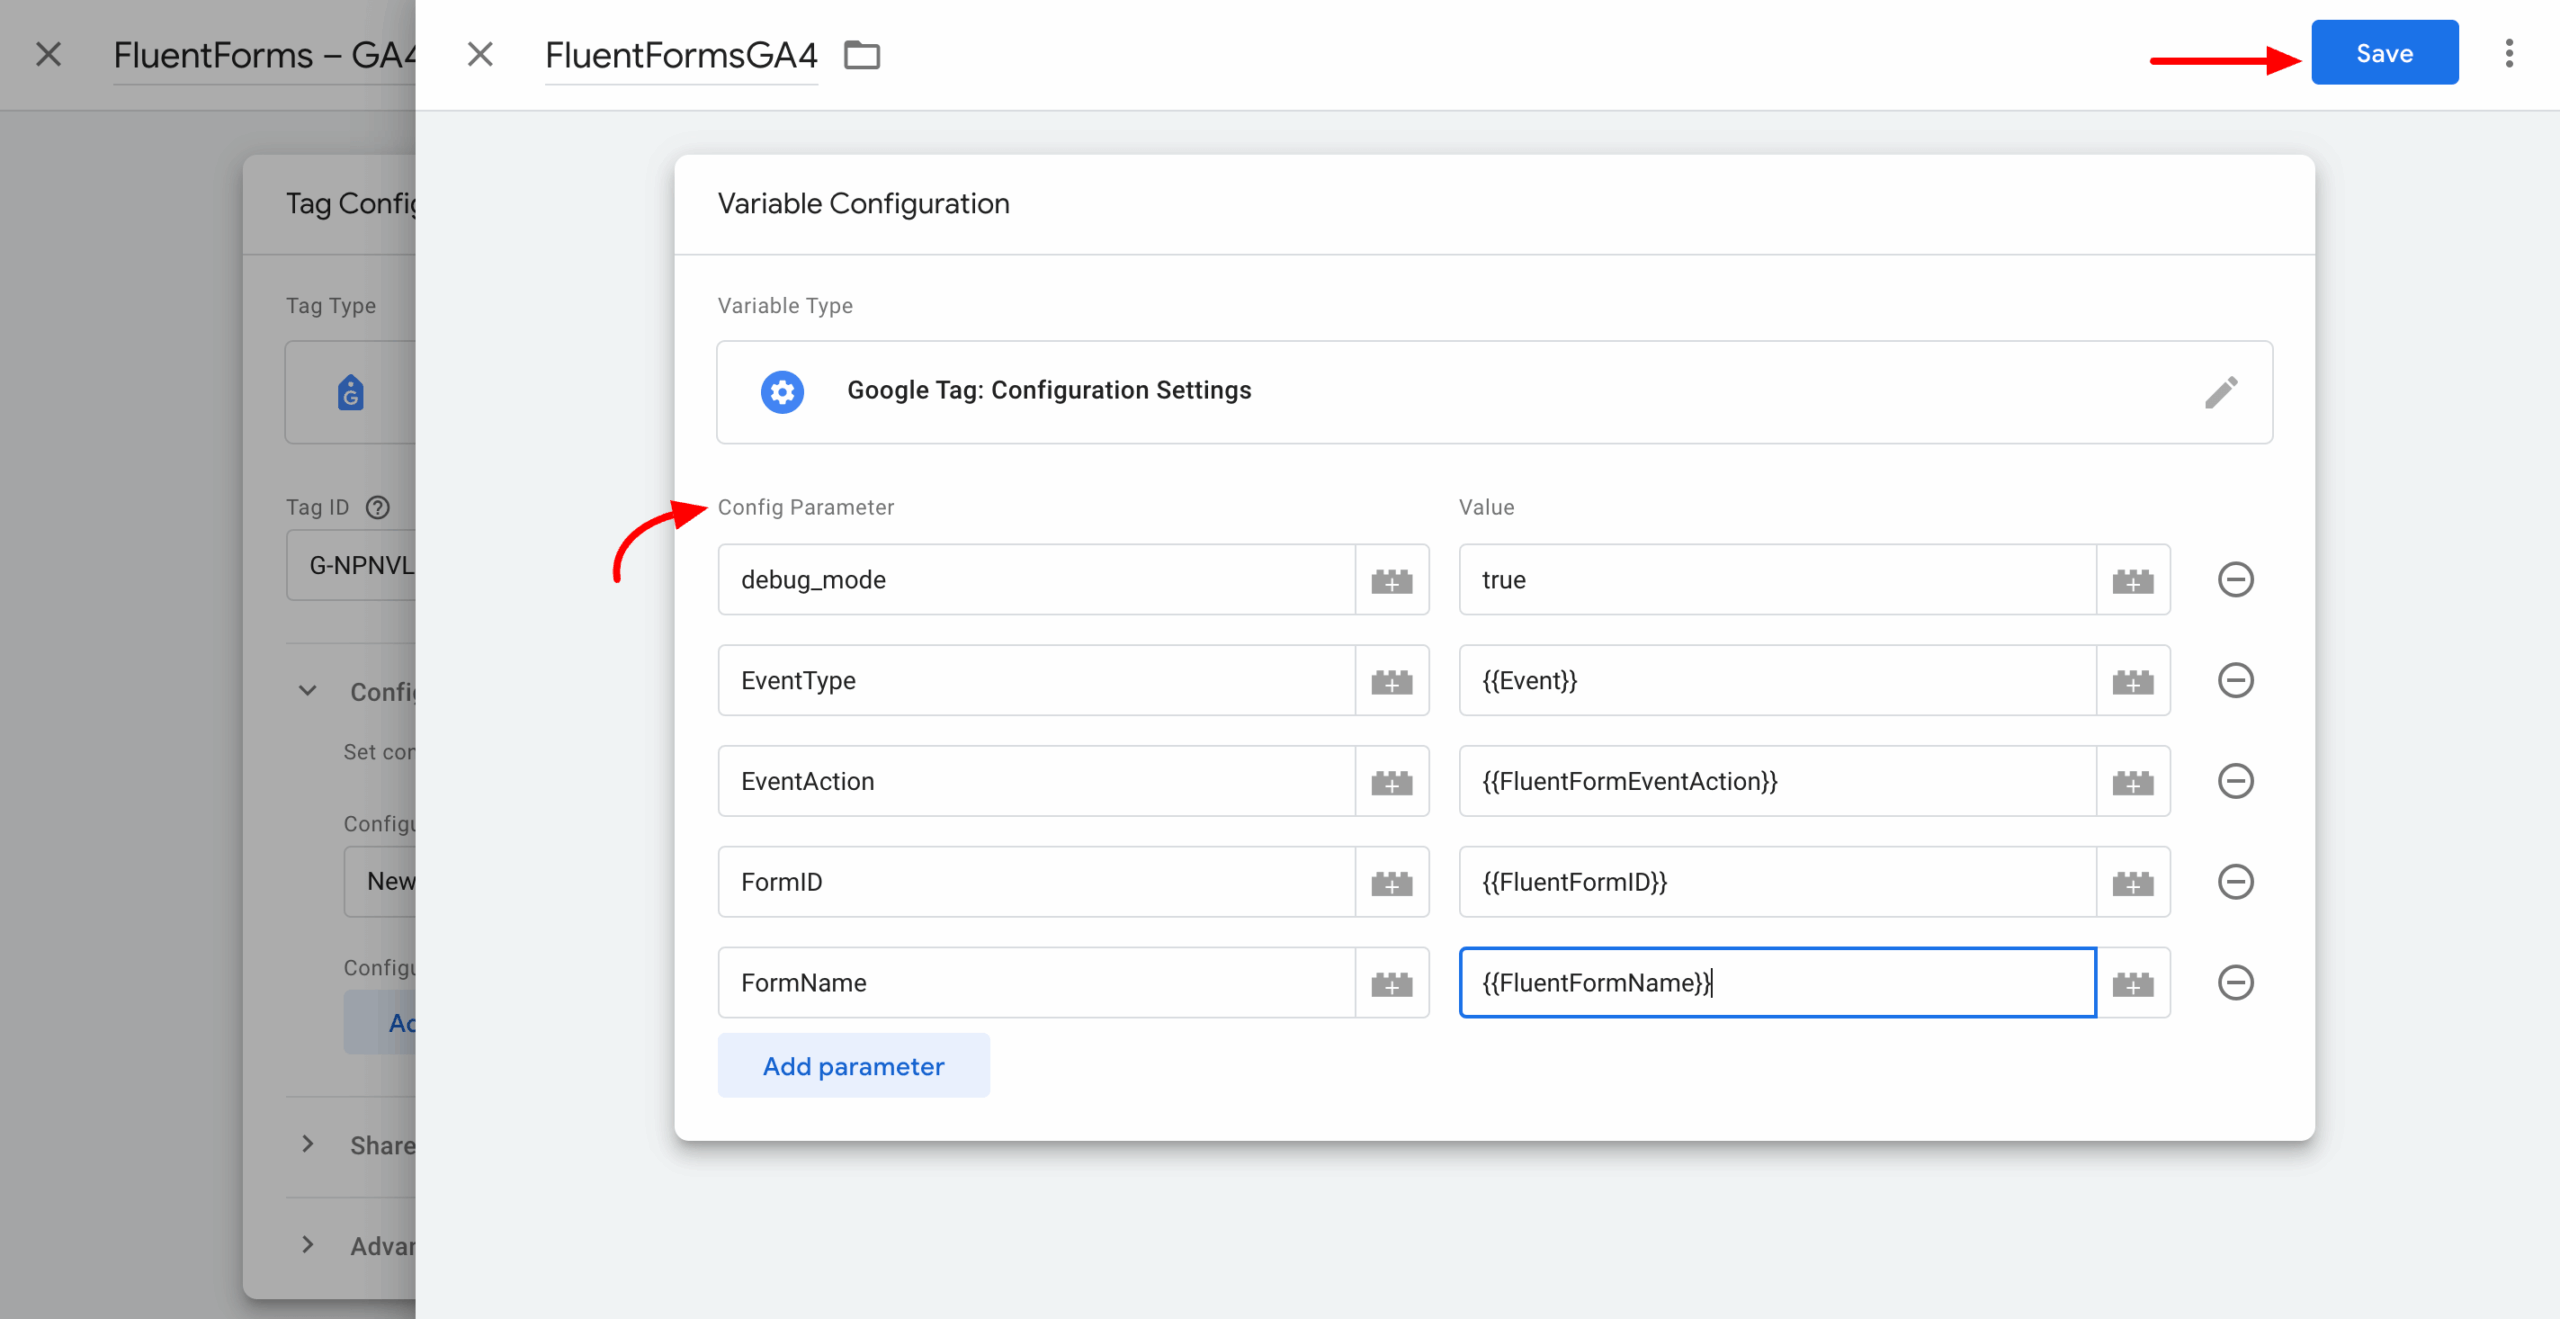
Fields to Set:
| debug_mode | true | For Debug View |
| EventType | {{Event}} | Select as Variable |
| EventAction | {{FluentFormEventAction}} | Select as Variable |
| FormID | {{FluentFormID}} | Select as Variable |
| FormName | {{FluentFormName}} | Select as Variable |
Google Analytics 4 Measurement ID #
To get the Google Analytics 4 Measurement ID, please follow the steps below:
Go to your Google Analytics Dashboard and then click on Admin (Gear Icon on the Bottom Left of the page).
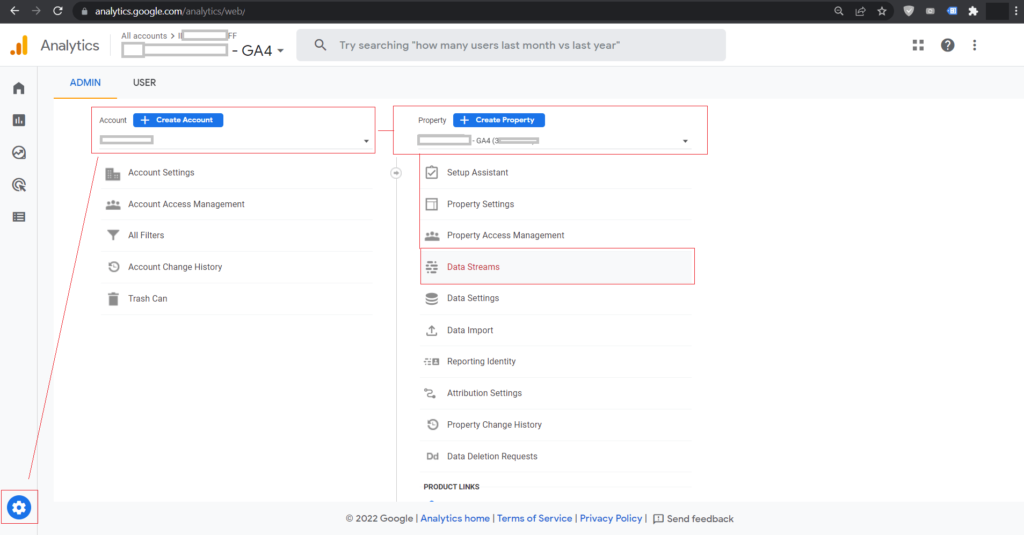
Then select the target account or create a new one with your desired details. Also, select an existing Property if you already have one, or create a new one with the desired details. Under the Property Name, the Data Streams option is available, and then click on it.
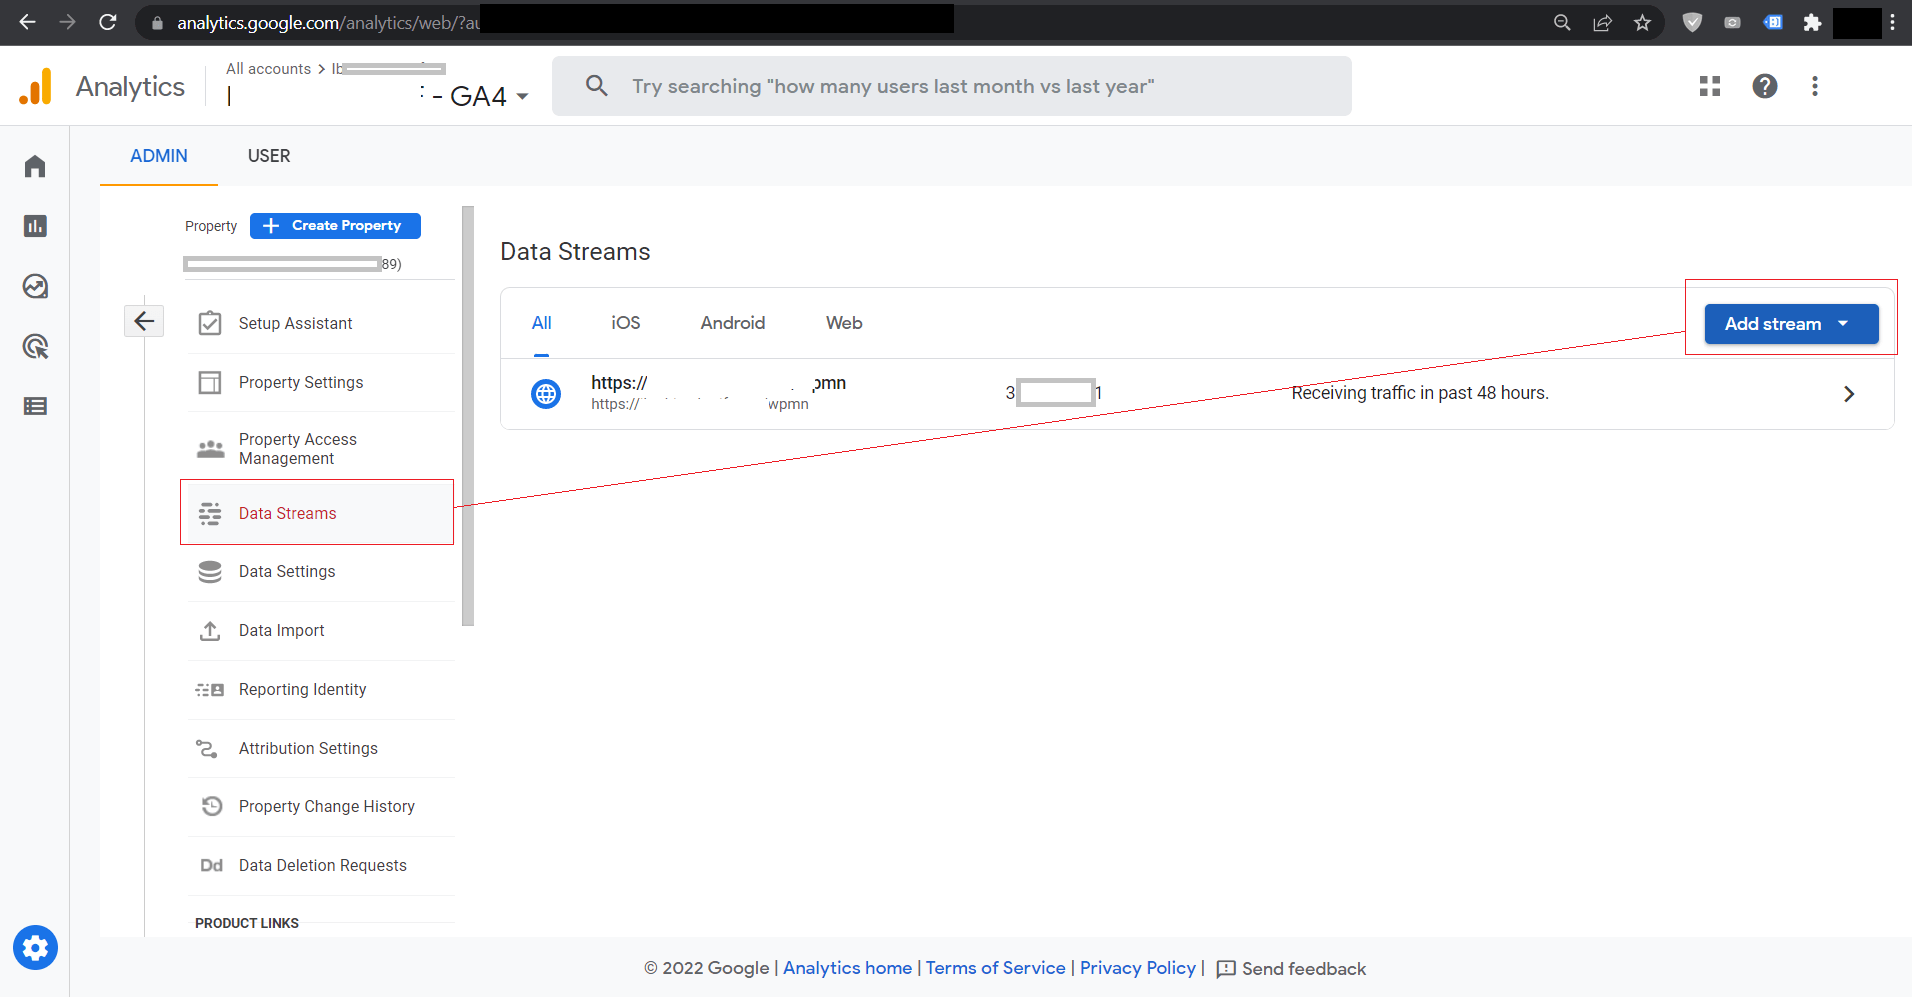
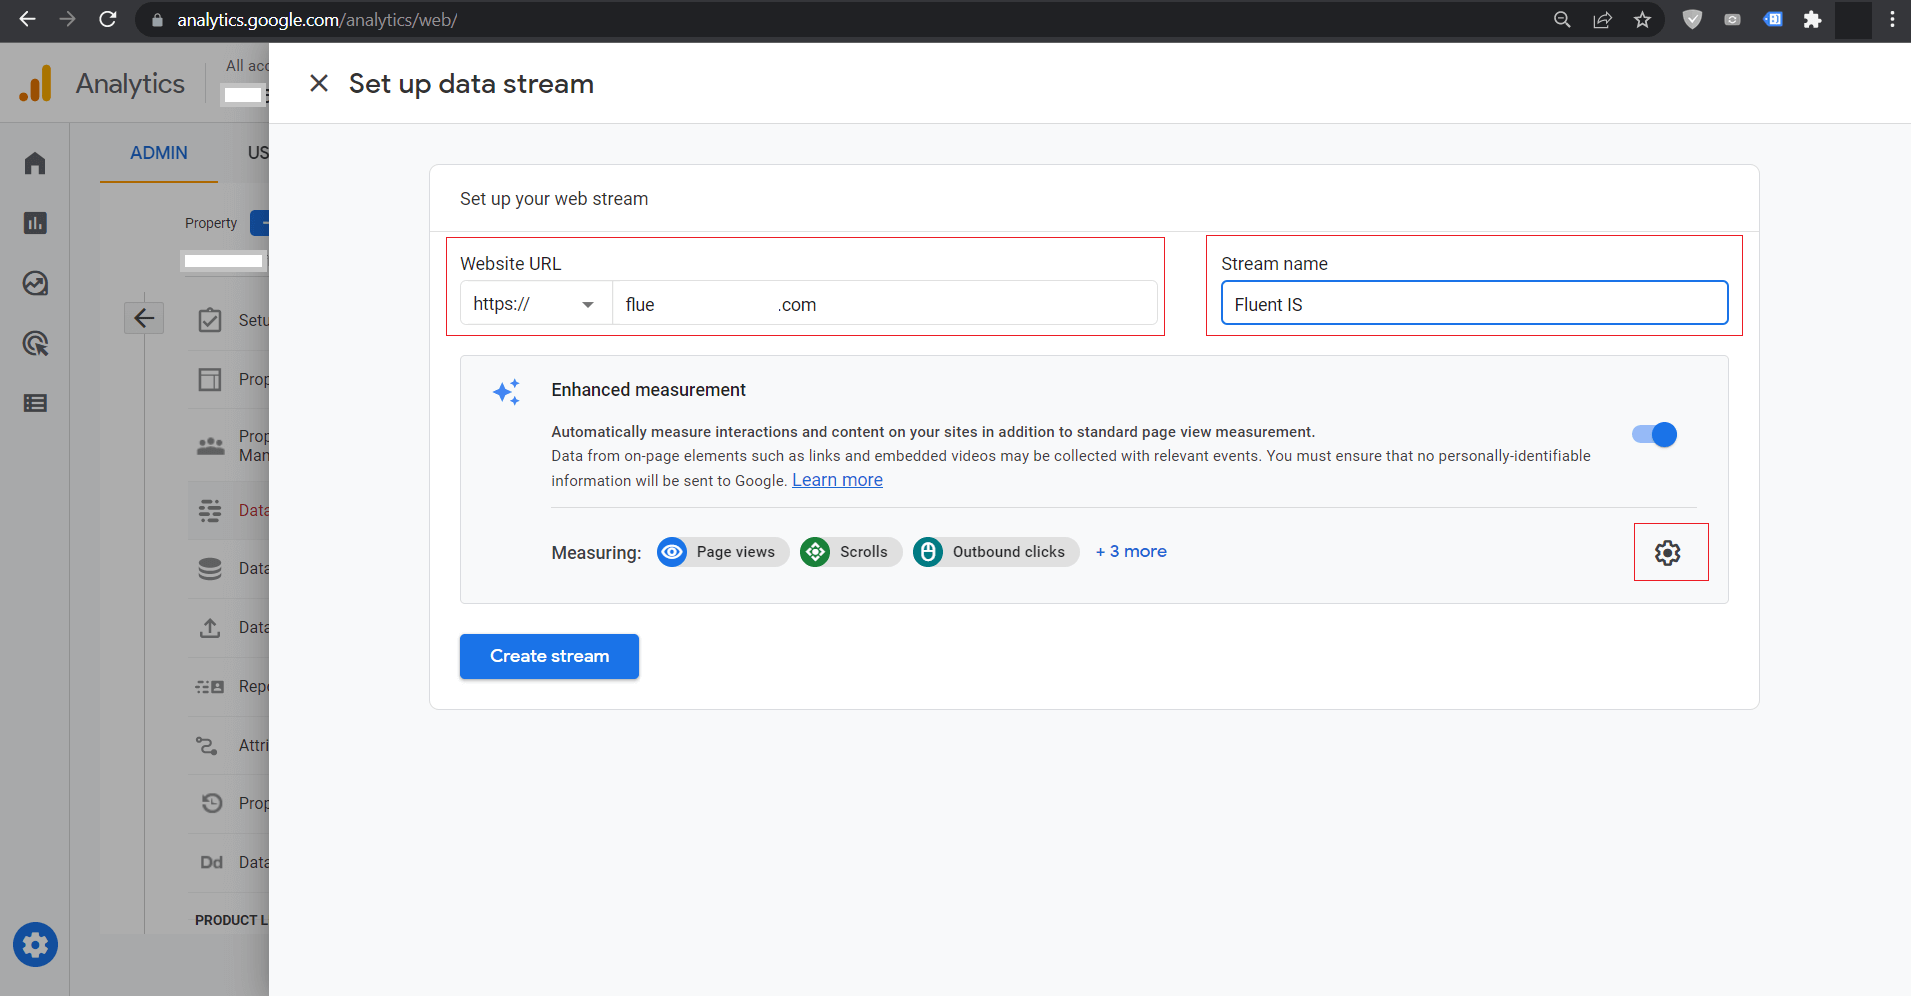
Now, create a new DataStream as Web if your website is not already configured. Provide an appropriate URL without a protocol and a Stream Name.
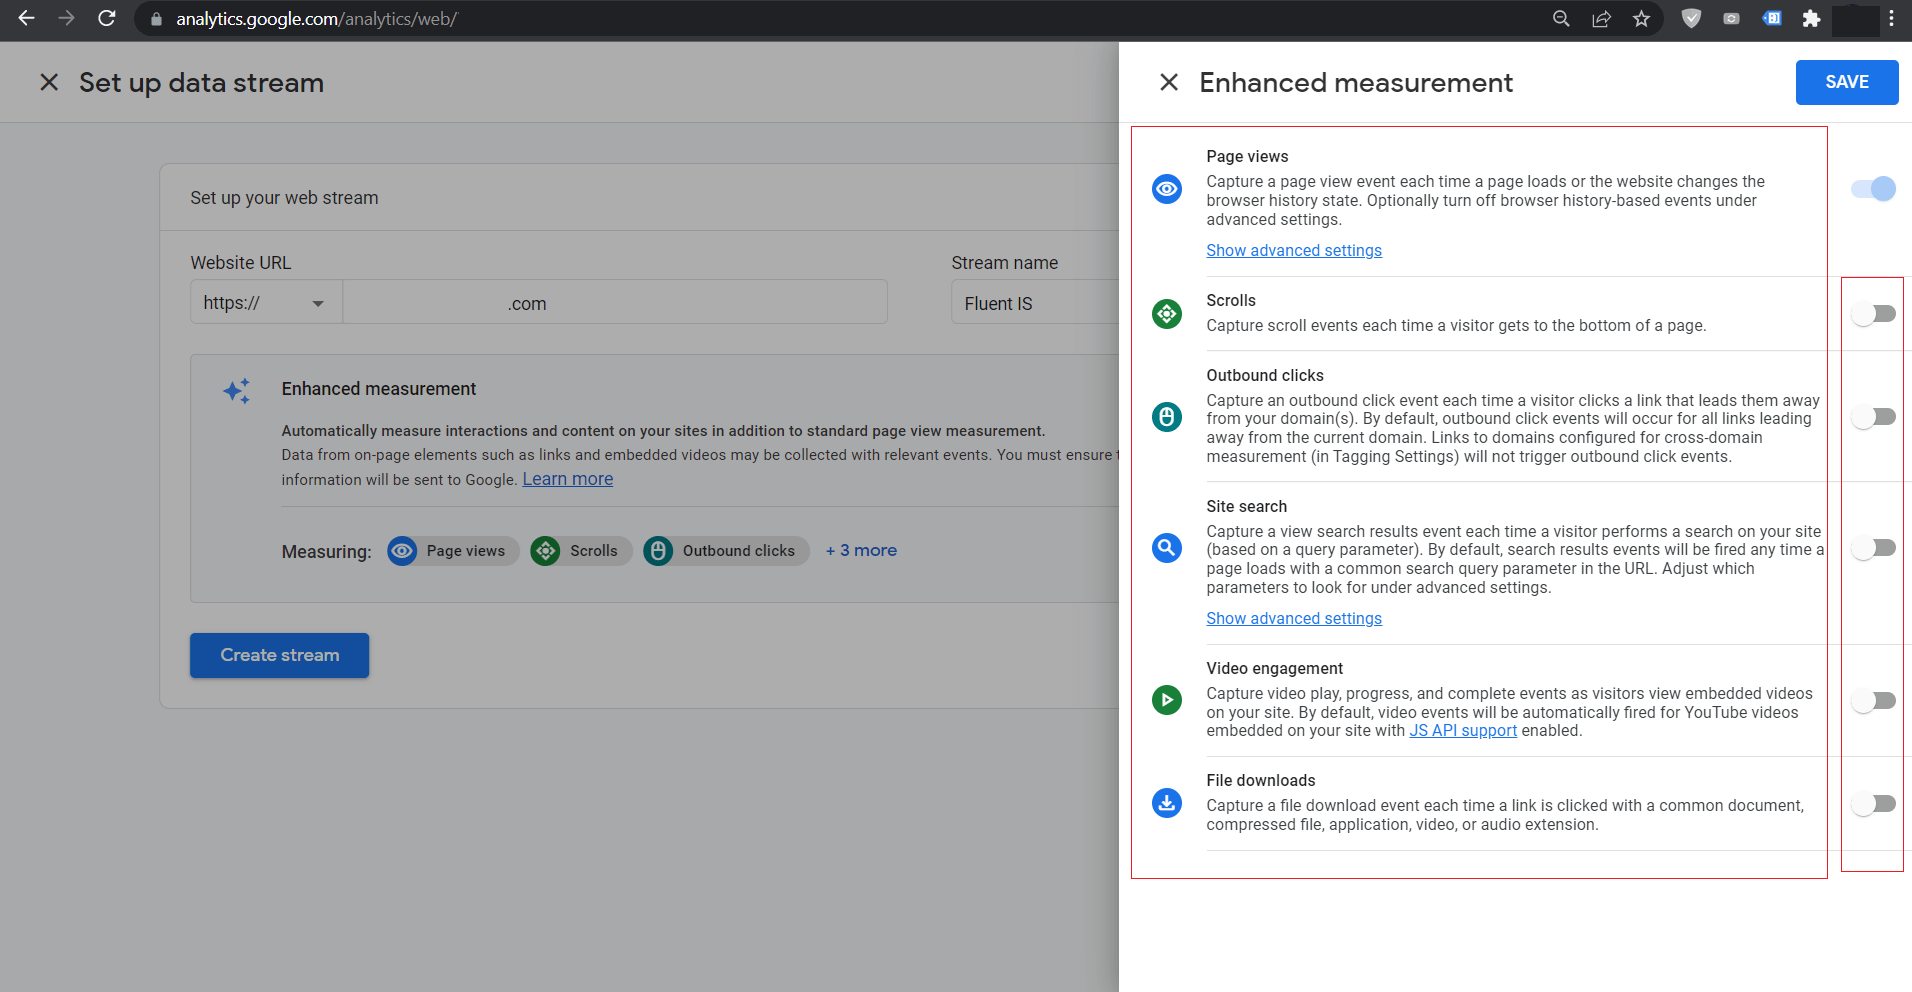
[Optional] Then, please click on the Gear icon to select the data we will need for Fluent Forms Event tracking only. We will only need Page Views and do not need other types. Those types of data will also bring unnecessary data to Google Analytics, which we will not need for Fluent Forms Events.
Now, after clicking on Save, you will see the Data Stream details, and now copy the Measurement ID, which we need to put in Google Tag Manager.

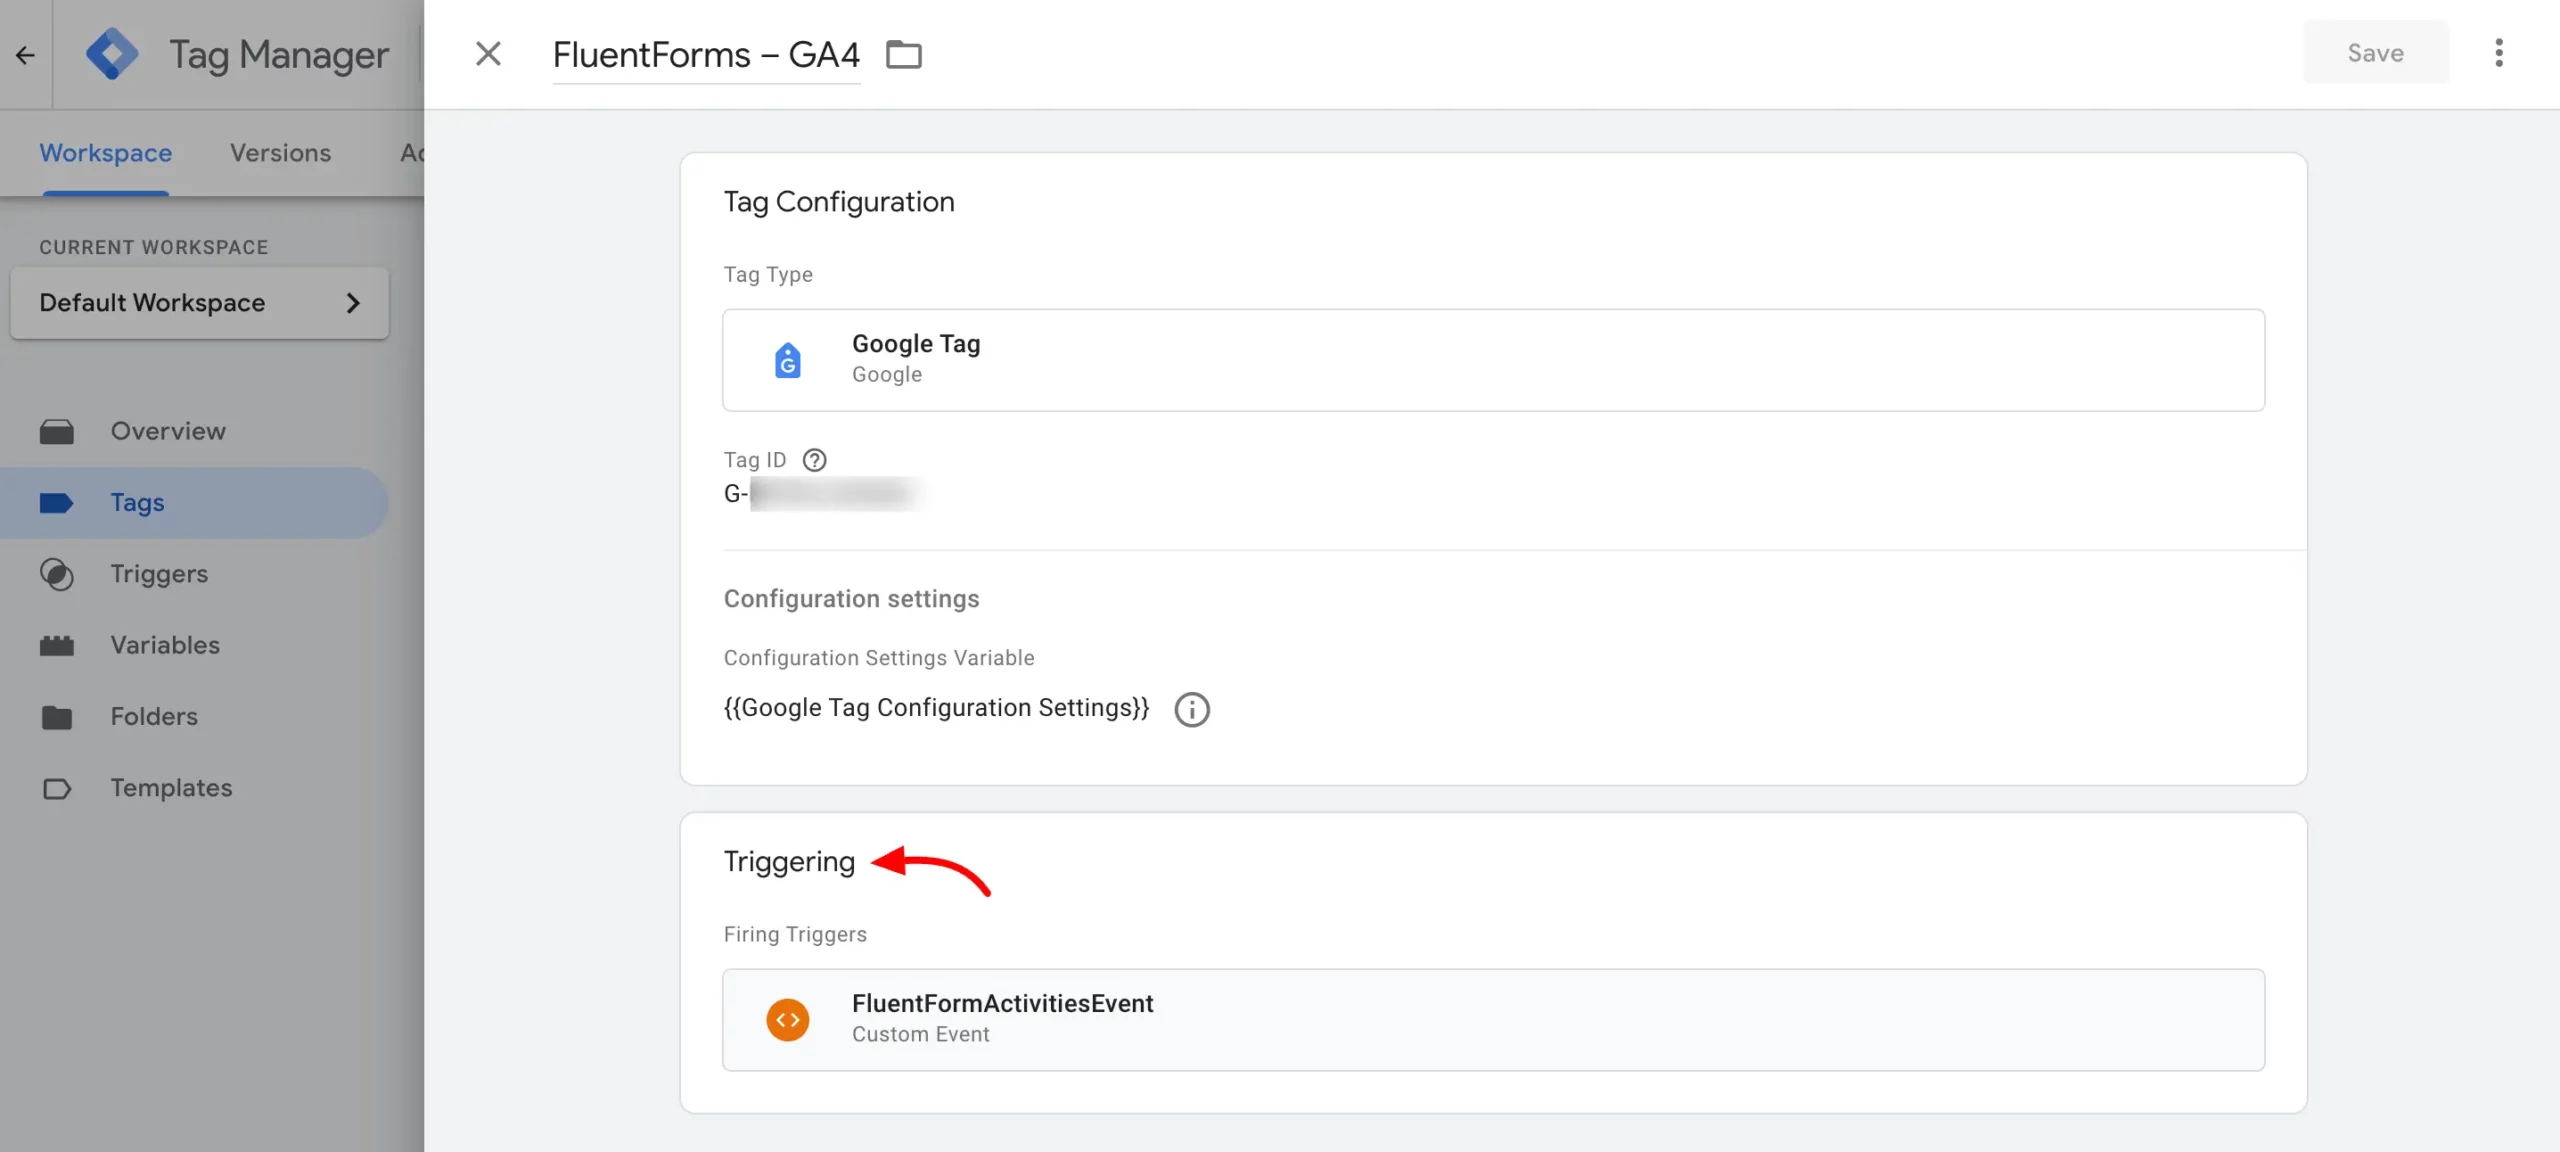
Now, let’s get back to the last Tag we created. When the Google Analytics Setting is also selected, it is time to select the trigger, like we previously did for Custom HTML.
This time, select the Trigger we created previously, named FluentFormActivitiesEvent
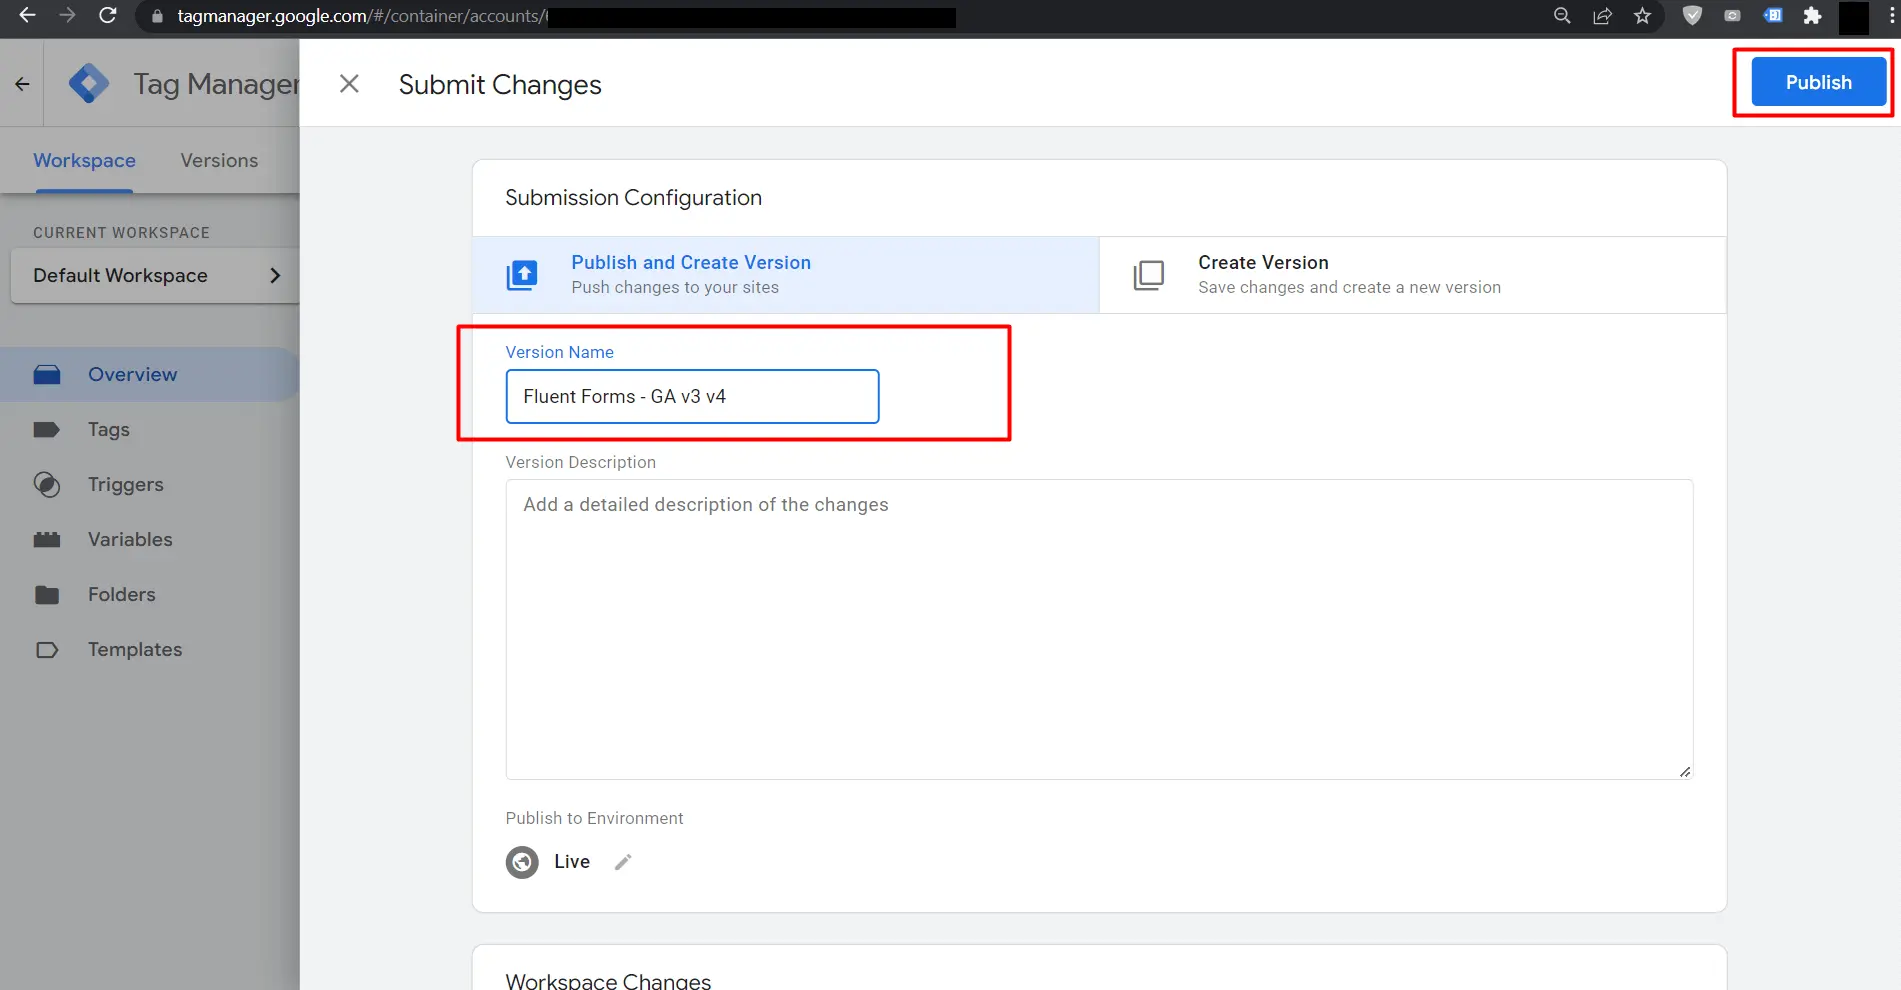
Now we are done with tasks. We can now debug what we just did live in Preview Mode or make the settings public by Publishing from the Workspace.
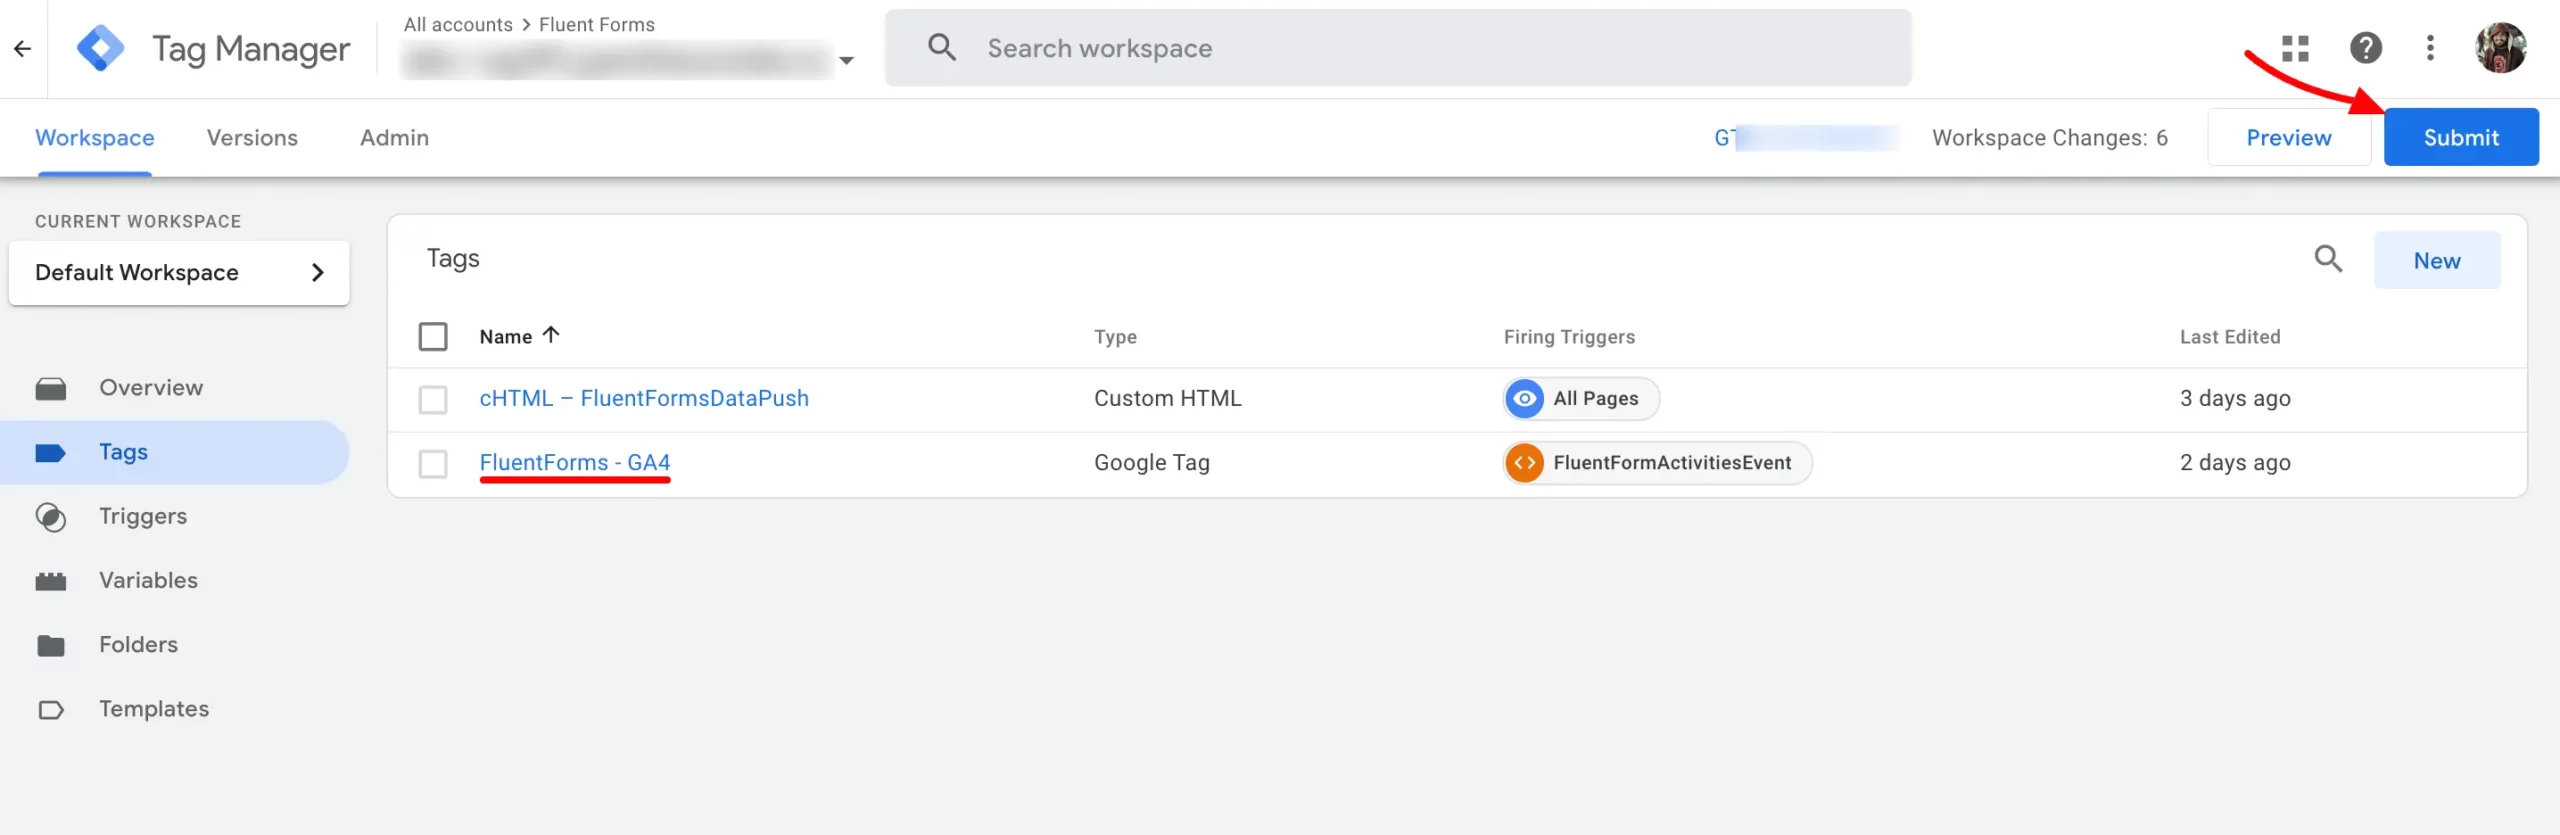
Type in a meaningful Version Name, which can be anything for future purposes; if anything goes wrong while working in the future, identify work done until now and revert to this stage if we like.
Since this method is confirmed for Fluent Forms I am going to publish my workspace and then check in Google Analytics by opening a Page that contains a Fluent Form, and then submit the form with some data and check the Events inside Google Analytics.
4. Final result in Google Analytics #
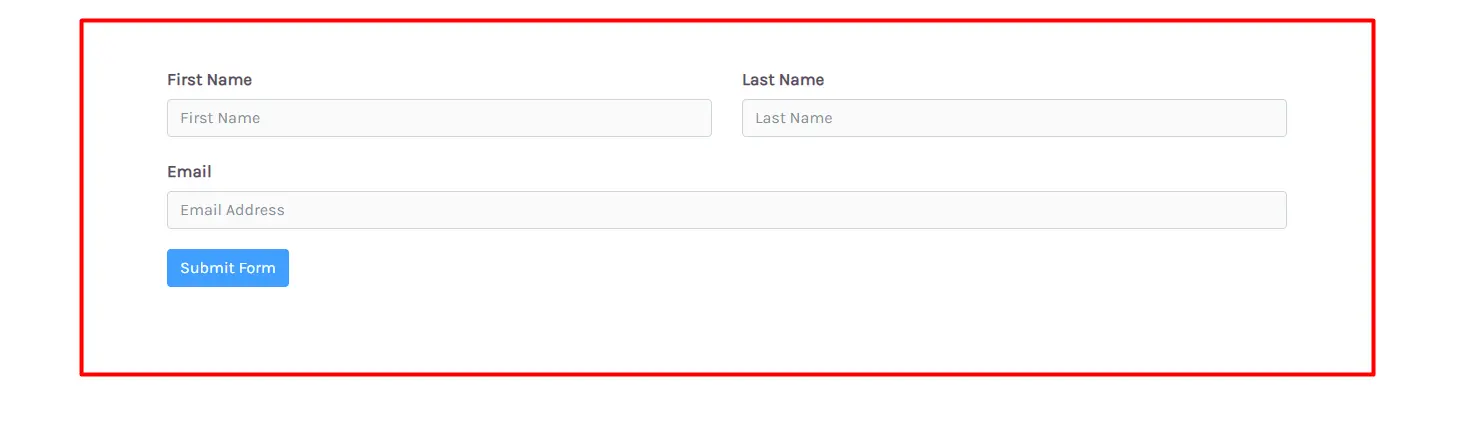
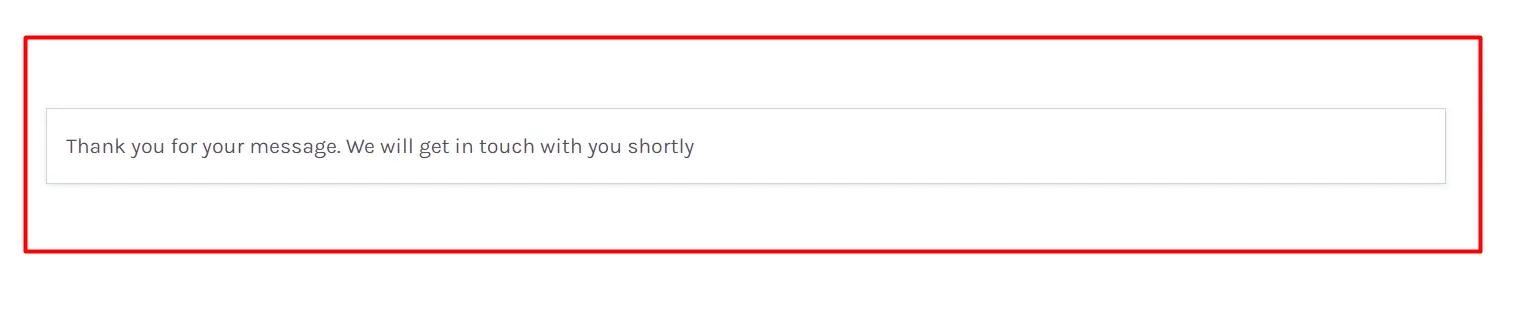
The sample form, which is being teste,d looks like the below:
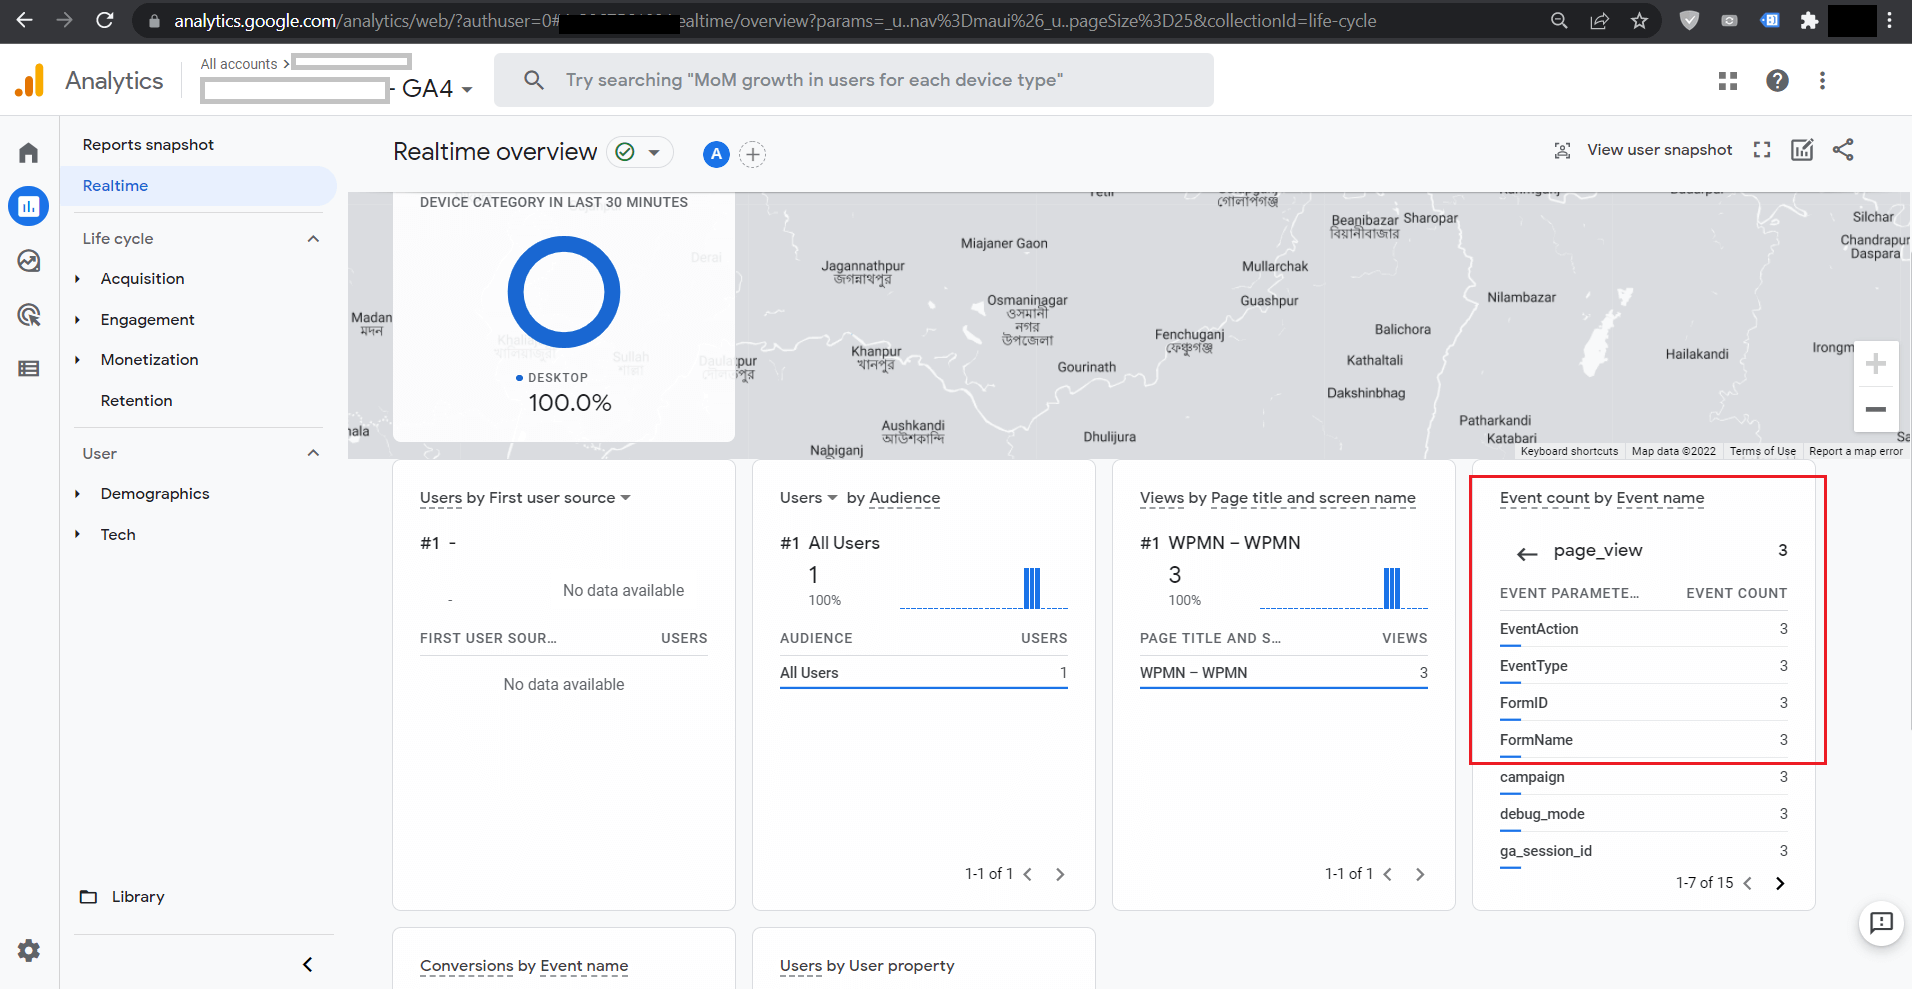
After the page loads, even without clicking anything on the page, the form sends an event named FormView to GTM, and then it is triggered by our configuration, and now shows up in Google Analytics.
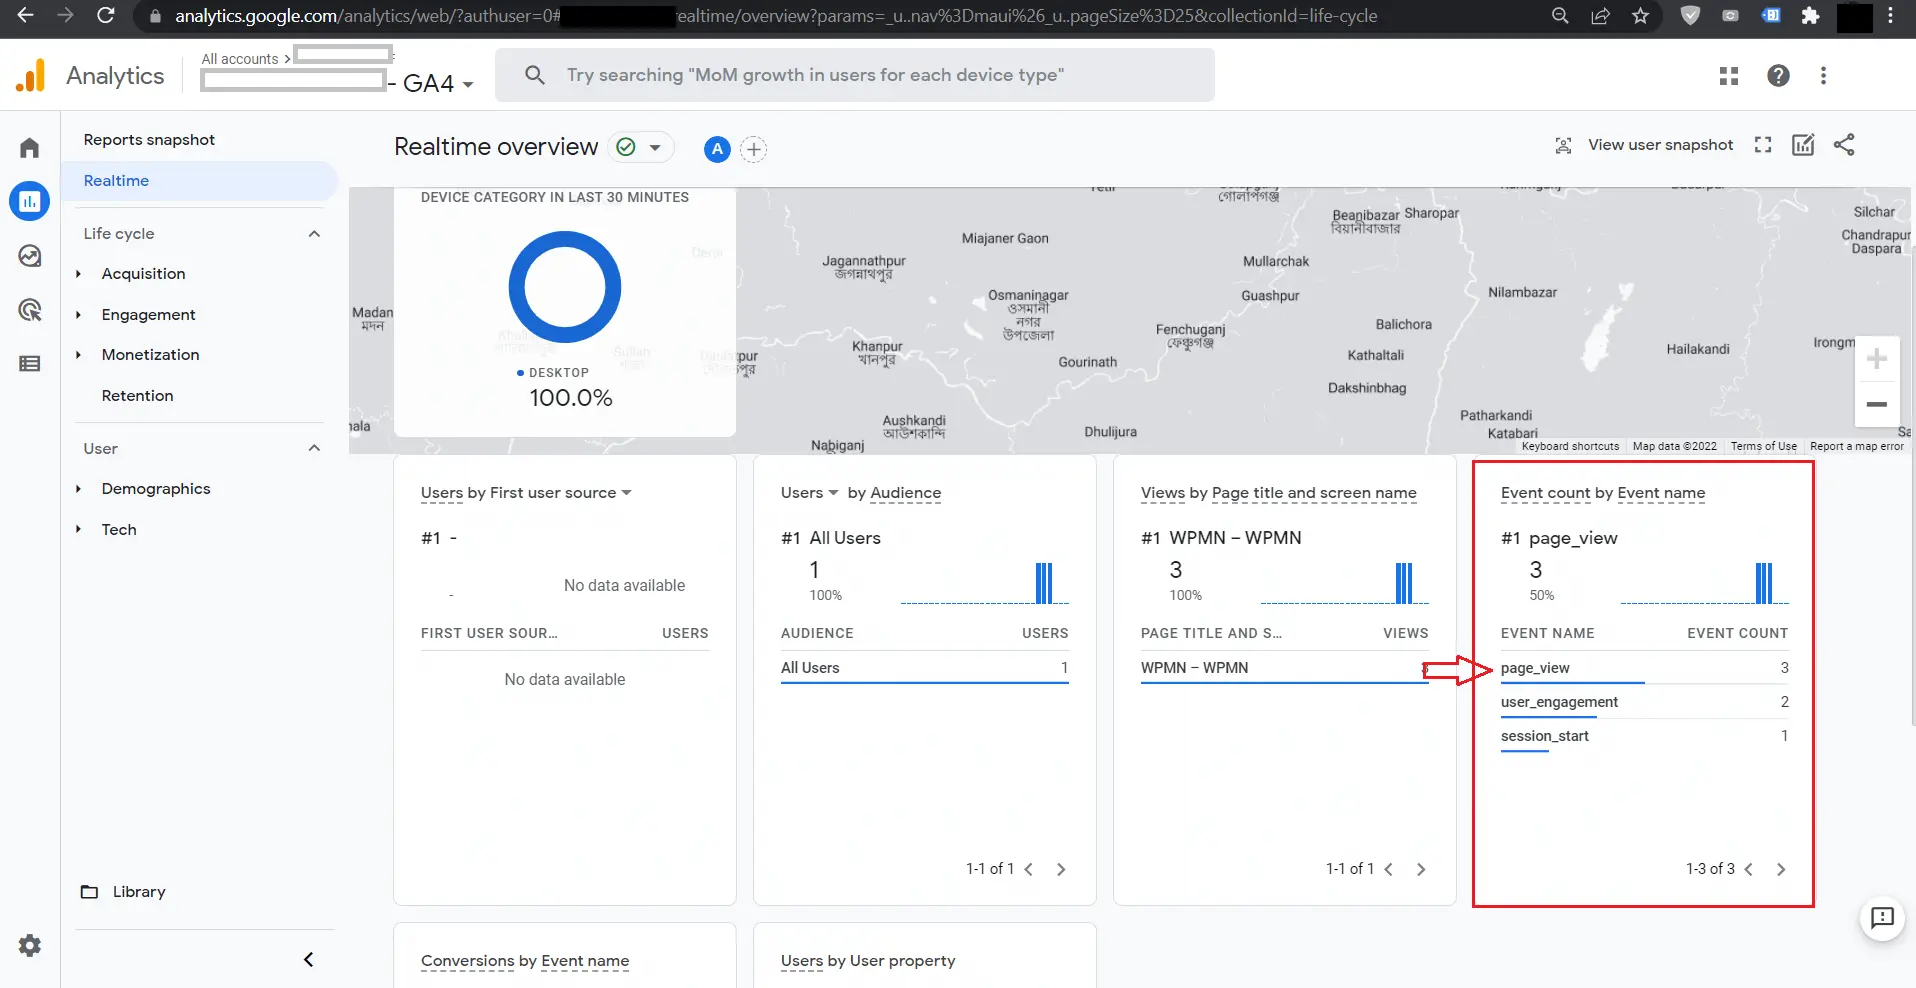
Expand the page_view Event for further details.
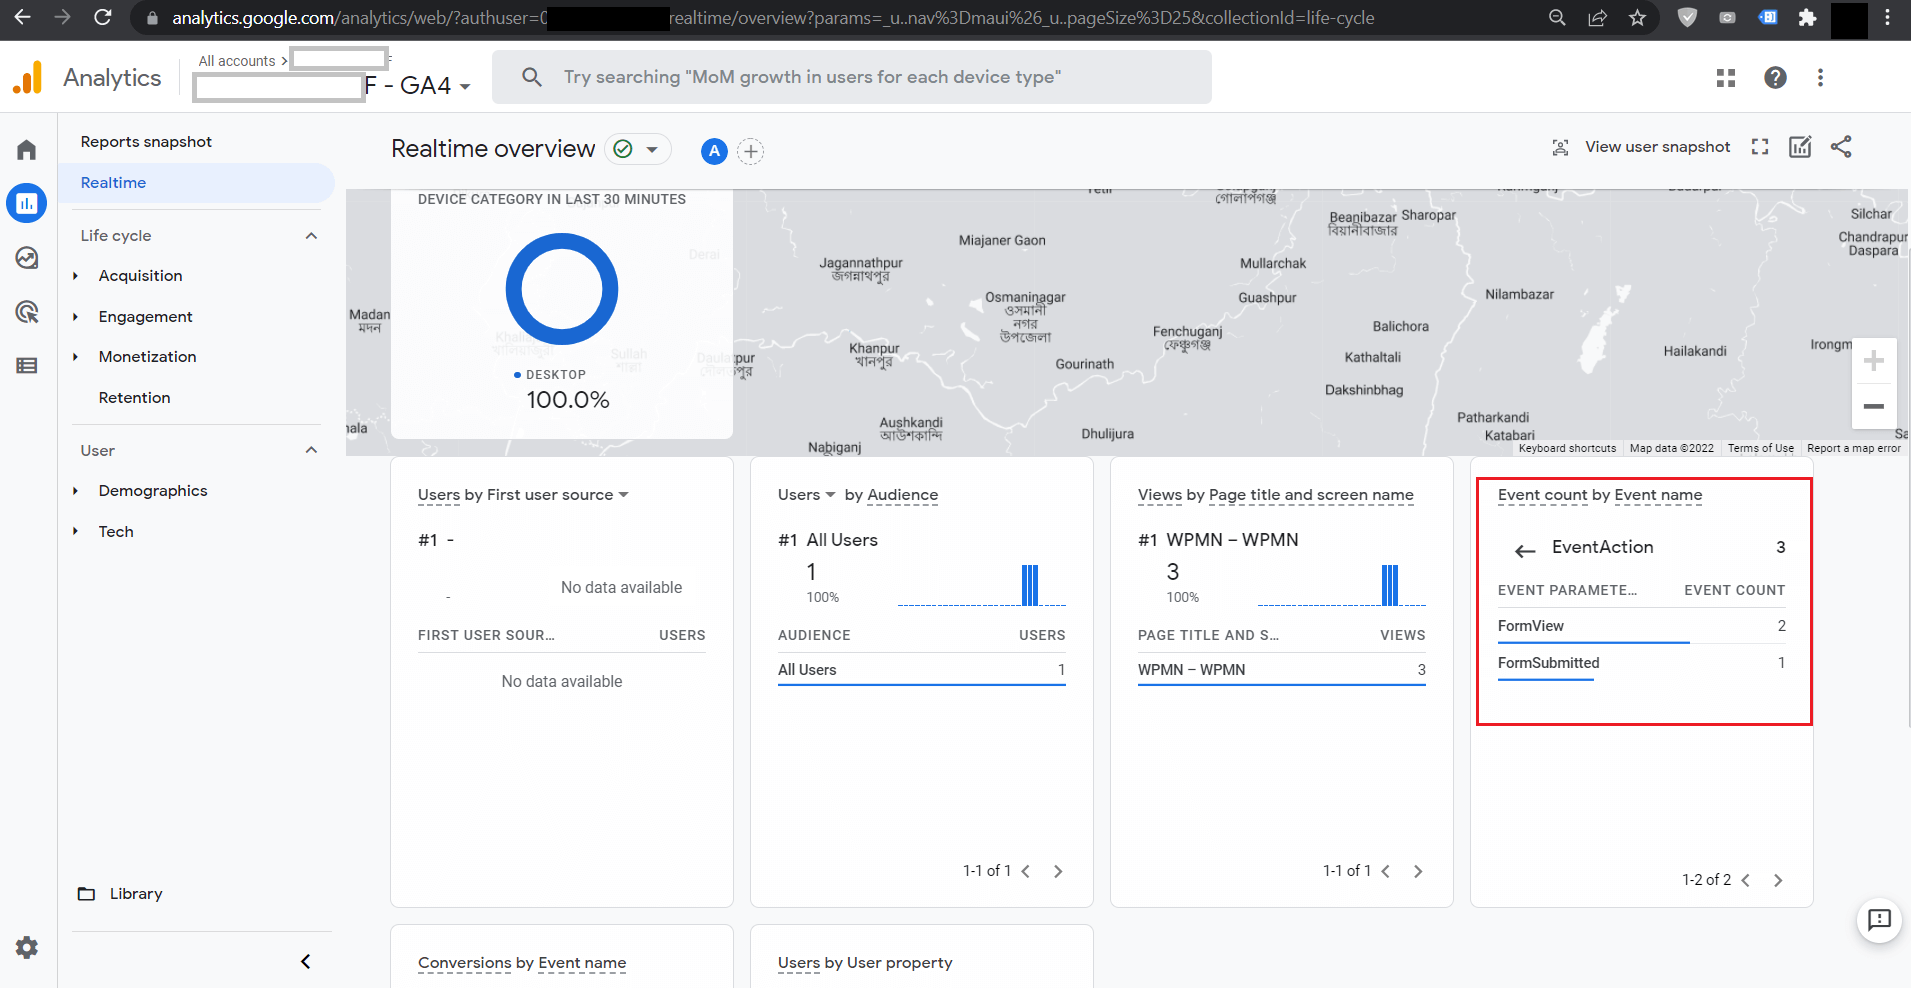
Also after submitting the form, we can see there is another event is pushed which is FormSubmitted
Expand any 4 types of Event Data to see more details:
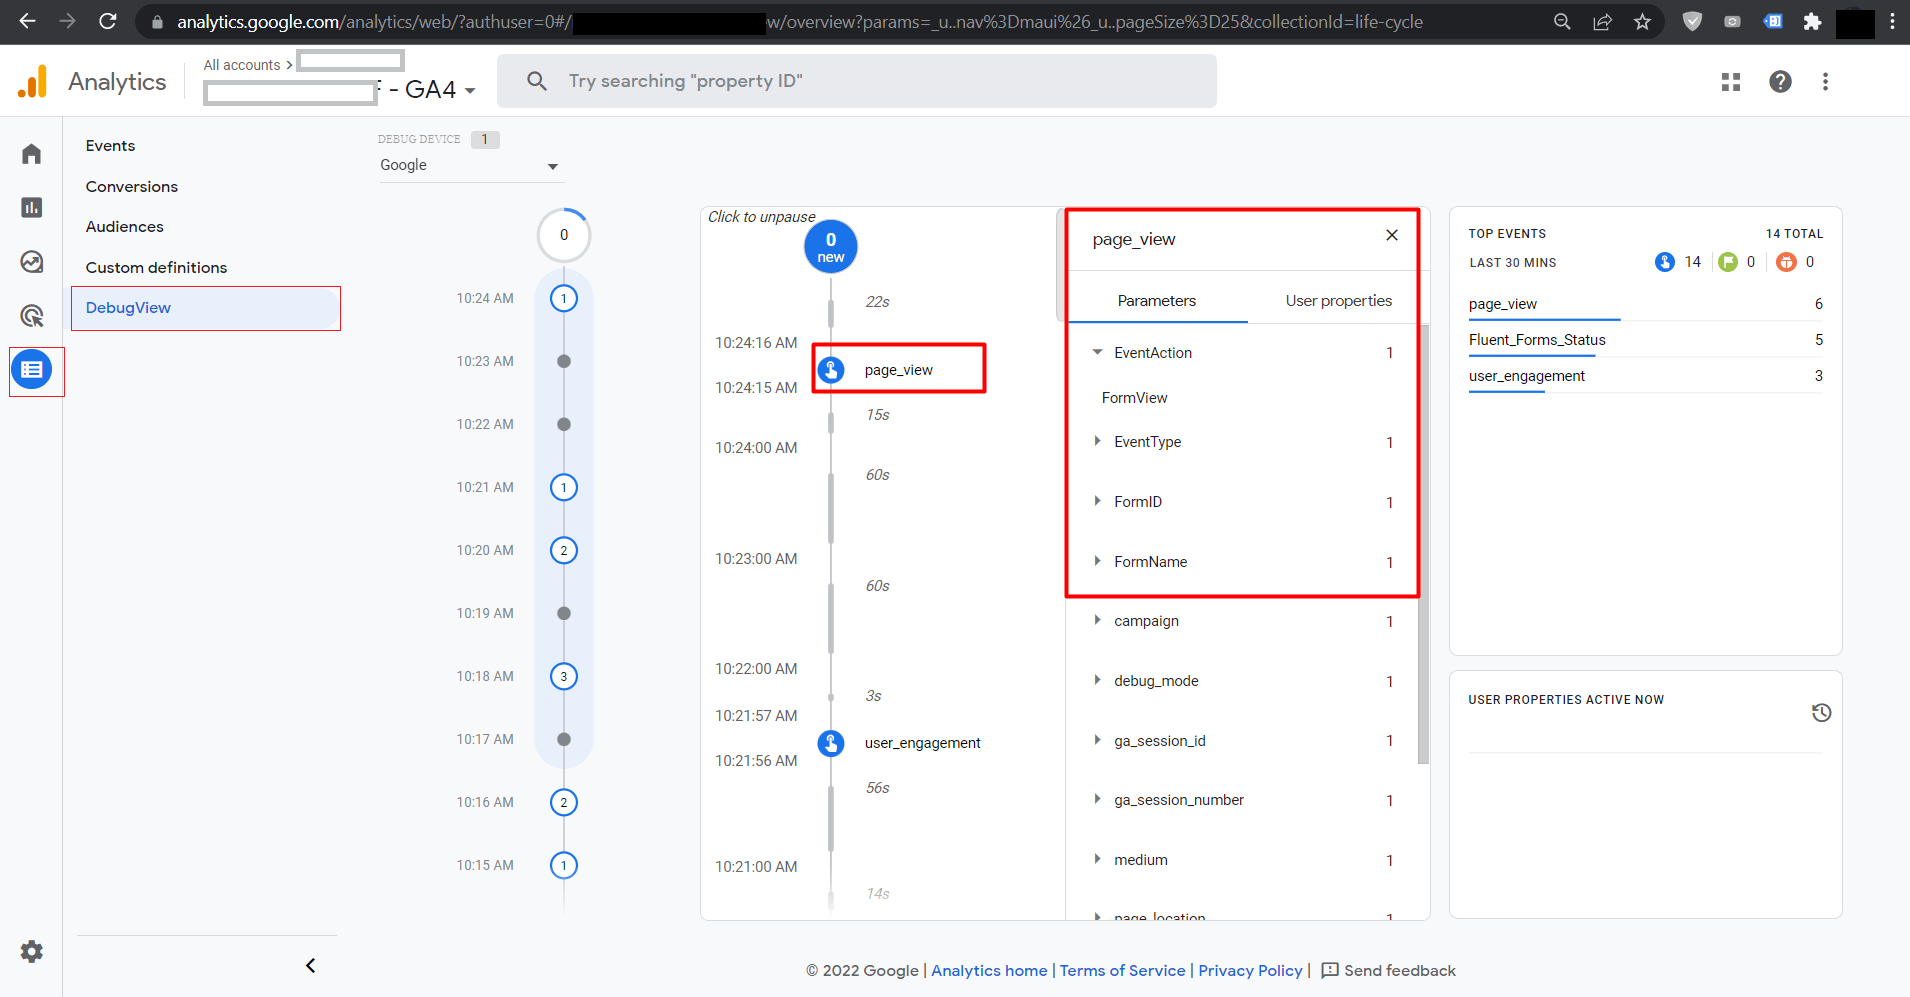
There is a super-advanced feature of Google Analytics 4 that we will explore for our Fluent Forms Events. While configuring our Tag Manager Google Analytics GA4 configuration, we enabled Debug View, and now we can explore that as below:
That’s it. Now you will get events to Google Analytics for all the Fluent Forms on your website.
Enjoy Fluent Forms as the most powerful form plugin for WordPress!


