With Fluent Forms Dynamic Fields, you can create fields that automatically pull in content like posts, users, taxonomy terms, or form data, giving users customized options and building form flexibility.
This guide will teach you how to set up and customize Dynamic Fields to make your forms more user-friendly.
The Dynamic Input field is an advanced feature of the Fluent Forms plugin. To use it, you require the Fluent Forms Pro Add-on.
Fluent Forms: Boost Form Efficiency with Dynamic Fields
Adding a Dynamic Input Field #
To learn how to add the Dynamic Field to Fluent Forms, follow the steps below.
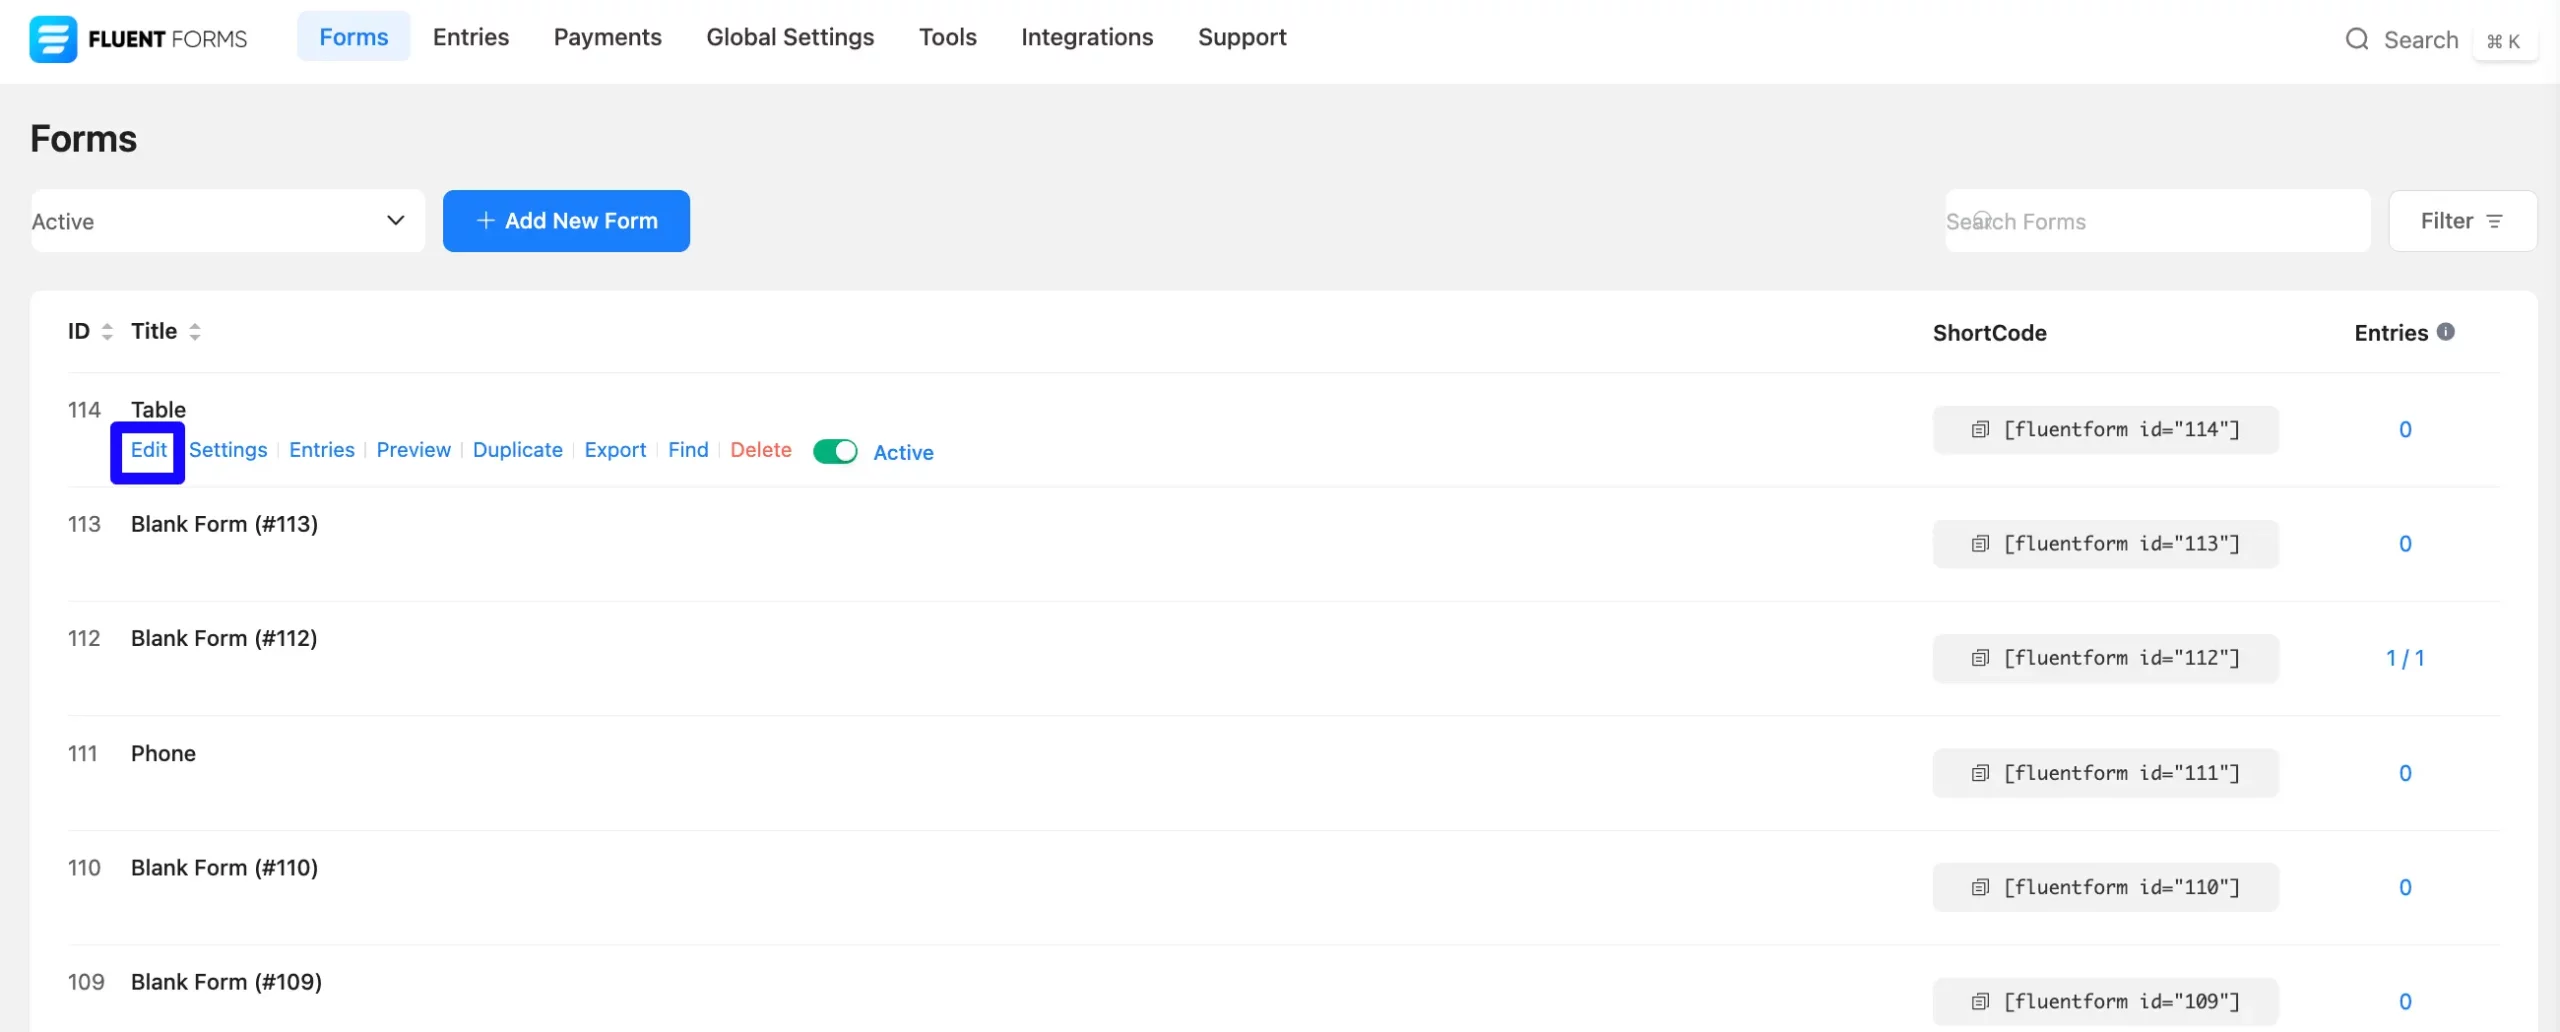
First, go to the Forms section from the Fluent Forms Navbar, choose a desired form, and click the Edit icon to open the Editor page of that form.
If you do not have any existing forms, read Create a Form from Scratch orCreate a Form using Templates documentation to create a new one.
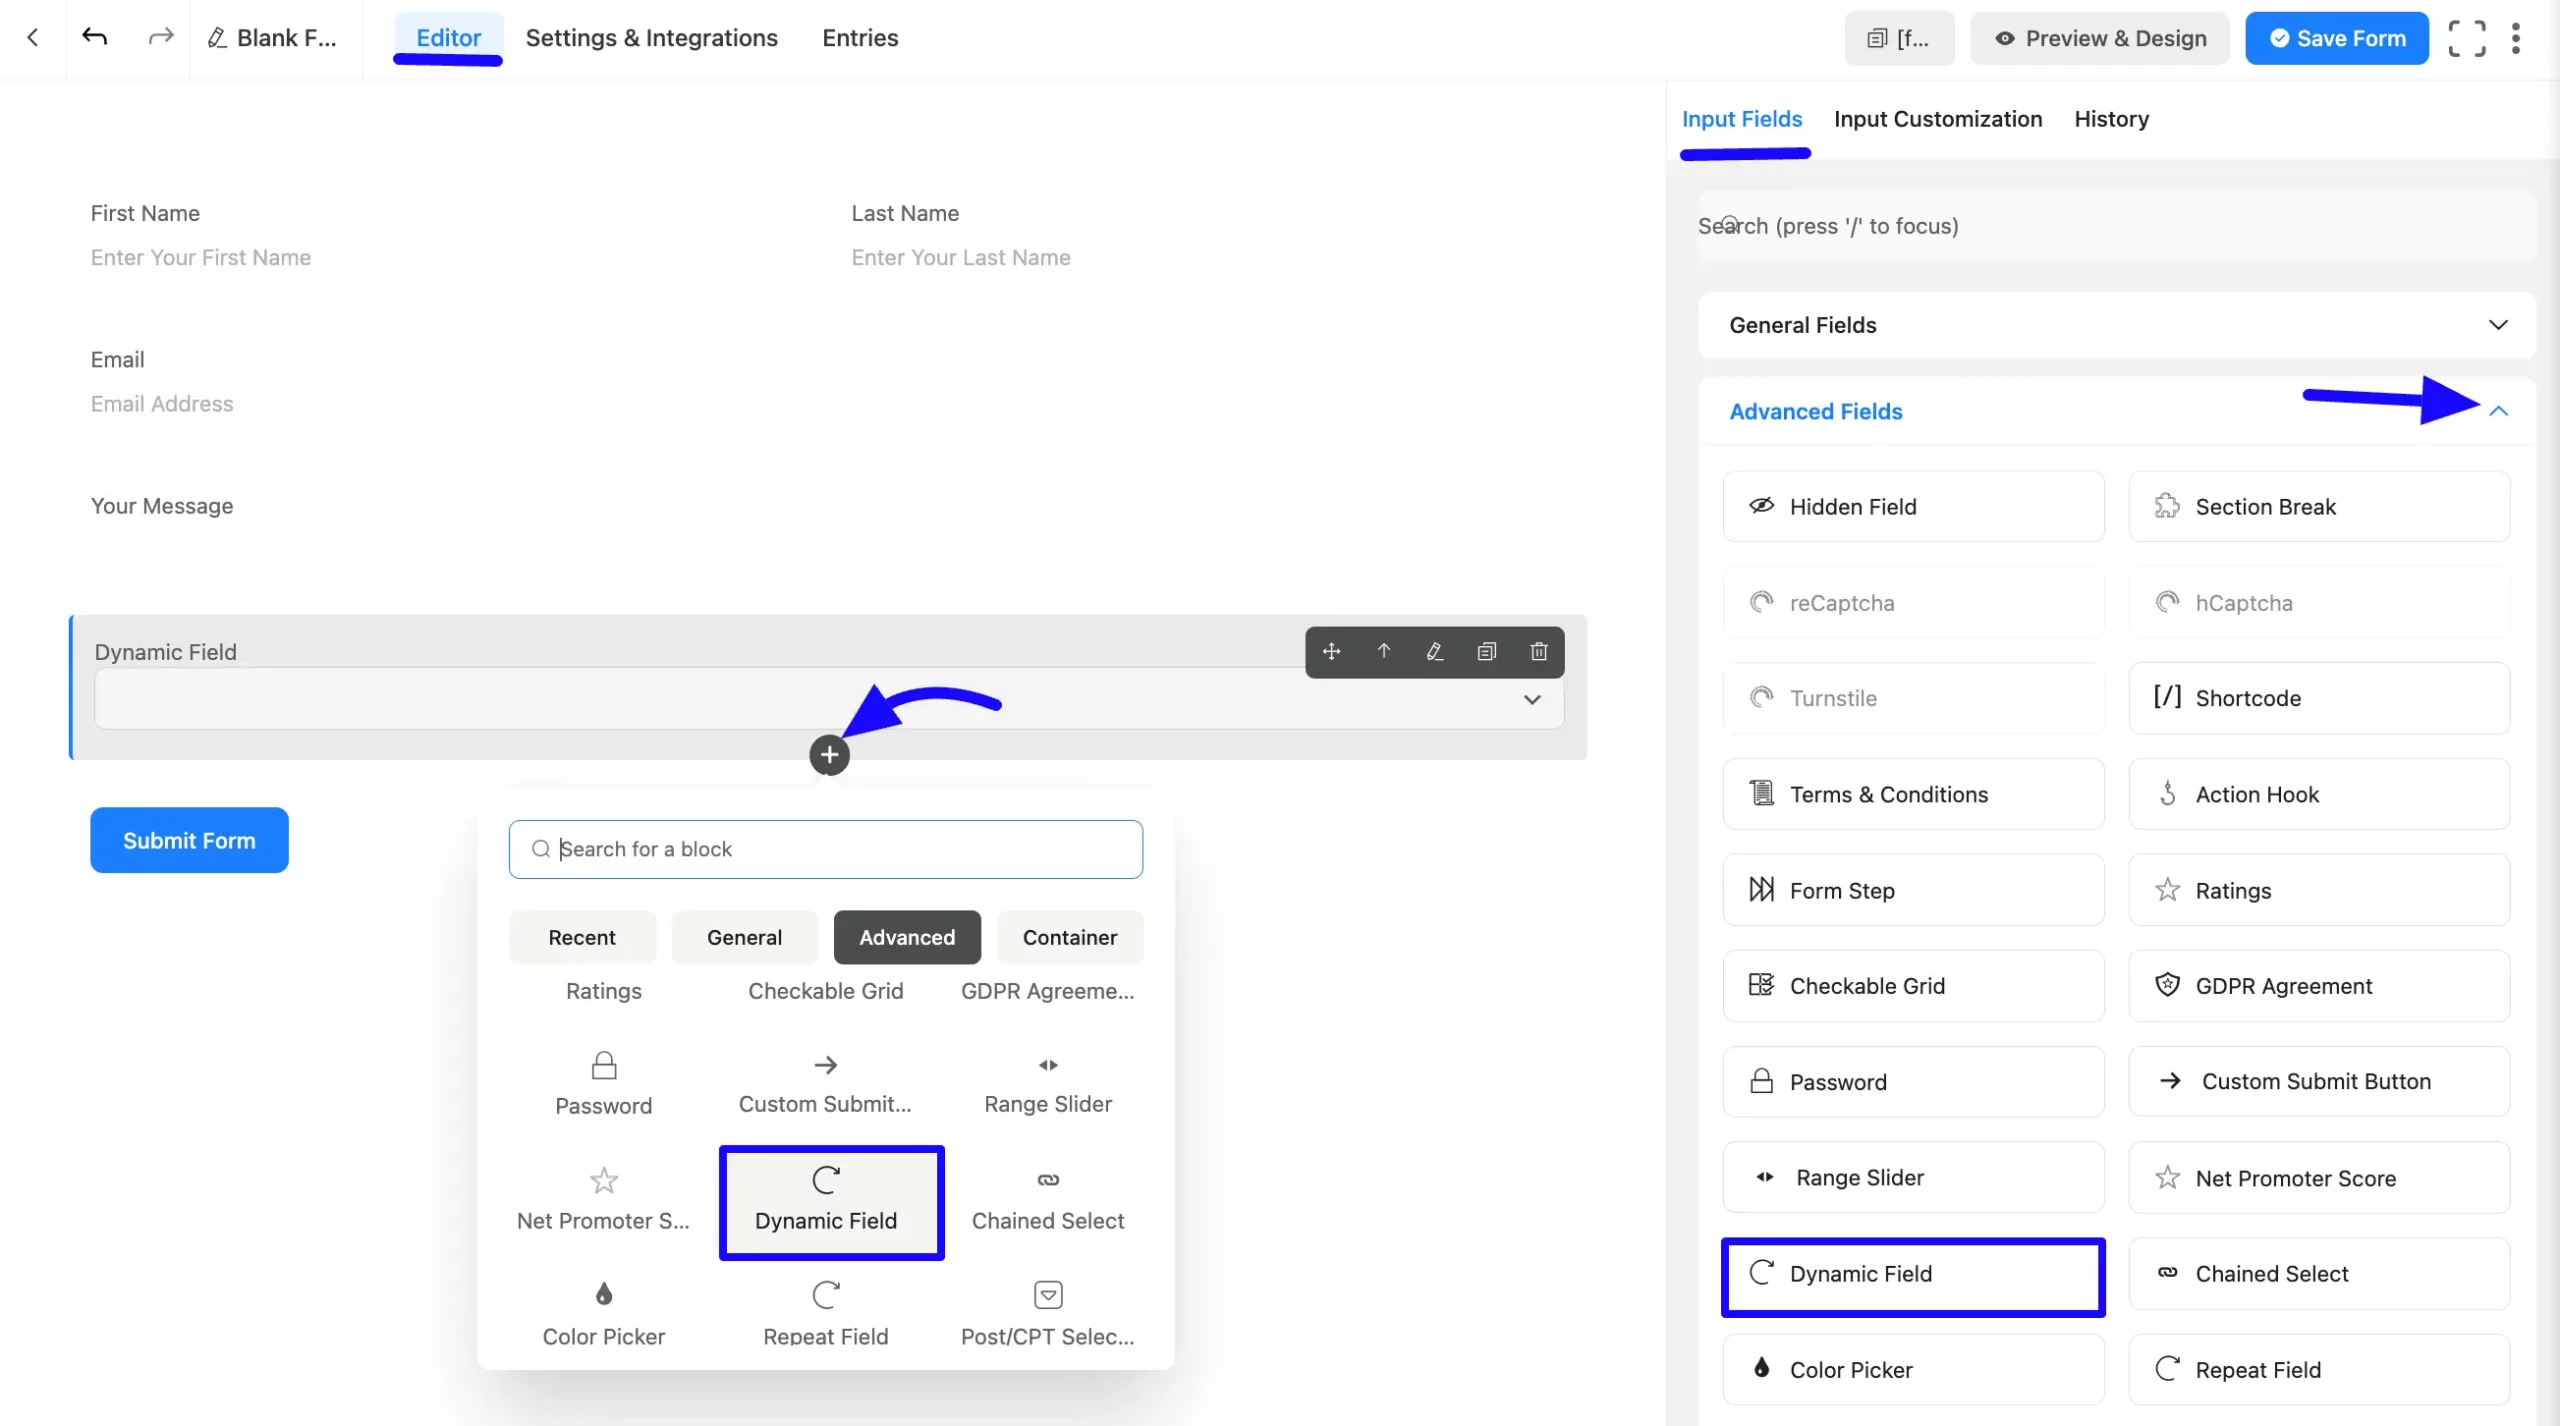
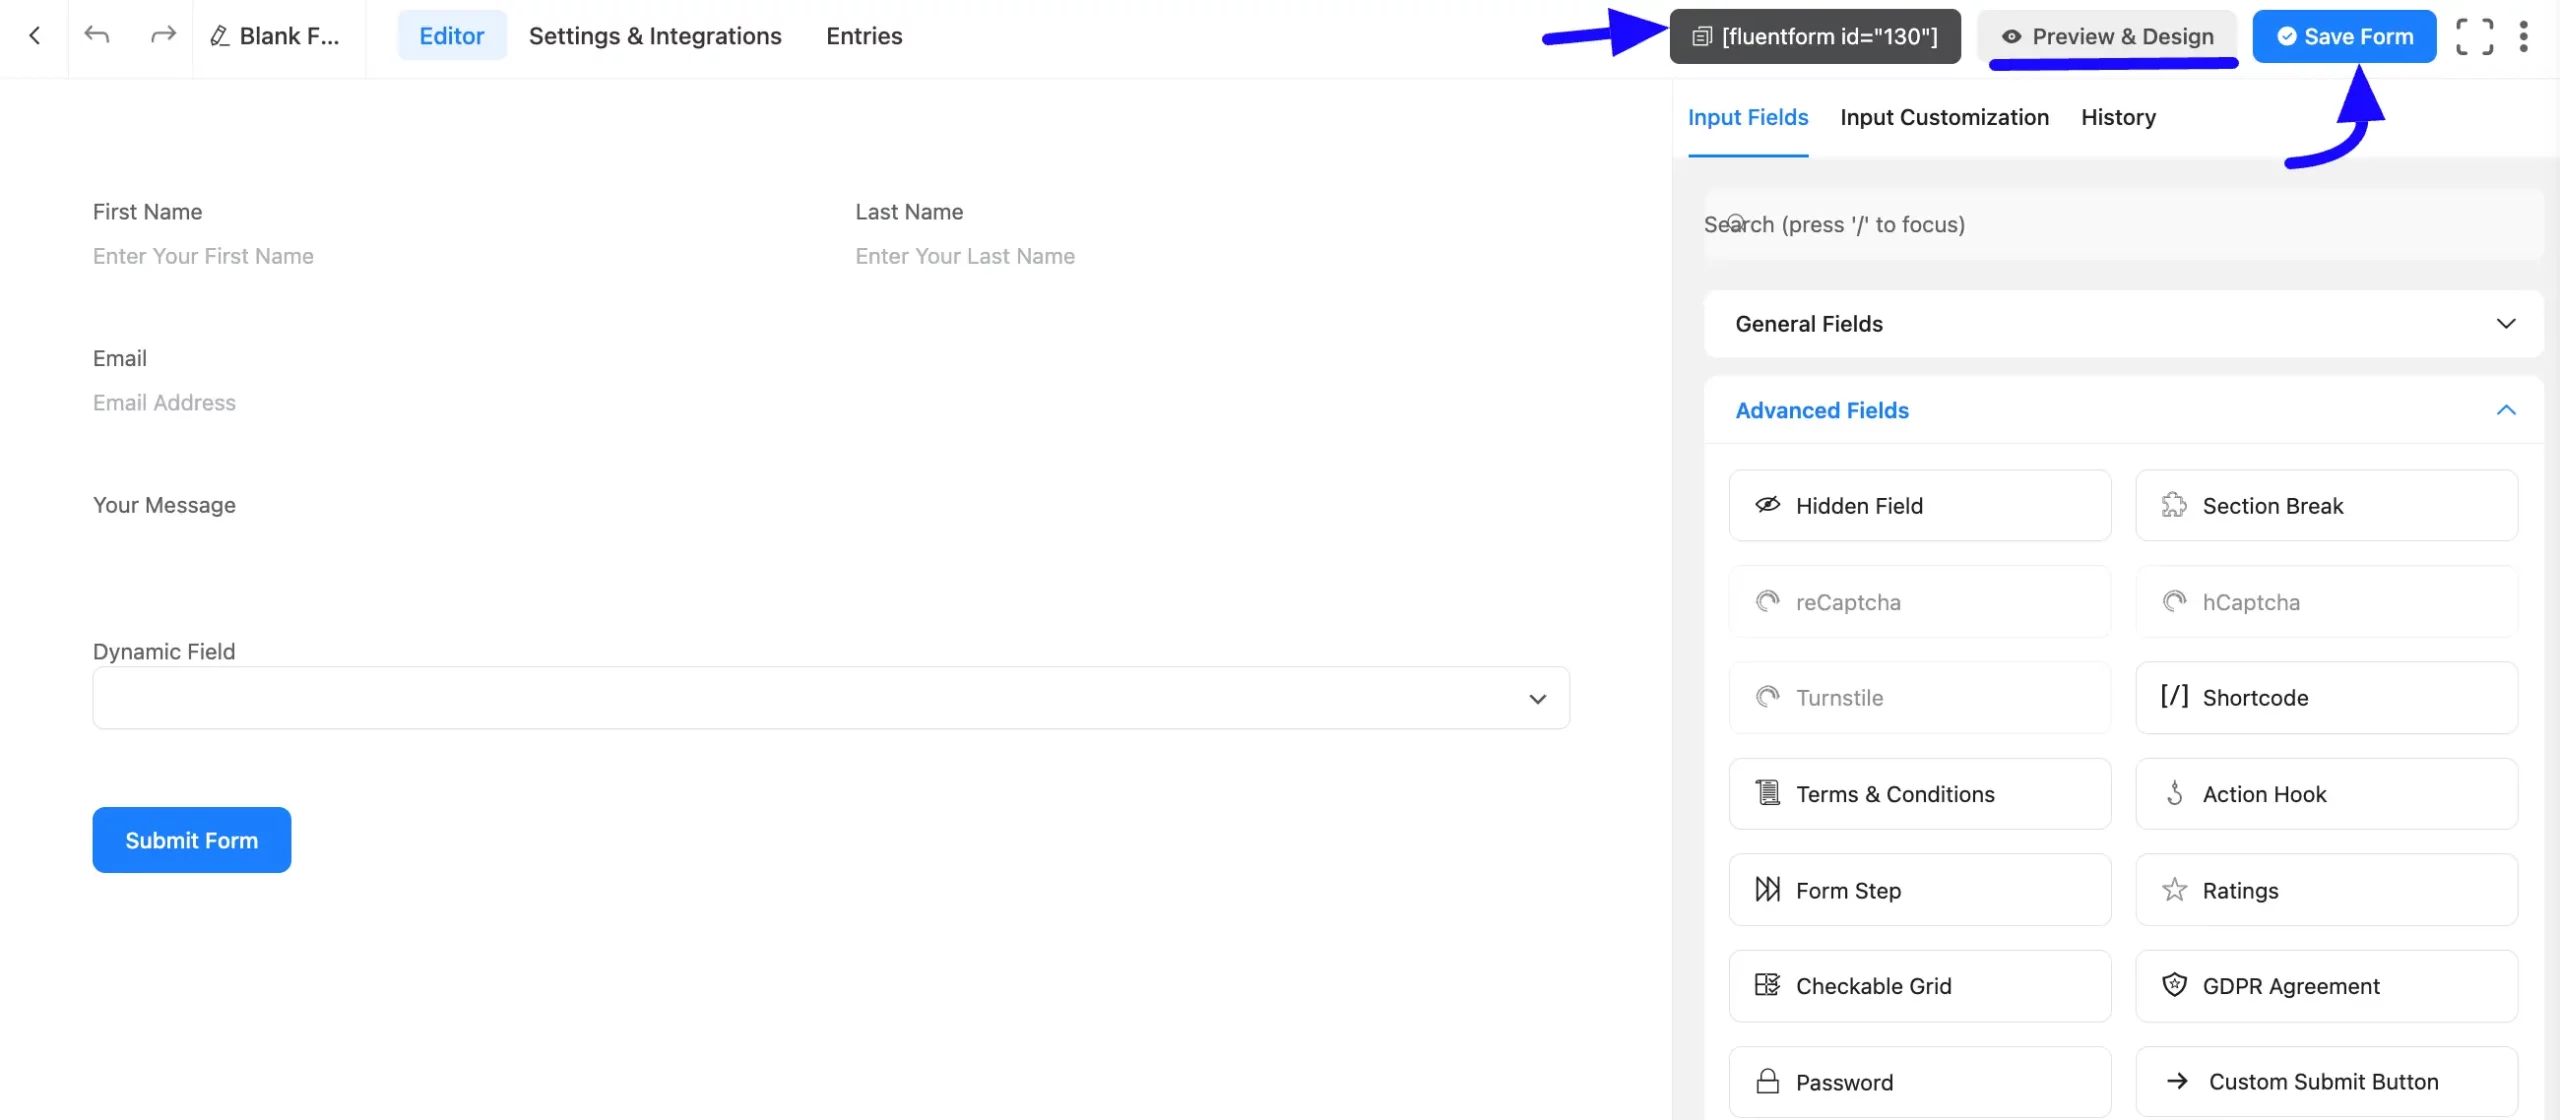
Once on the Editor page, click the Plus Icon in your form editor and open the Advanced Fields module. You can also find this option in the right sidebar under the Input Fields tab.
Now, select the Dynamic Input field by clicking or dragging it and dropping it into your editor.
Customizing the Dynamic Field #
Once you add the Dynamic Input field, you can customize it by hovering over it and clicking the Pencil Icon. It will take you to the Input Customization tab on the right, which offers the following customization options.
- Dynamic Field Options
- Advanced Options

Dynamic Field Options #
Under the Input Customization tab, you will find various settings options for customizing the field. These options allow you to configure essential aspects of the Dynamic Input field.
All the settings under the Dynamic Input Field mentioned above are briefly explained below-
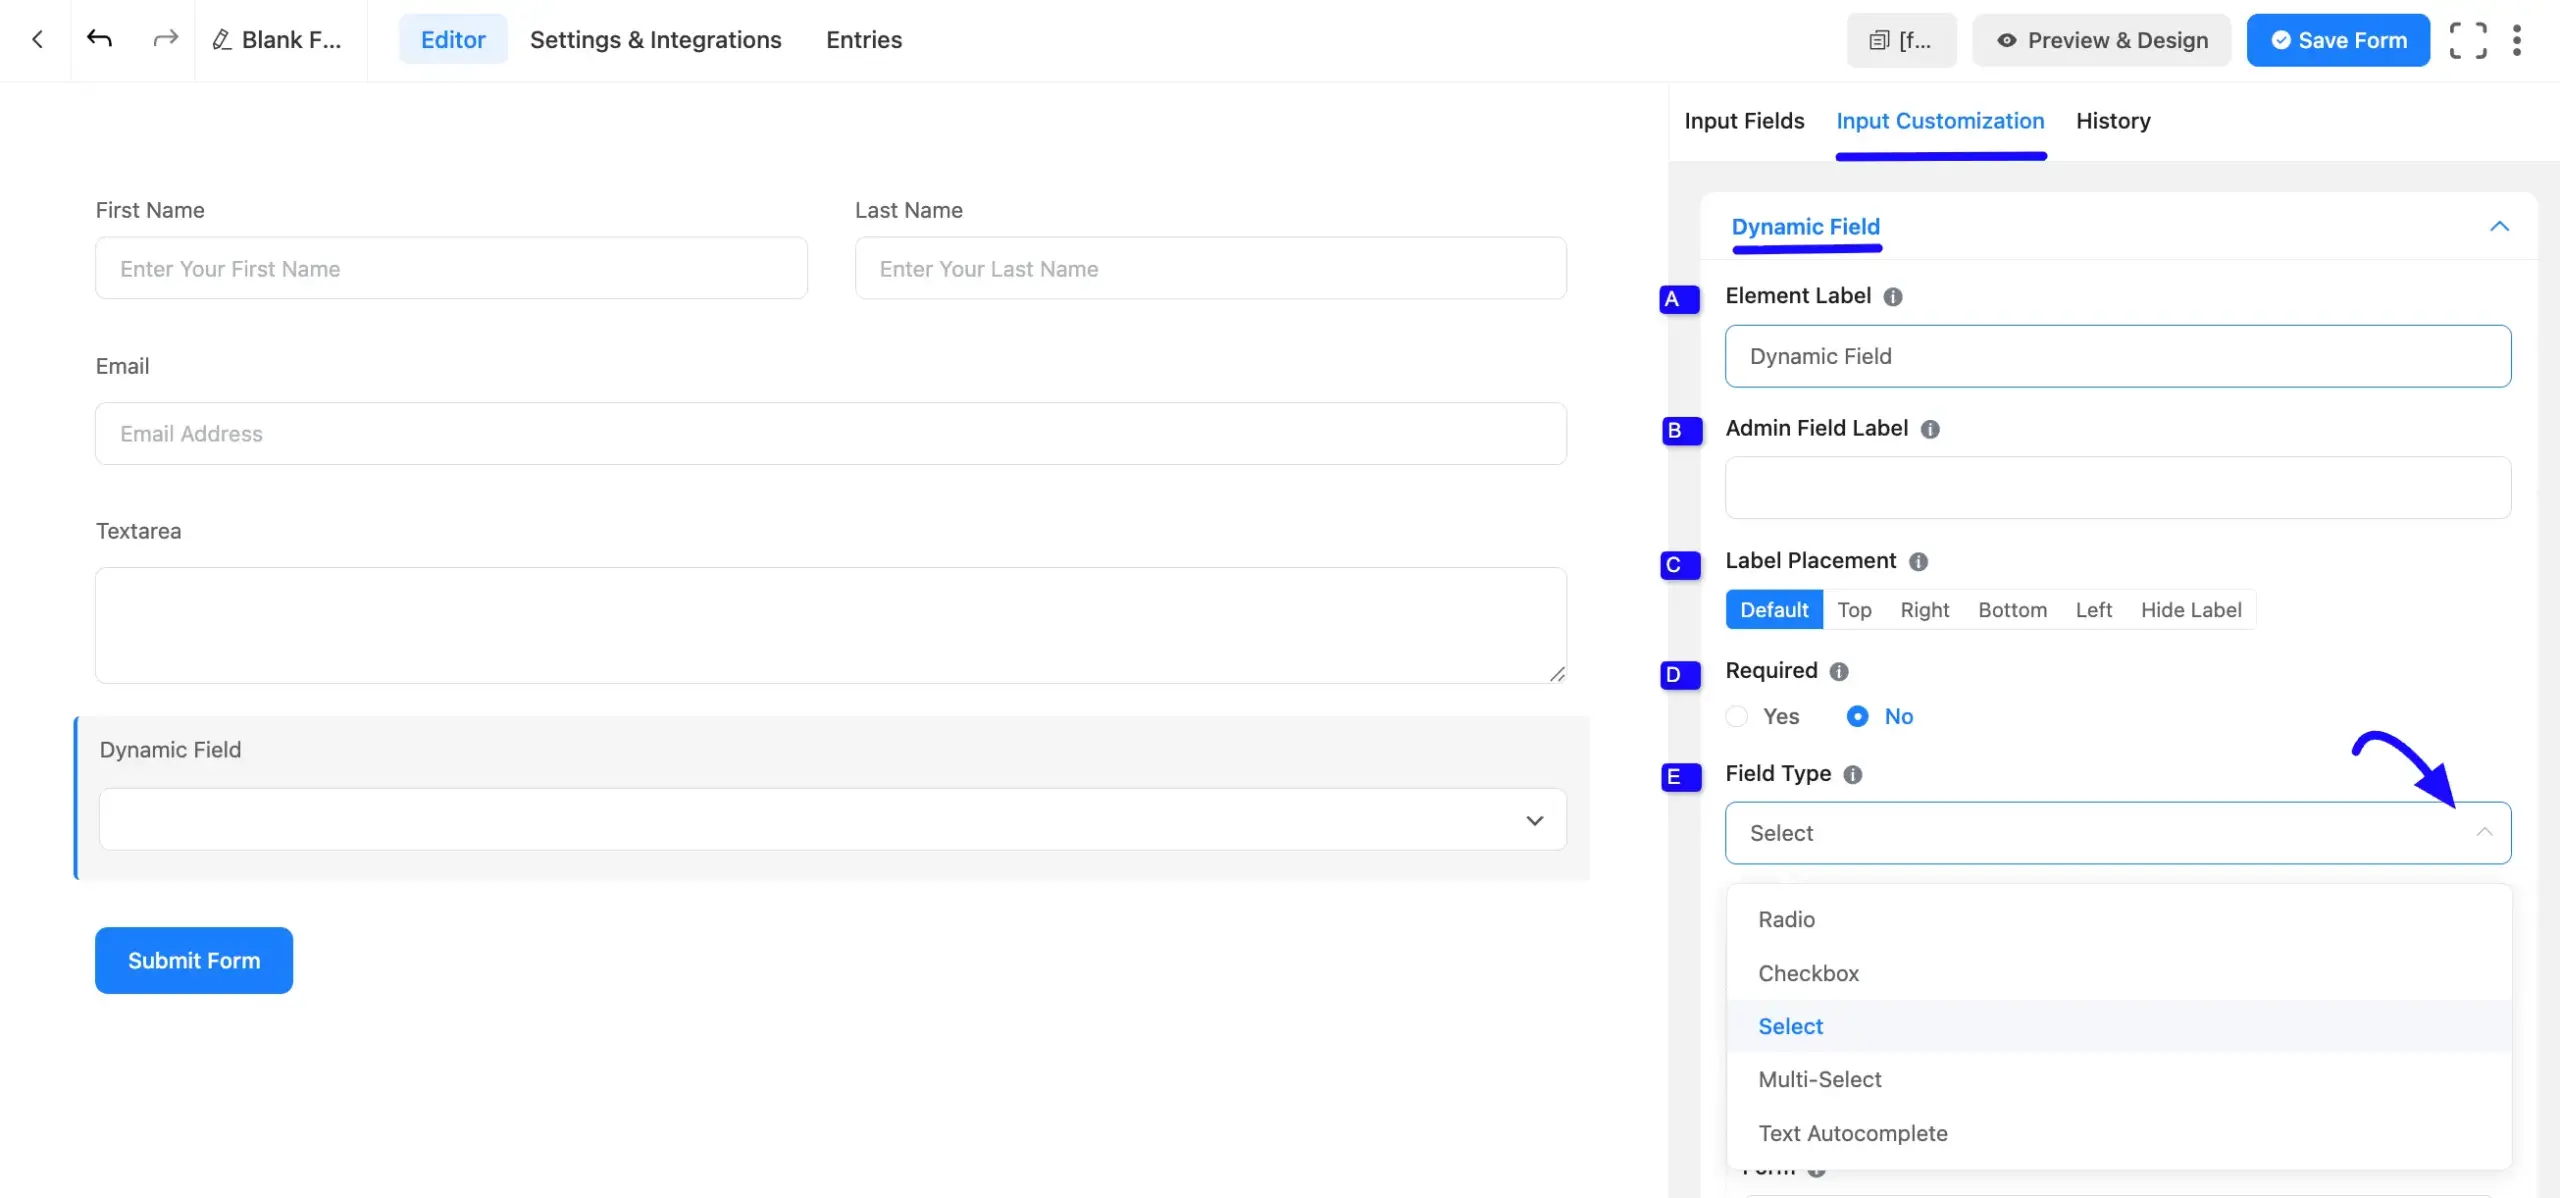
A. Element Label: This is the field title users will see when filling out the Dynamic field in a form. You can enter any text here to help users understand the field’s purpose.
B. Admin Field Label: The admin field label is a field title displayed only to admin users. You can configure this option to show a different field label for your admin users when they view the form submissions.
C. Label Placement: This option allows you to determine the position of the label title where the user will see it. The available options are Top, Left, Right, and Default. All of those are self-explanatory except the Default. If you select the Default option, it will represent your global label placement settings.
D. Required: Choose the appropriate option from here to determine whether the field should be empty when the user submits your form.
E. Field Type: Choose from five types to determine how users interact with the dynamic data: Radio, Checkbox, Select (dropdown), Multi-Select, and Text Autocomplete.
- Radio/Checkbox: Users can respond using standard radio buttons or checkboxes.
- Select/Multi-Select: Users can choose one or multiple options from a dropdown menu.
- Text Autocomplete: This type allows users to type into the field while the form suggests matching results dynamically from the source data.
Note: The Text Auto Complete feature is available in the Pro version of Fluent Forms.
Types of Dynamic Fields #
Fluent Forms offers five types of dynamic fields. After you’ve added a Dynamic Field to your form, you can choose the dynamic data you want to show in the field from the dropdown in the Source options.
After selecting a source, you can get more specific with your data by using filters. To do this, click on the Advance tab. Here, you can add multiple filter conditions. If you need more control, you can create separate groups of filters using the Add Filter Group button. This allows you to combine conditions with OR logic, giving you a powerful way to show exactly the data you need.
1. Post Type: The post filter option allows you to filter your posts for the form. So that only specific posts will be shown with your Form. Now, display posts on your website, and users come to select specific posts.
Filter the specific post types to display, such as Posts, Pages, Products, etc. By clicking the ADD button on the downside, you can set multiple filters to show only relevant posts.
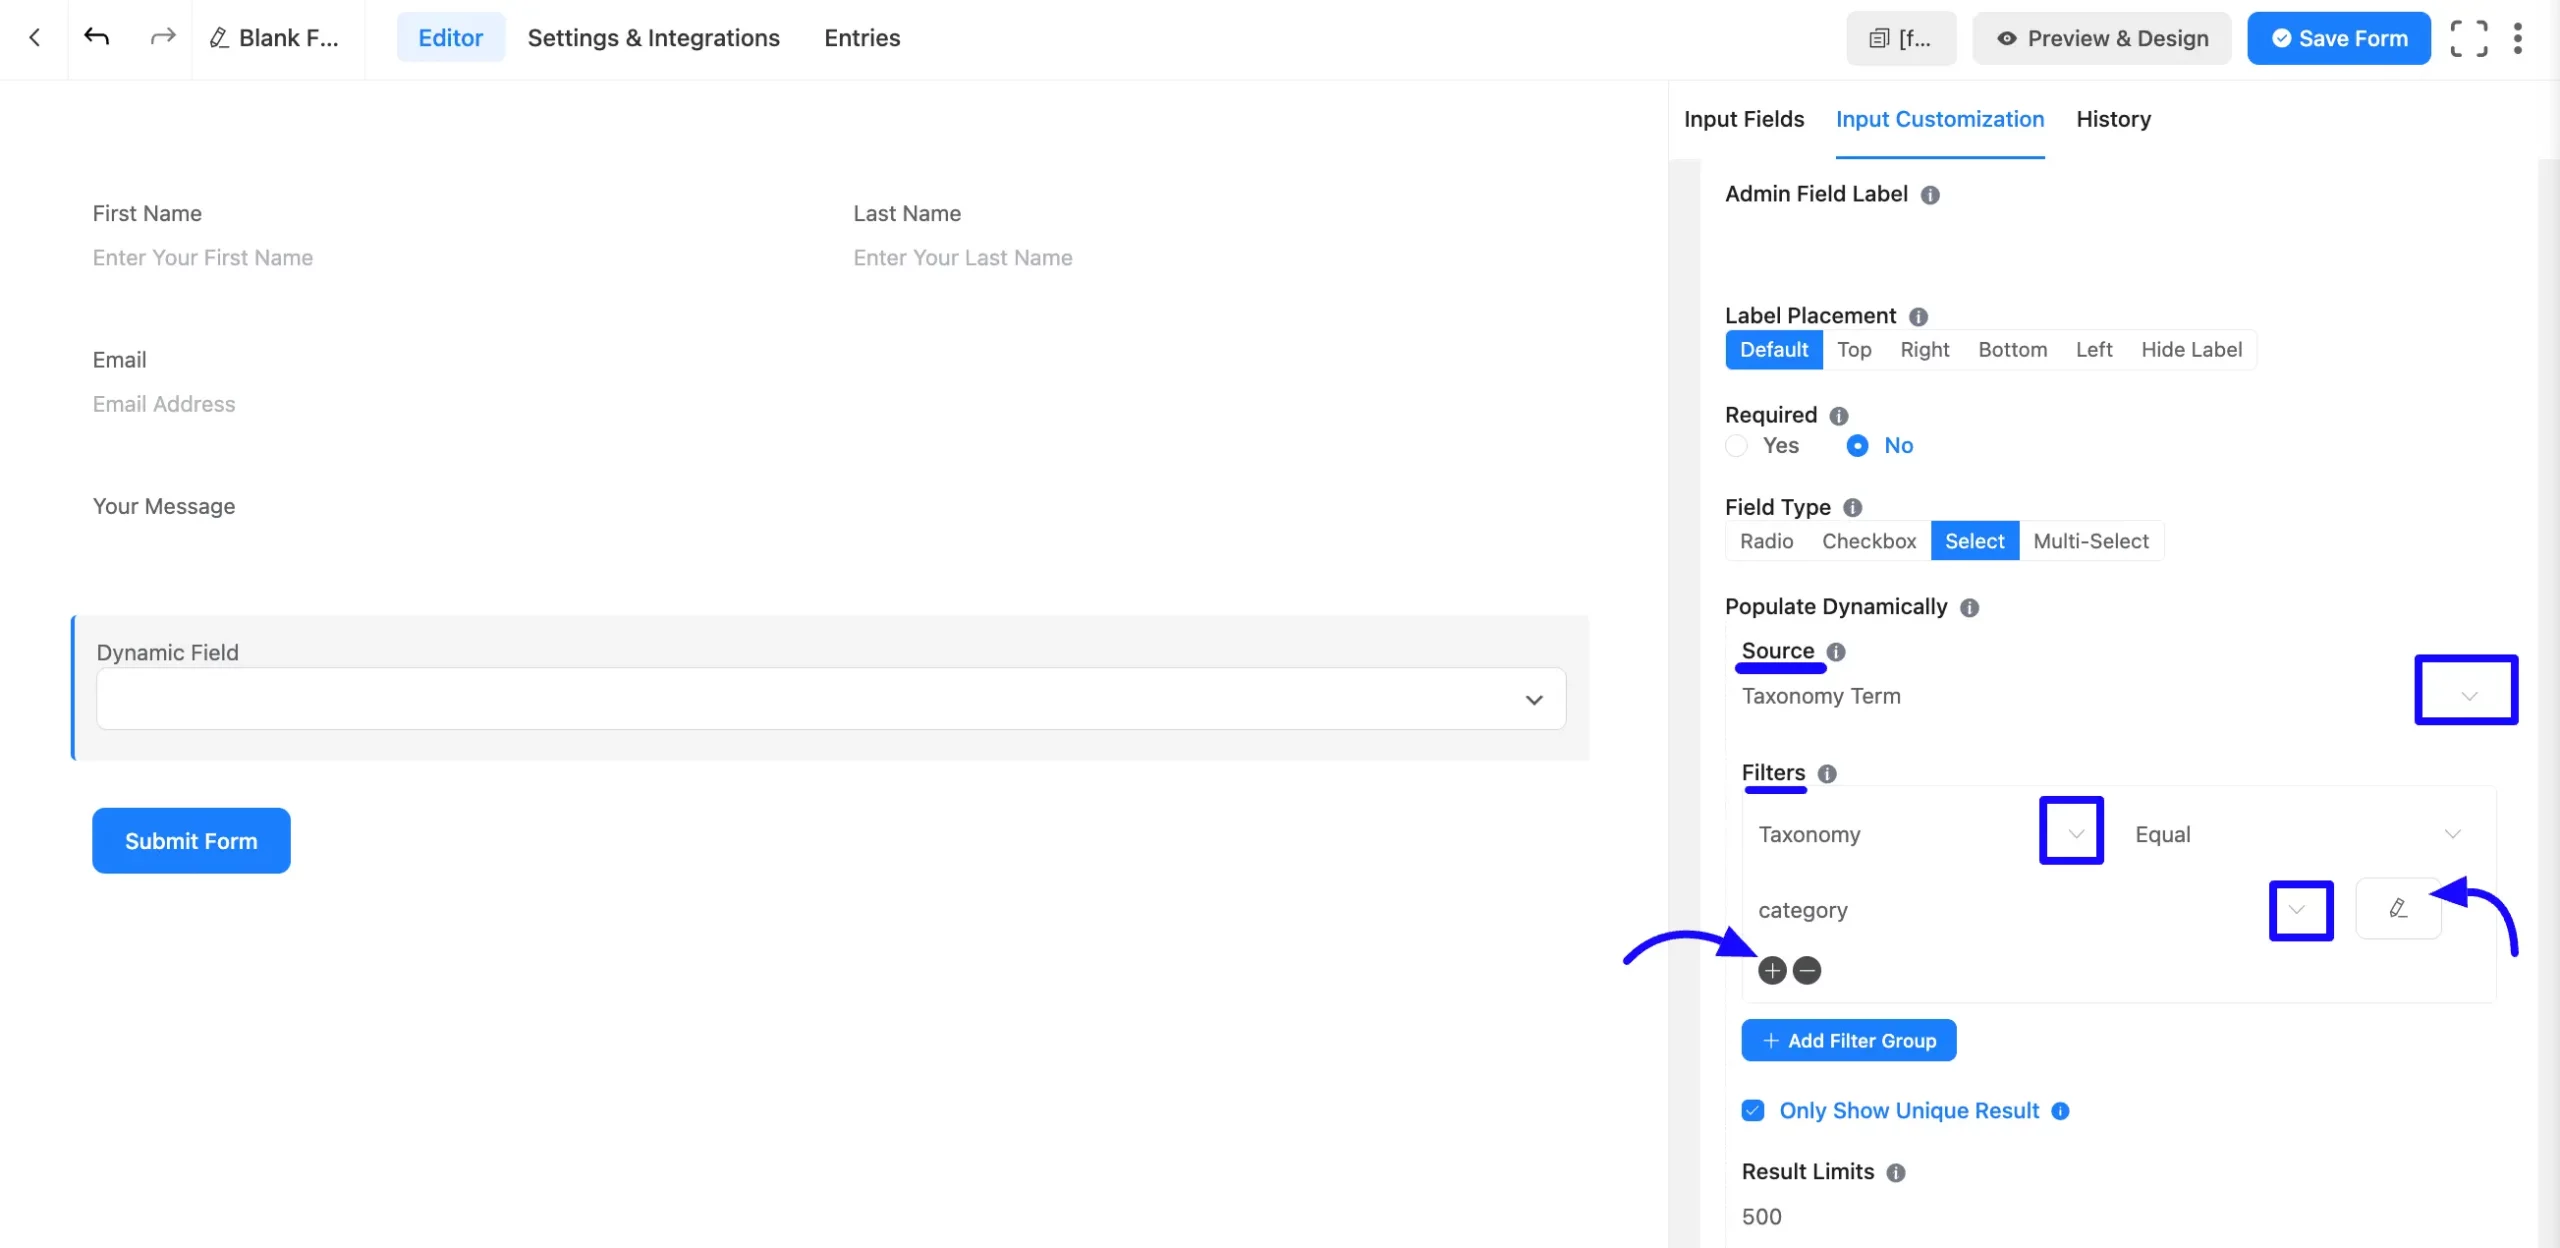
2. Taxonomy Terms: With the Taxonomy Term of dynamic fields, you can add the necessary taxonomy information you want to include to your group. You can add multiple taxonomy term groups by clicking the Add Filter Group button to make your dynamic taxonomy terms field more specific.
If you want to add multiple categories from the dropdown, click the Plus Icon, or if you want to delete a category, click the Minus Icon. You can edit the category name by clicking the Edit icon on the left side.
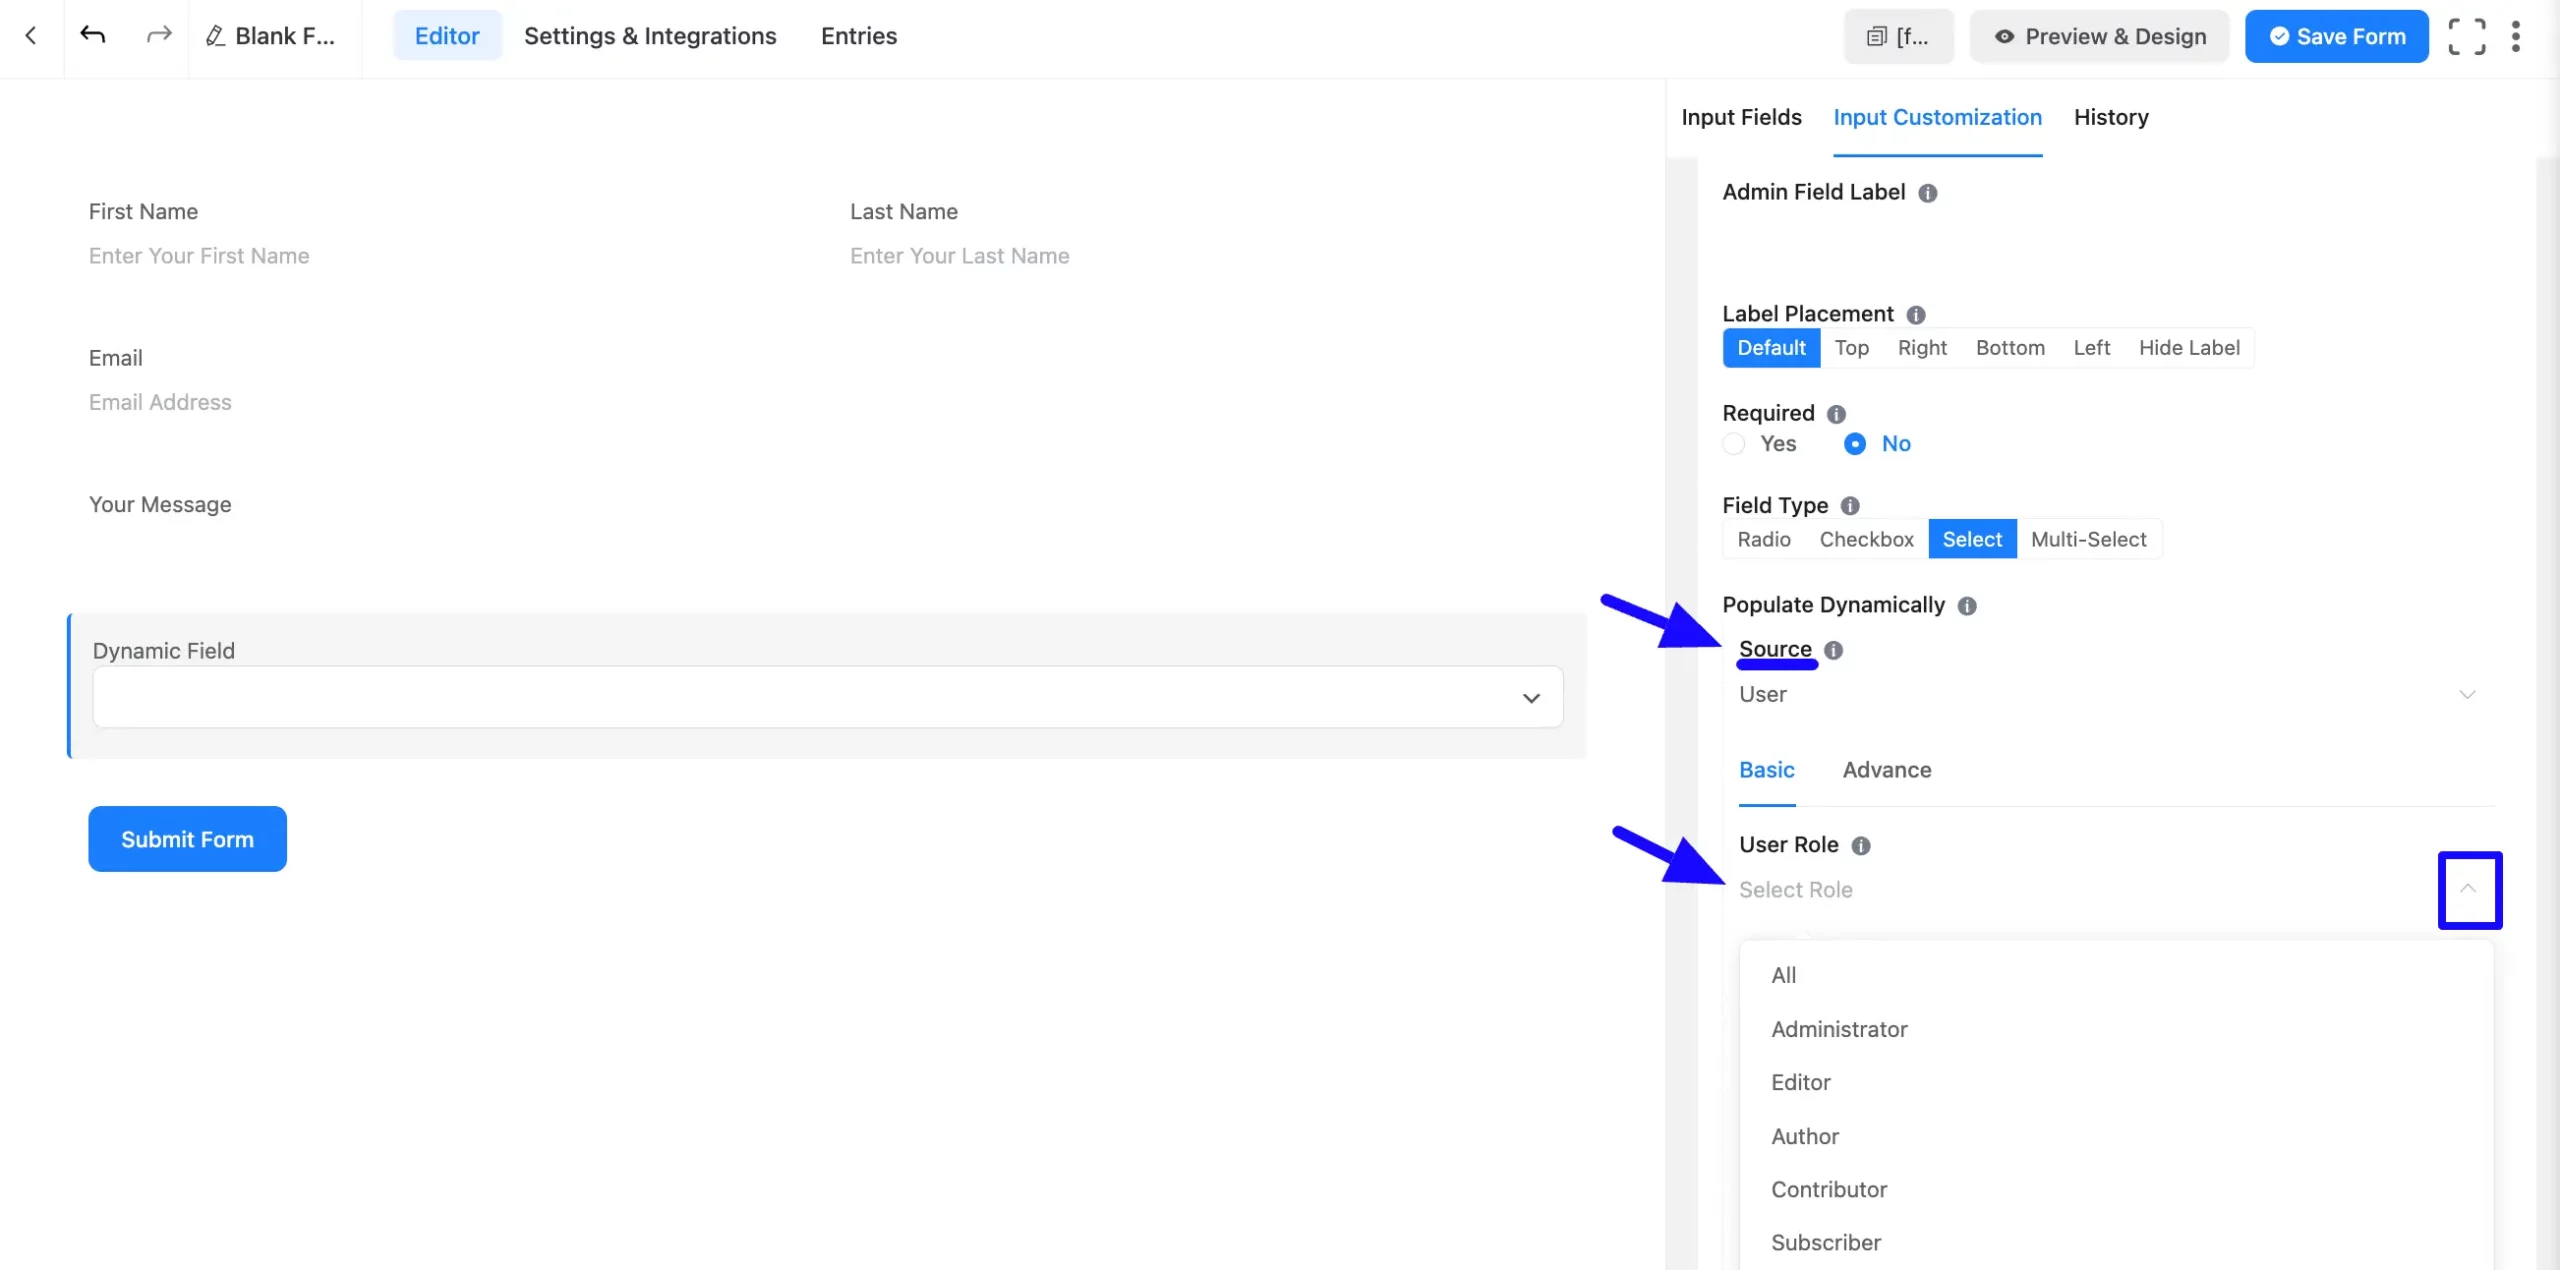
3. Users Type: Show WordPress users’ roles filtered by roles like Administrator, Editor, or Subscriber.
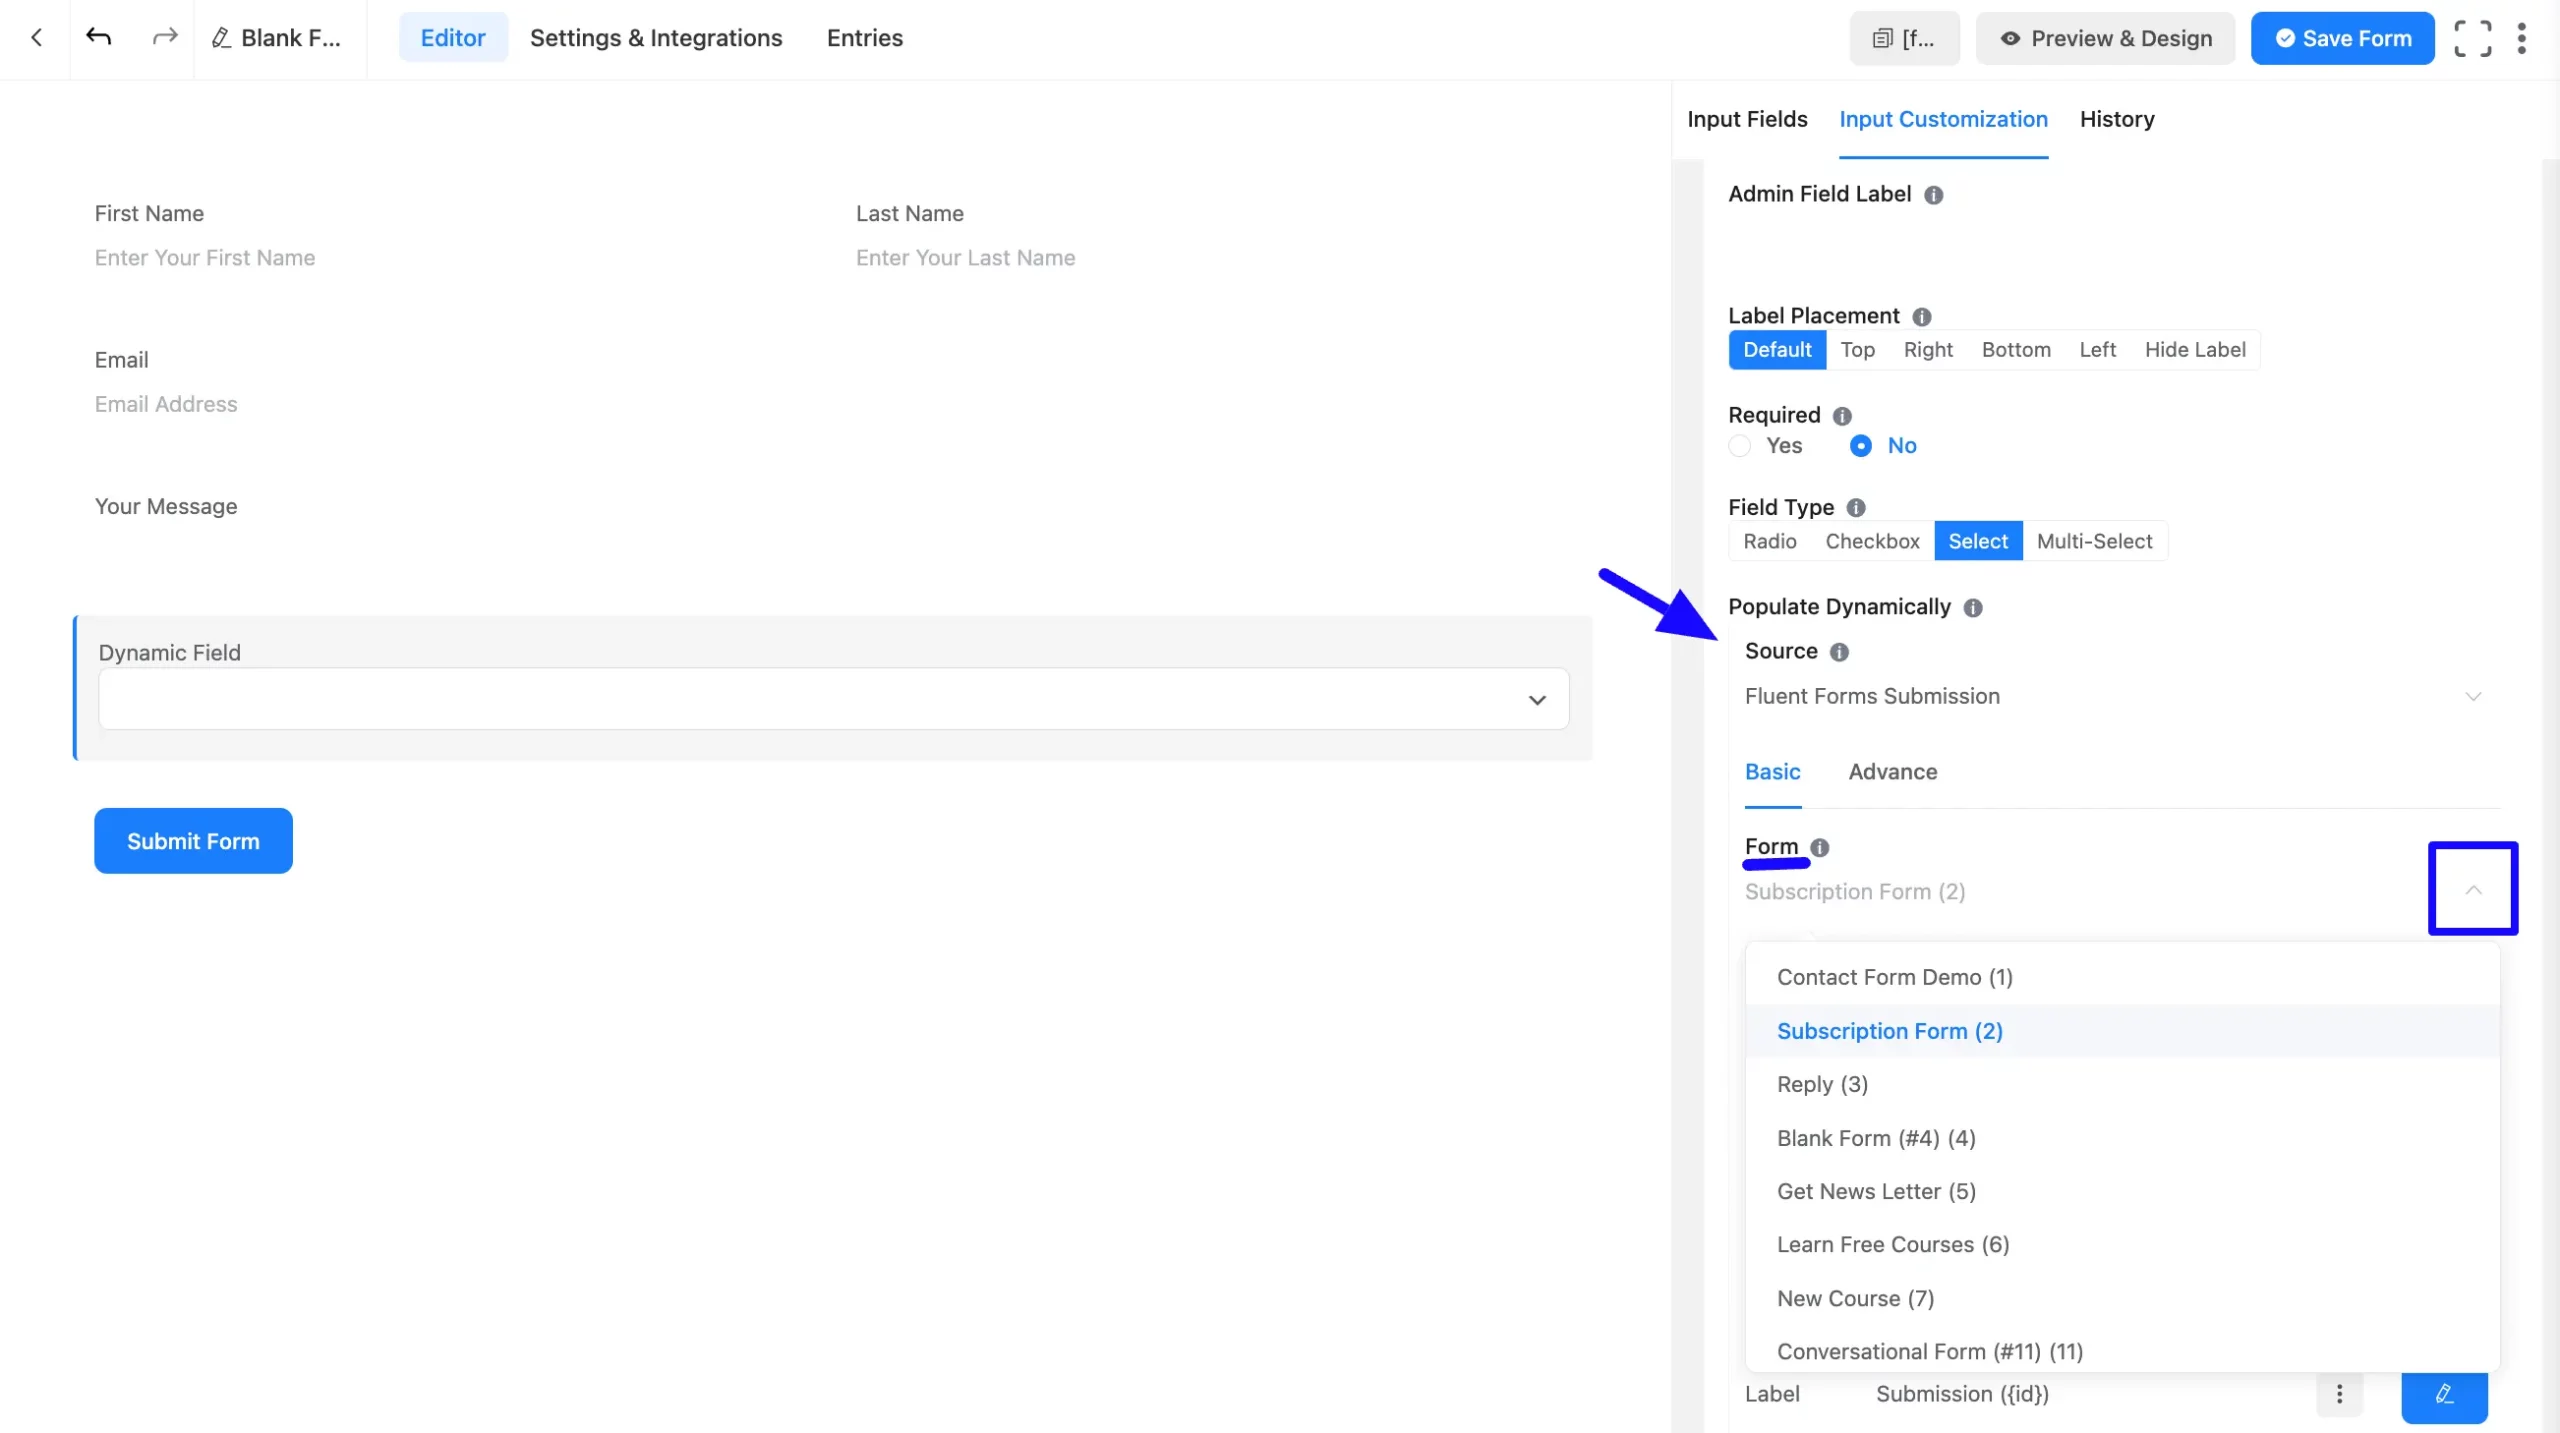
4. Form Submissions: Show data from specific form submissions.
Form and Field Selection: Choose the form and specific field whose data you want to display. Additional filtering options are available to refine the data shown.
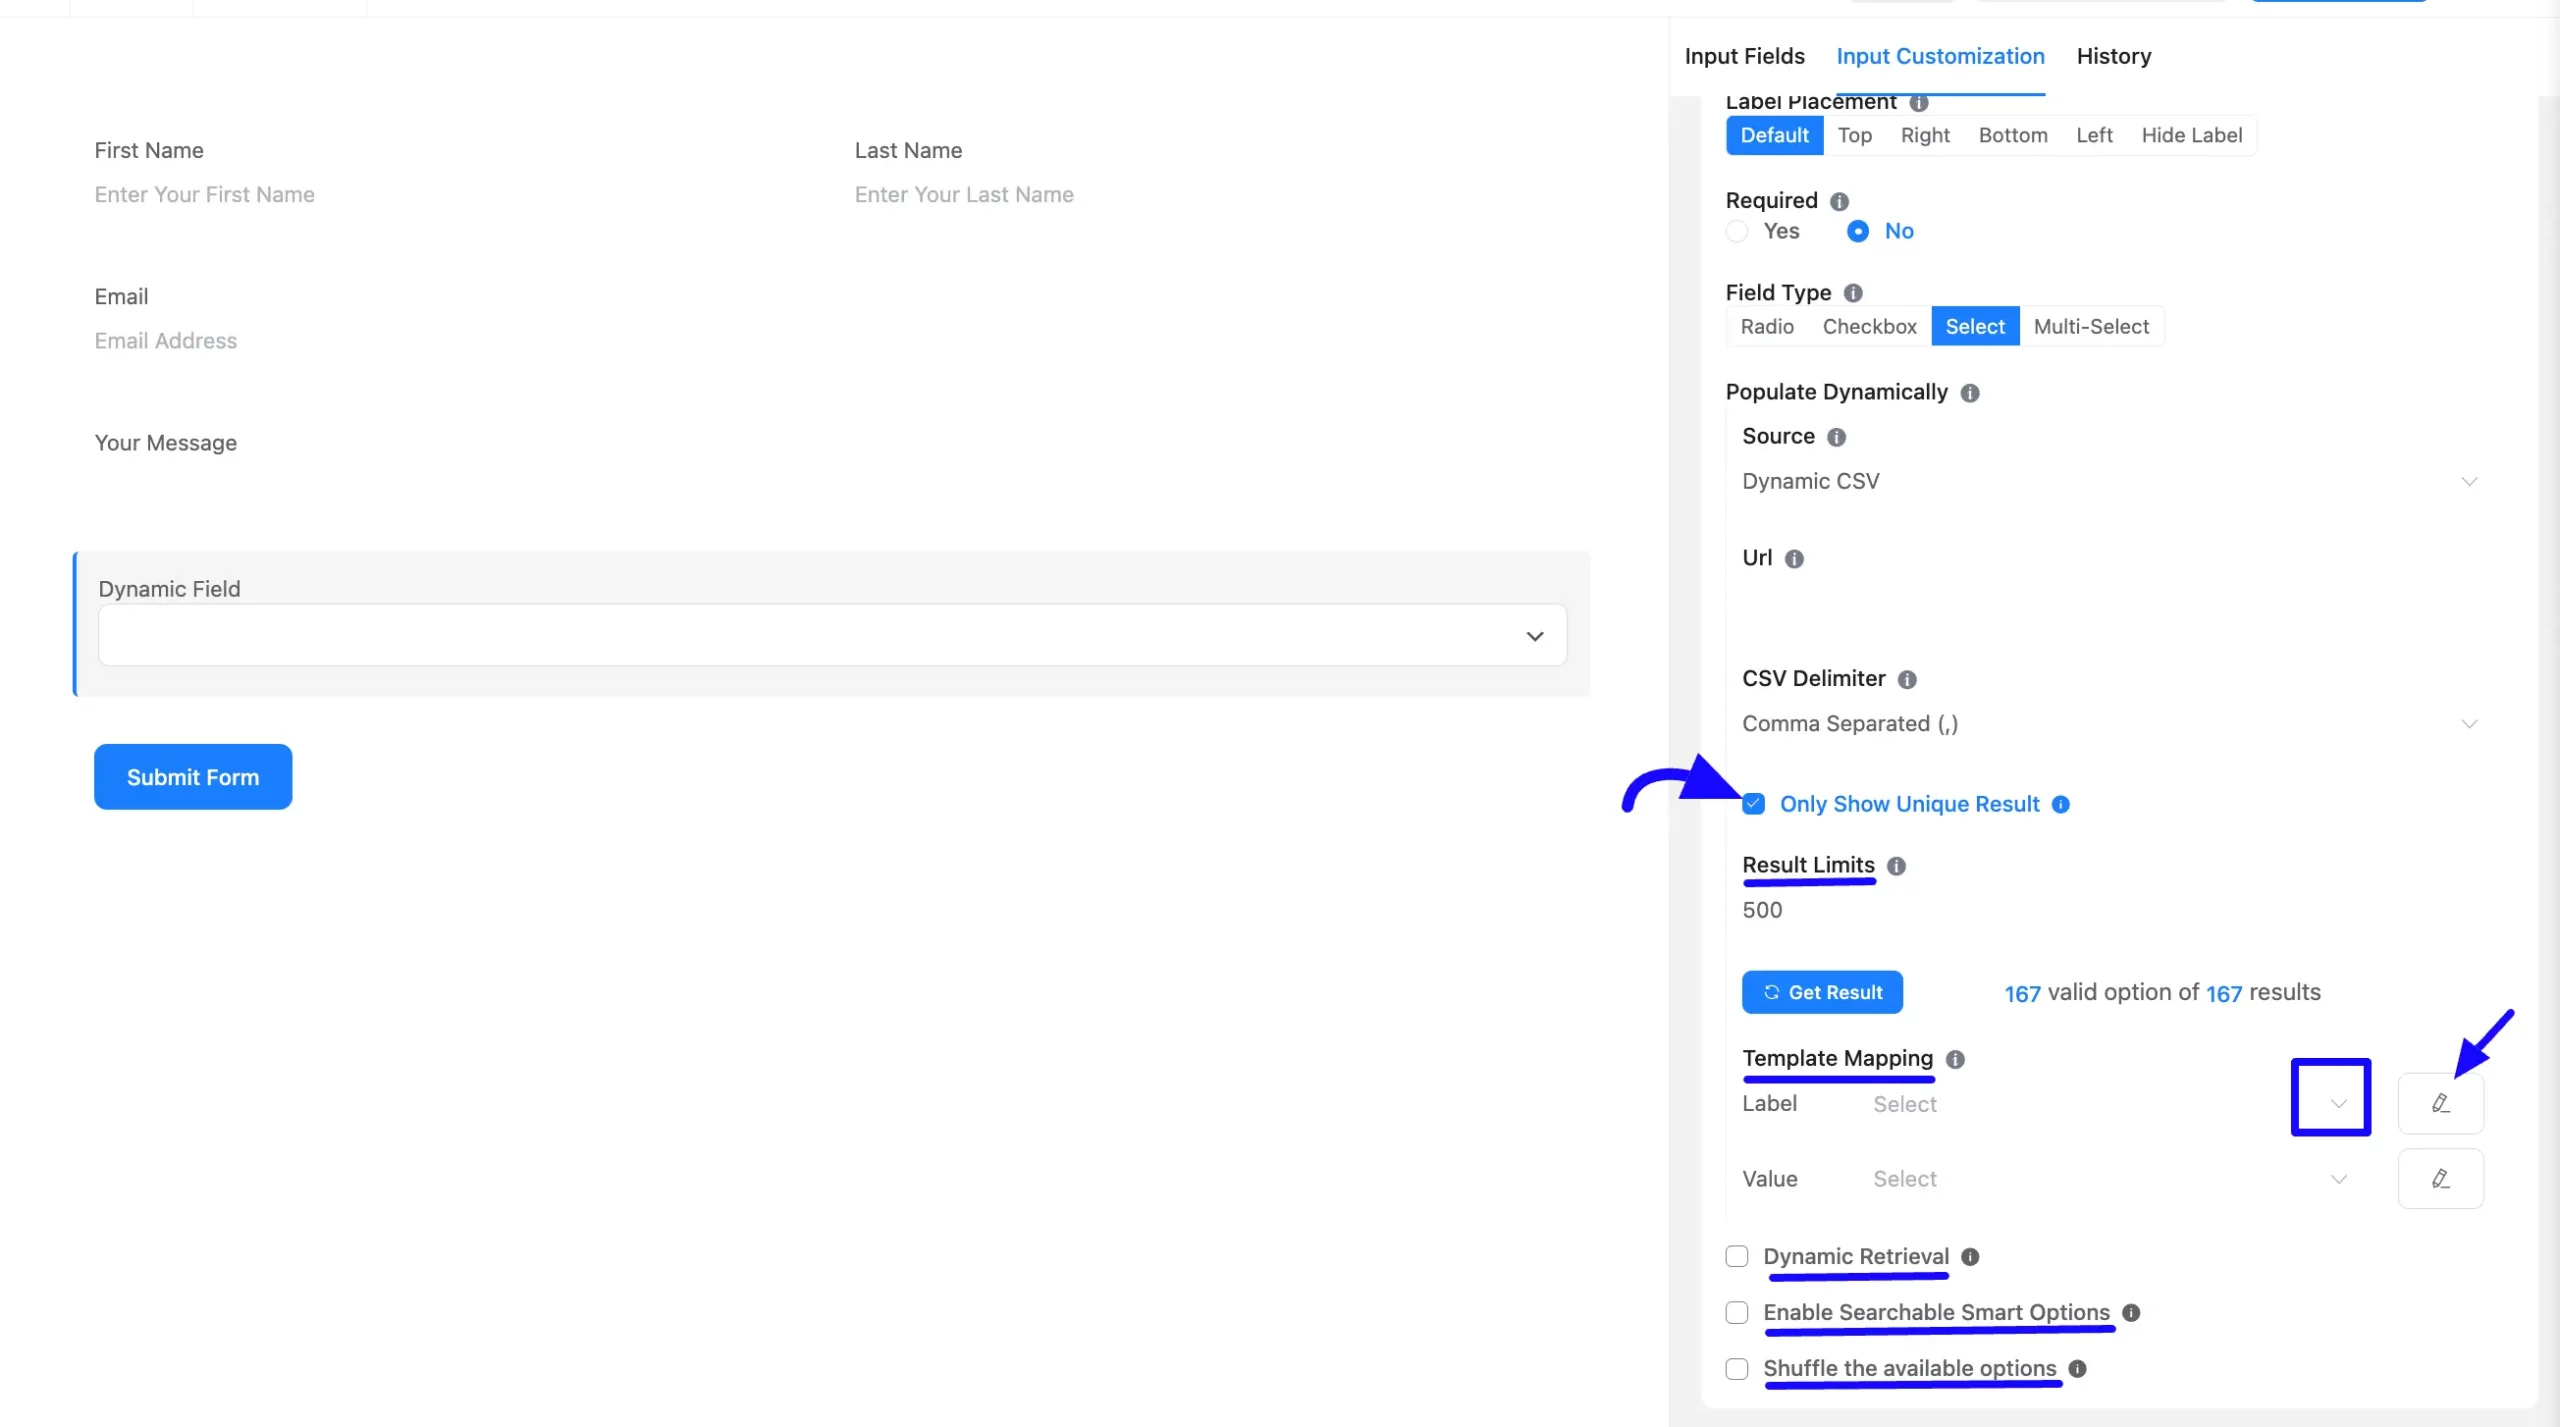
5. Dynamic CSV: You will use data from a Google Sheet or a CSV file in this field.
CSV Setup: For Google Sheets, publish the sheet as a CSV and use the published link in the URL section. Go to File > Share > Publish to Web. Make sure the sheet is publicly accessible.

Only Show Unique result: If you enable two options with the same values now, only one option will be shown in your Dynamic field.
Result Limit: Limit the number of results shown. For example, if you have 50 Posts, you can limit the display to 30 posts only.
Template Mapping: Define placeholders that will dynamically replace values from your data source.
Creating a mapping template for generating options involves defining placeholders that will be dynamically replaced with values from your database records.
You will choose Label and Values from the dropdown options. You can also edit the label and value by clicking the Edit Icon on the right.
Dynamic Retrieval: When you check this option, results are dynamically fetched based on filters during rendering. If unchecked, the current valid value remains unchanged.
Enable Searchable Smart Option: If enabled, options will be searchable by selecting their library.
Shuffle the Available Options: If enabled, the options will be shuffled.
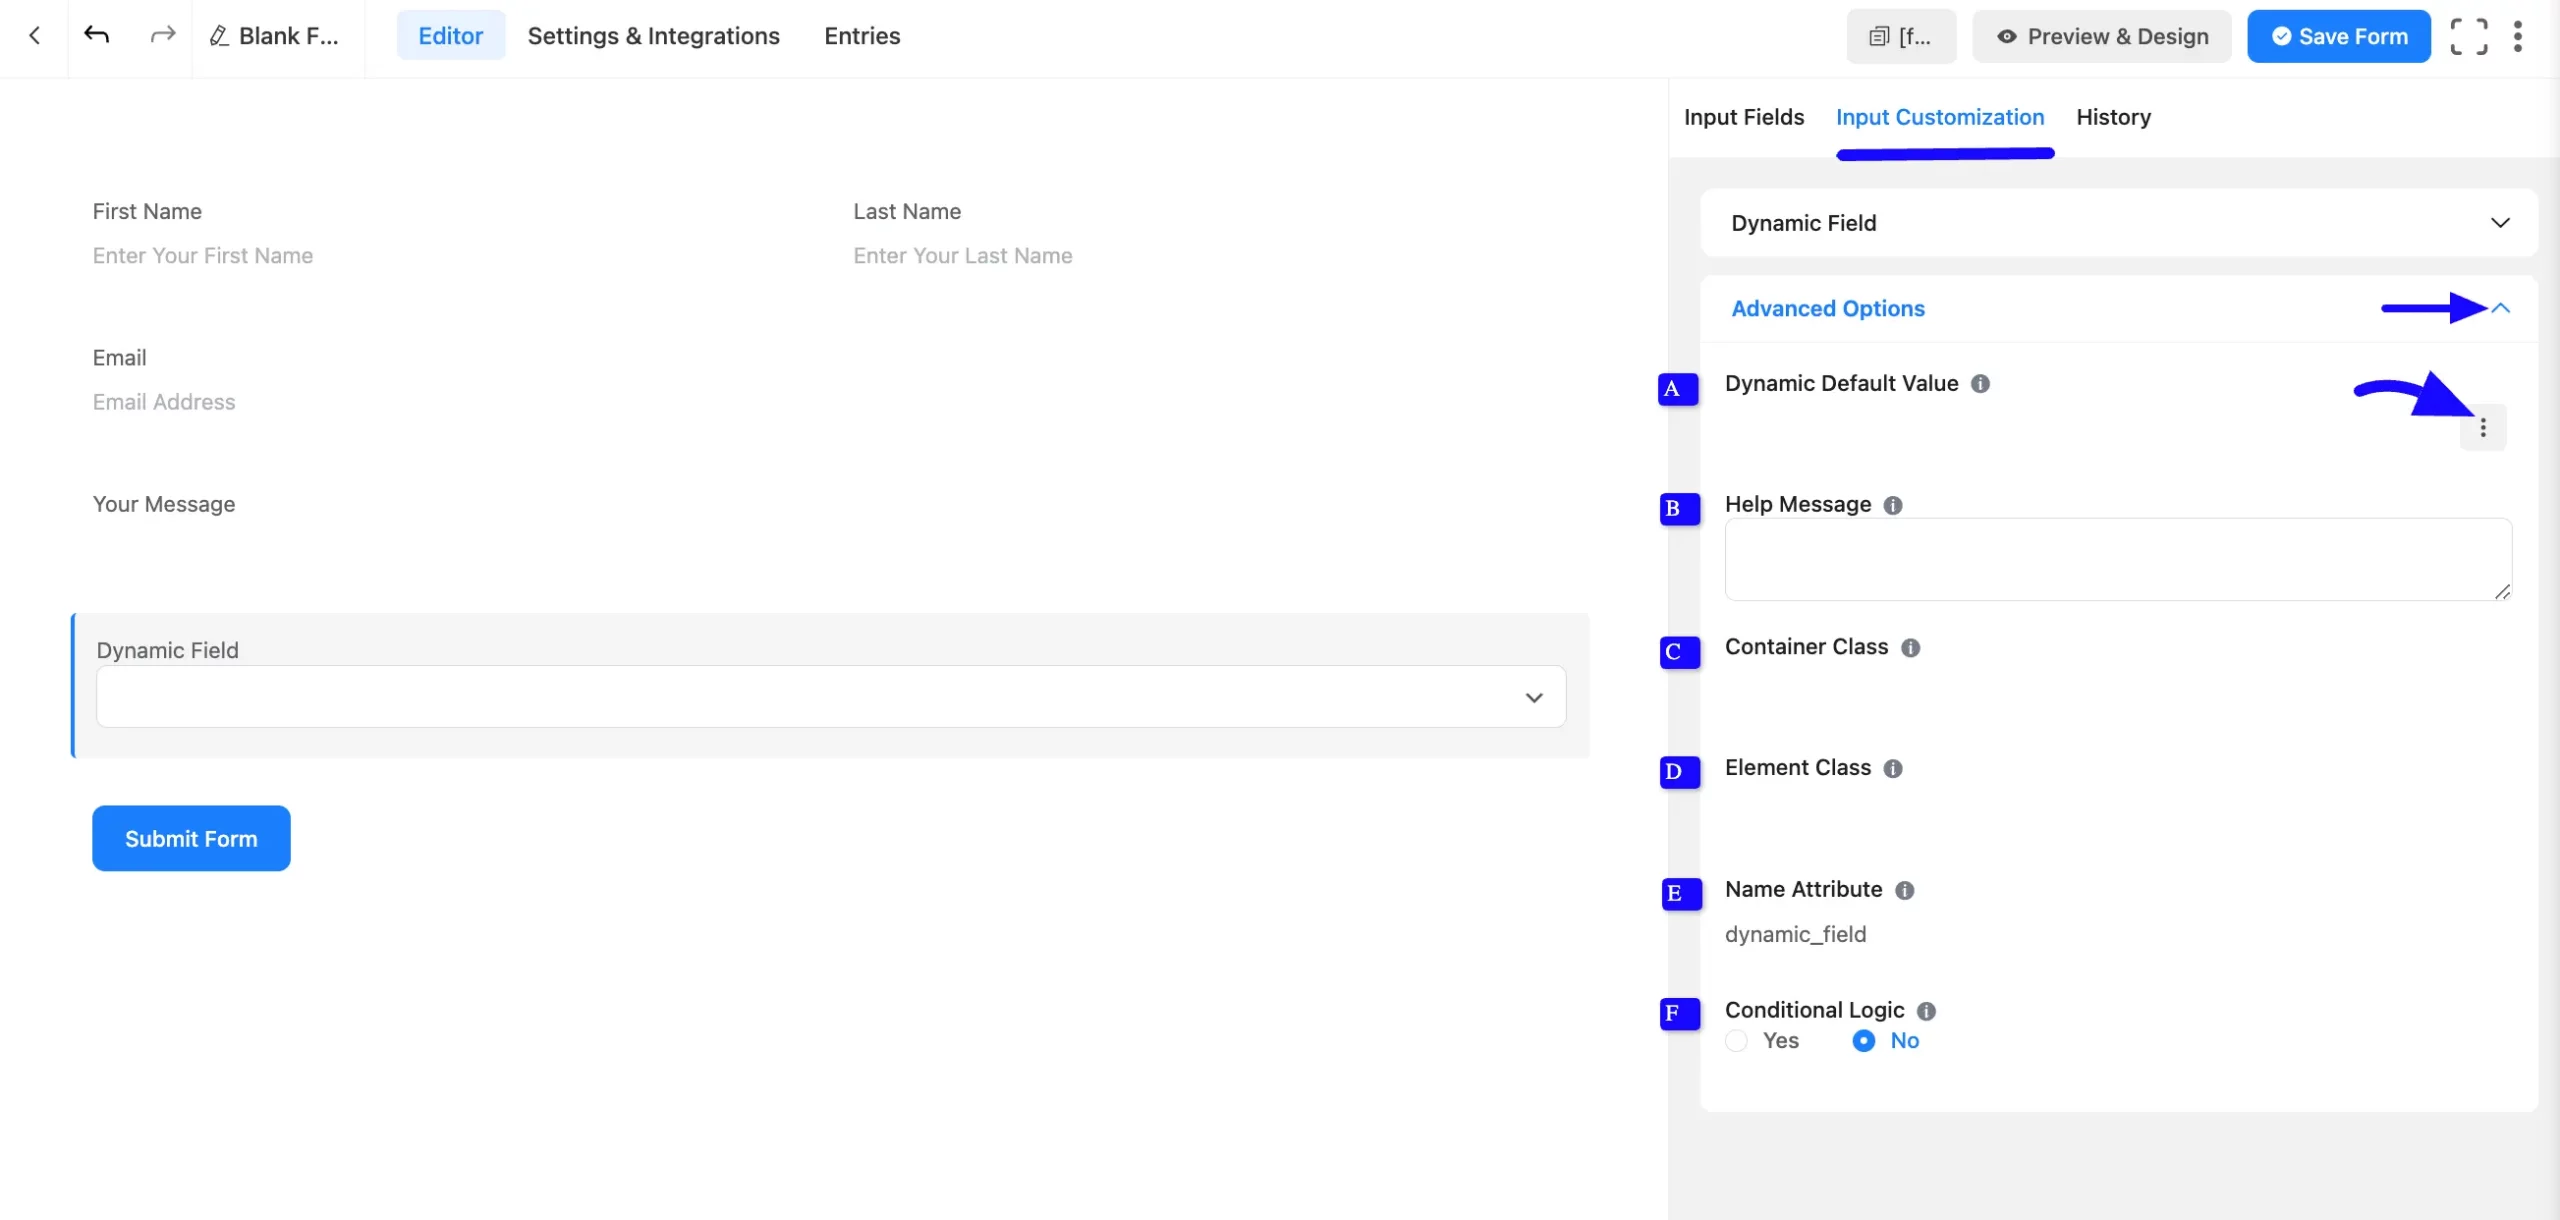
Advanced Options #
Advanced settings allow further customization to meet specific use cases. All the Settings under the Advanced Options tab mentioned in the screenshot are briefly explained below –
A. Dynamic Default Value: Using our shortcodes, you can manually set any fixed value in your field and pre-fill your input field dynamically. To get a better understanding of Dynamic Default Value, read this article.
You can add the default value by clicking the Three-Dot option on the right side.
B. Help Message: This option allows you to guide your user thoroughly. Add your text here, which will be shown as a help message to the user.
C. Container Class: Use this option to add your custom CSS classes to the field’s wrapper.
D. Element Class: Add custom CSS classes to the input field.
E. Name Attribute: The input field’s name attribute is the HTML equivalent of the same name. You don’t need to modify this.
F. Conditional Logic: This option allows you to create specific rules to dynamically hide/show the input field to function conditionally based on your submission values according to your set of conditional logics. To learn more, read this Documentation.
Embed the Form into Frontend #
Once you complete the customization, click the Save Form button to save all your changes. Click the Preview & Design button in the middle to see the form preview.
To integrate and display the form on a specific Page or post, copy the Shortcode from the top right side and paste it into your desired Page or post.
Preview of Added Dynamic Field #
Here is the preview of the added Dynamic field under the Form.
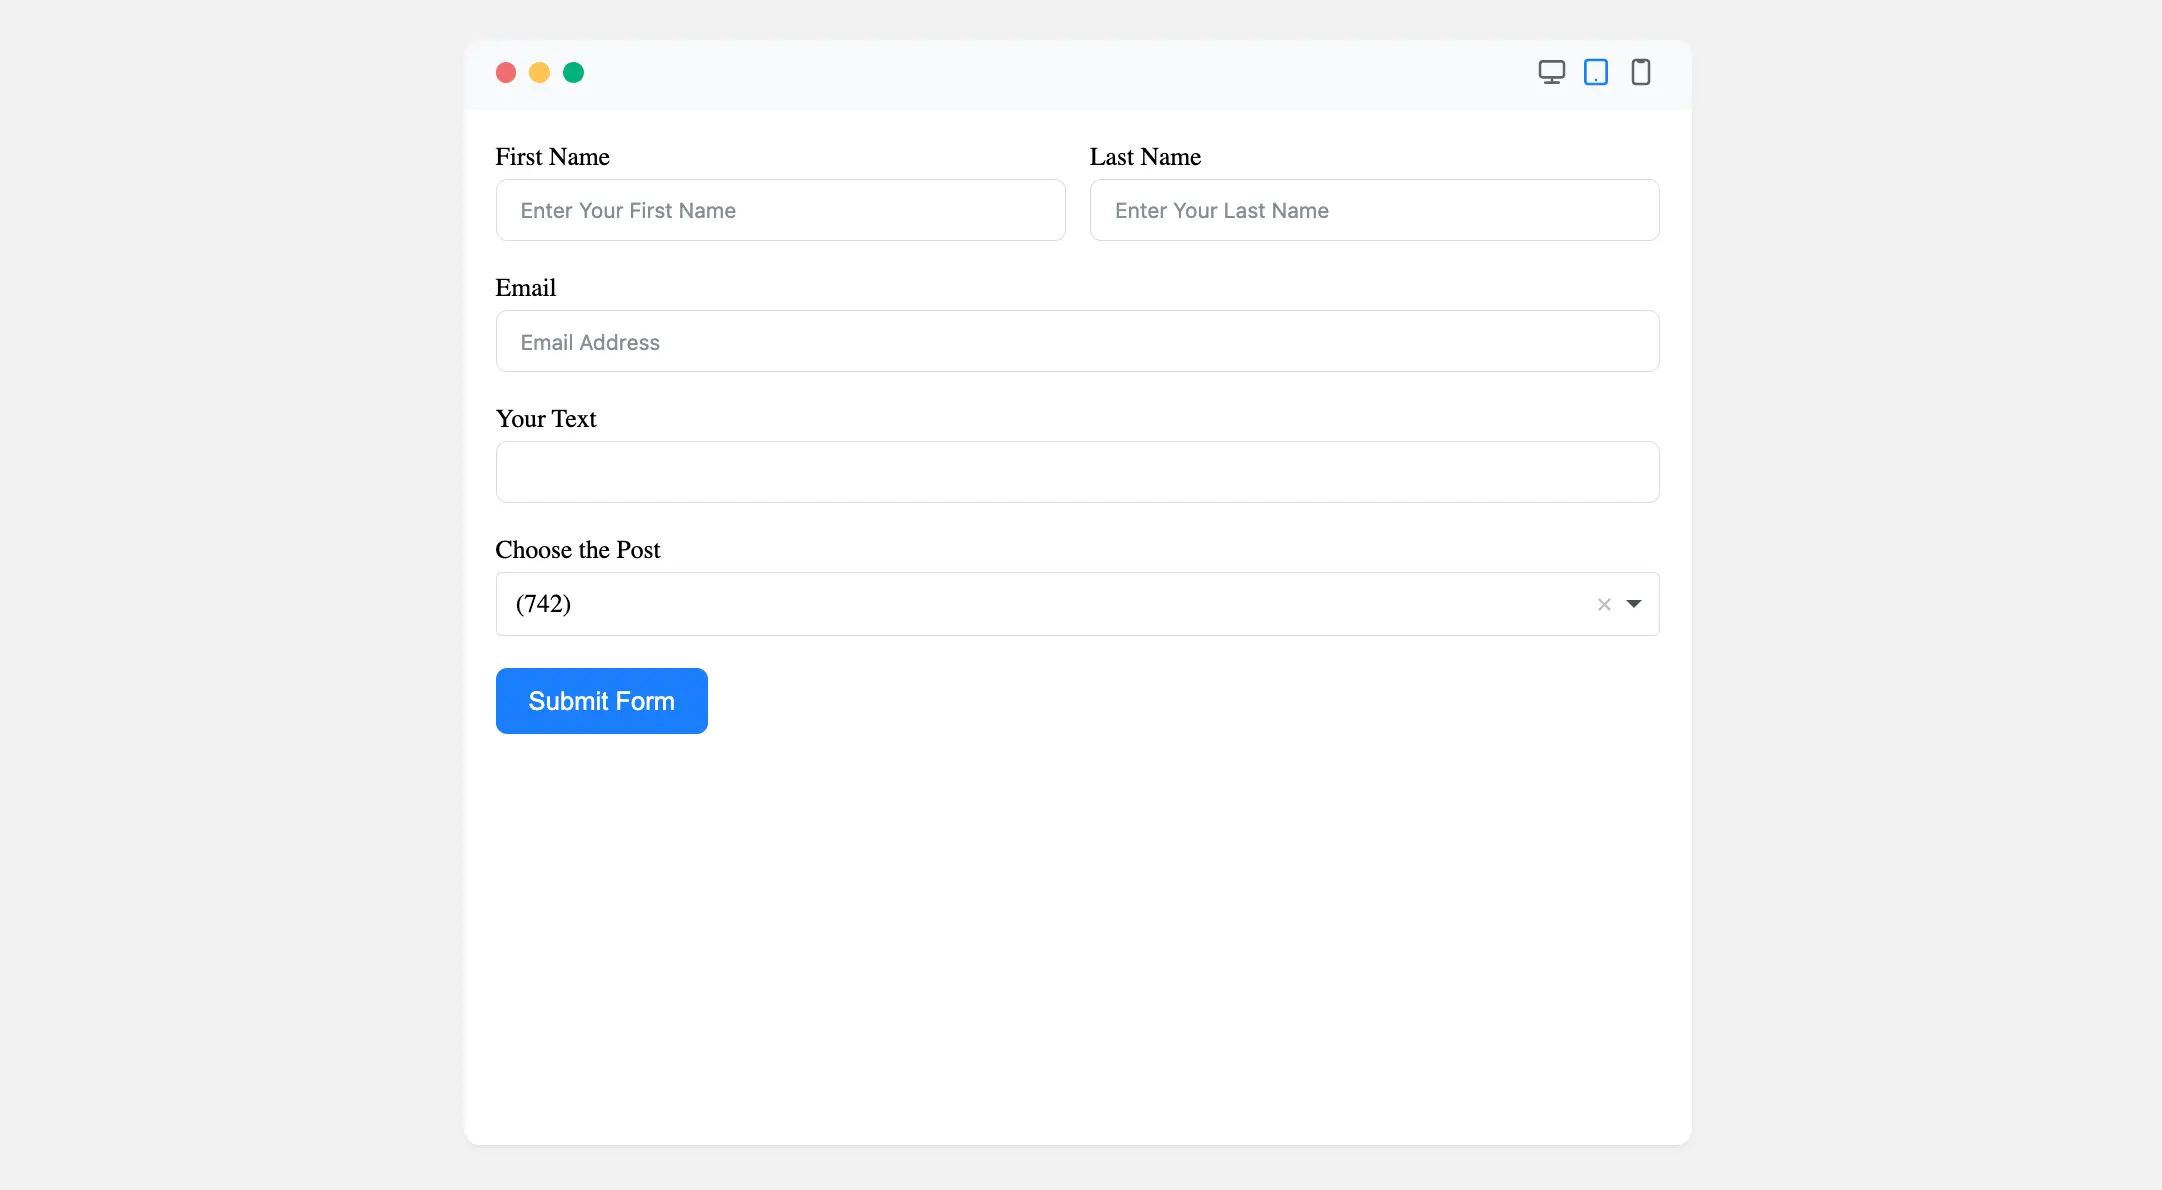
Congratulations! You have successfully added a Dynamic Field to your Fluent Forms form.
If you have any further questions, concerns, or suggestions, please do not hesitate to contact our support team. Thank you!


