
The Fluent Forms Admin Approval feature allows administrators to review, approve, or decline form submissions before processing them. When a user submits a form, an email notification is sent to the admin, who can approve or decline the entry.
This article will guide you through the admin approval feature in Fluent Forms.
Enabling the Admin Approval Module #
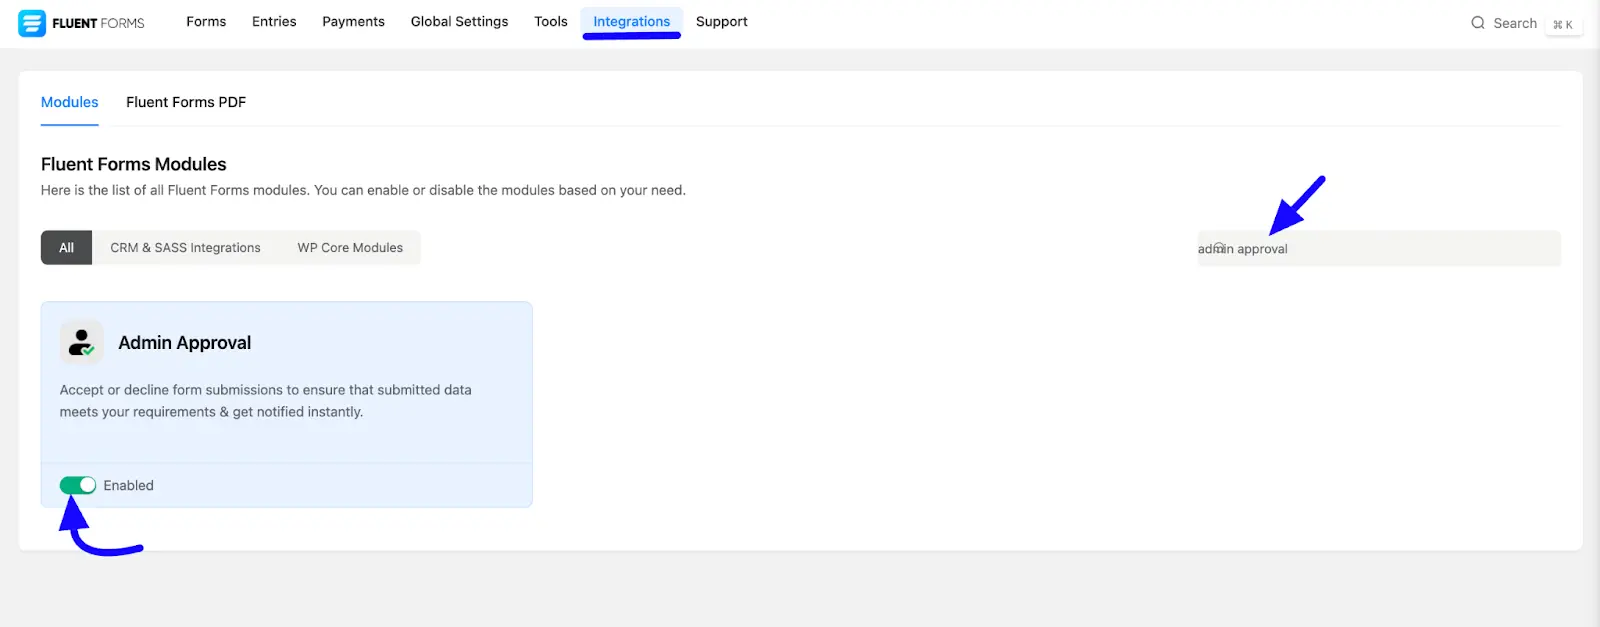
To learn how to enable the Admin Approval Module, follow the steps with the screenshots below.
First, go to Integrations from the Fluent Forms Navbar, search for Admin Approval Module through the search bar, and get the Admin module.
Now, Enabled it to activate the approval functionality.
Configuring Global Settings #
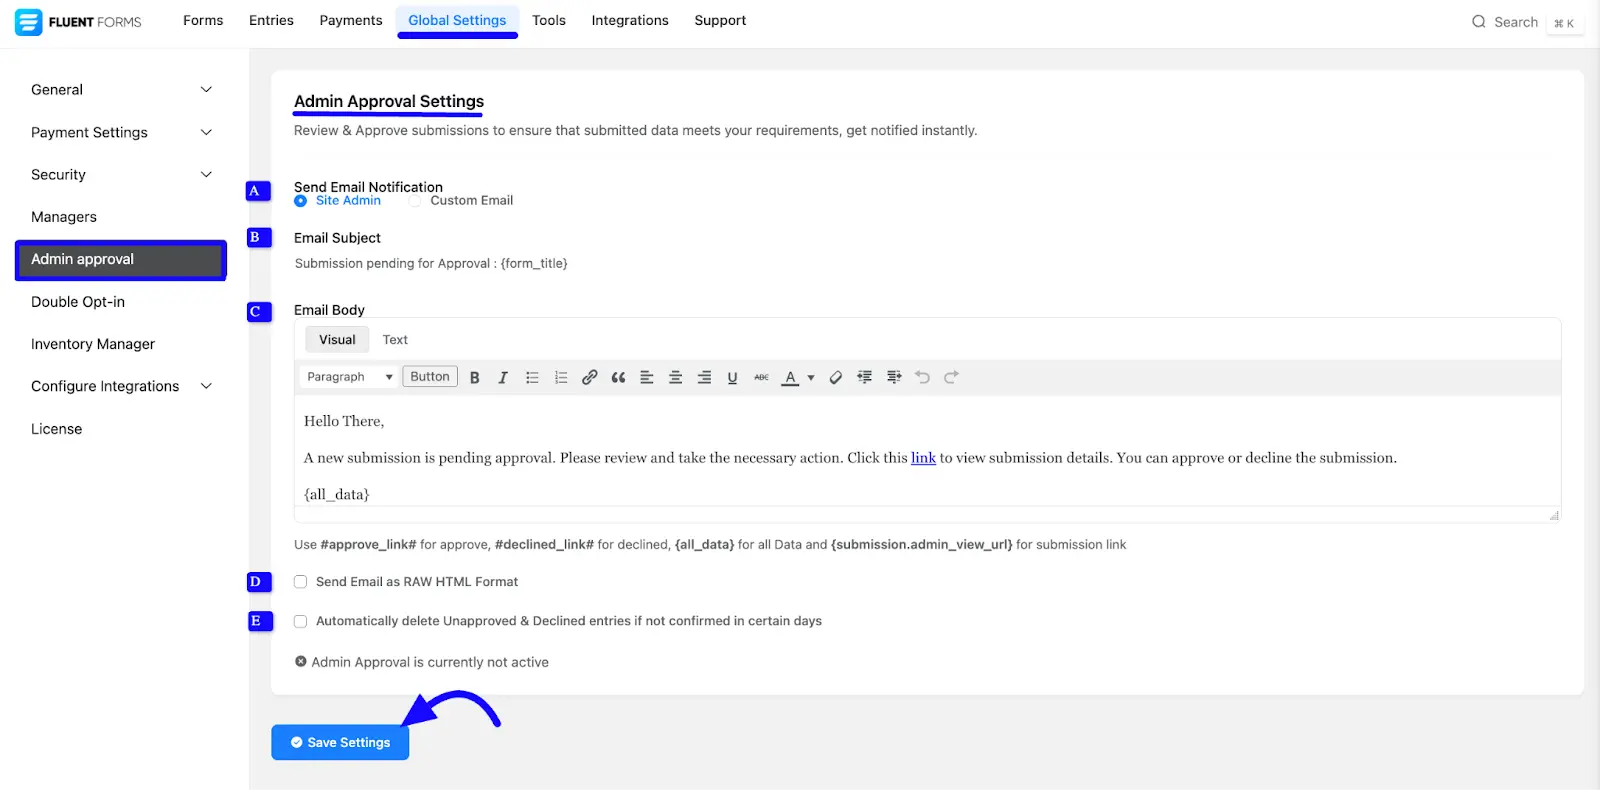
To configure Global Settings, click the Global Settings from the top menu. Then click the Admin approval section from the left sidebar. Here you can handle approval notifications. Now choose the following options are given screenshot below-
A. Send Email Notification: Choose between Site Admin or Custom Email for sending email notification options.
- Site Admin: If you select the site admin option, it sends submission confirmation emails to the site’s Admin Email for approval.
- Custom Email: If you choose the custom email option, you can specify an alternative email address for approval notifications.
Enter Recipient Email Address: When you choose the Custom Email, you will enter multiple email addresses separated by commas.
B. Email Subject: Enter the subject of your email here.
C. Email Body: Customize the email content, including the option to send emails in Raw HTML format.
D. Send Email as RAW HTML Format: If you check this Send Email as RAW HTML Format option, emails will be sent in HTML Raw format.
E. Auto-Decline Option: Check the Automatically delete Unapproved & Declined entries if not confirmed on certain days option to set a time limit (in days) after which unapproved submissions are automatically declined.
Setting Up Admin Approval for Specific Forms #
To enable Admin Approval for a particular form, follow these steps-
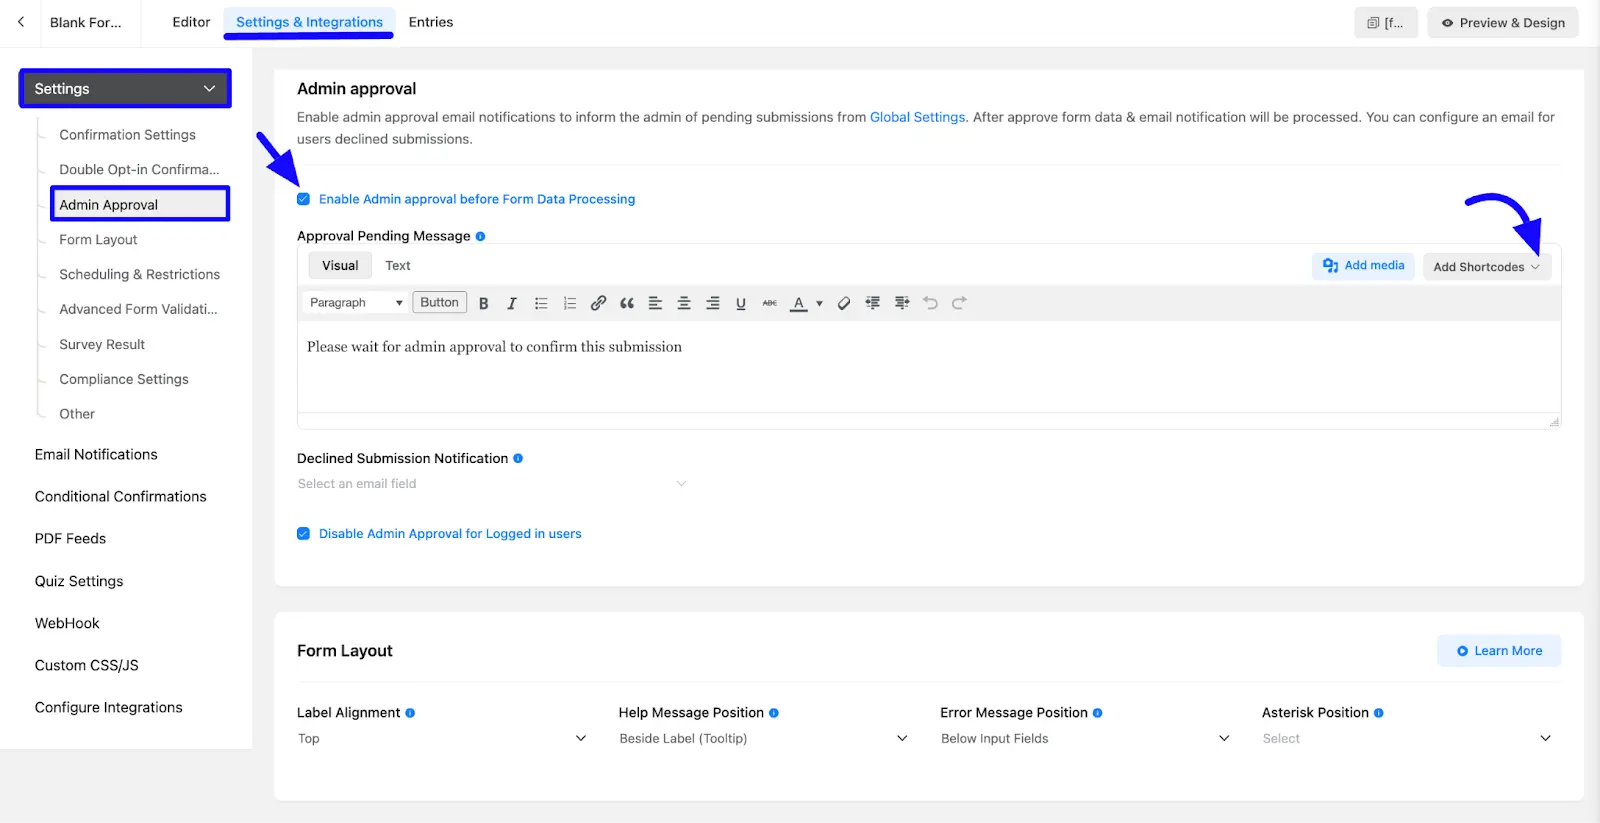
First, navigate to the Settings & Integration section for your form. Go to the Settings section and click the Admin Approval section.
Now, enable Admin Approval before checking the Form Data Processing option for that form. Customize the Approval Pending Message (shortcodes can be used for dynamic content).
Declined Submission Notification #
If a submission is declined, an email notification can be sent to the user. To enable this, follow the instructions-
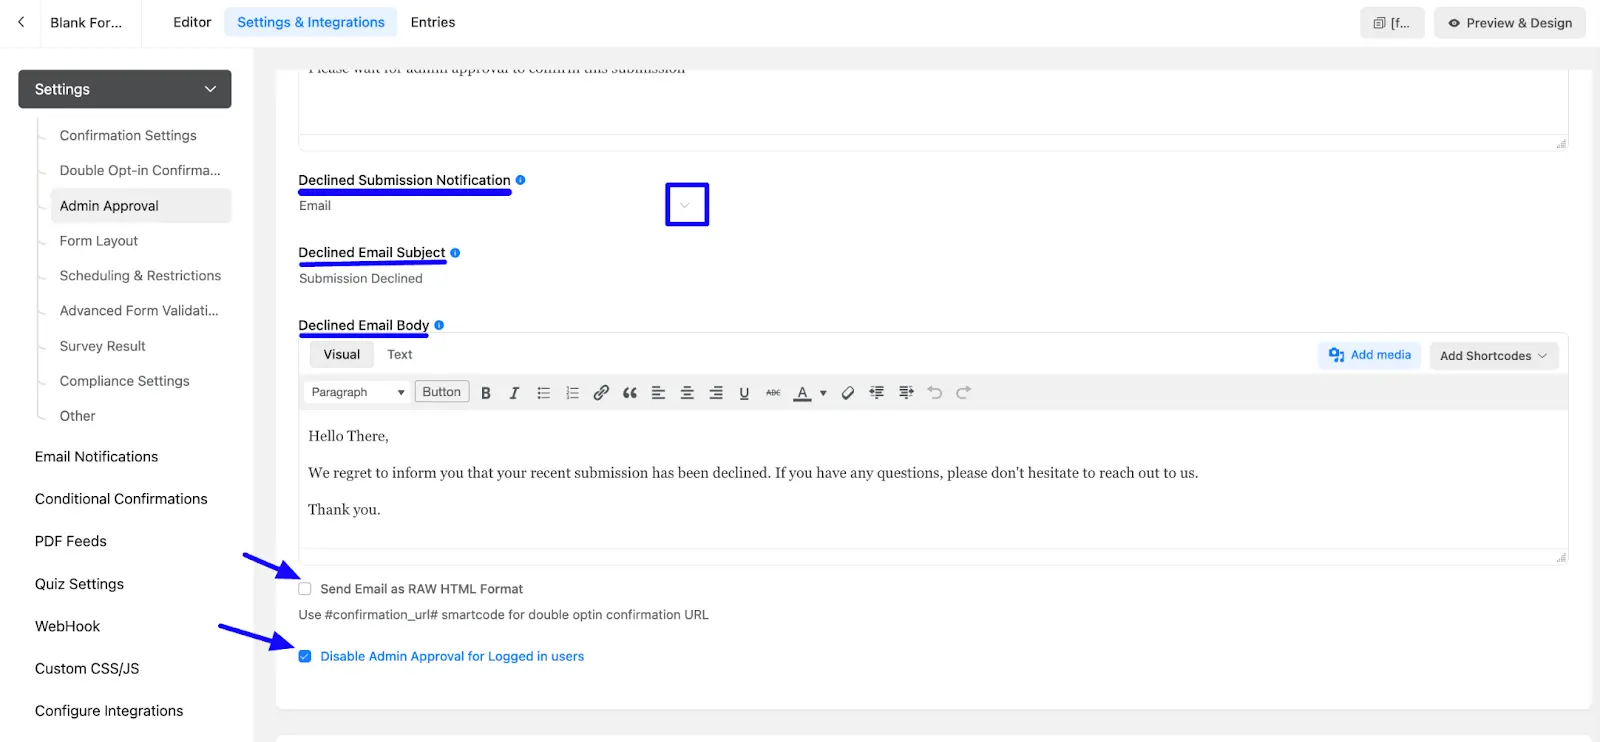
Ensure your form includes an Email ID field. You will choose the email option from the drop-down options. Now, configure the Declined Submission Notification settings.
Customize the email subject and body (it supports Raw HTML format). Check the checkbox options to Send an Email in RAW HTML Format.
Disabling Admin Approval for Logged-In Users #
To automatically approve submissions from logged-in users, check the Disable Admin Approval for Logged-in Users checkbox. It allows users with authenticated accounts to bypass the approval process.
After that, click the Save Settings button to save the settings.
Preview the Admin Approval Email #
Admins will receive an email with options to approve or decline form submissions. The email format will resemble the example shown in the preview.

If your form includes a Payment Field, the Admin Approval process will be bypassed.
So, you can easily manage and control form submissions using the Fluent Forms Admin Approval feature.
If you have any further questions, concerns, or suggestions, please do not hesitate to contact our support team. Thank you.


