Fluent Forms allows you to create beautiful, standalone landing pages for your forms that are perfect for campaigns, lead generation, surveys, or events. With a dedicated landing page, your form becomes the main focus without distractions.
In this article, you will learn how to show your form on a dedicated landing page.
The Dedicated Landing Page feature requires the Fluent Forms Pro plugin.
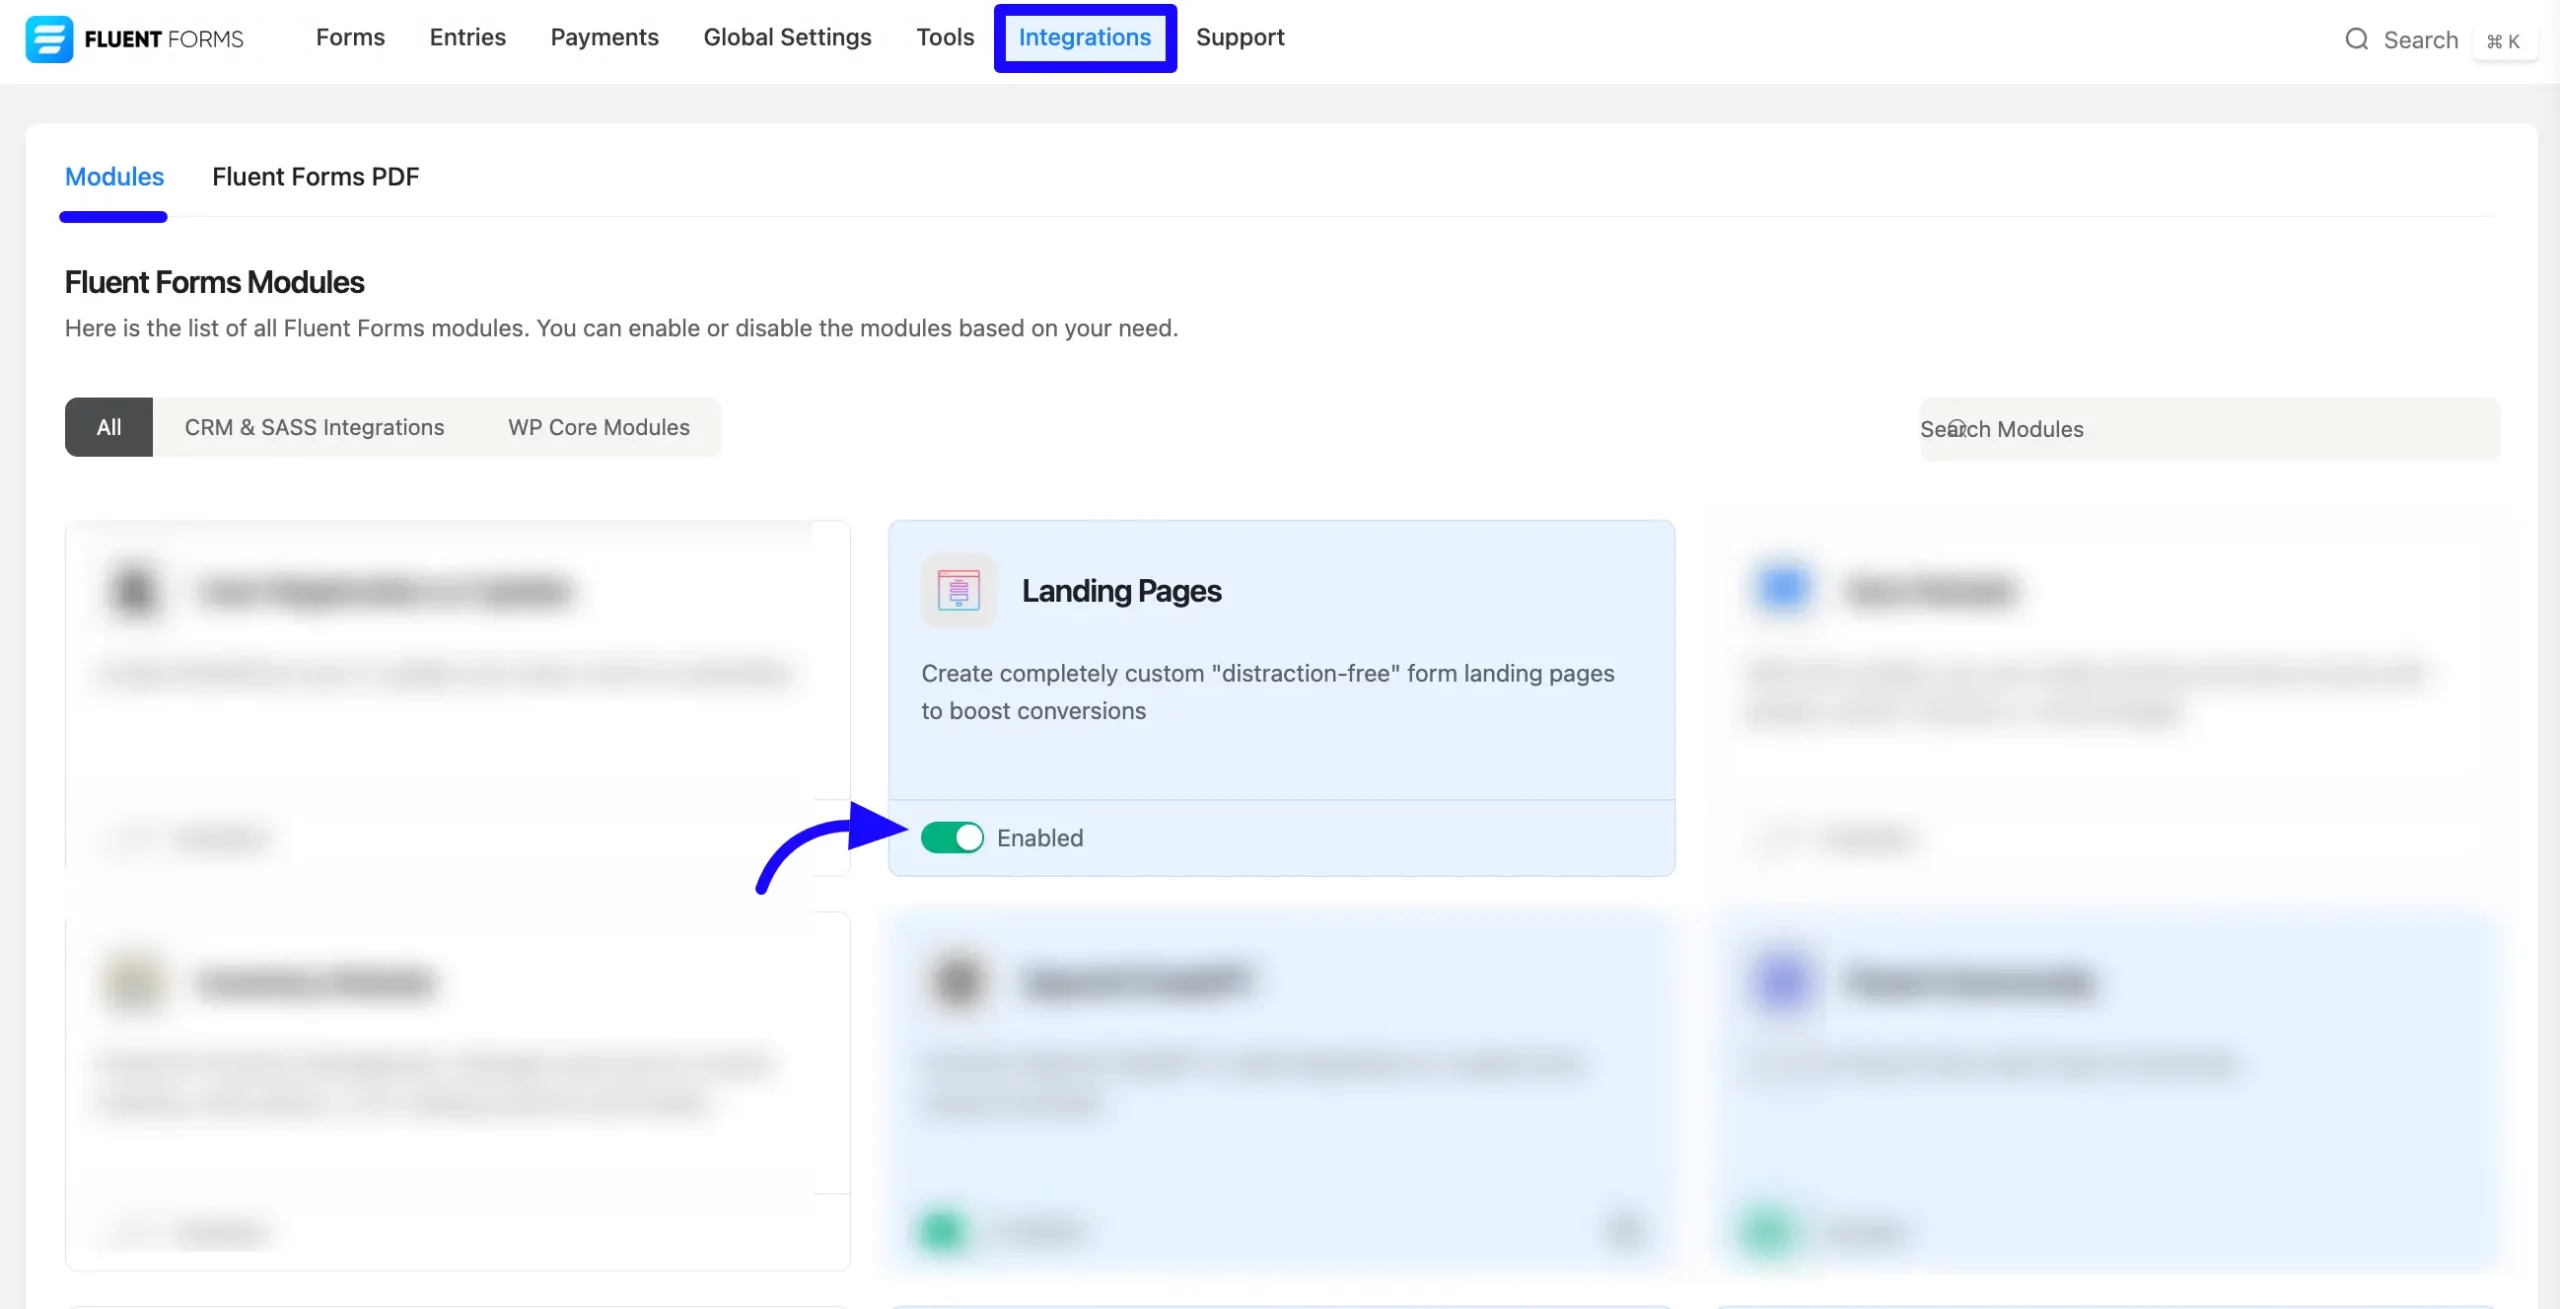
Enabling Landing Pages #
To enable the Landing page Module, go to the Integrations Modules from Fluent Forms (WordPress admin panel sidebar) and turn on the Landing Pages Module by clicking the Toggle button.
Configuring Your Form for a Dedicated Landing Page #
After the landing pages option is enabled, you can configure your existing forms or create new ones to appear as dedicated landing pages.
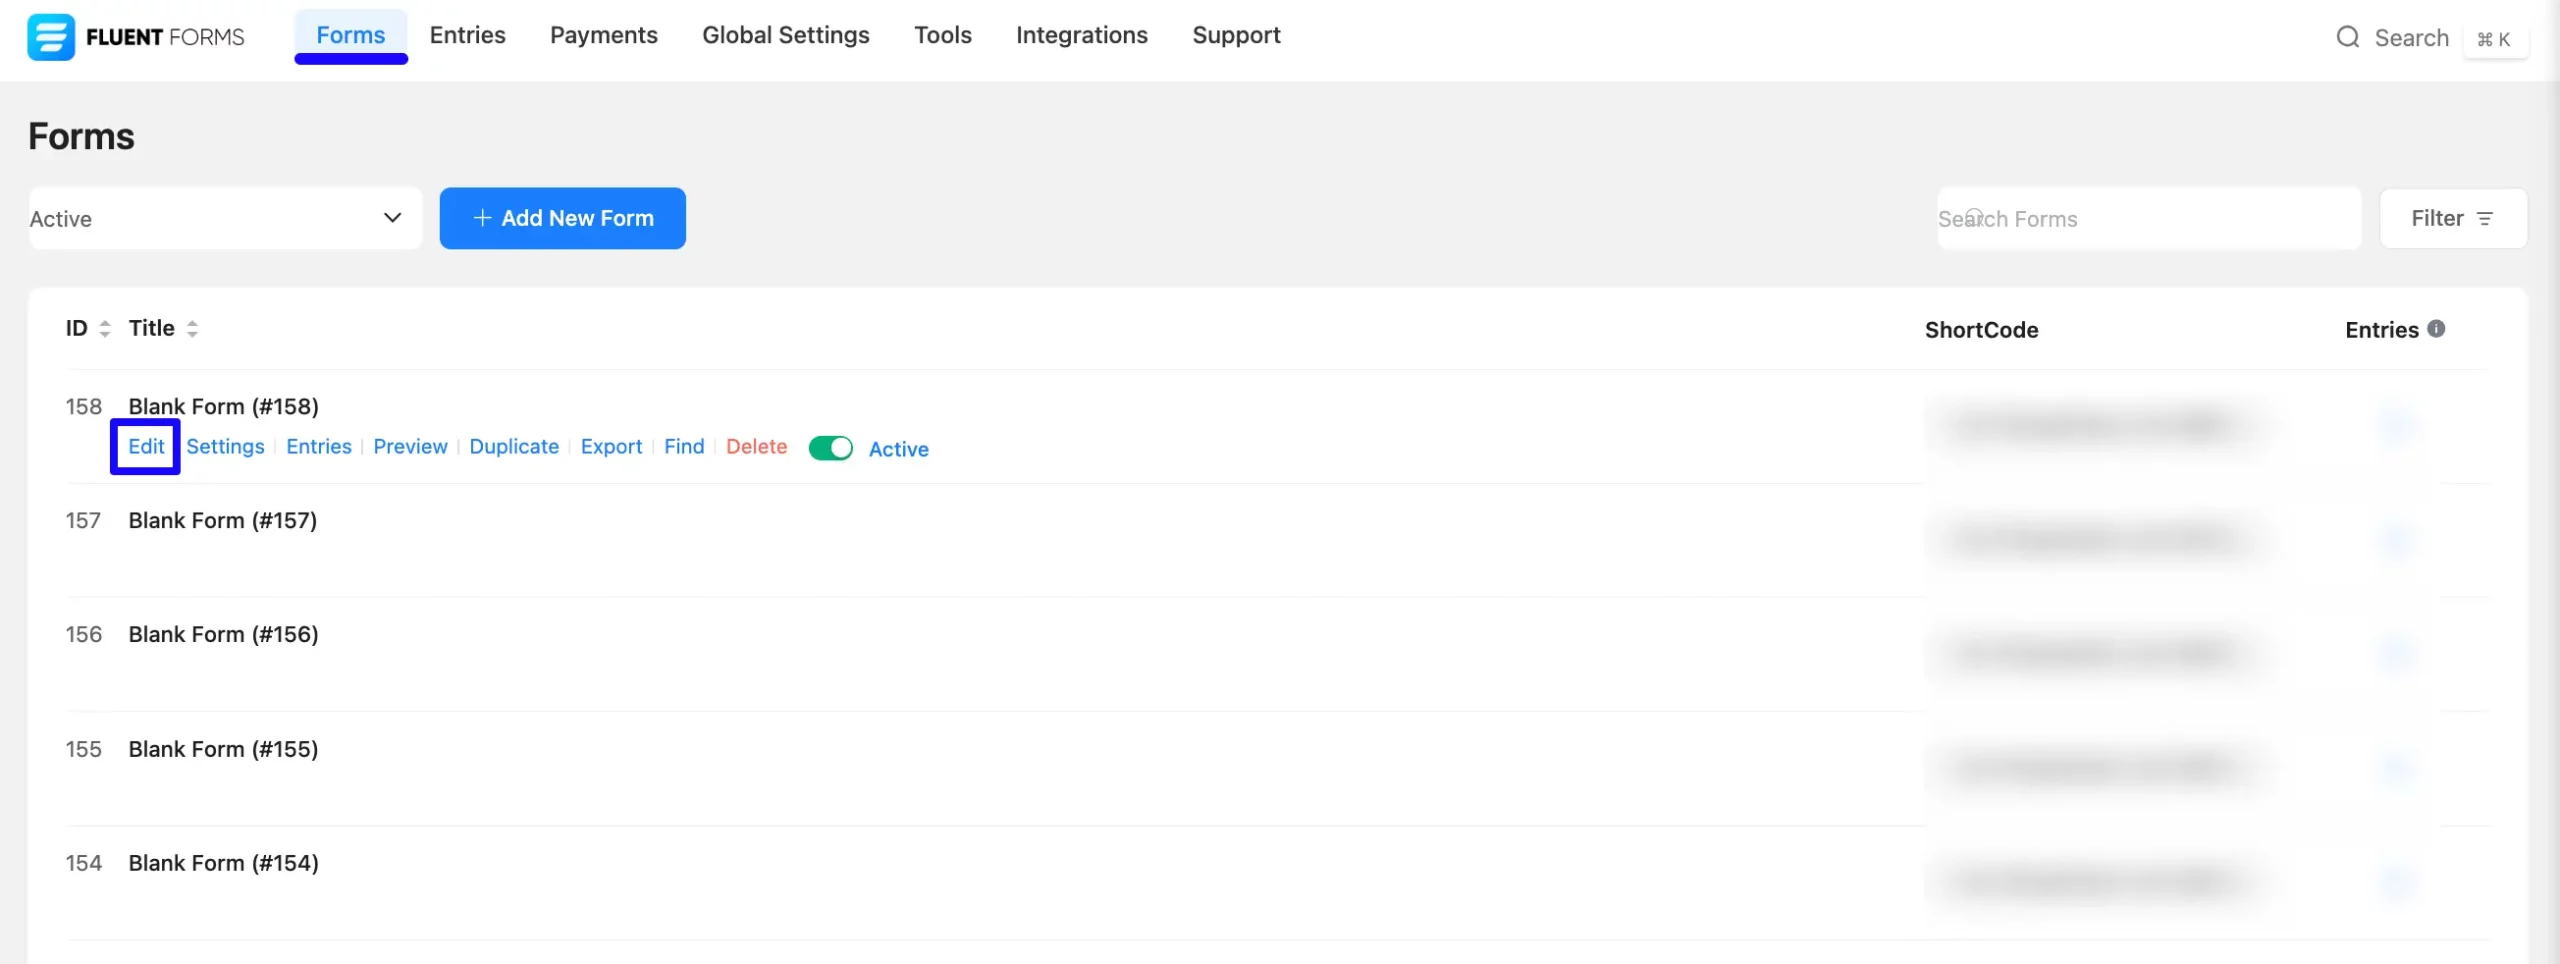
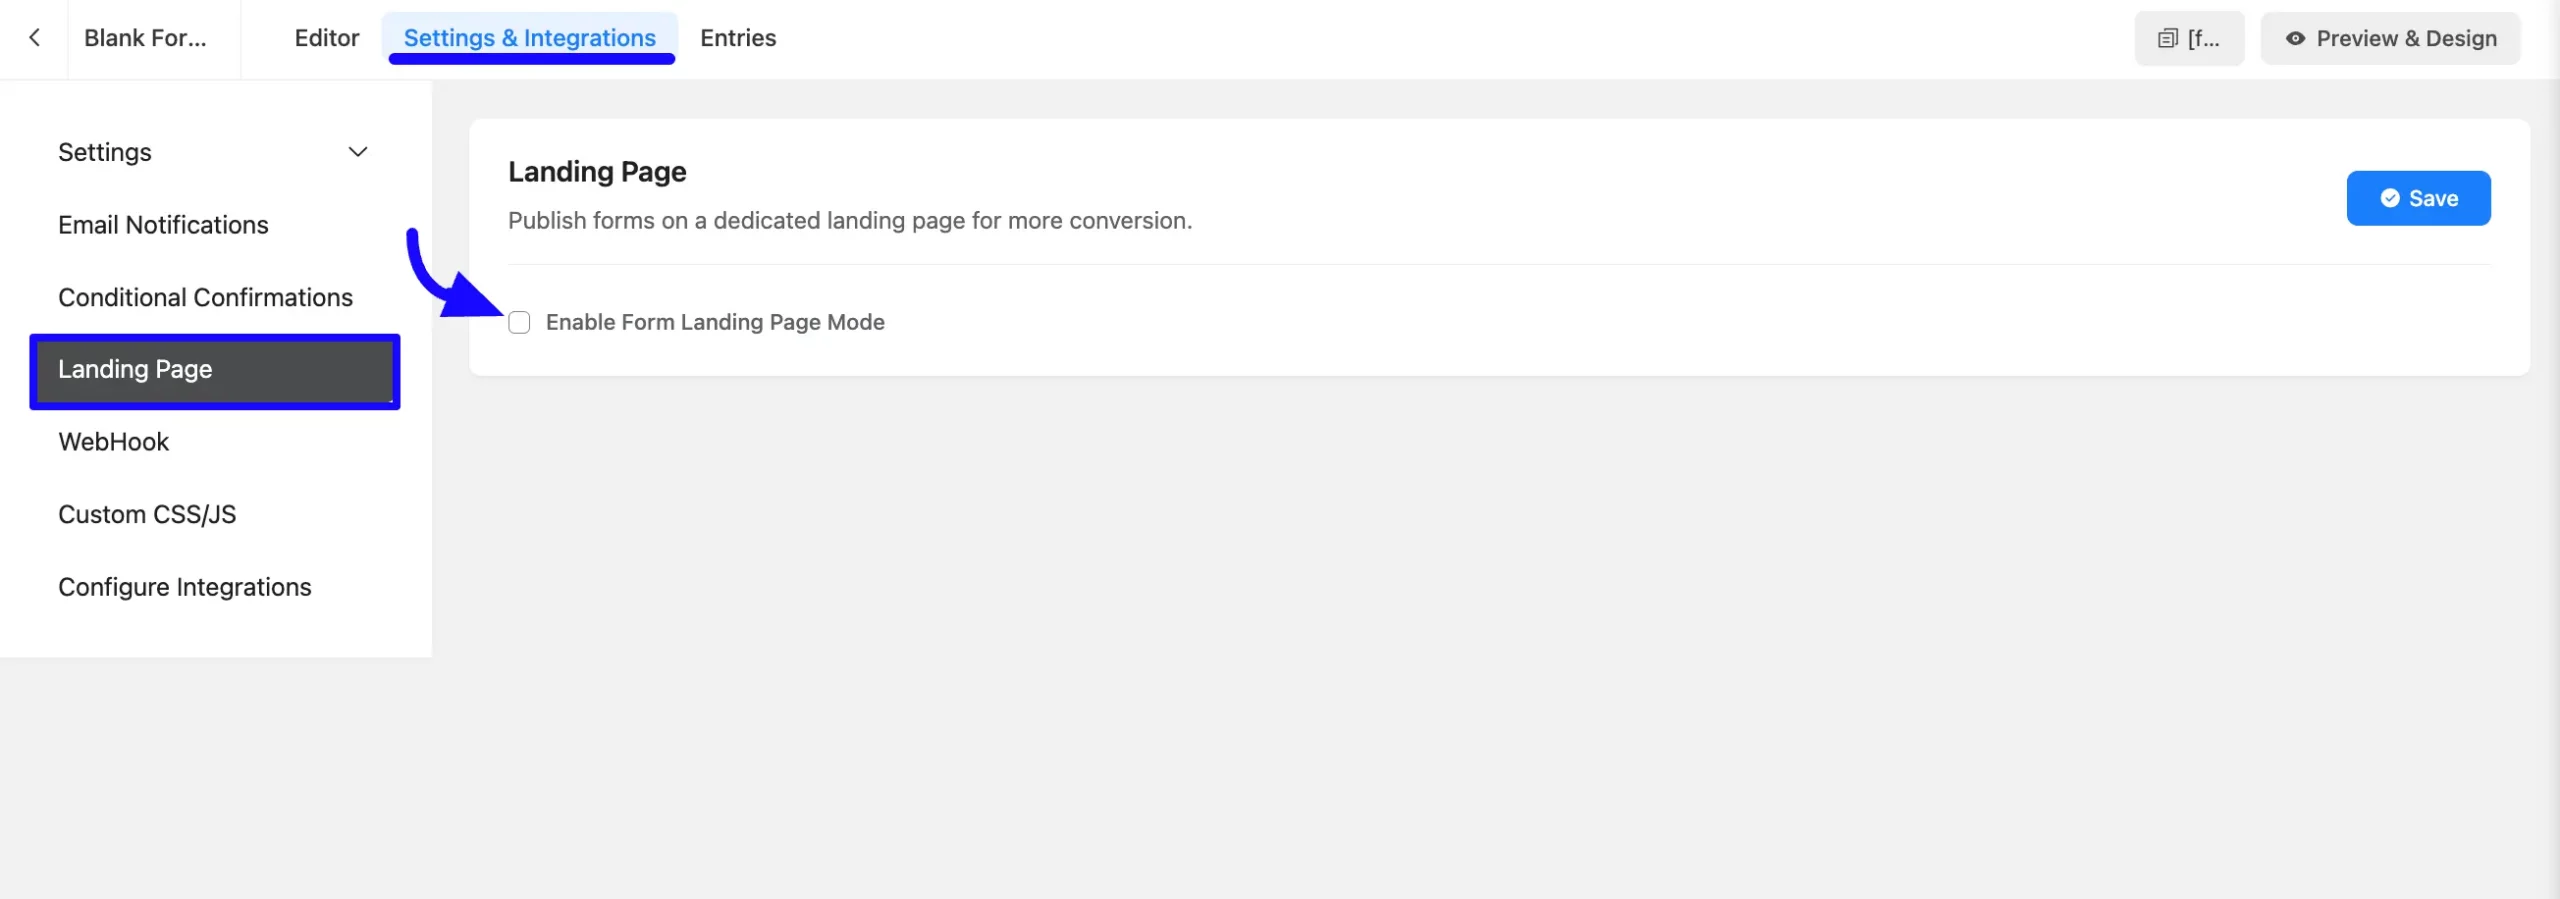
Once you are in the form editor, go to the Settings & Integrations tab. In the left sidebar, click on Landing Page.
Now, on the Landing Page settings screen, enable the Form Landing Page Mode by checking the checkbox. This action designates your current form to function as a standalone landing page.
You will now see two distinct sections for customizing your landing page: Design and Share.
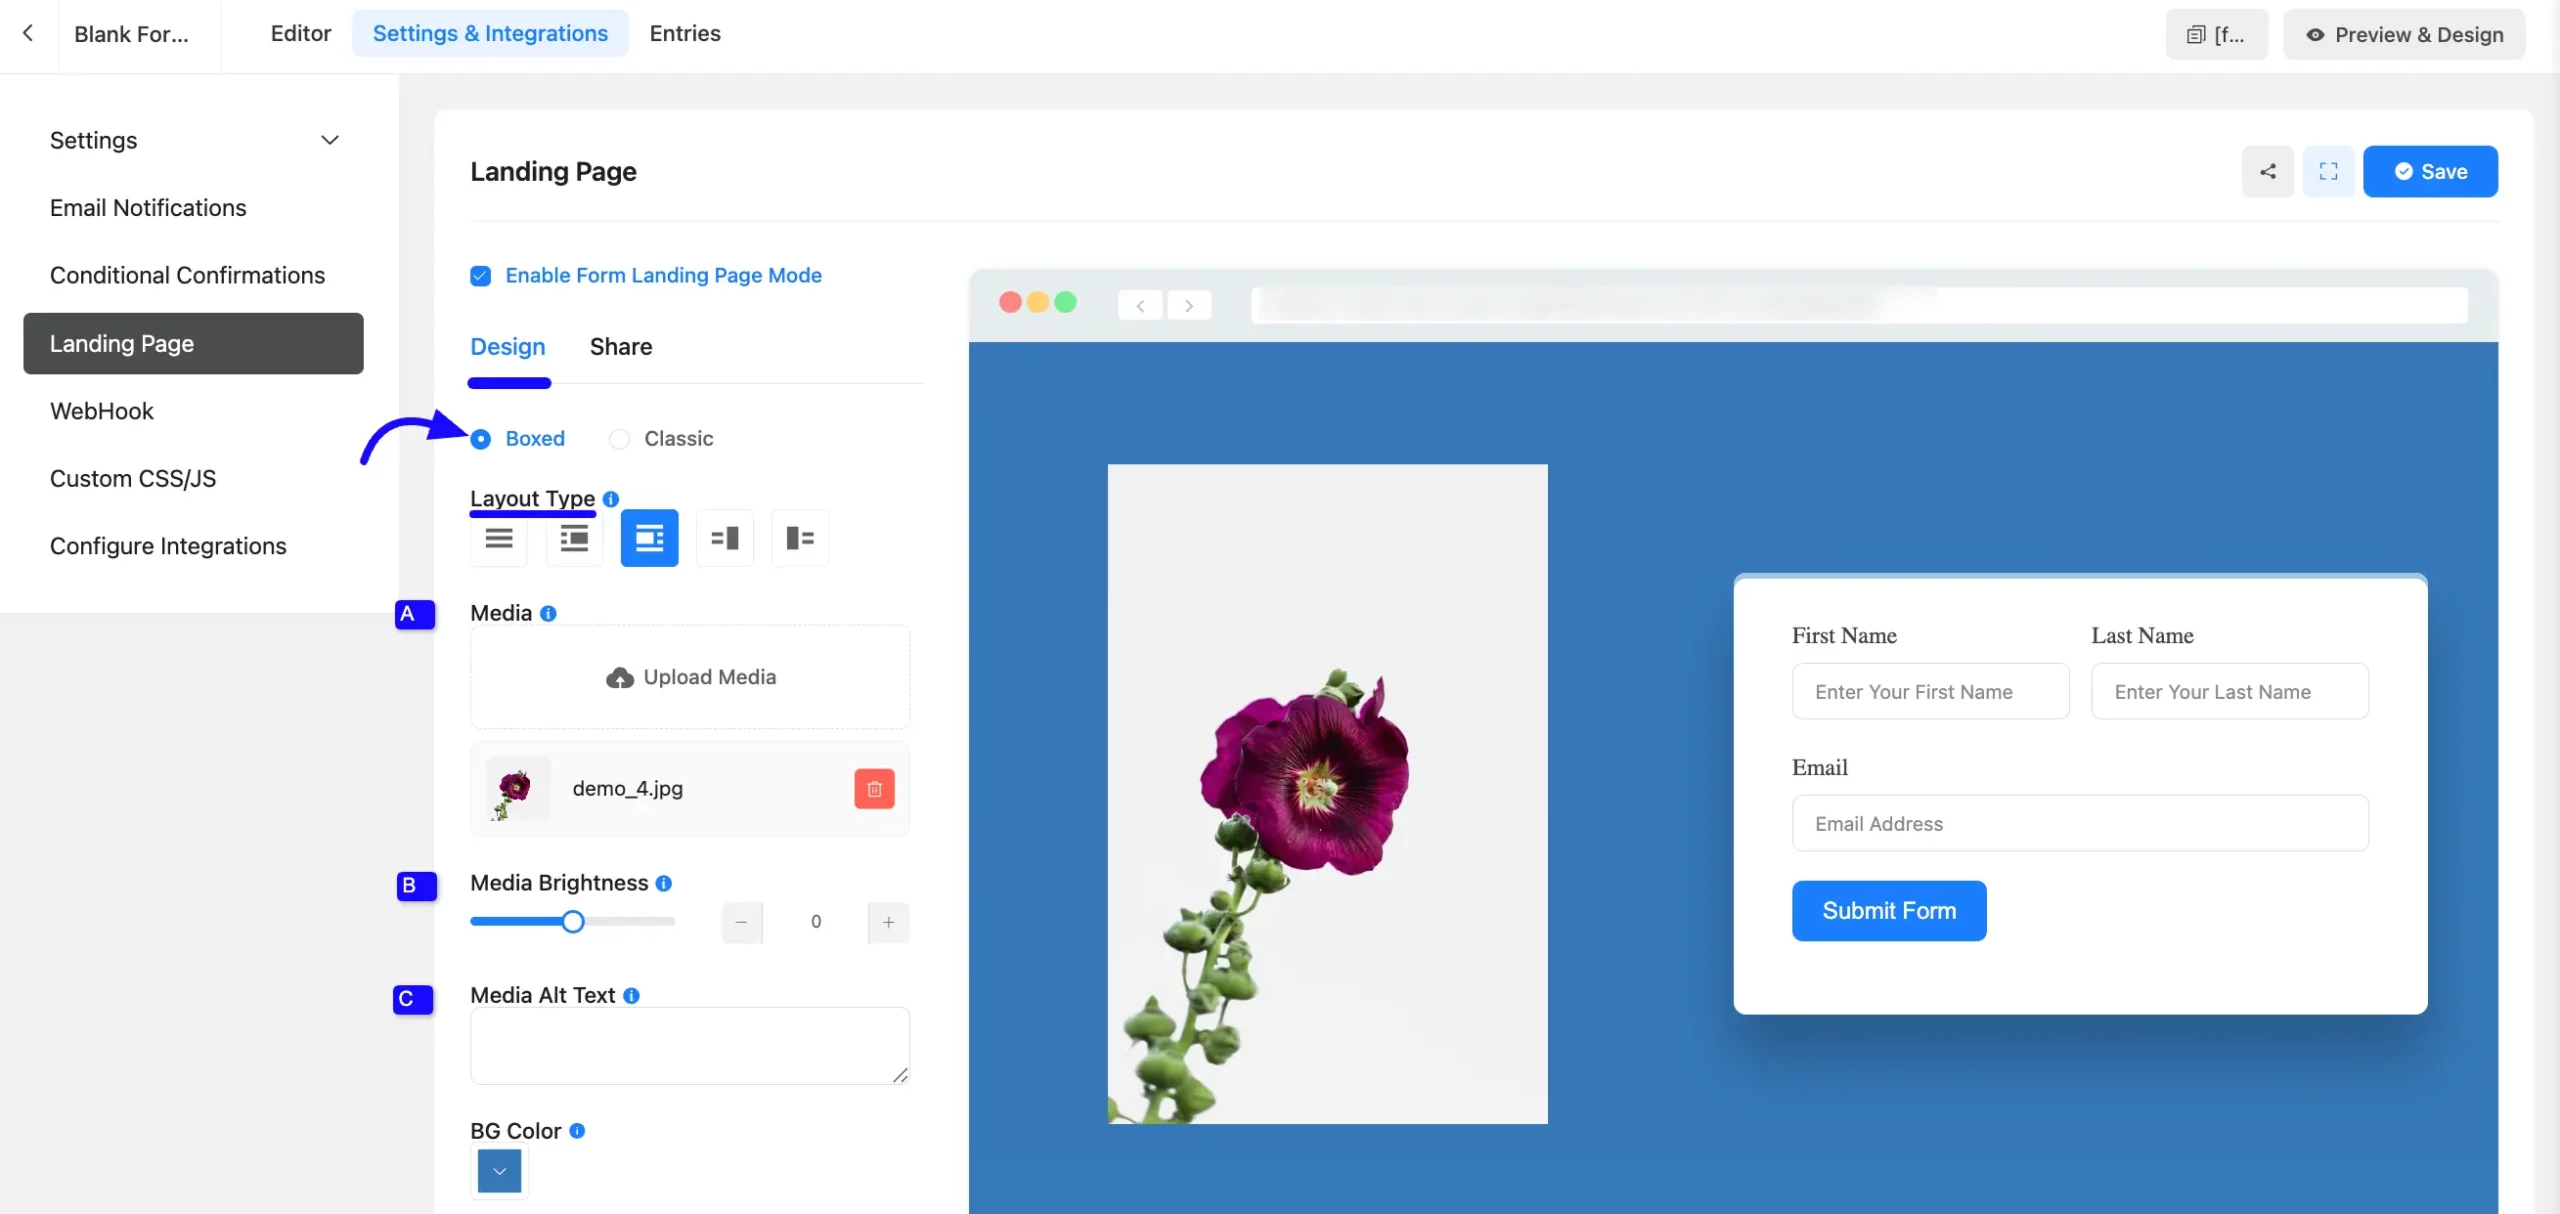
Design Your Landing Page #
The Design section allows you to personalize the visual appearance of your form’s landing page. Under the Design tab, customize the visual layout of your page.
Click the Radio button here to select whether you want the Page Design Style to be Boxed or Classic. By default, it selects Boxed.
Layout Type: Choose the layout type that you want to show this input. Here are five types of layouts that you can select.
A. Media: Add an image next to your form.
B. Media Brightness: You can adjust your image brightness by clicking the Plus(+) or Minus (-) Icon.
C. Media Alt Text: Enter descriptive alt text for accessibility.
BG Color: Choose a background color for your form page.
Outer Shadow: Add a shadow around the form container.
Inner Shadow: Add an inner shadow for depth.
BG Image: Upload an image to use as the background for your landing page.
Form Logo: Upload your company or campaign logo, which will typically appear at the top of the page.
Featured Image: Set a featured image that will serve as a thumbnail when your landing page is shared on social media platforms.

Page Headings: Add a compelling page heading that will be displayed at the top of your page.
Description: Enter a description that briefly explains what the form is about.
Security Code: Add a code to protect the form’s URL from unwanted access.
Now click the Save Settings button to save the form design.

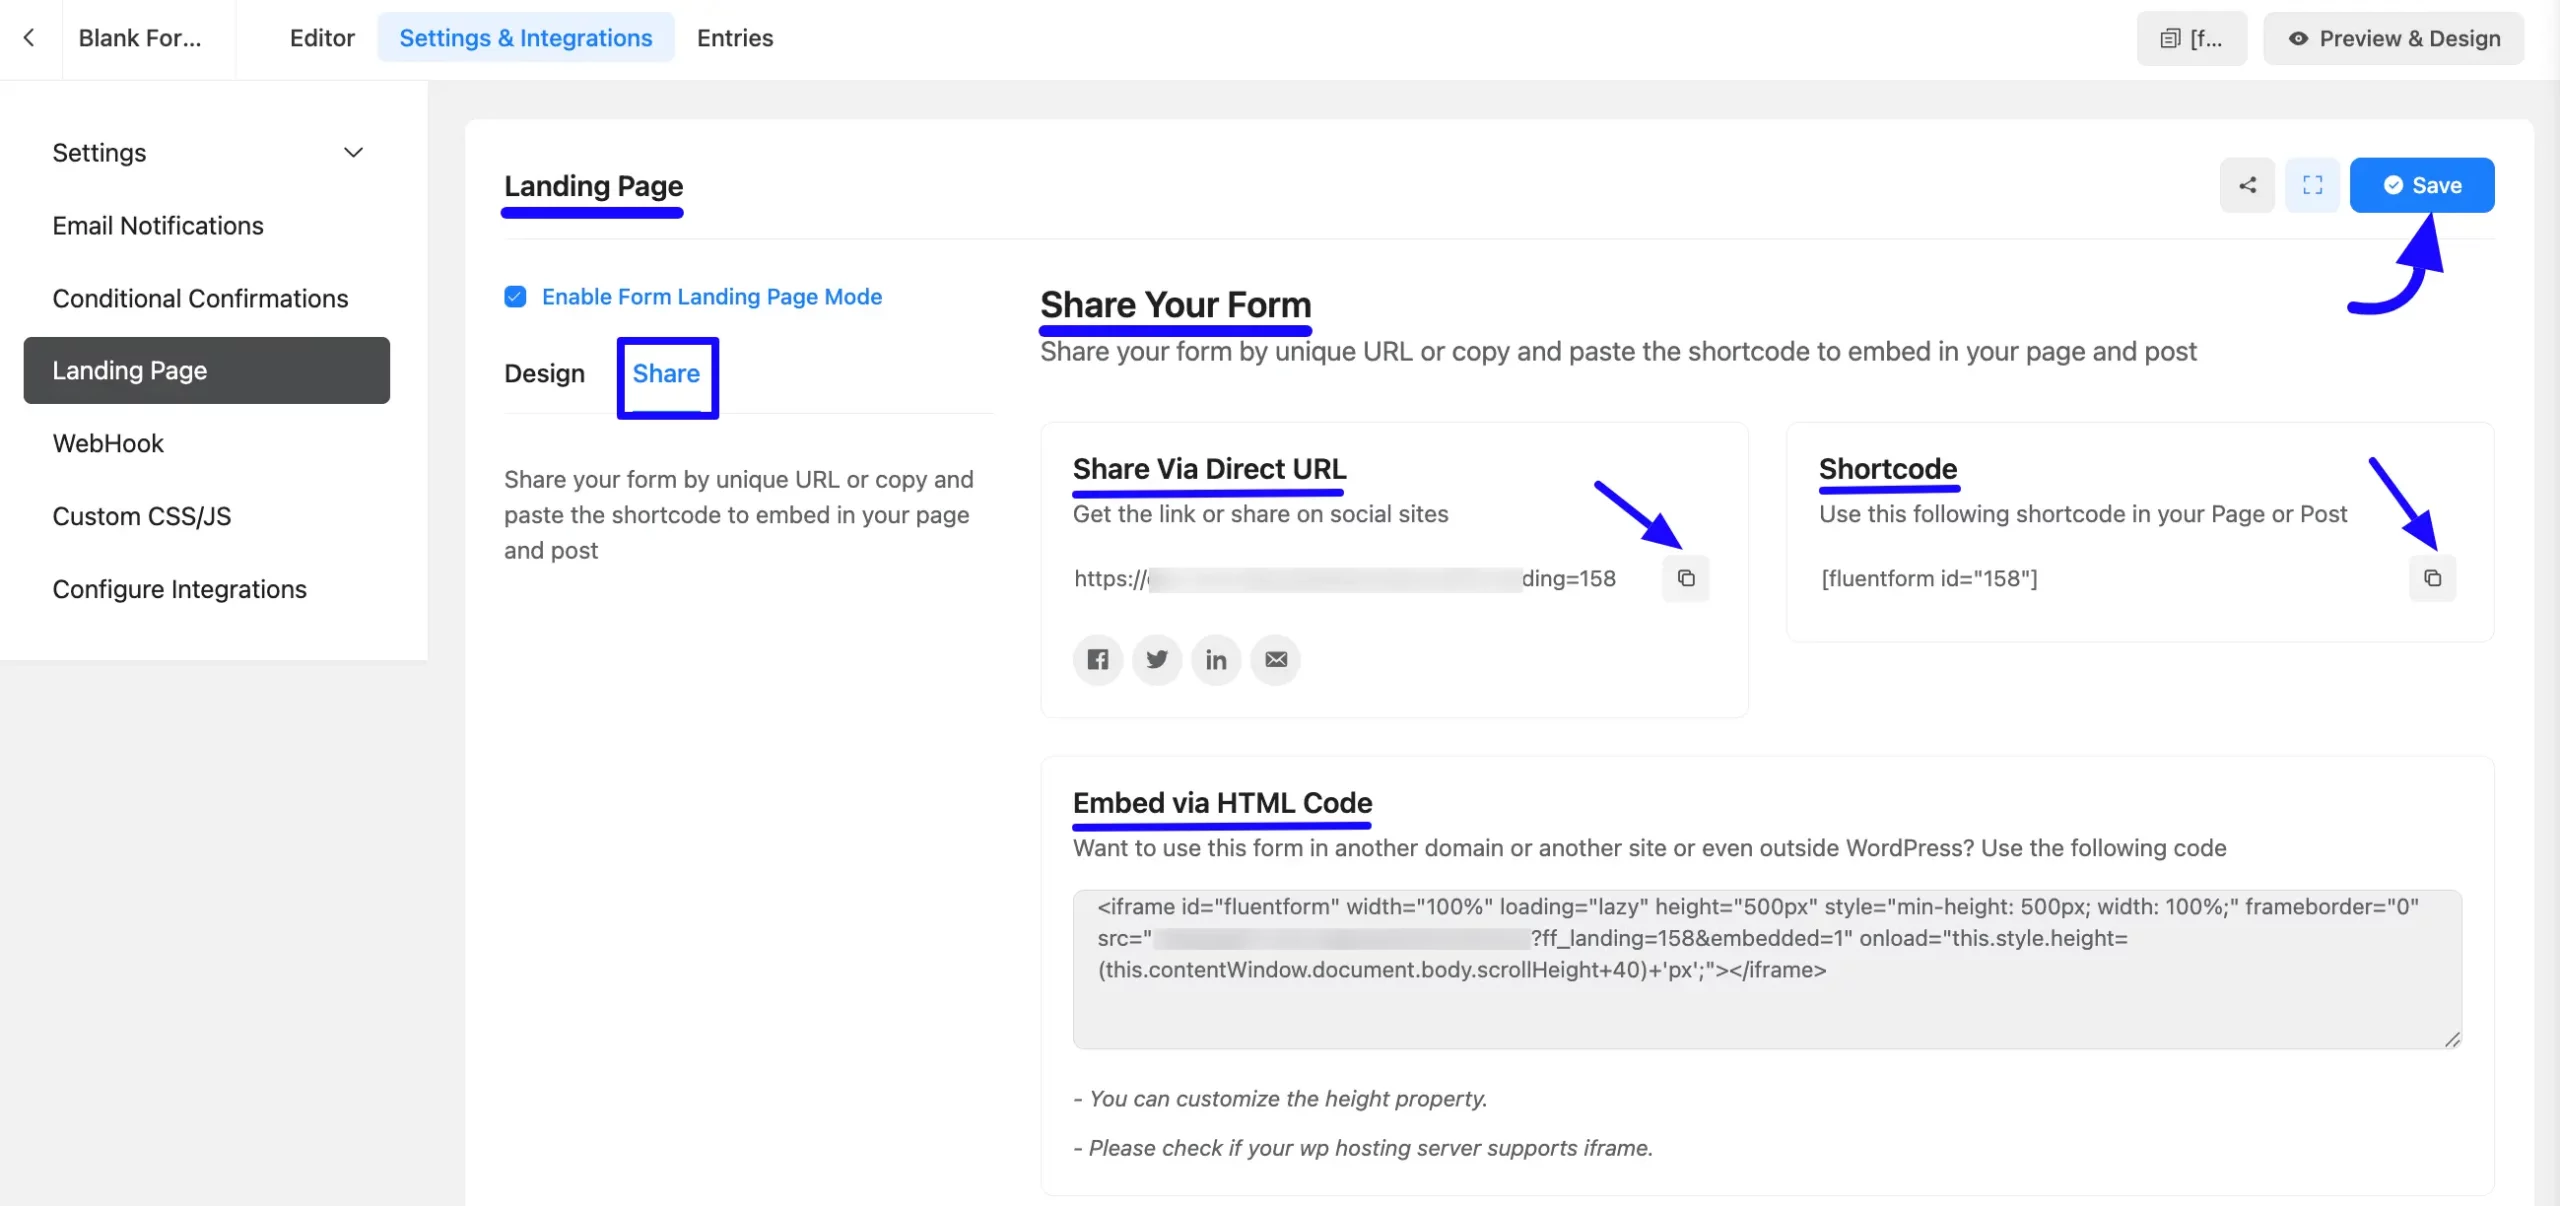
Share Your Landing Page #
Once you’ve designed your landing page, the Share section provides various ways to make it accessible. For this, select the Share options.
Share Via Direct URL: A unique URL is generated for your landing page. You can directly share this link via email, social media, or any other platform.
Shortcode: A dedicated Shortcode is provided. Simply copy the shortcode provided and paste it into any post, page, or widget area. Once added, it will show the form using the default design and layout.
Embed via HTML Code: Use the provided HTML to embed the landing page on external websites or other platforms that support HTML.
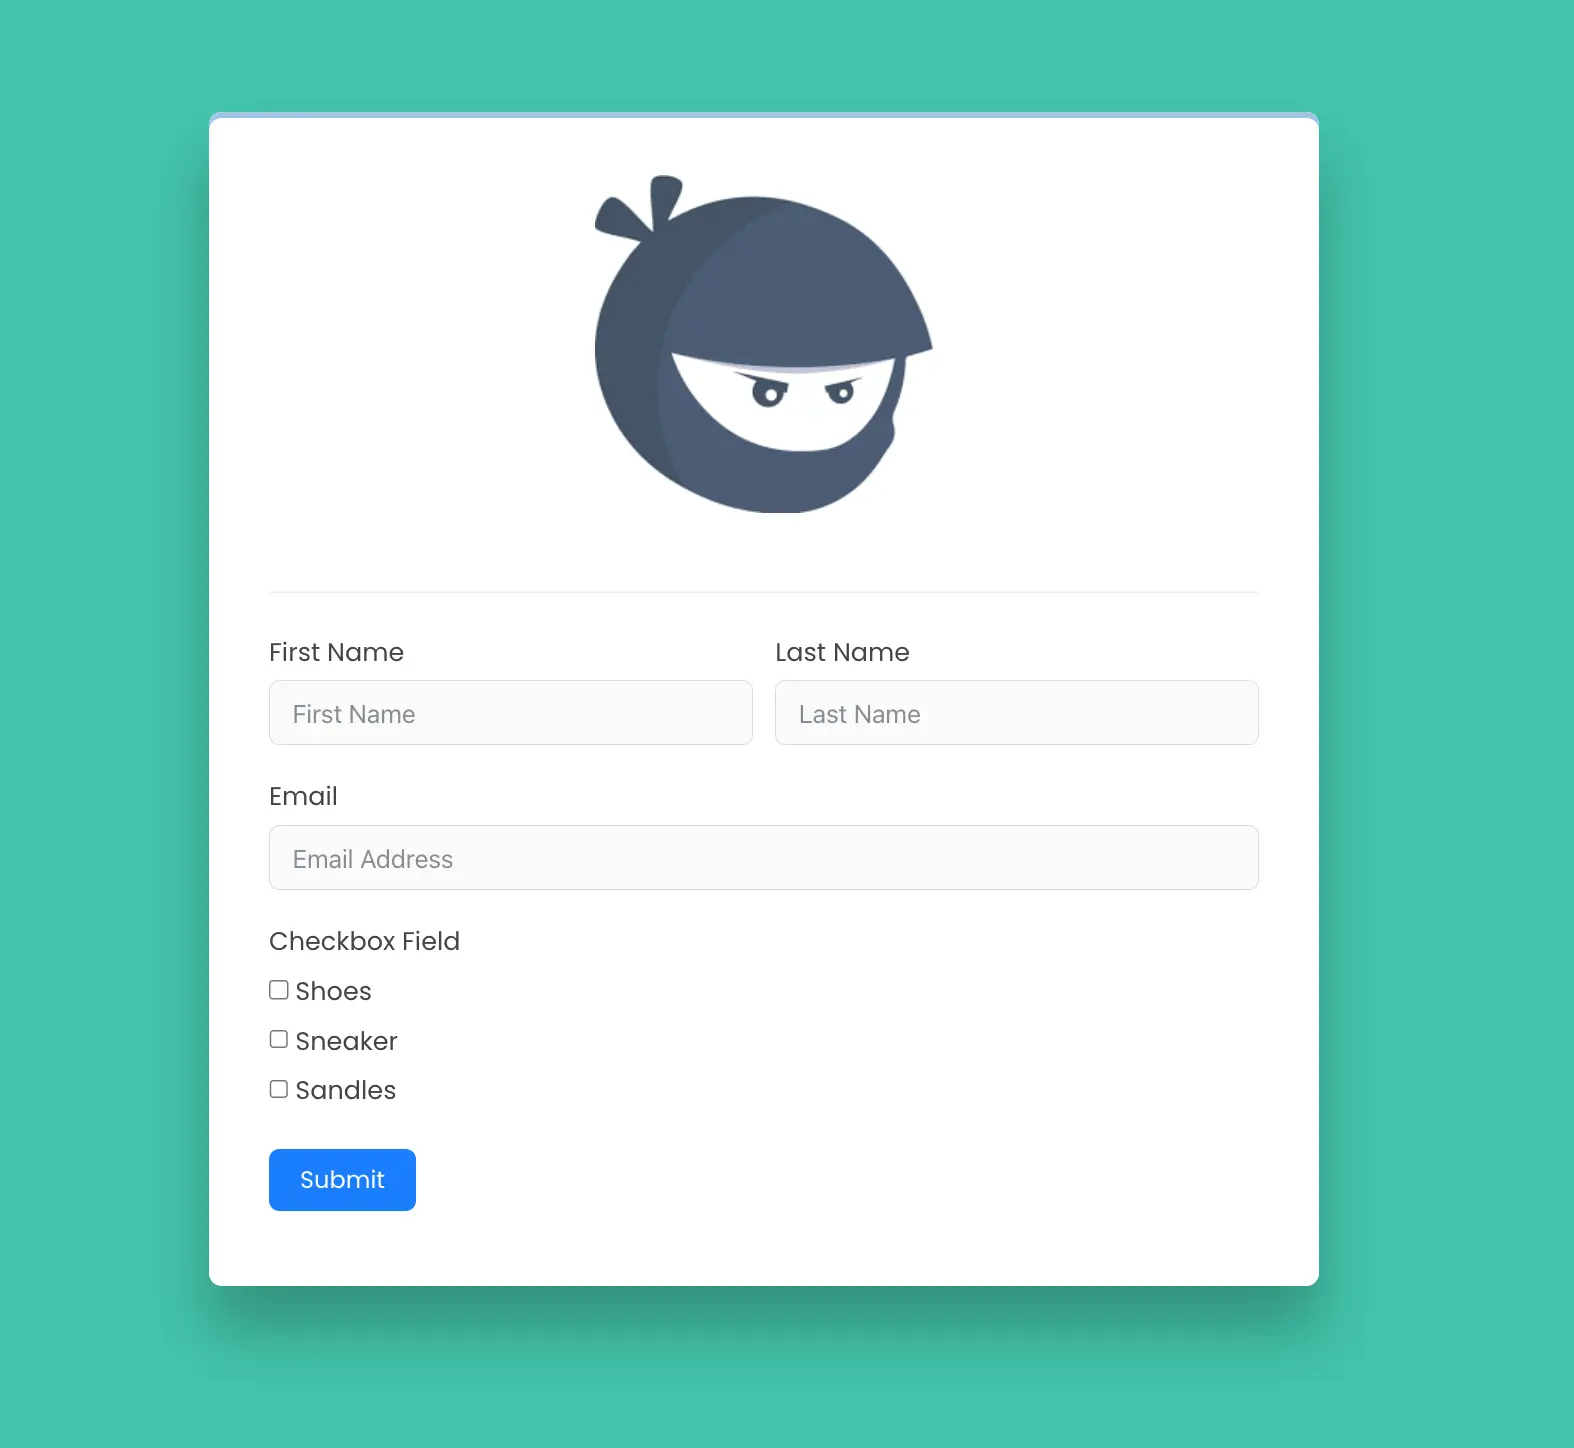
Preview the Dedicated Landing page #
This is how it will look on the dedicated landing page.
You’ve successfully created a dedicated landing page using Fluent Forms that designed, styled, and ready to share with the world.
If you have any questions or require further assistance, don’t hesitate to contact our support team.


