The Fluent Form Scheduling feature allows you to easily schedule a form’s live period. This scheduling feature enables admins to set an opening date and a closing one for particular forms.
Users cannot fill out forms before or after when setting the schedule.
This article will guide you on scheduling your form in Fluent Forms.
Access the Form settings #
First, go to Forms from the top navbar, and open the Editor page of your desired form by clicking the Edit button which form you want to schedule.
Now, click the Settings & Integrations tab at the top bar and stay in the Settings section. Scroll down to the Scheduling and Restrictions segment under the Settings section.
“If you do not have any existing forms, read Create a Form from Scratch or Create a Form using Templates documentation to create a new one.”
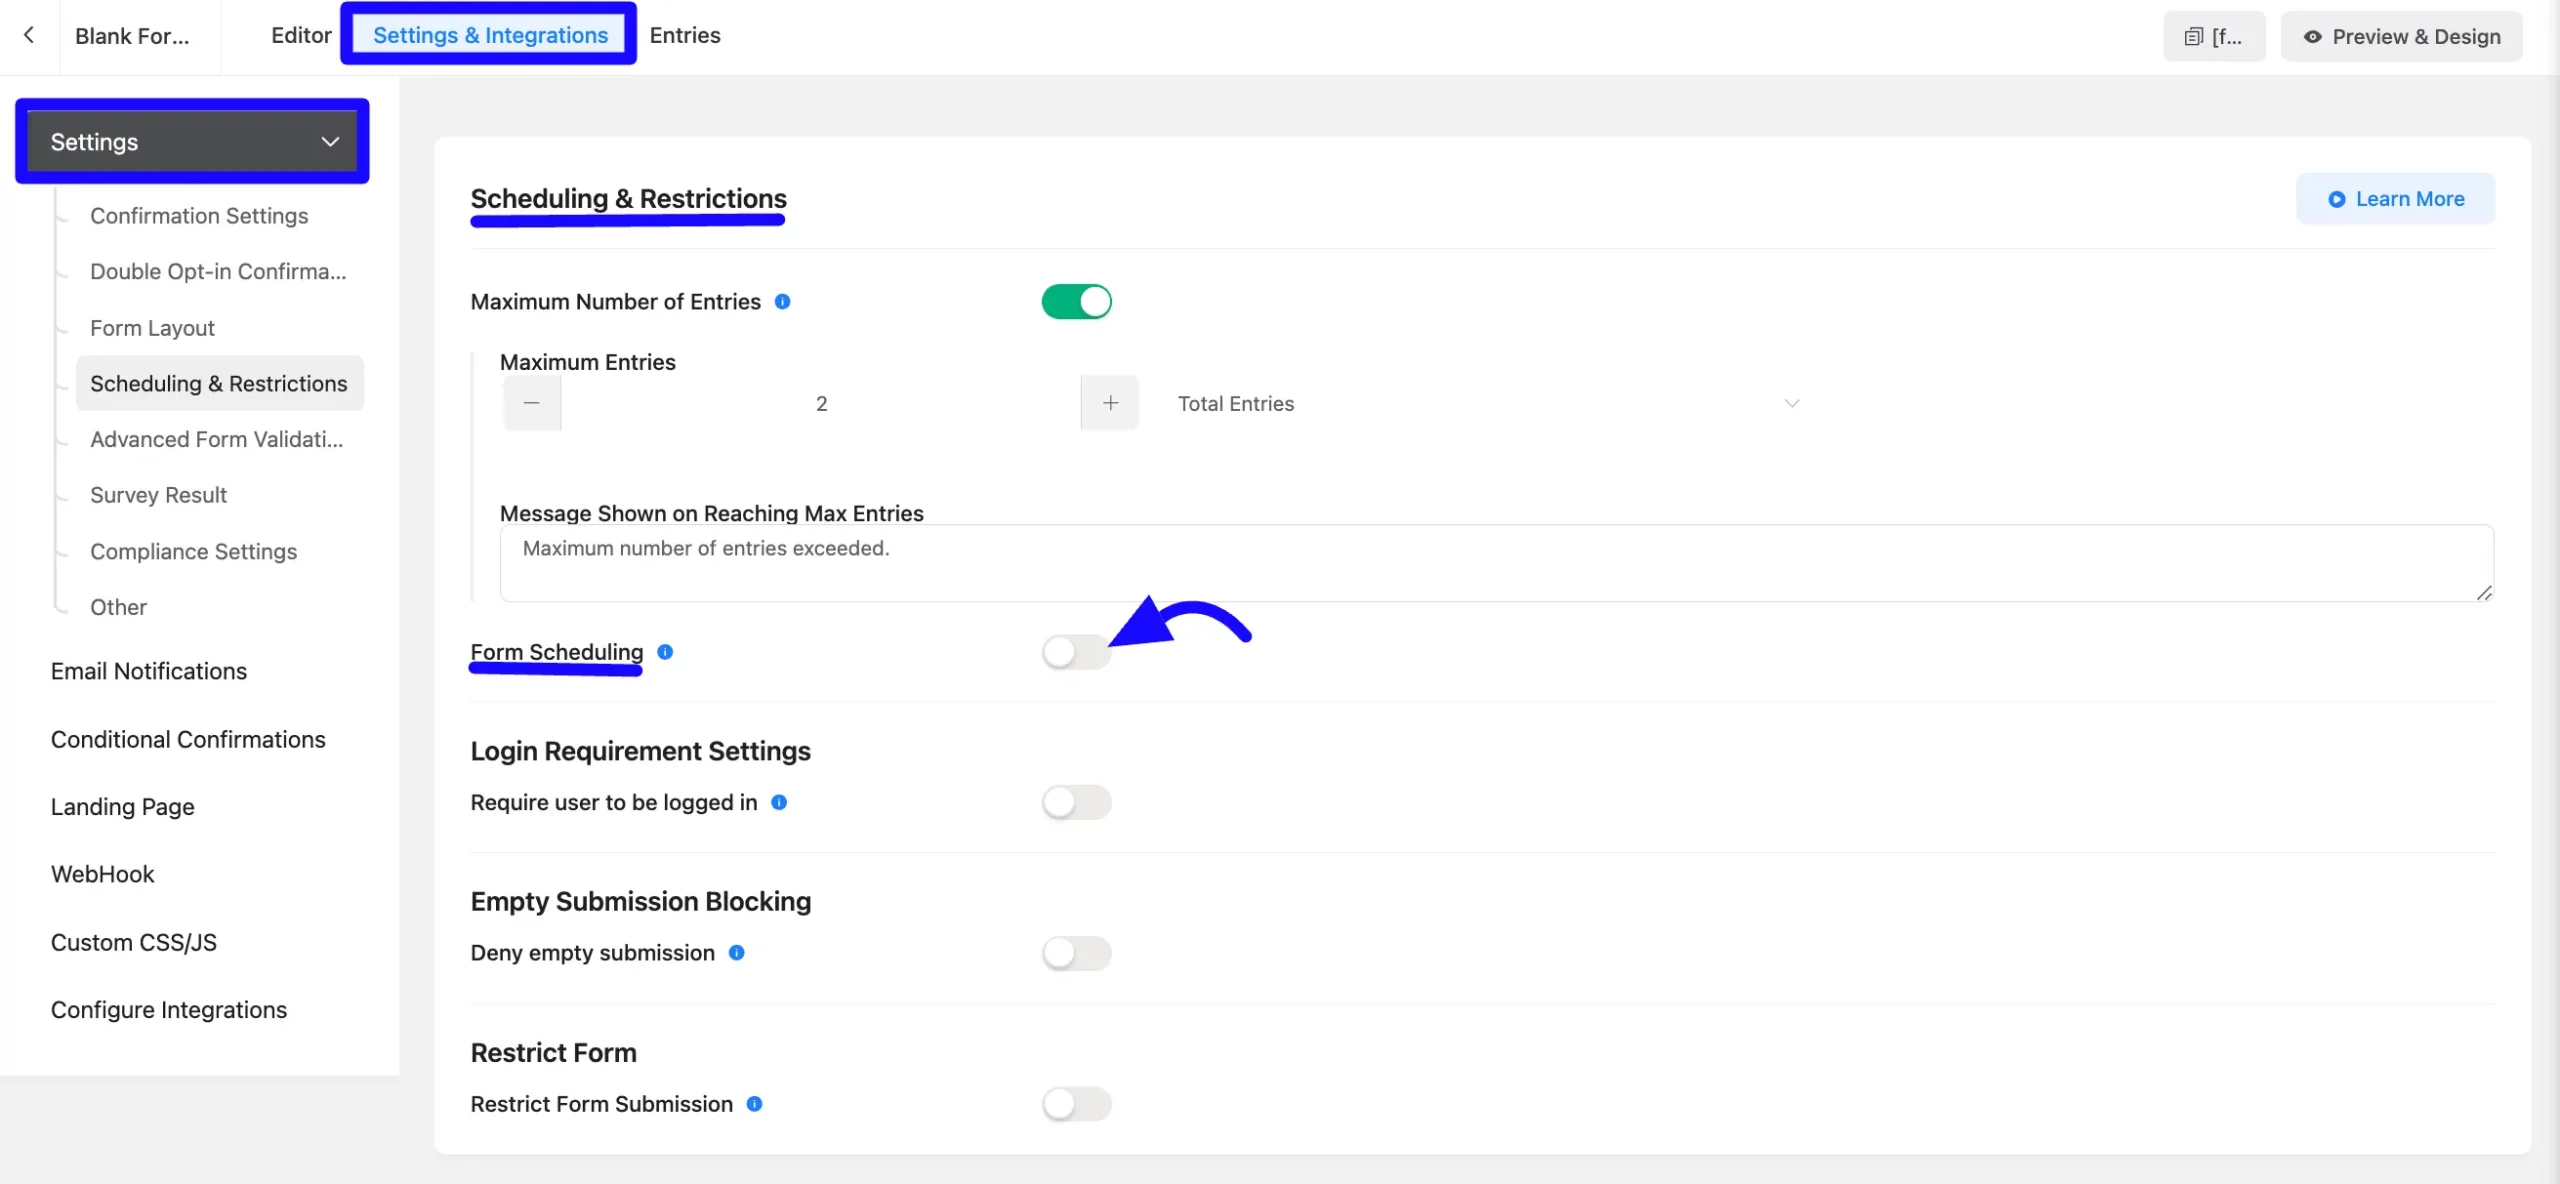
Form Schedule #
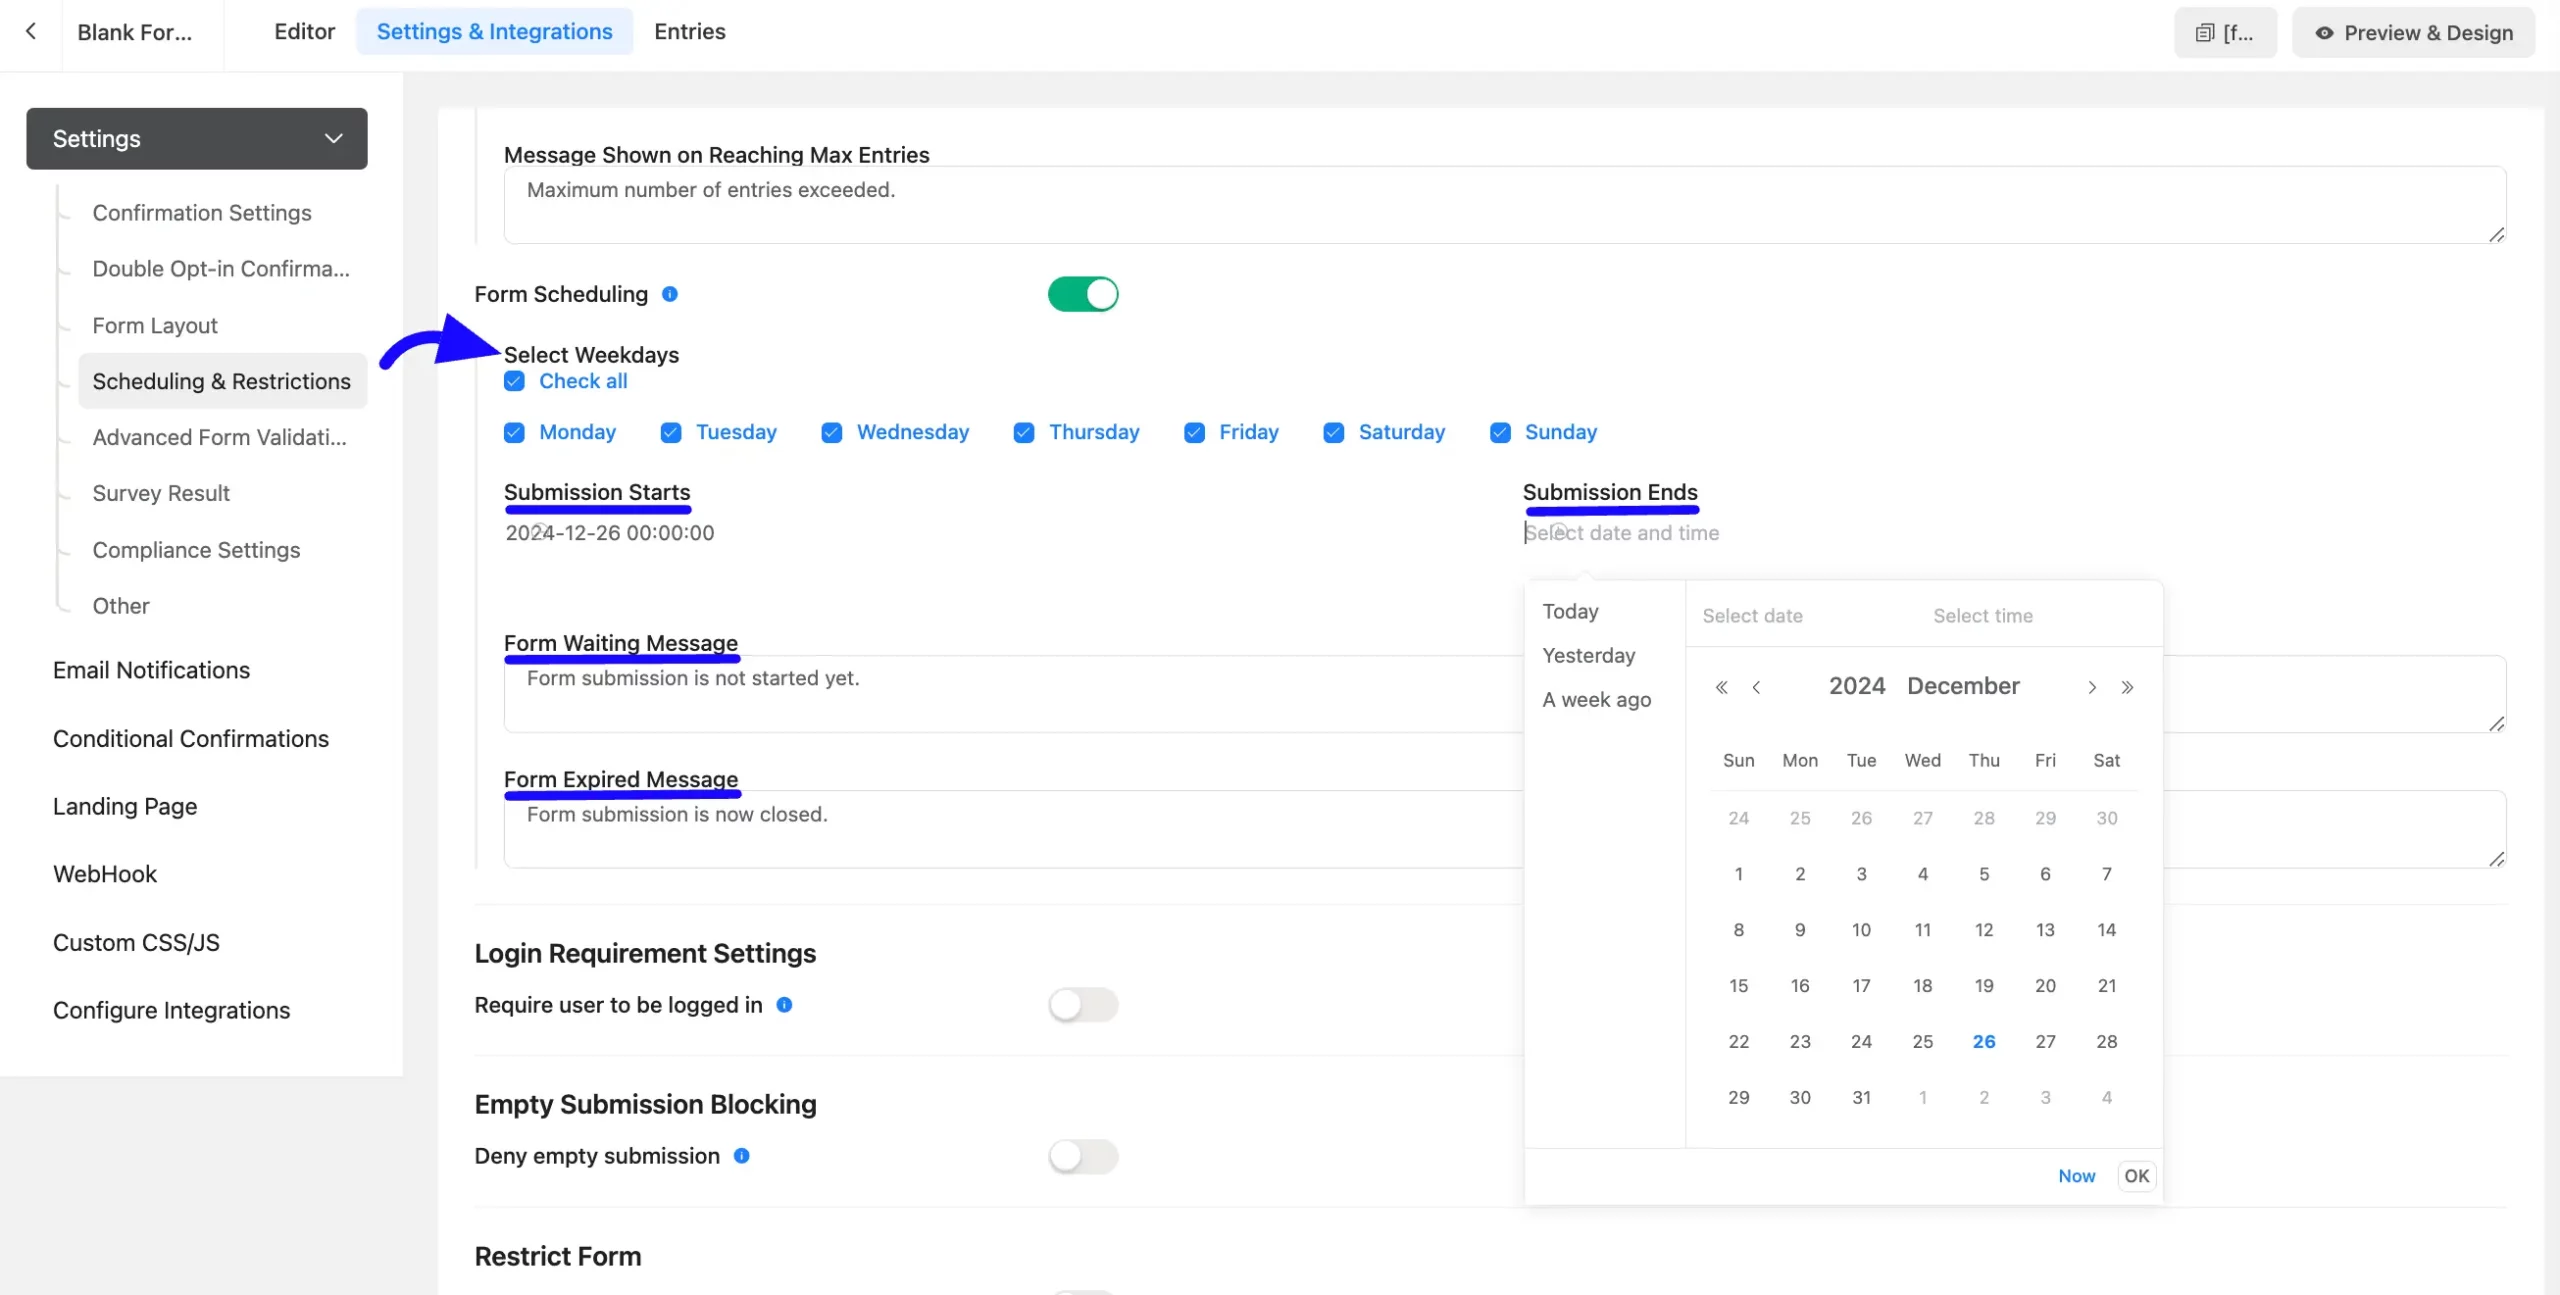
First, enable the Form Schedule options.
Select Weekdays: After enabling the form schedule, you can select the weekdays by checking the checkbox as needed.
Submission starts date: Now, set the date for the user when the form submission starts.
Submission Ends date: You can set the date for the user when the form submission ends.
Form Waiting Message: Enter the message for the displayed user when the form hasn’t yet been submitted.
Form Expired Message: Enter the message for the displayed user when the form expires for the user.
Once complete the form scheduling, then Save the form.
So, this is the form of all things: form scheduling in fluent form. If you have any further questions, contact our support team.


