Fluent Forms integrates Cloudflare Turnstile to provide website visitors with a frustration-free, CAPTCHA-free browsing experience. It stops abuse and confirms visitors are real without the data privacy concerns or awful UX that CAPTCHAs thrust on users.
This article will guide you through configuring Cloudflare Turnstile in your WordPress Site through Fluent Forms.
Configuring CloudFlare Turnstile #
To learn how to configure Turnstile integration, follow the steps with screenshots below –
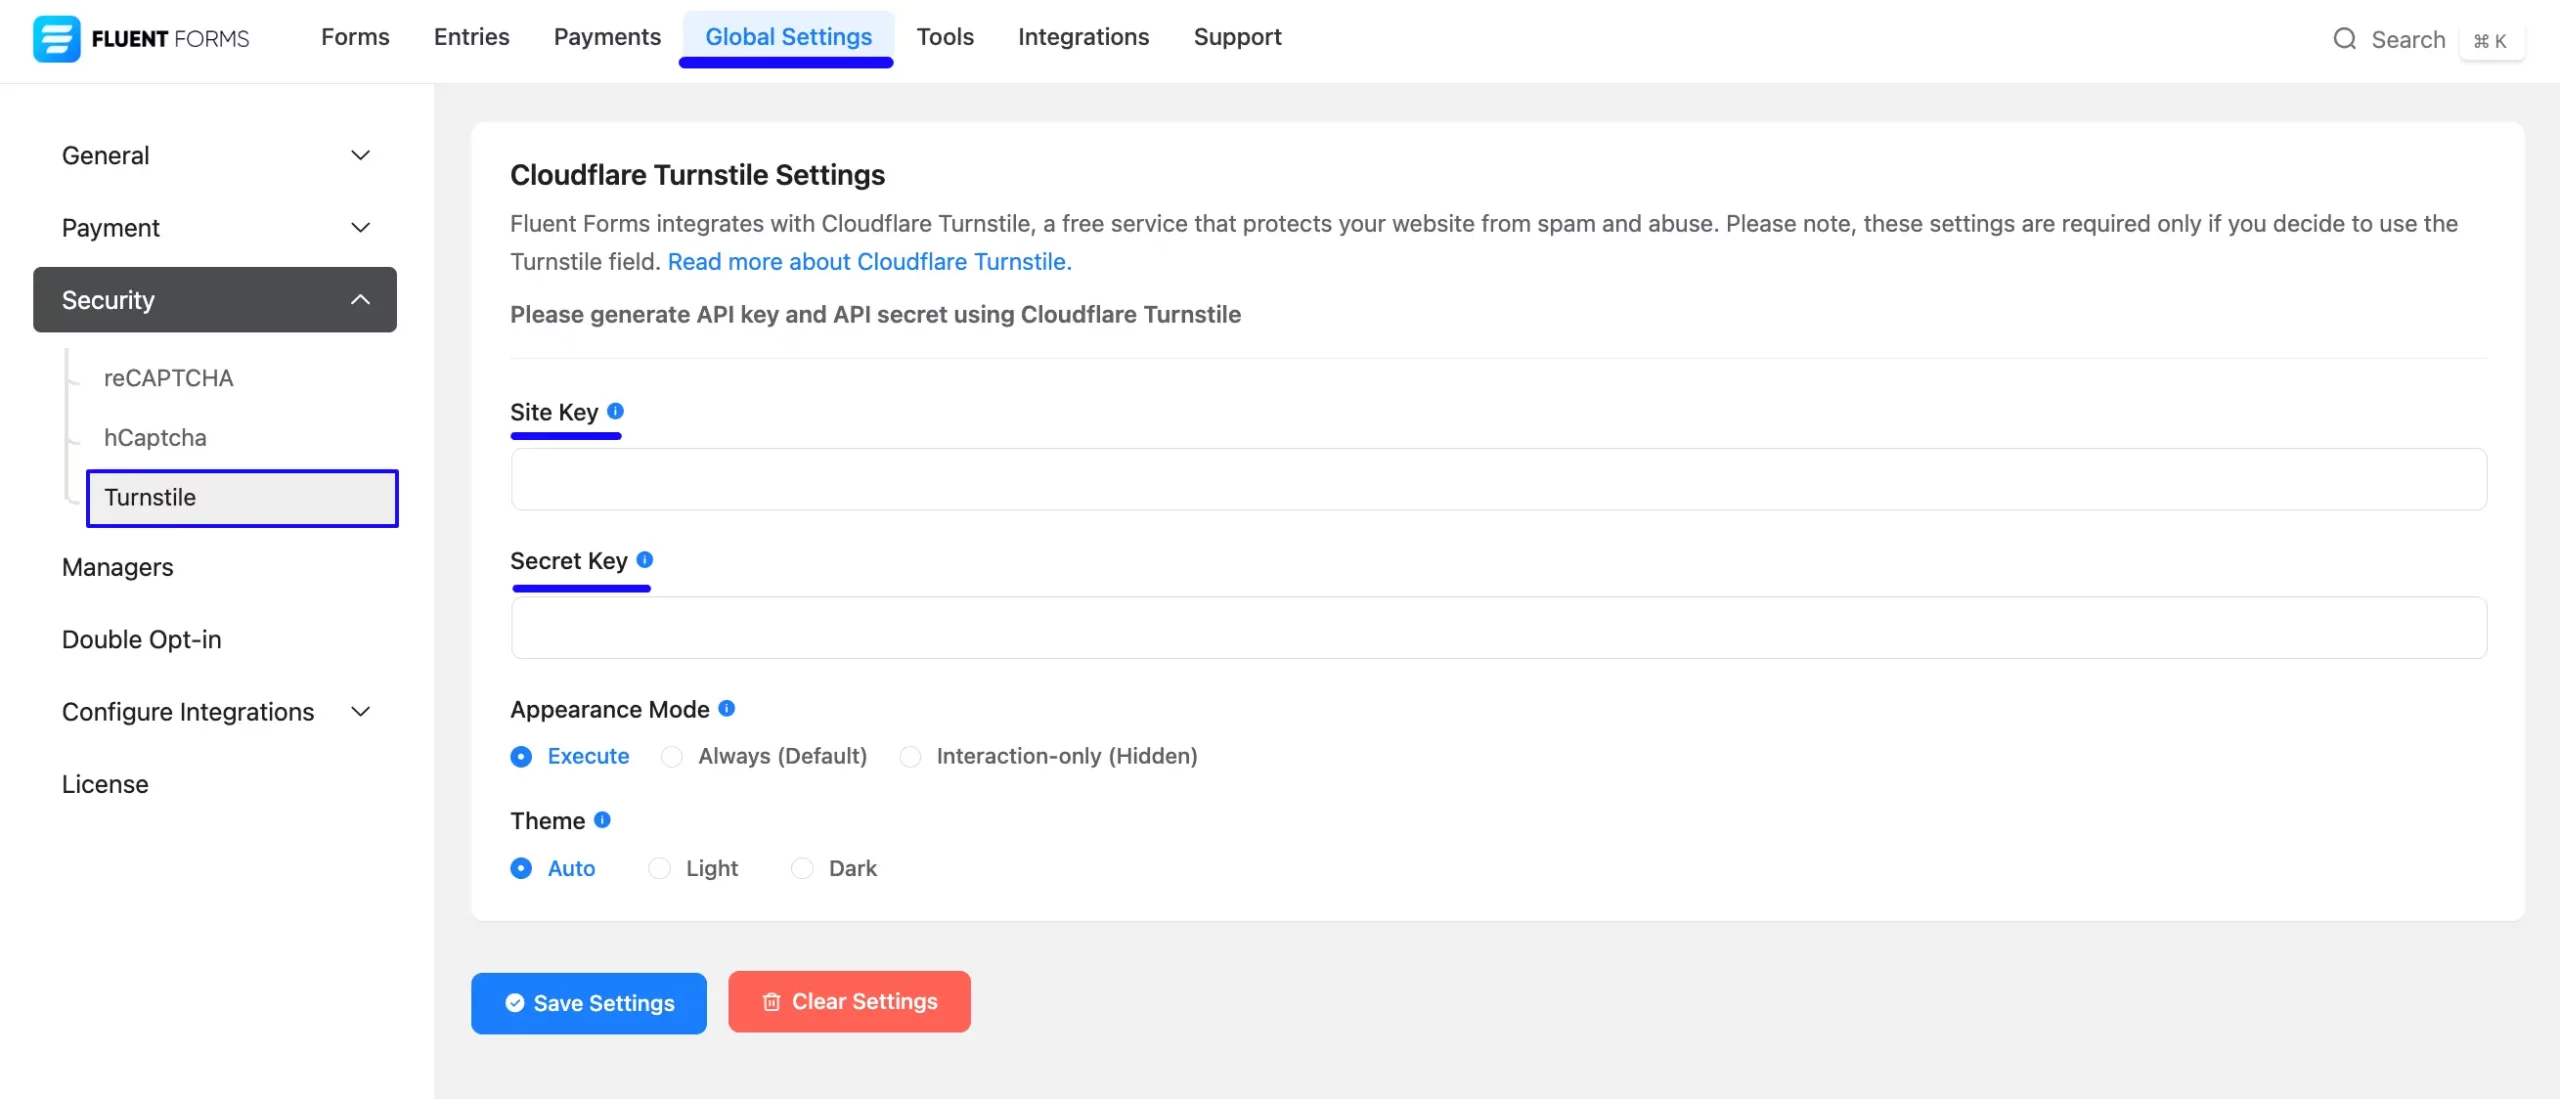
First, go to Global Settings from the FluentForms Navbar, open the Security tab from the left sidebar, and click the Turnstile option.
Now, you will be asked to provide the Site Key and Secret Key of your Turnstile Account for the configuration.
Get the Turnstile Site and Secret Key #
To learn how to get the Turnstile Site and Secret keys, follow the steps with the screenshots below –
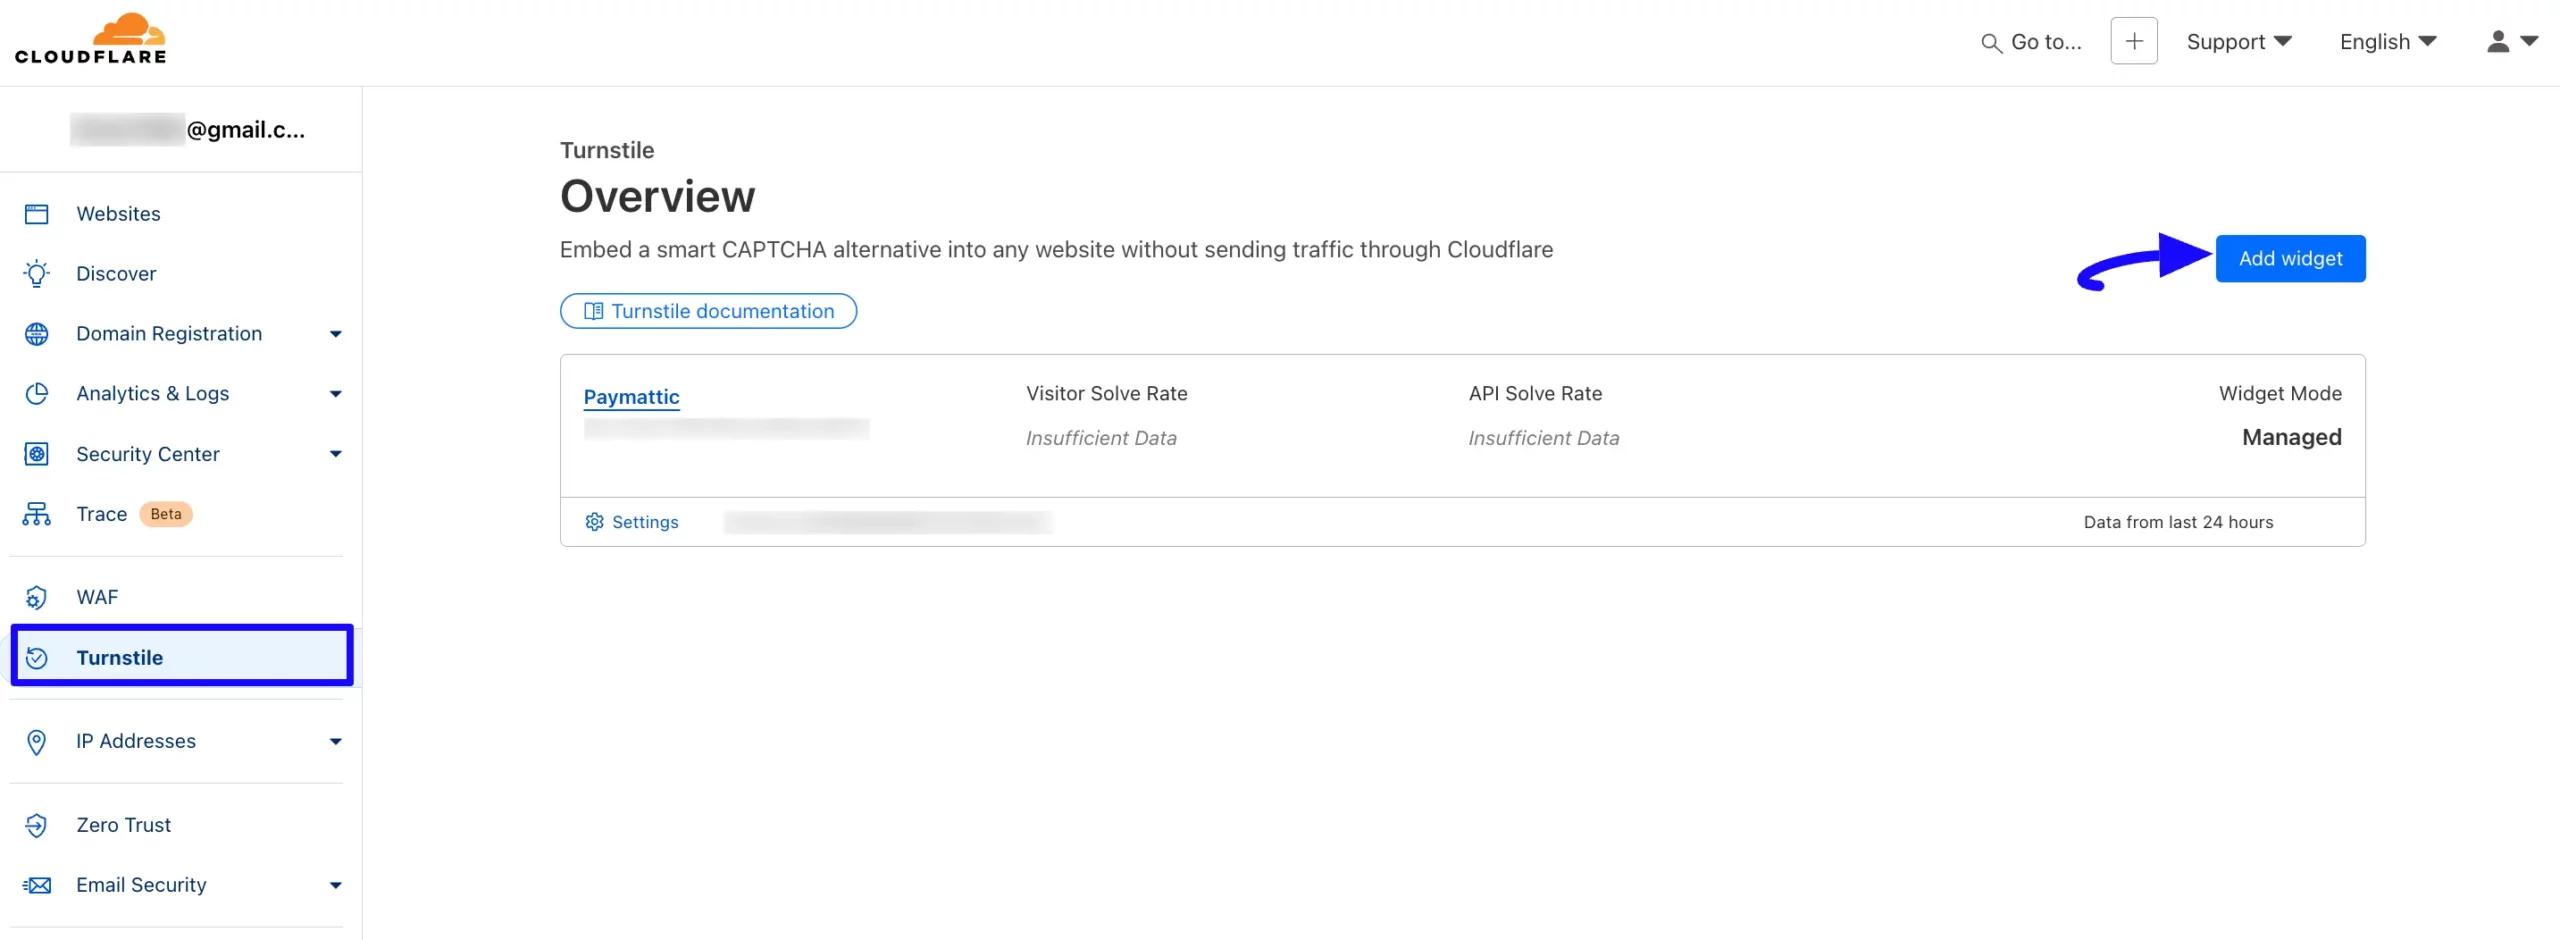
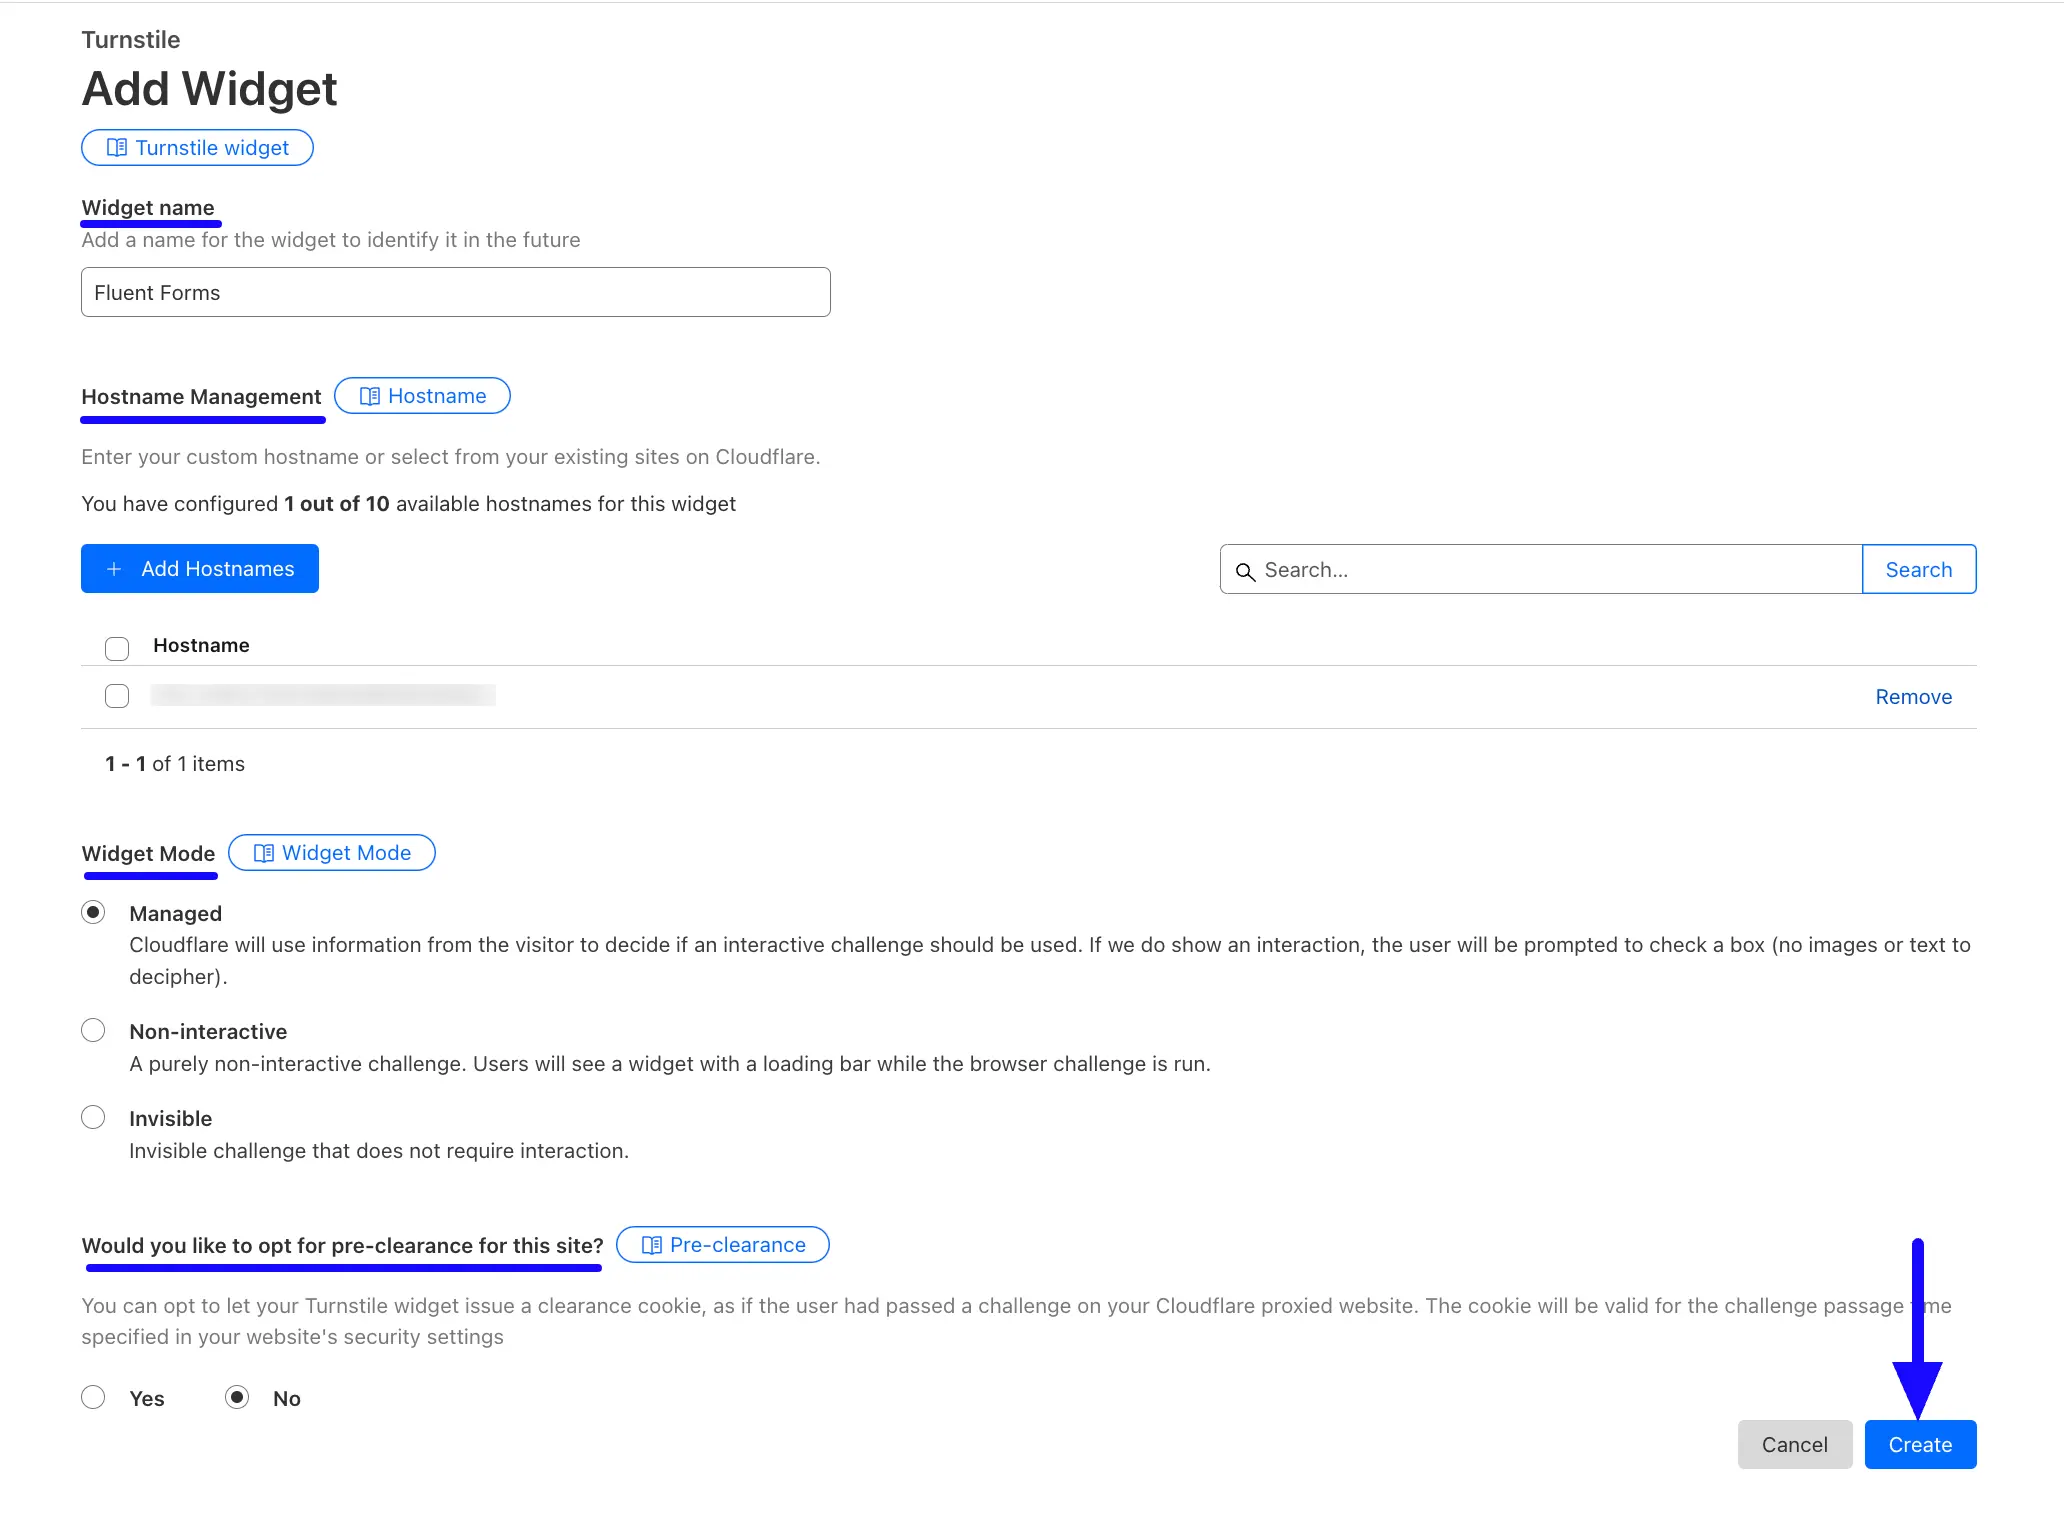
First, log in to your Turnstile Account, go to Turnstile from the left-side menu, and click the Add widget button.
If you don’t have a Turnstile account, you can sign up here.
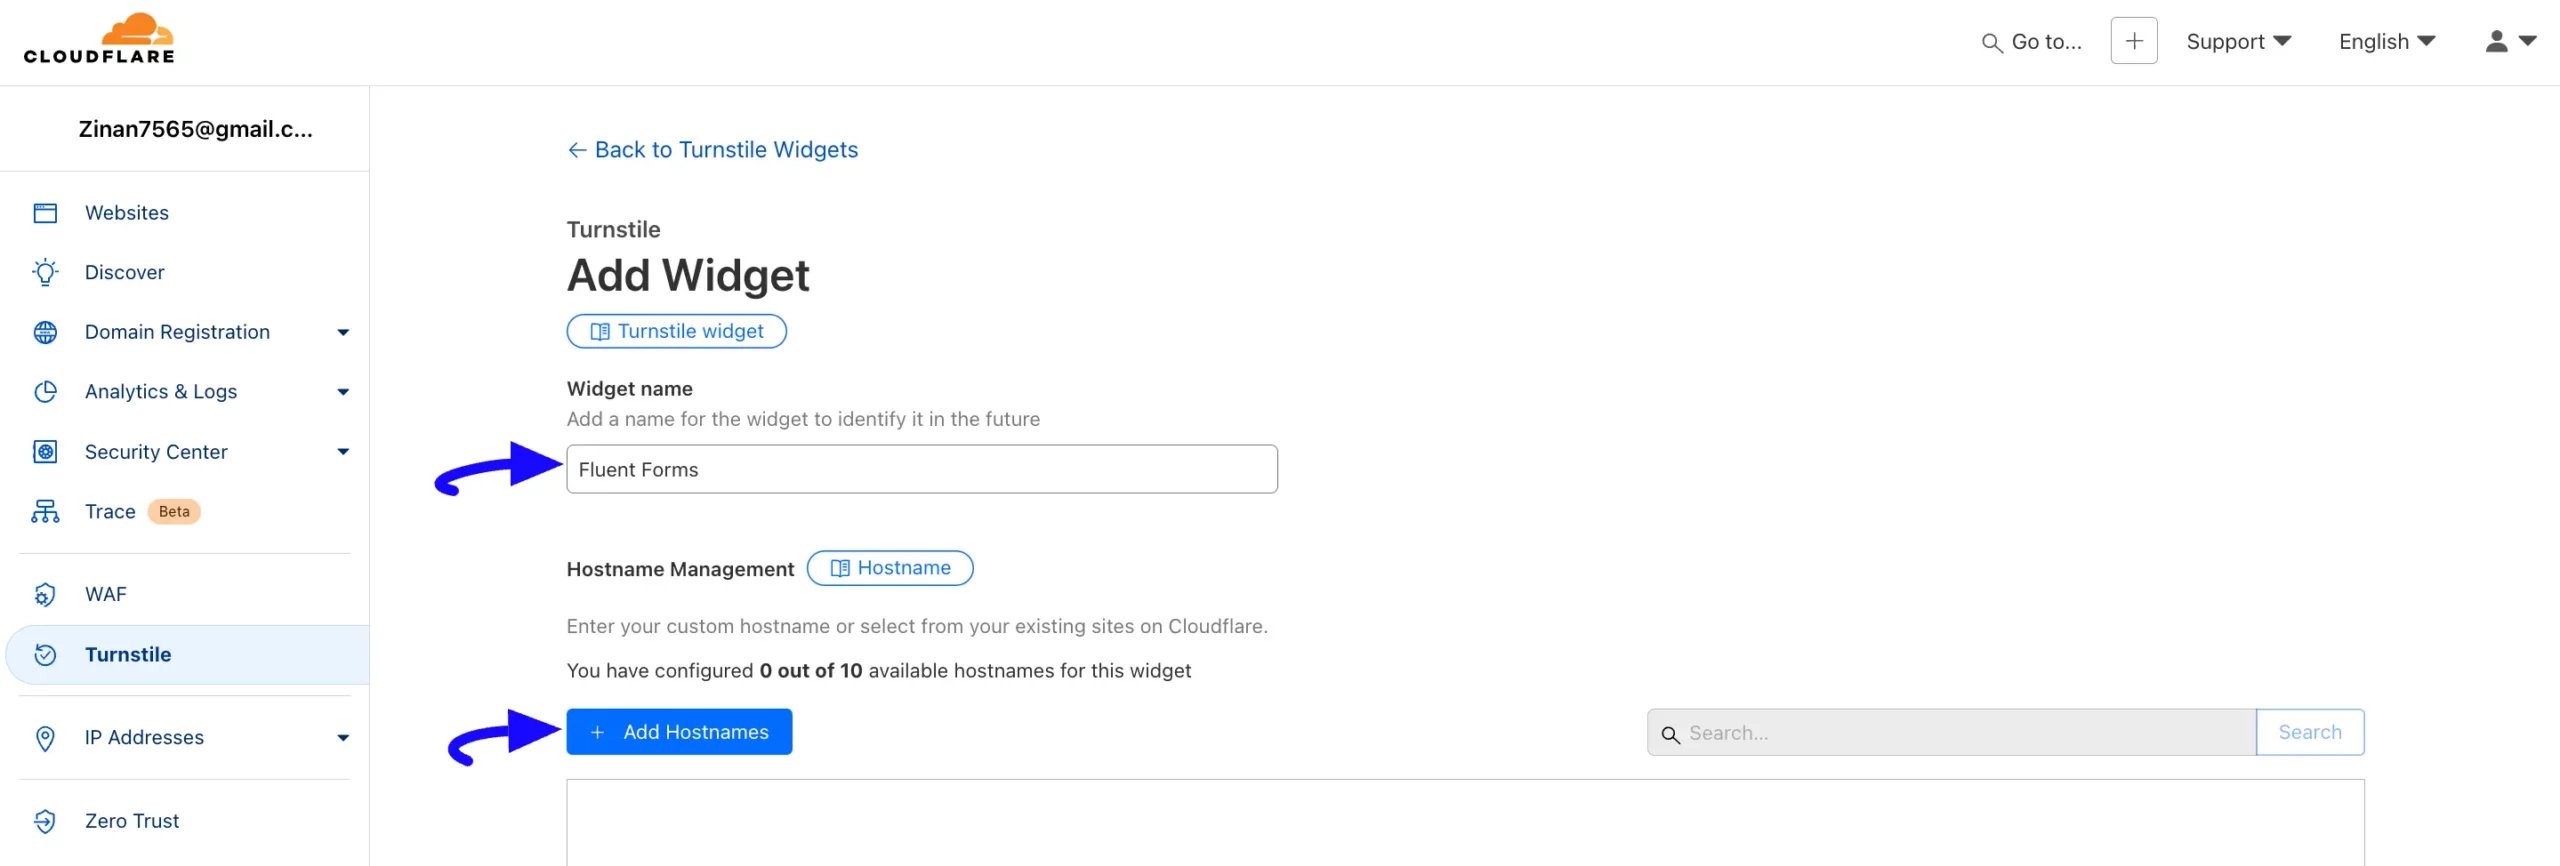
Now, put a Name to identify your website in the future and enter your website/s address using the + Add Hostnames button to register your domain for Turnstile verification.
Now, enter your site domain in the Add a Custom Hostname field and click the Add button.
Then, your domain will be added under the Selected Hostnames. You can remove it anytime if needed. Again, click the Add button below.
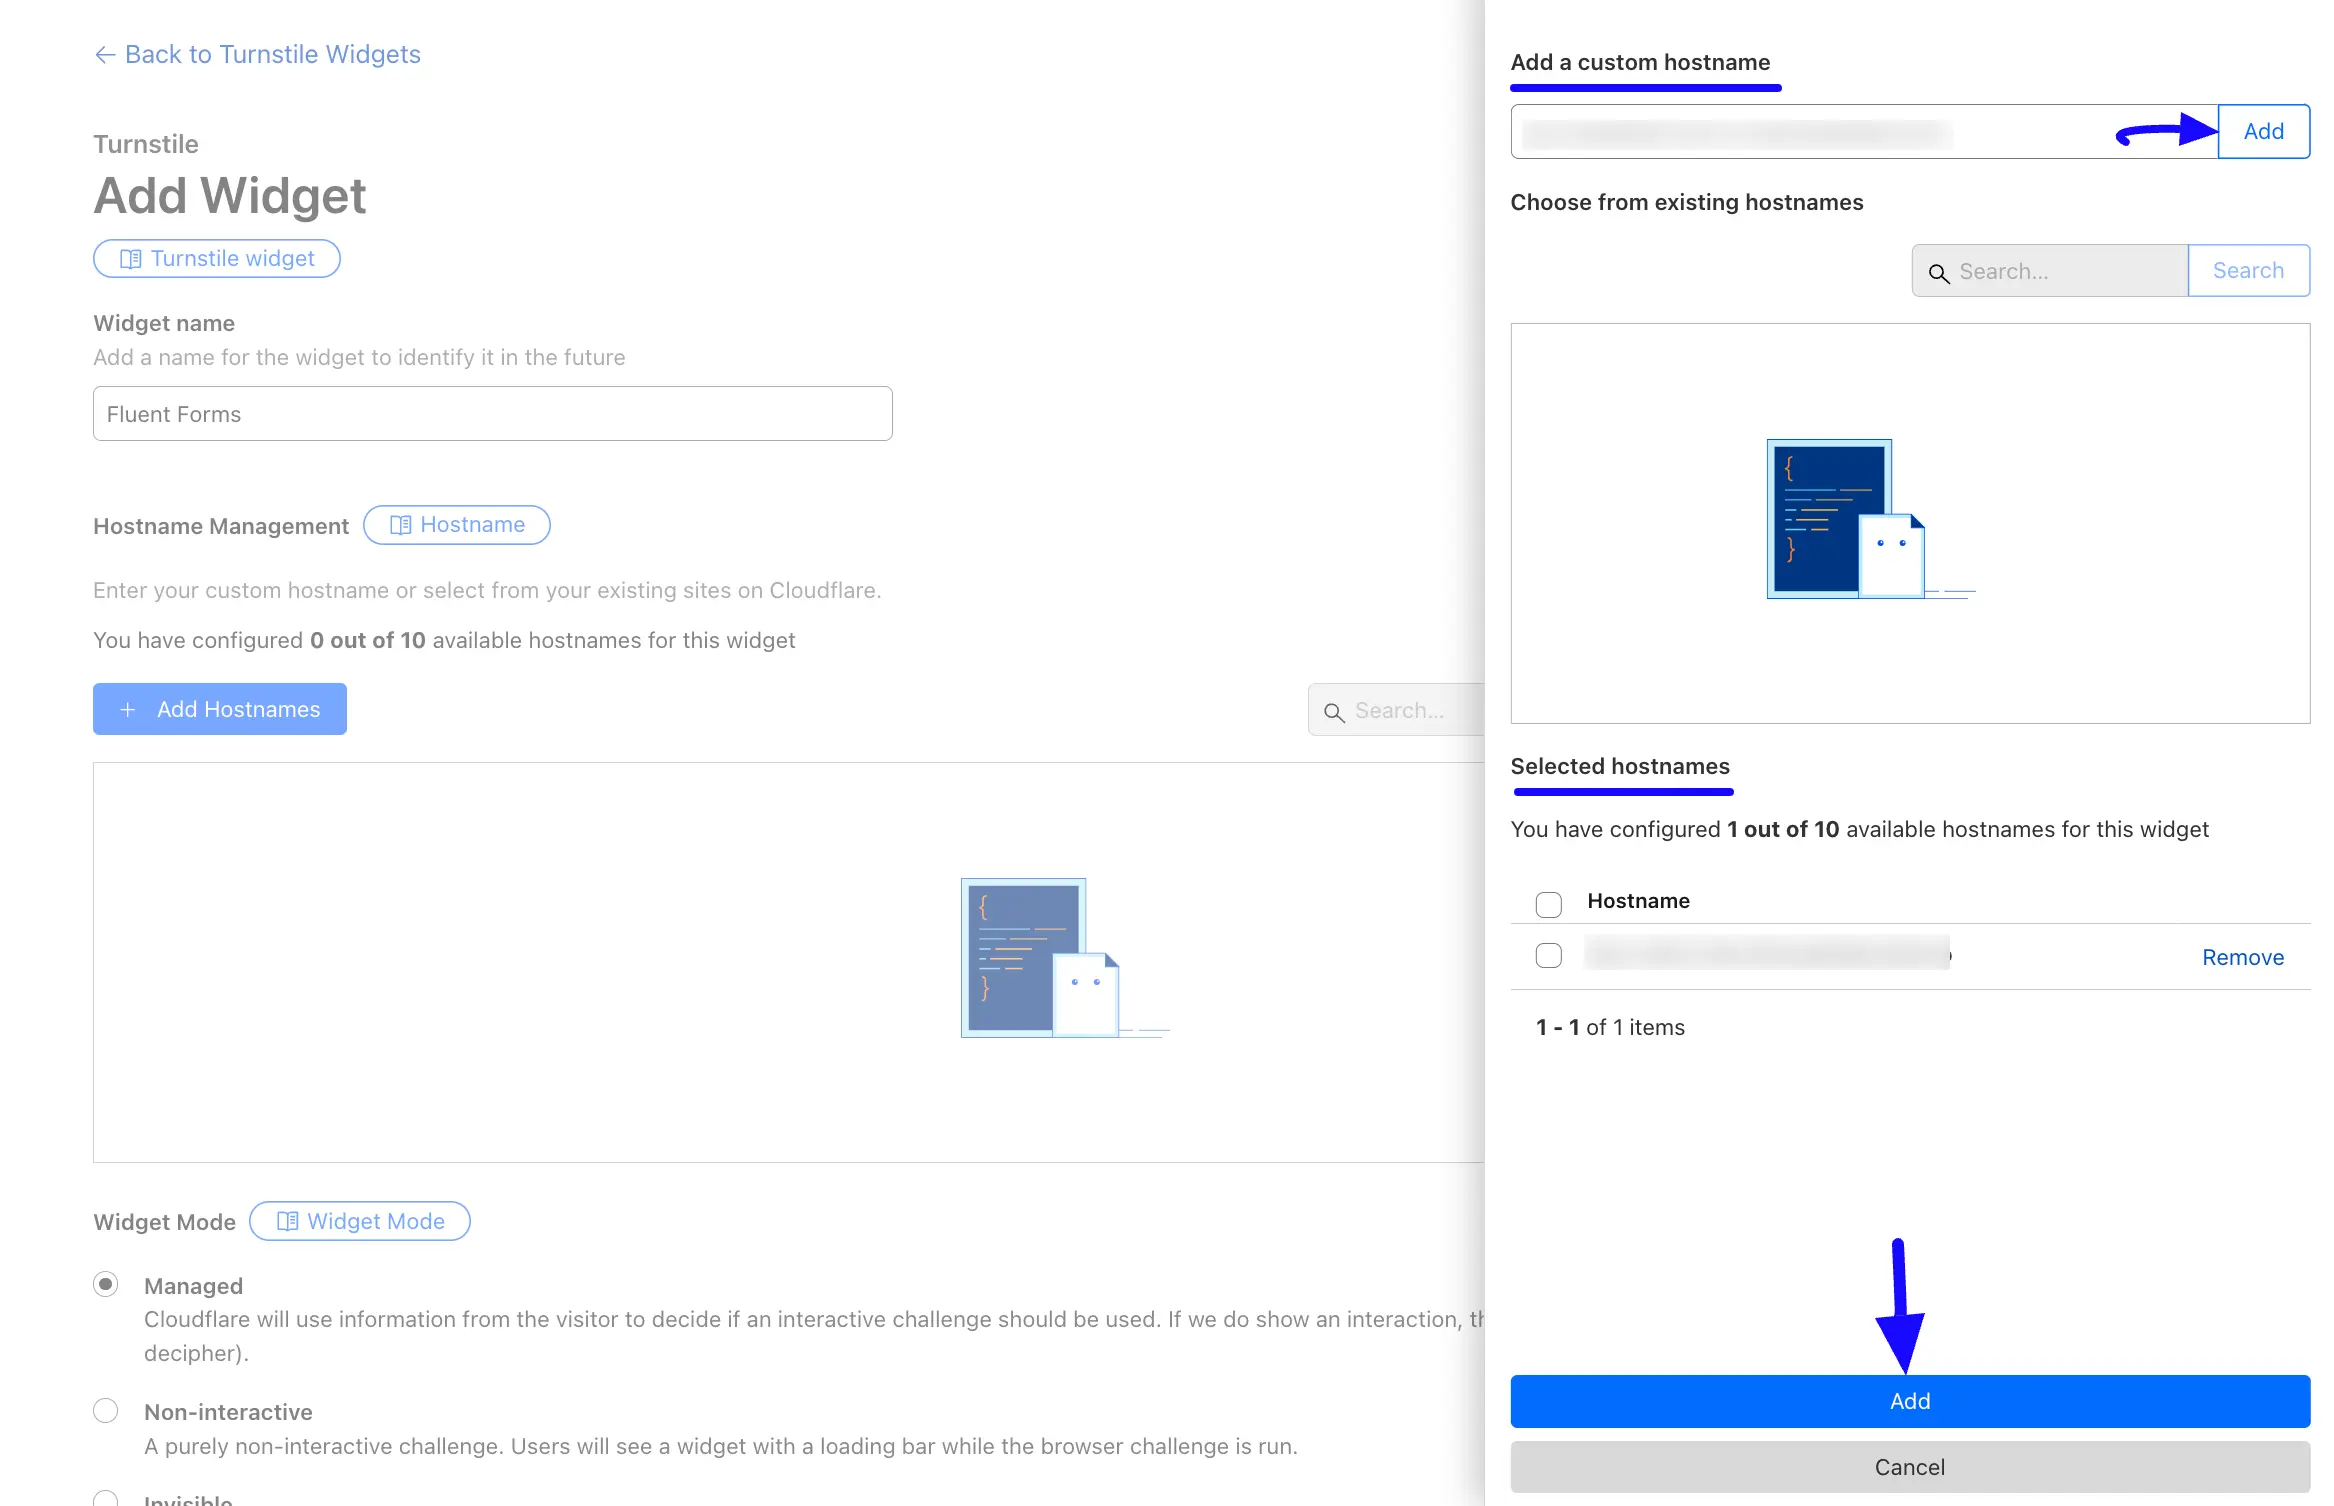
Now, you can choose your Widget Mode and Pre-clearance according to your preference.
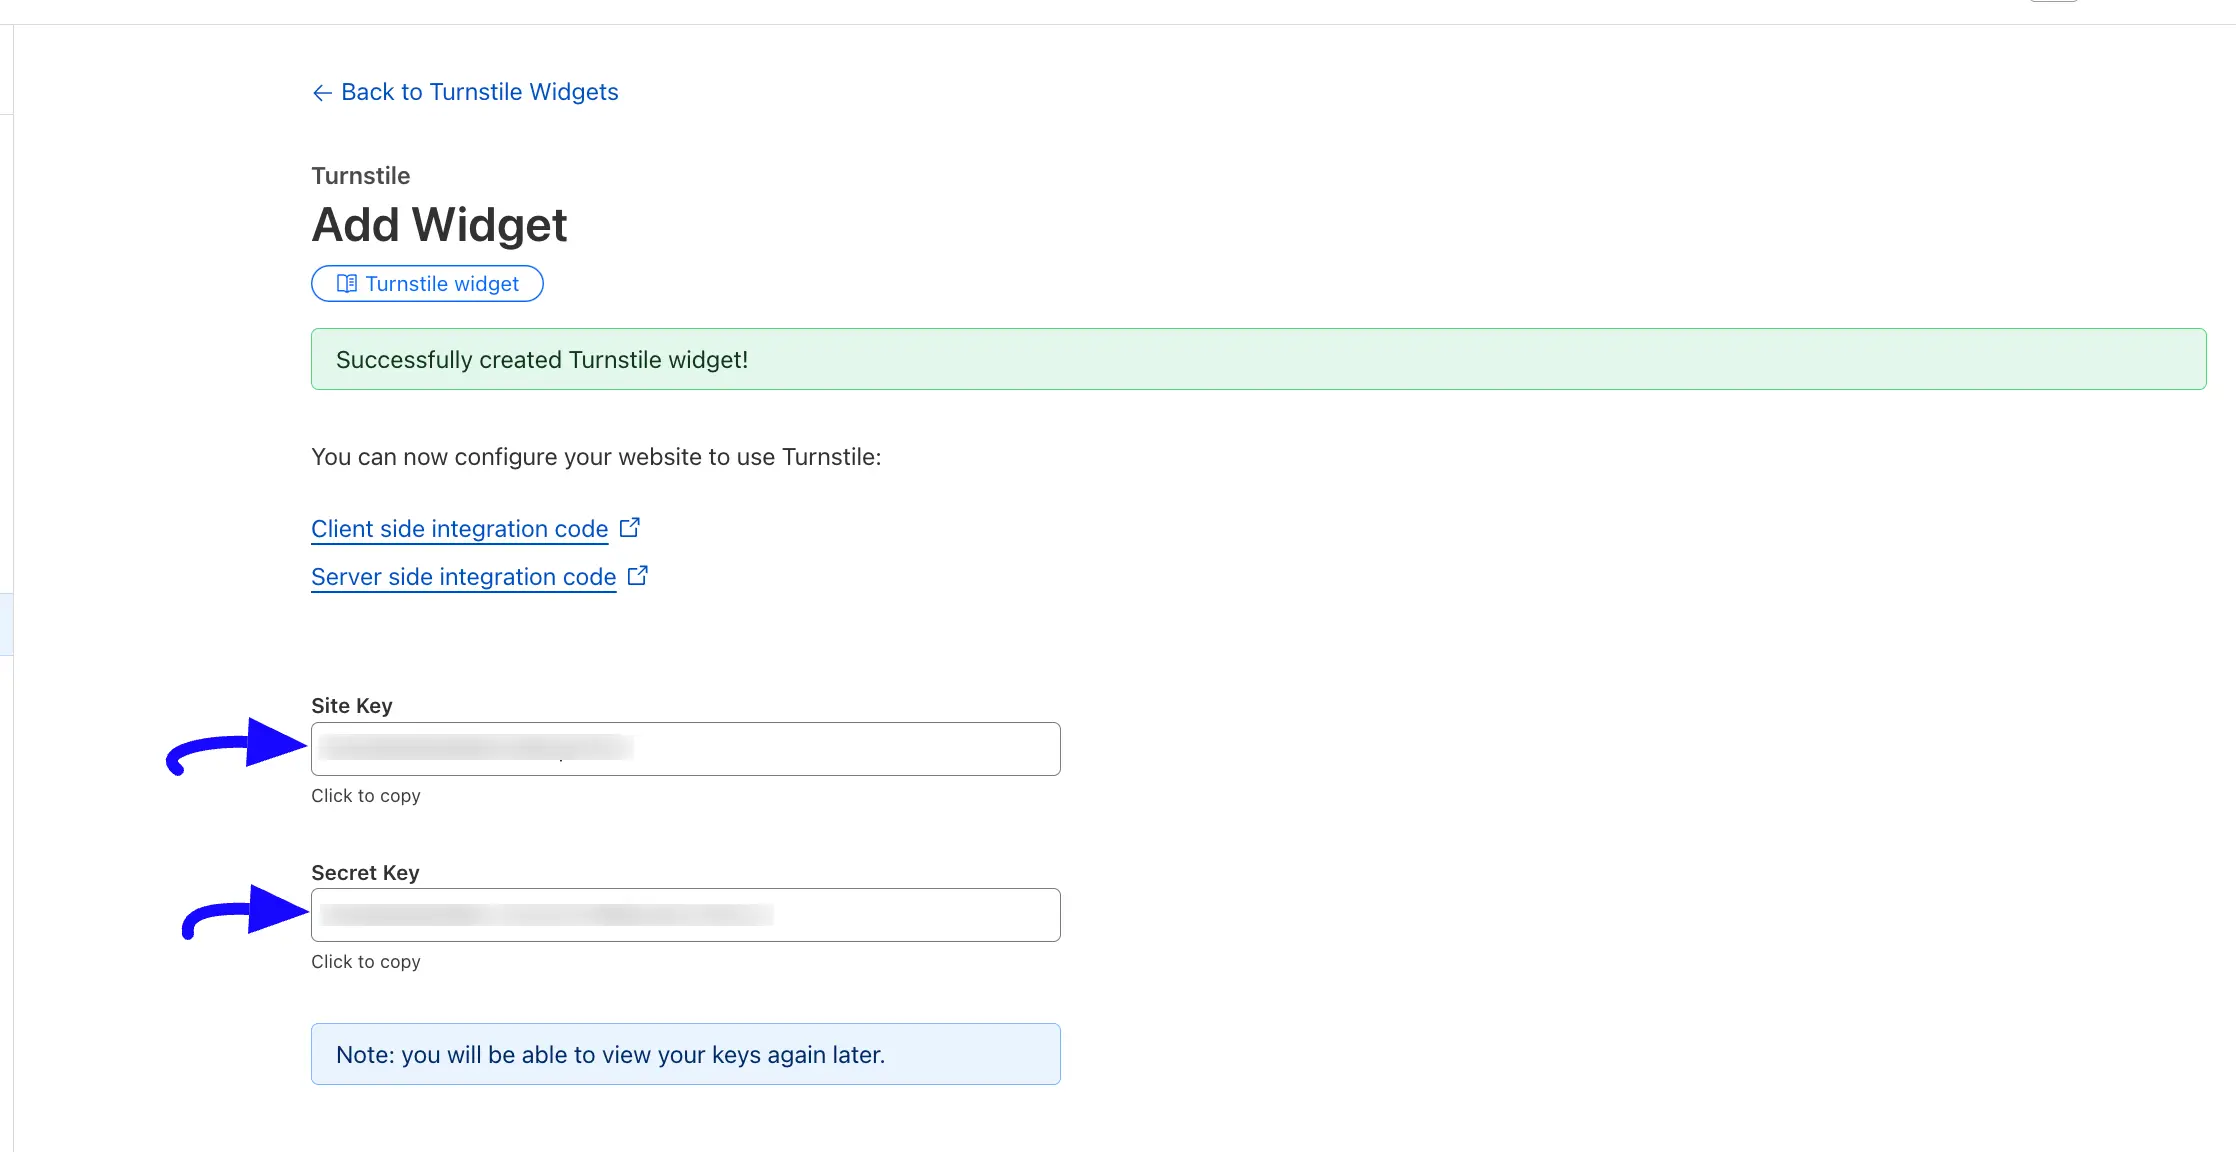
Once you are done, click the Create button, and the Site and Secret keys will be shown.
Here, you will get your desired Site key and Secret key. Simply, copy them by clicking the Site Key and Secret Key buttons.
Connecting Turnstile with Fluent Forms #
Return to the Global Settings from the FluentForms Navbar, open the Security tab from the left sidebar, and click the Turnstile.
Now, paste the Keys you copied from the Turnstile into the Site Key and Secret Key fields respectively.
Then, select the turnstile’s Appearance Mode and Theme according to your preference. Also, after providing the keys, a popup will appear to Verify their validity.
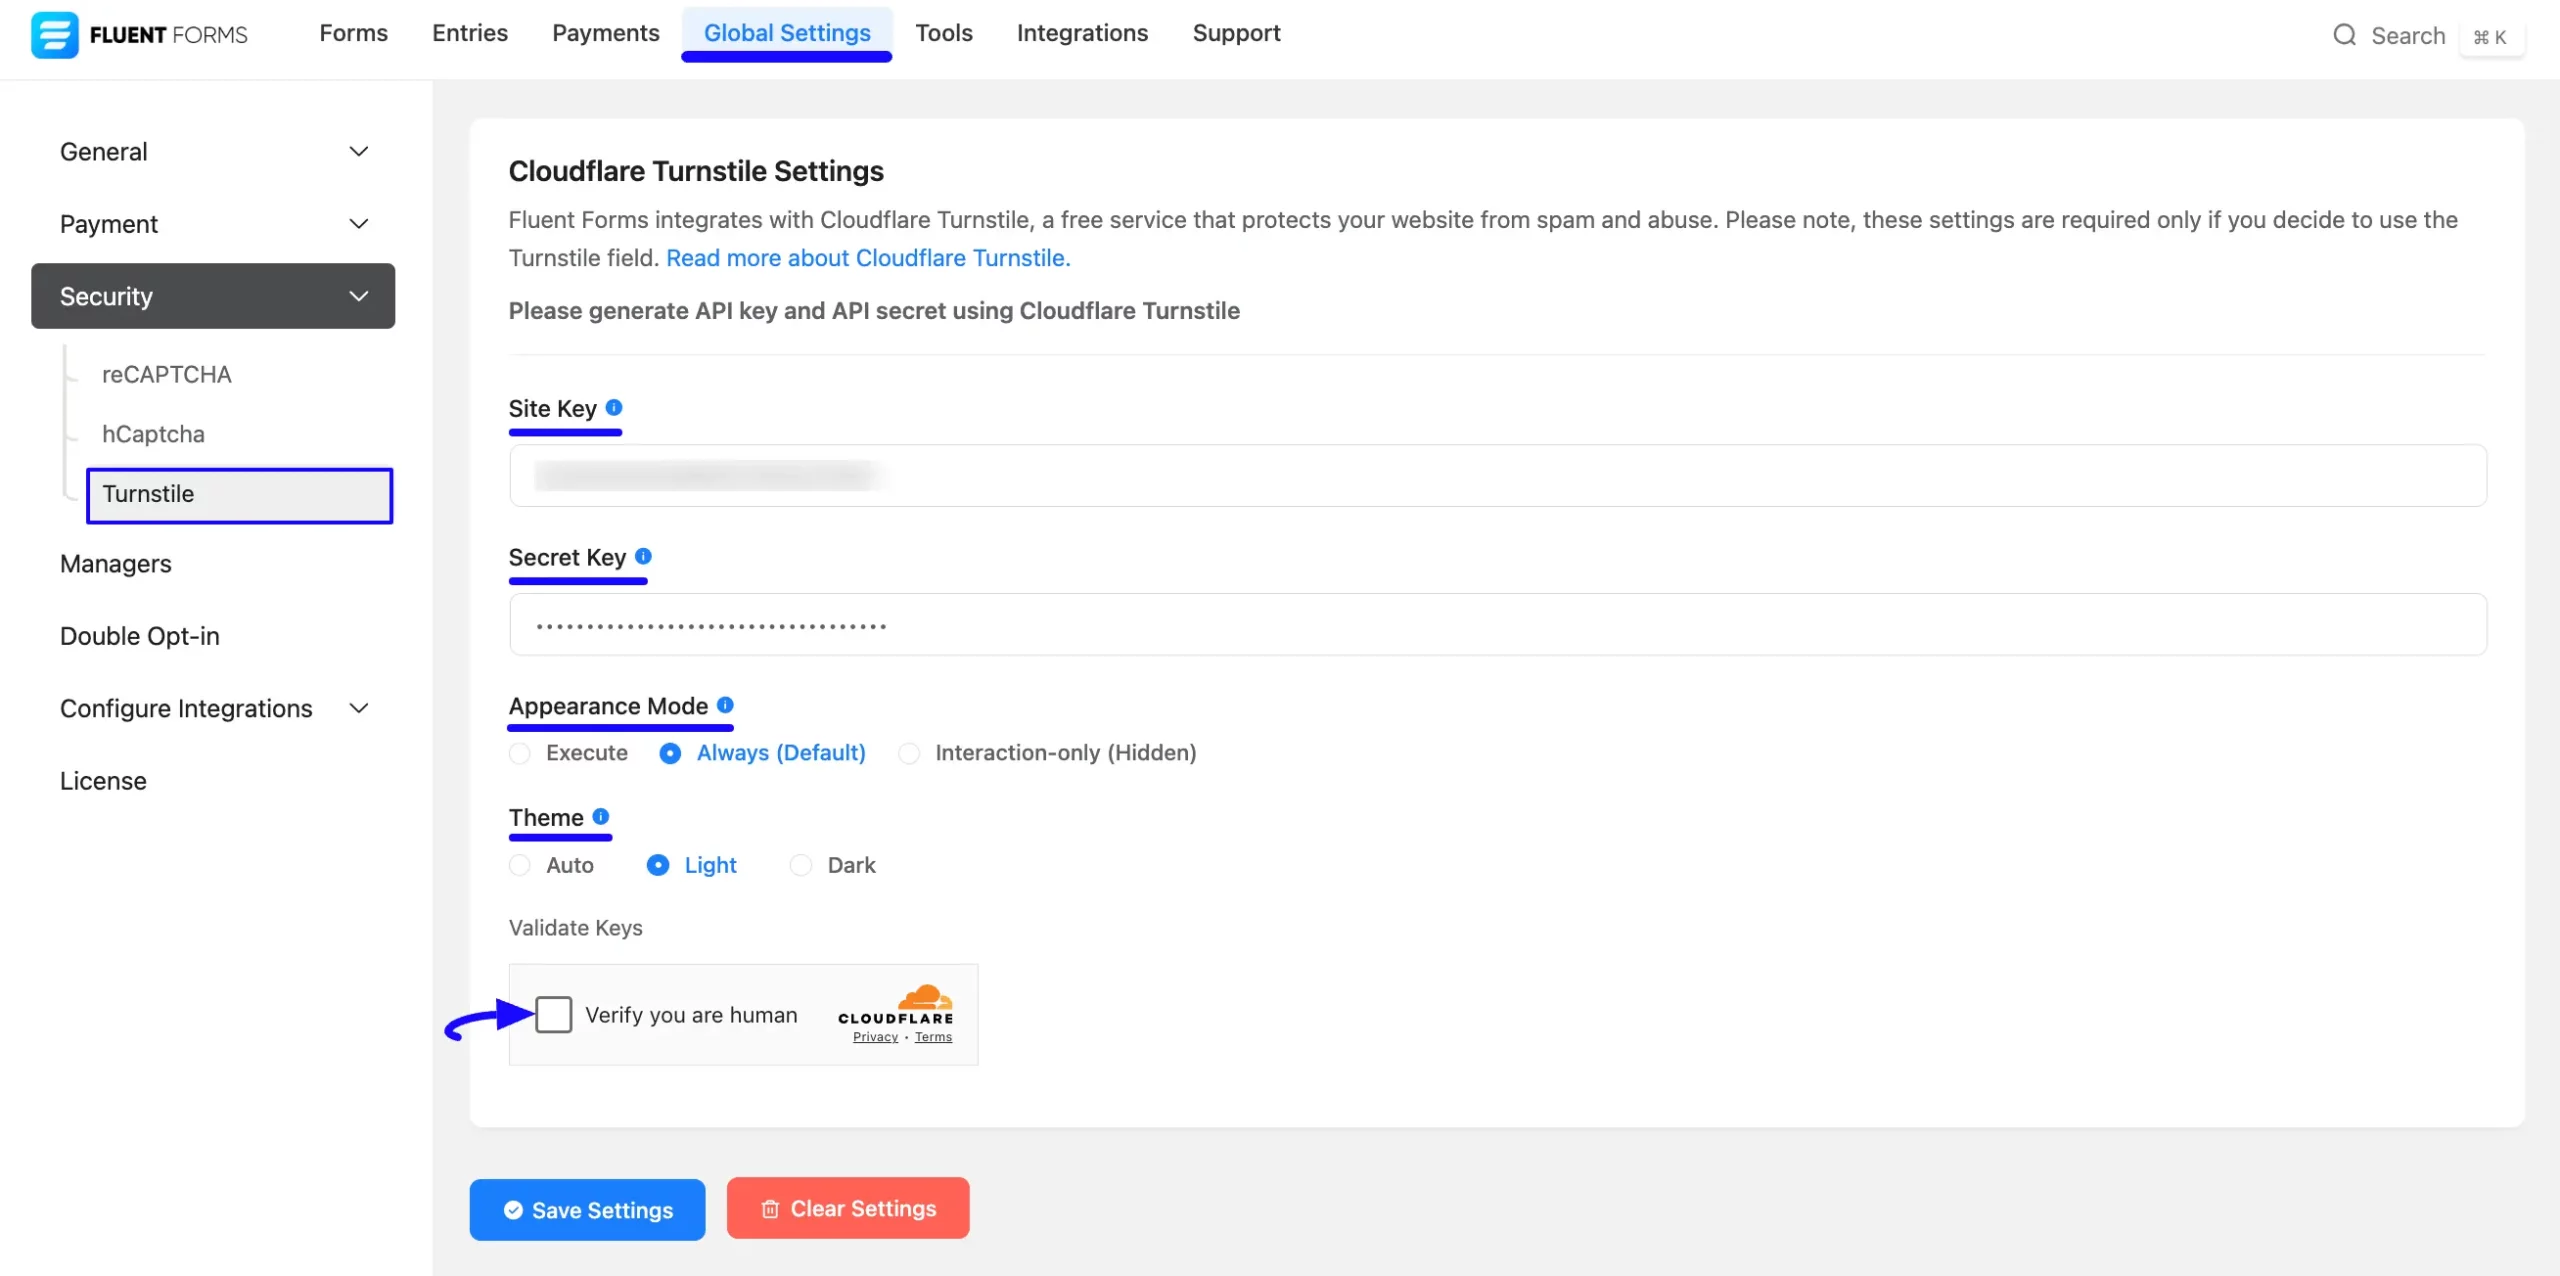
Once you have verified the keys, press the Save Settings button to make your Turnstile Integration functional.

Integrating Turnstile with Forms #
To learn the process of integrating the Turnstile in a specific form, follow the steps with screenshots below –
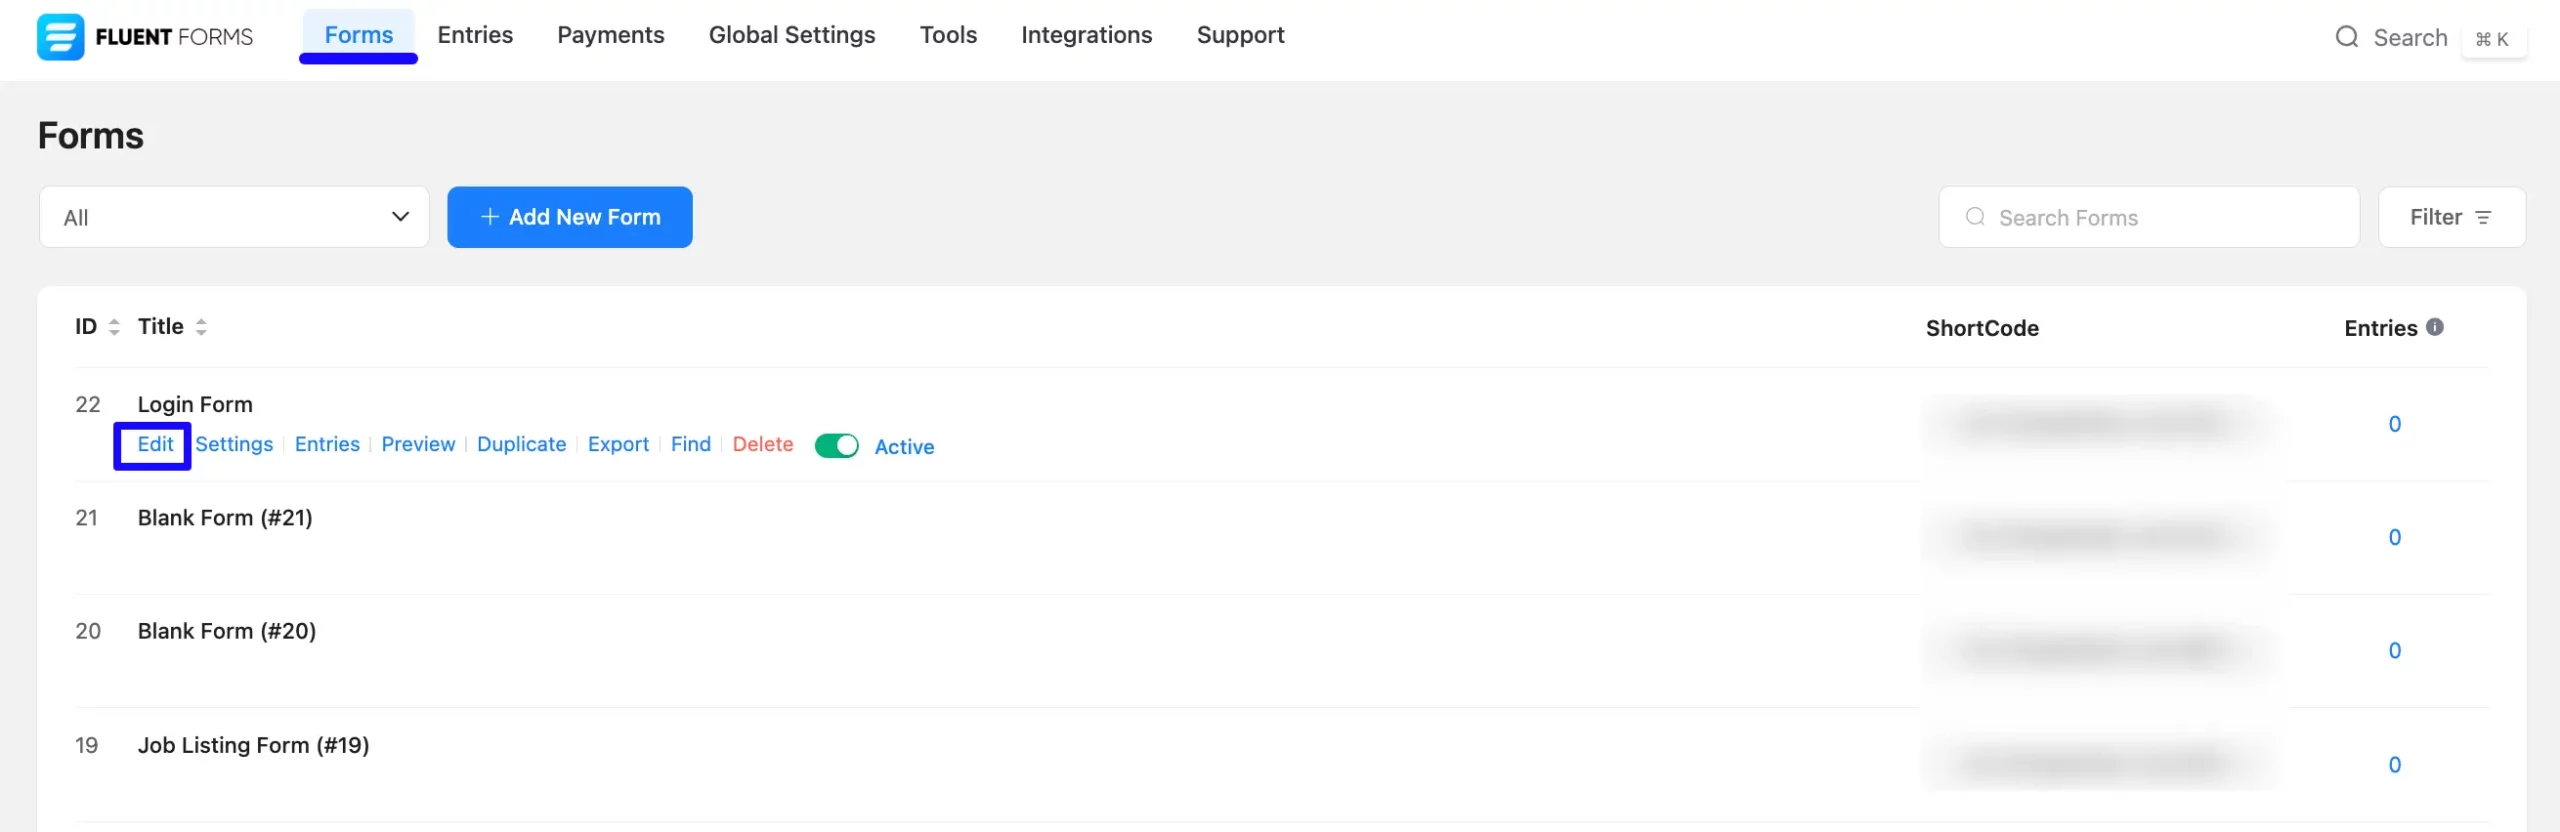
First, go to Forms from the top navbar, and open the Editor page of your desired form by clicking the Edit button where you want to set this Turnstile protection.
If you do not have any existing forms, read the Create a Form from Scratch or Create a Form using Templates documentation to create a new one.
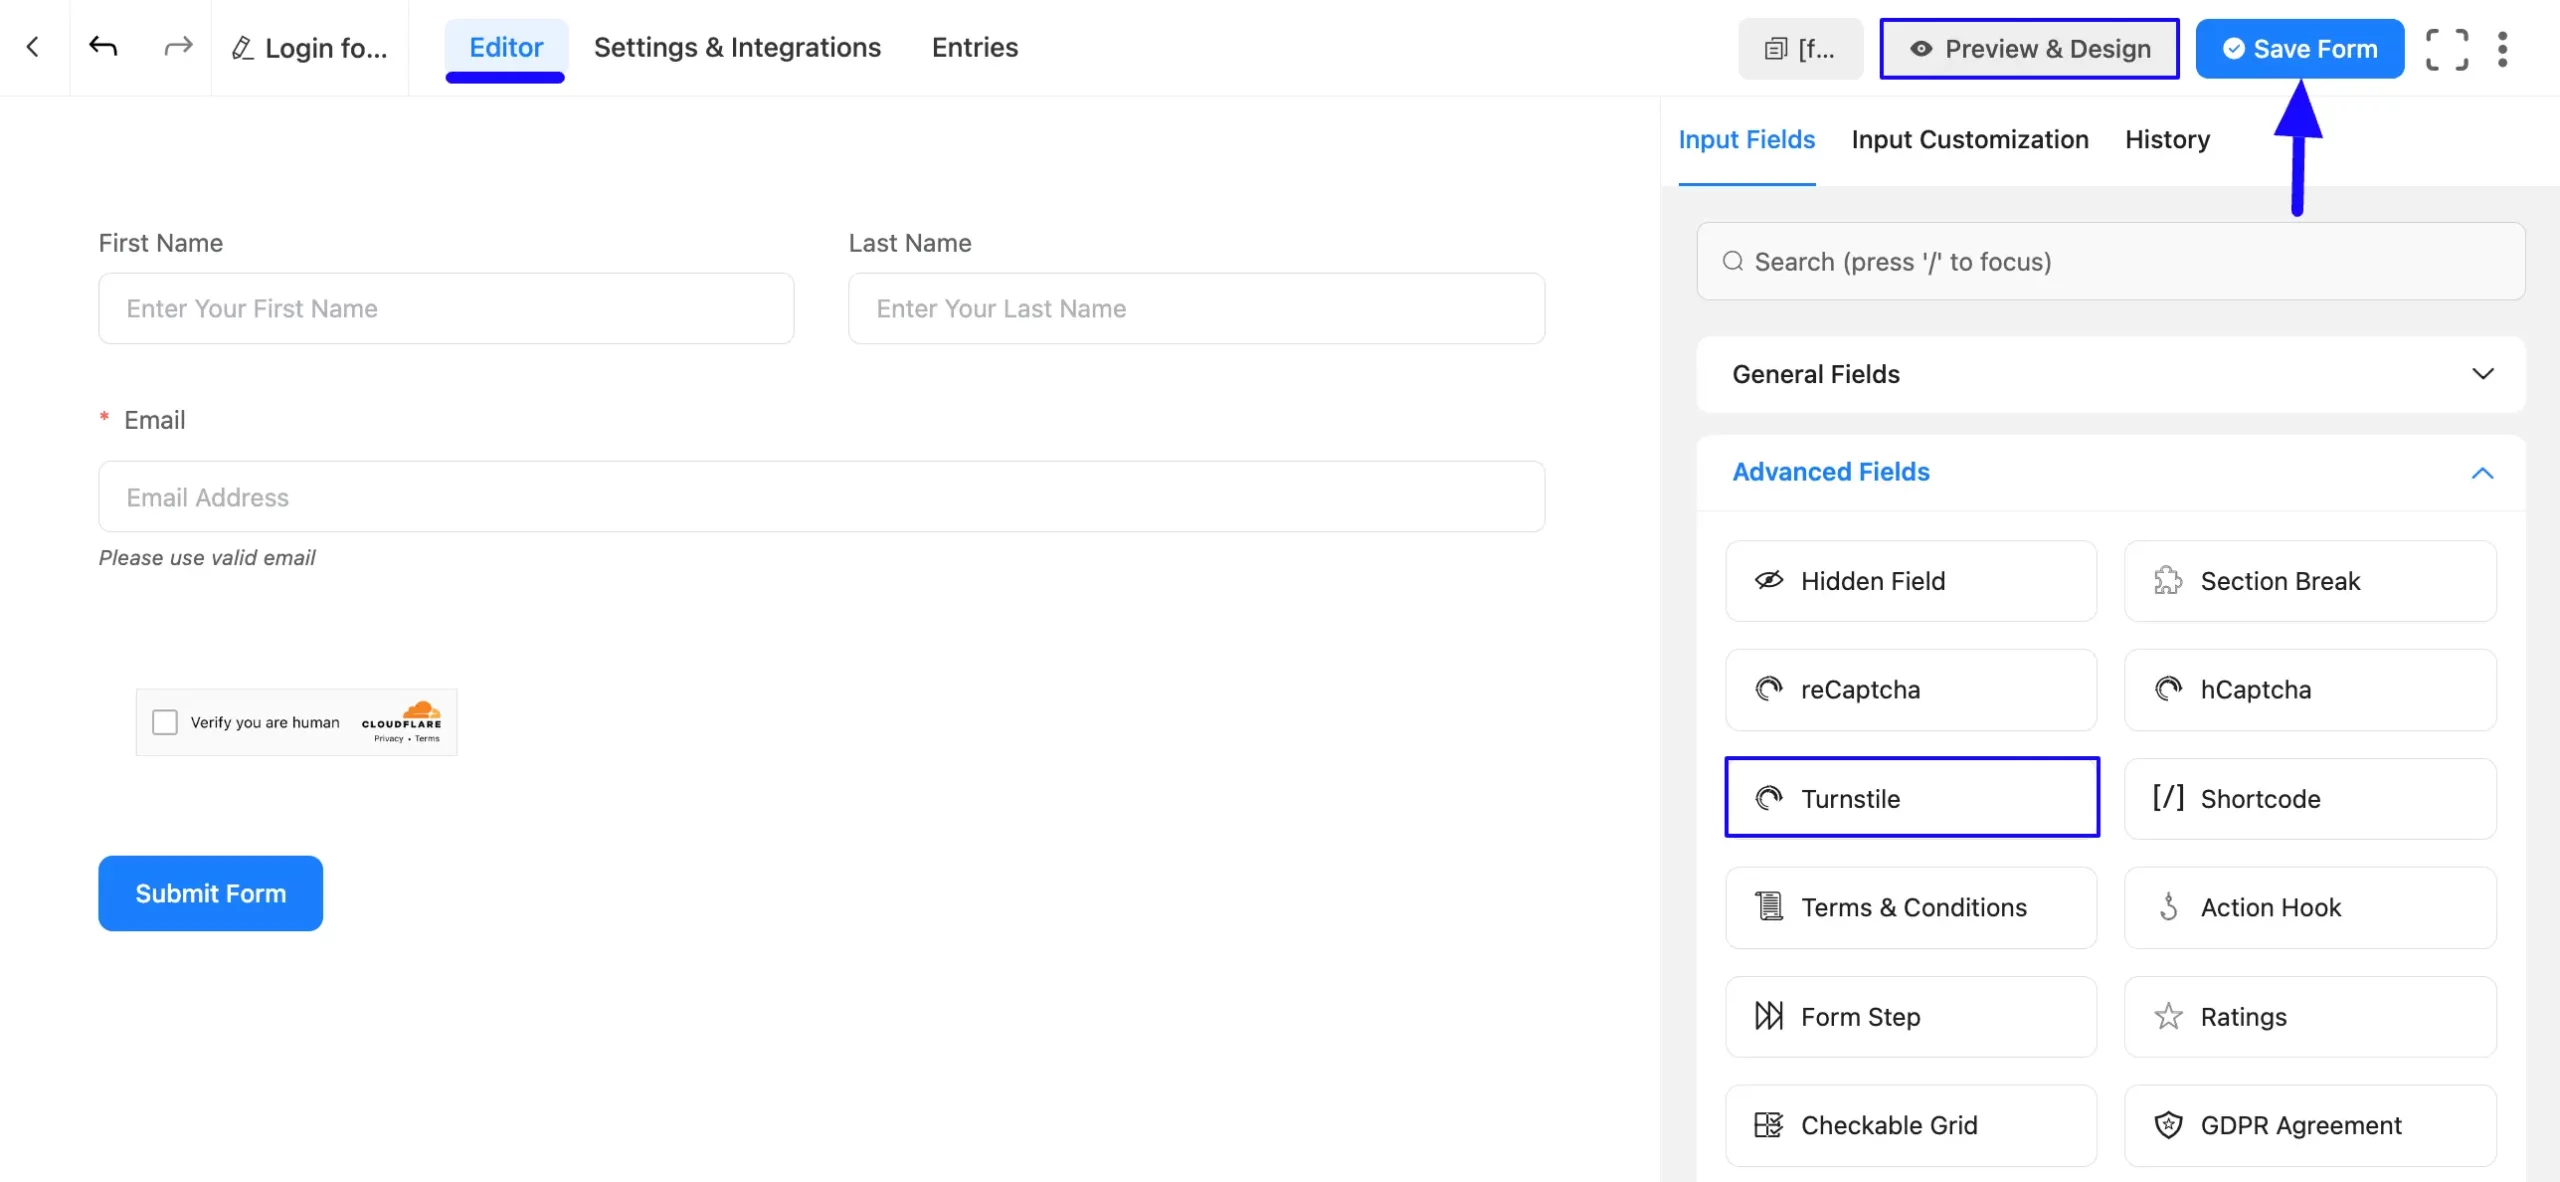
Once you are on the Editor page, go to the Input Fields on the right side, open the Advanced Fields dropdown list, and click the Turnstile input field.
Finally, click the Save Form button to integrate your configured Turnstile into this form.
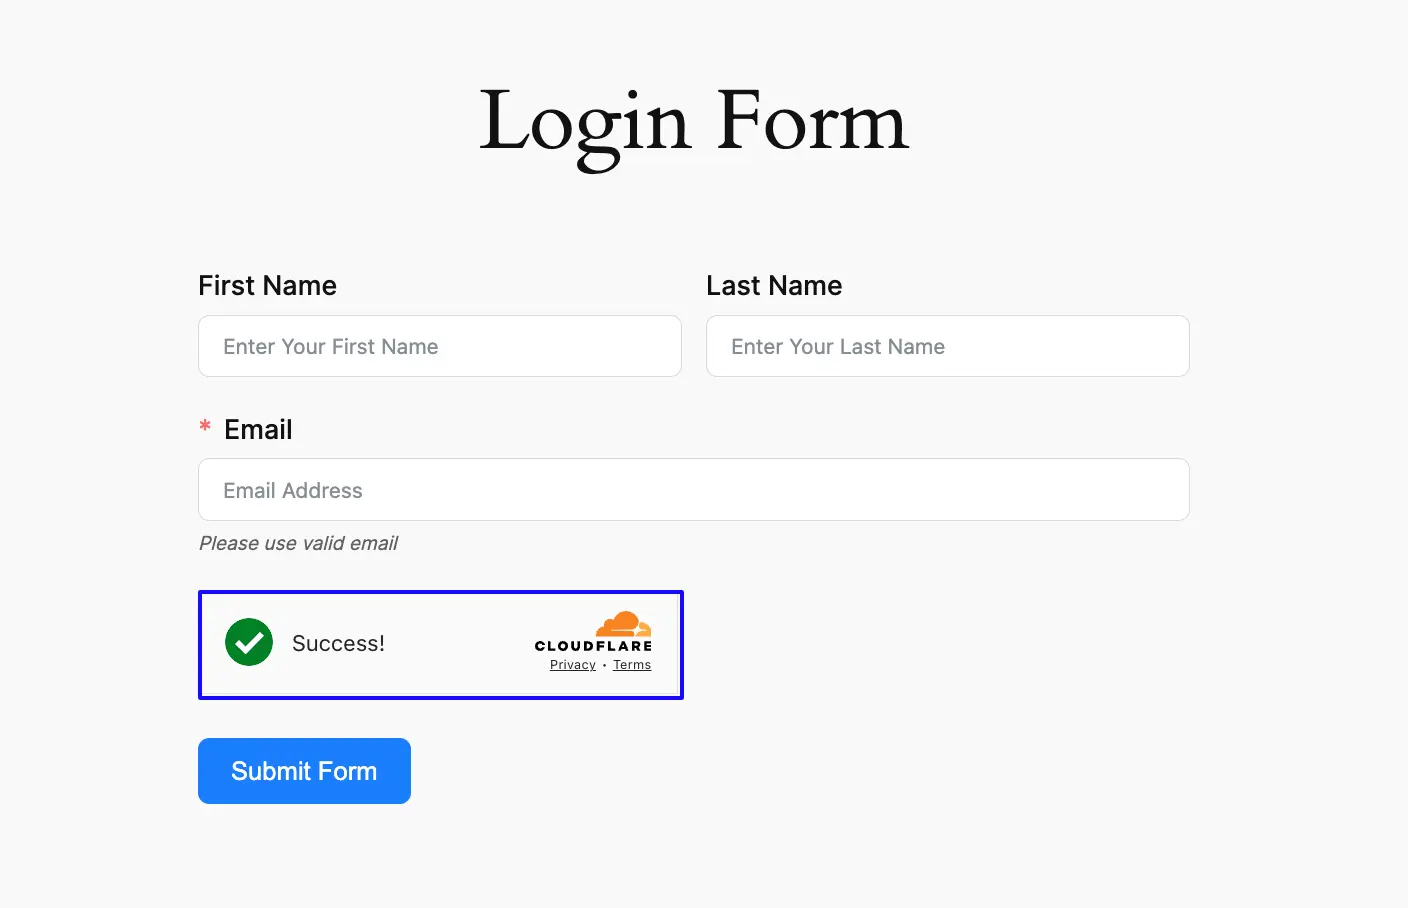
Here is the preview of the integrated Turnstile in a specific form.
If you have any further questions, concerns, or suggestions, please do not hesitate to contact our @support team. Thank you.


