
Using Fluent Forms, you can embed forms directly into your sidebar or footer as widgets without any coding knowledge. This enables you to particularly display forms on your site, making it easier for visitors to engage with your content.
This guide will walk you through the step-by-step process of adding your form as a widget in your WordPress sidebar or footer.
Access WordPress Widget Settings #
To access Widget Settings, first, you need to create a form that you want to use.
If you do not have any existing forms, read Create a Form from Scratch or Create a Form using Templates documentation to create a new one.
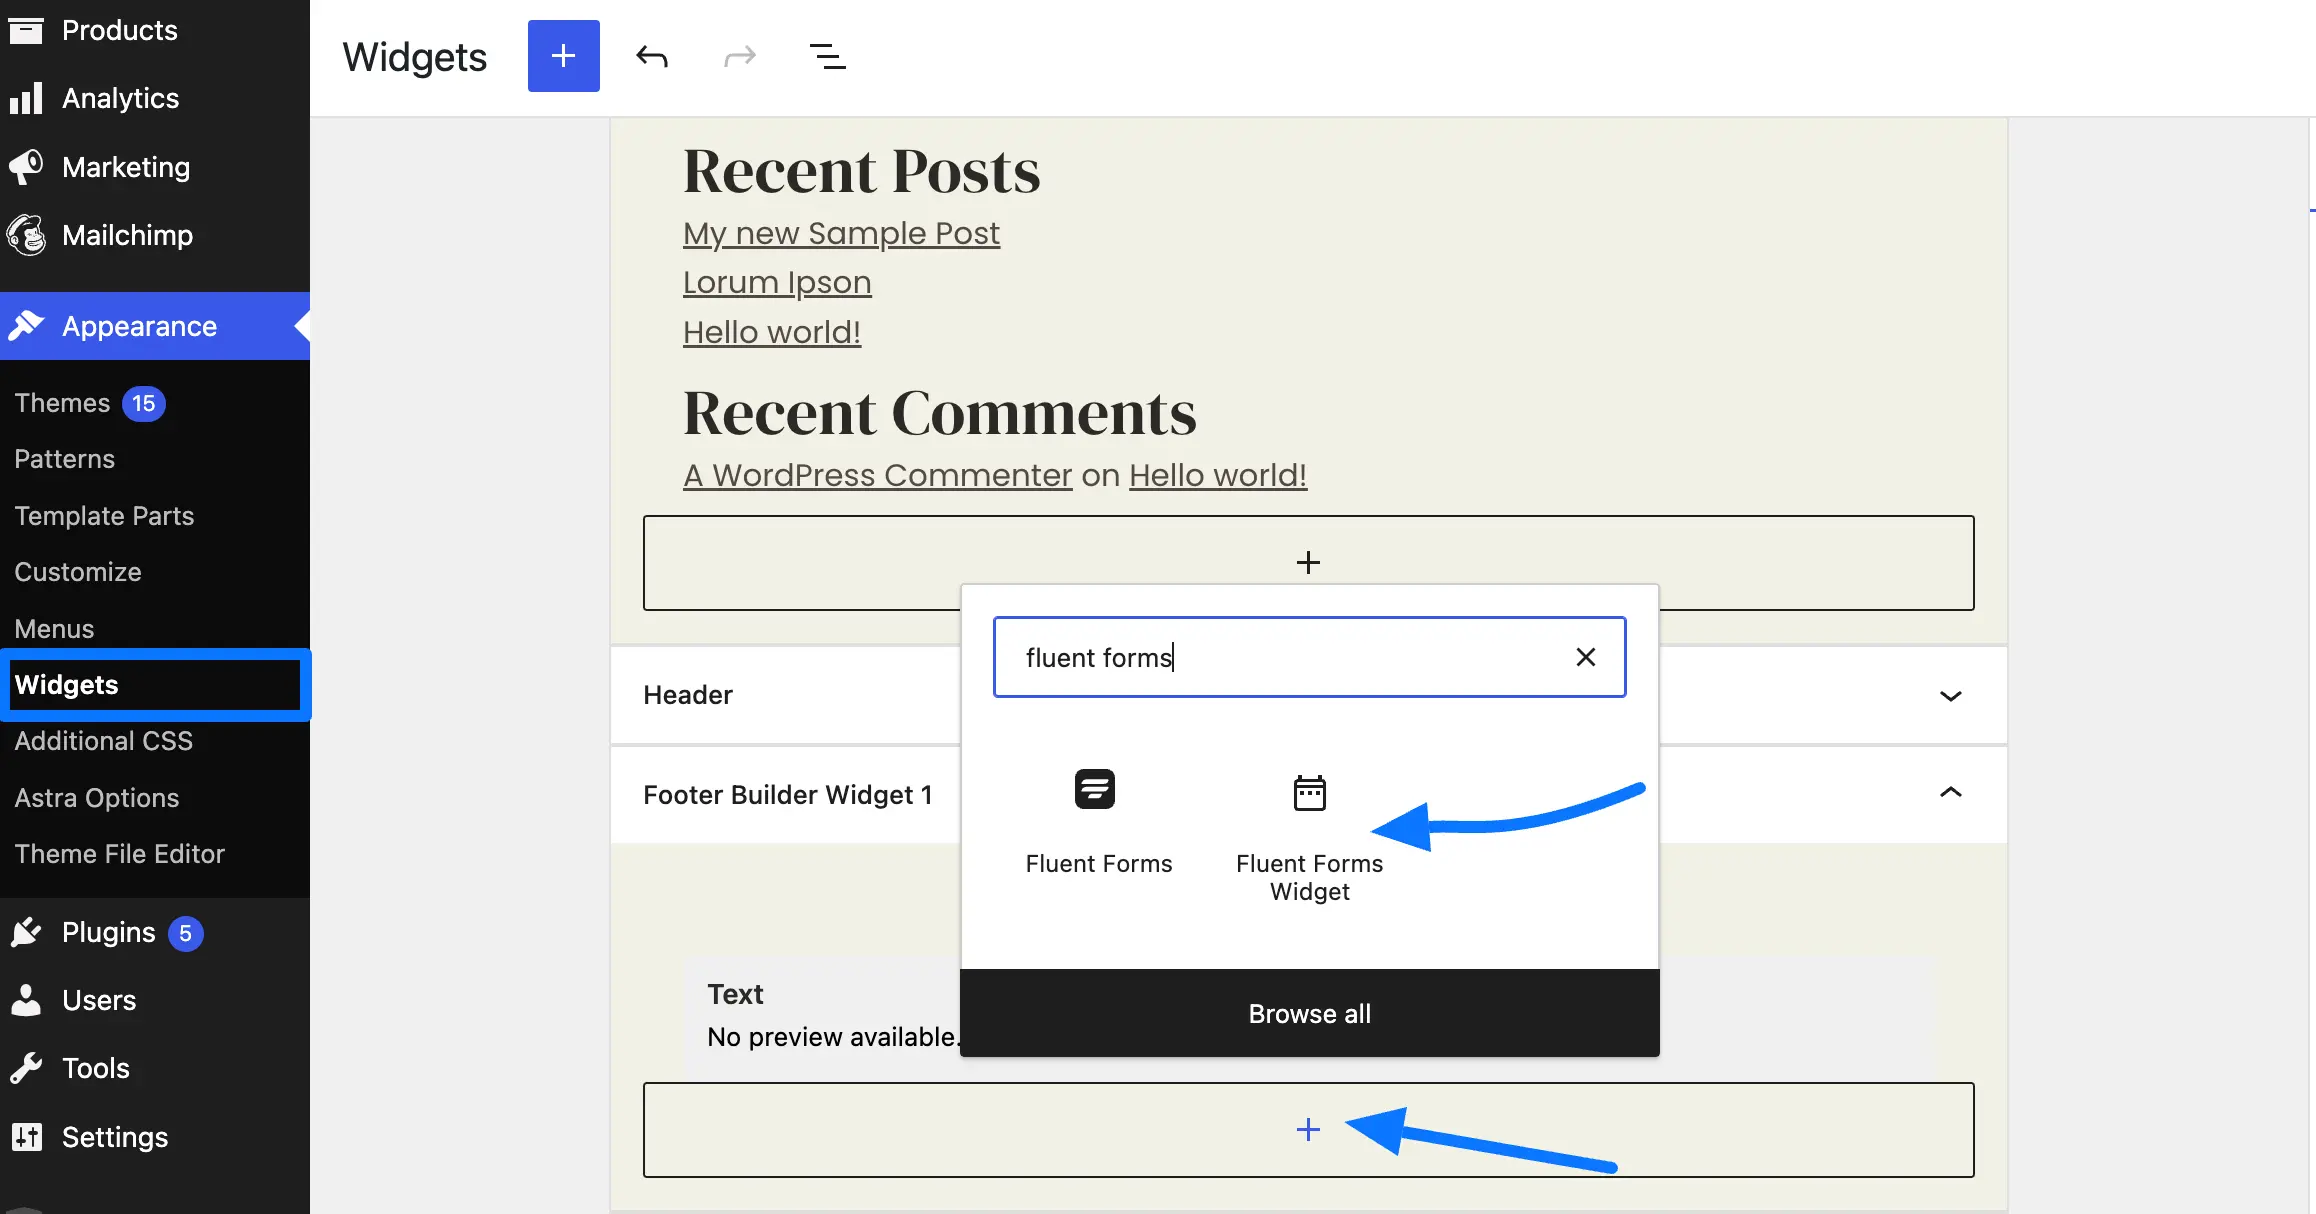
Now, navigate to your WordPress Dashboard. Hover over the Appearance menu and click the Widget section. Now select the section where you want to add your form Sidebar or Footer.
After that, click on the Plus (+) Icon. A popup will appear. In the search box, type Fluent Forms. You will see the Fluent Forms Widget. Just click on it.
Configure the Widget #
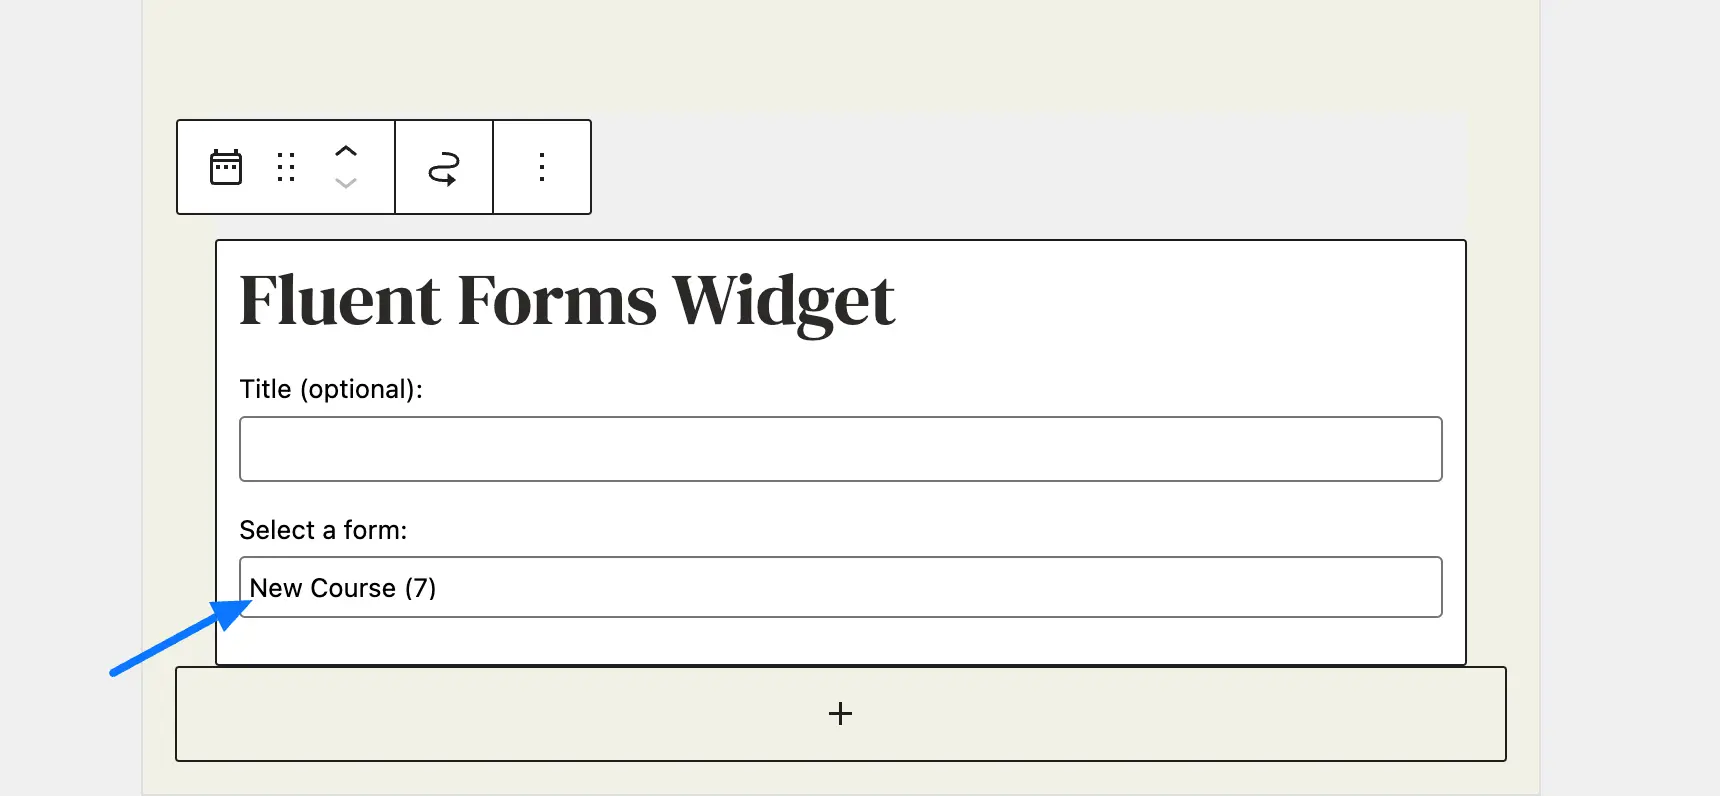
Here, you can add your Fluent Forms Widget Title. Then, choose a Form that you want to display from the dropdown options. Once you have chosen your form, click Save or Update to apply the changes.
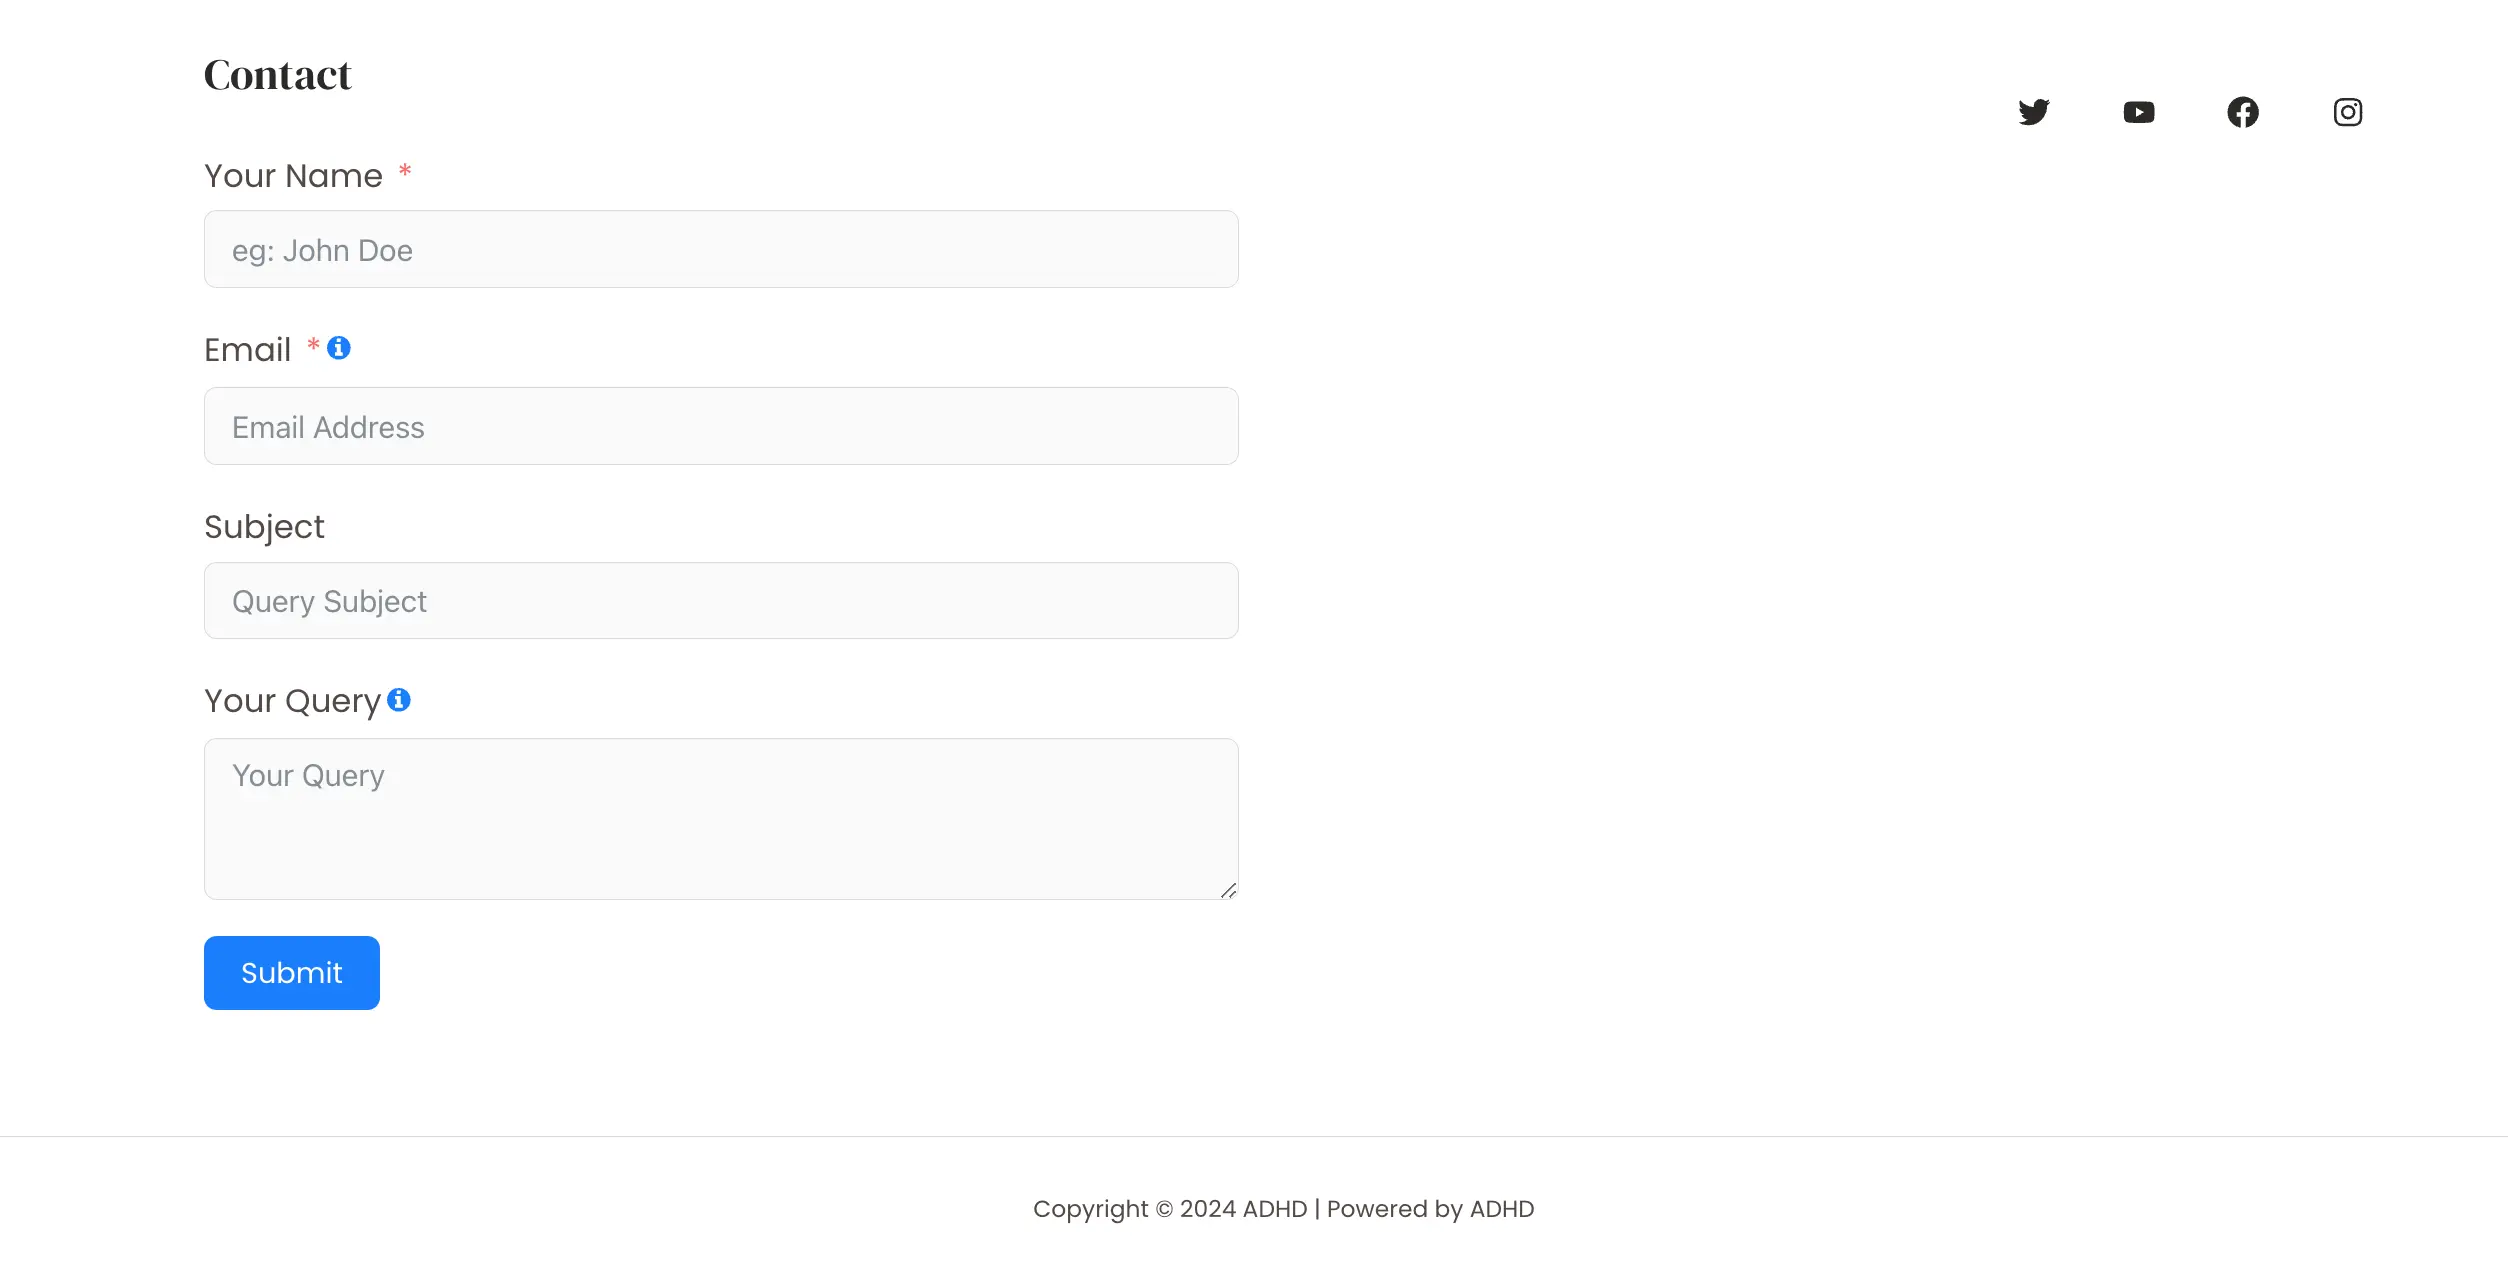
Preview the Form #
Go to your website’s public view. You’ll see your selected form now showing up in the sidebar or footer, ready for visitors to interact with.
You can now easily add forms to your WordPress sidebar or footer. If you have any further questions, concerns, or suggestions, please do not hesitate to contact our support team. Thank you.


