The PDF Module in Fluent Form is an amazing feature that allows you to export form entries as PDF files. It is easy to save, share, and manage submissions.
This guide will show you how to export an entry as a PDF with no hassle.
Install and Activate the PDF Generator Plugin #
You need to install the Fluent Forms PDF Generator extension to enable the PDF export feature.
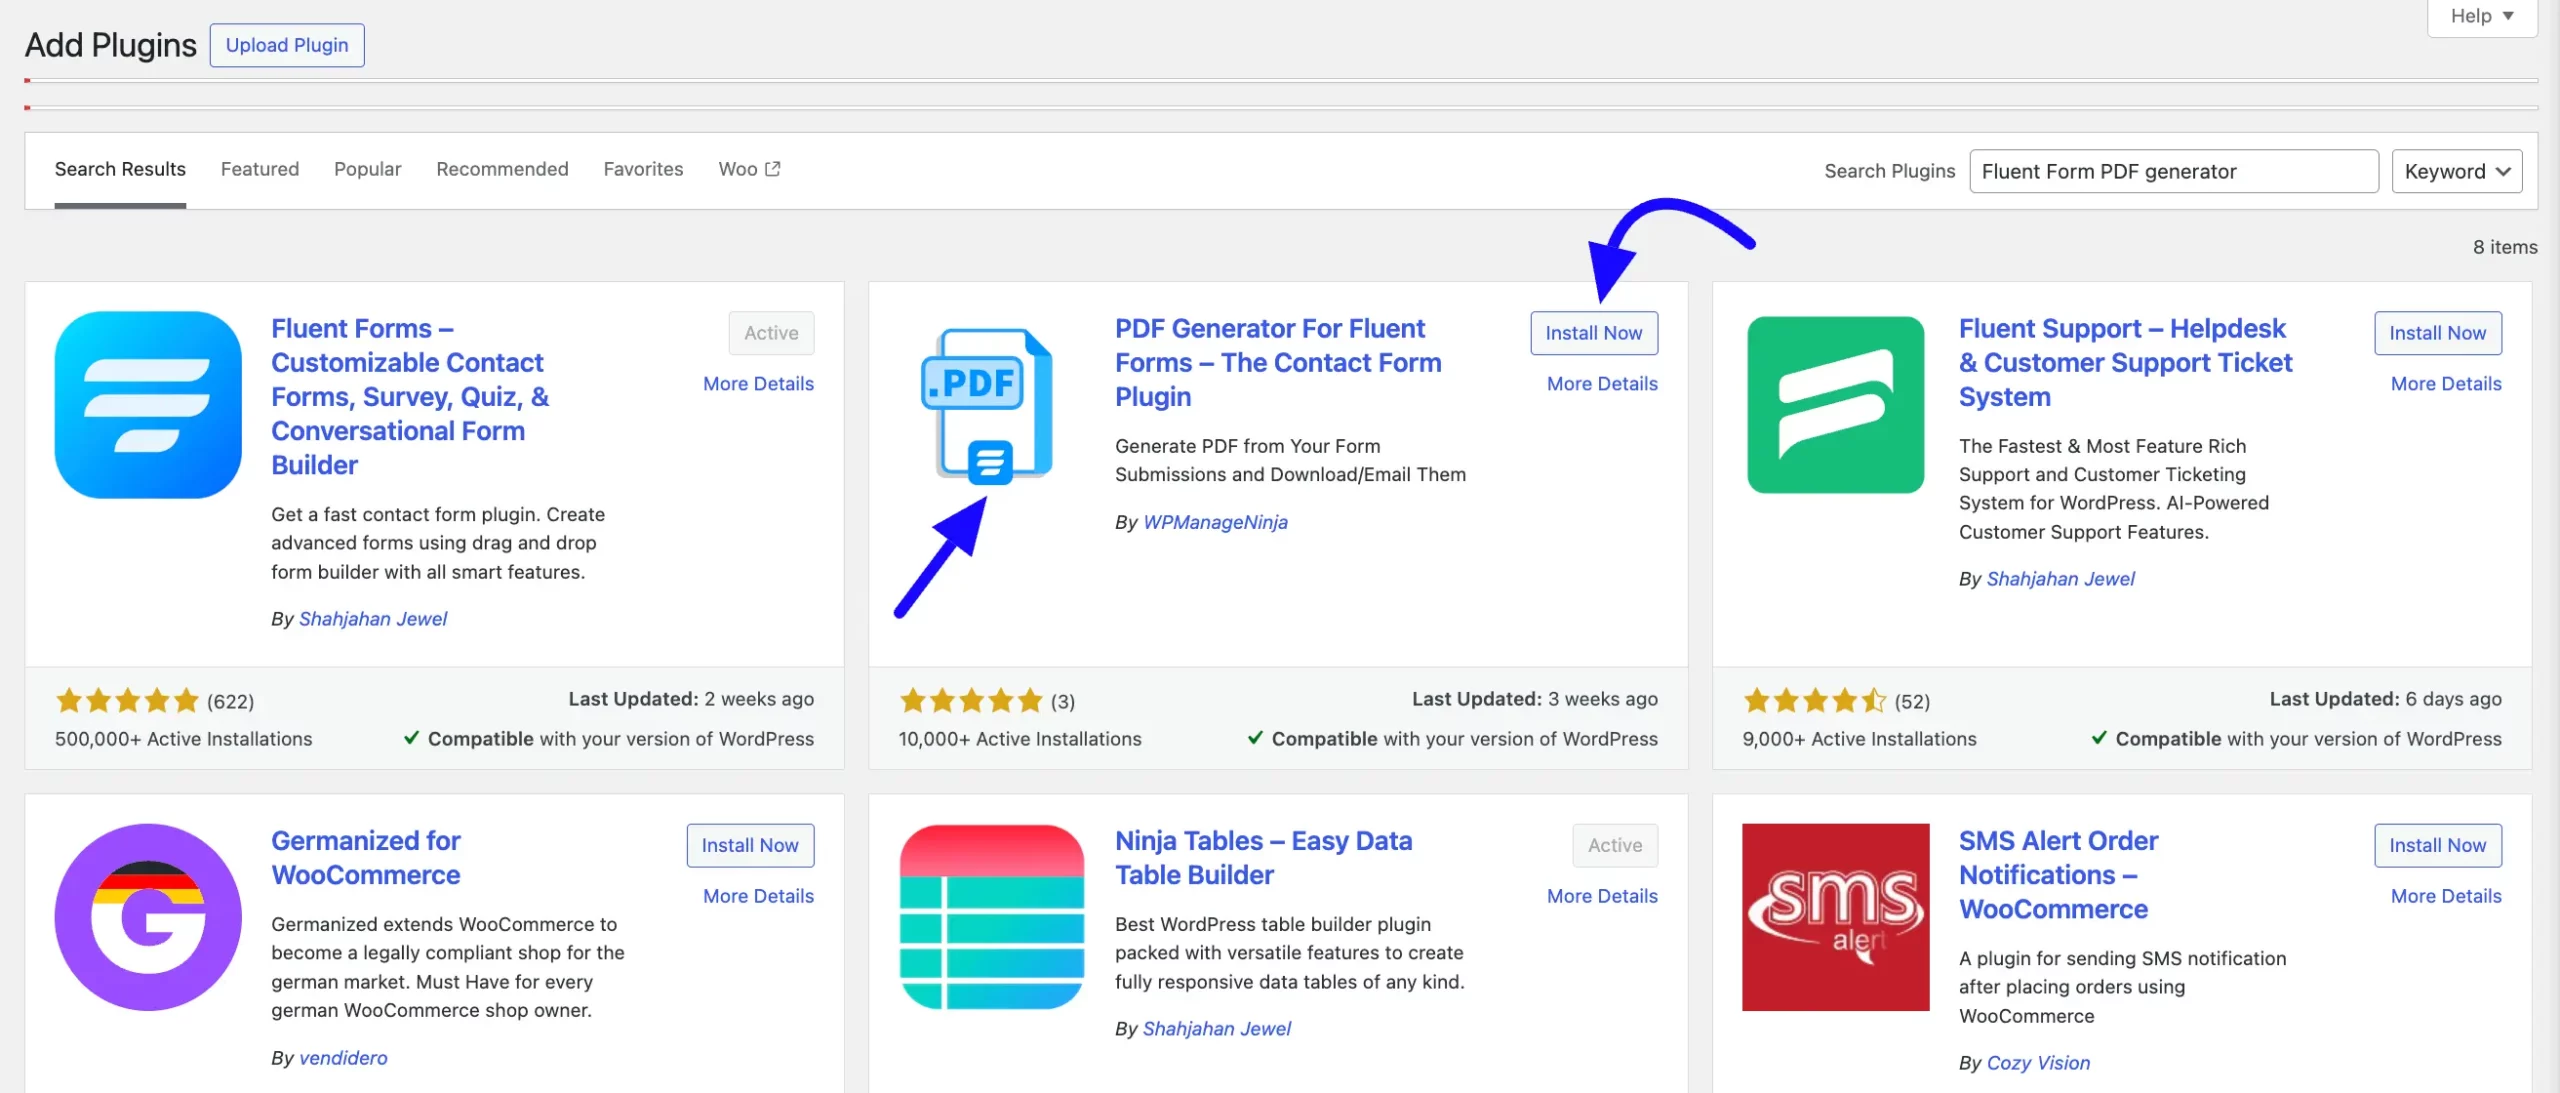
First, navigate to your WordPress Dashboard, go to Plugins, and click Add New Plugin. Here, search for the Fluent Forms PDF generator.
Now, install and activate the plugin on your website. A new tab ( Fluent Forms PDF) will be added to the modules section.
It will automatically install the add-on from wp.org.
Install and Activate the PDF Feed #
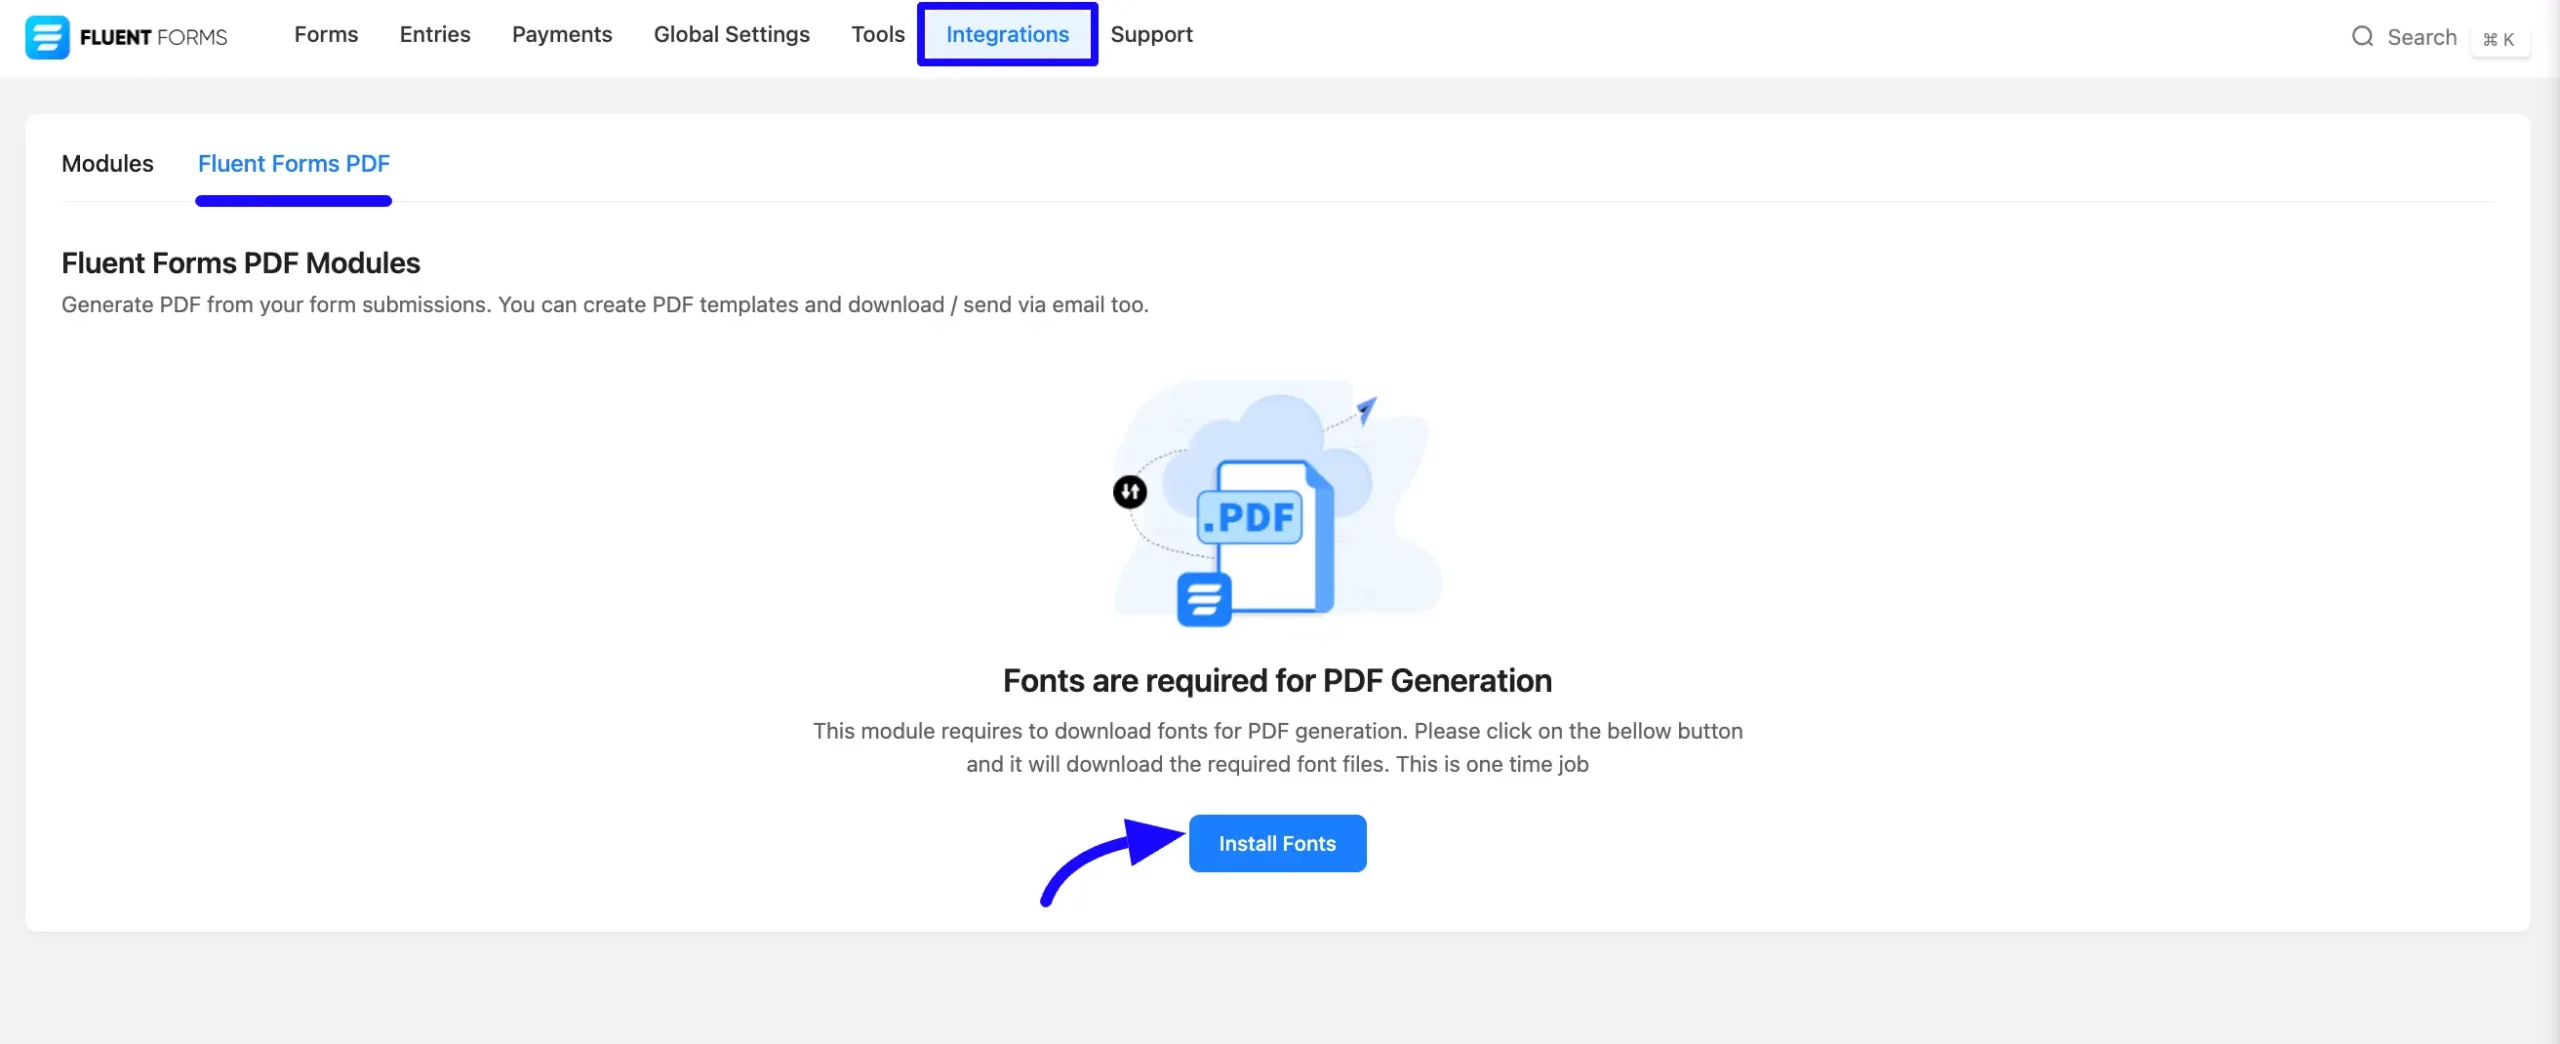
After activating the PDF generator plugin, click the Integration section from the top menu bar. Then, select the Fluent Form PDF section. Here, you will see the Fluent Form PDF Modules. Now, click Install Fonts to set up the required fonts and elements.
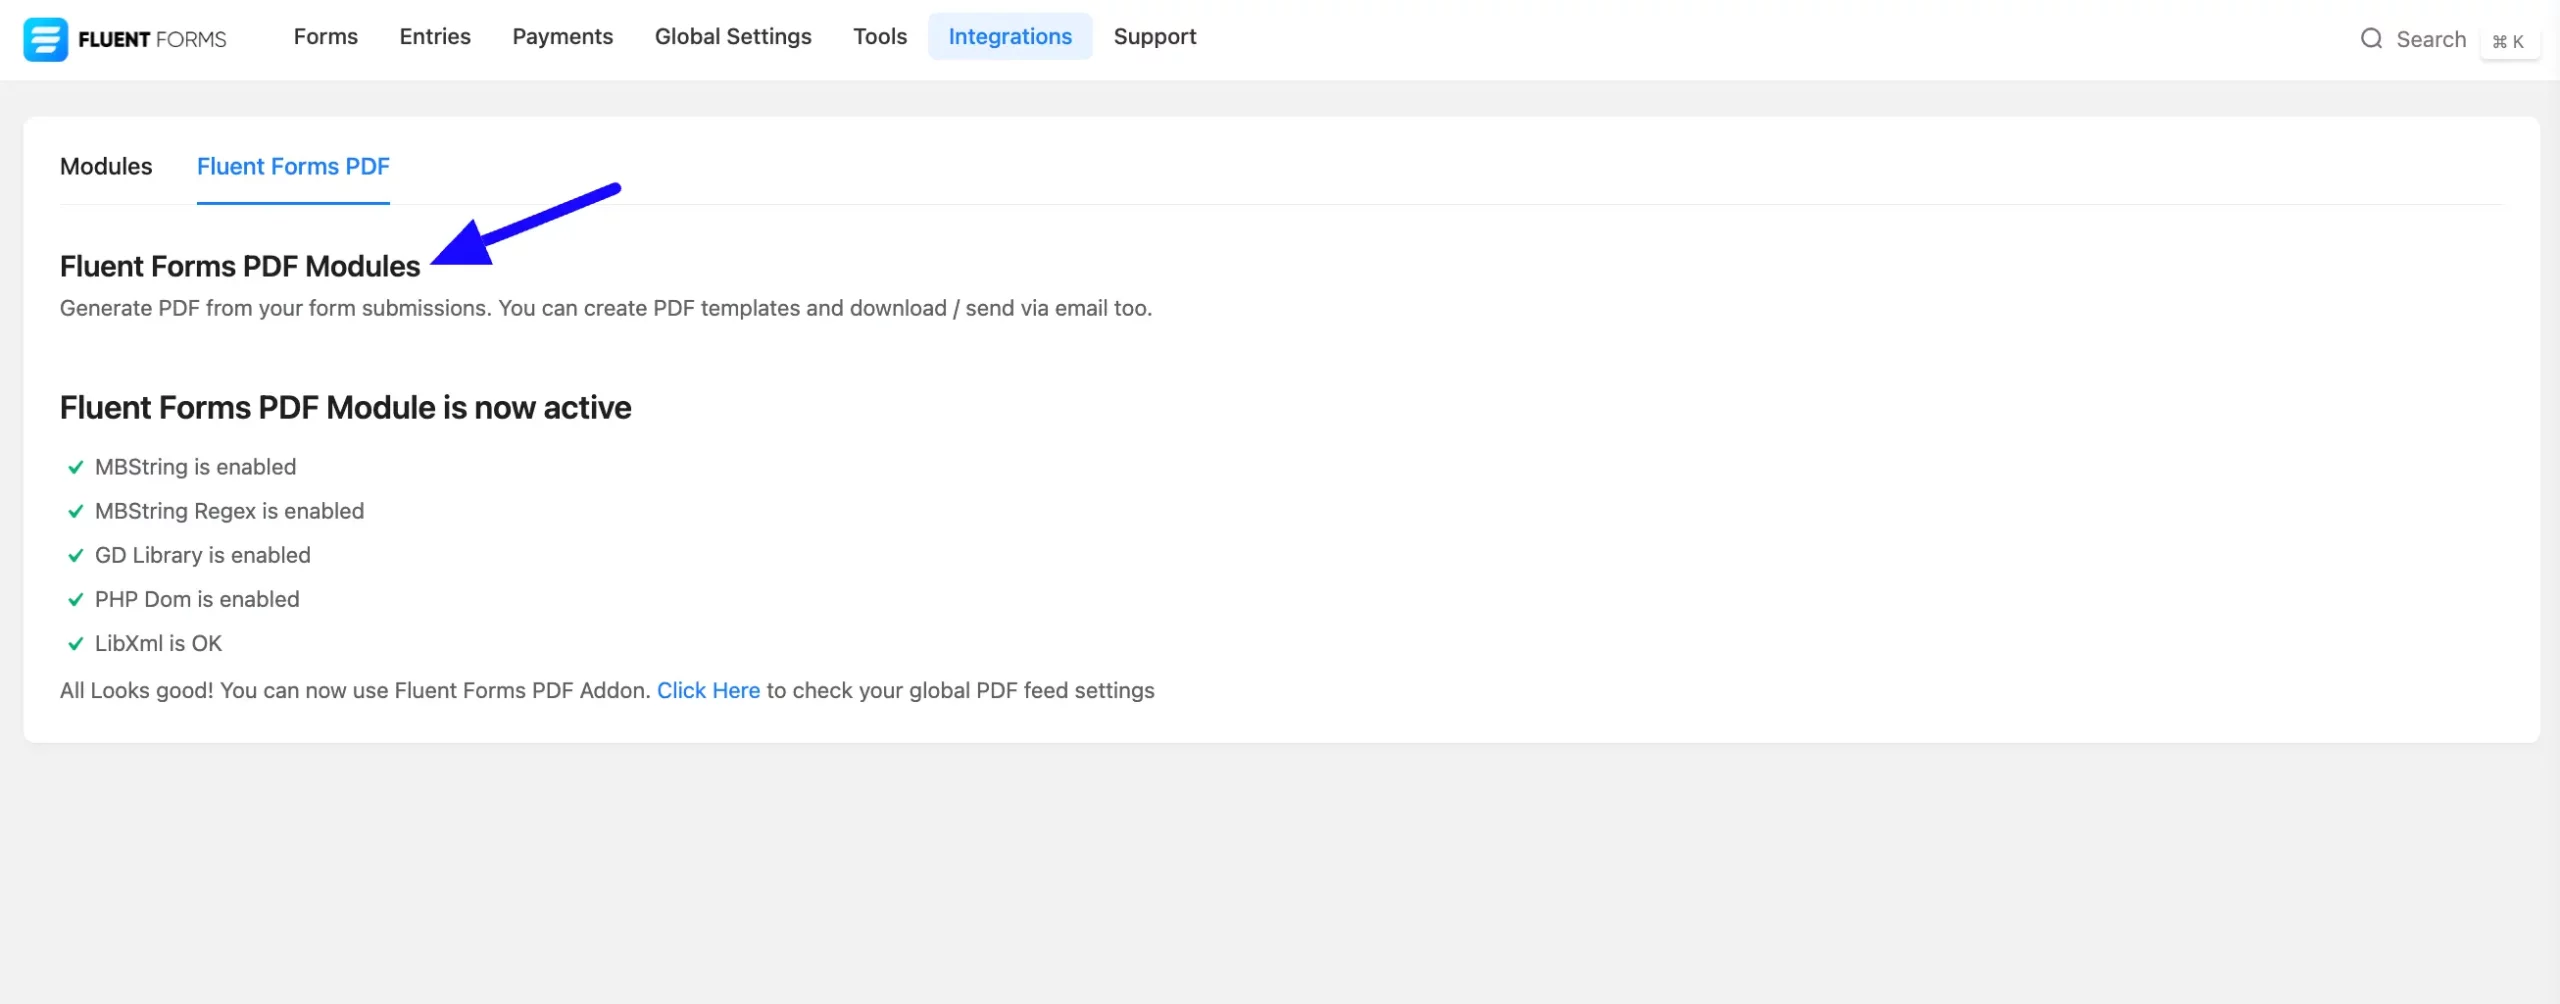
Wait for the installation to complete. A success message will confirm the setup.
Do not close the window until the installation finishes.
Your Fluent PDF Module is active, so you can now use the PDF Feed of Fluent Form.
Configure Global PDF Settings #
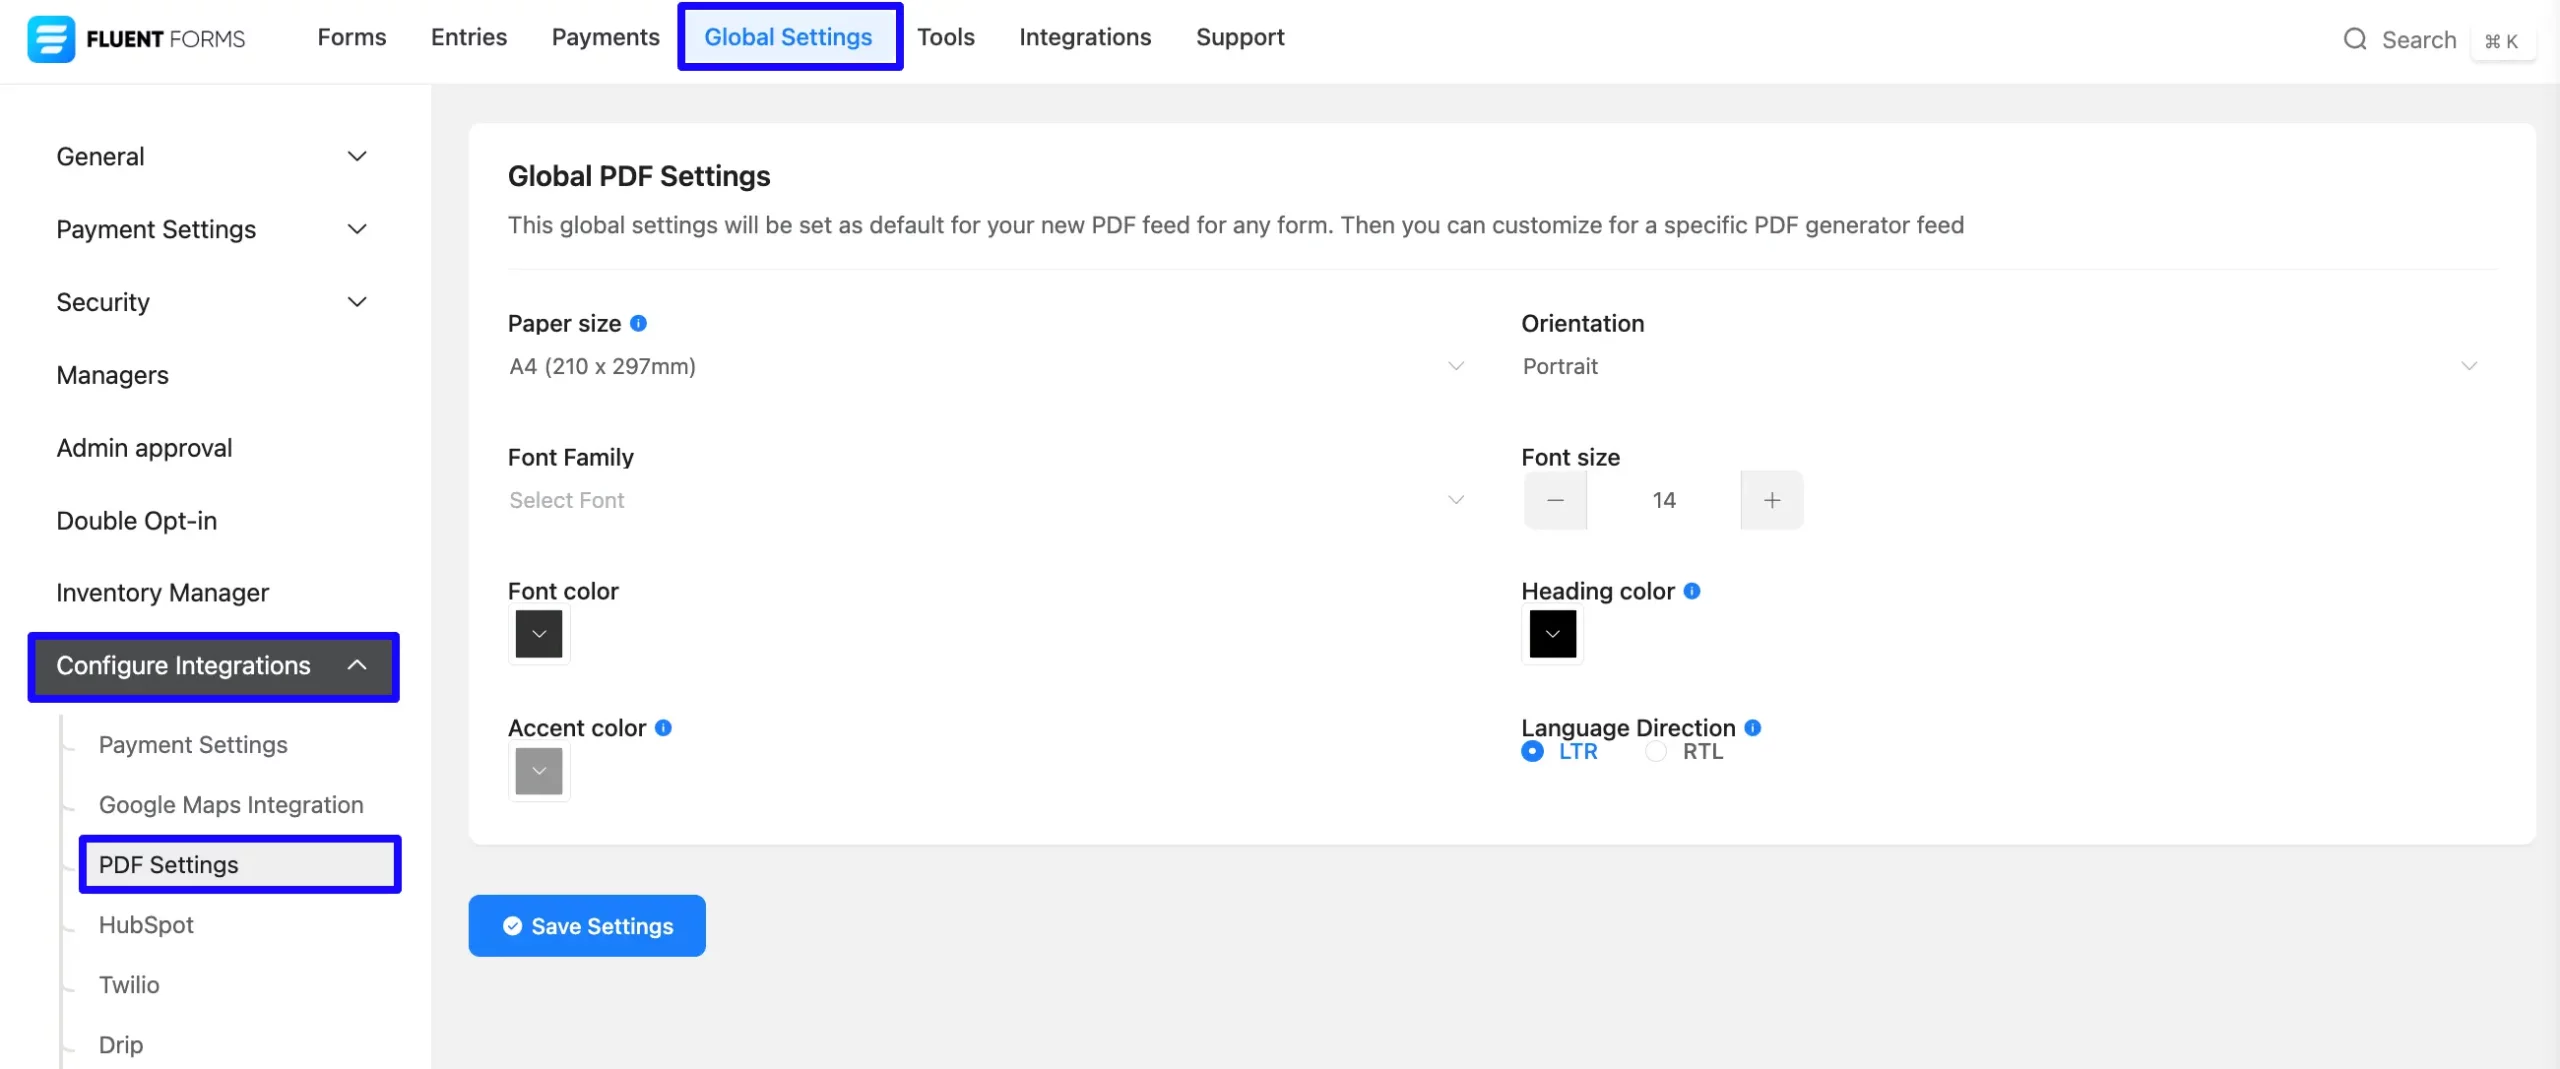
To configure Global PDF Settings, go to your WordPress dashboard, hover over Fluent Forms Pro, and select Settings. This will open Fluent Forms’ Global Settings window.
Now, click on PDF Settings. Here, you will need to configure PDF settings globally. Note that each form can override this setting.
Setting Up a PDF Feed for a Form #
To enable PDF export for a specific form, follow these steps-
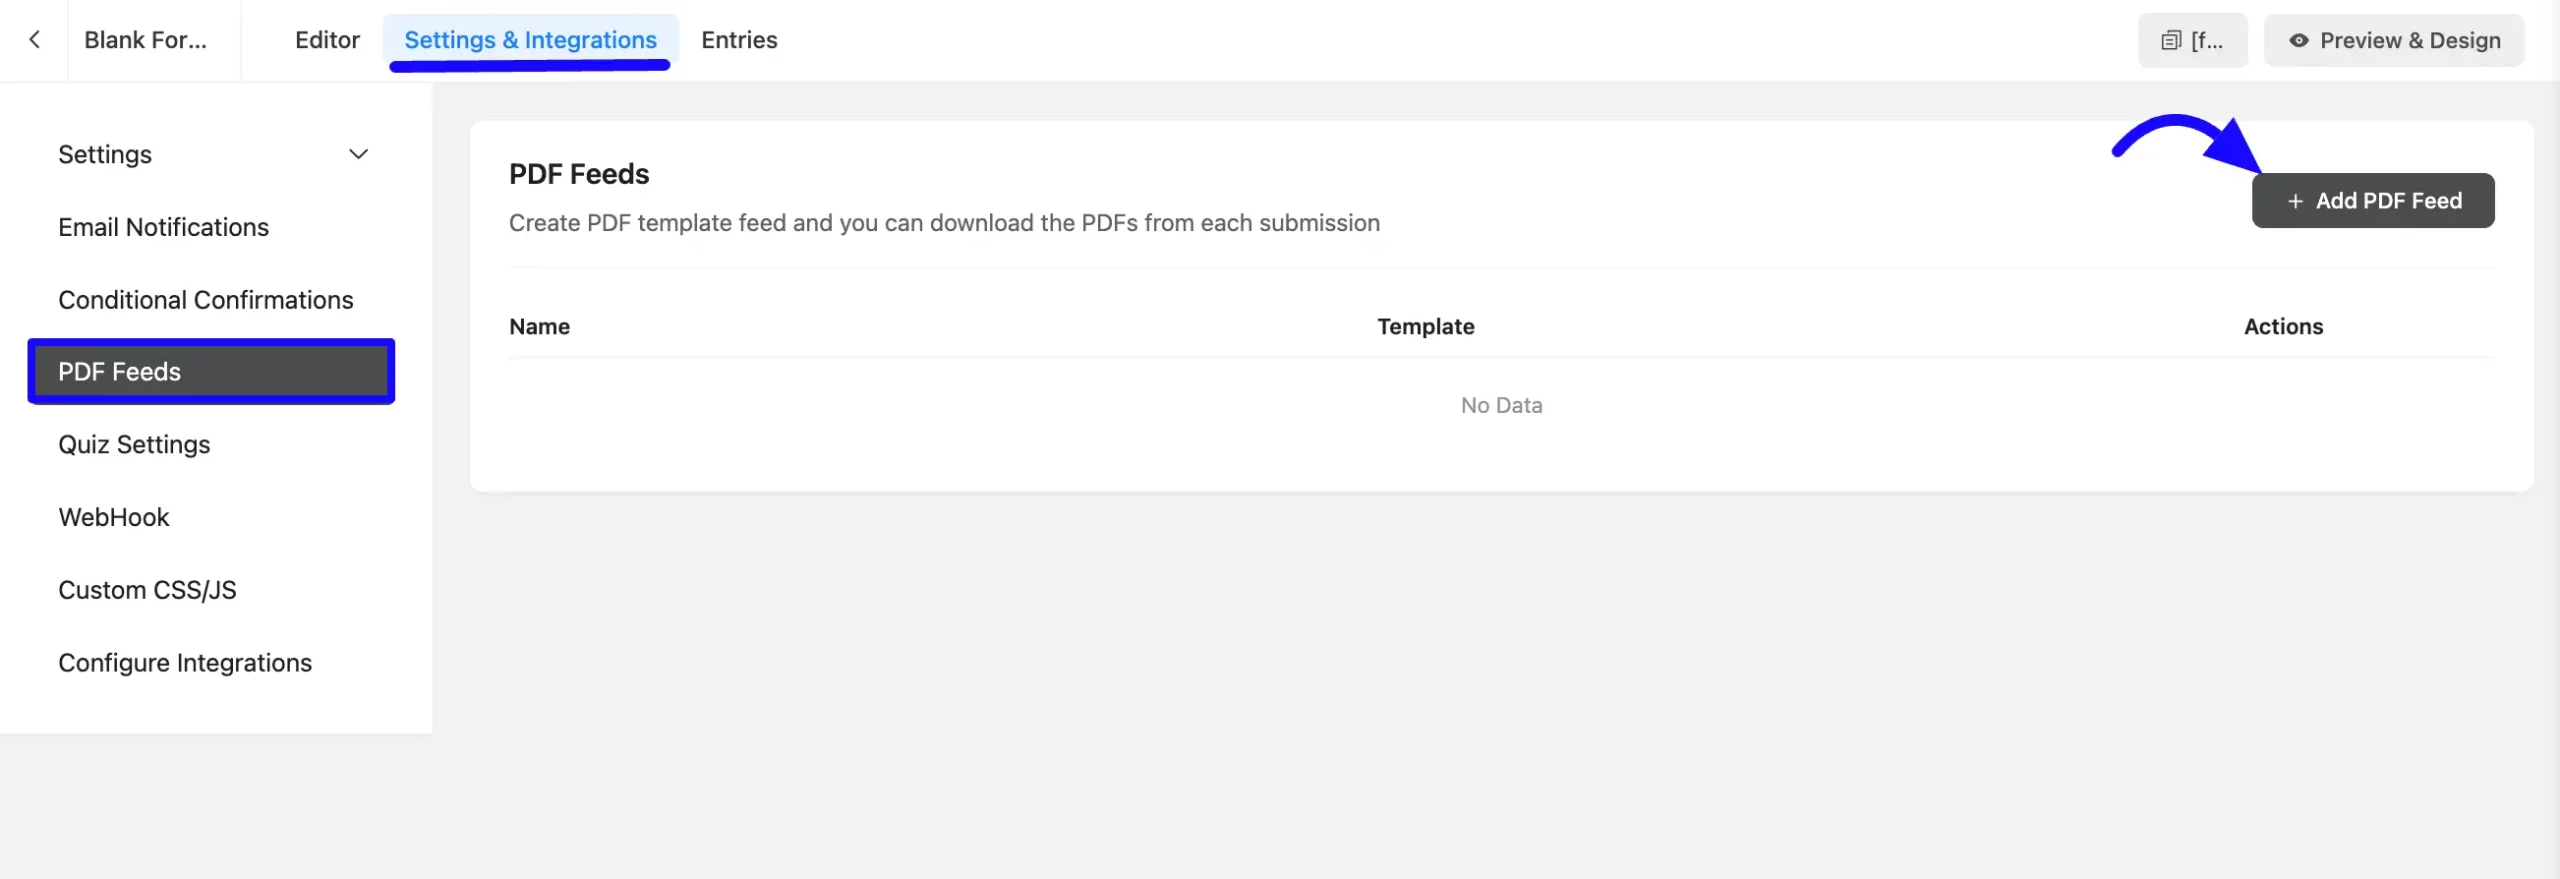
Open the form where you want to allow PDF Export. Navigate to the Settings & Integrations tab.
If you do not have any existing forms, read Create a Form from Scratch or Create a Form using Templates documentation to create a new one.
Now click on PDF Feeds from the left sidebar. Then click the Add PDF Feed button.
Customizing the PDF Feed #
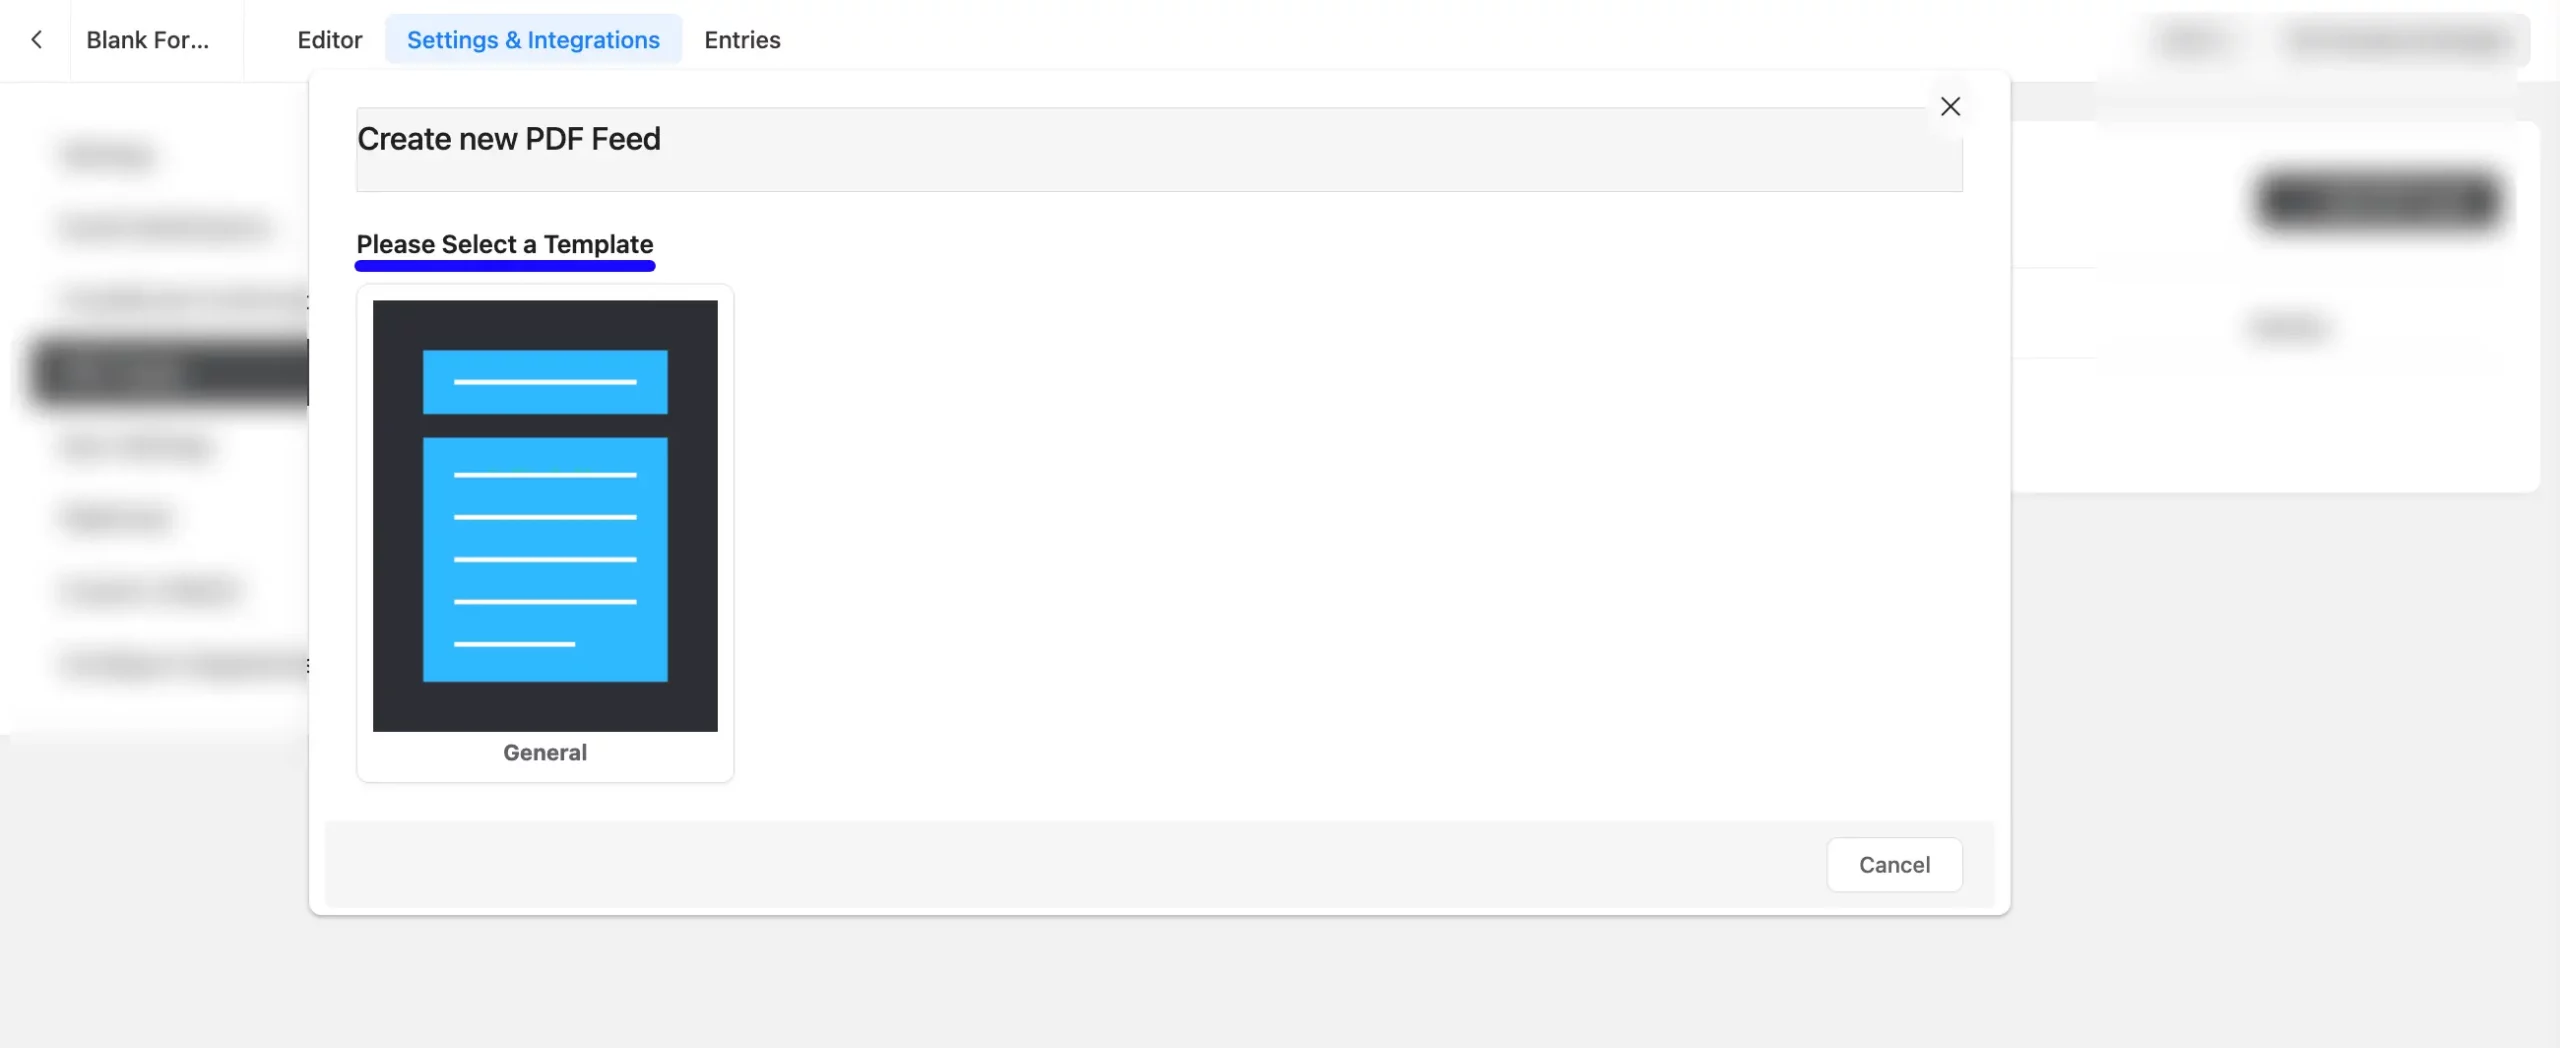
A popup will appear asking you to choose a PDF Template. Select the available template.
PDF Content #
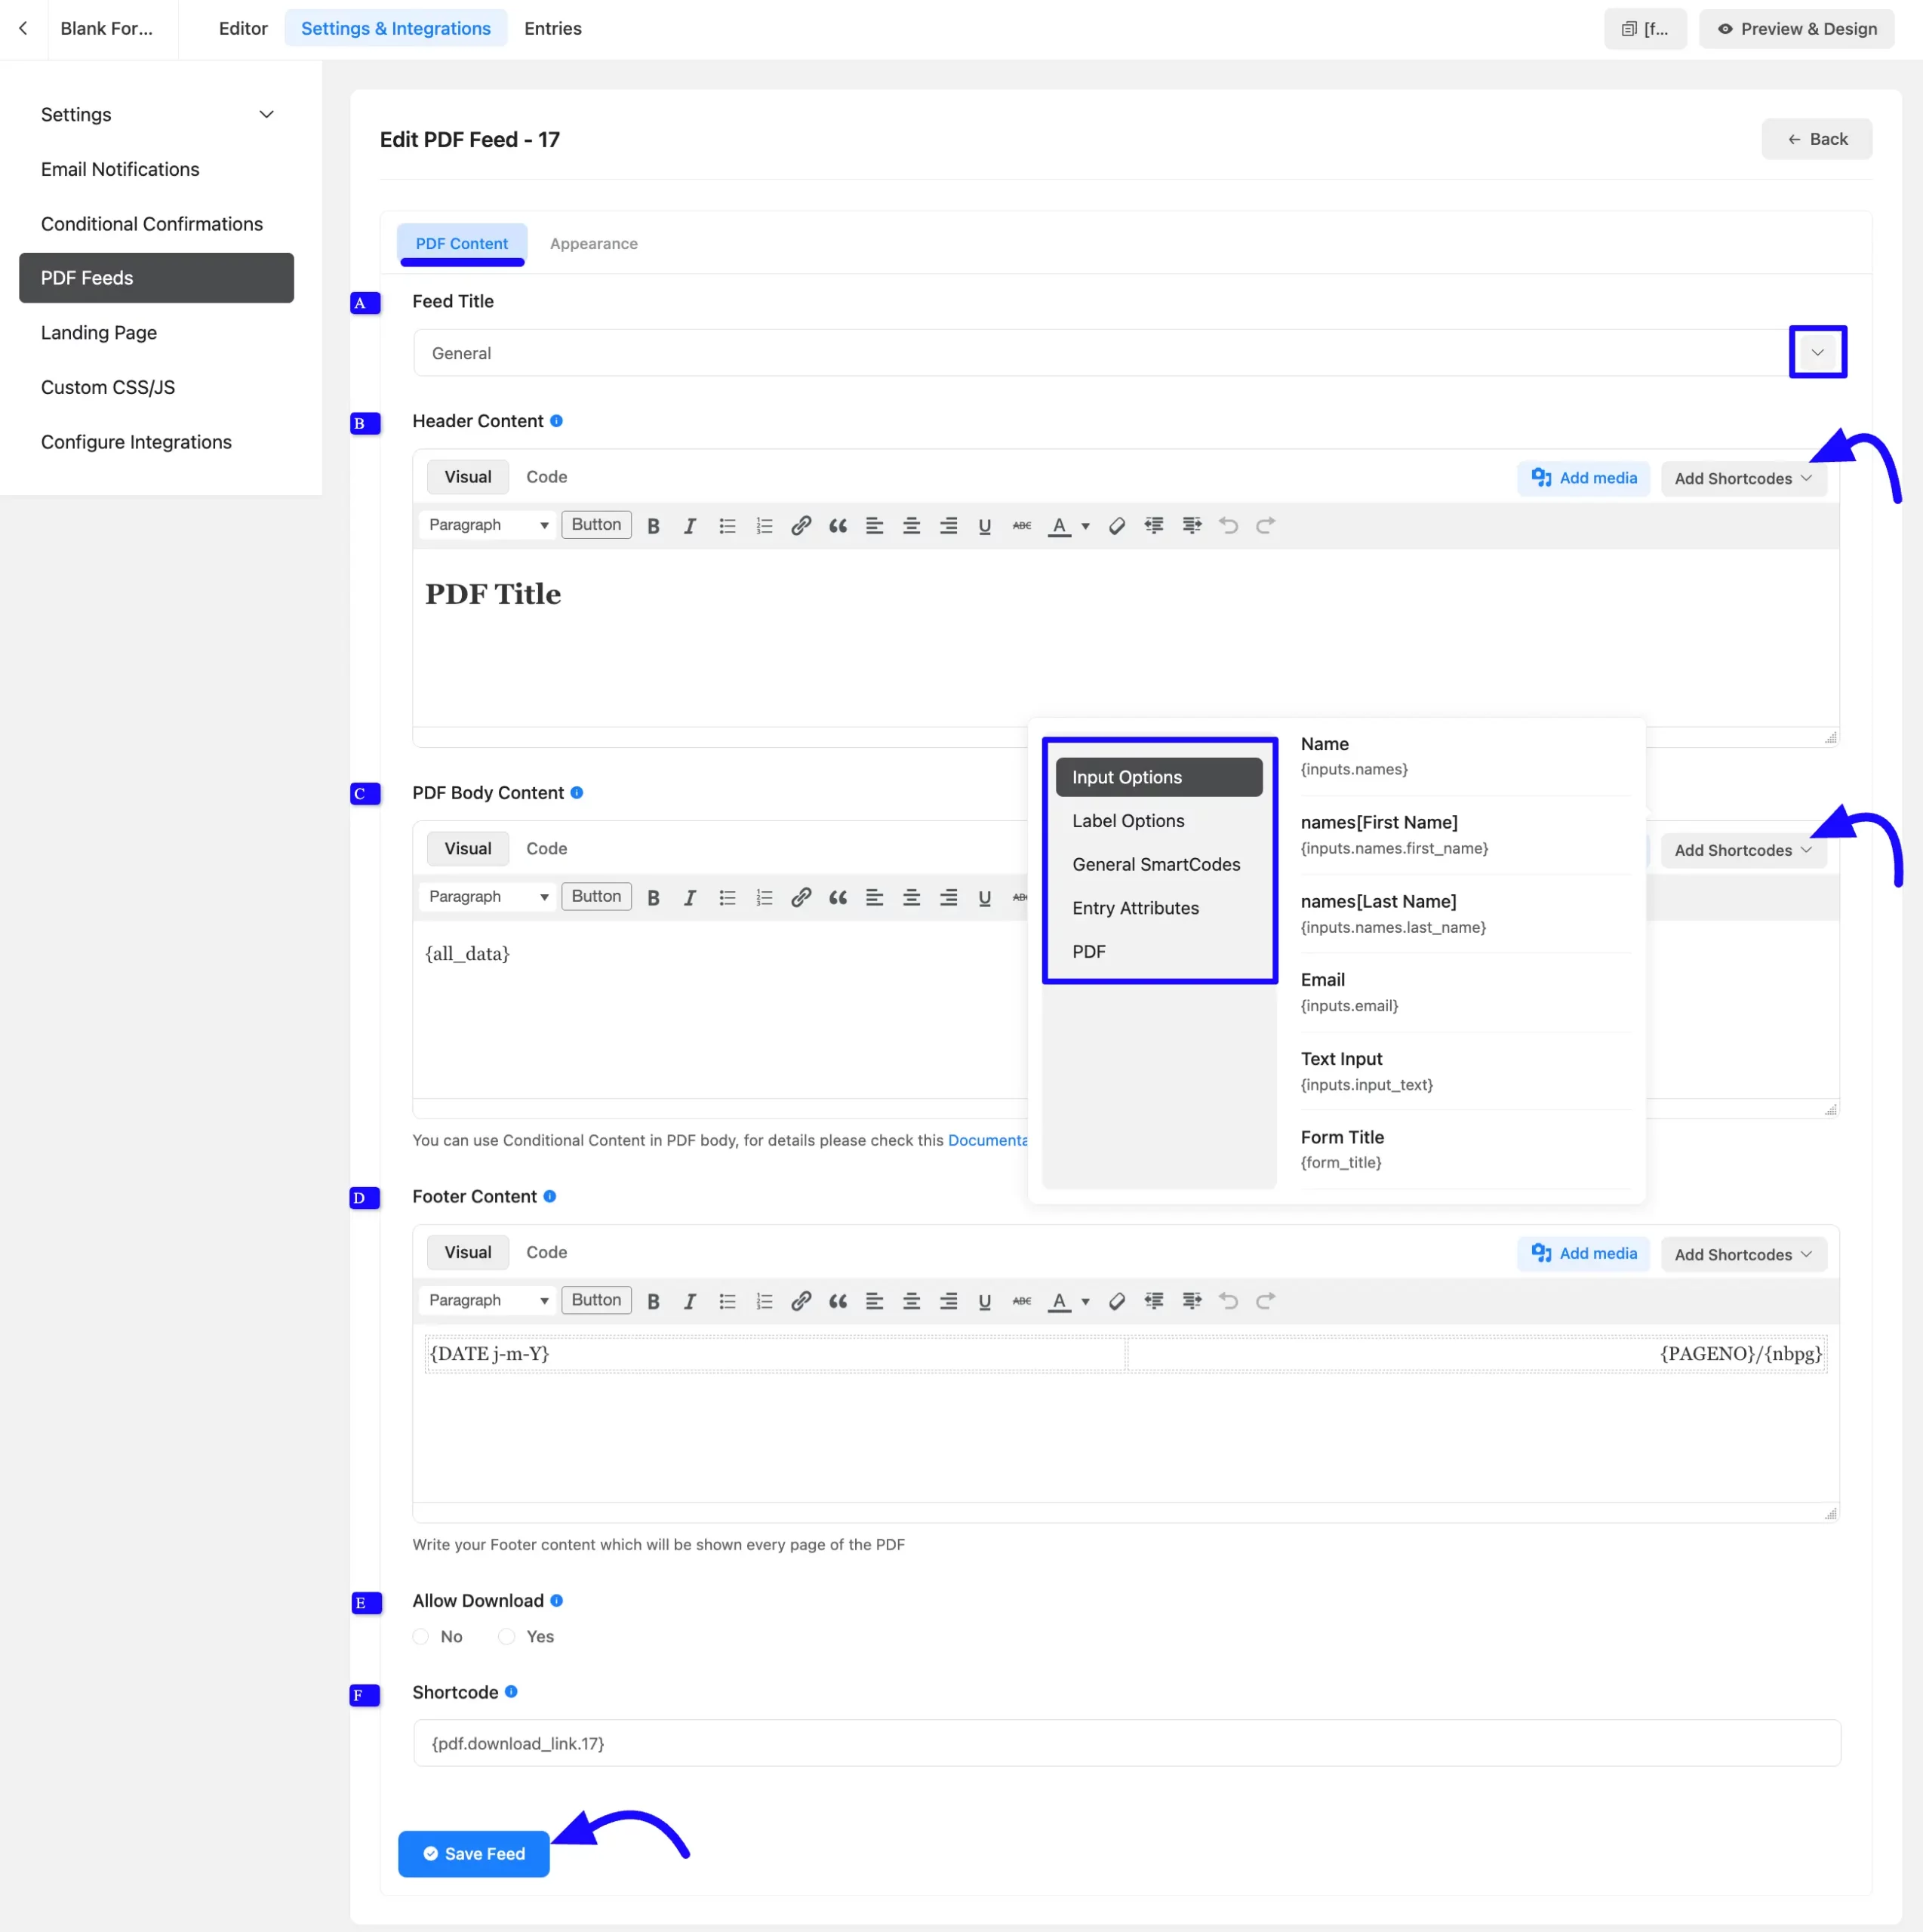
A. Feed Title: Set the feed title for the PDF Feed. Also, add a shortcode from the dropdown options on the right side.
B. Header Content: Enter the header custom text here. You can also Add Shortcode here.
C. PDF Body Content: This section allows you to design the main content of your PDF. For example, using {all_data} will include all submitted form data in the PDF. You can also click the Add Shortcode button to insert dynamic content using shortcodes. This enables you to format your content precisely, creating clean, well-organized, and dynamic PDFs that display your form data exactly as needed.
Fluent Forms also provides an HTML editor for full control over the PDF layout and design. Click the Code view to access it.
D. Footer Content: Enter the custom Footer text here.
E. Allow Download: Select the Yes/No options toggle to enable PDF downloads.
F. Shortcode: You can use this shortcode on the submission message to generate a PDF link.
Appearance #
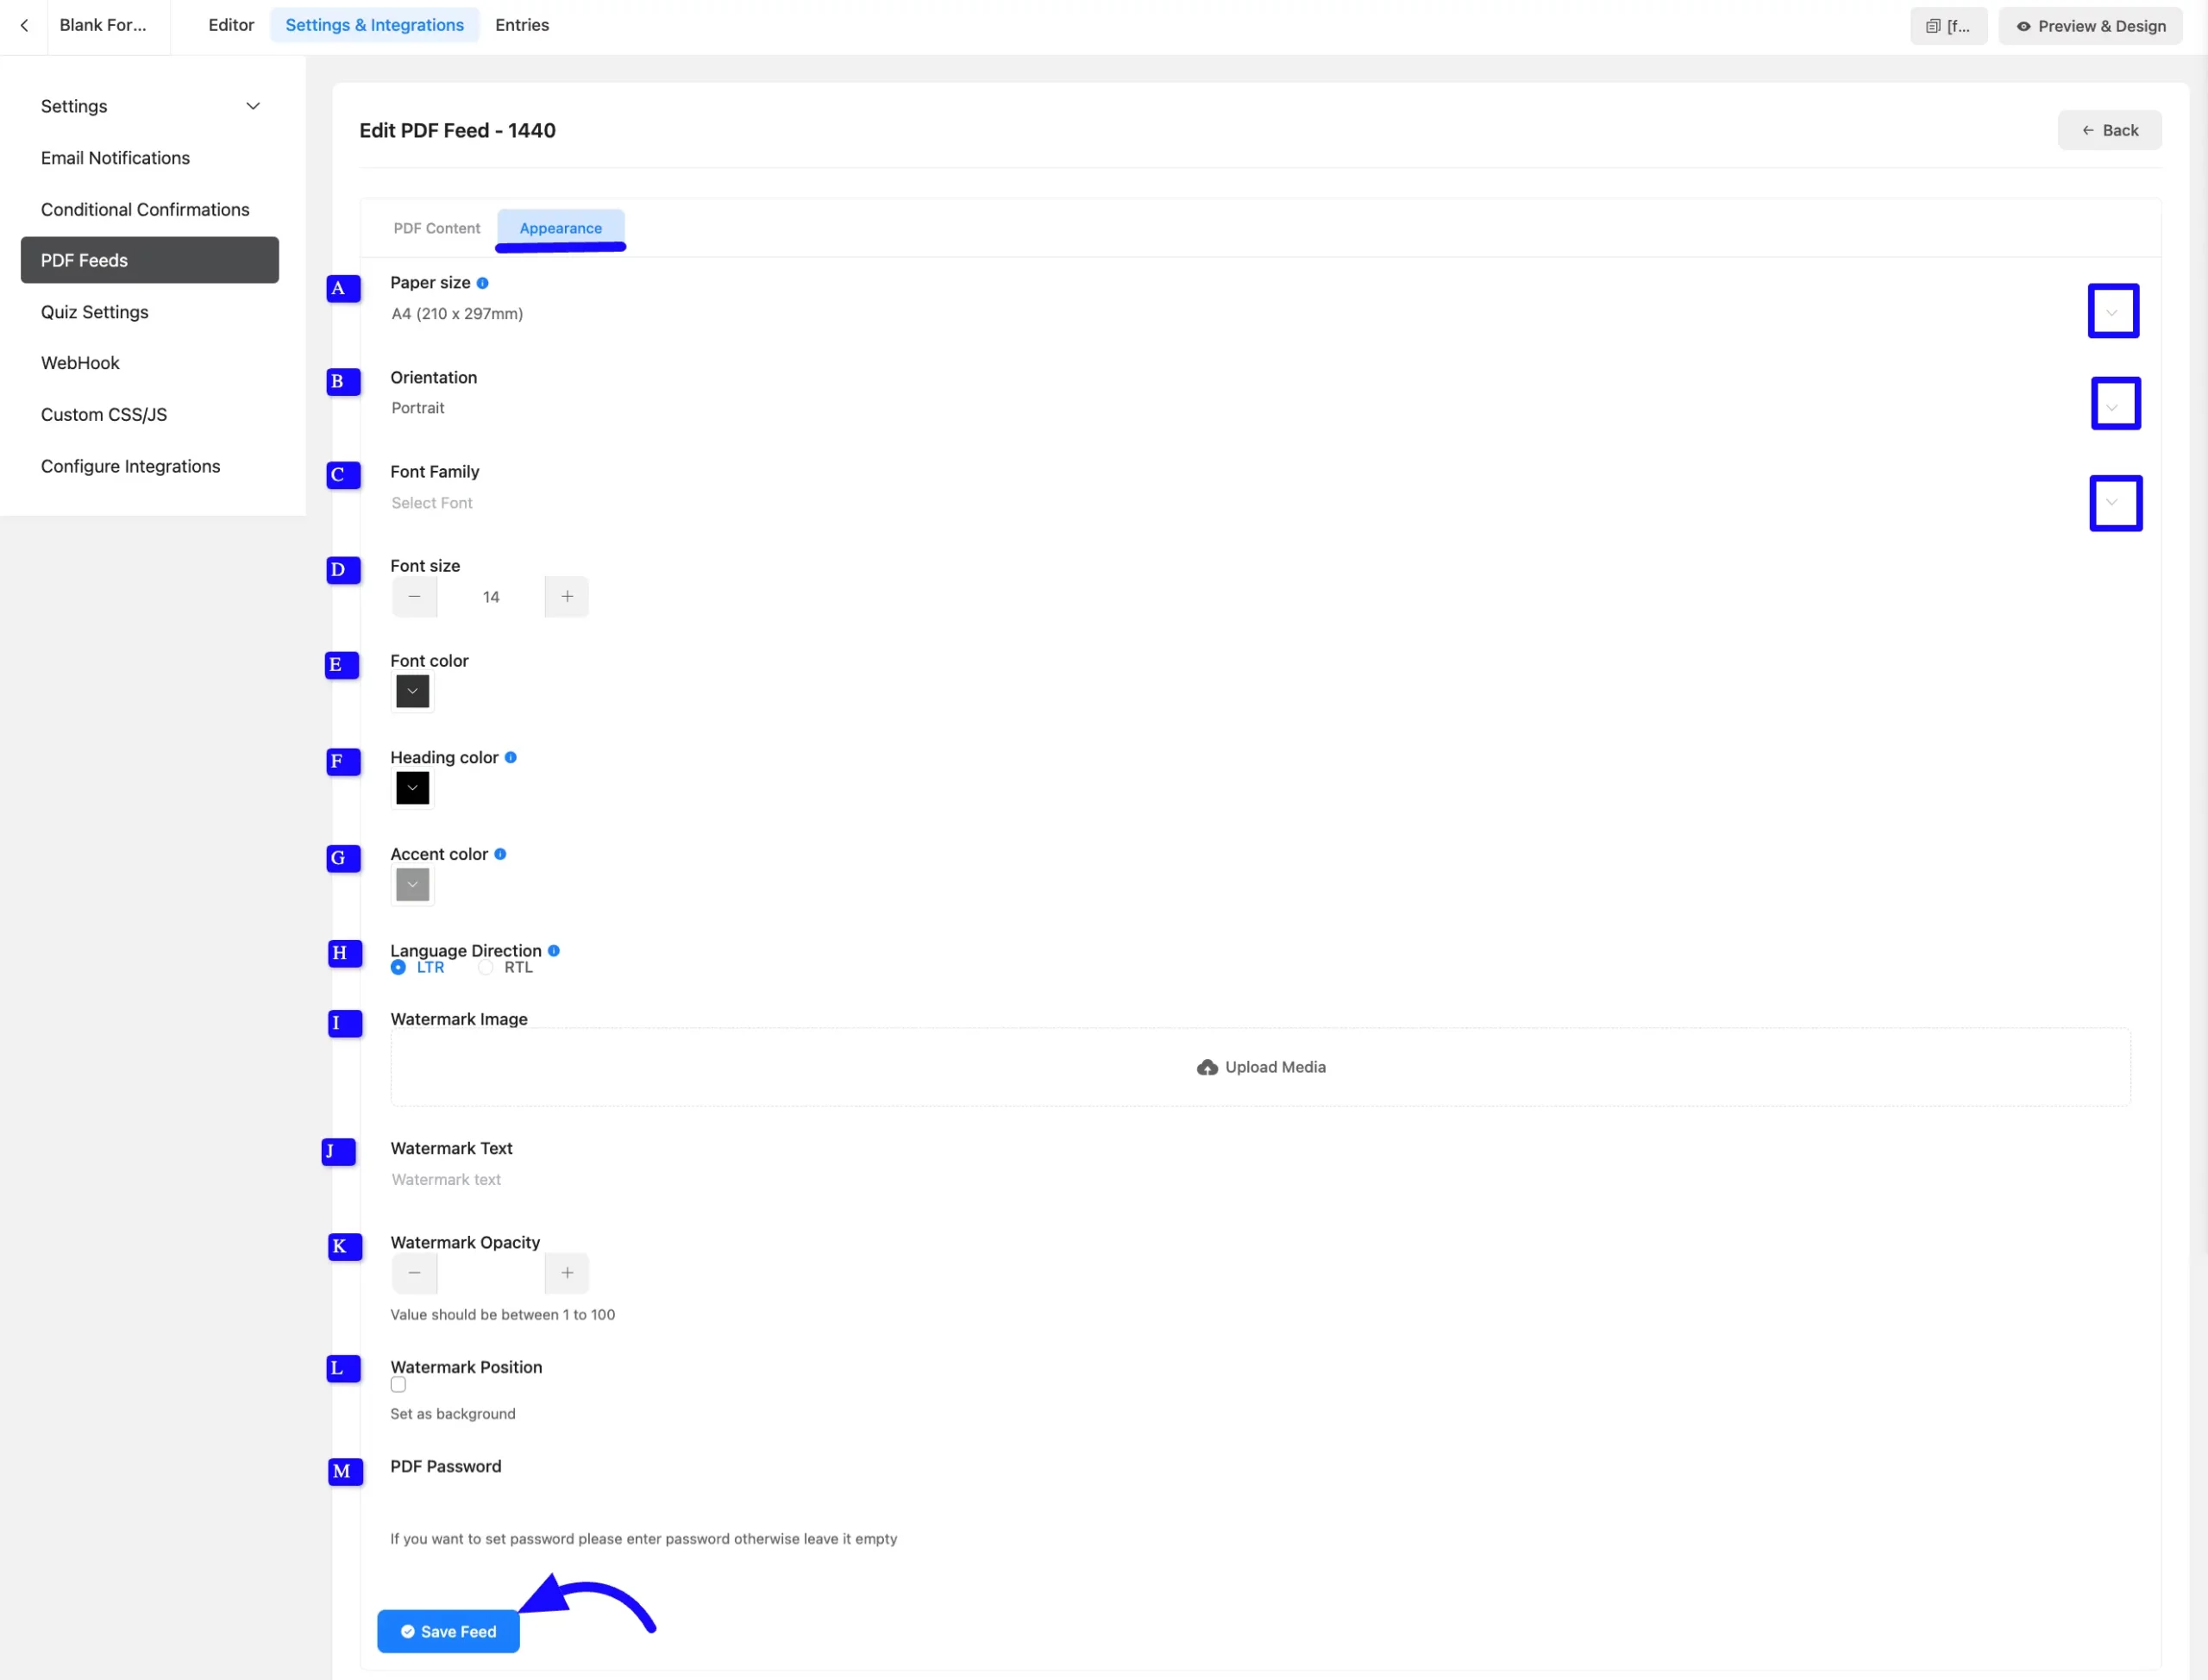
You can override the PDF appearance you have set up globally from the Appearance tab.
A. Paper Size: Select the page format from the dropdown options.
B. Orientation: Choose the orientation, Portrait or Landscape, from the dropdown options.
C. Font Family: Select a font for the PDF text from the dropdown options.
D. Font Size: You can adjust your font size by clicking the Plus or Minus Icon.
E. Font Color: Select font color from the color plate.
F. Heading color: Select the heading color from the color plate.
G. Accent Color: Select the accent color from the color plate. The accent color is used for borders, breaks, etc.
H. Language Direction: Scripts like Arabic and Hebrew are written right to left. For Arabic/Hebrew, please select RTL. Others, by default, select LTR options.
I. Watermark Image: Upload an image as a background watermark.
J. Watermark Text: Enter text to be used as a watermark.
K. Watermark Opacity: Controls the transparency of the watermark (1-100). The watermark’s opacity is significant, and 50 is the recommended size.
L. Watermark Position: Option to set the watermark as a background.
M. PDF Password: You can set a password for protected PDF access. If you don’t want to enter the password, leave the options.
When the change is complete, click the Save Feed button, and the PDF Feed will be added to your form.
Downloading a Form Entry as a PDF #
Once you have customized the form and added the PDF Feed, go to the Entries section of the chosen form.
Now, select any submission entry you wish to work on and click the View Icon of that entry.
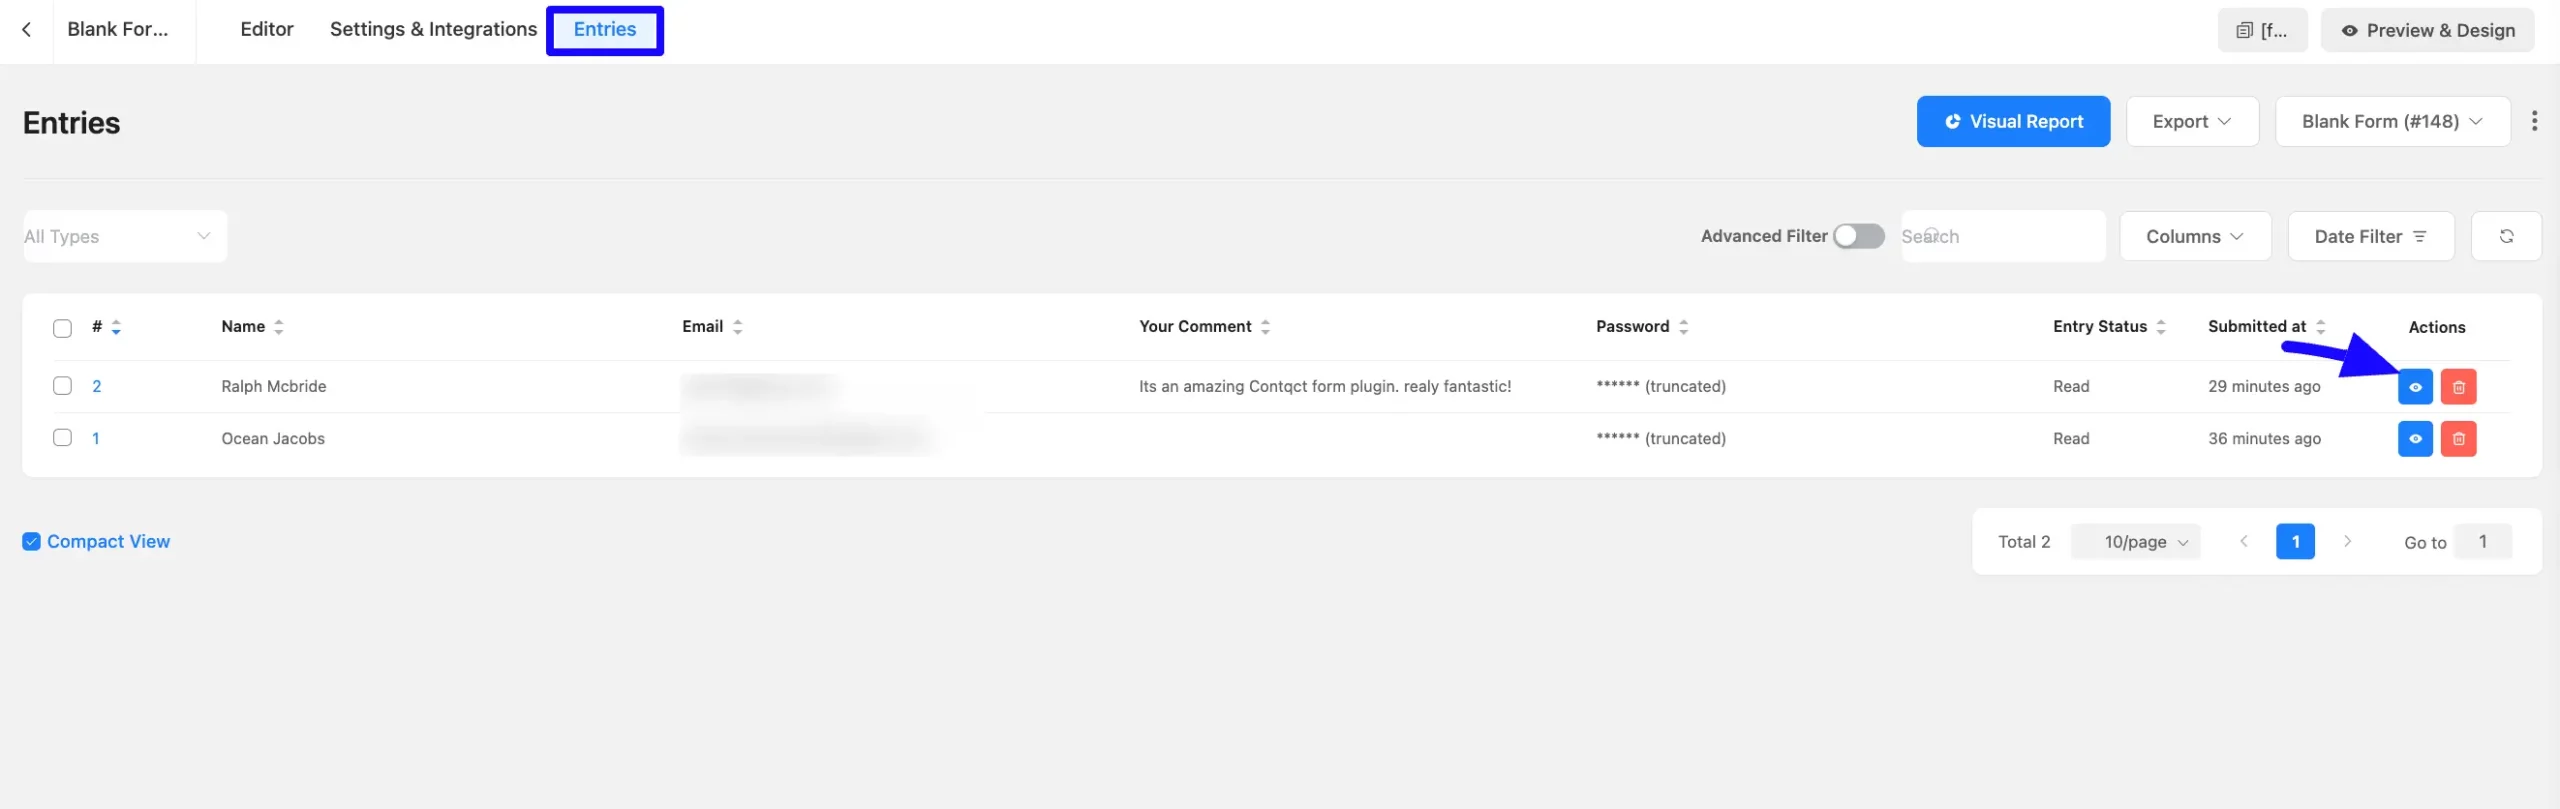
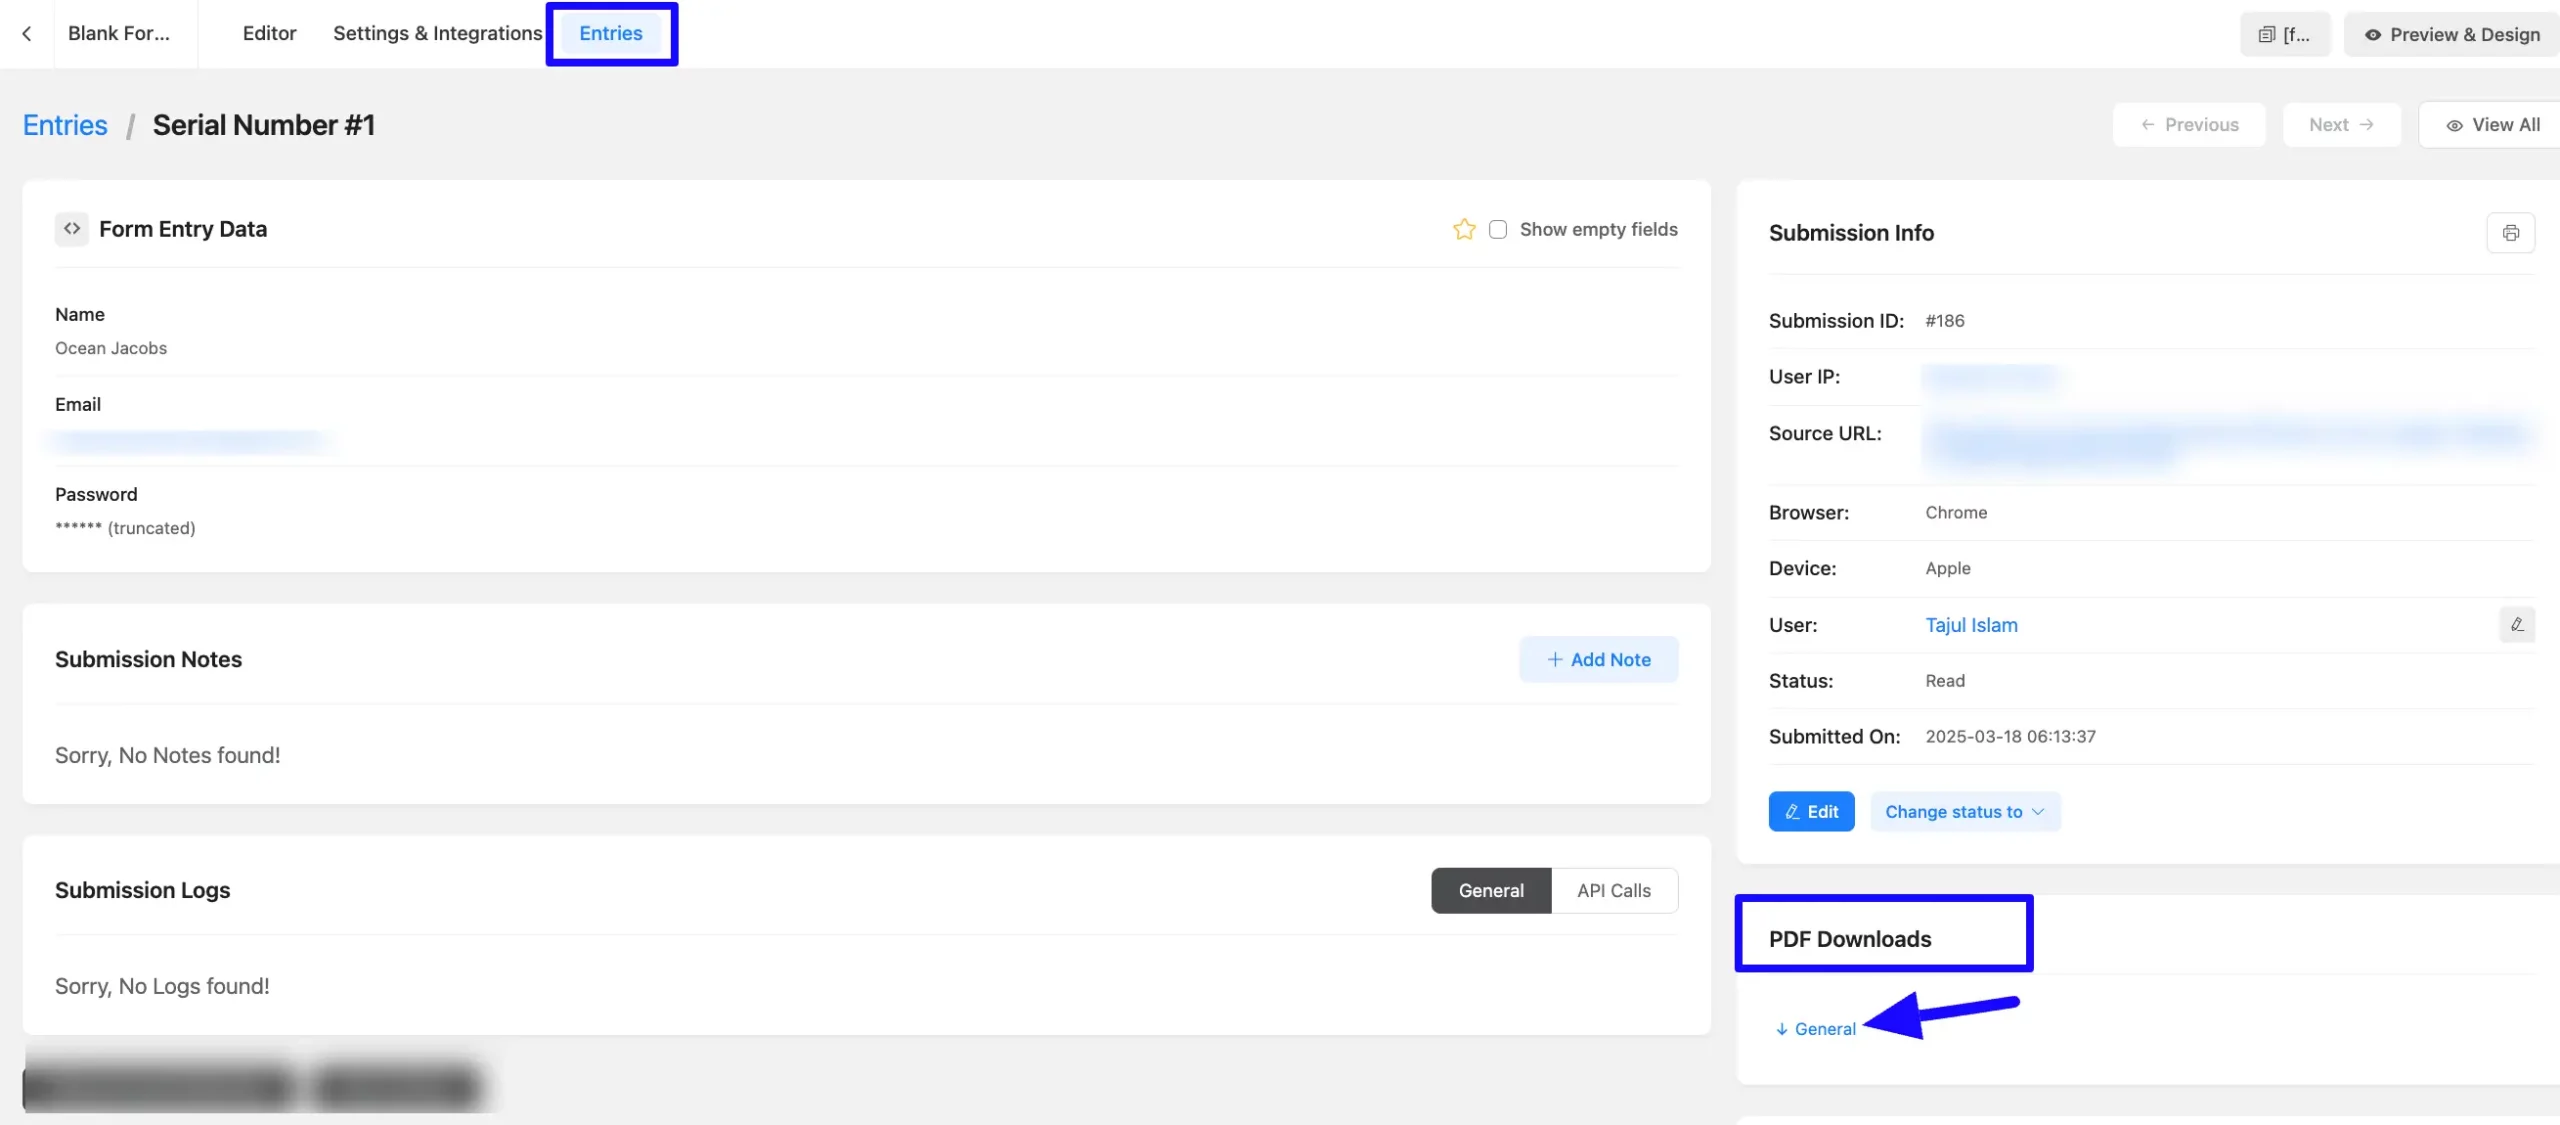
From here, you will see the Download option for your PDF Feed preview. Then click the Download PDF button to generate and save the file.
Sending Form Entries as PDFs via Email #
To learn how to add PDF Feed into Admin/User Email for a specific Form, follow the steps with the screenshots below –
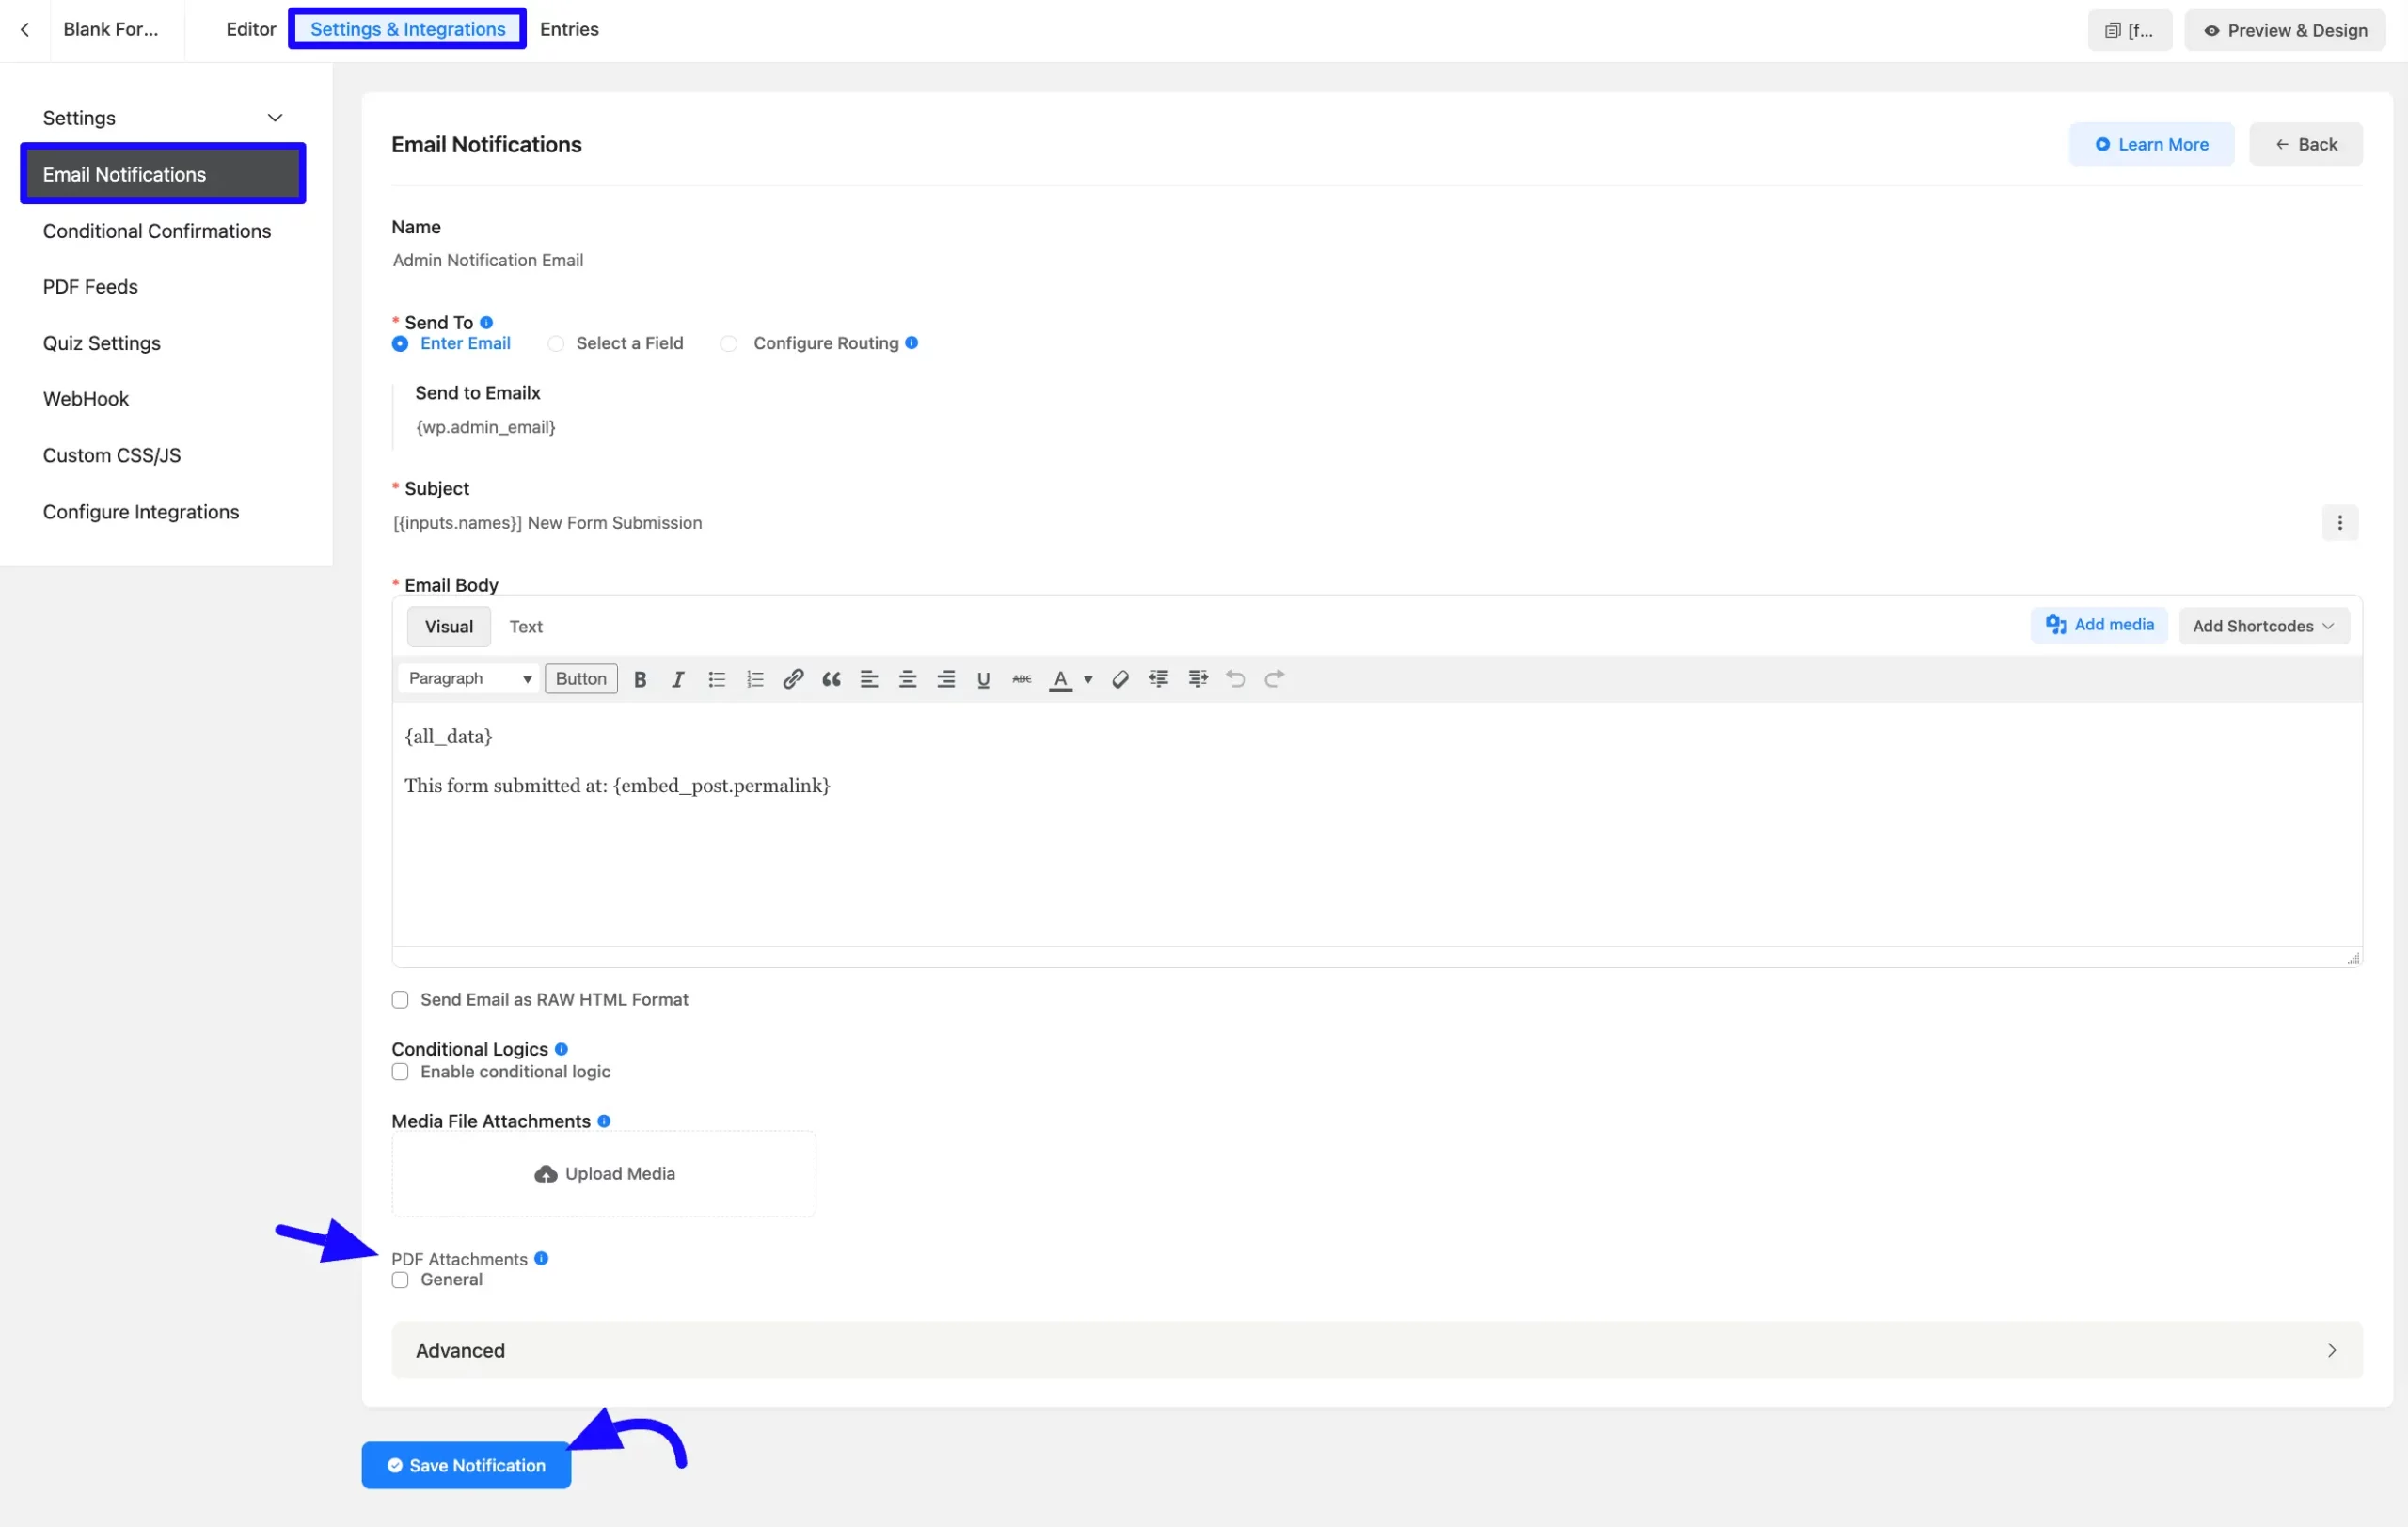
To automatically send form entries as PDFs in emails, navigate to Email Notifications Settings for your form. Scroll down to PDF Attachments (above the Advanced tab). Then, select the PDF feed you want to attach to emails. It ensures users receive a PDF version of their form submission via email.
When a user submits the form, this PDF Feed will be sent to the Admin Email.
If you want to know about email notifications, then read this article.
Now you can create, download, and email a PDF Template feed in your Fluent Form.
If you have any further questions, concerns, or suggestions, please do not hesitate to contact our support team. Thank you.


