Fluent Forms is the most powerful, user-friendly drag-and-drop form-building plugin for WordPress. It allows you to create, manage, and customize website forms.
This documentation walks you through the key elements and capabilities of the Fluent Forms user interface.
Dashboard #
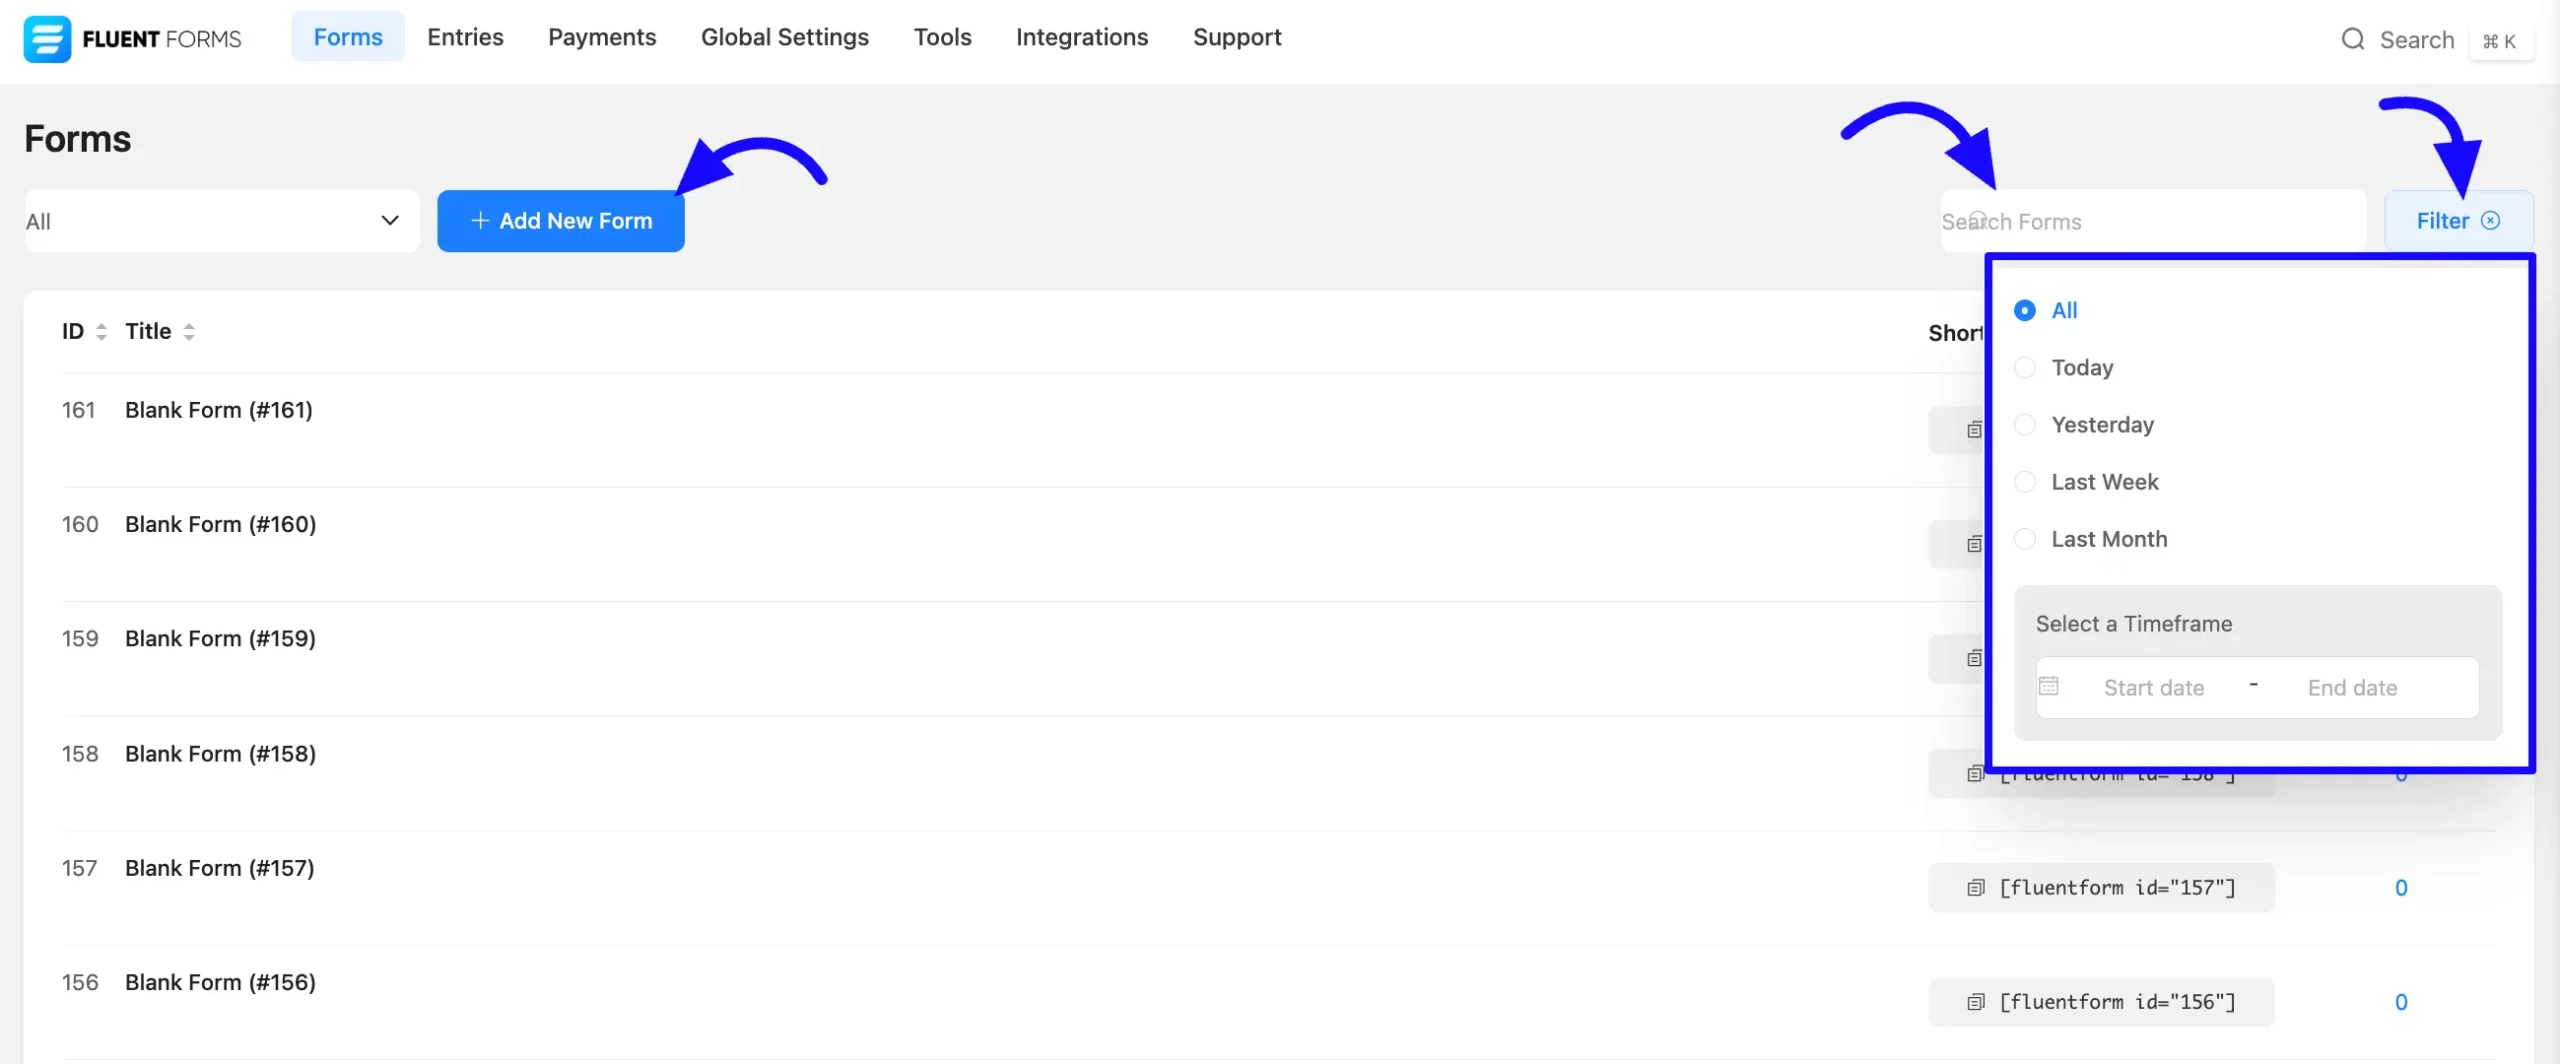
The dashboard is Fluent Forms’ main control centre. From here, you can view an overview of all your forms, track recent submissions, view analytics, and manage everything in one place.
At the top, you’ll find menu items like Entries, Payments, Global Settings, Tools, Integrations, and Support, giving you quick access to all major sections.
- Add New Form: Click this button to start building a new form for your site.
- Search Bar: Located at the top-right, you can quickly search through your forms and form data.
- Filter Options: Easily filter form stats by day, week, month, or a custom date range to analyze performance.
Form List Overview #
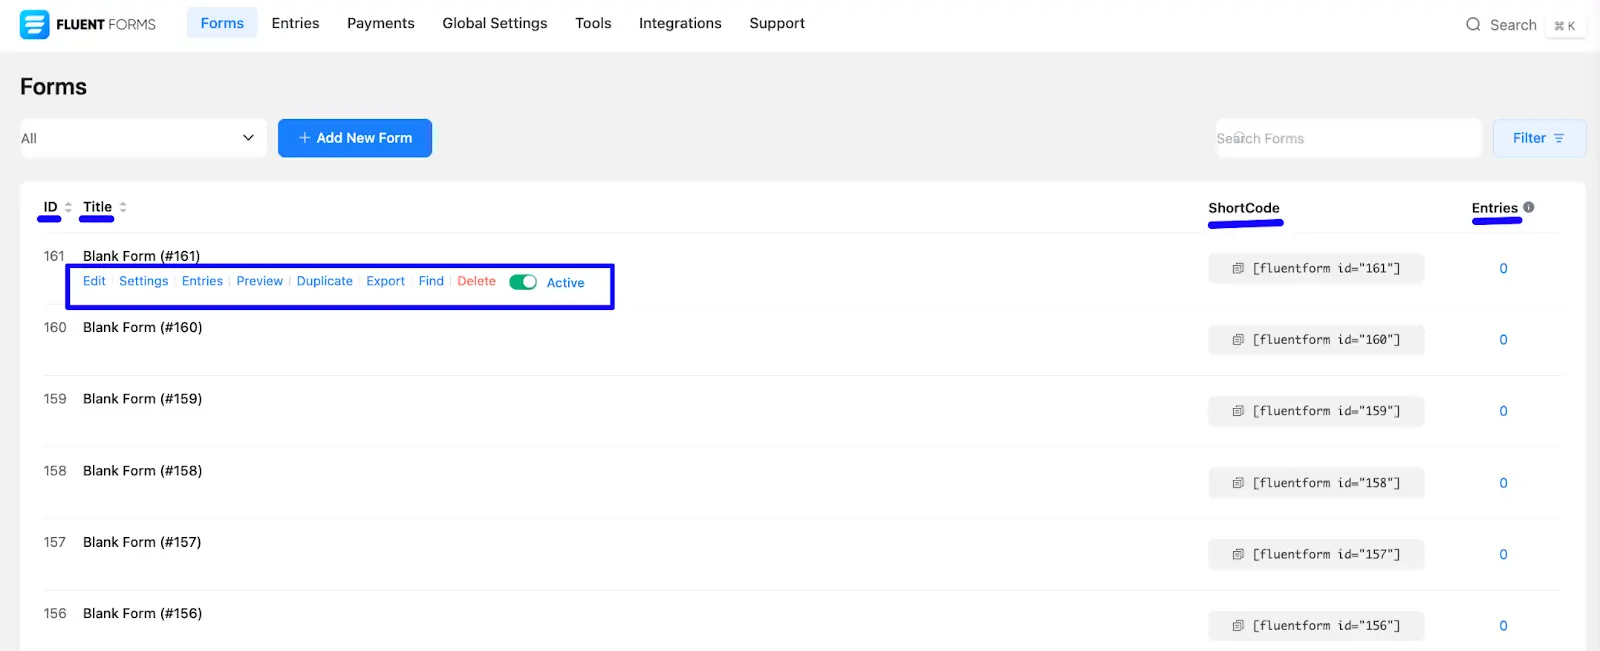
- ID: Displays the unique ID of each form.
- Title: Shows the name or title of your form.
- Shortcode: Each form has a shortcode that you can copy and paste anywhere on your site (pages, posts, or widgets) to display the form.
- Entries: View all submissions collected through each form, including recent entries.
Form Menu #
This menu helps you quickly manage and organize each form directly from the dashboard. When you hover over a specific form, a menu appears with several options to manage the form.
- Edit: Opens the form builder so you can change the form.
- Settings: This takes you to the form’s settings page.
- Entries: Shows all submissions made through that form.
- Preview: Let’s see how the form will appear on the front end.
- Duplicate: Creates a copy of the form with the same structure and settings.
- Export: You can export the form for backup or use it on another site.
- Find: Helps you locate similar forms.
- Delete: Permanently remove the form from your site.
- Active/Inactive: Use the toggle button to activate or deactivate the form on your website.
Forms Category #
You can filter your forms by category using the drop-down menu. This helps you quickly find specific types of forms you’ve created on your website:
- All: Shows every form you’ve created.
- Active: Displays only the forms that are currently active.
- Inactive: Lists all the forms that are deactivated.
- Payment Form: Filters to show only forms that include payment options.
- Conversational Form: Shows forms designed in a chat-like, conversational style.
- Multi-step Form: Displays forms that are split into multiple pages or steps.

Form Builder #
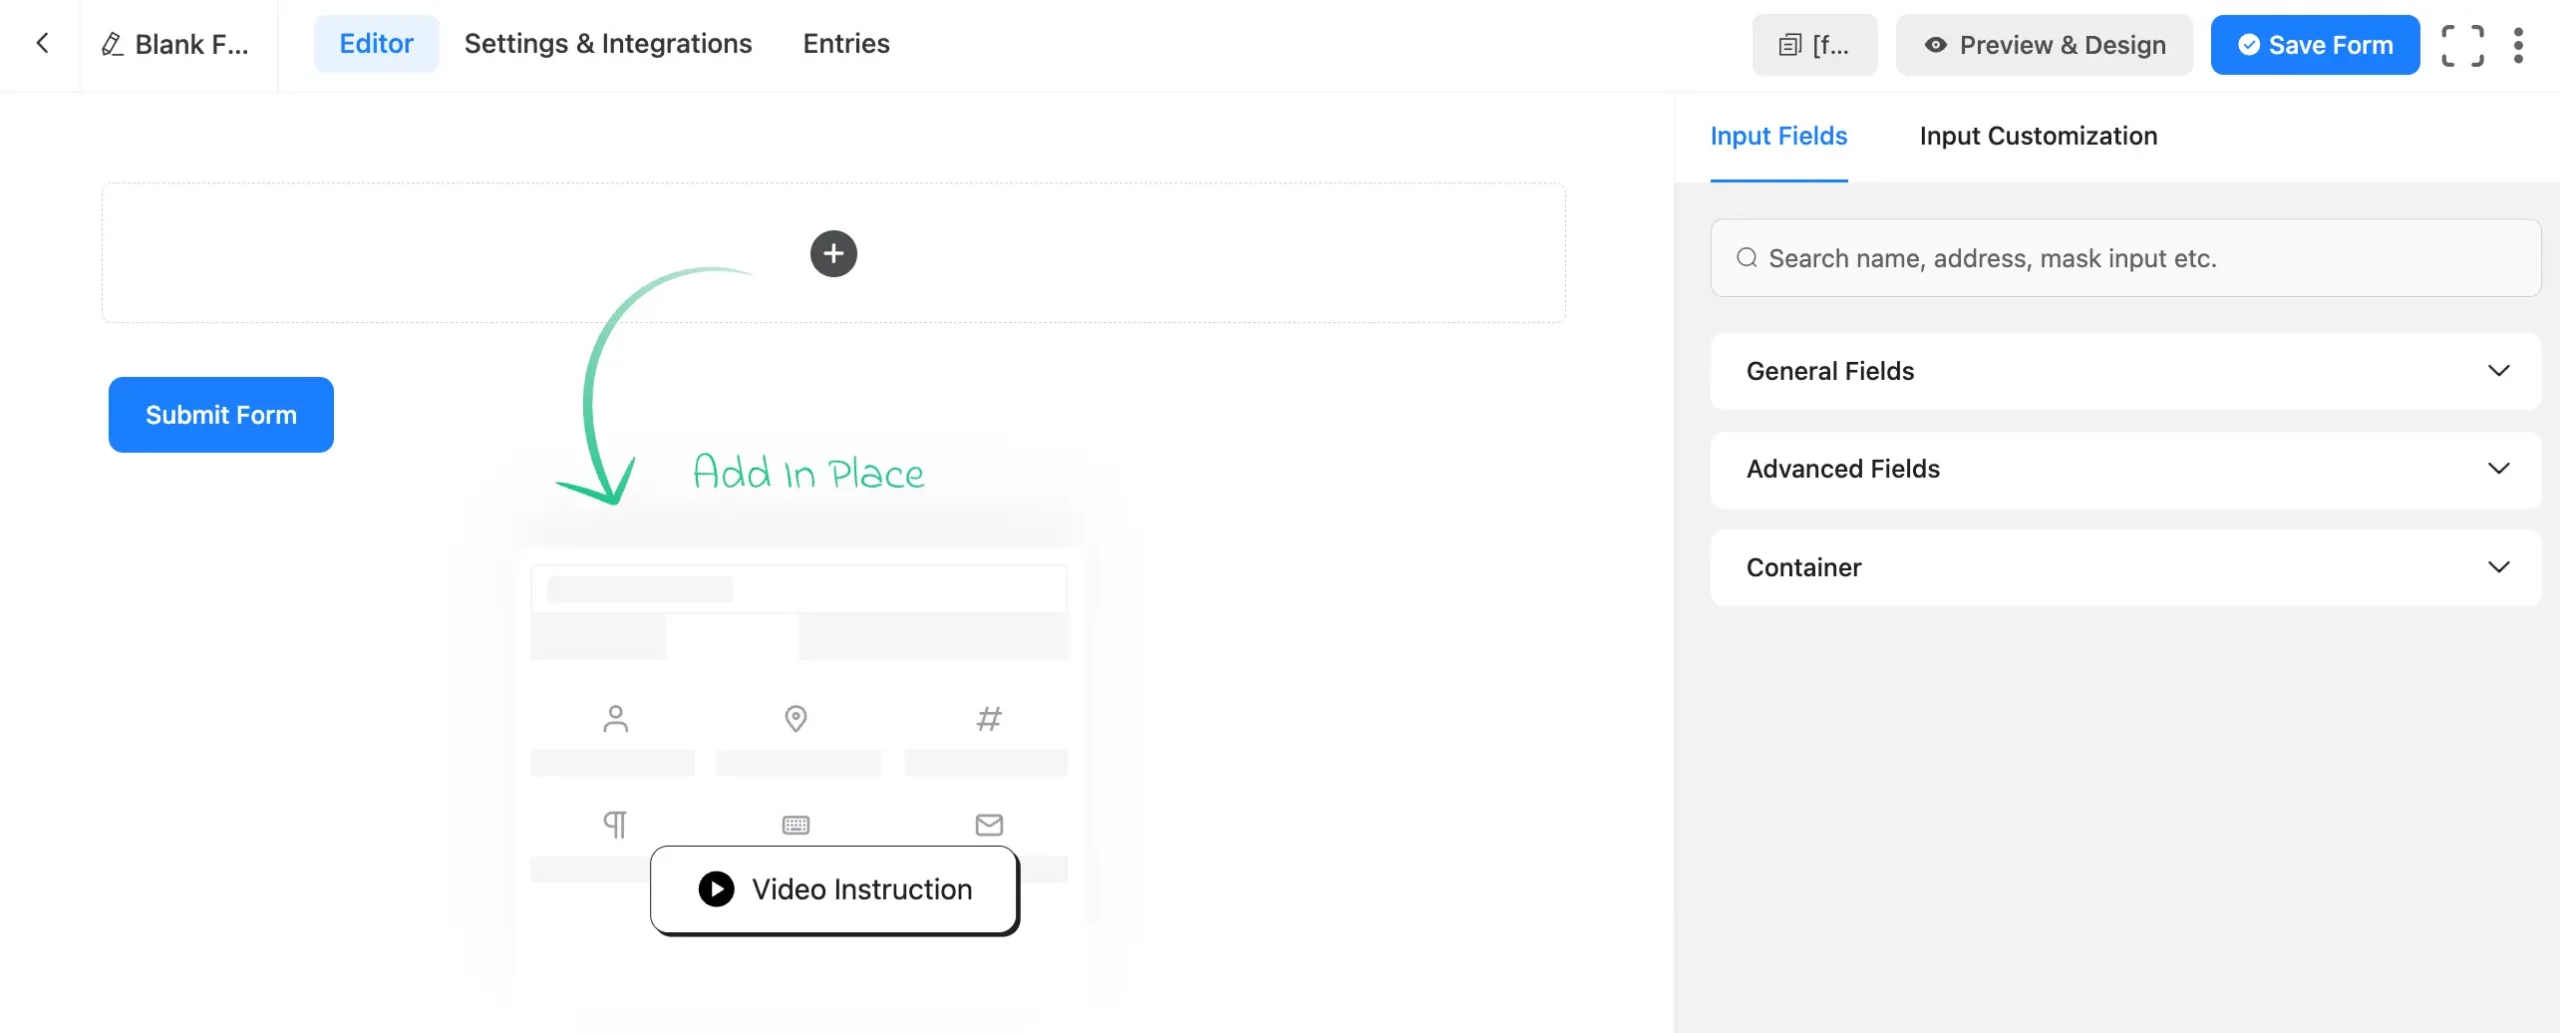
The Form Builder allows you to create and customize forms using a drag-and-drop system.
- Field Panel: This is the sidebar that shows all available form fields, including general and advanced types like text input, checkboxes, and dropdowns. You can drag any field from here to your form.
- Customization: On the right side, you’ll find options to customize each field after adding it to the form.
- Form Canvas: This is the main workspace where you design and arrange your form.
- Field Settings: When you click on a field, you can edit its label, placeholder, validation rules, and other options.
- Container: Use containers to create multi-column layouts. You can also resize them as needed.
- Preview: Click the Preview button to see how your form will look on the front end.
- Save Form: After making changes, click the Save Form button to save your form to your website.
If you do not have any existing forms, read Create a Form from Scratch or Create a Form using Templates documentation to create a new one.
Form Template #
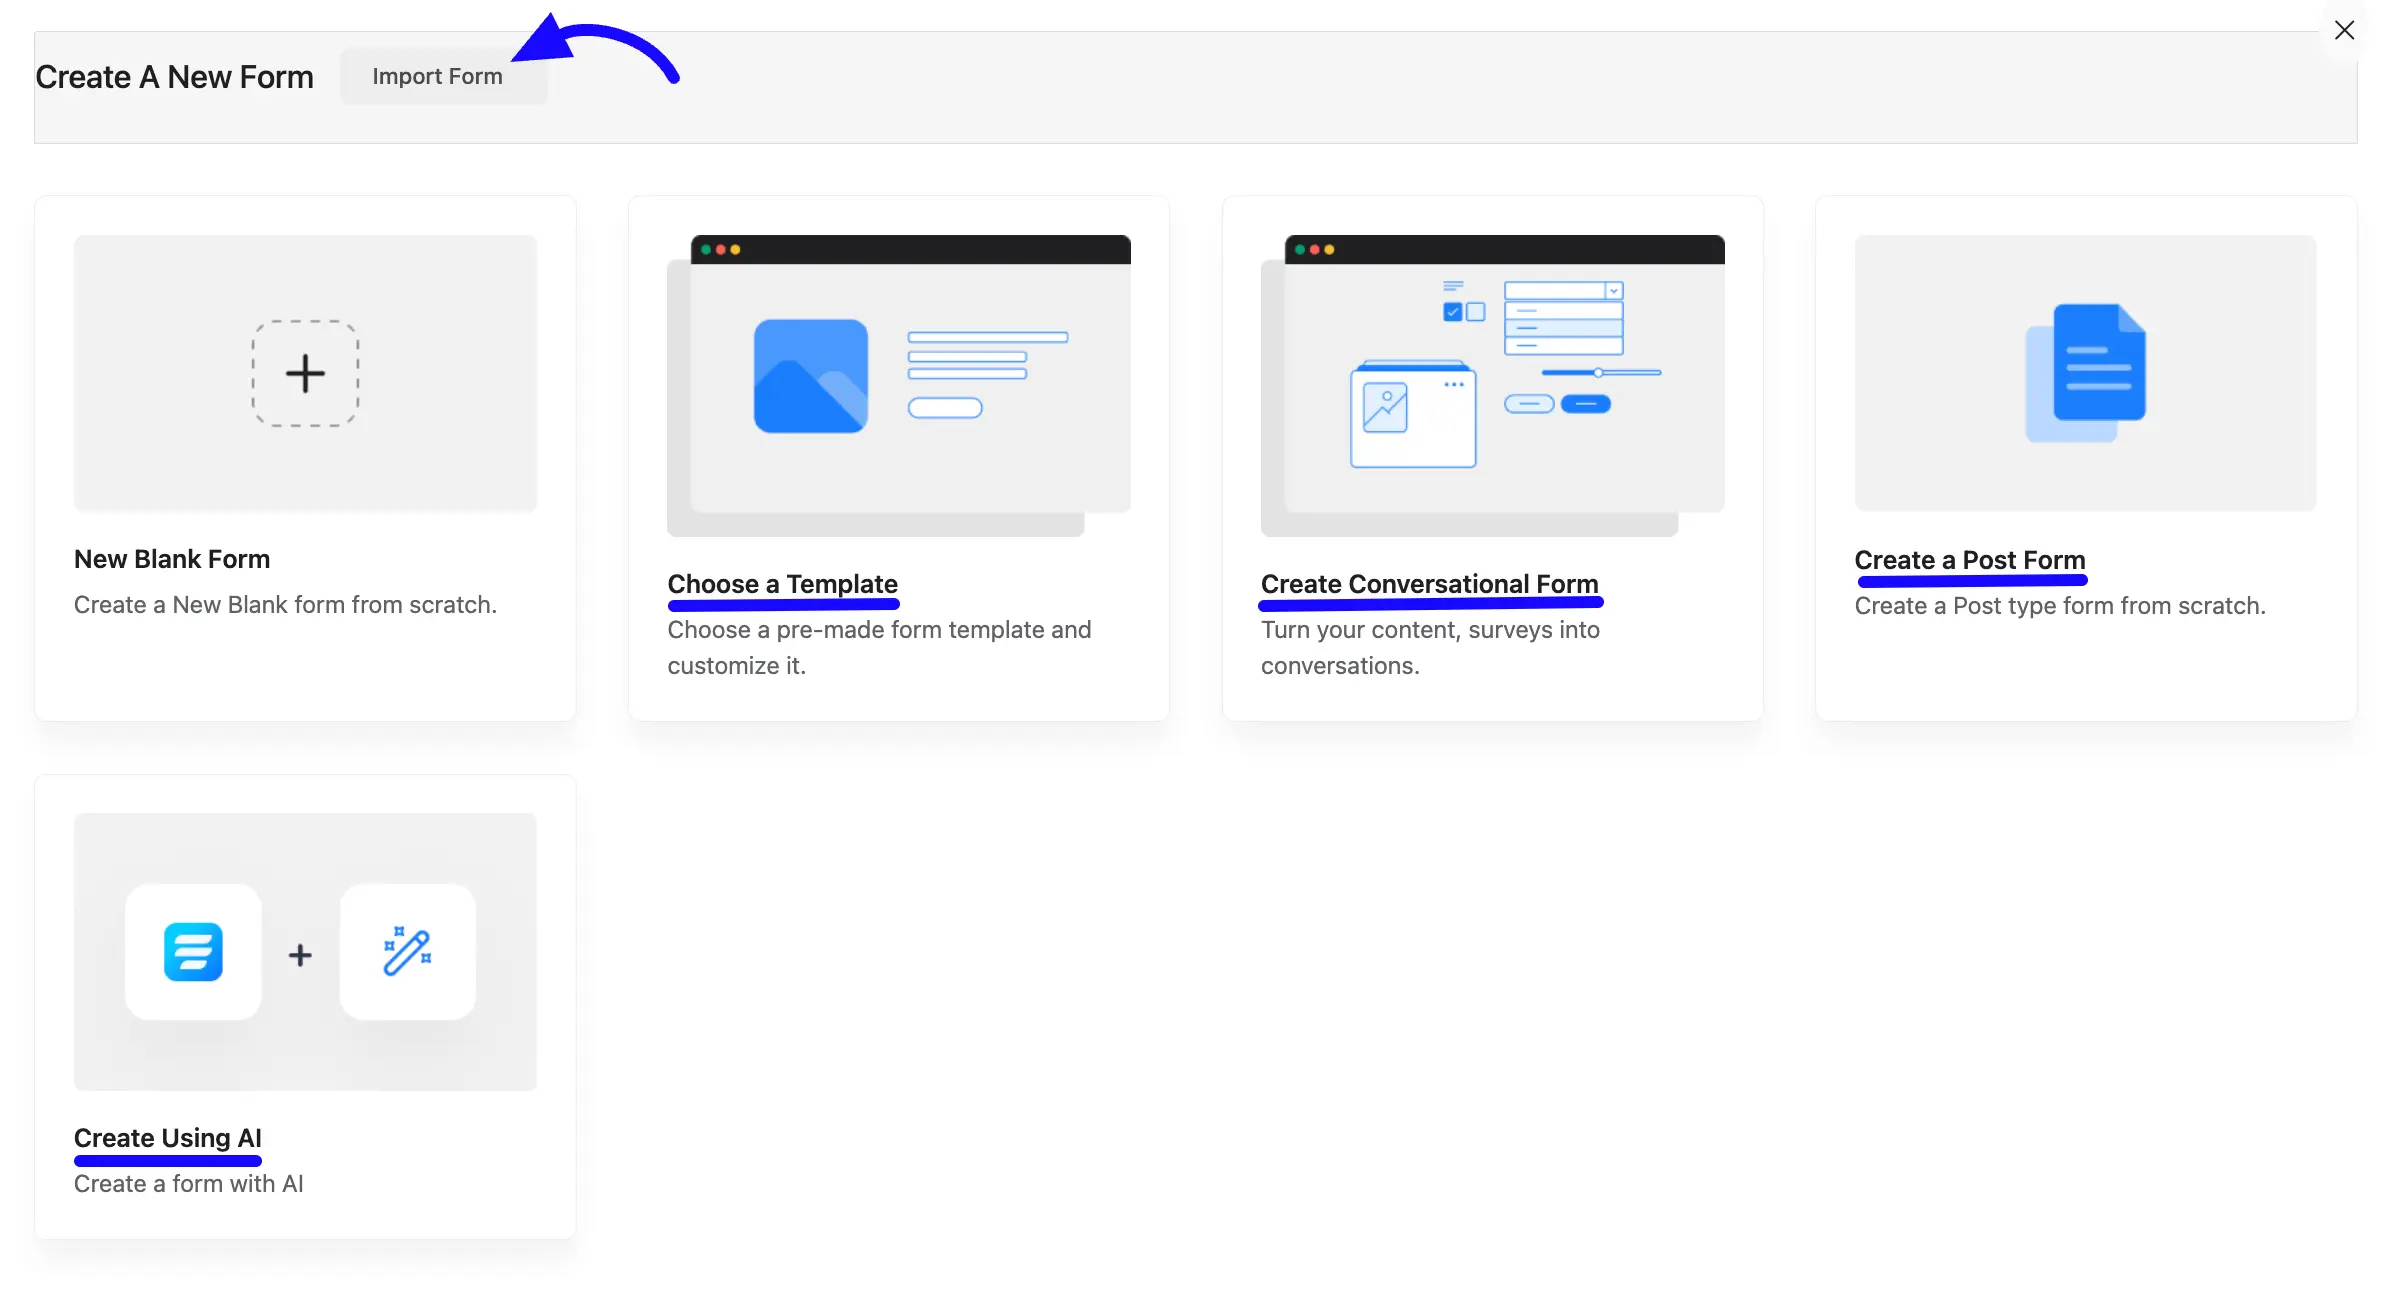
You can use a collection of ready-made form templates to quickly get started.
- Import Button: Click this button to import an existing template into your form builder.
- Choose a Template: Pick and customize a pre-designed template to fit your needs.
- Create Conversational Form: Use this option to start building a conversational-style form.
- Create a Post Form: Select this template to create a form that can generate WordPress posts. To learn more about Post Forms, check the related guide.
- Create a Form with AI: Choose this option to generate a form using AI. To learn more about Fluent Forms AI Builder, read this article.
Entries #
The Entries section shows all the form submissions collected on your website. You can filter them by specific forms or by read and unread status. You can also import entries from other sources. For more details, check out the full article on Entries.

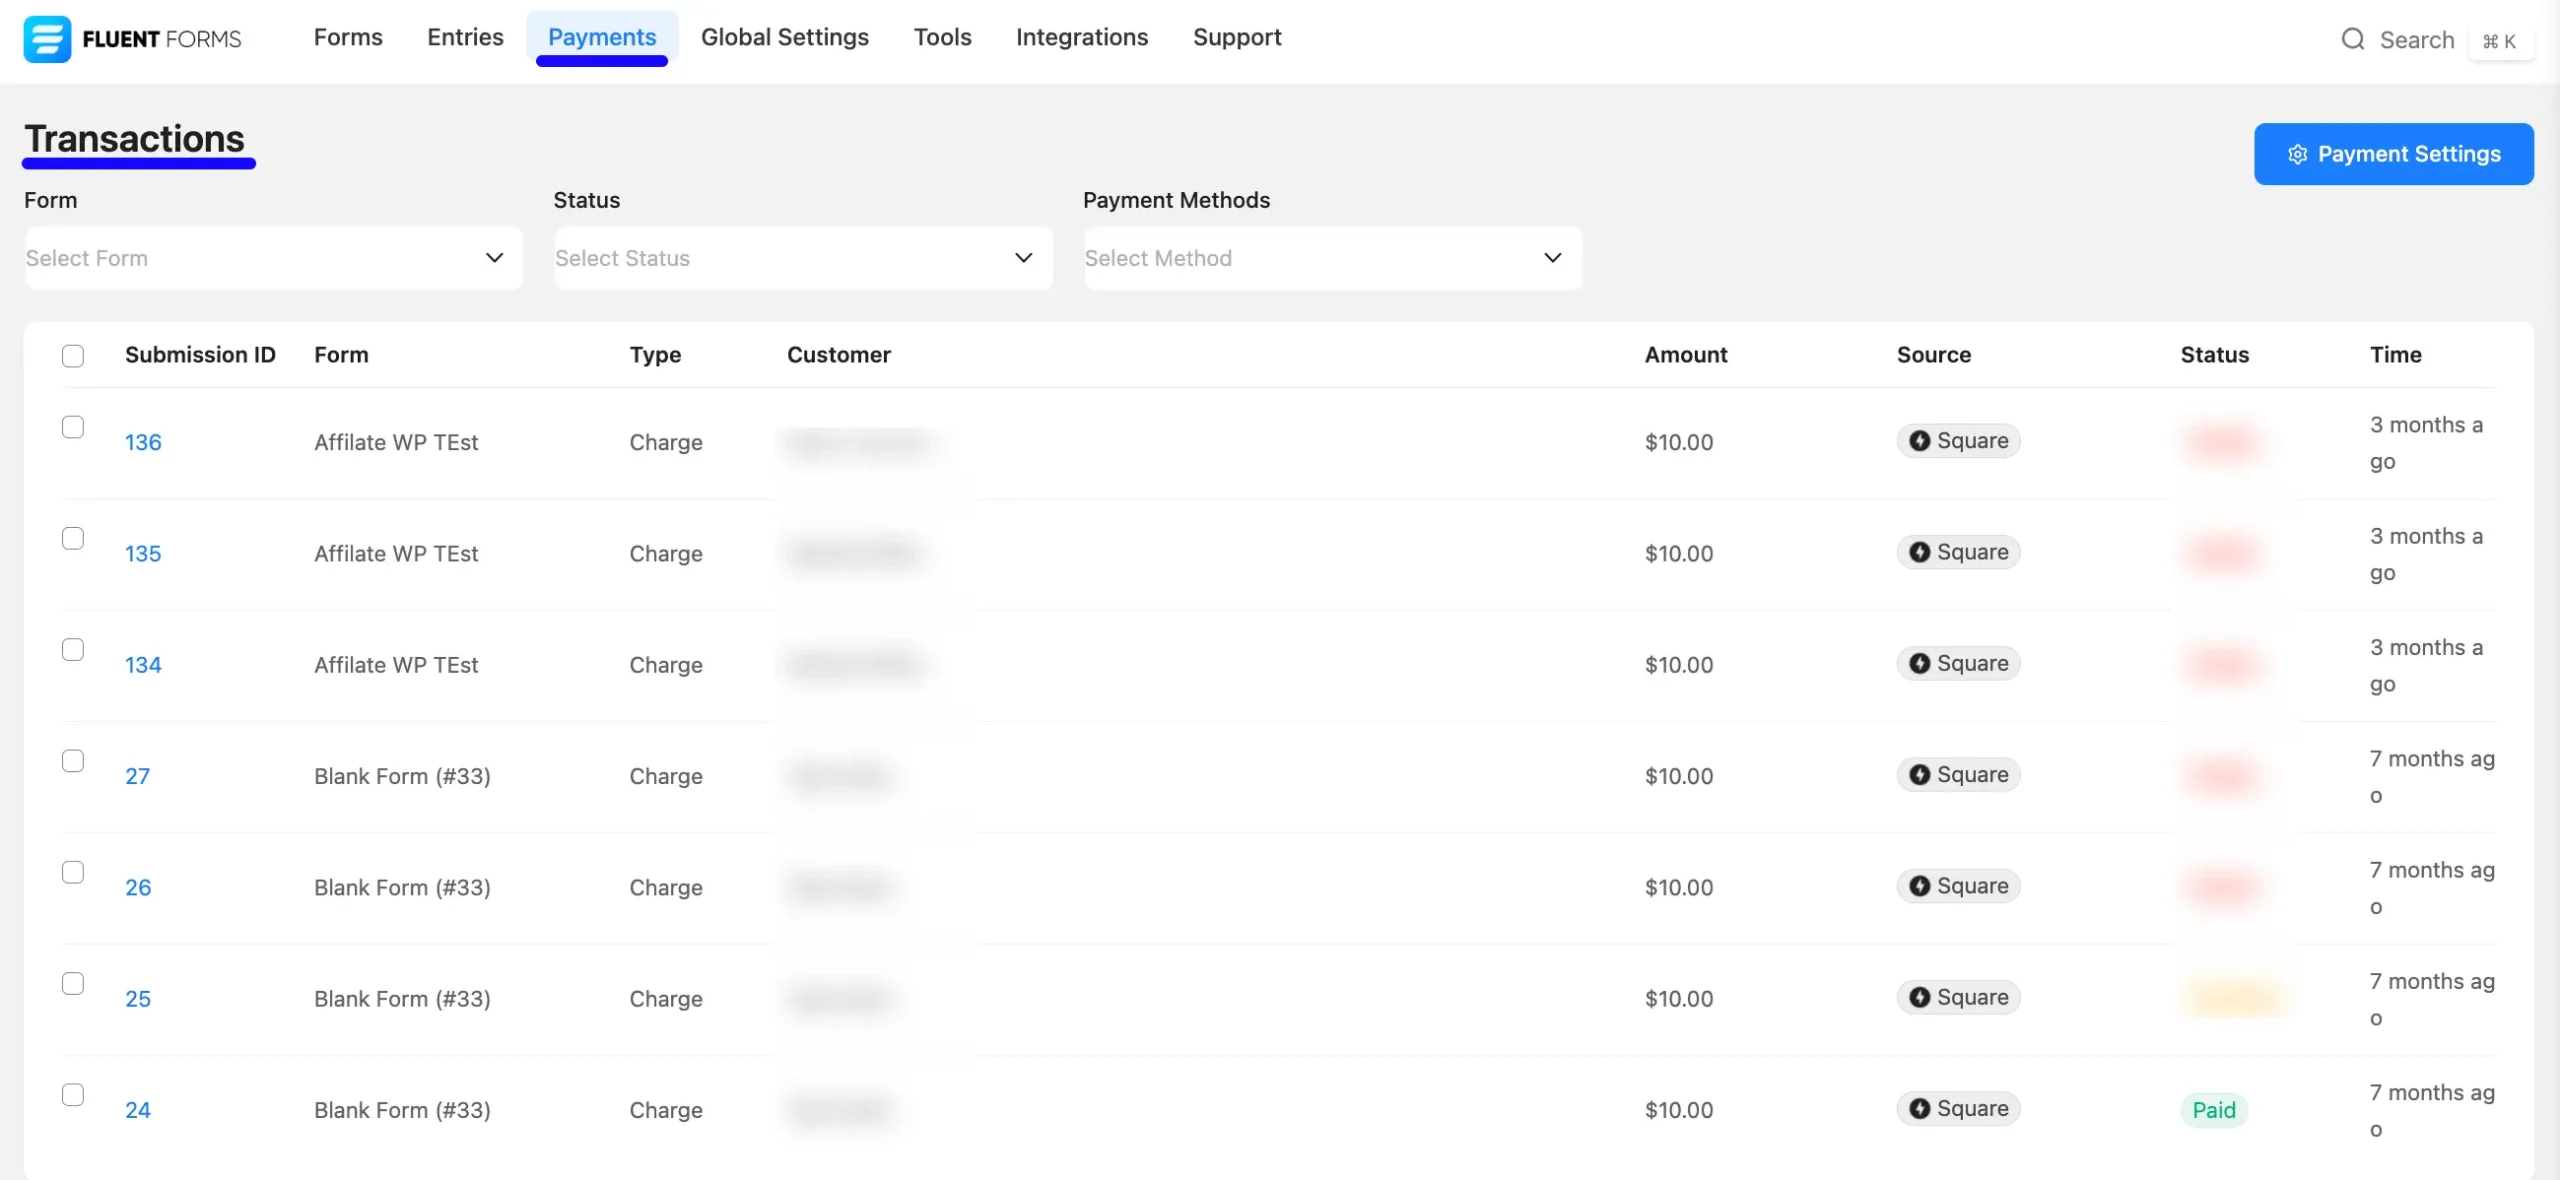
Payment #
Once you enable the payment feature, you can choose and set up your preferred payment methods, such as Stripe, PayPal, or Razorpay. You can also connect specific forms to specific payment options based on your needs.
When you click the Payments menu, you’ll see a list of all transactions made through your forms. You can view payment details for each form separately.
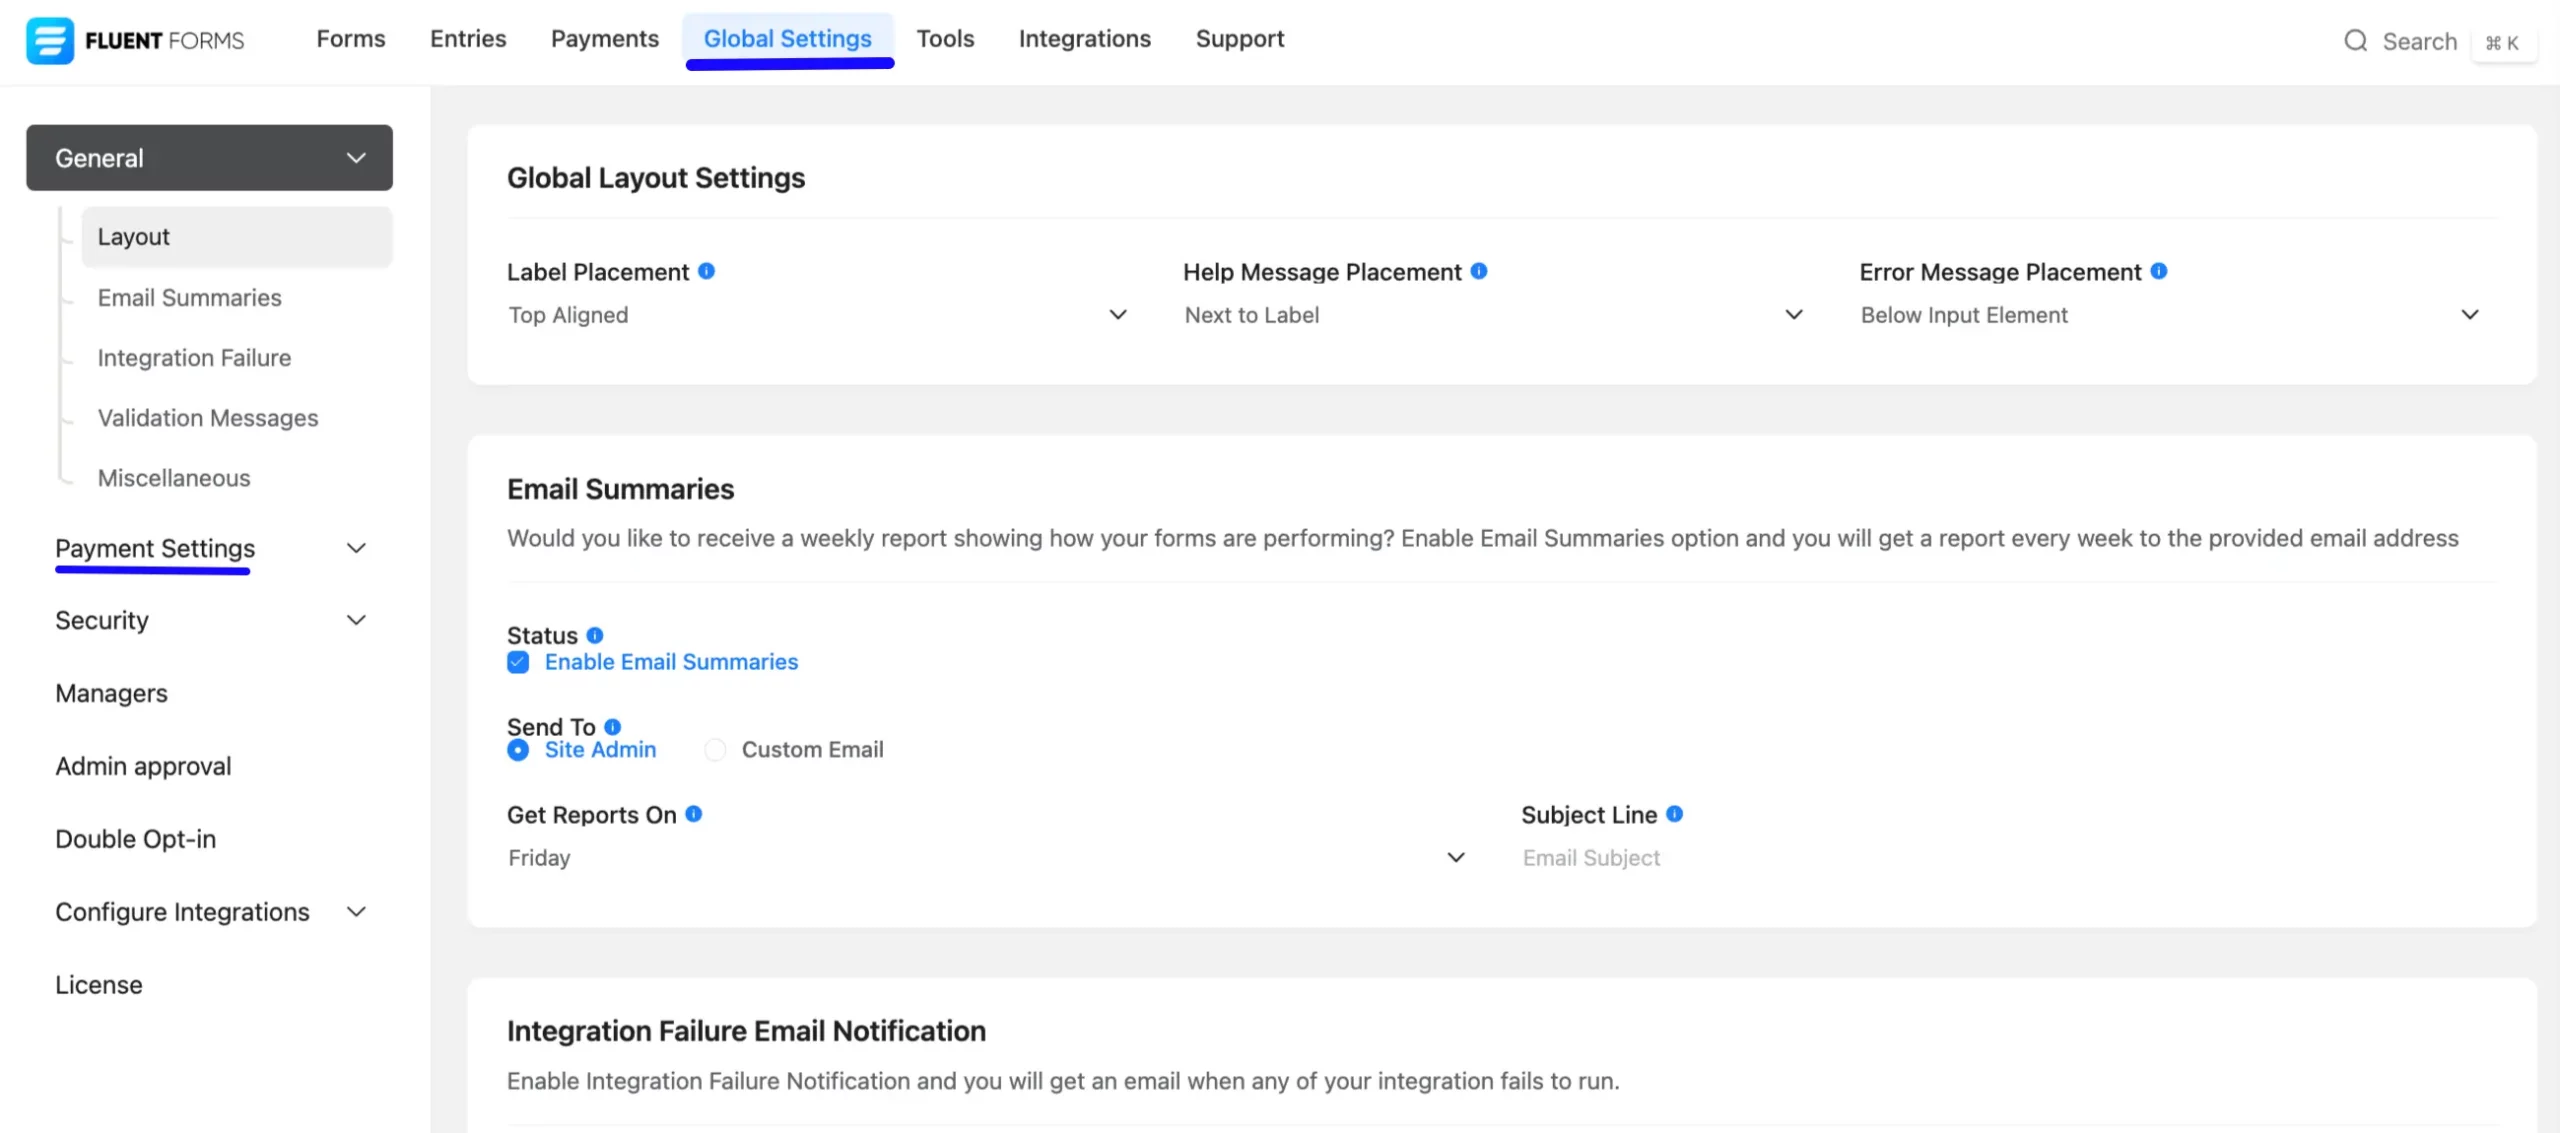
Global Settings #
Global Settings is the section where you can manage both general and form-specific settings in one place. From here, you can adjust overall options like default layouts, integration settings, form behaviors, and other preferences that apply to all forms on your site.
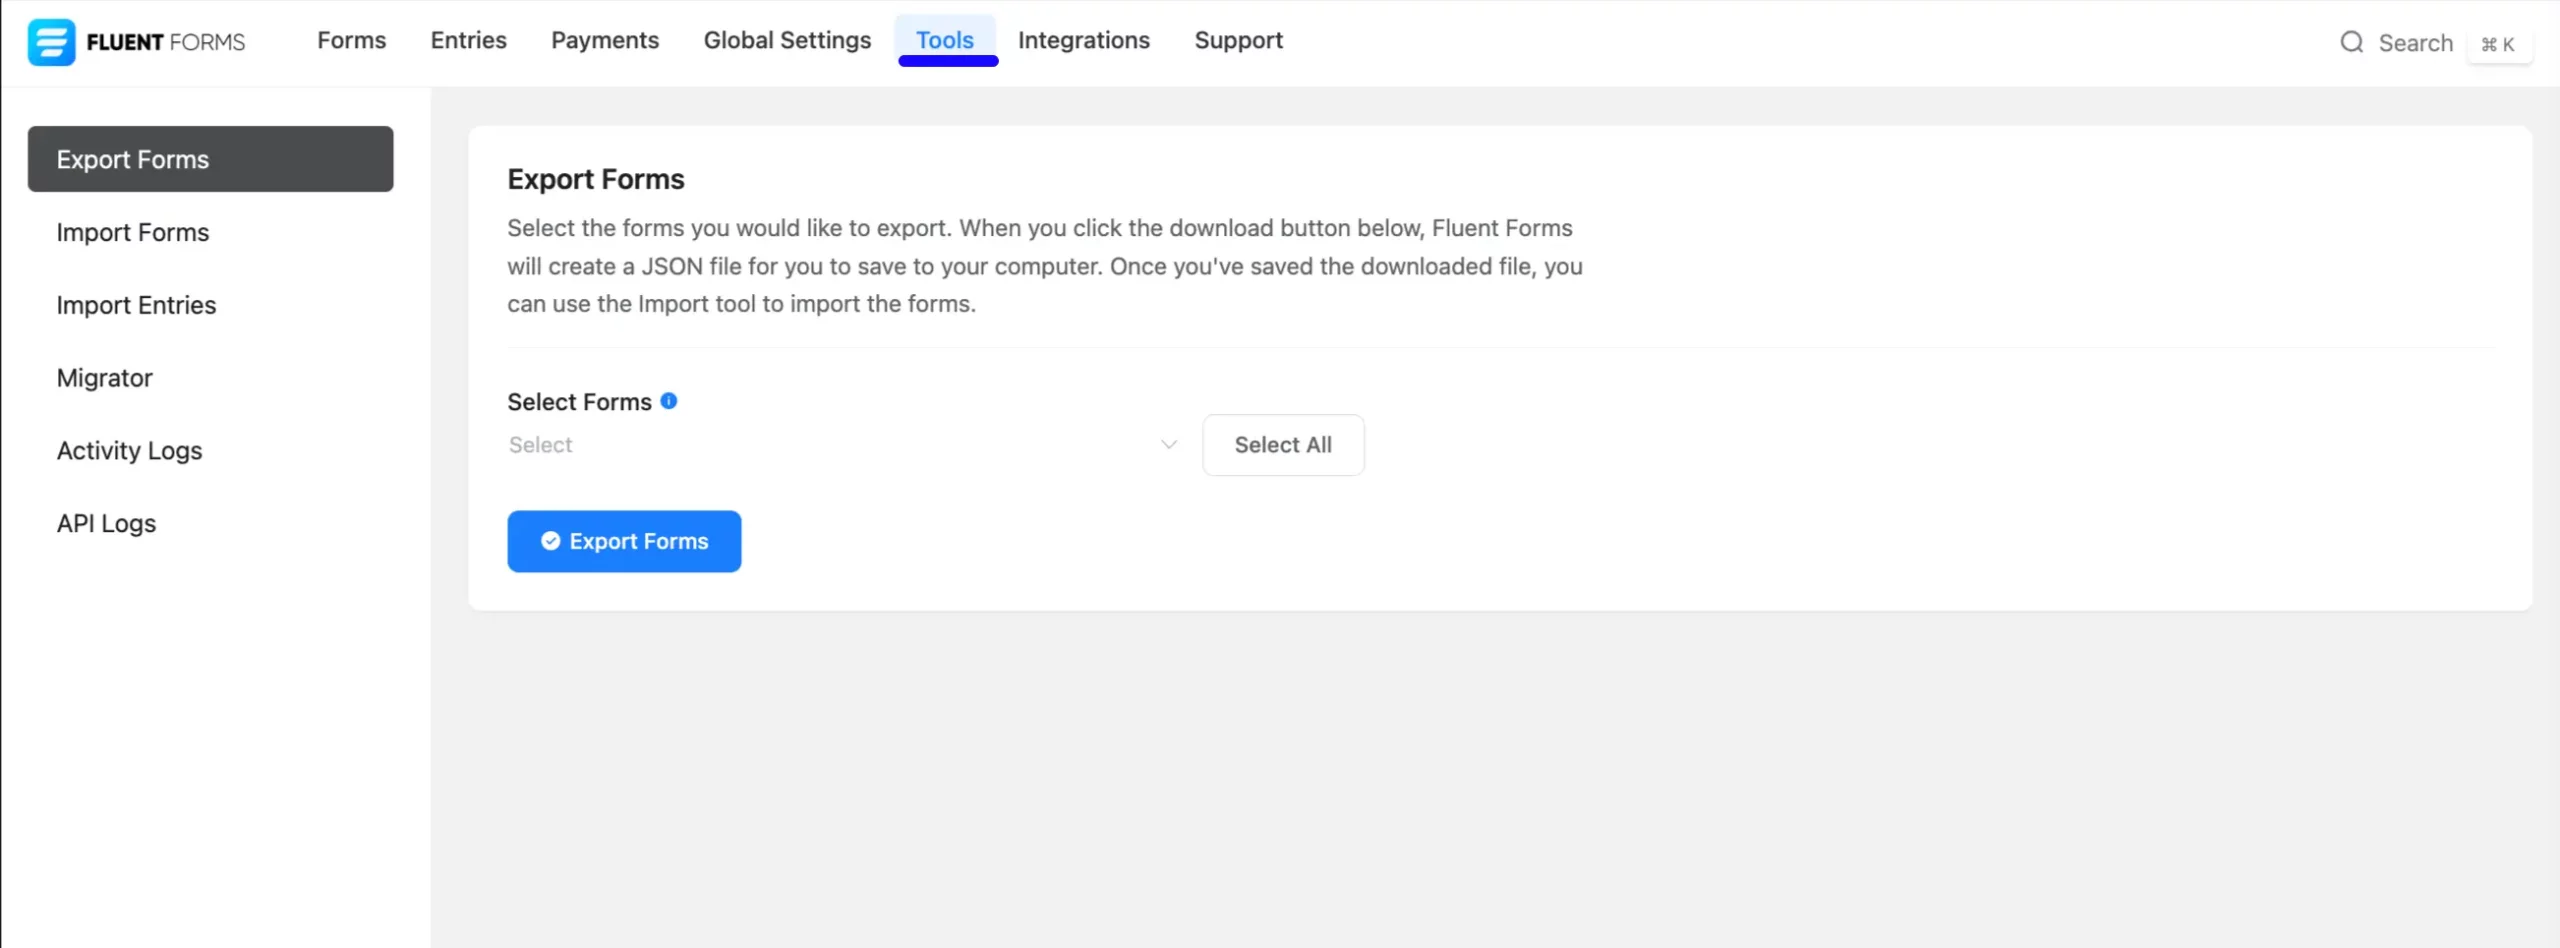
Tools #
The Tools section in the Fluent Forms Dashboard allows you to easily manage and transfer your forms and data. In this section, you can:
- View API activity logs
- Export and import forms
- Import entries from JSON or CSV files
- Migrate forms from other plugins.
- Monitor form activity
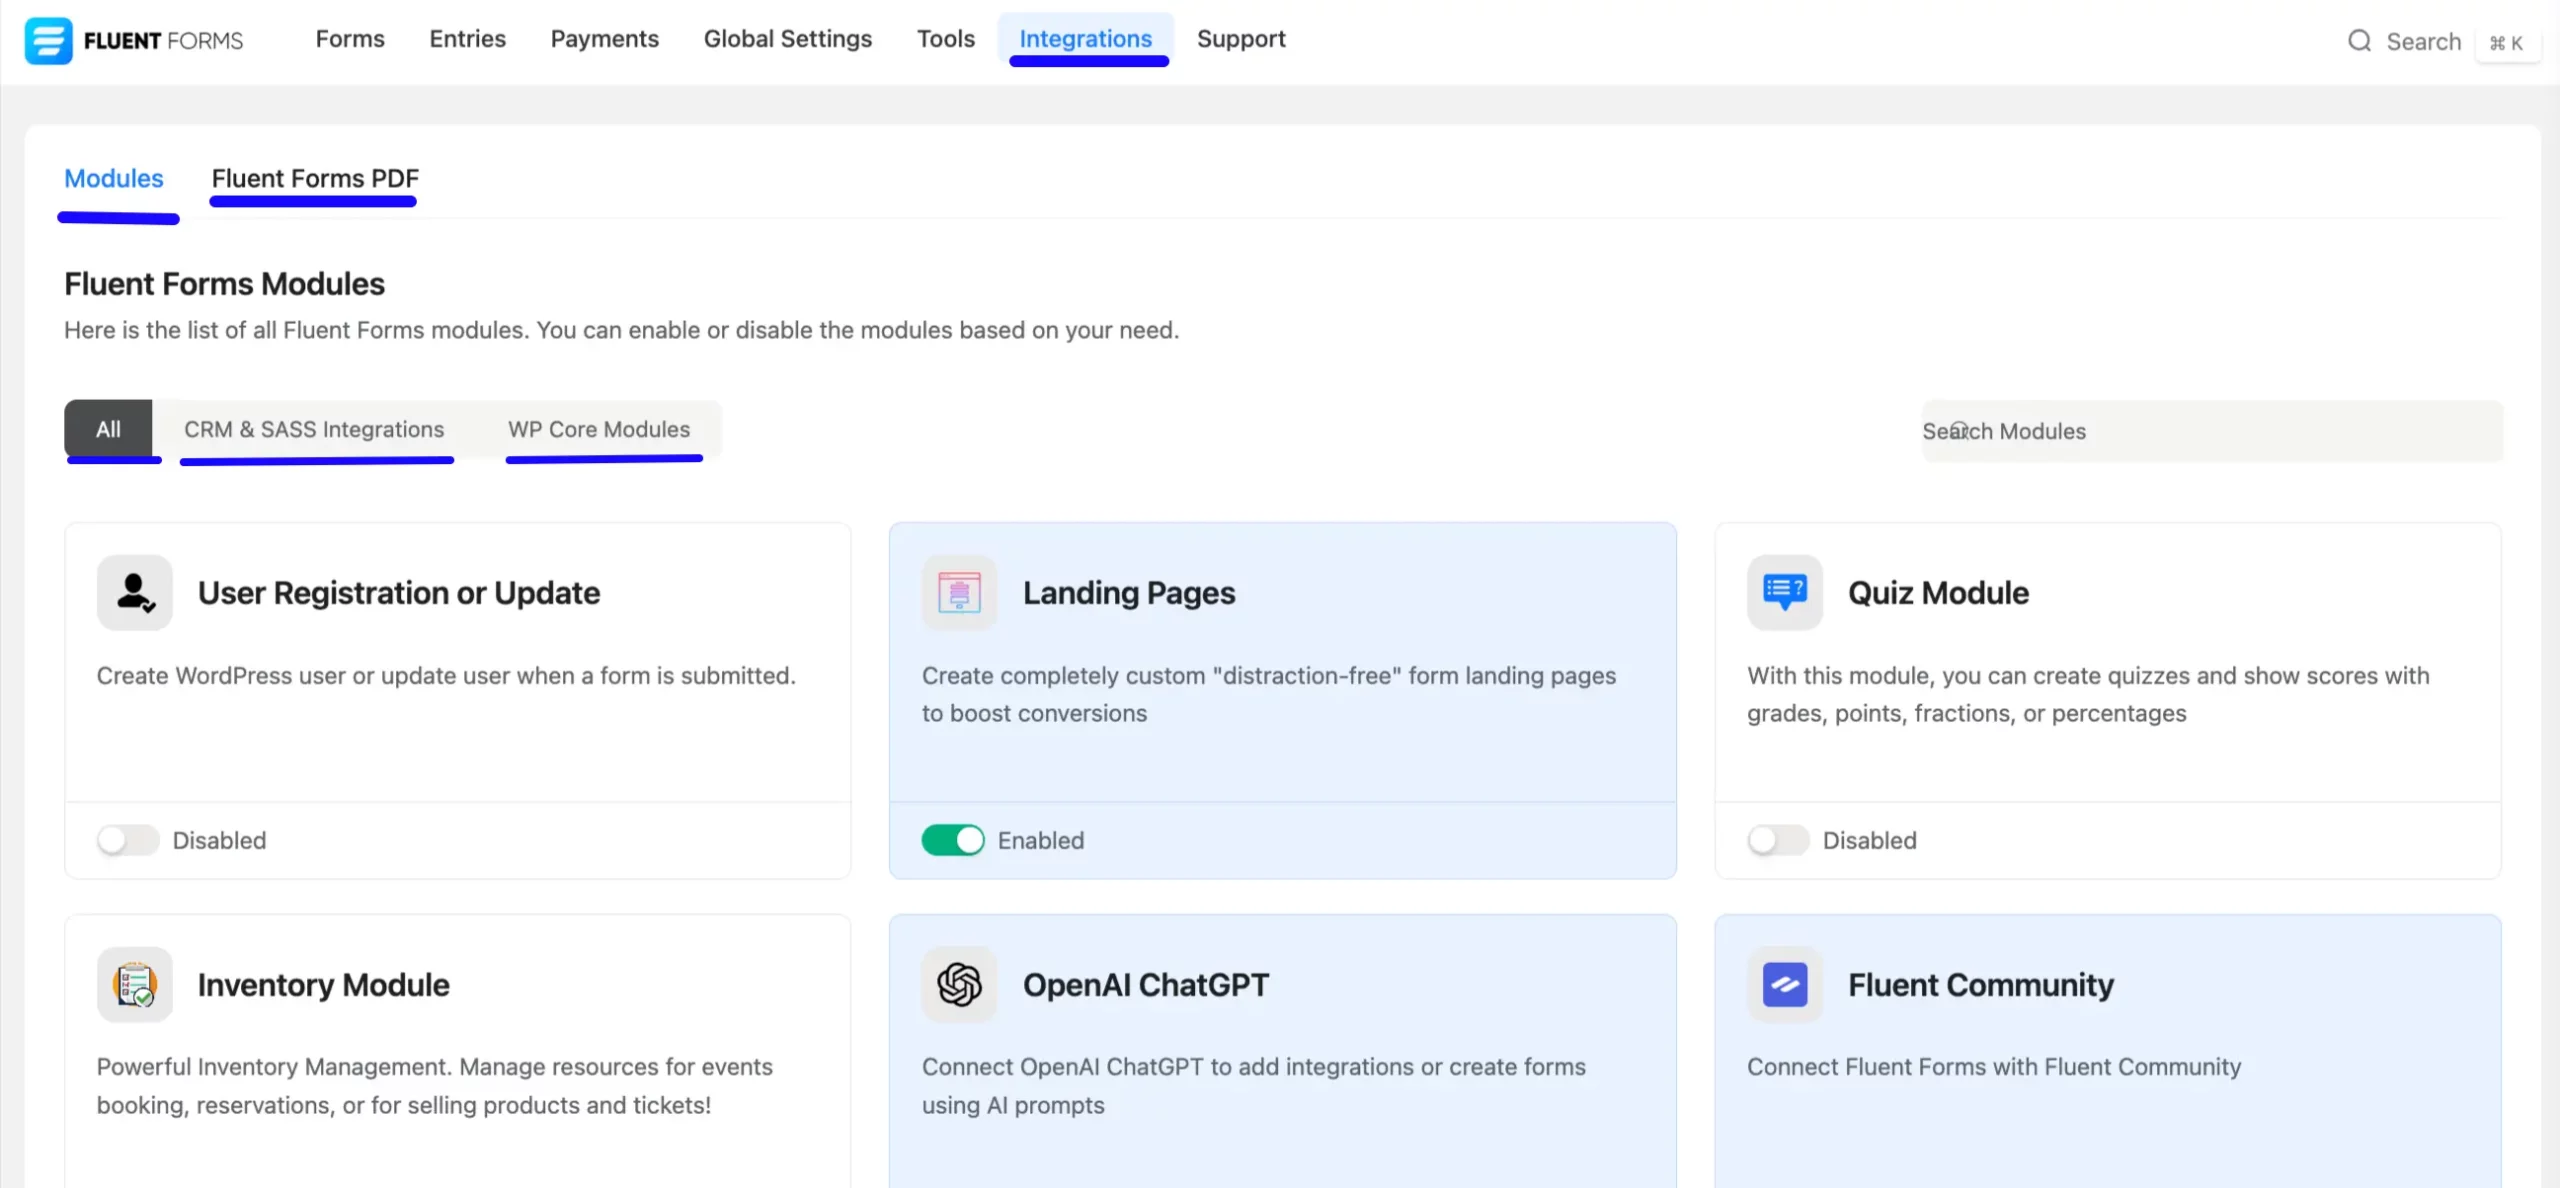
Integration #
Here is the list of modules you can turn on or off using the Toggle button.
Modules: There are three fluent forms module options: All, CRM & SASS integration, and WP Core module. You can search for modules in the right-side search boxes.
Fluent Form PDF: The Fluent Forms PDF module allows users to generate and download form submissions as PDF files.
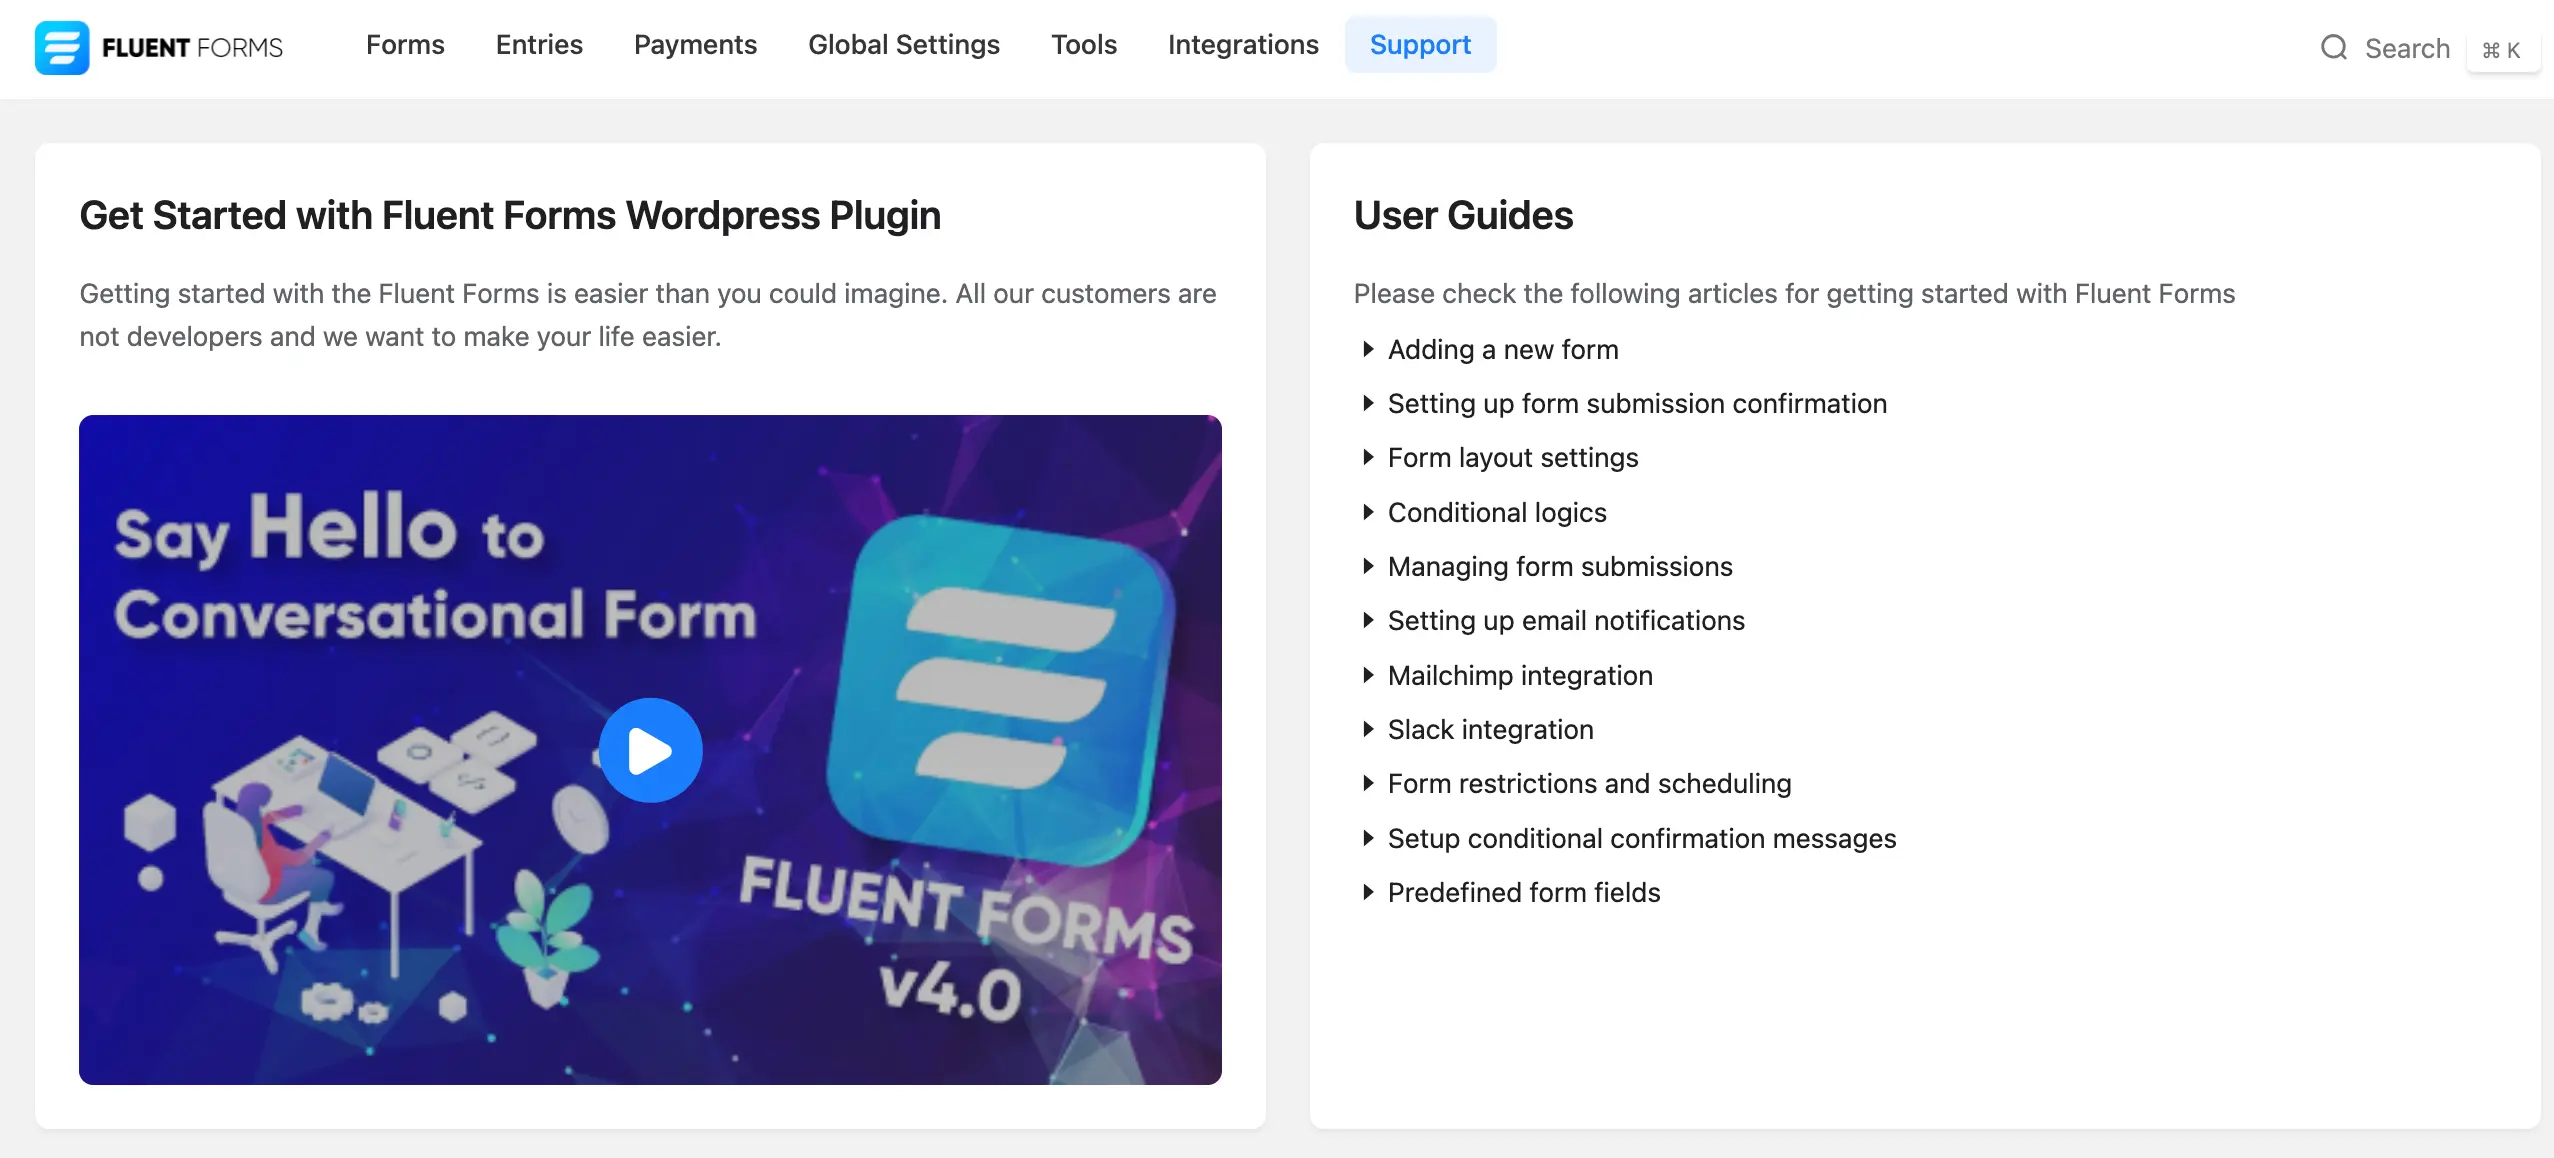
Support #
This Support menu contains user guidance, documentation, community support, and expert live support. You can also request features here.
This overview highlights the essential components of the Fluent Forms UI, making it easier for users to navigate and utilize the plugin effectively.
Here is Fluent Form’s basic user interface. If you have any questions, feel free to ask our support team. Thank you.


