Ready to create your first Form with Fluent Forms?
With Fluent Forms, you can easily publish your forms with just a few clicks. Follow these step-by-step processes to create and publish your first Forms on your site.
Creating a New Form #
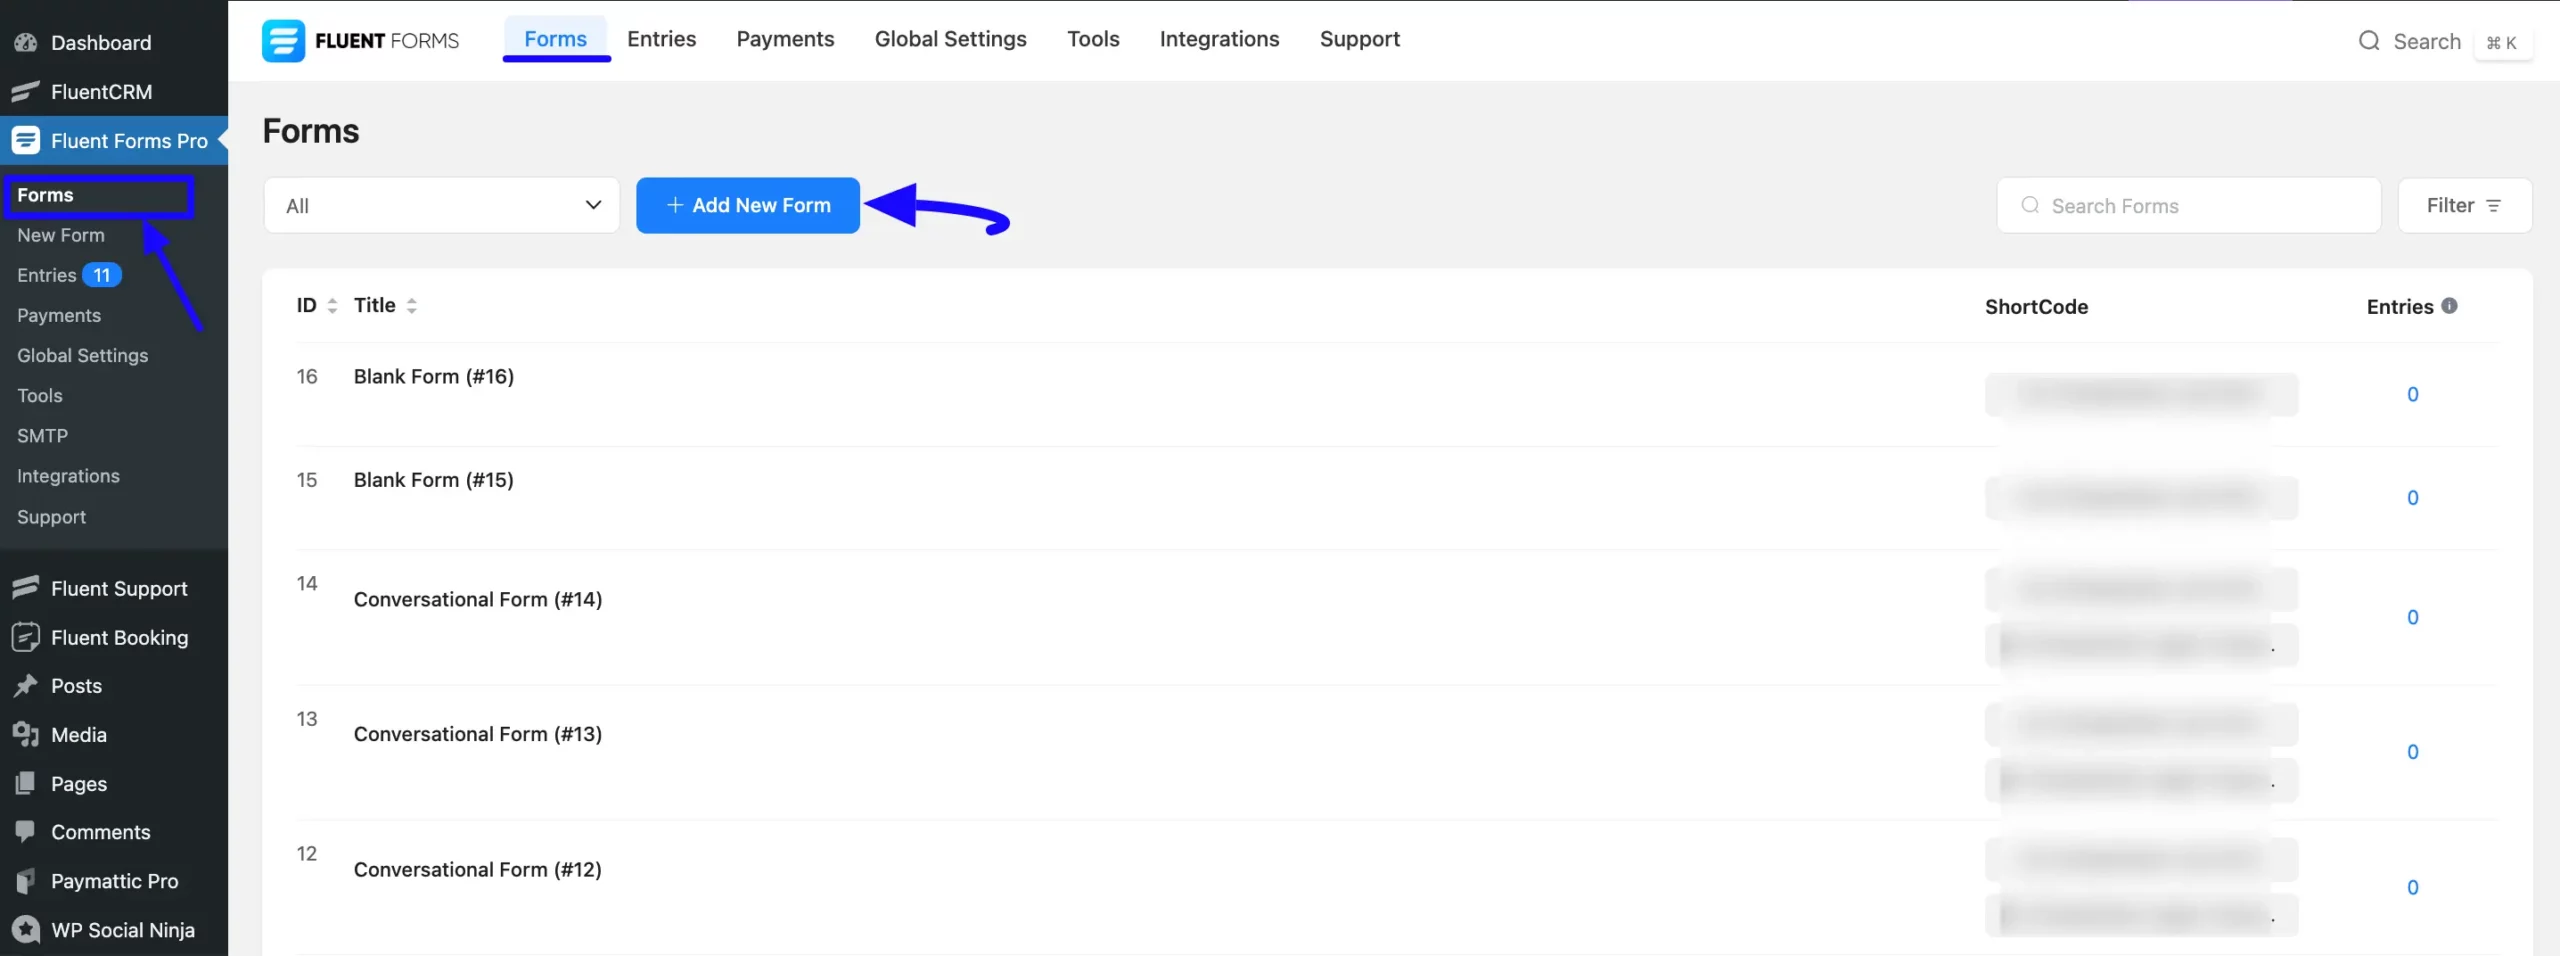
To start, log in to your WordPress Dashboard. Now, navigate to the Fluent Forms > Forms from the left sidebar.
Then click on the + Add New Form button in the Forms Section.
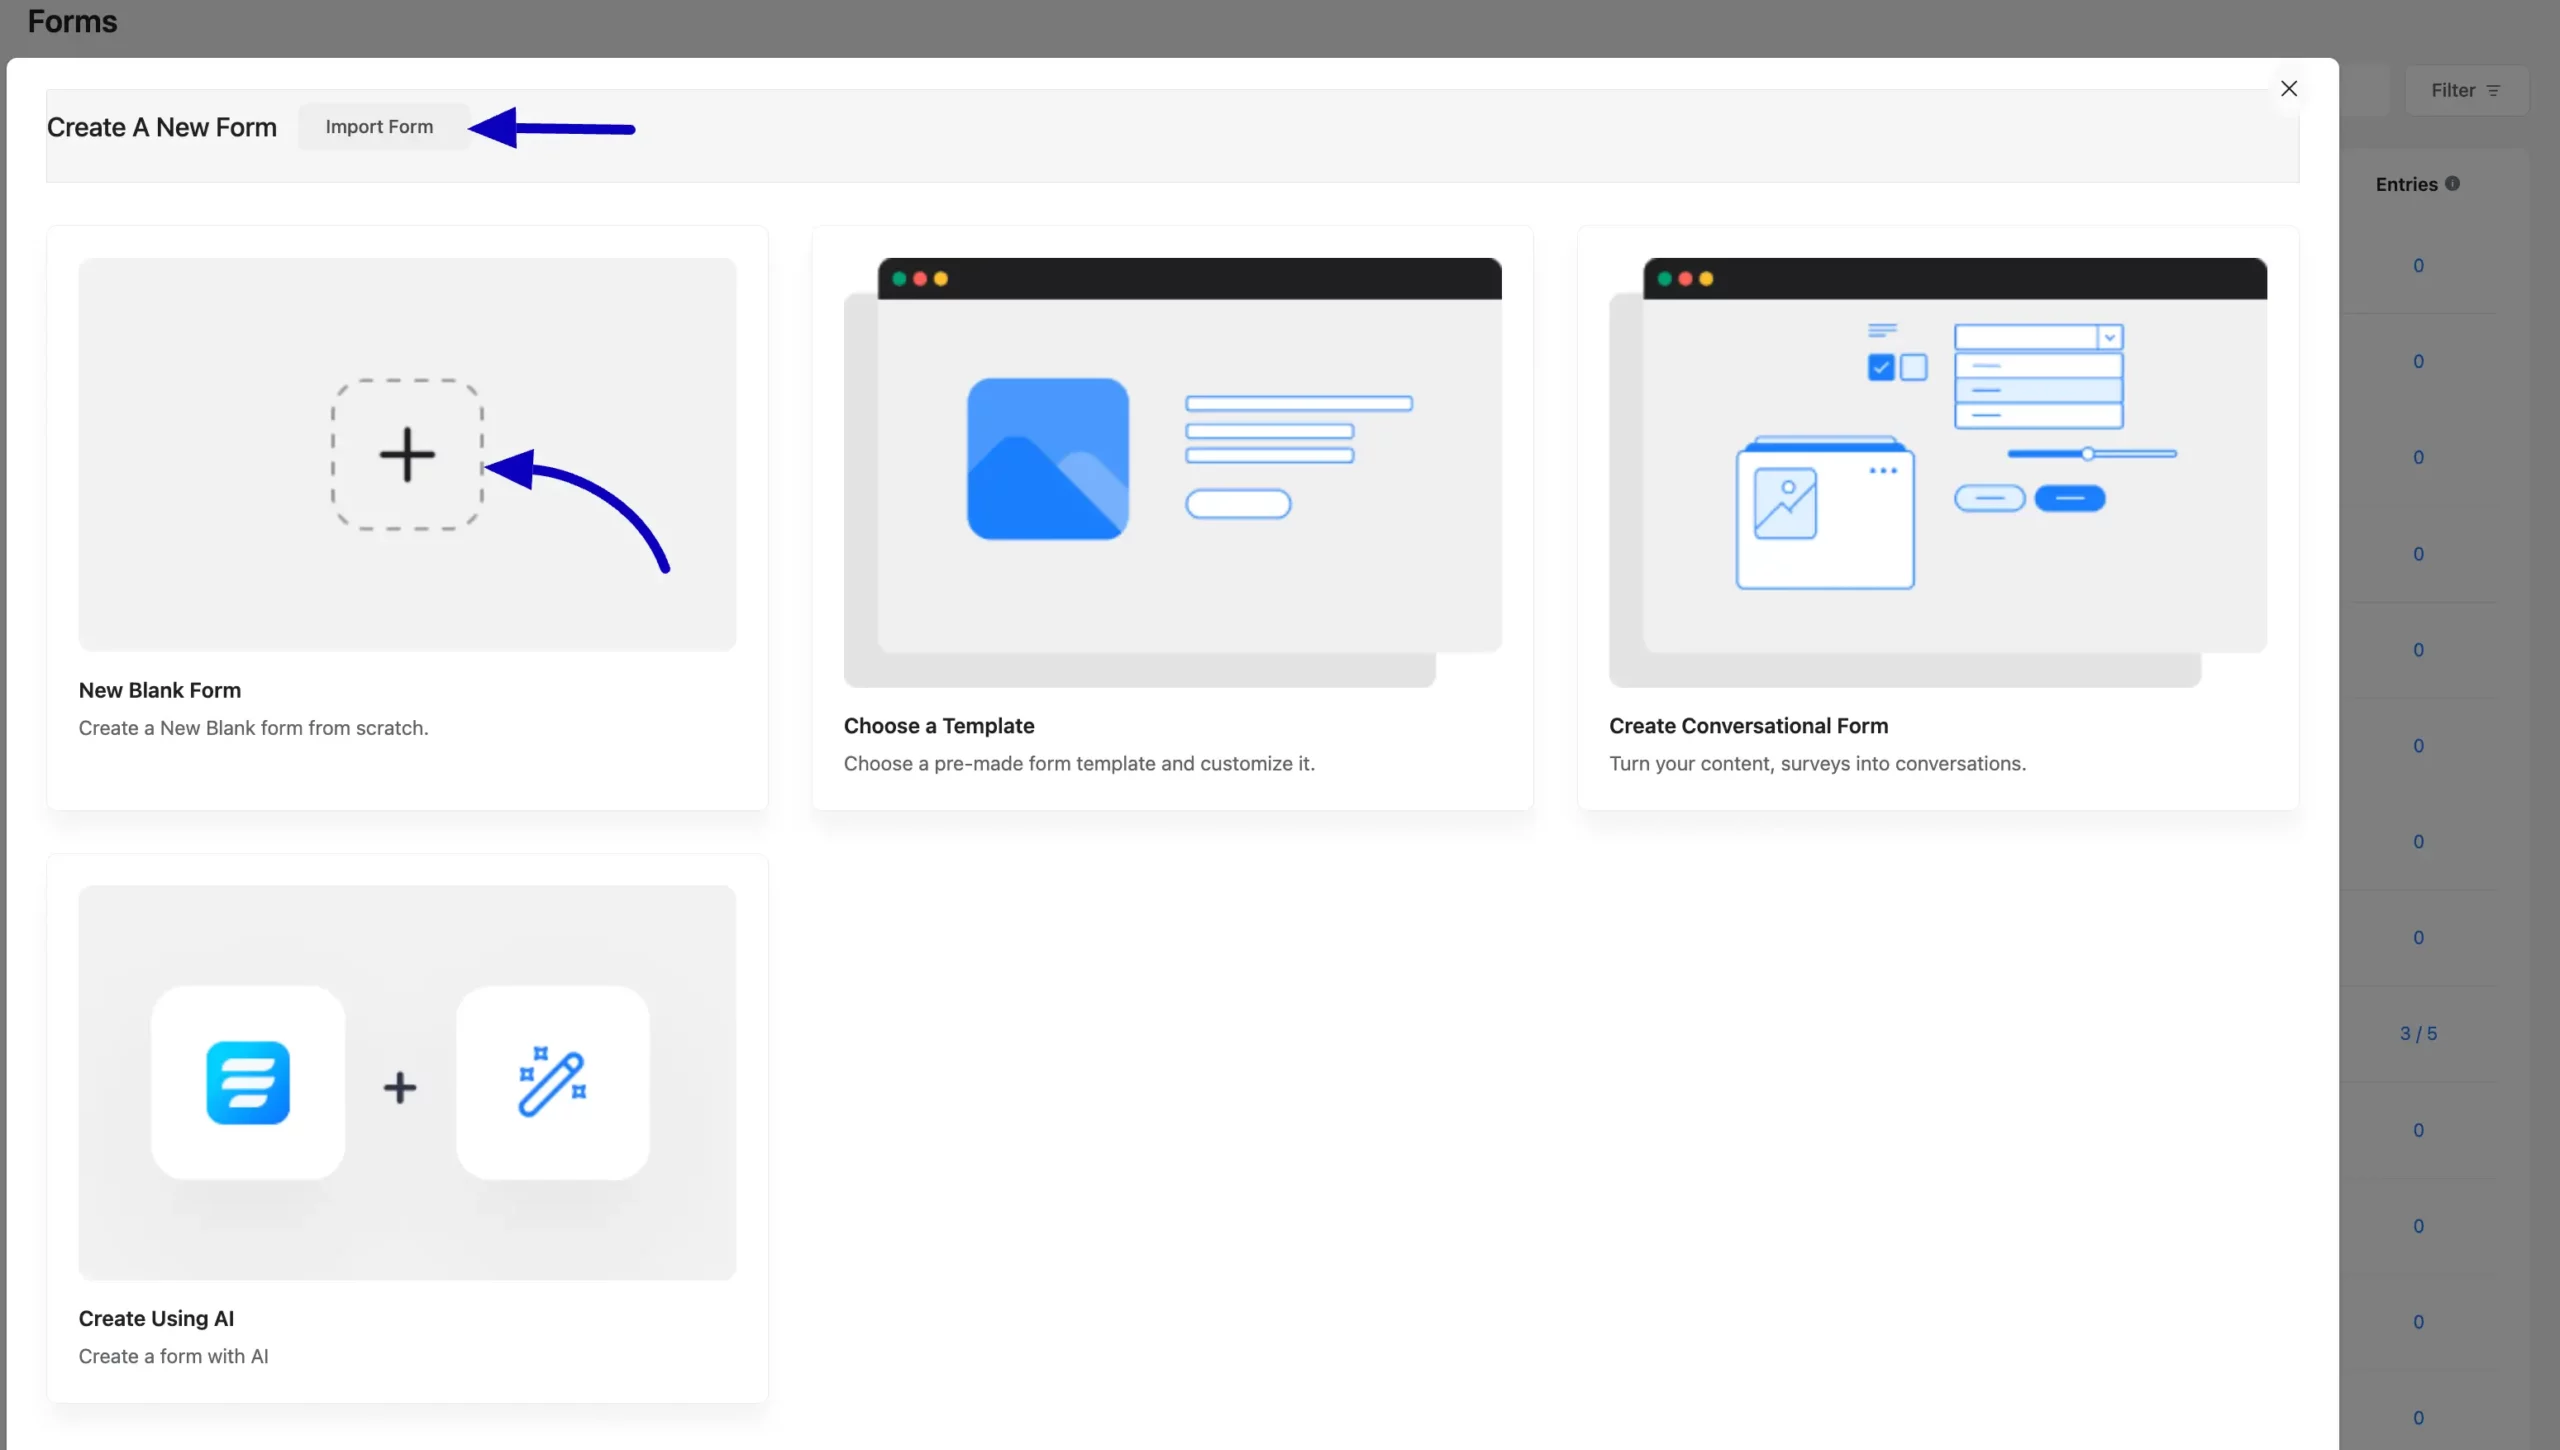
A popup will appear, and you will have some options to create a form. These are:
- New Blank Form: Creating a blank form allows you to build a form from scratch.
- Choose a Template: This option allows you to choose a pre-made template for your website, divided into different categories, to avoid the hassle of building form from scratch. To use the premium templates, you need to install & activate the Fluent Forms Pro Add-on.
- Conversational Forms: This allows you to transform content or surveys into interactive conversations.
- Create Using AI: This option allows you to create a form with AI.
You can also import ready-made forms by clicking the Import Form button. For example, here I created a Blank From from scratch to show you the whole process of creating a new form.
First, click the Plus Icon to create a new blank form.
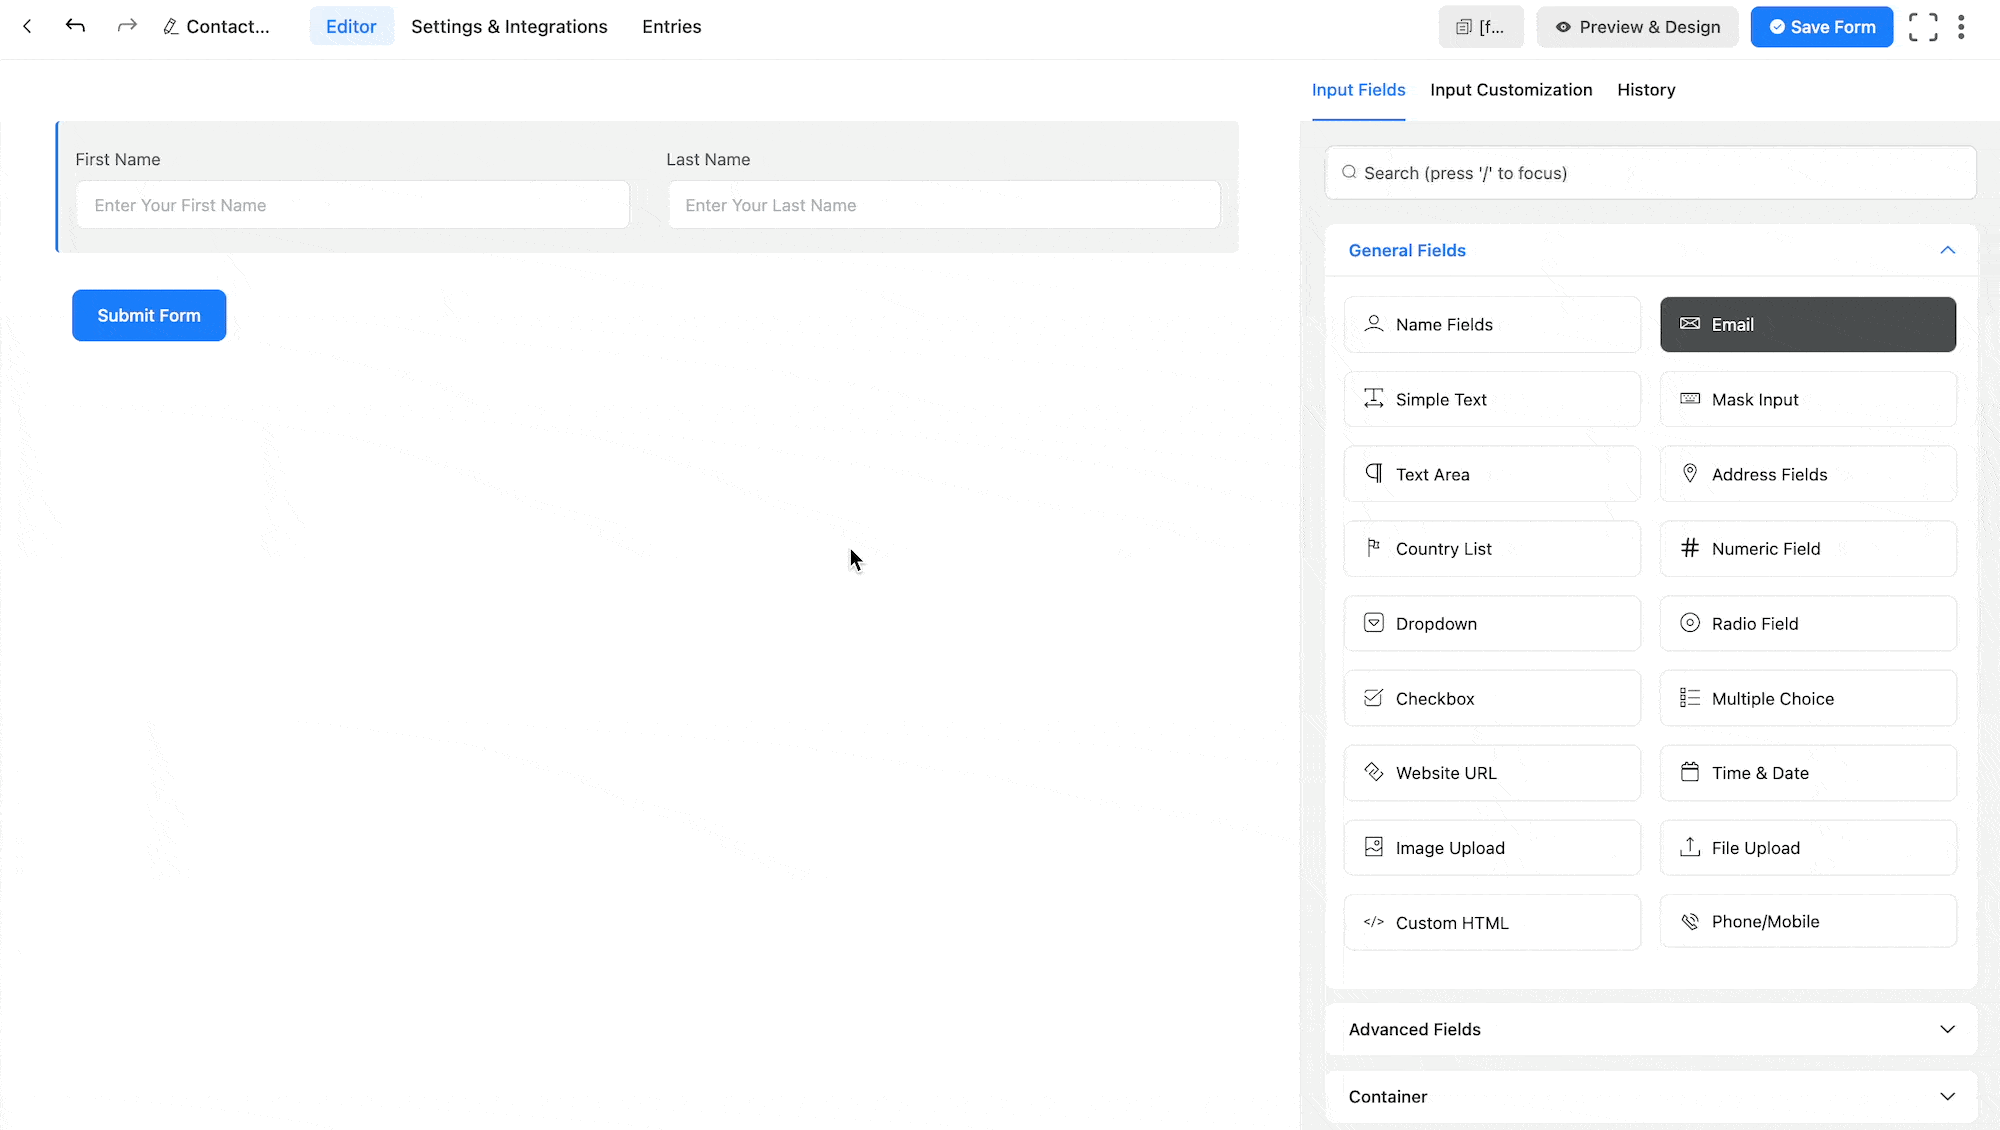
Adding Fields #
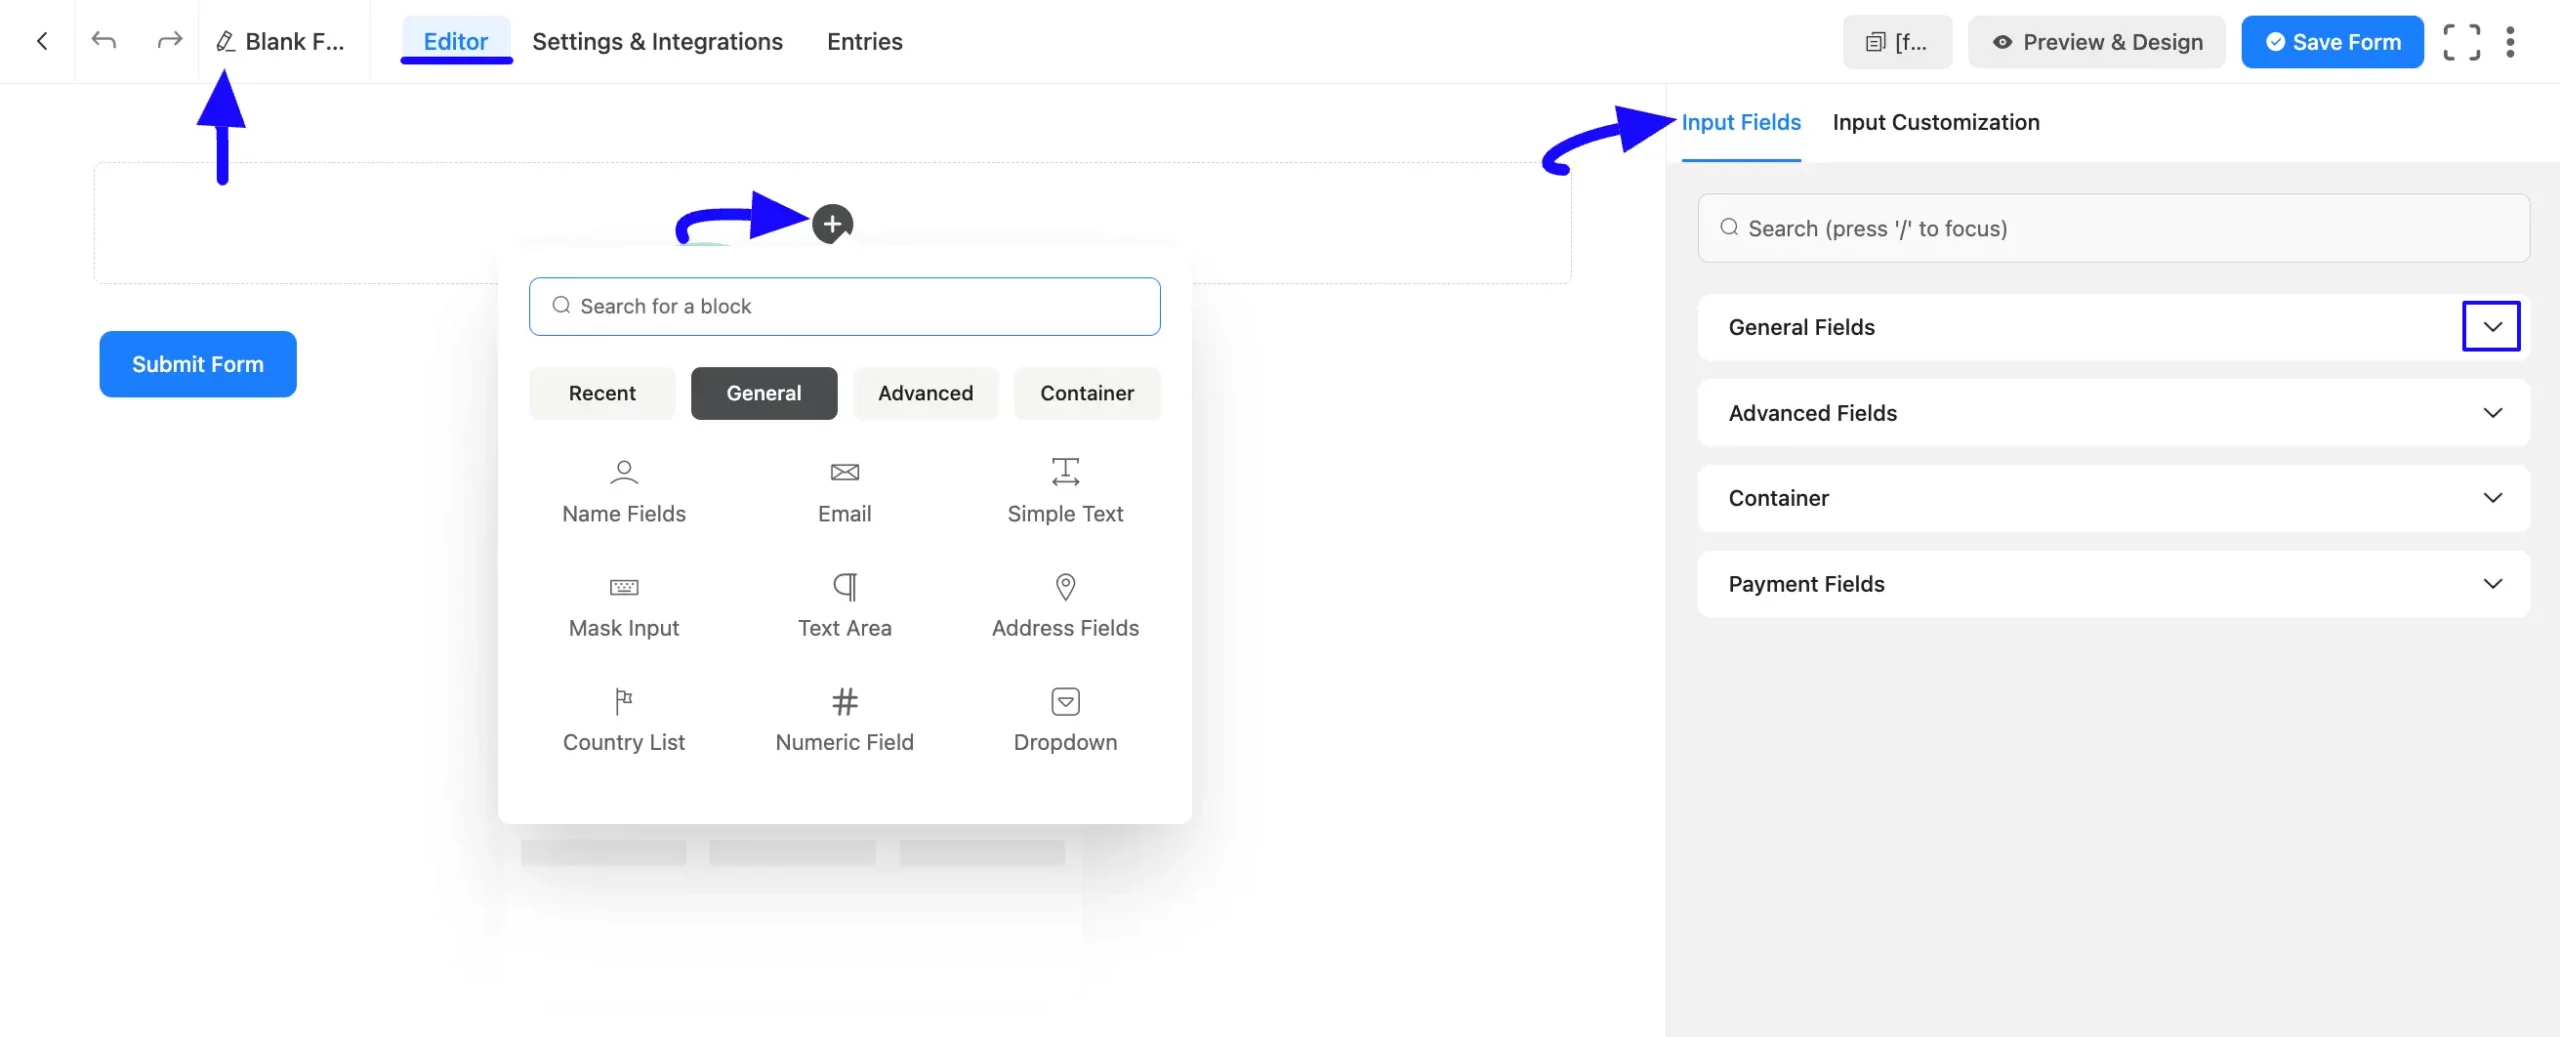
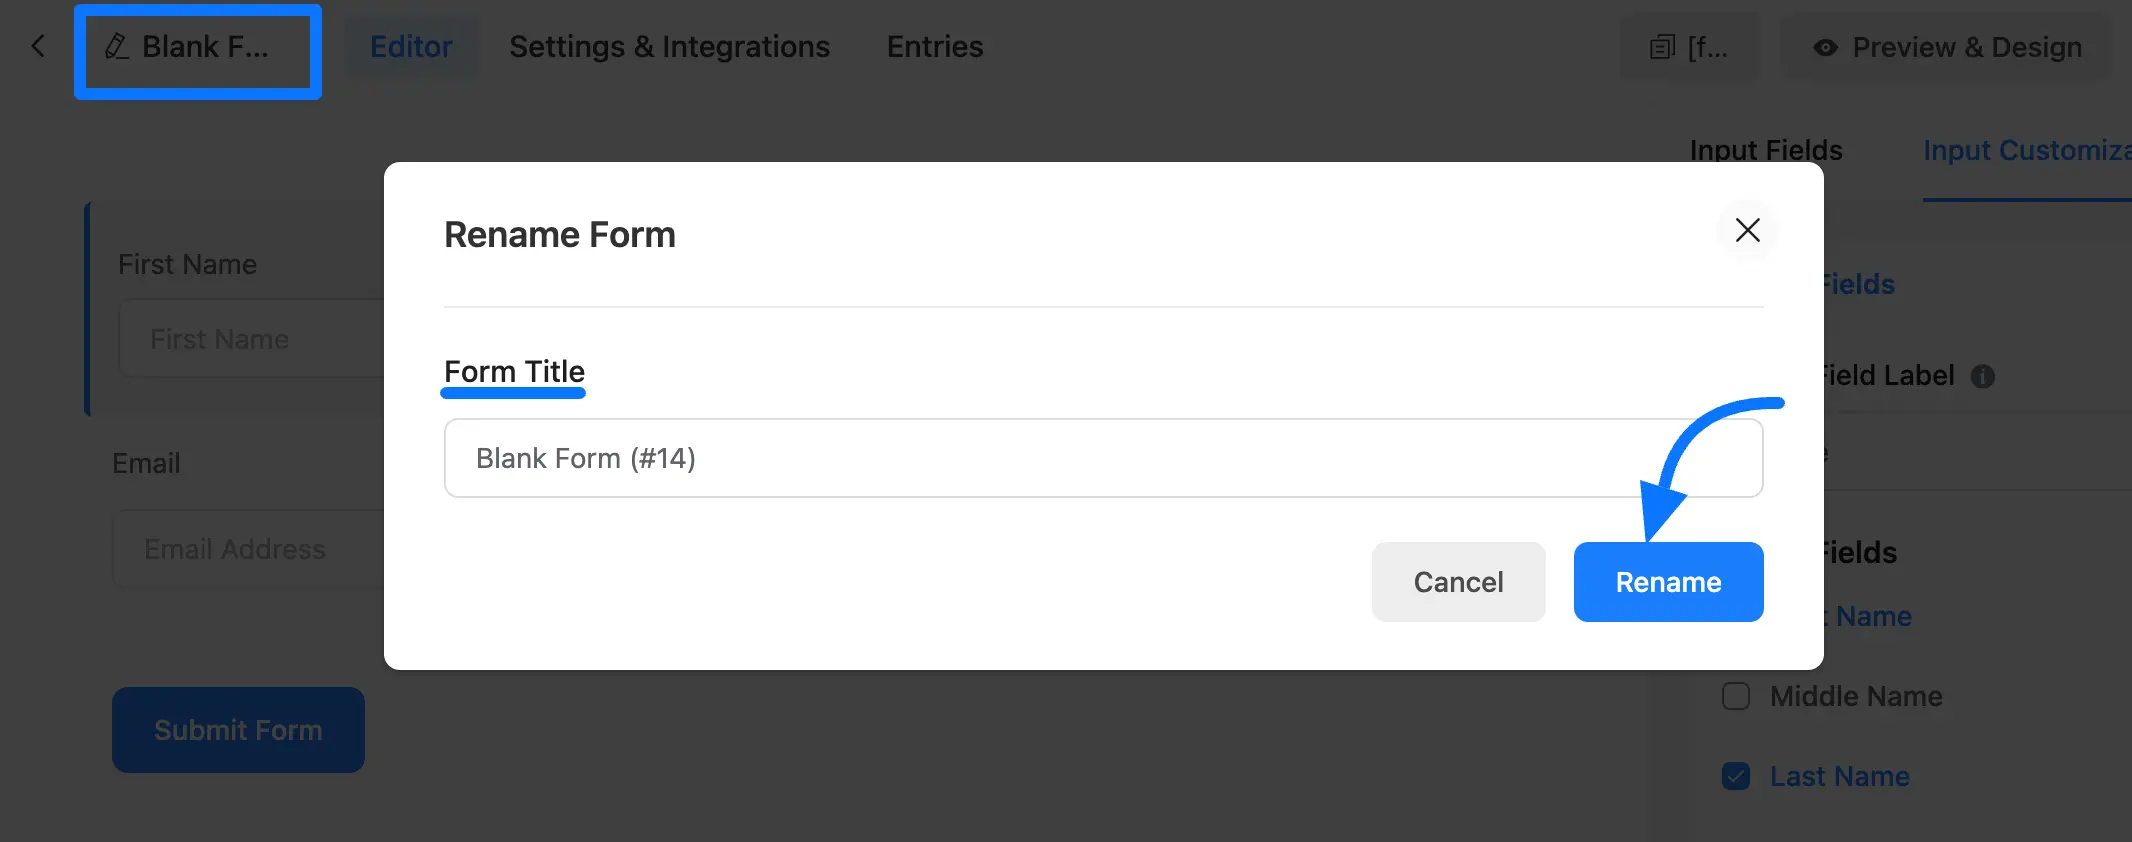
Here comes the Editor page. Now, click the Pencil Icon in the left corner to edit your form name.
To add the desired fields, either click the Plus Icon or open the Fields Sections by clicking the Dropdown Arrow under the Input Fields tab.
You can also search for the desired fields by their name using the Search Bar.
Once you click the Pencil/Edit Icon, a new pop-up will appear to set the form title. Now, type the desired Title Text and click the Rename button to set Form Names.
Now add fields according to your requirements by clicking the desired Field buttons or just Drag and Drop them into the Editor. To learn more about adding fields, click here.
Customizing Form #
Now, to customize the Fields, hover over the desired field and click the Pencil/Edit Icon.
It will redirect you to the Input Customization tab on the right sidebar, which offers a wide range of customization possibilities, from renaming a field to setting the maximum size of a file input field.
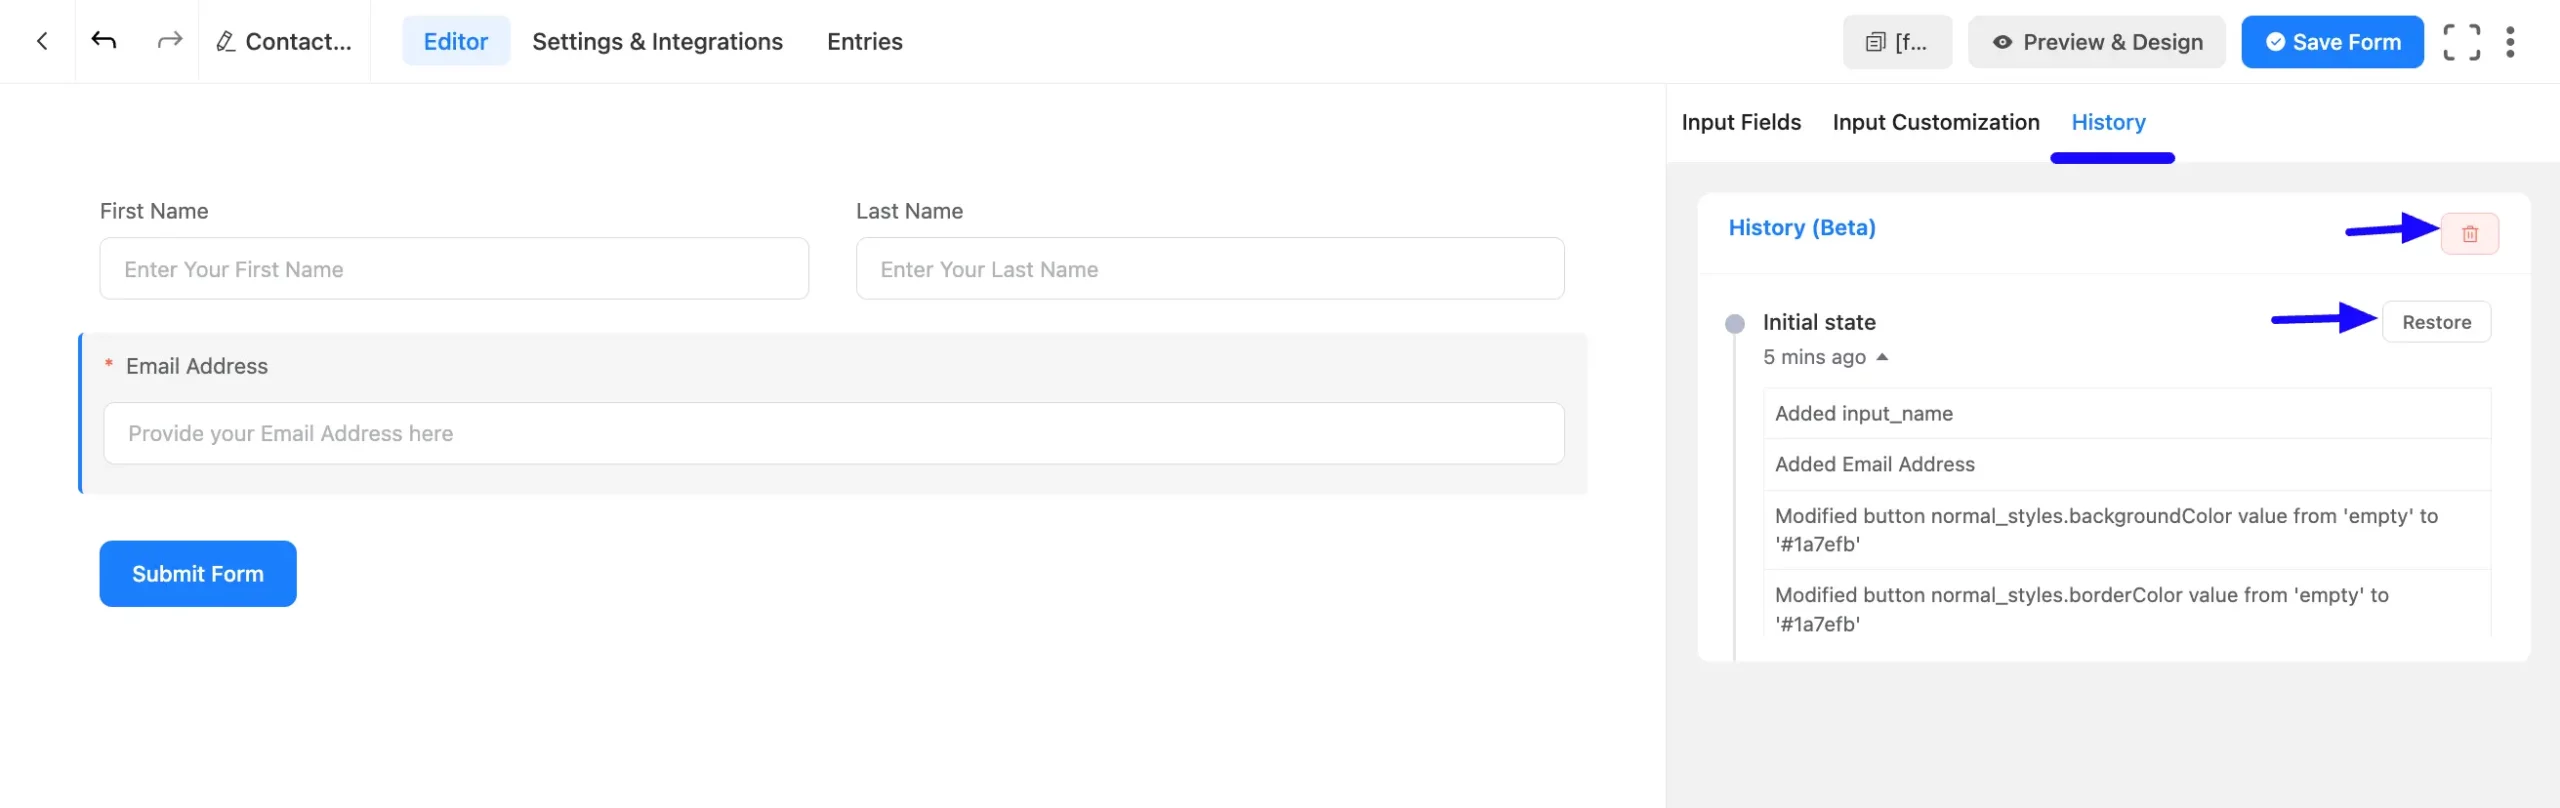
Checking History #
To see the recent changes you made on your form click the History tab.
Plus, from this tab, you can restore or delete recent edits at any time by clicking the Restore button or Delete Icon.
Embedding Form into Frontend #
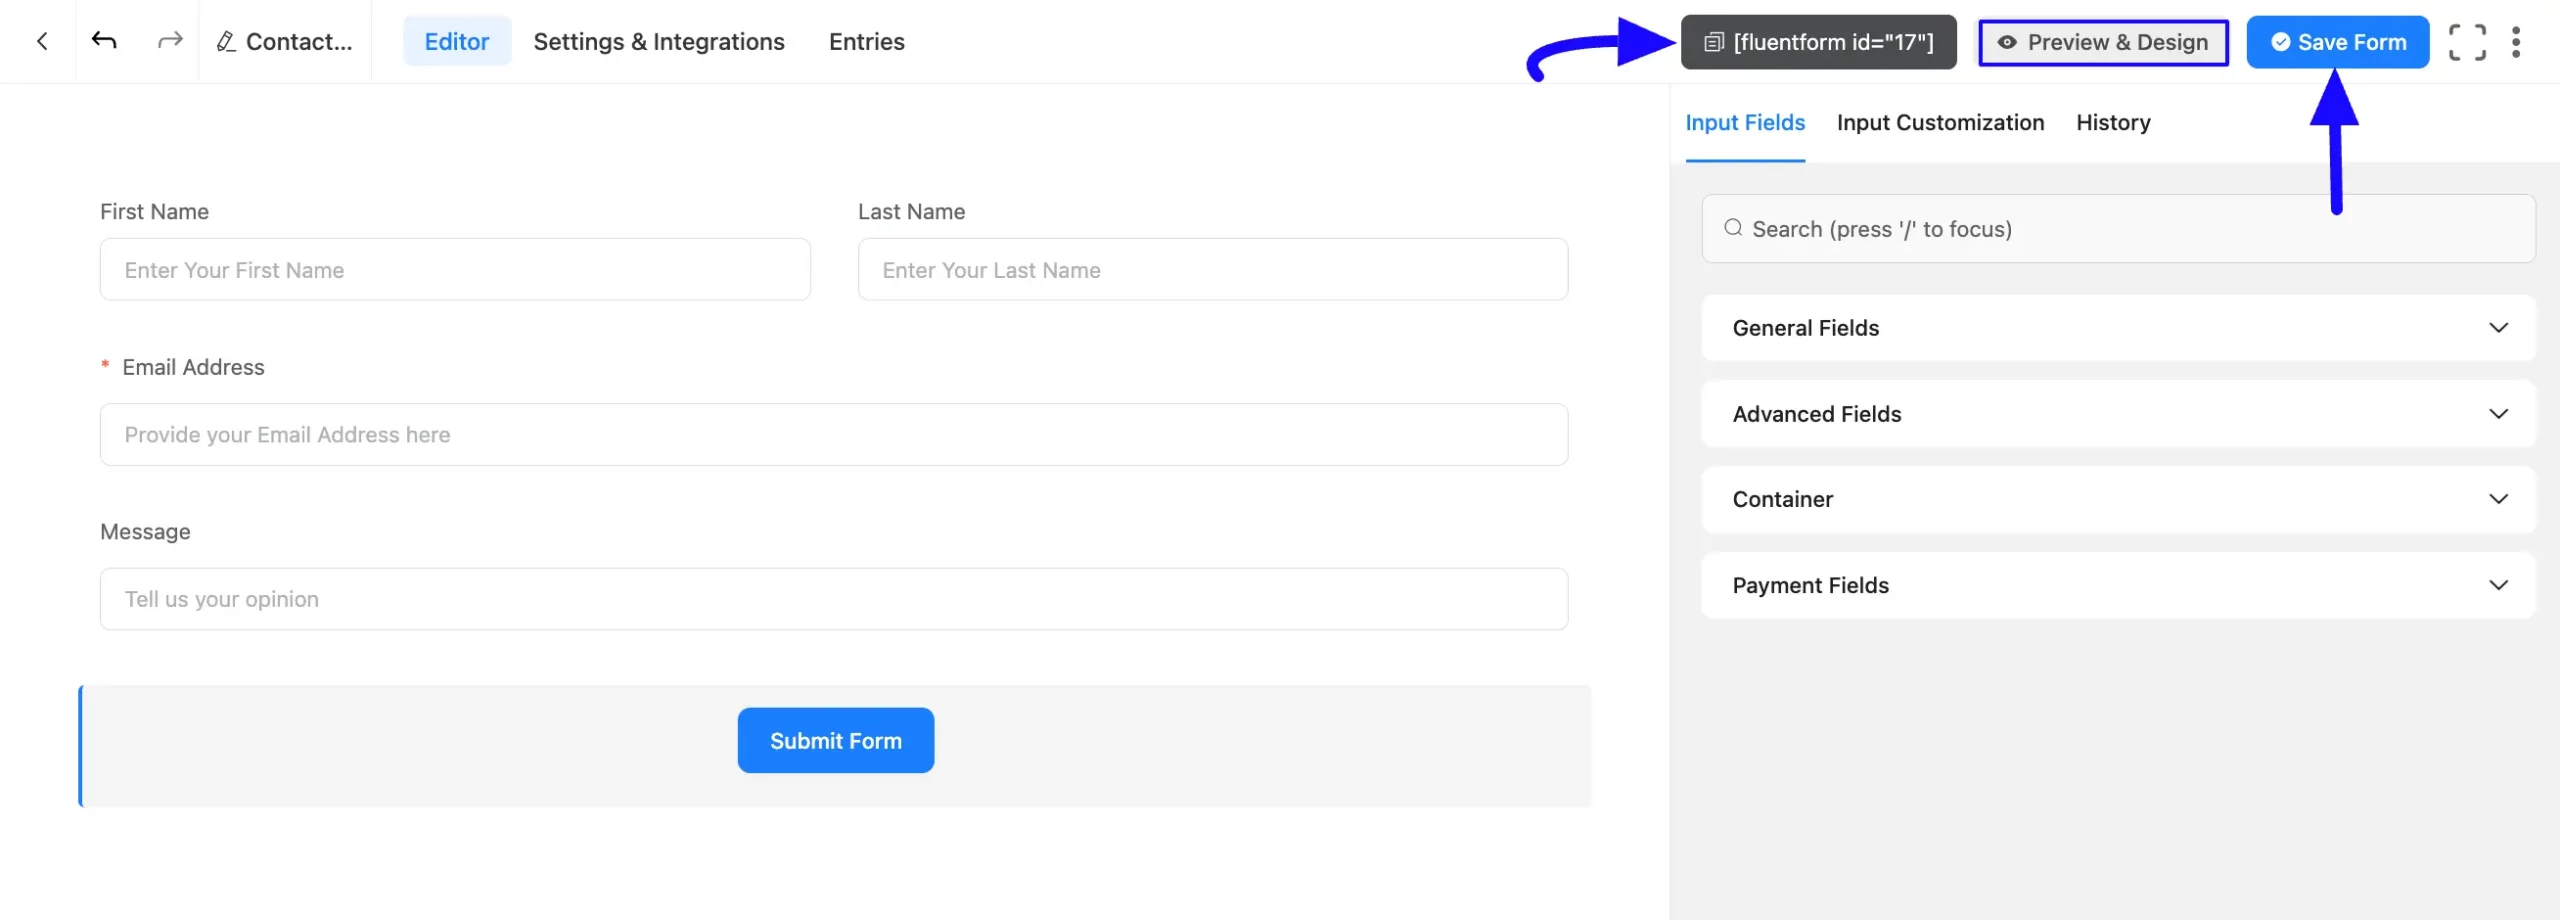
After customization, click the Save Form button in the top right corner to save all the changes.
Also, click the Preview & Design button in the middle if you want to see the preview of your form.
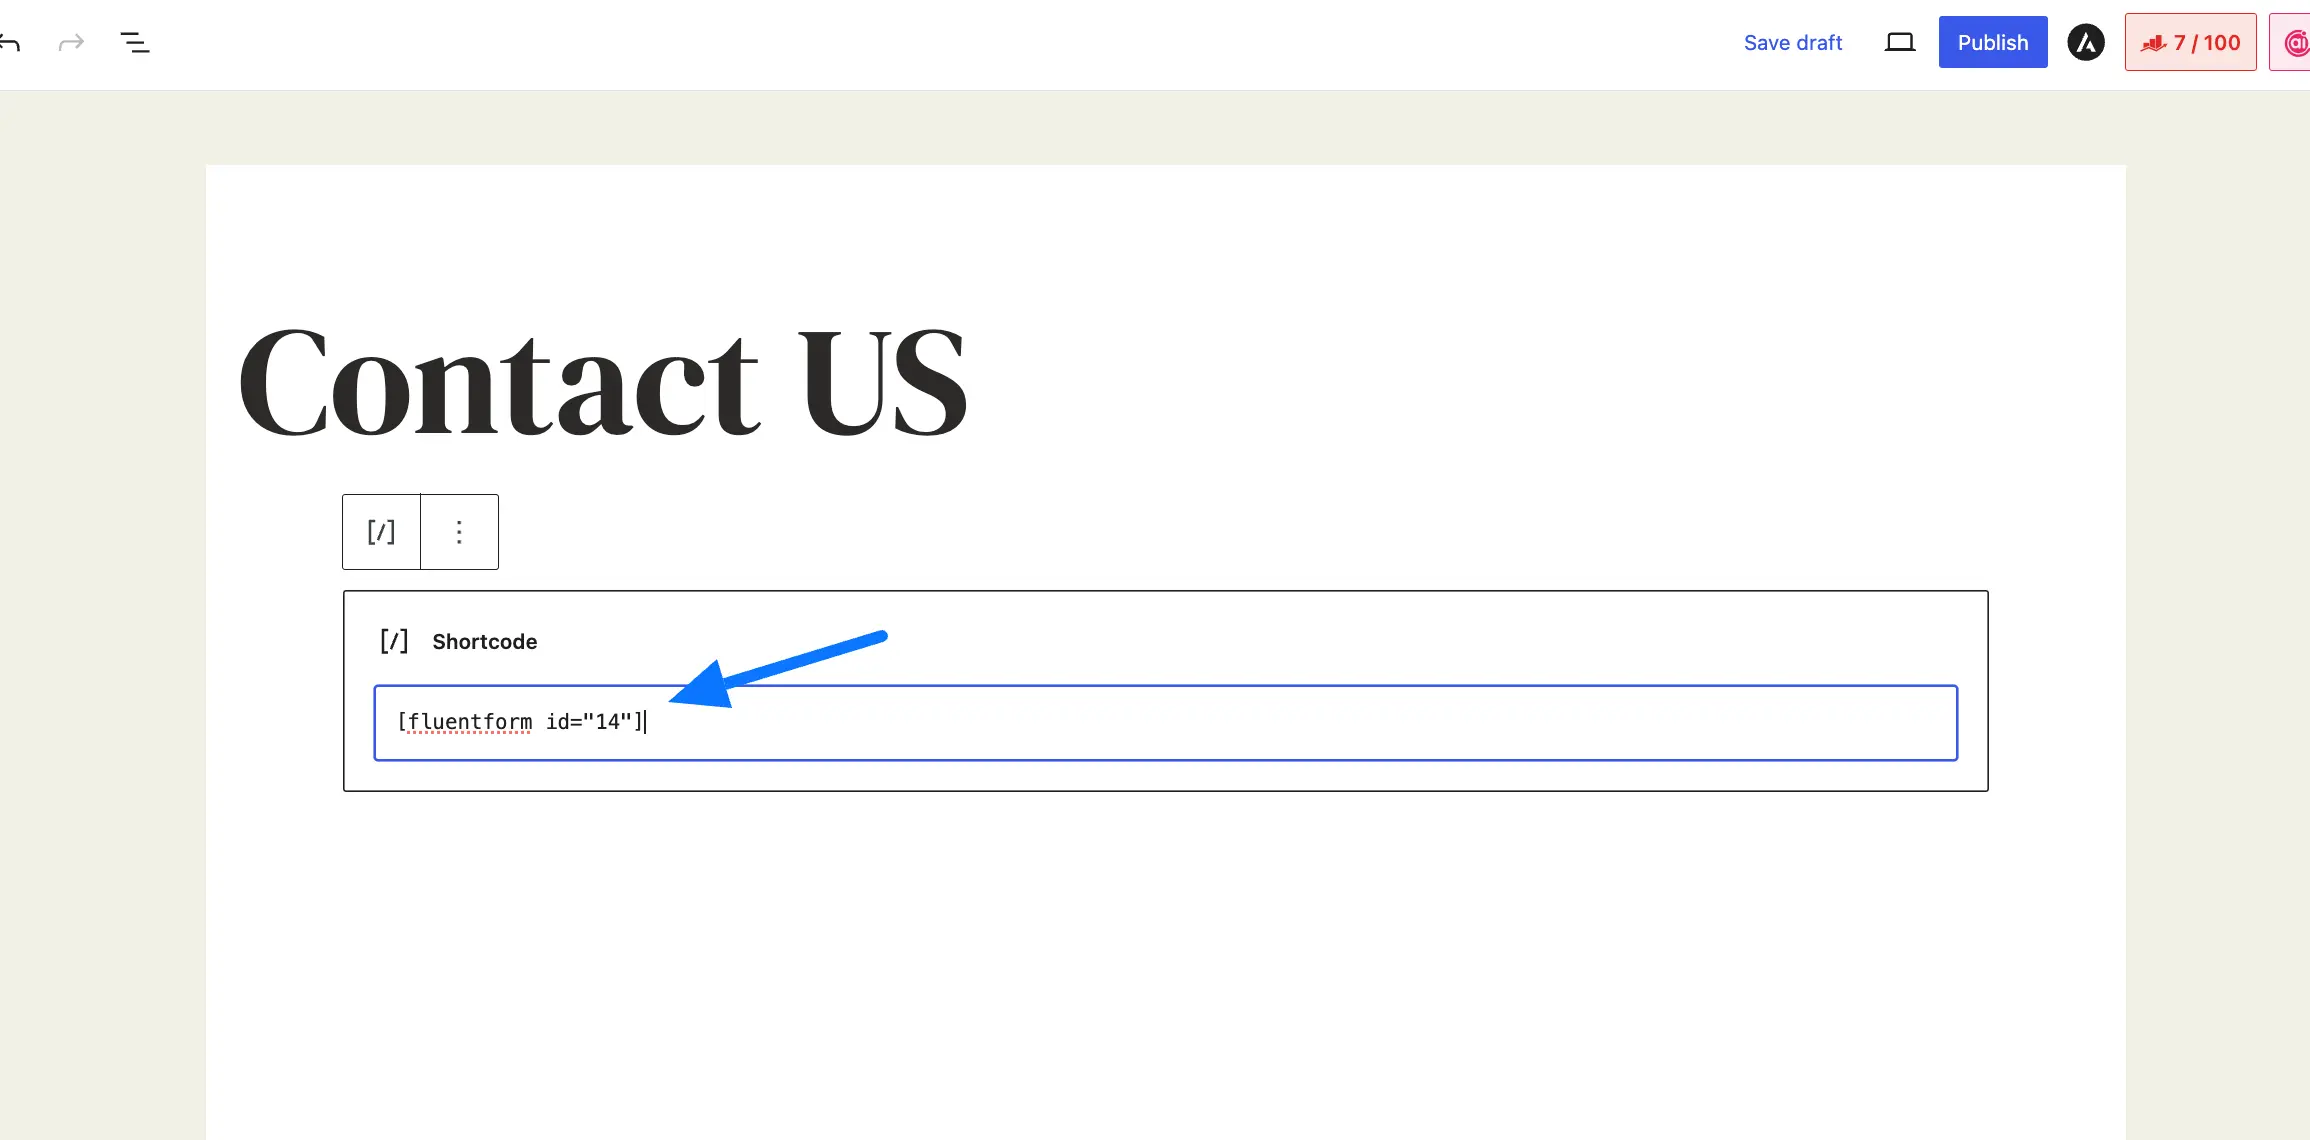
Then, copy the Form ShortCode from the top bar to display it on the front end.
Paste the shortcode in your desired Page/Post where you want this shortcode to appear on your WordPress Site.
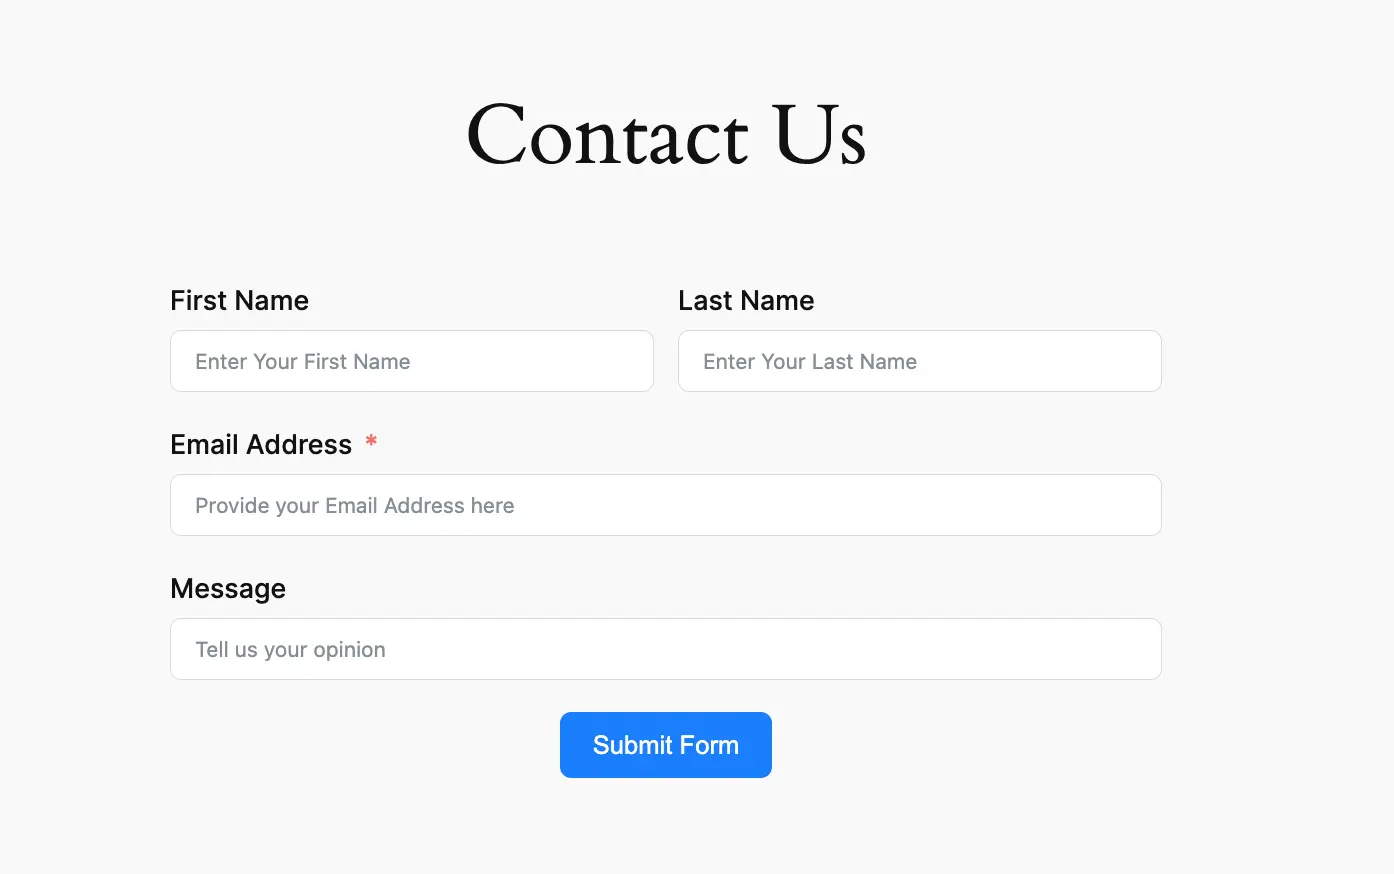
Preview of Form #
Here is the preview of the newly created form.
Congratulations! You have successfully created a new form with Fluent Forms!
This way you can create as many forms as you want with Fluent Forms.
If you have any further questions, concerns, or suggestions, please do not hesitate to contact our @support team. Thank You.


