In Fluent Forms, you can easily create Payment Forms to accept payment through different platforms. This article will guide you through Creating Payment Forms to Collect Payments.
Creating a Payment Form #
To learn how to create Payment Forms with Fluent Forms, follow the steps with the screenshots below –
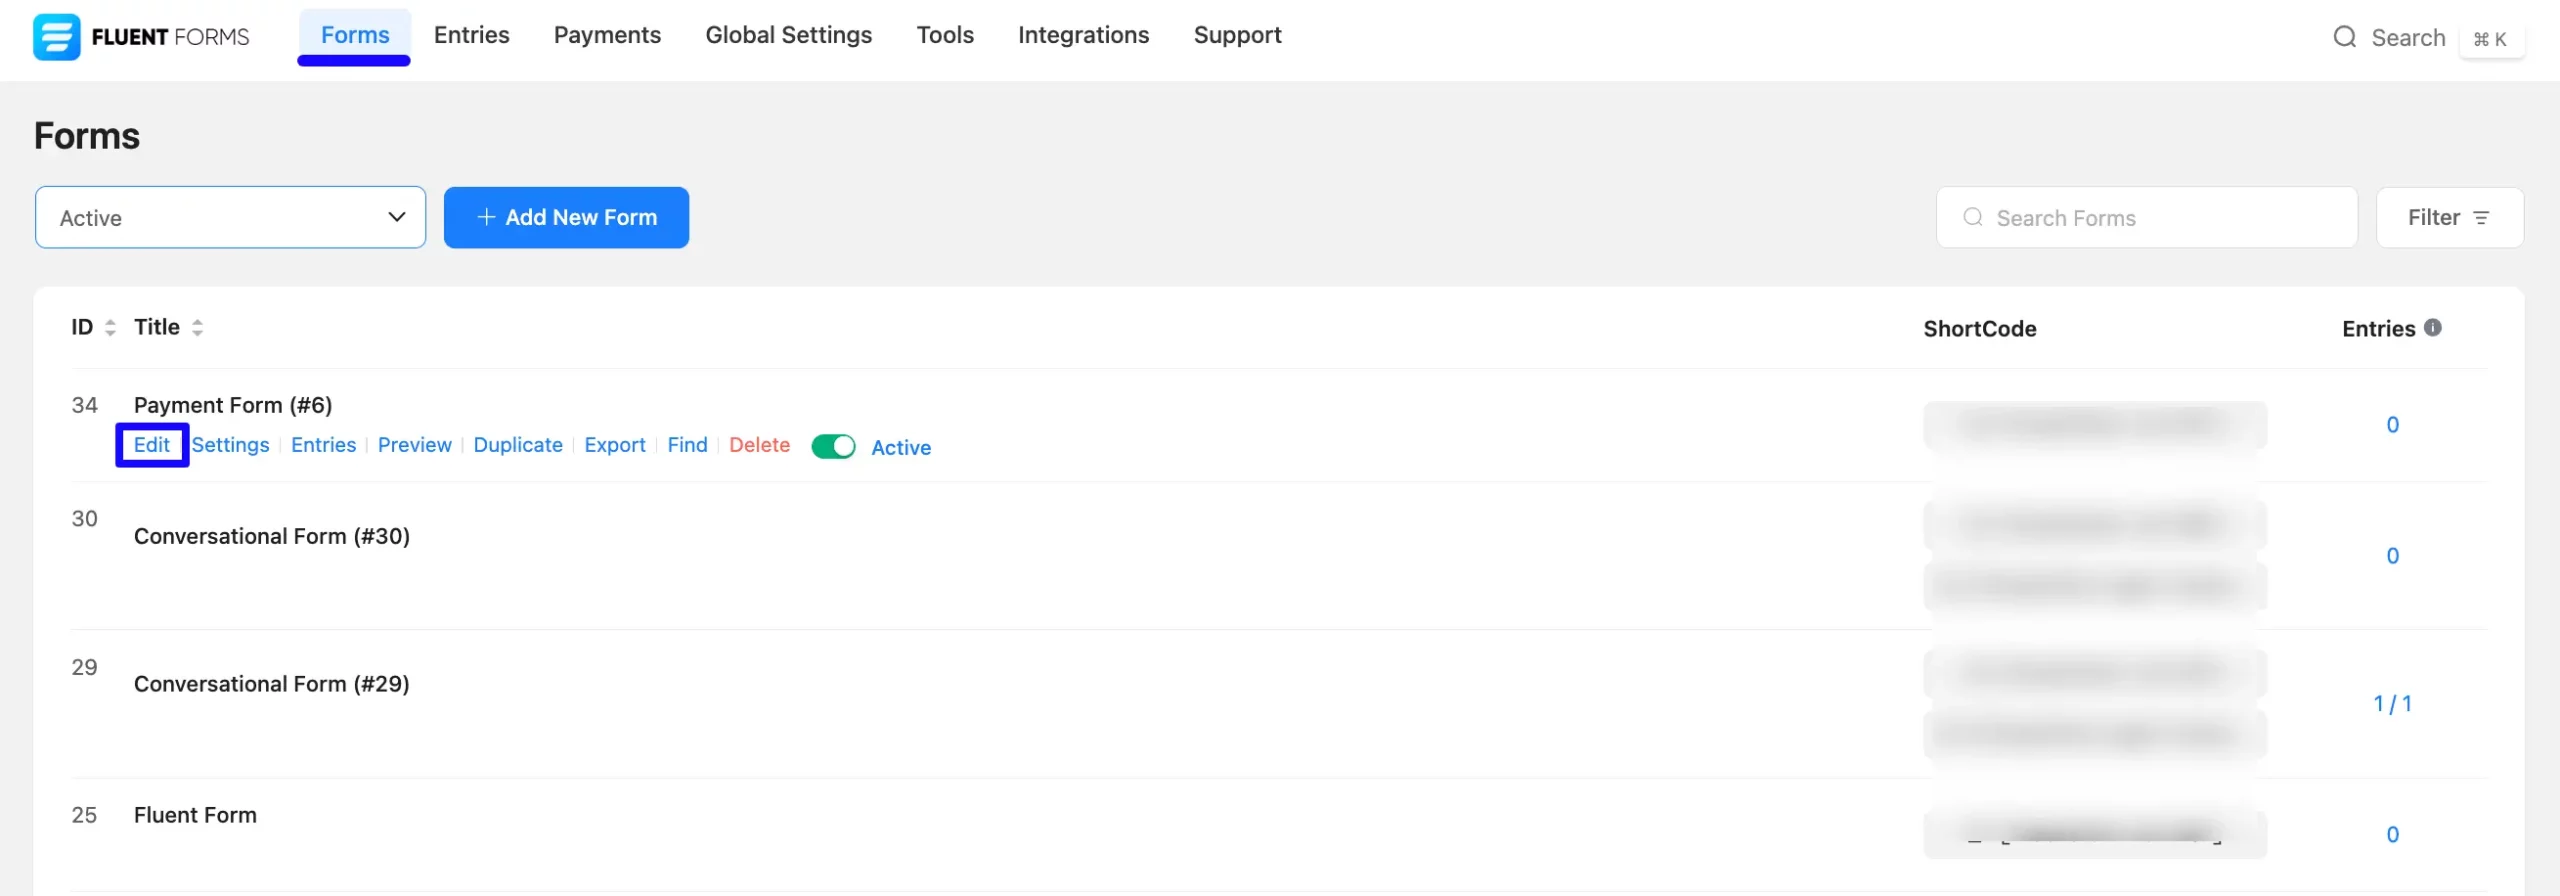
First, go to the Forms section from the Fluent Forms Navbar, choose a desired Form, and click the Pencil/Edit icon to open the Editor page of that form.
If you do not have any existing form, refer to the articles below, to learn how to Create a Form from Scratch or Create a Form using Templates.
For example, I chose an existing form to show the whole process.
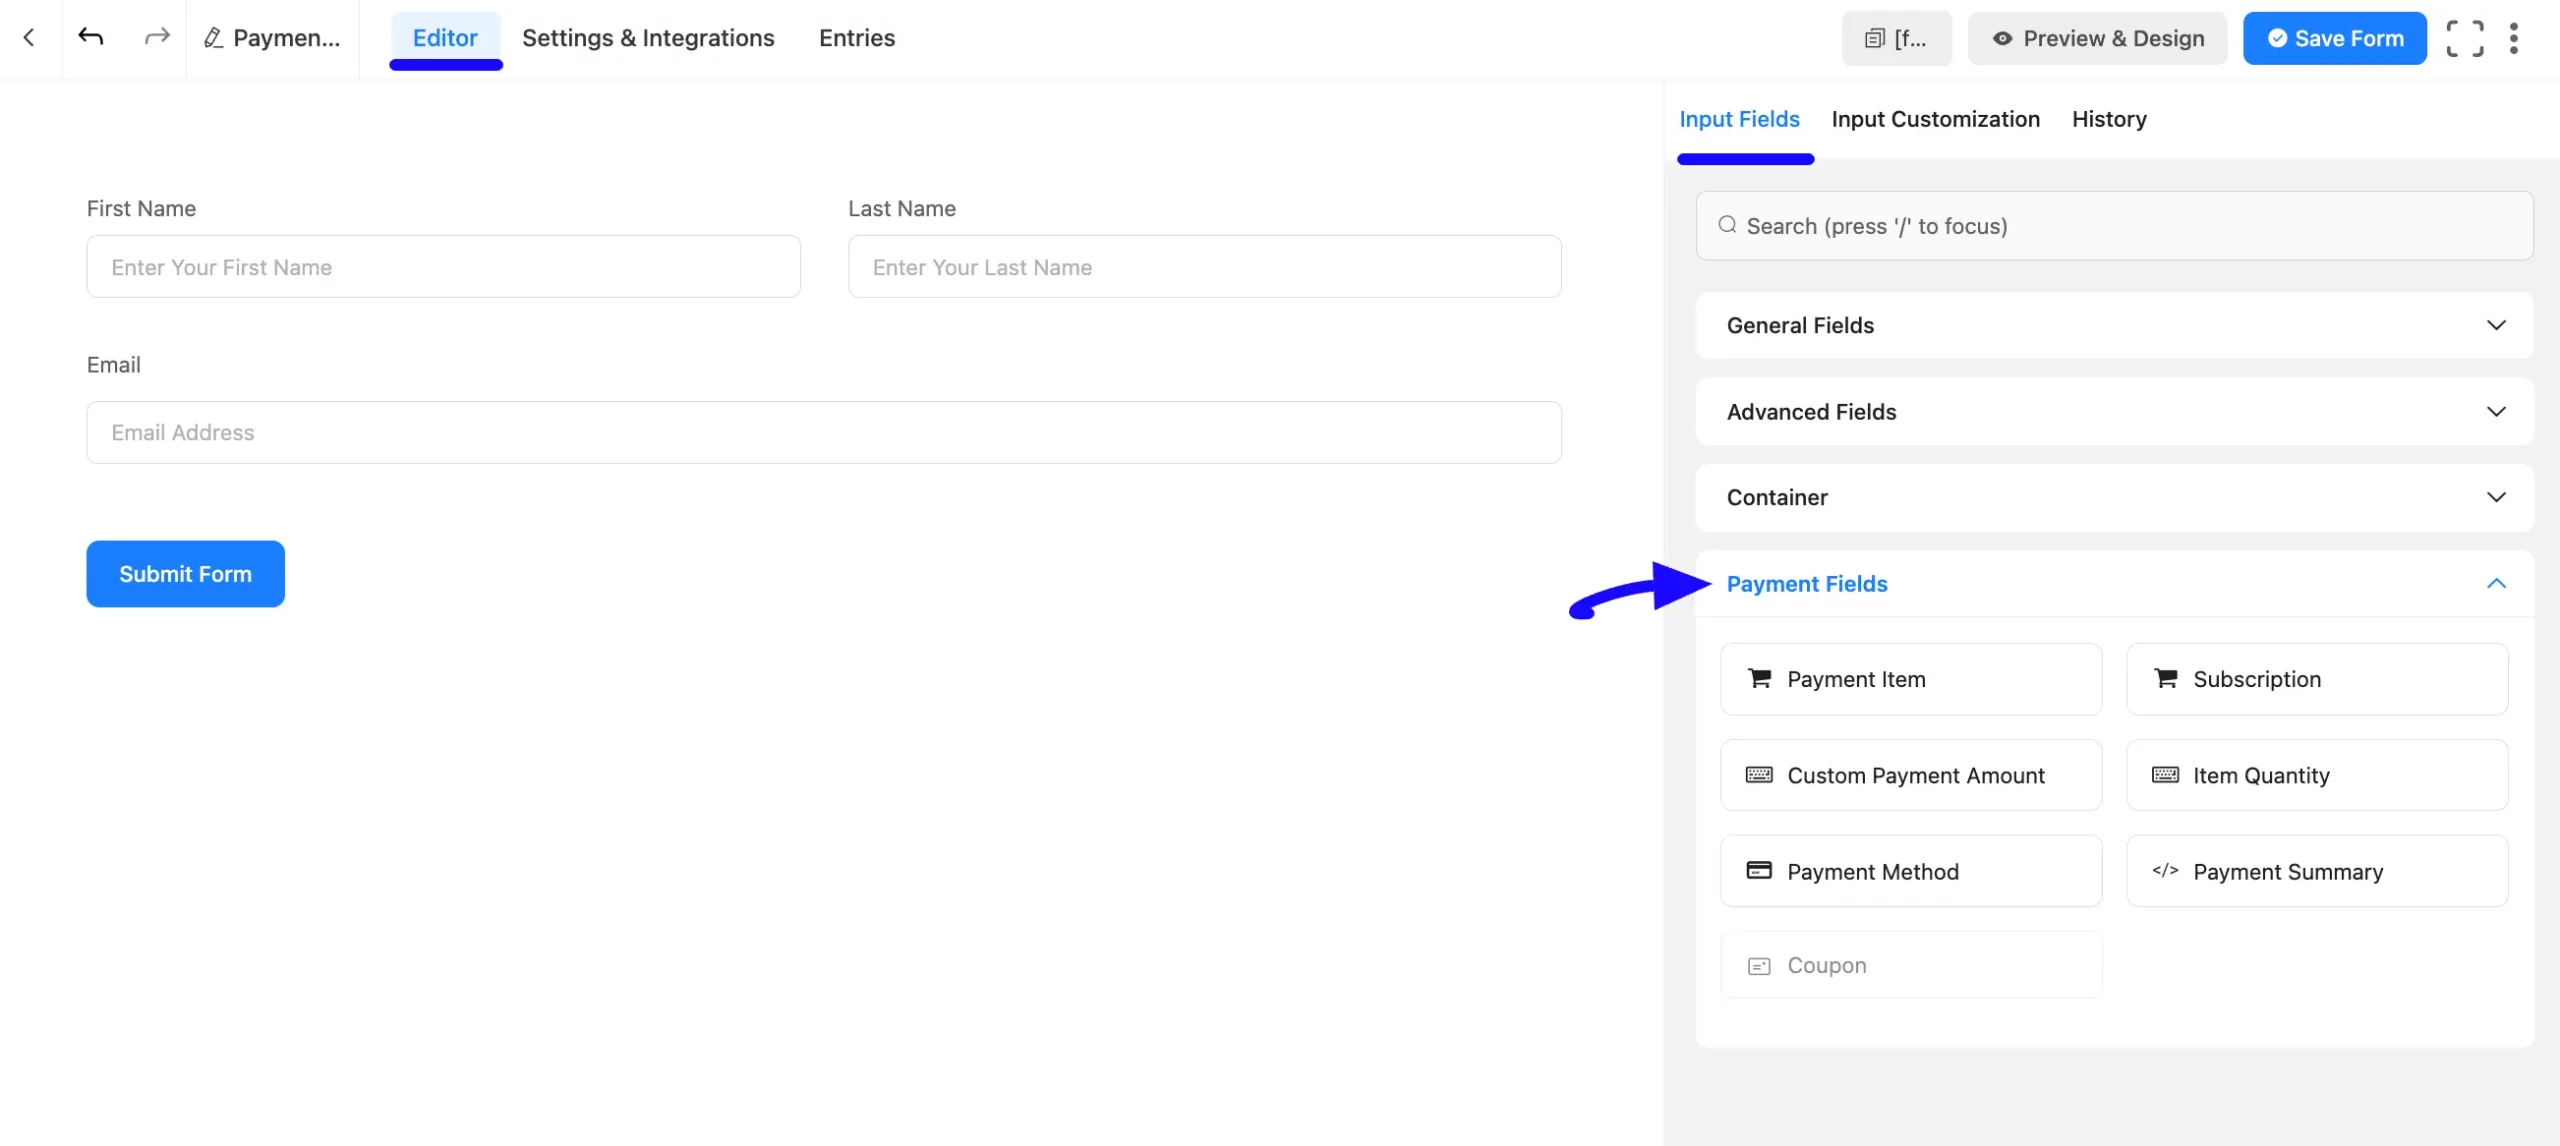
Once you open the Editor page, you need to add the necessary fields from the Payment Fields module.
Enabling Payment Module #
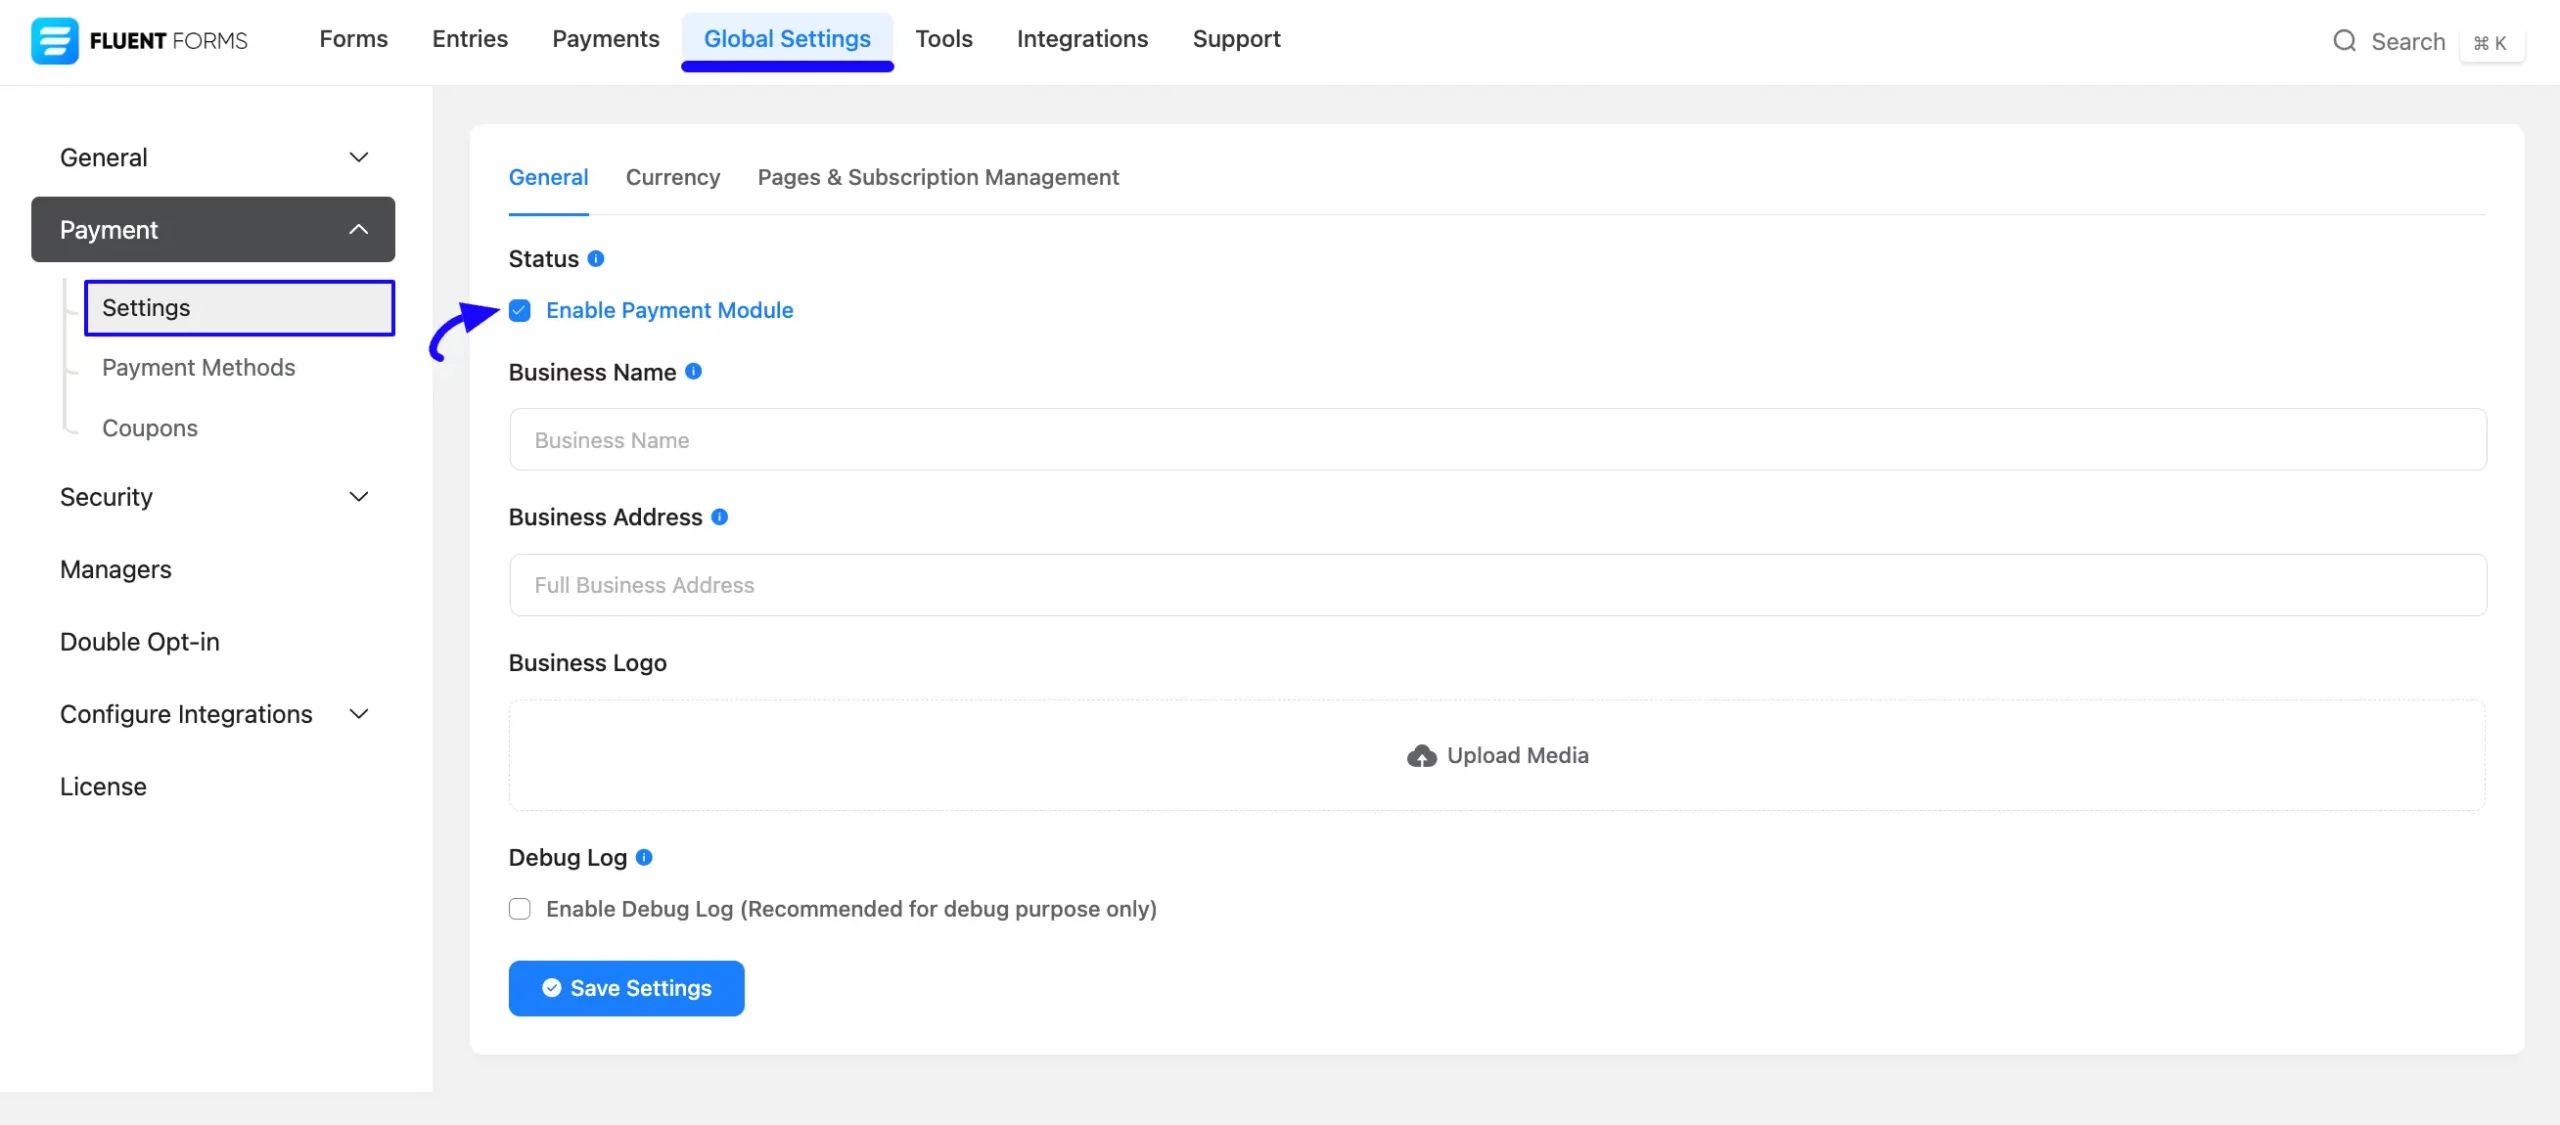
To get the Payment Fields module in your Fluent Forms, you have to make sure that your Payment Fields module is enabled.
If not, go to the Global Settings from the Fluent Forms Navbar to enable the payment options for all forms.
Now, open the Payment tab, click the Settings option, and check the Enable Payment Module. This will activate all the payment-related fields within the Payment Module for every form.
Once you ensure the Payment Module is Enabled, select the necessary fields for your Payment Form.
Remember, to create a Payment Form you must add at least a Payment Item and a Payment Method field. To collect recurring payment, add Subscription field. We Always Suggest you keep the Name and Email field at the beginning of any form.
Also, remember, the added payment method in your Form will not function unless you properly complete the configuration process. To Learn how to configure the Payment on your site through Fluent Forms, click here and read the desired Payment Integration Documentation you selected as a payment method.
Customizing Payment Method Field #
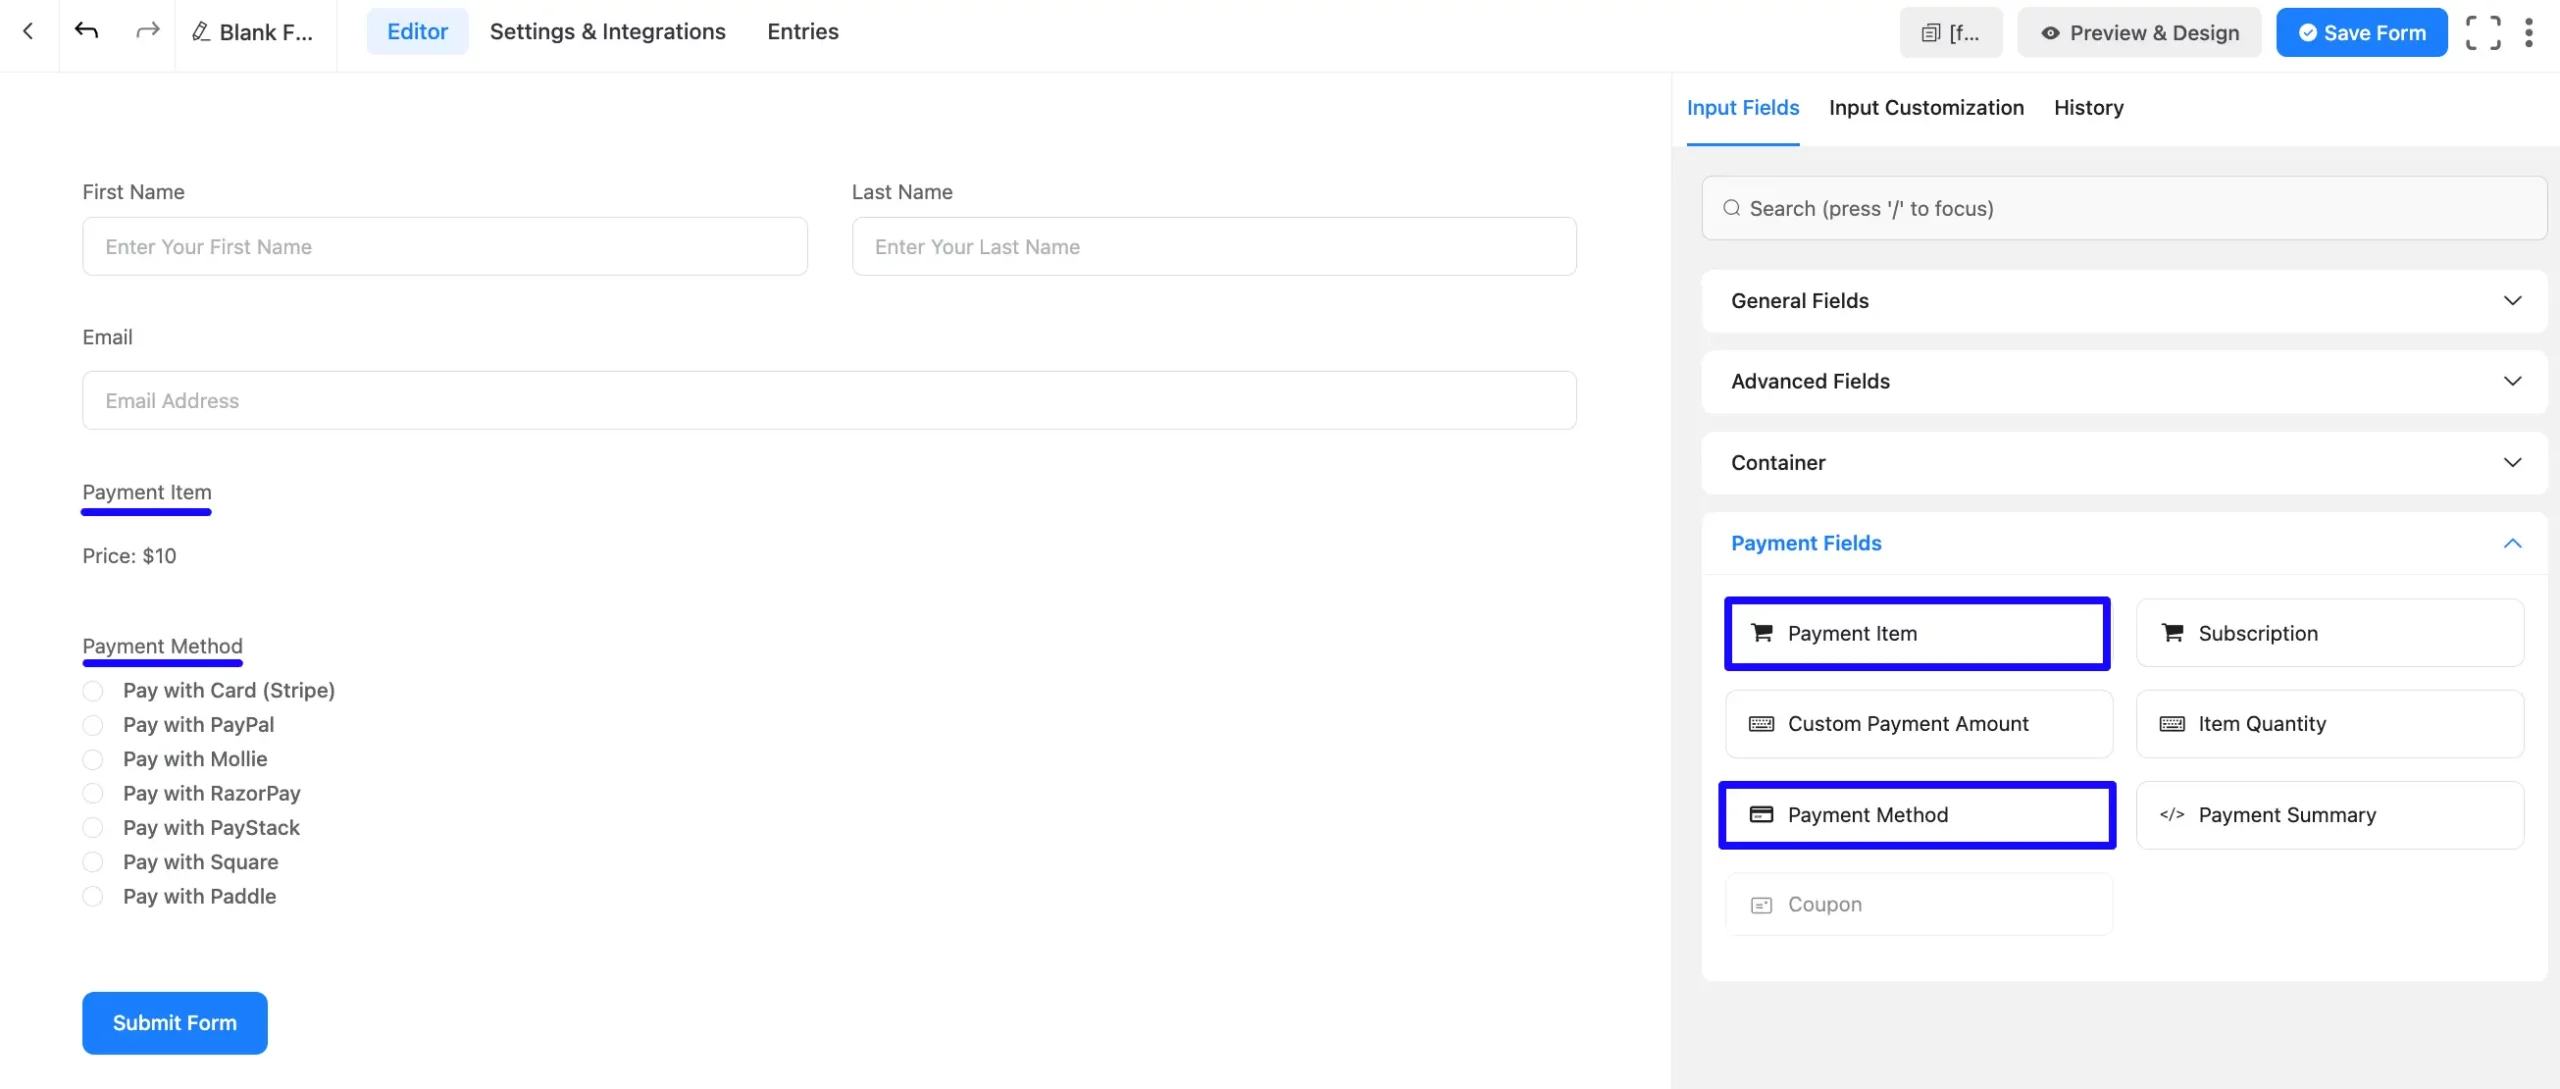
Here, you can see that all the fields necessary for a payment form have been added.
You can edit any field by hovering over it and clicking the Pencil Icon. It will take you to the selected field’s Input Customization tab on the right side.
To learn how to edit the Payment Item and Choose Payment Method field specifically, refer to the Documentation below:
Also, you can choose your preferred payment method/s by checking the desired payment platforms under the Payment Methods section on the right-side customization menu.
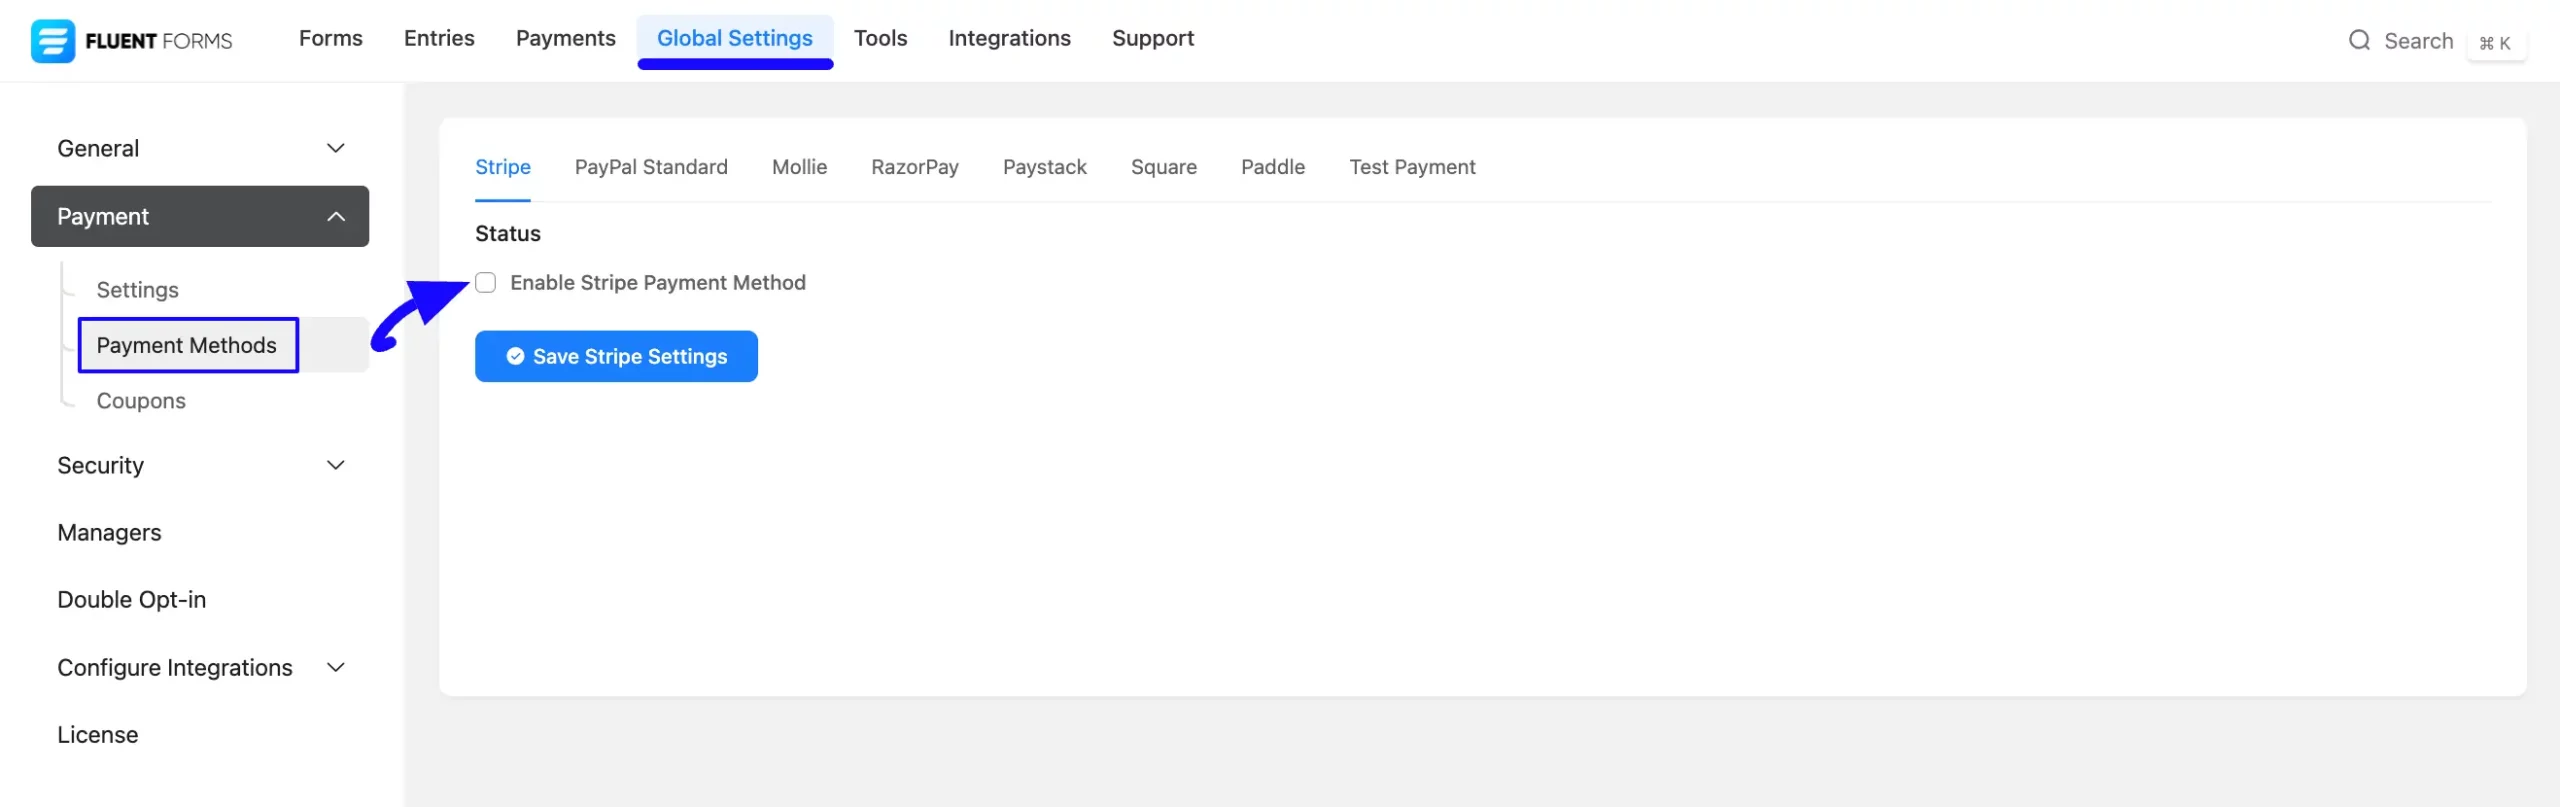
Enabling Payment Methods #
To get all the available Payment Methods in your Payment Fields module, you need to ensure all payment methods are enabled. If not, go to the Global Settings from the Fluent Forms Navbar to enable all the payment methods for all forms.
Once you open the Payment tab and click the Payment Methods option, you will see all the available payment platforms.
Now, go to your desired payment platform/s and check the Enable Payment Method. This will activate all the payment methods within the Payment Fields module for every form.
Customizing Payment Settings #
You can also customize the payment settings globally for all forms or individually for each form based on your needs.
To learn the detail process of how to customize the payment settings, read this Documentation.
Integrating Form in WordPress Site #
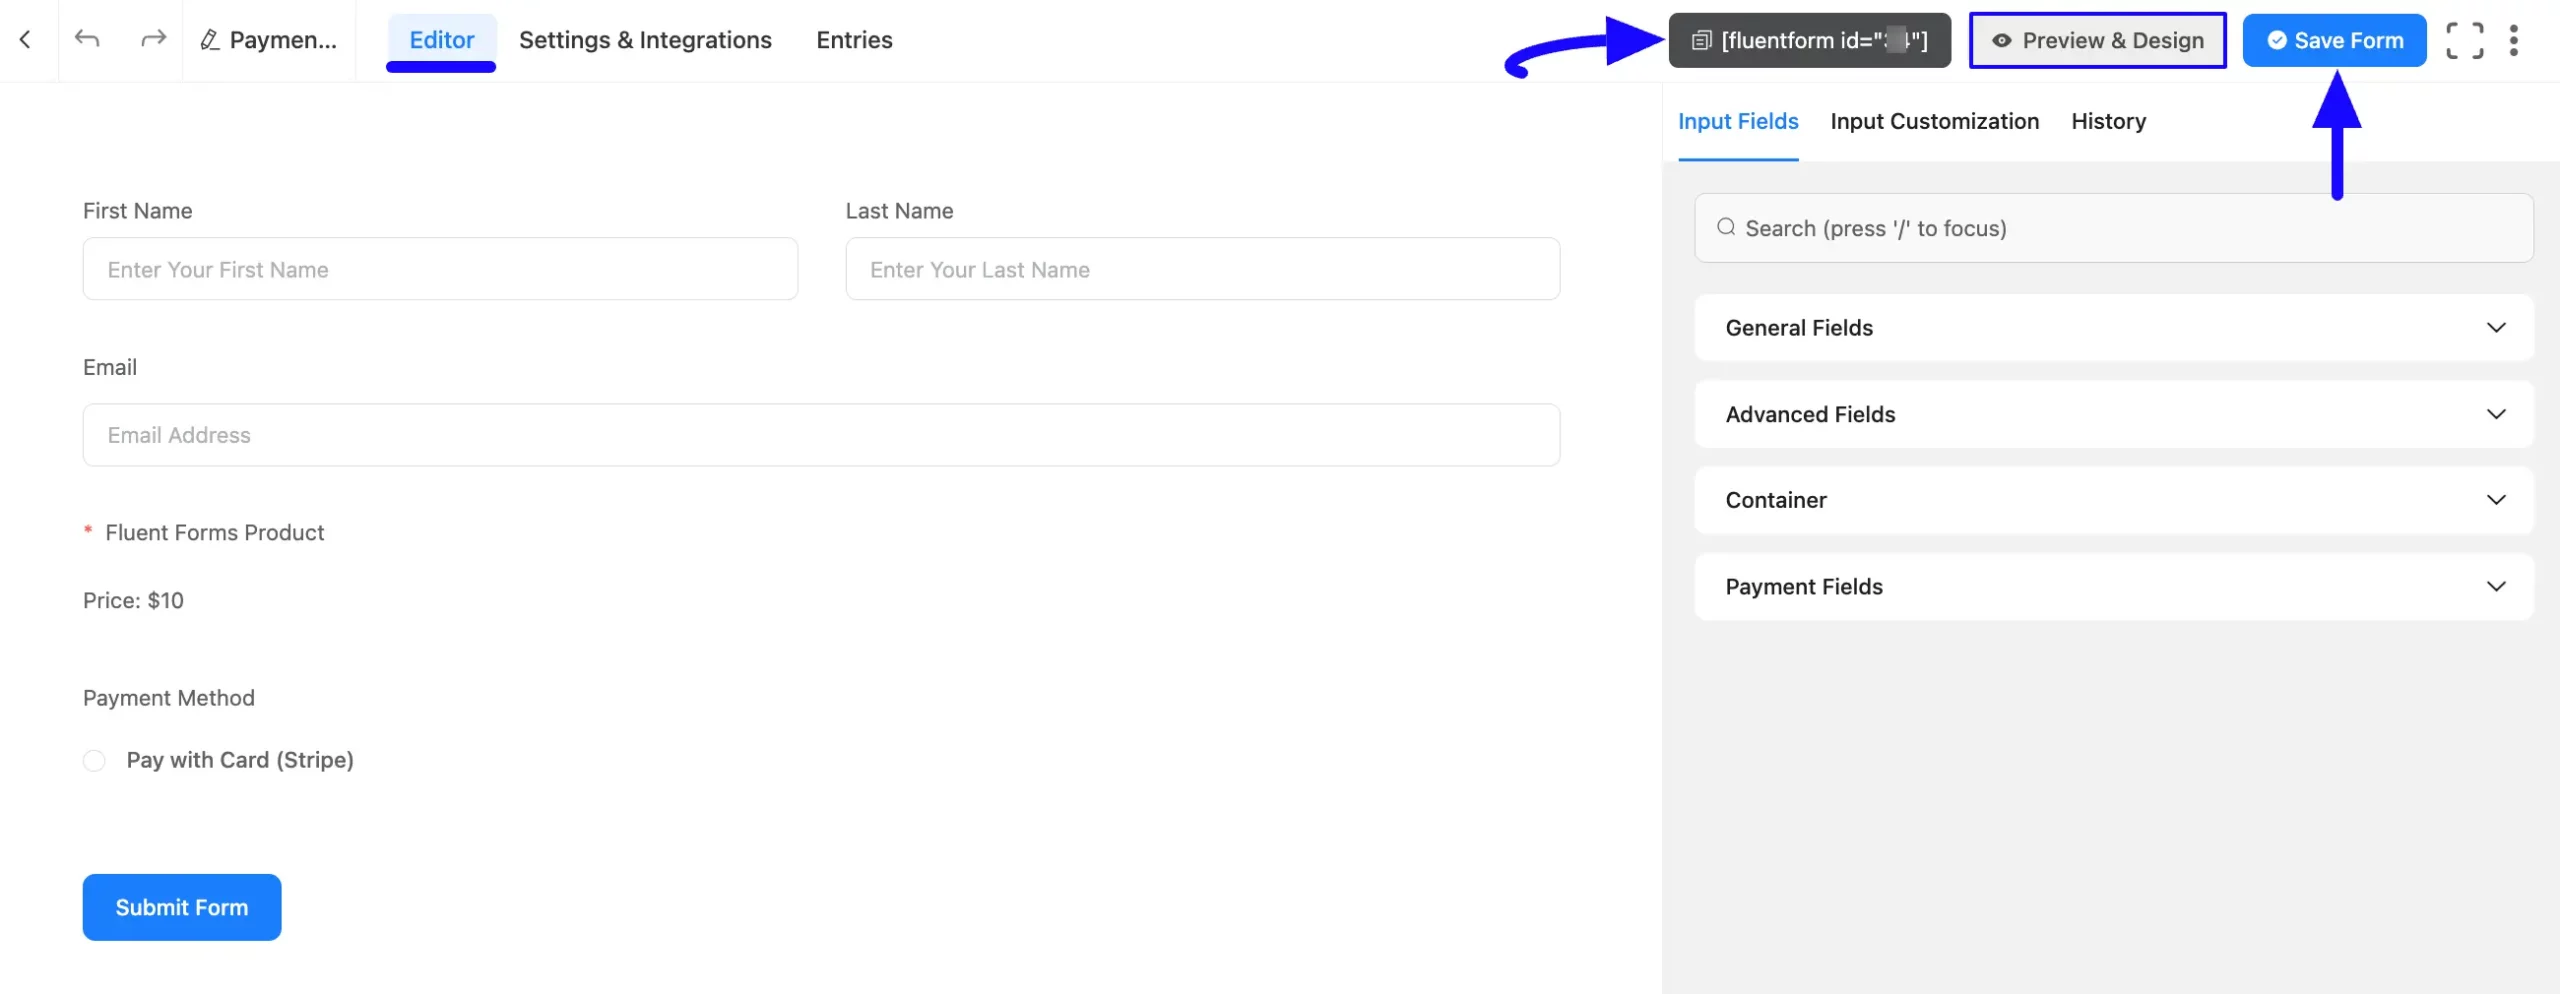
Once you complete the edit, press the Save From button to save all the changes you have made.
Also, to see the form preview, click the Preview & Design button in the middle.
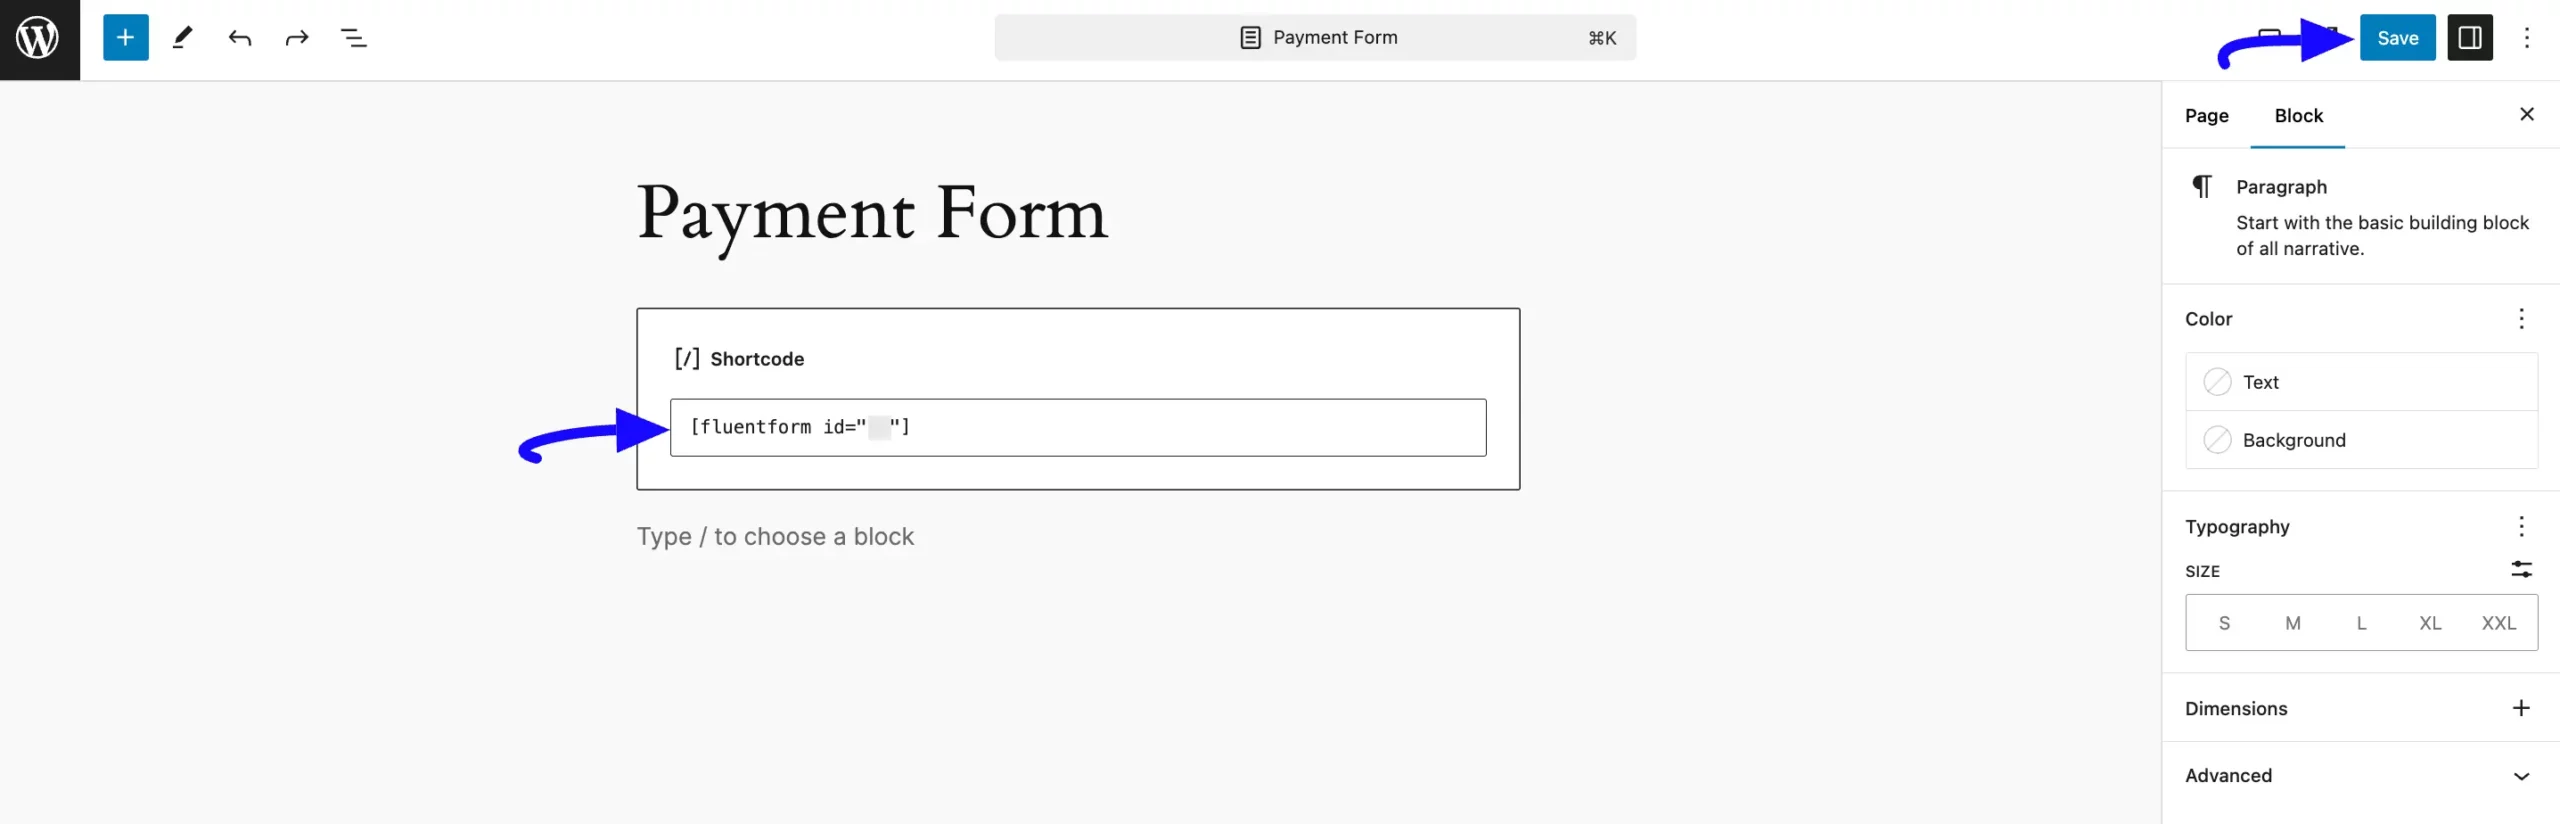
Finally, to integrate and display the form on a specific Page/Post, copy this Shortcode from the top right side and paste it into your desired Page/Post.
Then, open a desired page/post, paste the shortcode, and press the Save button.
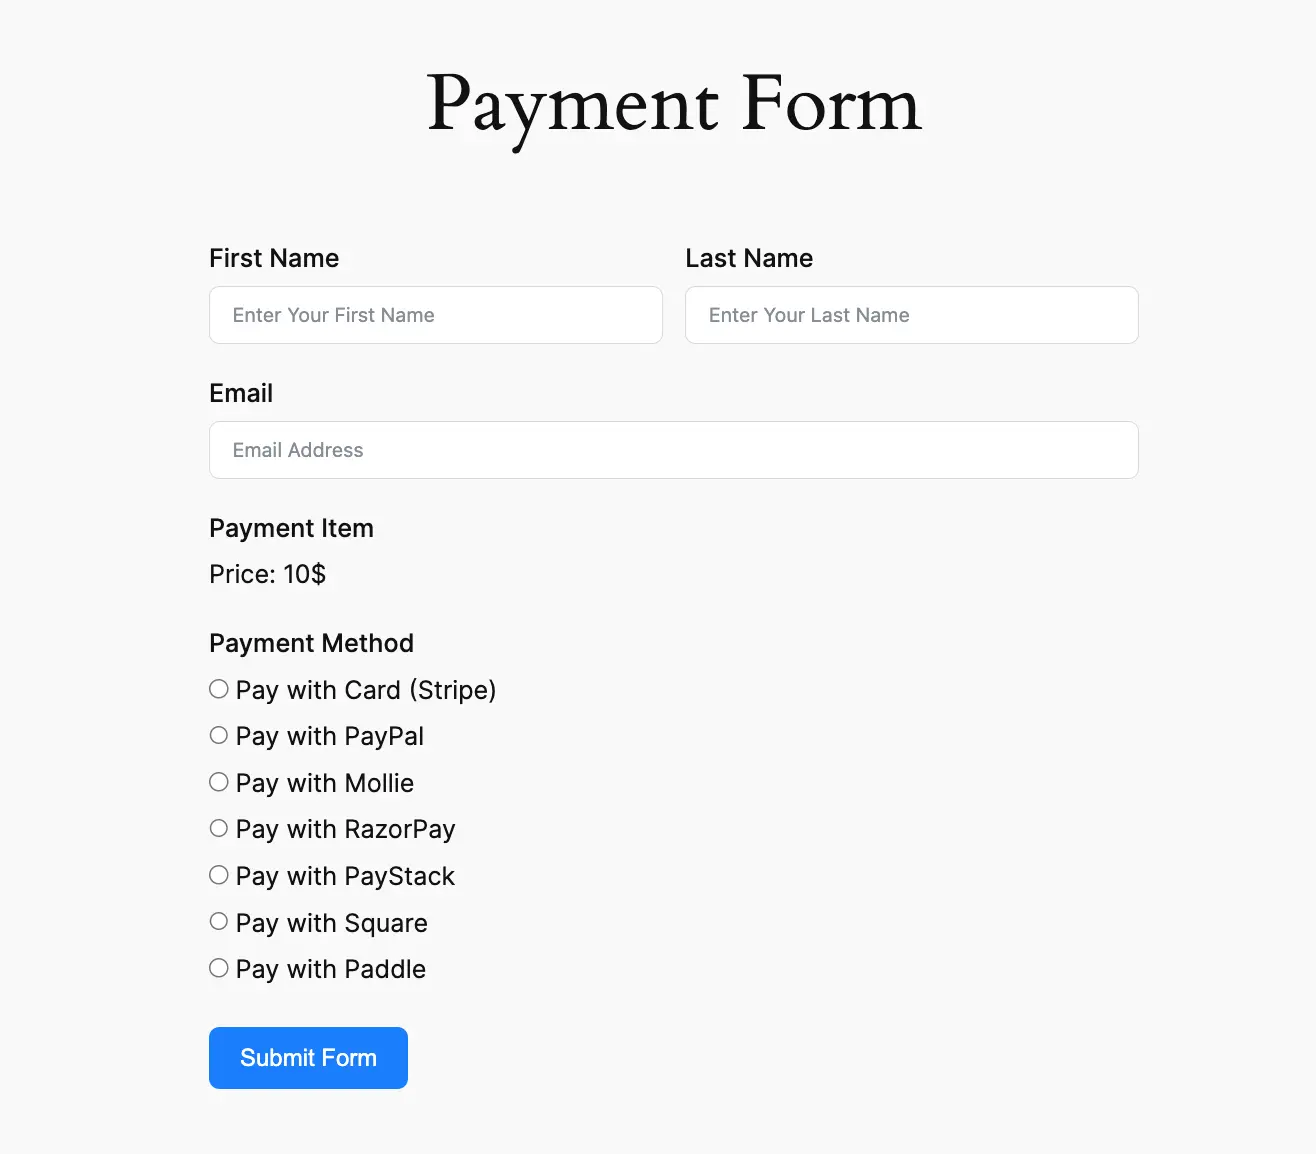
Preview of Payment Form #
Here is the preview of the Payment Form that we just created.
This way, you can easily create the Payment Forms in Fluent Forms!
If you have any further questions, concerns, or suggestions, please do not hesitate to contact our @support team. Thank you.


