The user profile editing option for any form is a fantastic feature of Fluent Forms. You can make the WordPress User Update process super easy by creating a user update form using Fluent Forms.
This article will guide you through how users can update forms with Fluent Forms on your WordPress site step by step.
Users must be logged in for the update process to function.
Enable the User Update Module #
To learn how to enable the WordPress user update form, follow the easy steps with the screenshots below.
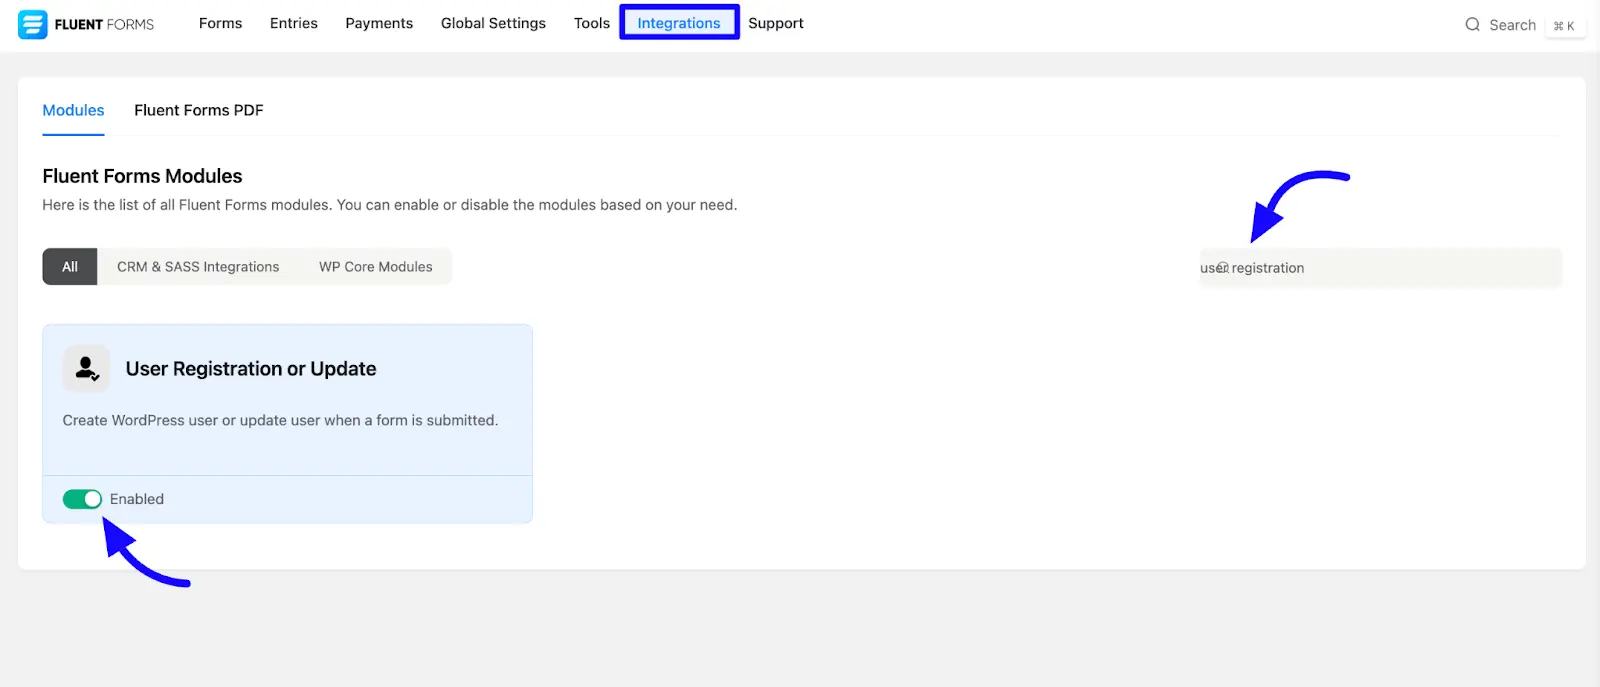
First, go to Integrations from the Fluent Forms Navbar, search for User Update through the search bar, and get the User Registration or Update module.
Now, enable the User Registration or Update module.
Configure the User Update Feed #
Before configuring the user update feed, you must move a particular form or create a new form for your user update.
If you do not have any existing forms, read Create a Form from Scratch or Create a Form using Templates documentation to create a new one.
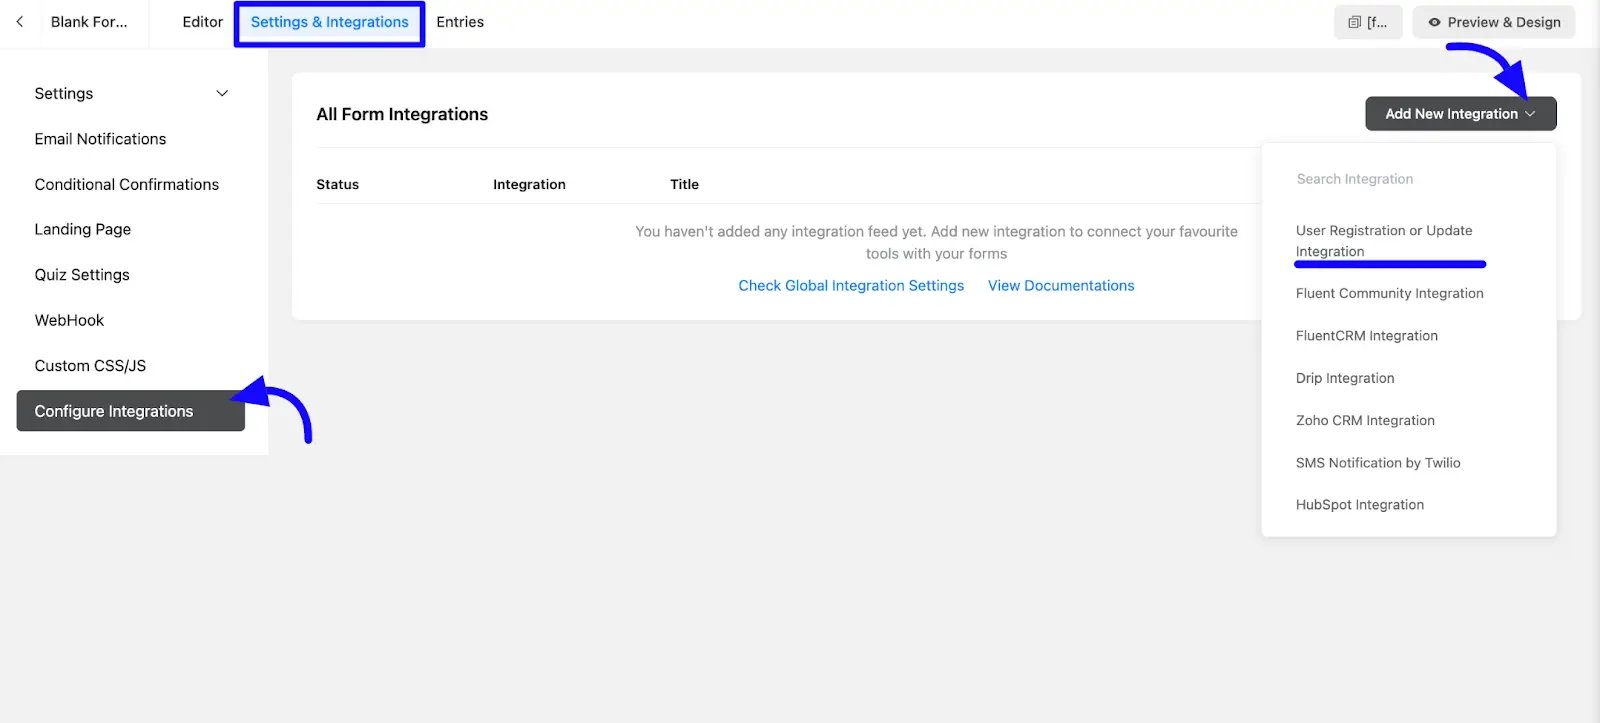
Once the module is enabled, proceed with the form settings. Click the forms Settings & Integration tab. Then click the Configure Integrations section from the scroll down.
Now, click the Add New Integration button and select the User Registration or Update Integration option shown in the screenshot below.
Customize the User Update Feed #
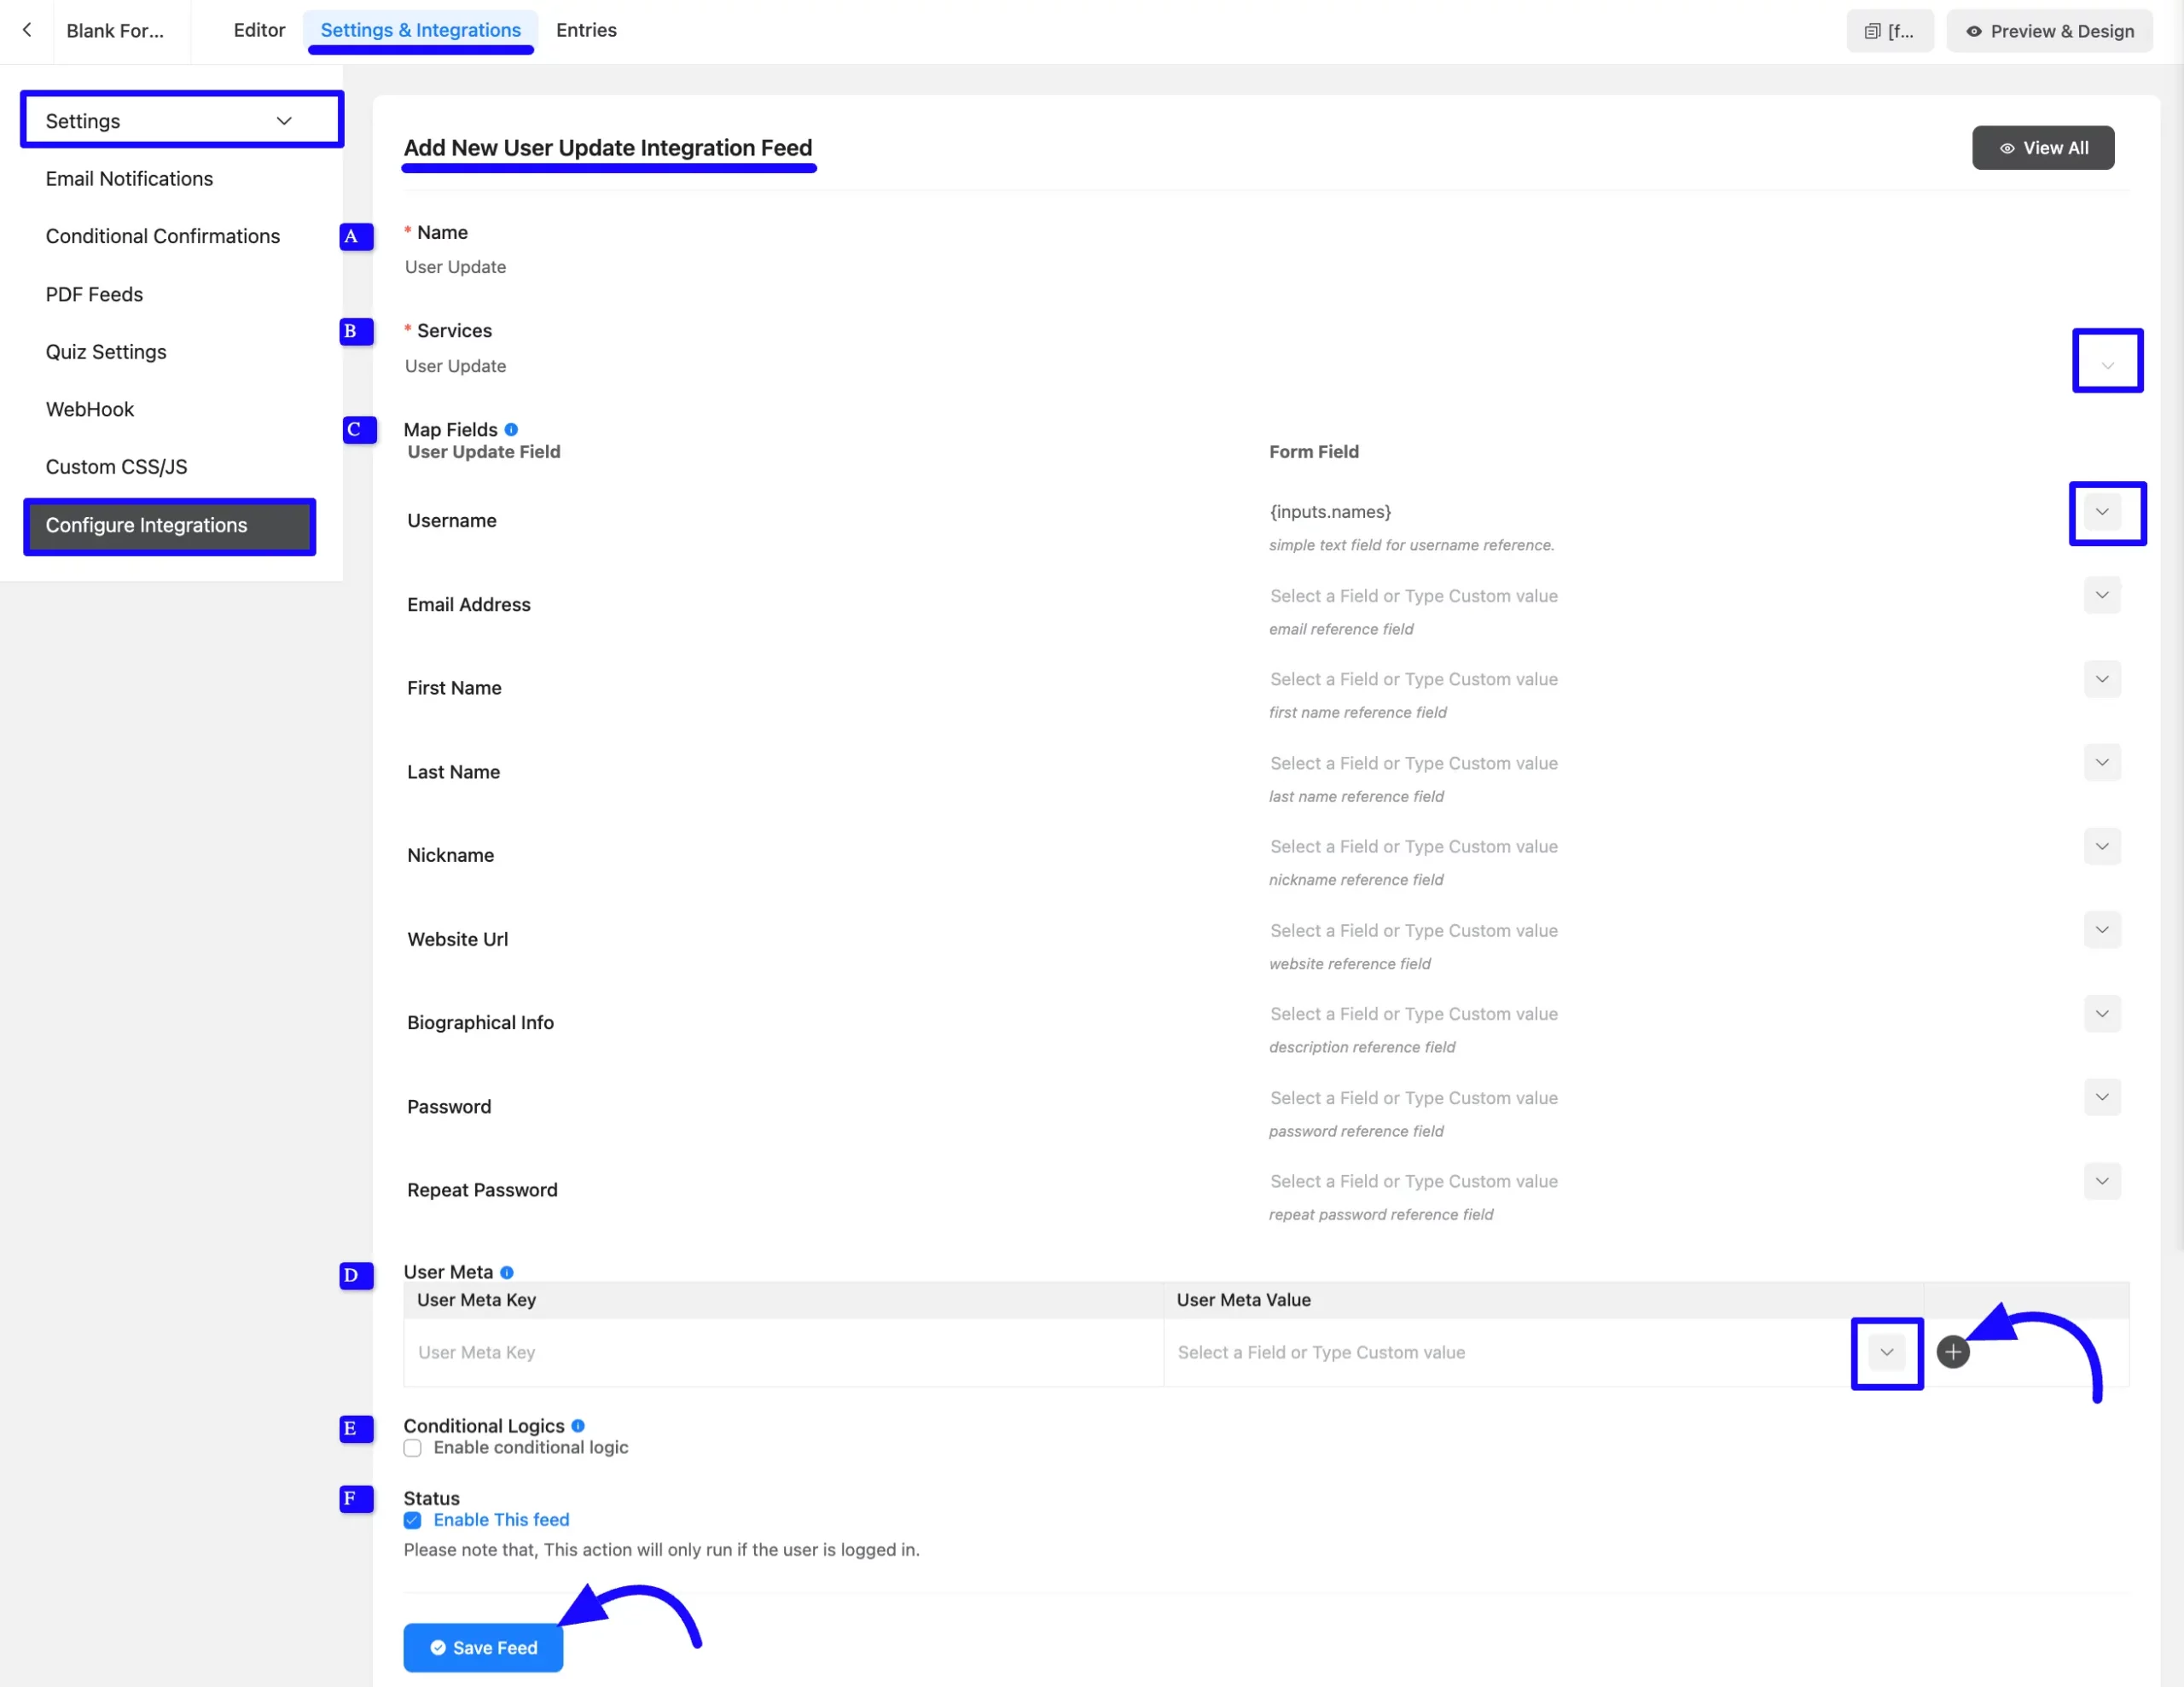
A new Window page will appear. Now, customize the User Update feed according to your name feed and select the User Update fields from the available options.
A. Name: Enter the name that specifies the name of the user update feed.
B. Service: Select the type of service that feeds User Update.
C. Map Fields: Use all the fields under this option to properly link your user update field with the Form Fields. You can easily select the value for the Form Fields based on the user update using the Shortcode Arrow.
D. User Meta: Add custom user meta fields in the User Meta section. In the first column, type the meta key. In the second column, select the corresponding form field value.
You can add multiple meta keys by clicking the Plus Icon.
User Meta Key is the form field’s name attribute!
E. Conditional Logic: This option allows you to create specific rules to dynamically hide/show the input field to function conditionally based on your submission values according to your conditional logic set. To learn more, read this Documentation.
F. Status: Enable this feed option to activate the integration.
Once the setup is done, finally, click the Save Feed button.
Your User Registration form or Update will be integrated into this specific form!
Users can register in a single form. Users can register using a single form. Read the article to learn more about User registration.
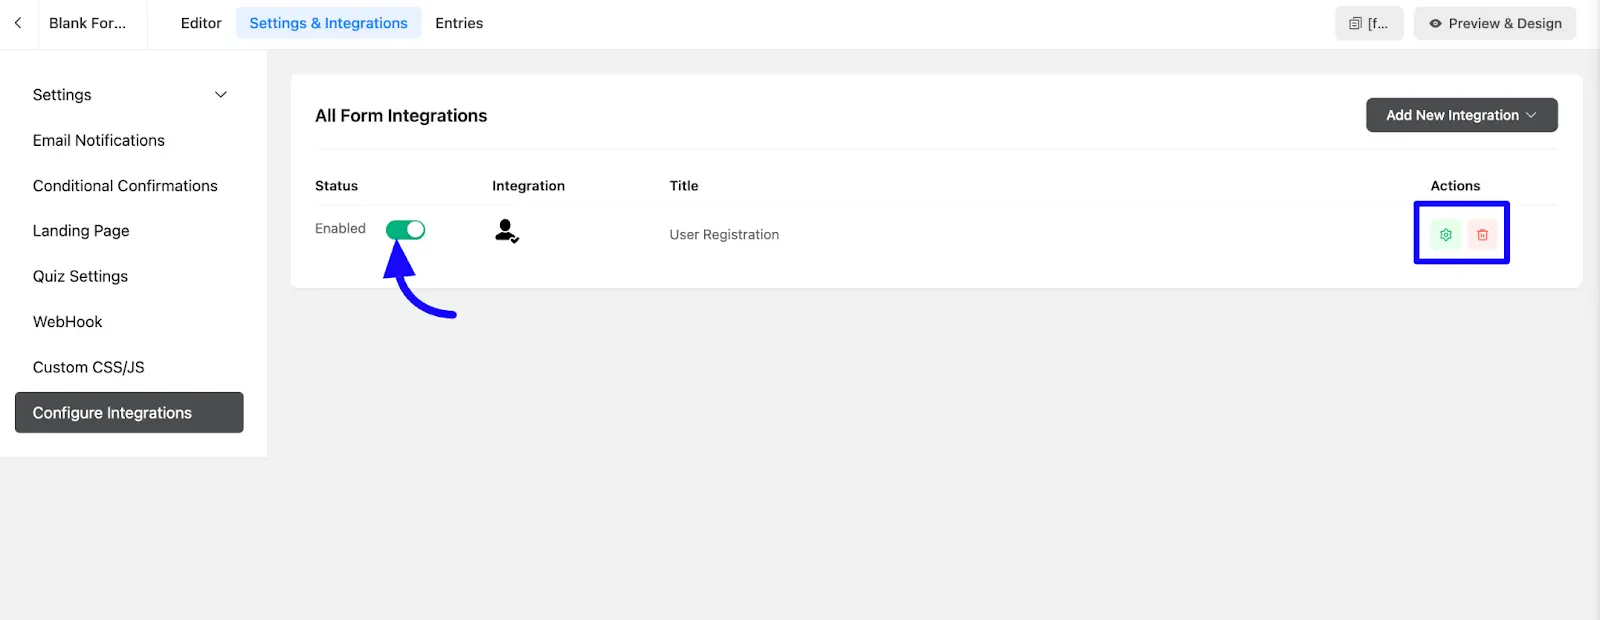
After successful Integration, you will see that your User Registration or Update Feed has been added here.
You can modify your feed anytime by clicking the Settings Icon and Delete it by clicking the Trash Icon.
Also, you can disable or enable this feed anytime by turning off the Toggle if needed.
Preview the User Registration Form #
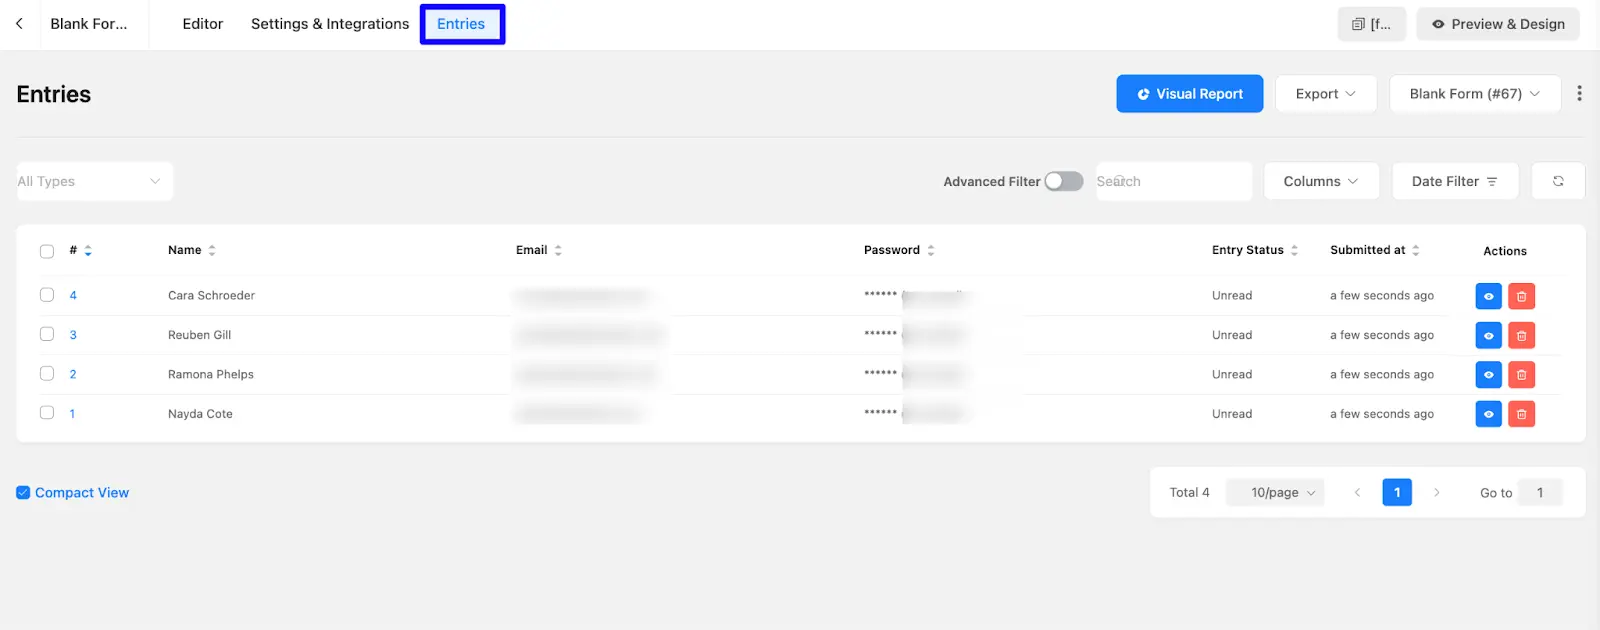
Here, you can see the preview of the added contacts for the User Registration form through the form entries I set up during the integration.
You can see form submissions from the Entries section of this particular form.
Following this guide, you can easily enable user registrations and updates while customizing the form to fit your specific requirements.
If you have any further questions, please contact our support team.


