Fluent Forms Pro offers a variety of advanced features that are unavailable in the free version. It is packed with numerous features and functionalities to create effective forms.
To unlock the ultimate potential of Fluent Forms, you need to upgrade to the Pro add-on. Here is how you can upgrade Fluent Forms.
To use Fluent Forms Pro, you must first install and activate Fluent Forms (free). To know more about Fluent Forms free vs pro, read this article.
How to Upgrade to Fluent Form Pro Add-on #
Before upgrading to Fluent Forms Pro, ensure you have the Pro Add-on .zip file ready. Below is a step-by-step process to get the .zip file-
Get the Zip File #
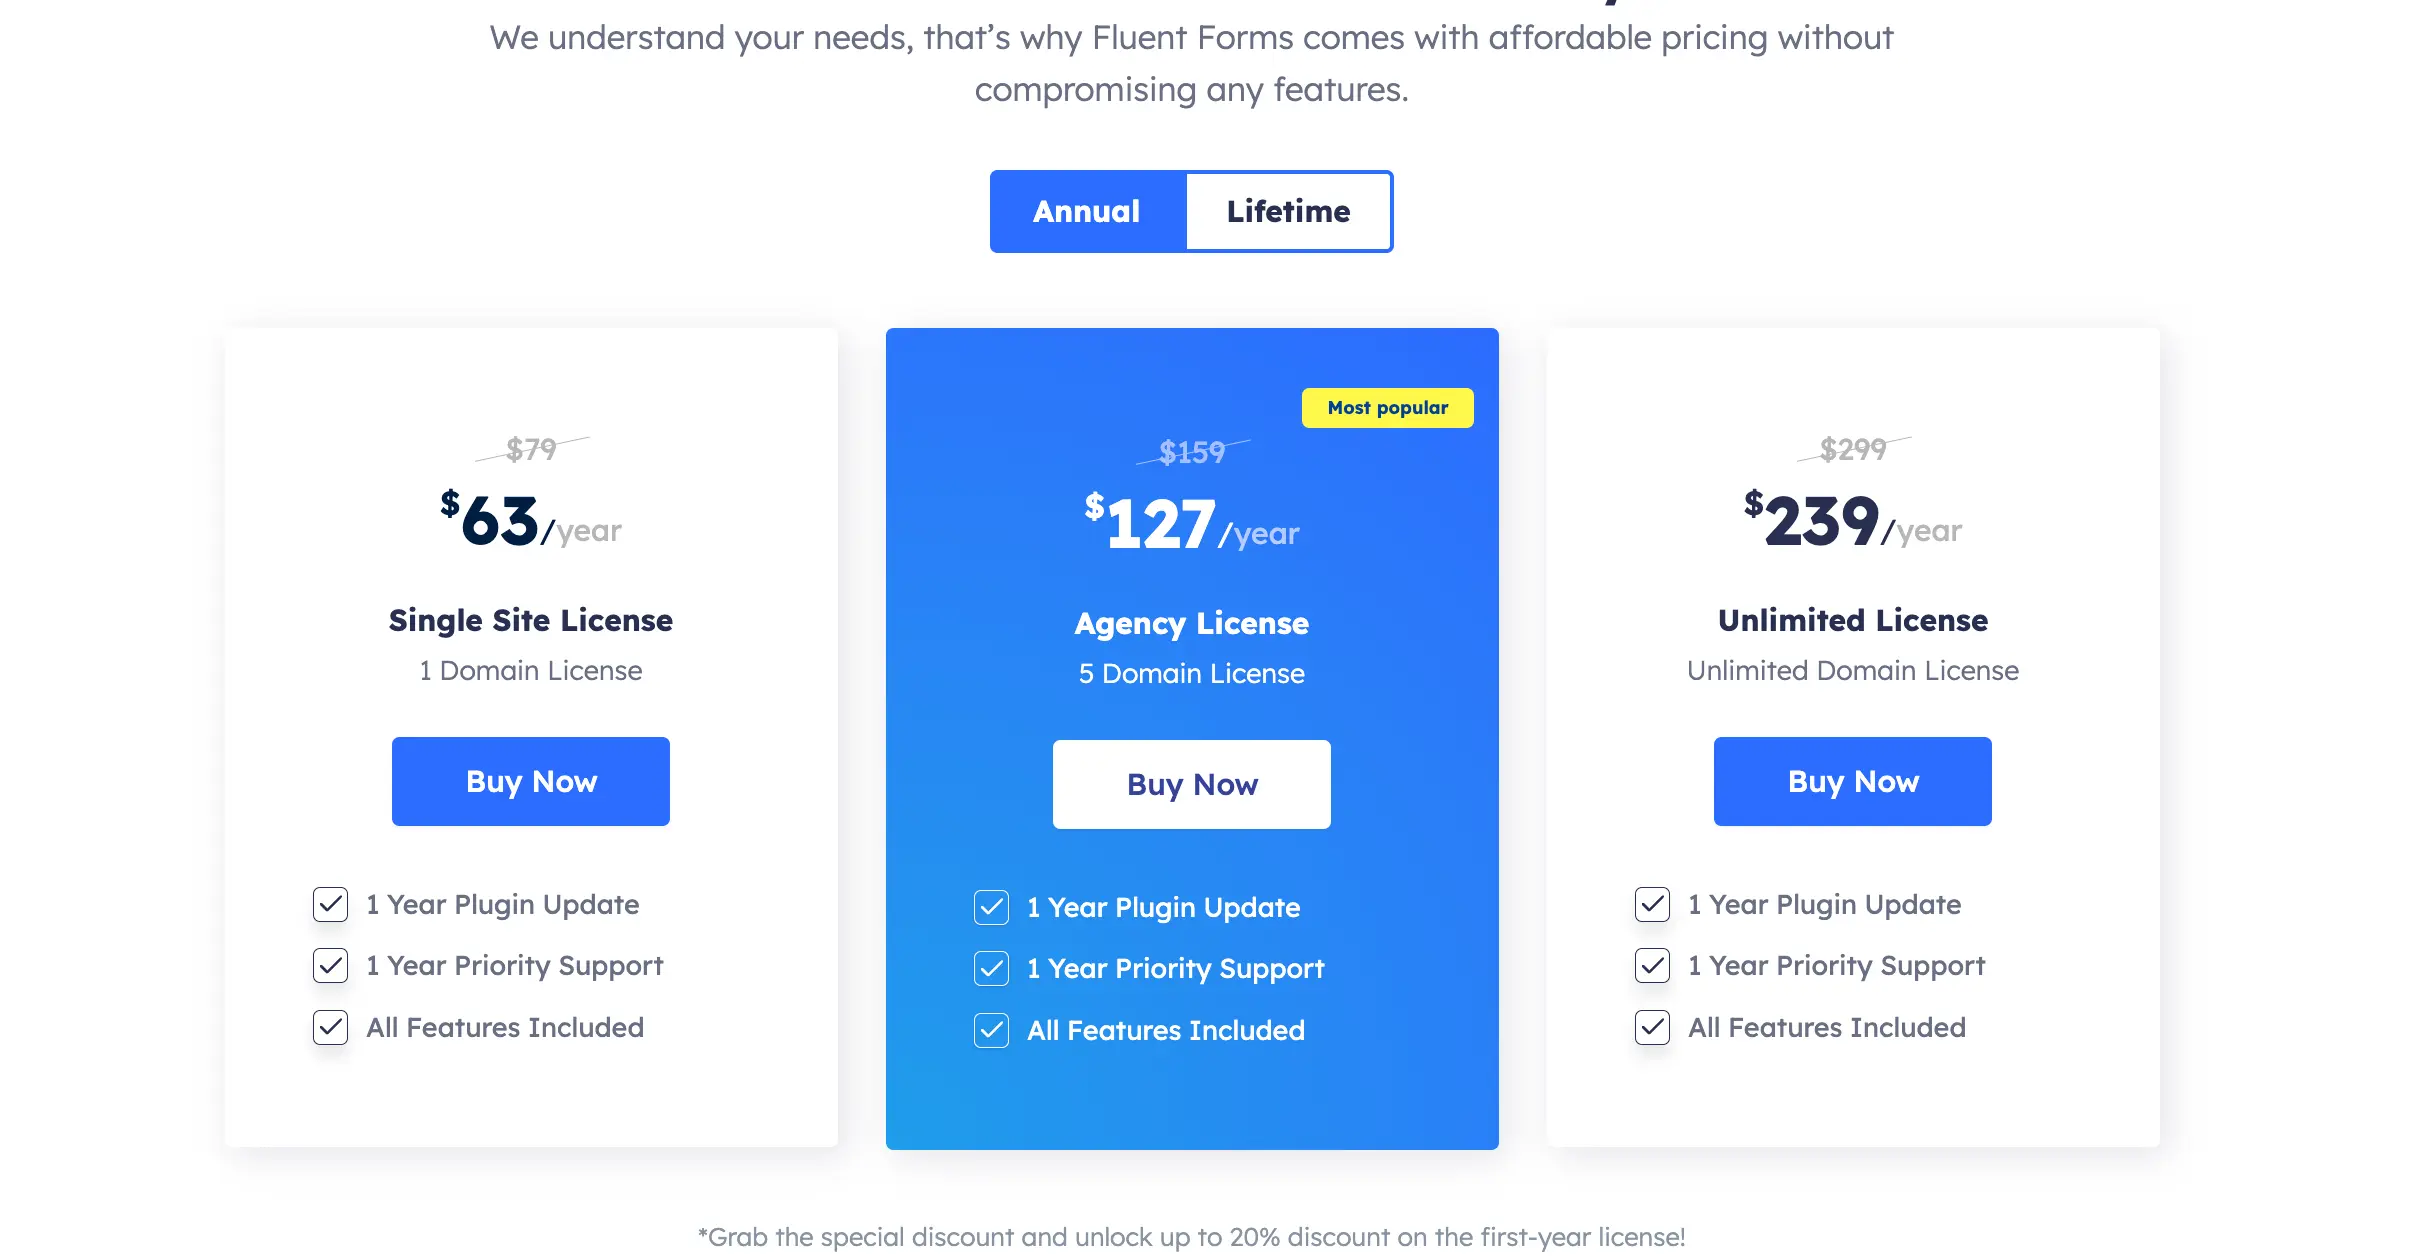
You’ll first need to purchase the Pro version of Fluent Forms to get started. You can do this in two ways:
Visit the official Fluent Forms or WPManageNinja websites and choose a pricing plan that fits your needs.
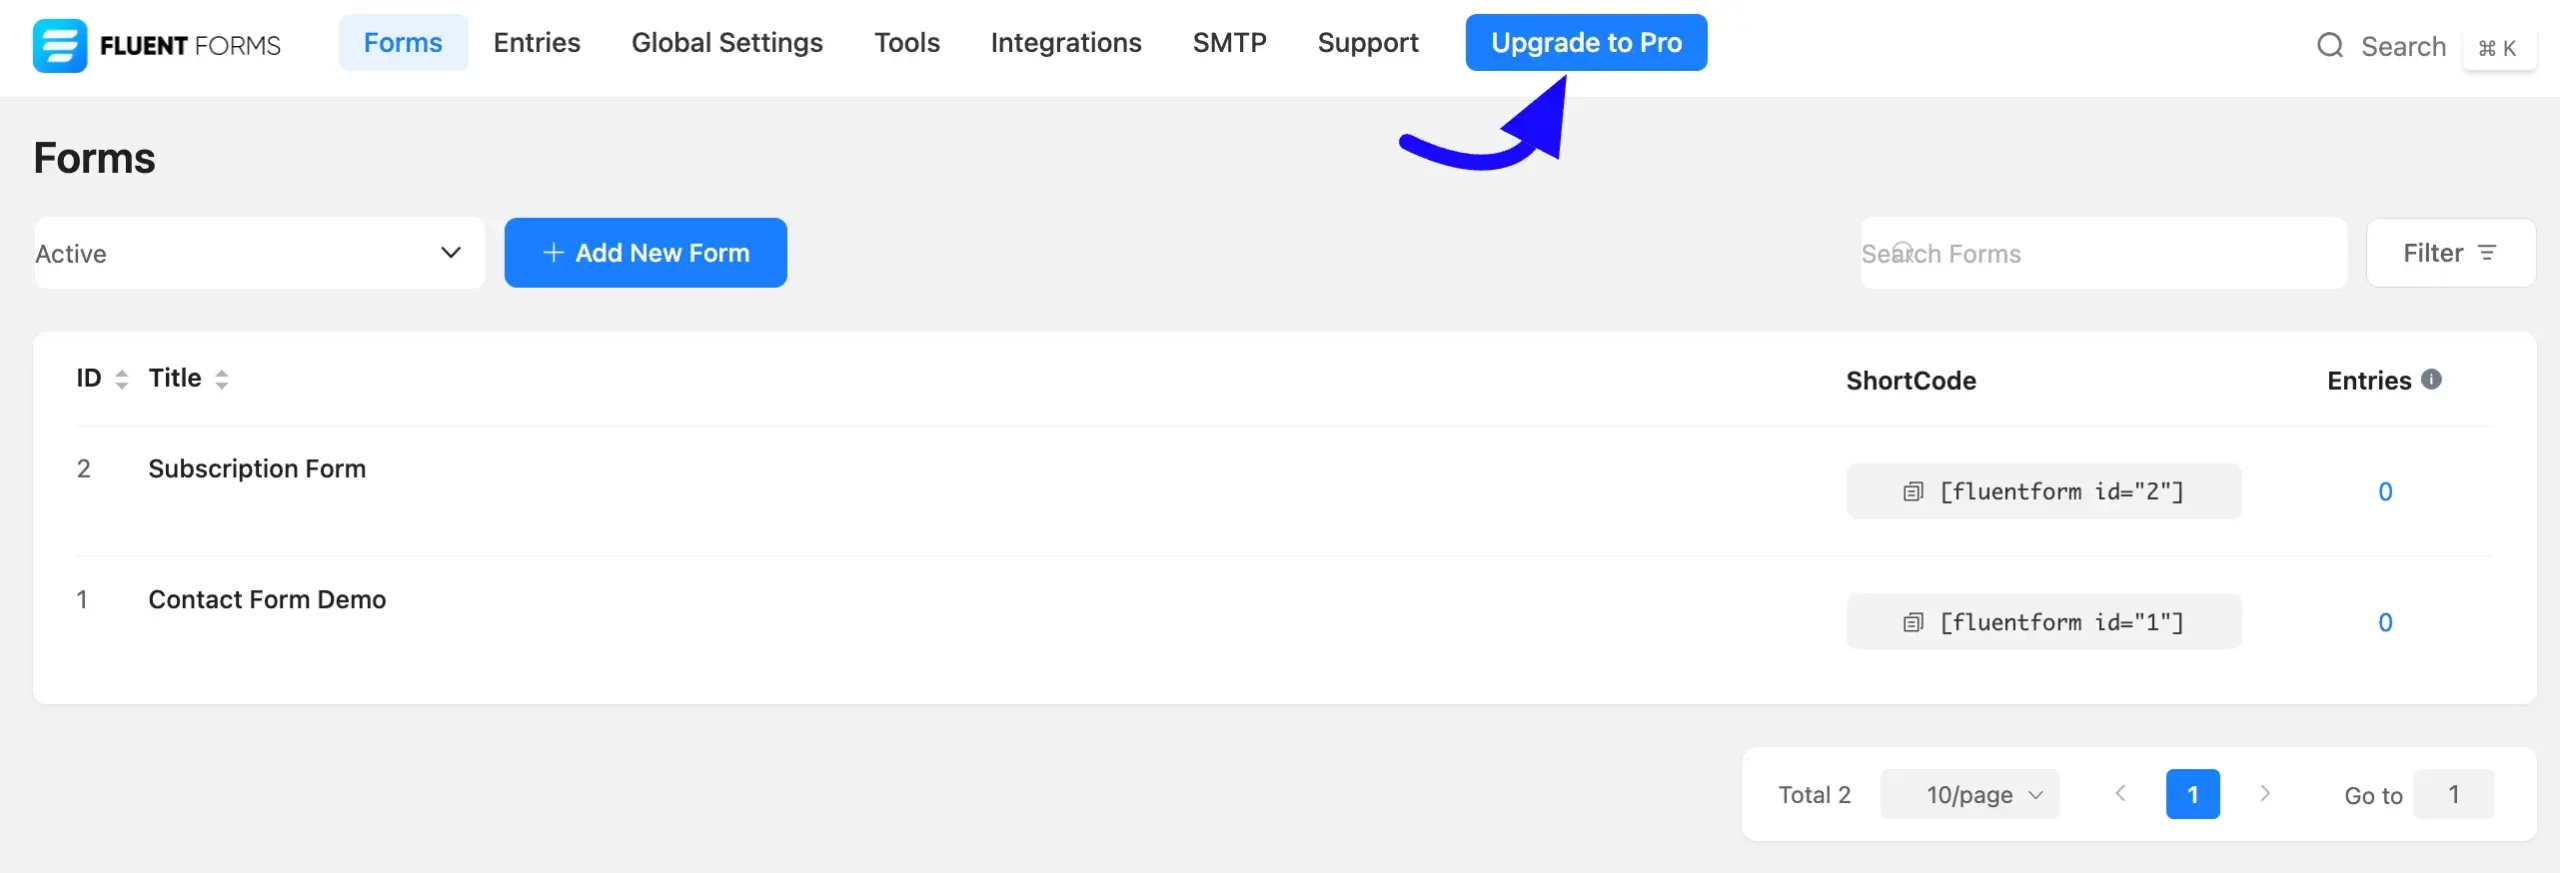
Or, you can open the Fluent Forms free plugin from your WordPress dashboard and click the Upgrade to Pro button. This will take you directly to the purchase page.
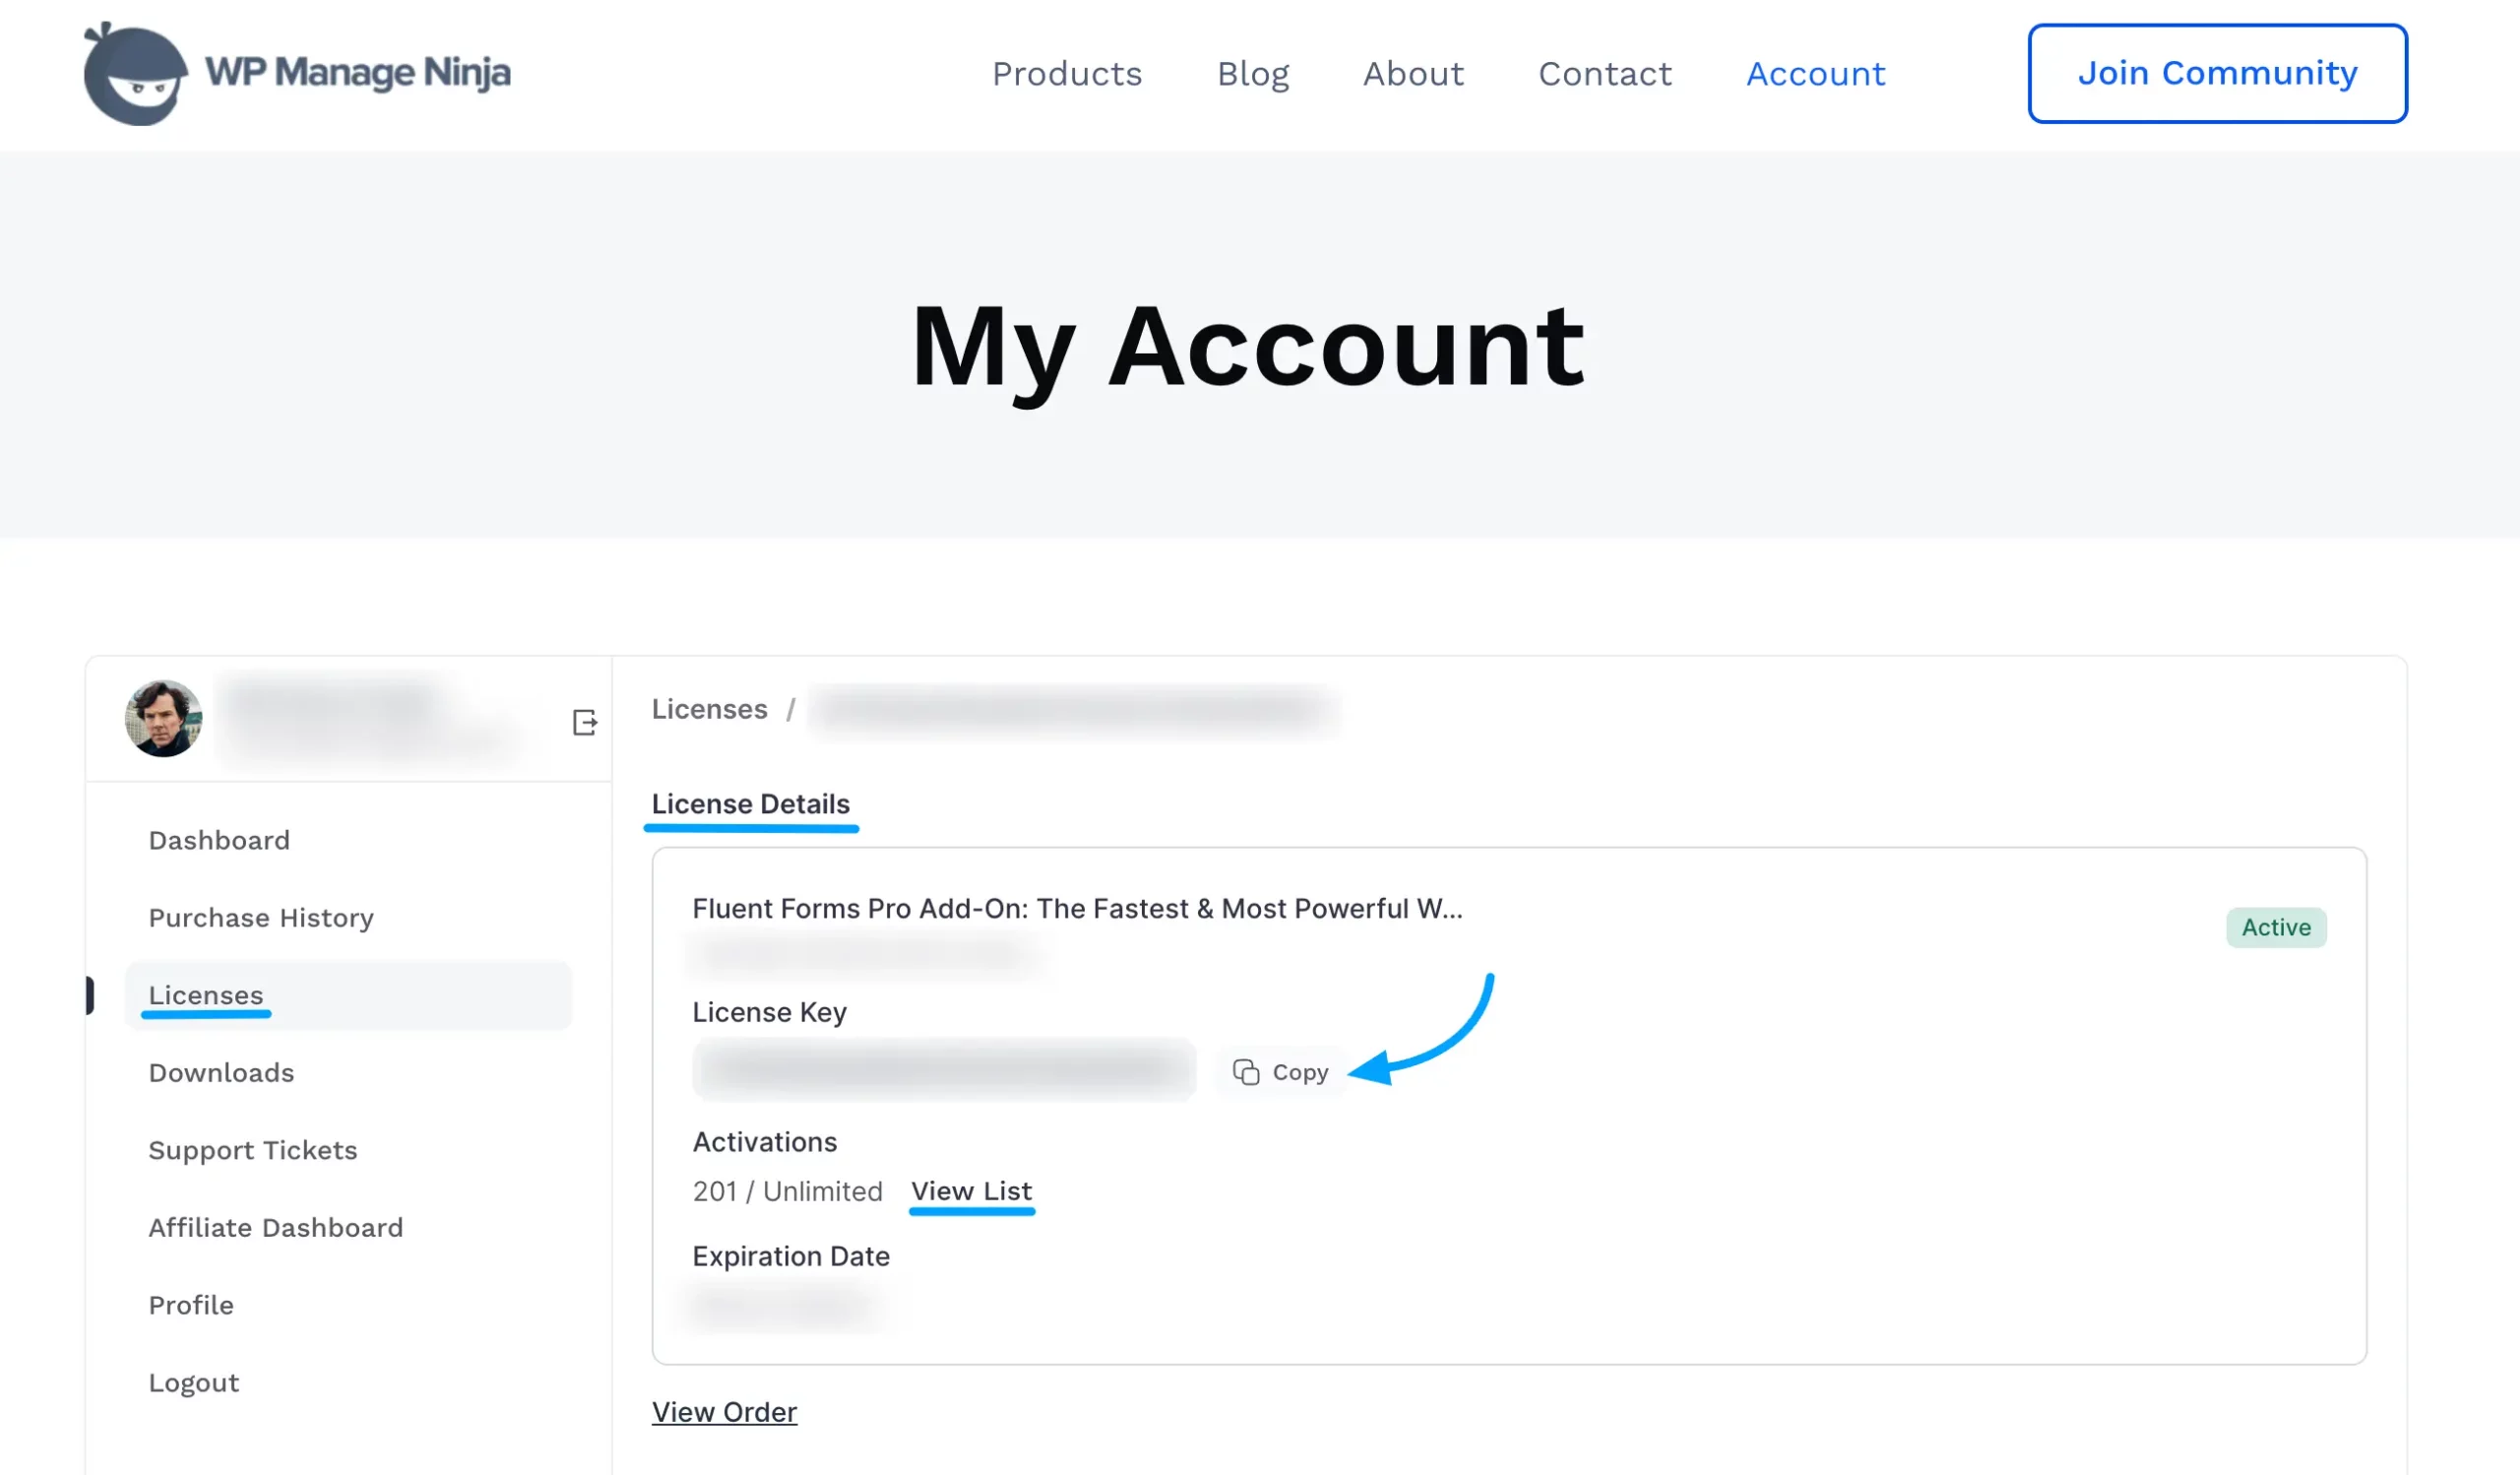
Once your purchase is complete, you can access the WPManageninja Dashboard. Log in to the account with your credentials.
Then go to the Dashboard, and you will find Fluent Forms Pro zip under Downloads. Now, click the Download button and you will see the Fluent Forms .zip file has downloaded to your device.

To access your Fluent Forms license, navigate to Licenses in the left sidebar. You’ll find your Fluent Forms license key there. You’ll need this key later when activating the plugin. If you miss it now, you can always come back and retrieve it from your WPManageNinja Dashboard.
Click View List to see all active sites currently using this license key.
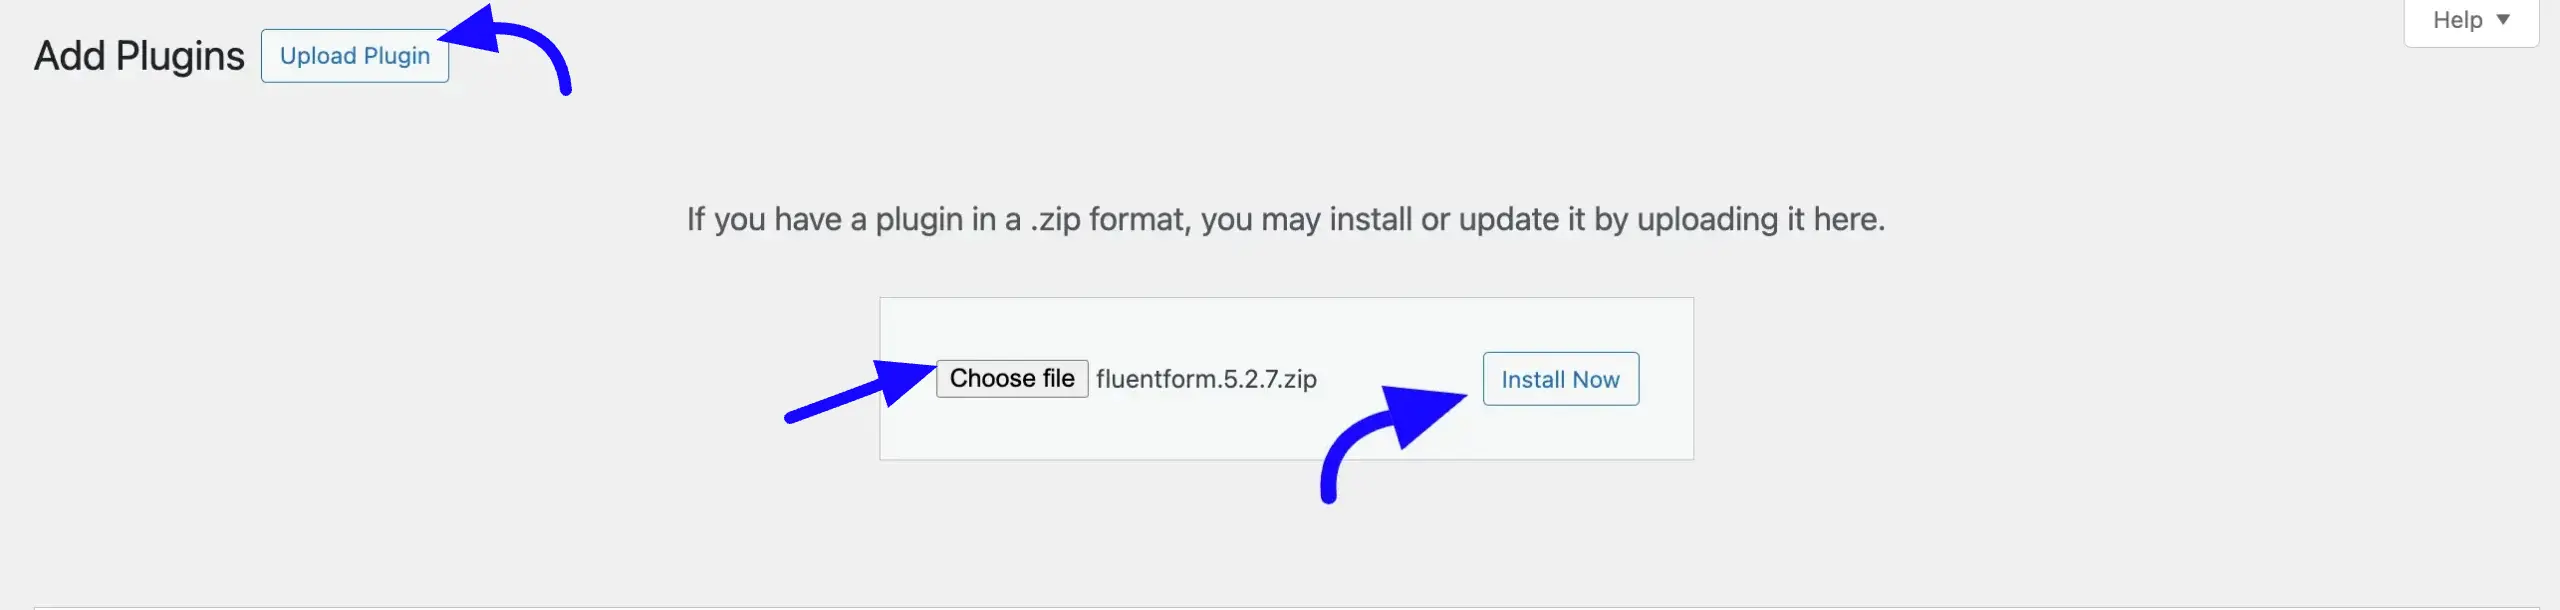
Install the Fluent Form Pro #
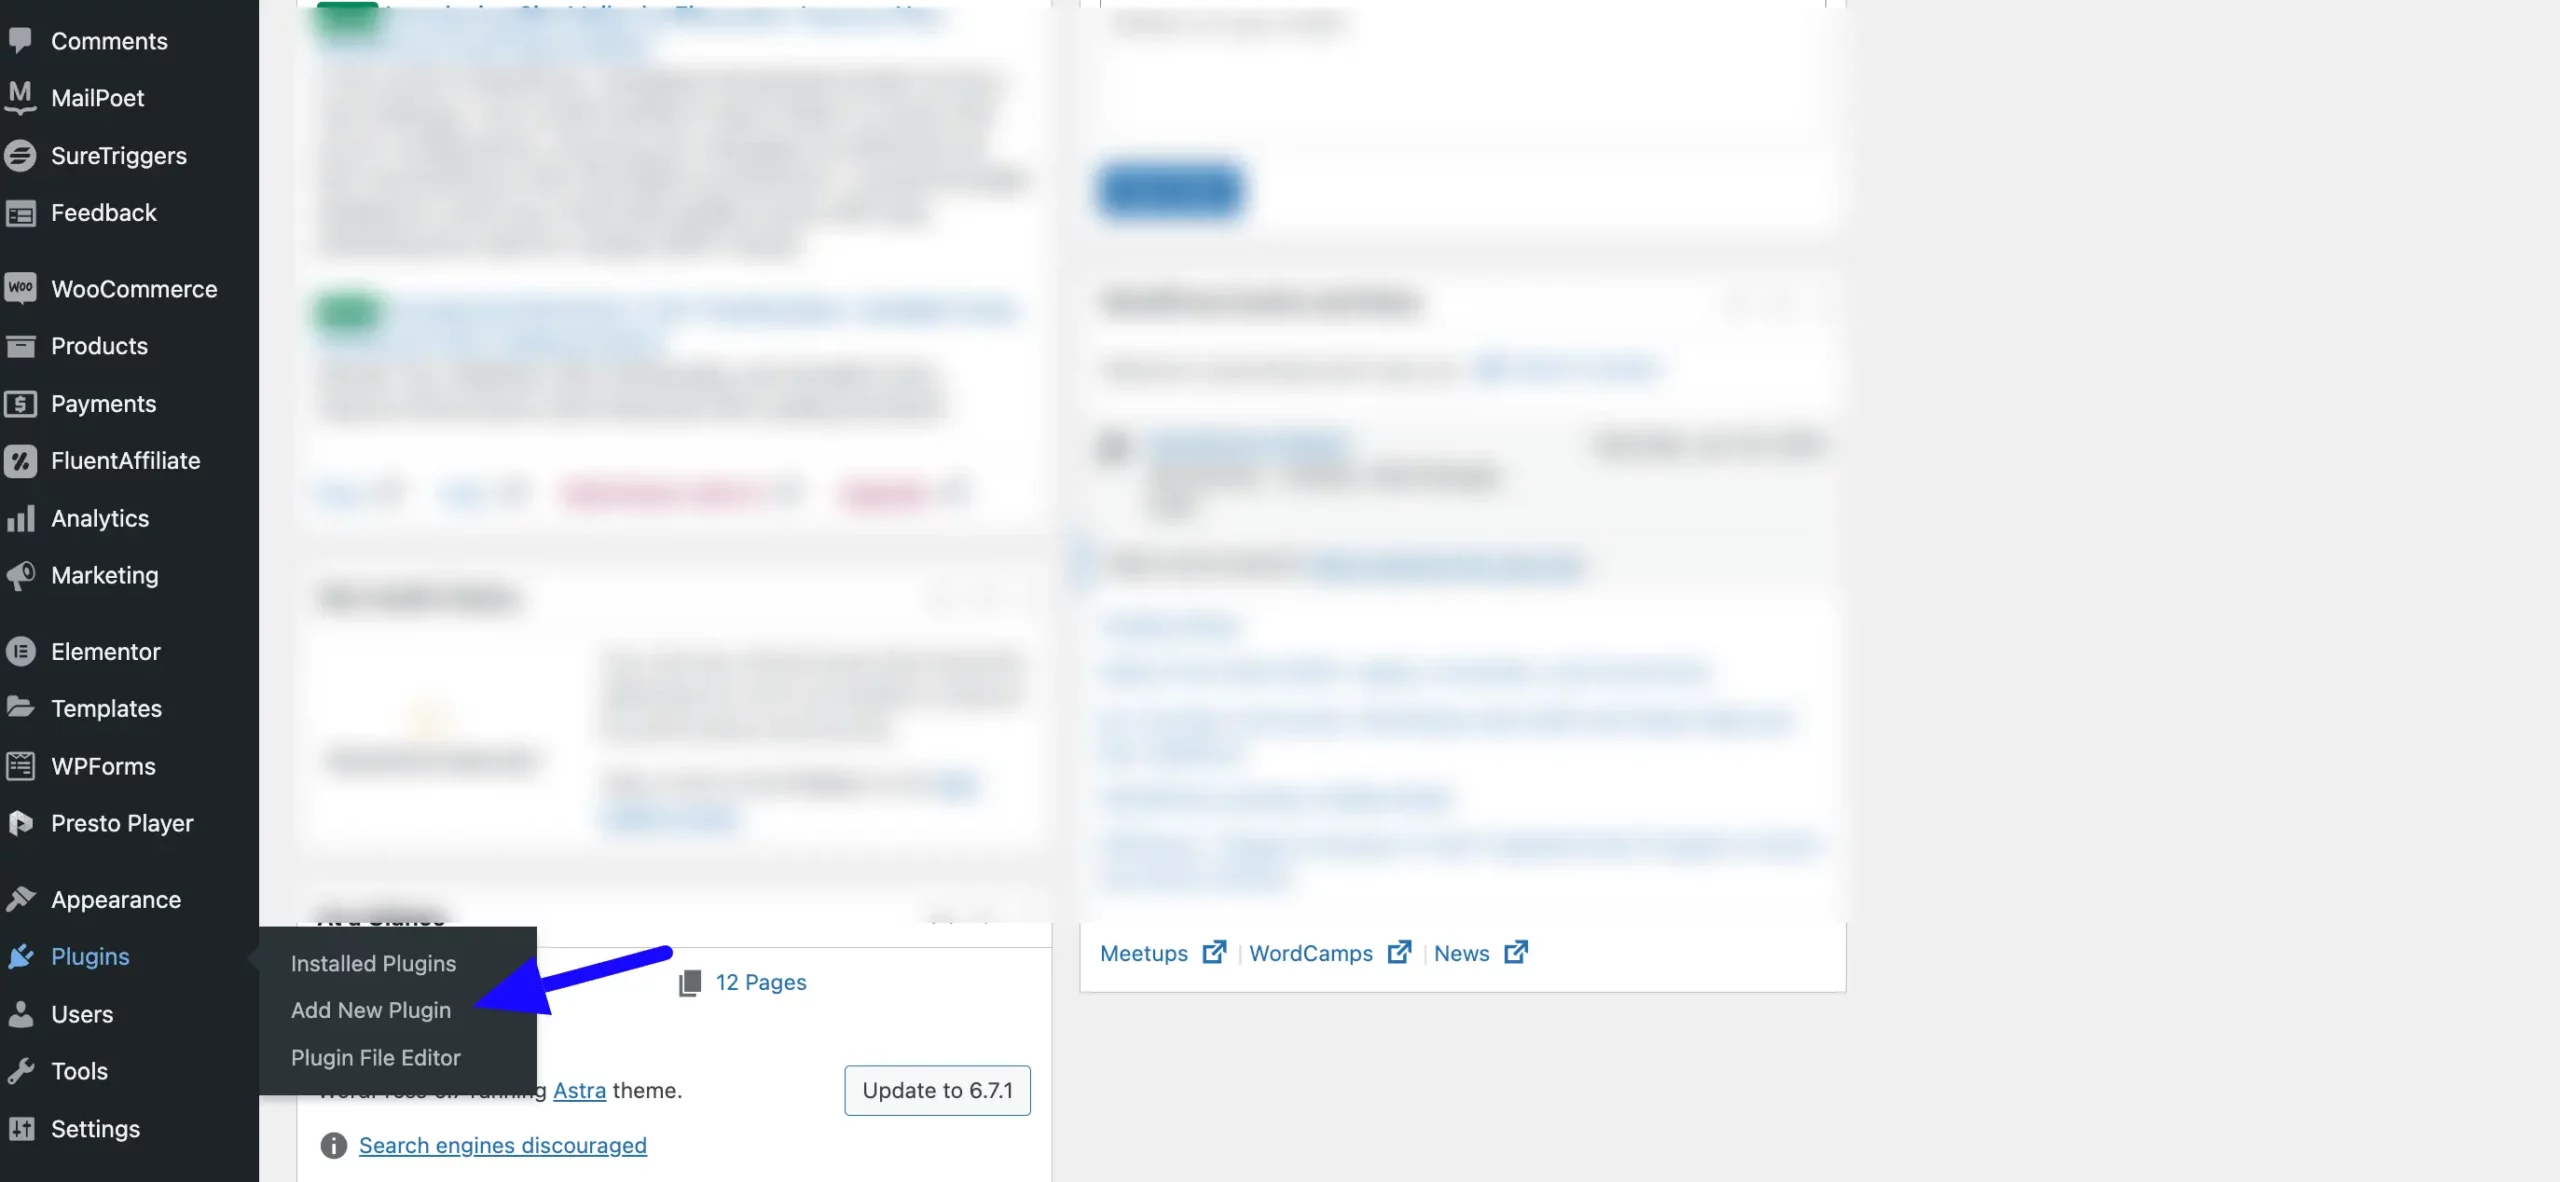
Once you get the zip file, go to Plugins from your WordPress Dashboard and click on the Add New Plugin button.
Now, click the Upload Plugin button. Then, press the Choose file to upload the Fluent Forms .zip file you’ve downloaded before, and click the Install Now button.
The Fluent Forms Pro plugin will be successfully installed on your WordPress site!
Do not deactivate or uninstall the Fluent Forms plugin from the Installed Plugins list. If you do this, you will be unable to use the Pro features and will need to reinstall and activate the Pro add-on.
Now, to activate the plugin, click the Activate Plugin button.

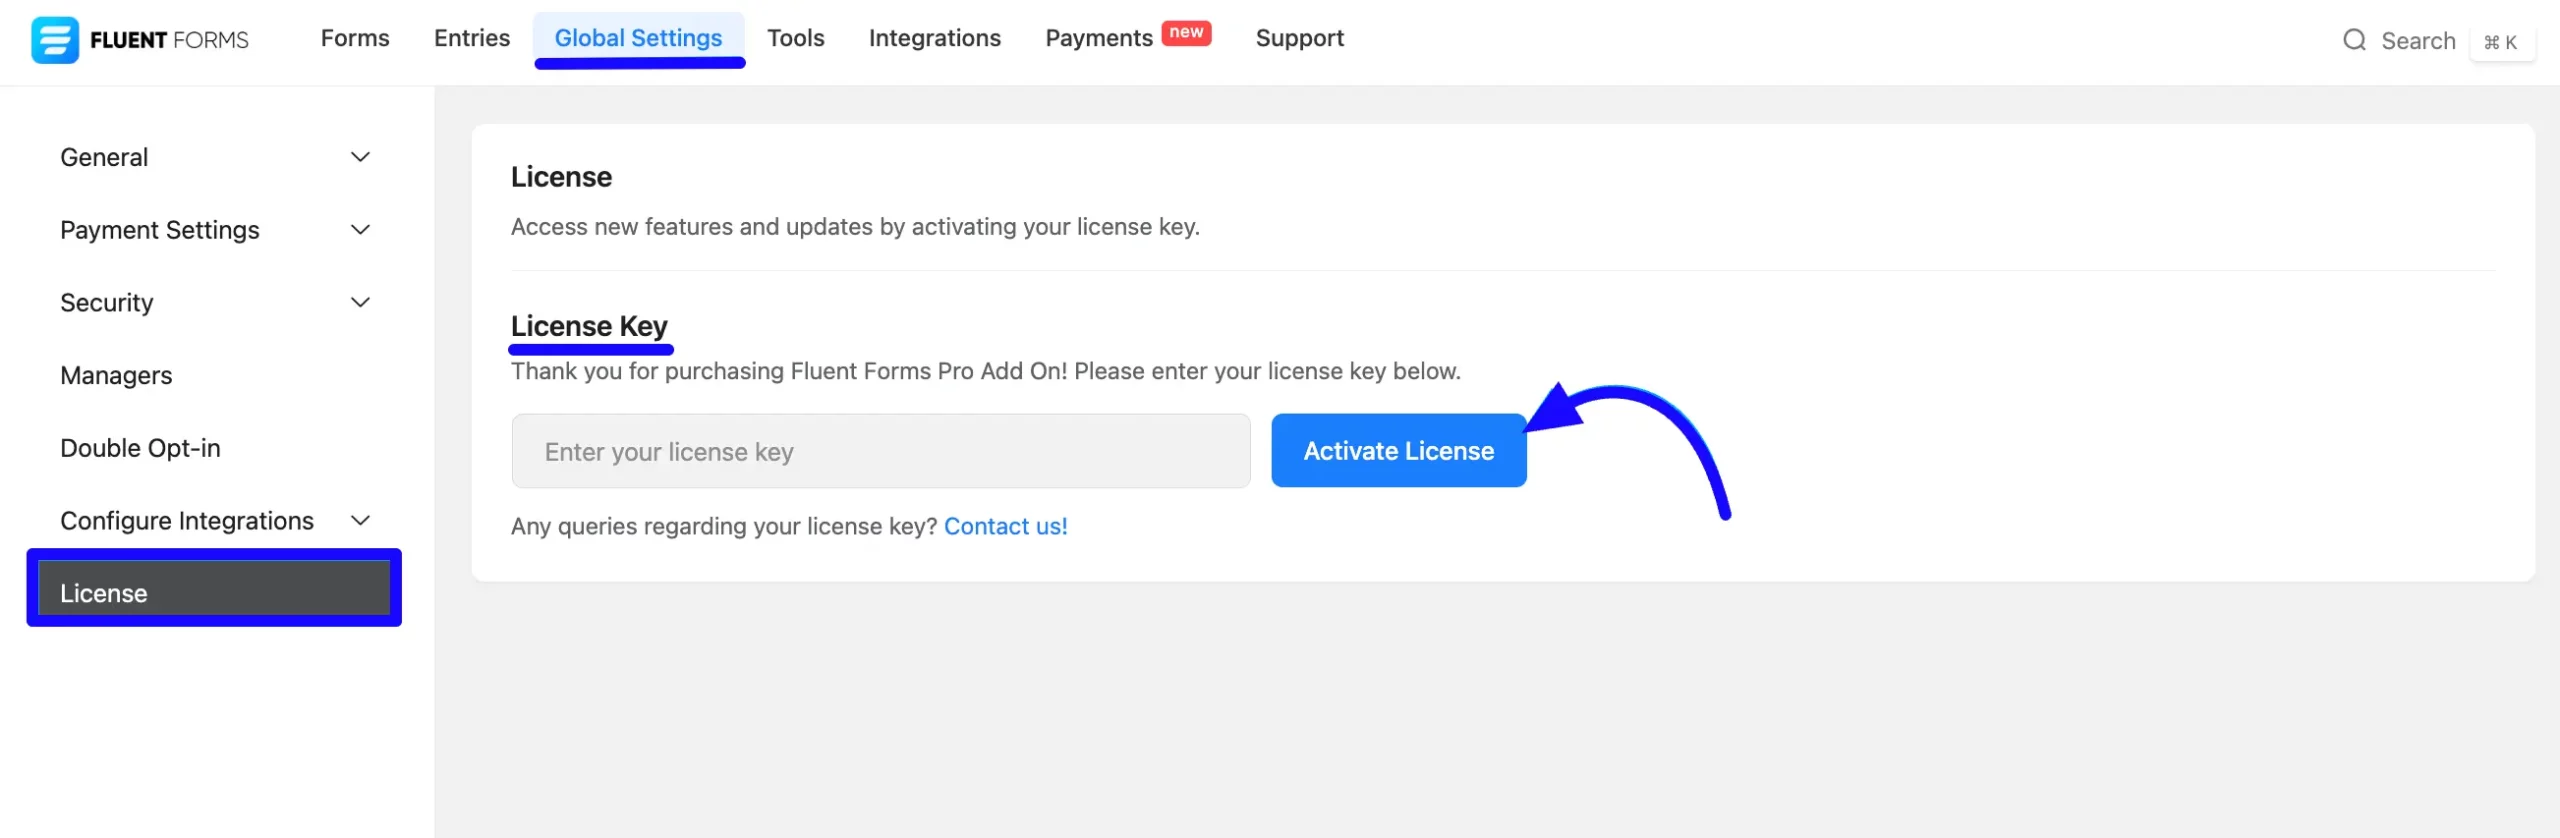
Activate the License Key #
To activate all the Pro features of Fluent Forms with the license key, follow the steps with the screenshots below —
First, go to Global Settings from your Fluent Forms Dashboard, open License from the left sidebar, and enter the License Key you’ve copied before into the input field.
And finally, click the Activate License button. Your Fluent Forms Pro plugin will also be successfully activated on your WordPress site!
How to update Fluent Forms #
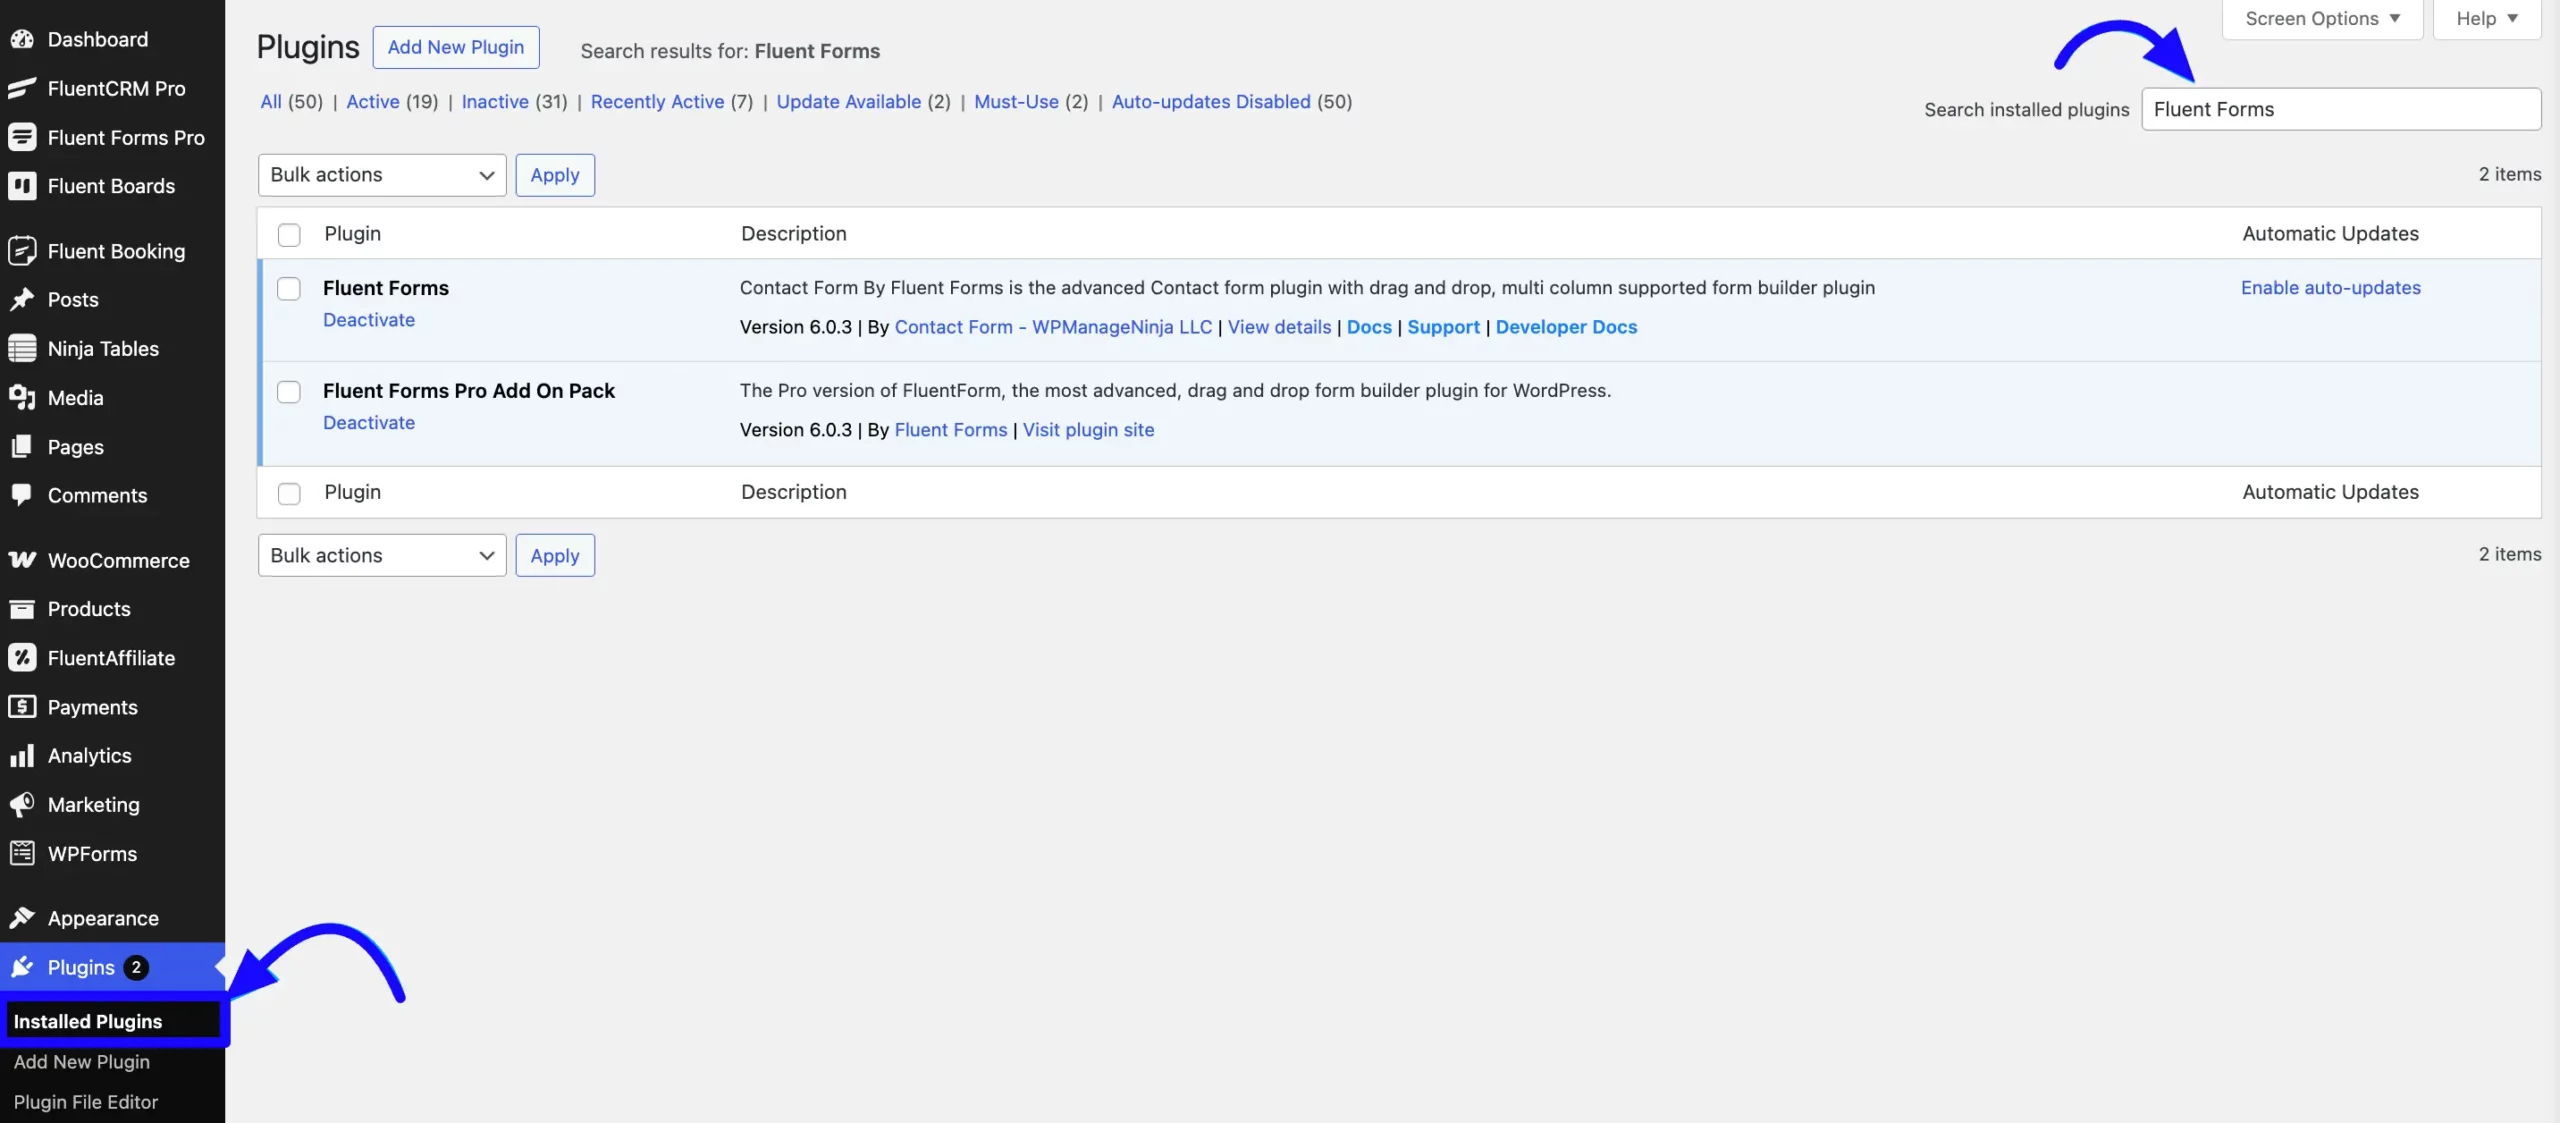
To update the Fluent Form plugin manually, follow the steps in the screenshot below —
Go to the Installed Plugins page of your WordPress Dashboard and search for Fluent Forms from the Search Bar in the top right corner.
Now, check if any updates are available. If yes, click on the Update button.
Congratulations! Now, you can explore all the fantastic features of Fluent Forms.
If you have any further questions, concerns, or suggestions, please do not hesitate to contact our support team.


