Fluent Forms integrates with Salesflare, an email marketing automation tool that helps you collect leads or B2B leads, grow your small business, and automatically add it to your Salesflare list through Fluent Forms Submissions.
This article will guide you through integrating Salesflare with Fluent Forms on your WordPress Site.
Remember, Salesflare is the Premium Feature of the Fluent Forms Plugin. So, you need the Fluent Forms Pro plugin to integrate this.
Enable the Salesflare Integration #
To learn how to enable Salesflare integration, follow the easy steps below –
First, go to Integrations from the Fluent Forms Navbar, search for Salesflare through the search bar, and get the Salesflare integration module.
Now, turn on the Toggle to enable the Salesflare module, and click the Settings Icon on the right side.
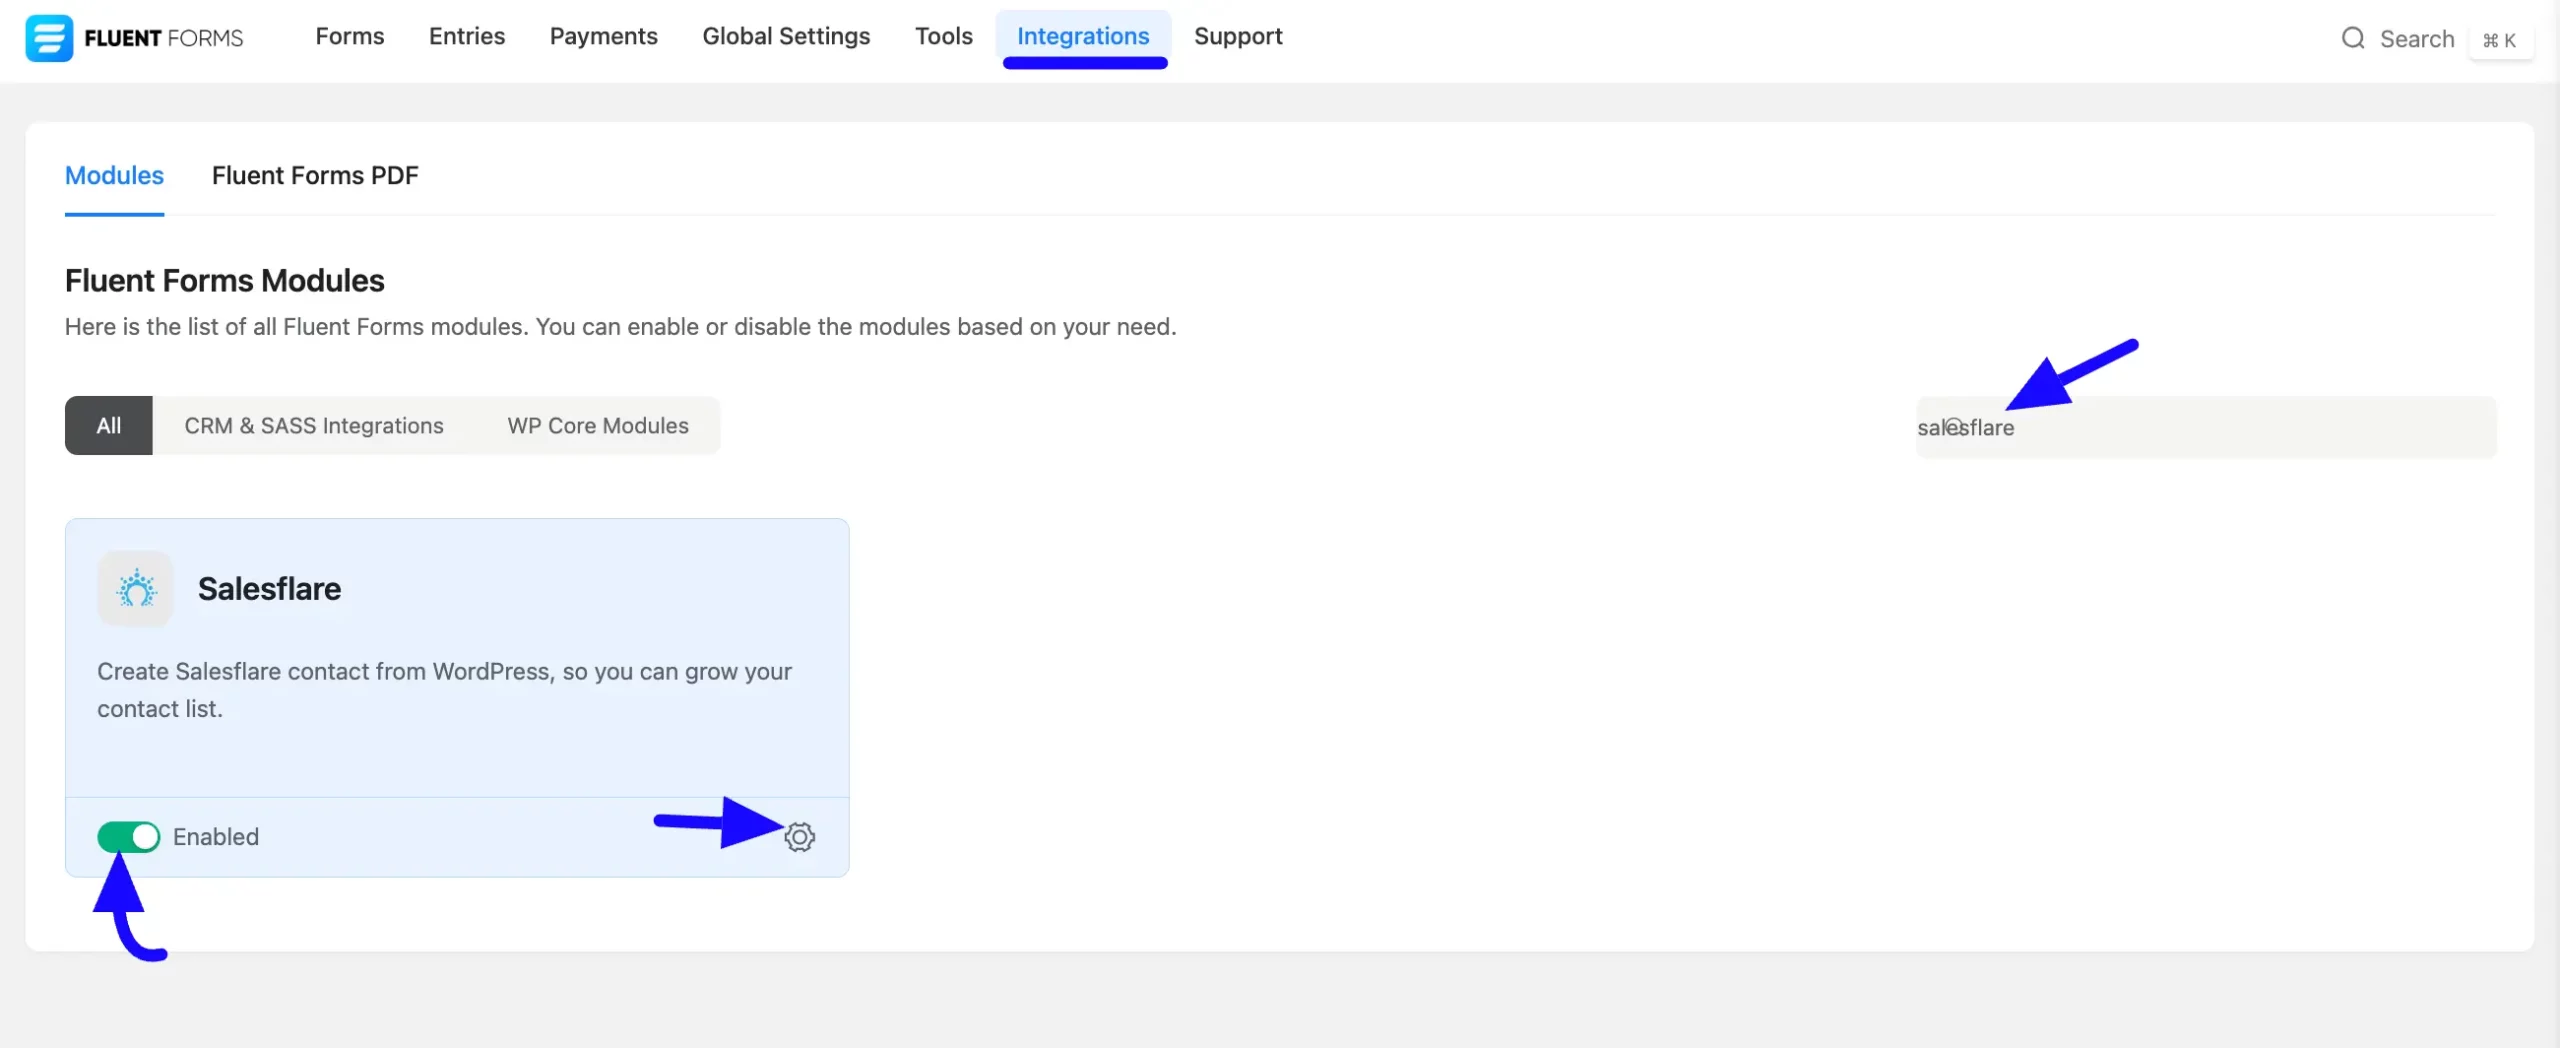
Once you enable Salesflare, you will be asked for the Salesflare API Token of your Salesflare Account.
If you don’t have an existing account, click here to create a new one.
Get the Salesflare API Token #
To learn how to get the Api Token from Salesflare, follow the steps with screenshots below –
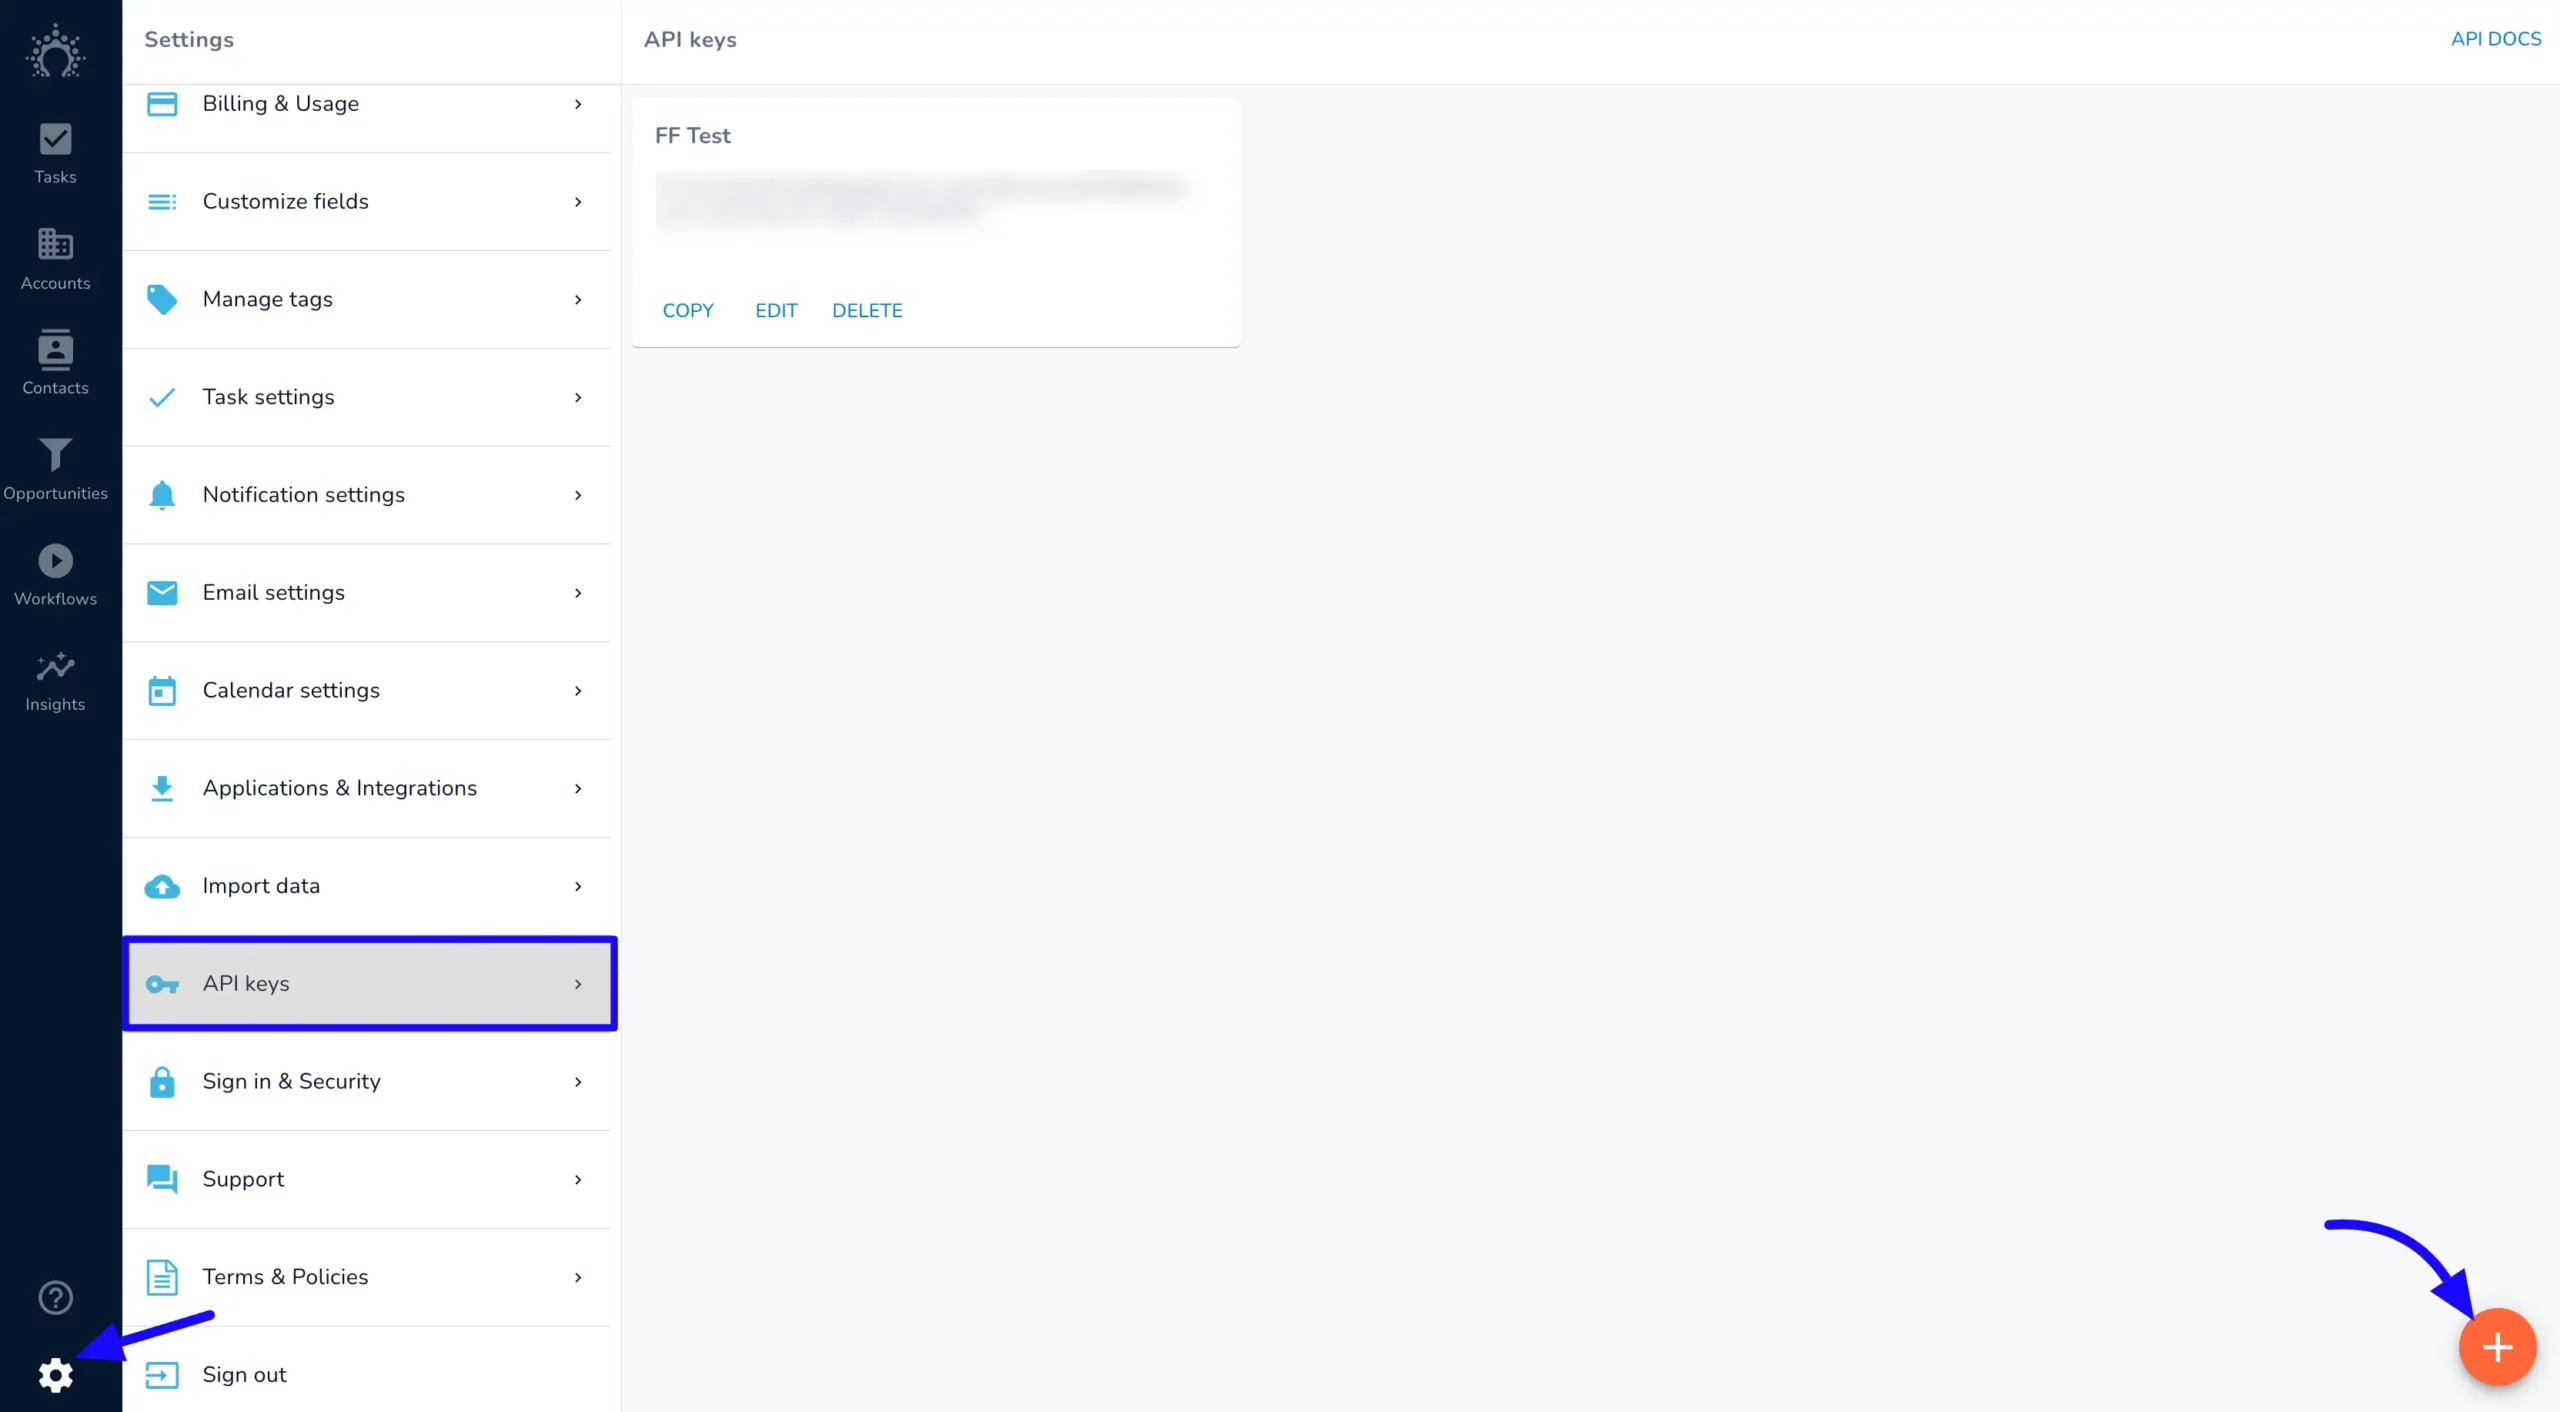
First, log in to your Salesflare Account, go to the Settings section and click the API Key options.
Now, Click the Plus Icon to Create an API key.
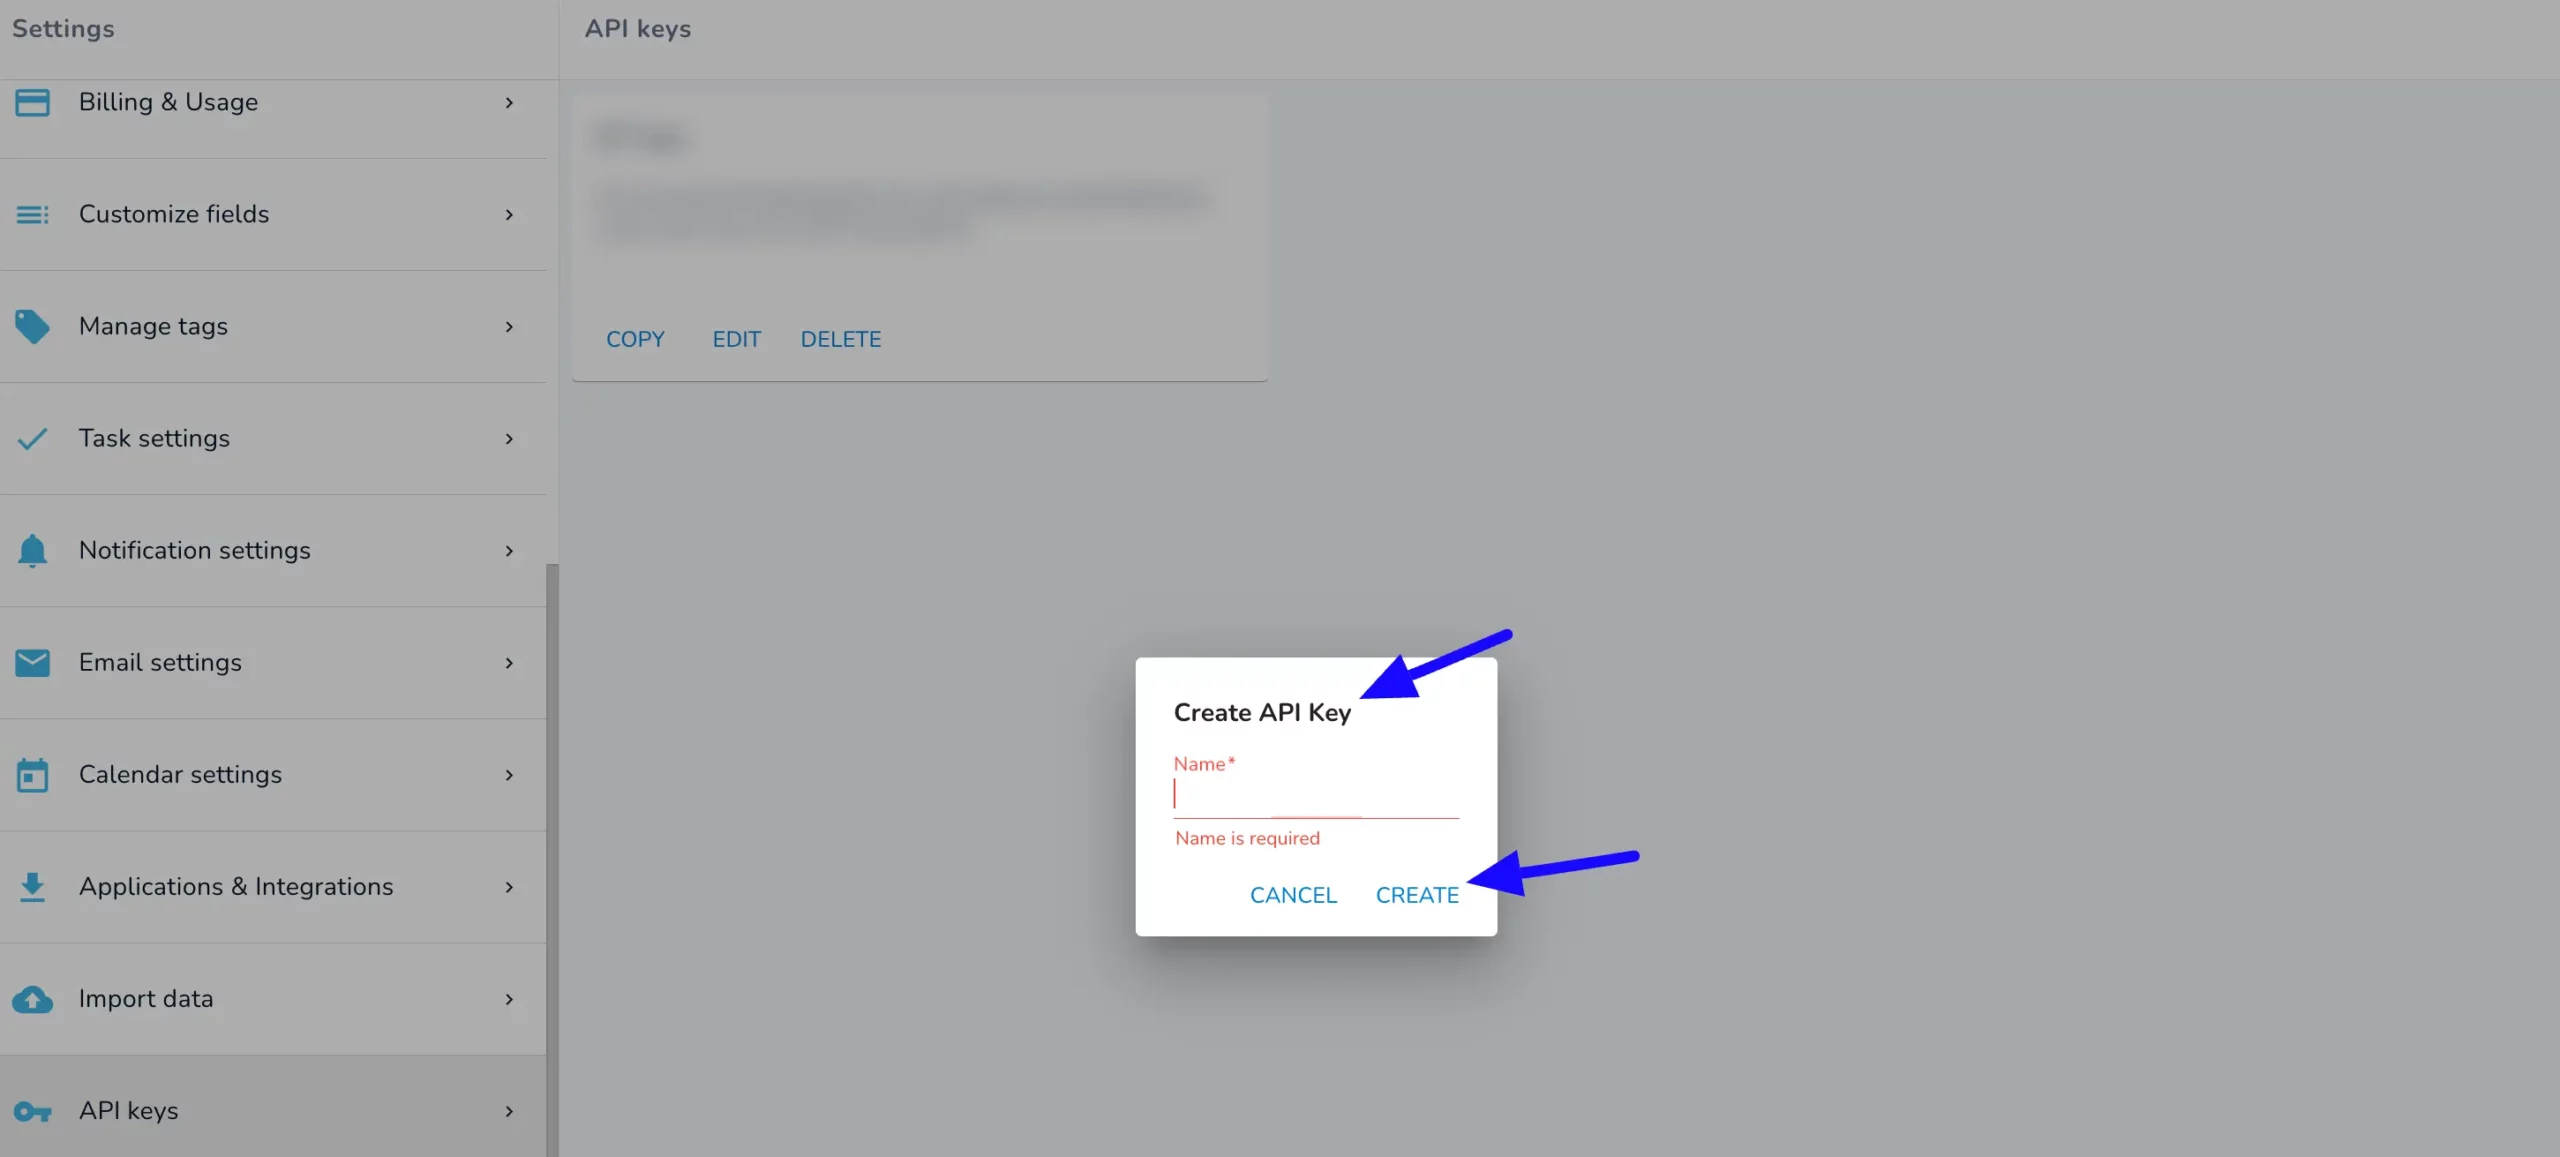
Here appears a popup. Enter the API Name and then click the Create button.
After creating the API key, copy it for later use.
Connect Salesflare with Fluent Forms #
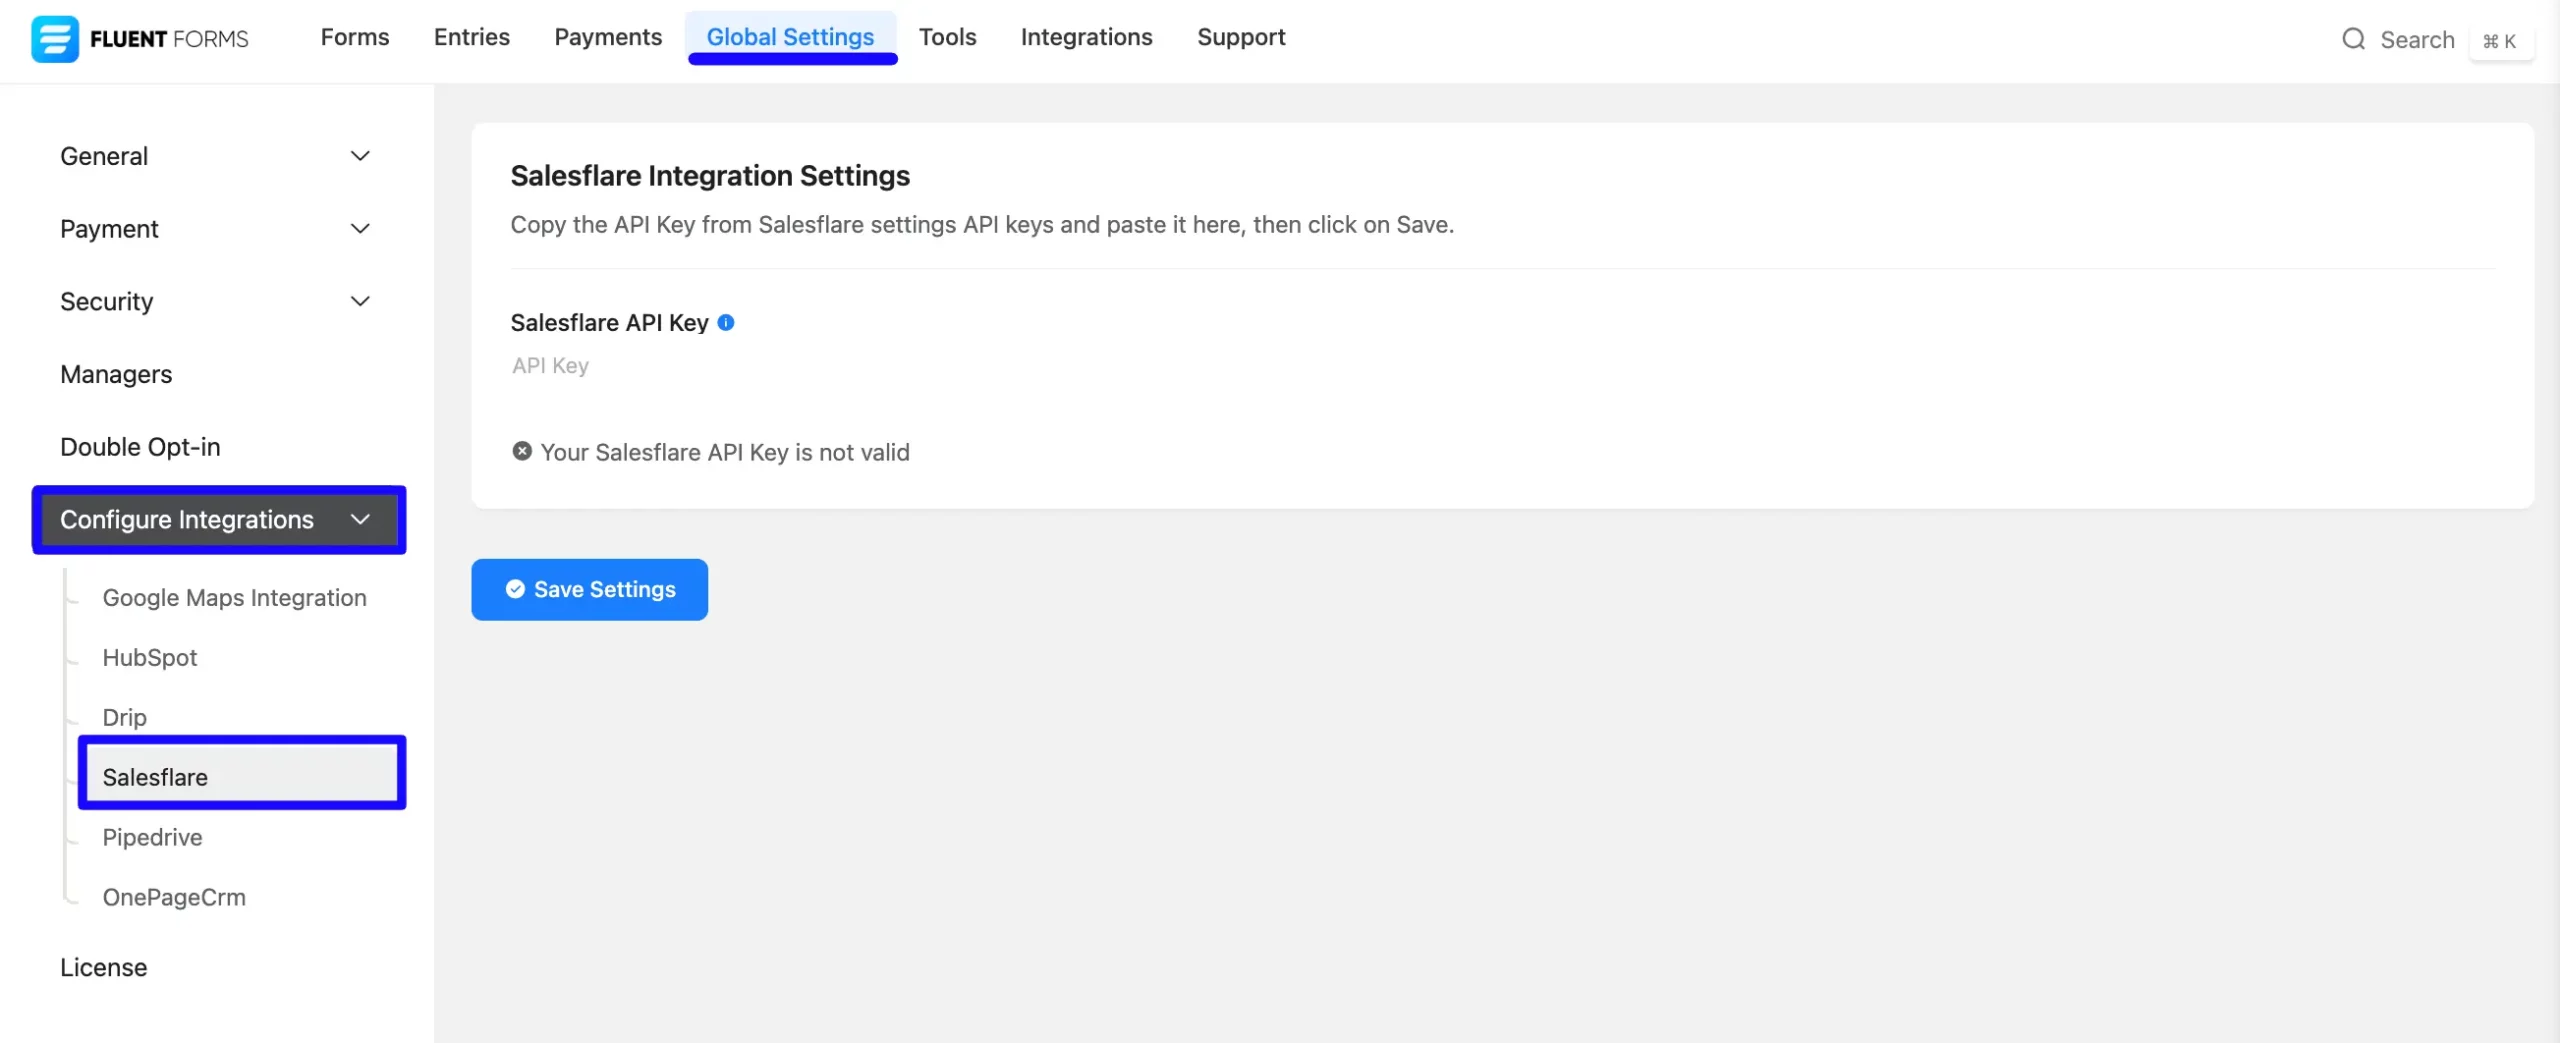
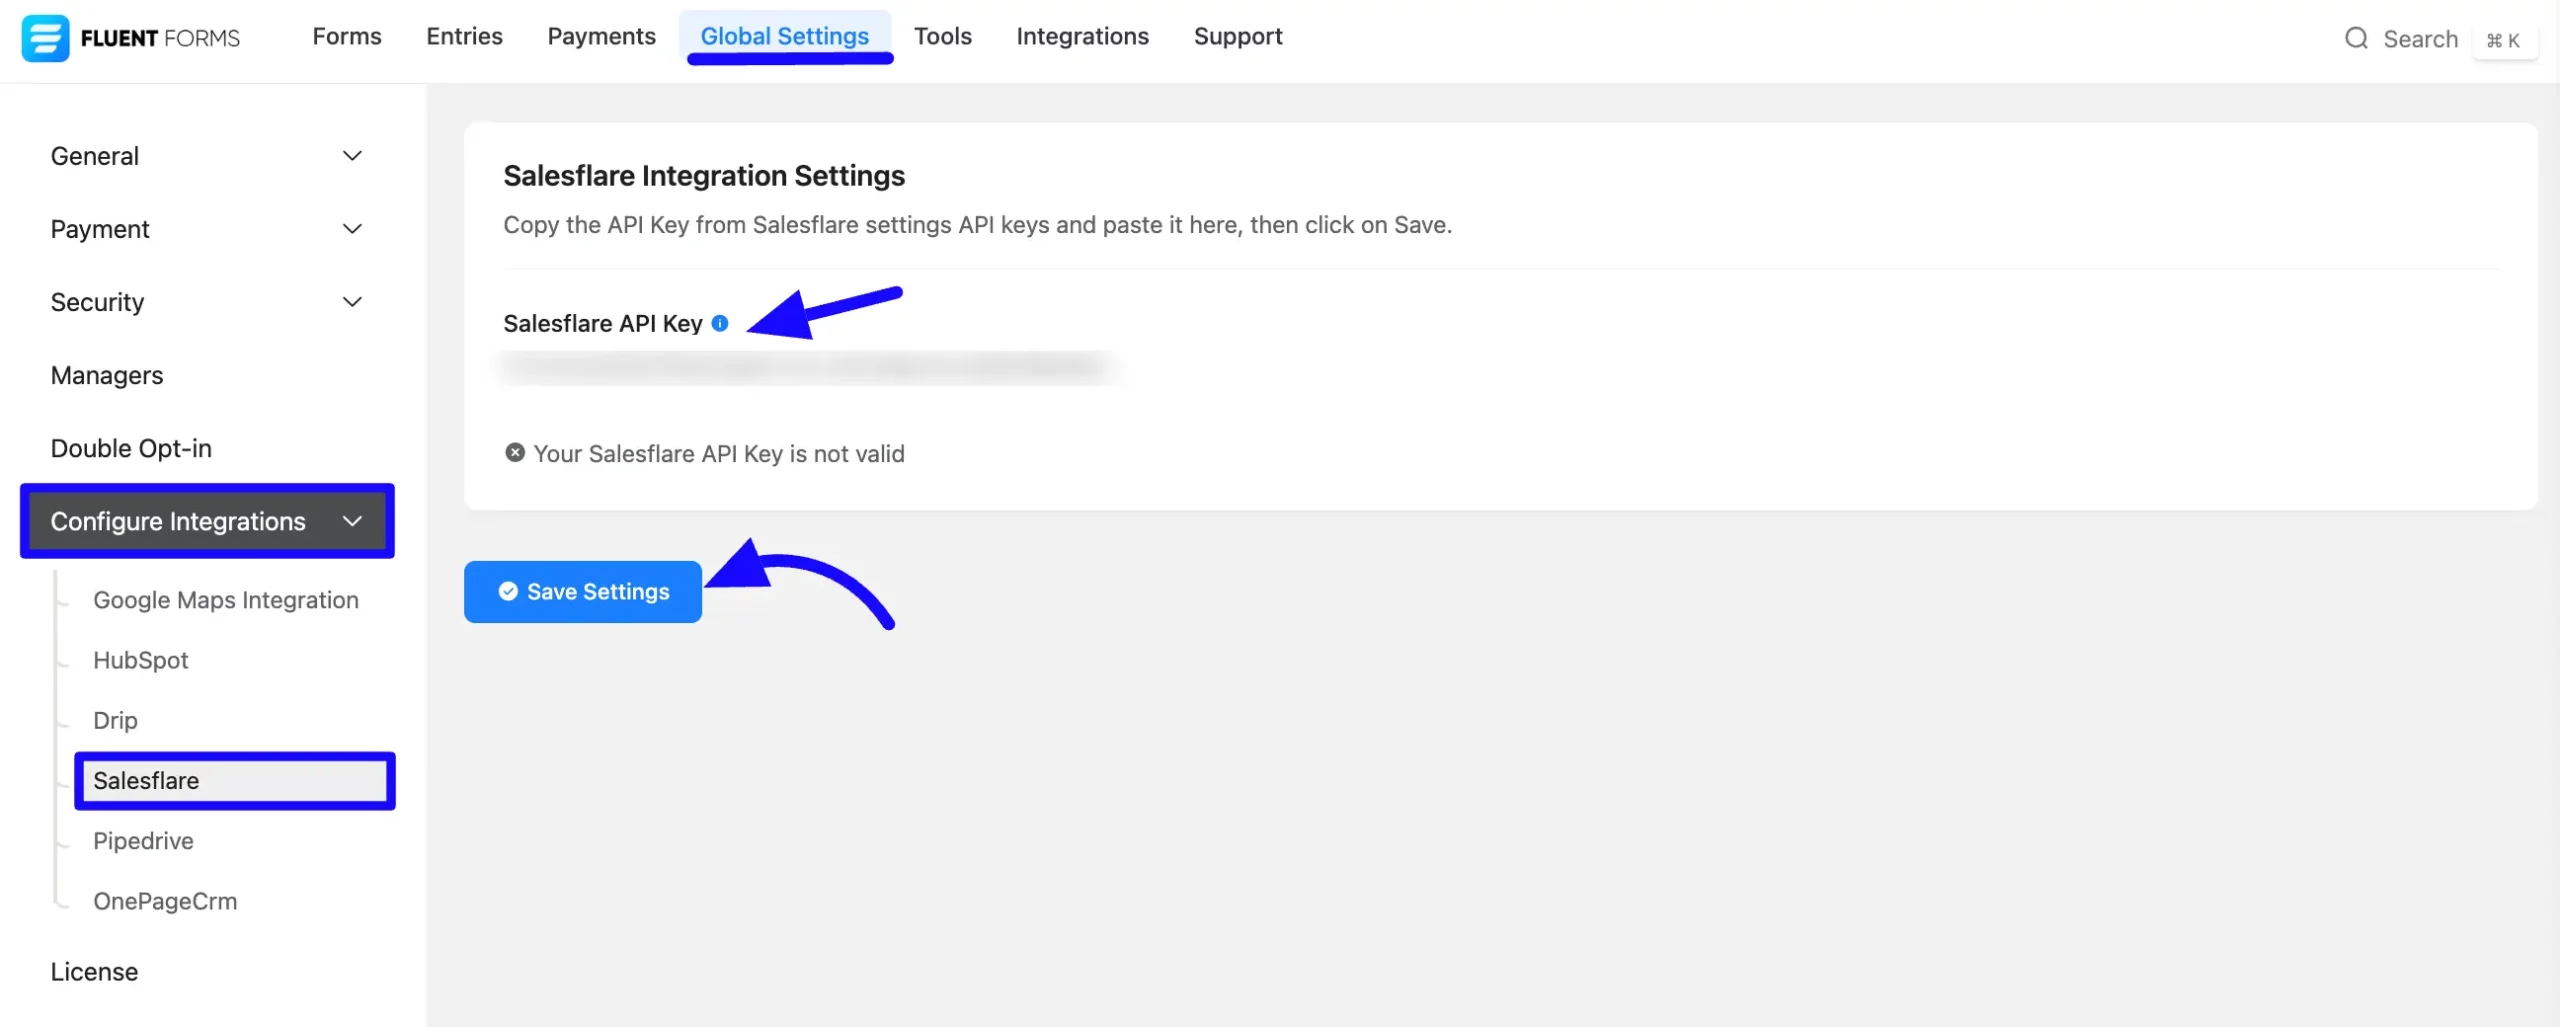
Then, return to the Salesflare Settings page under the Configure Integration tab of the Global Settings from the Fluent Forms Navbar.
Now, paste the Api Key that you copied before.
After that, click the Save Settings button to make your Salesflare Integration module functional.
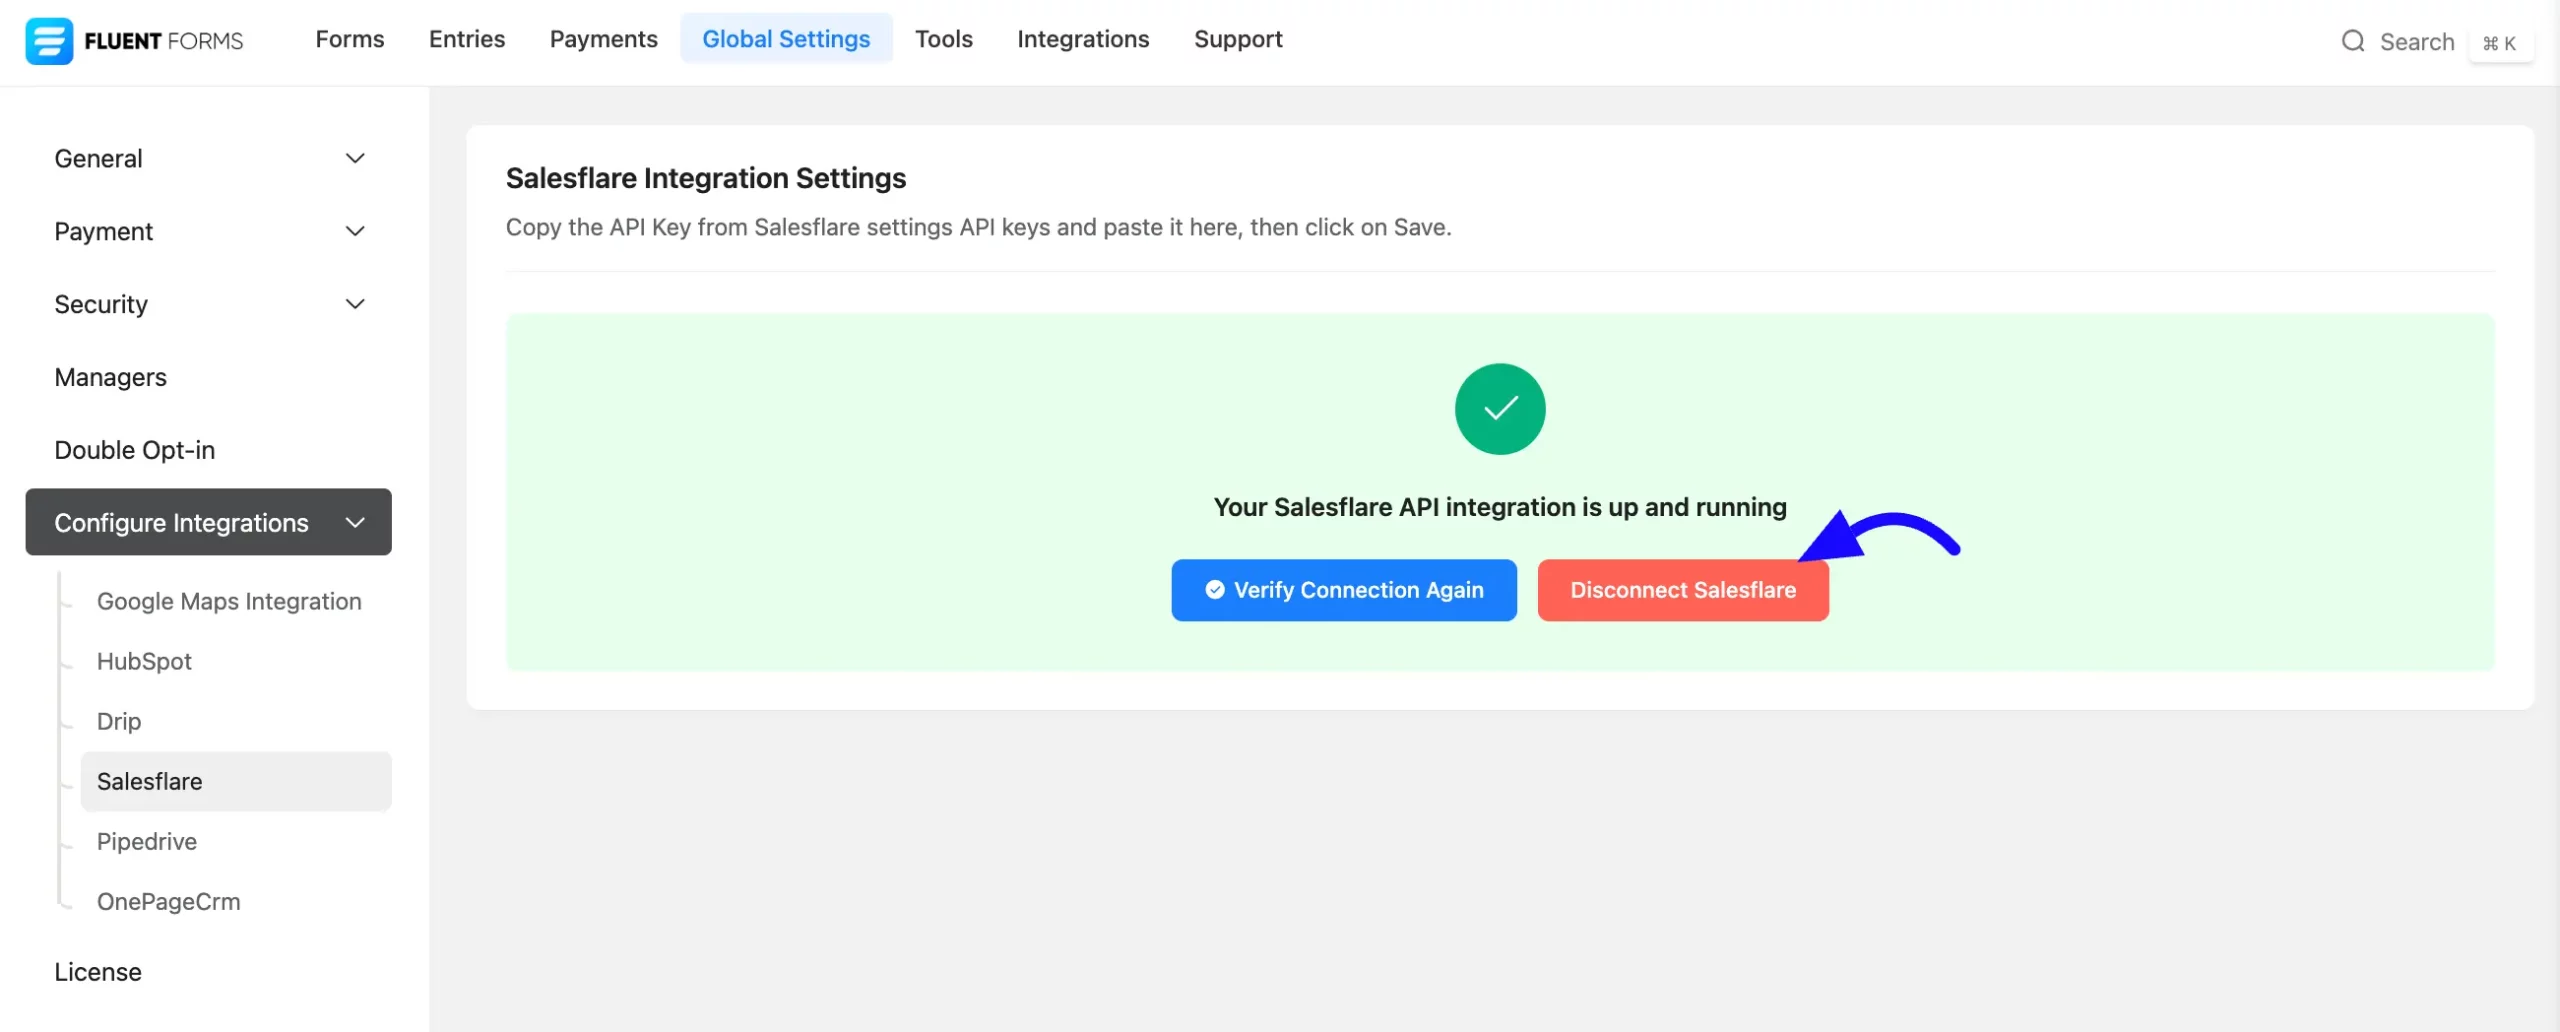
Here, you will see that your Salesflare API integration is up and running. To disconnect, click the Disconnect Salesflare button.
Integrate Salesflare into Fluent Forms #
To learn how to integrate salesflare into any specific Form in Fluent Forms, follow the steps with the screenshots below –
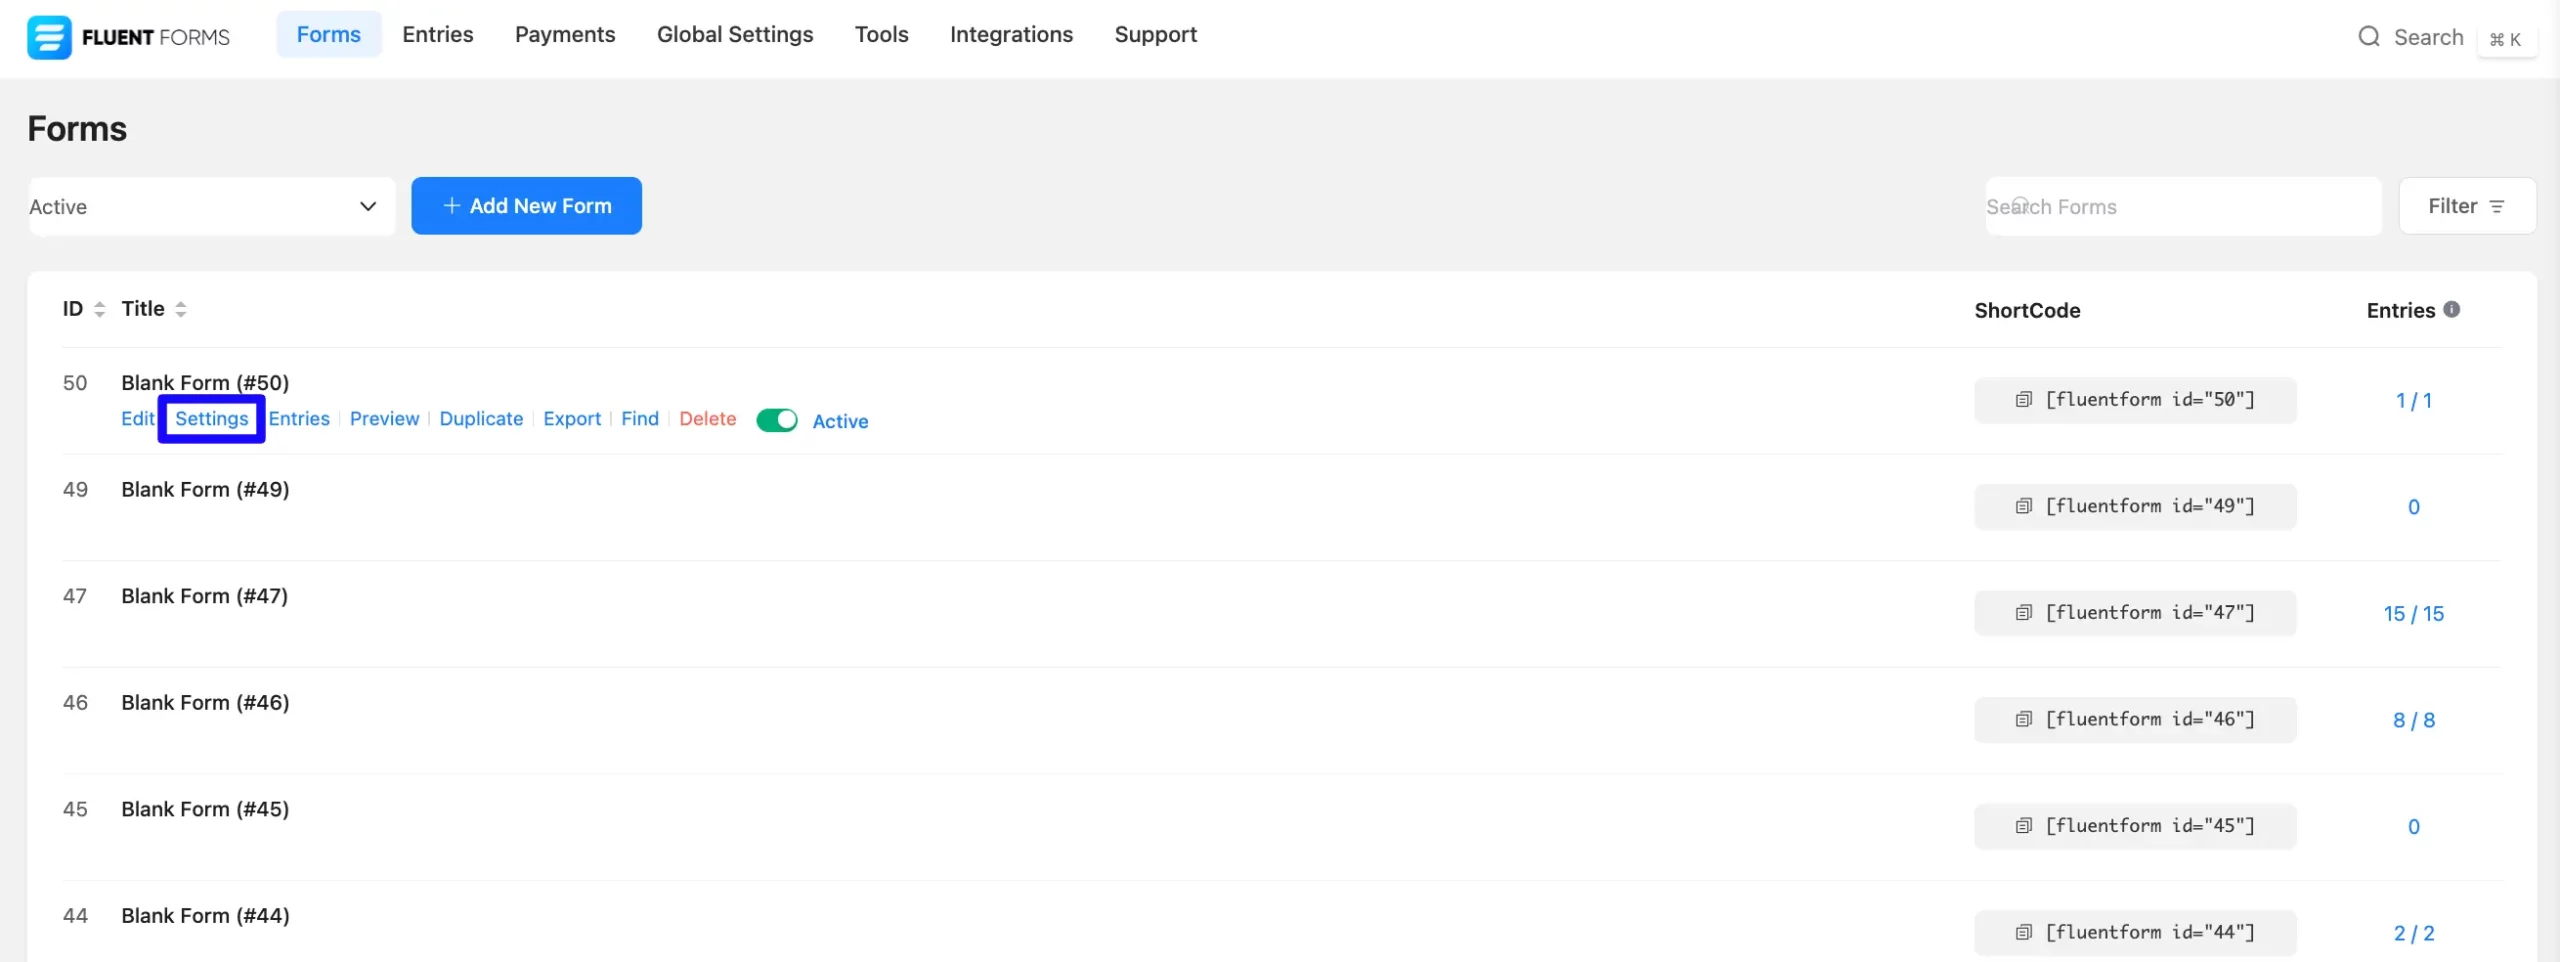
First, go to Forms from the Fluent Forms Navbar, select the Desired Form where you want to integrate your salesflare and click the Settings button.
If you do not have any existing forms, read Create a Form from Scratch or Create a Form using Templates documentation to create a new one.
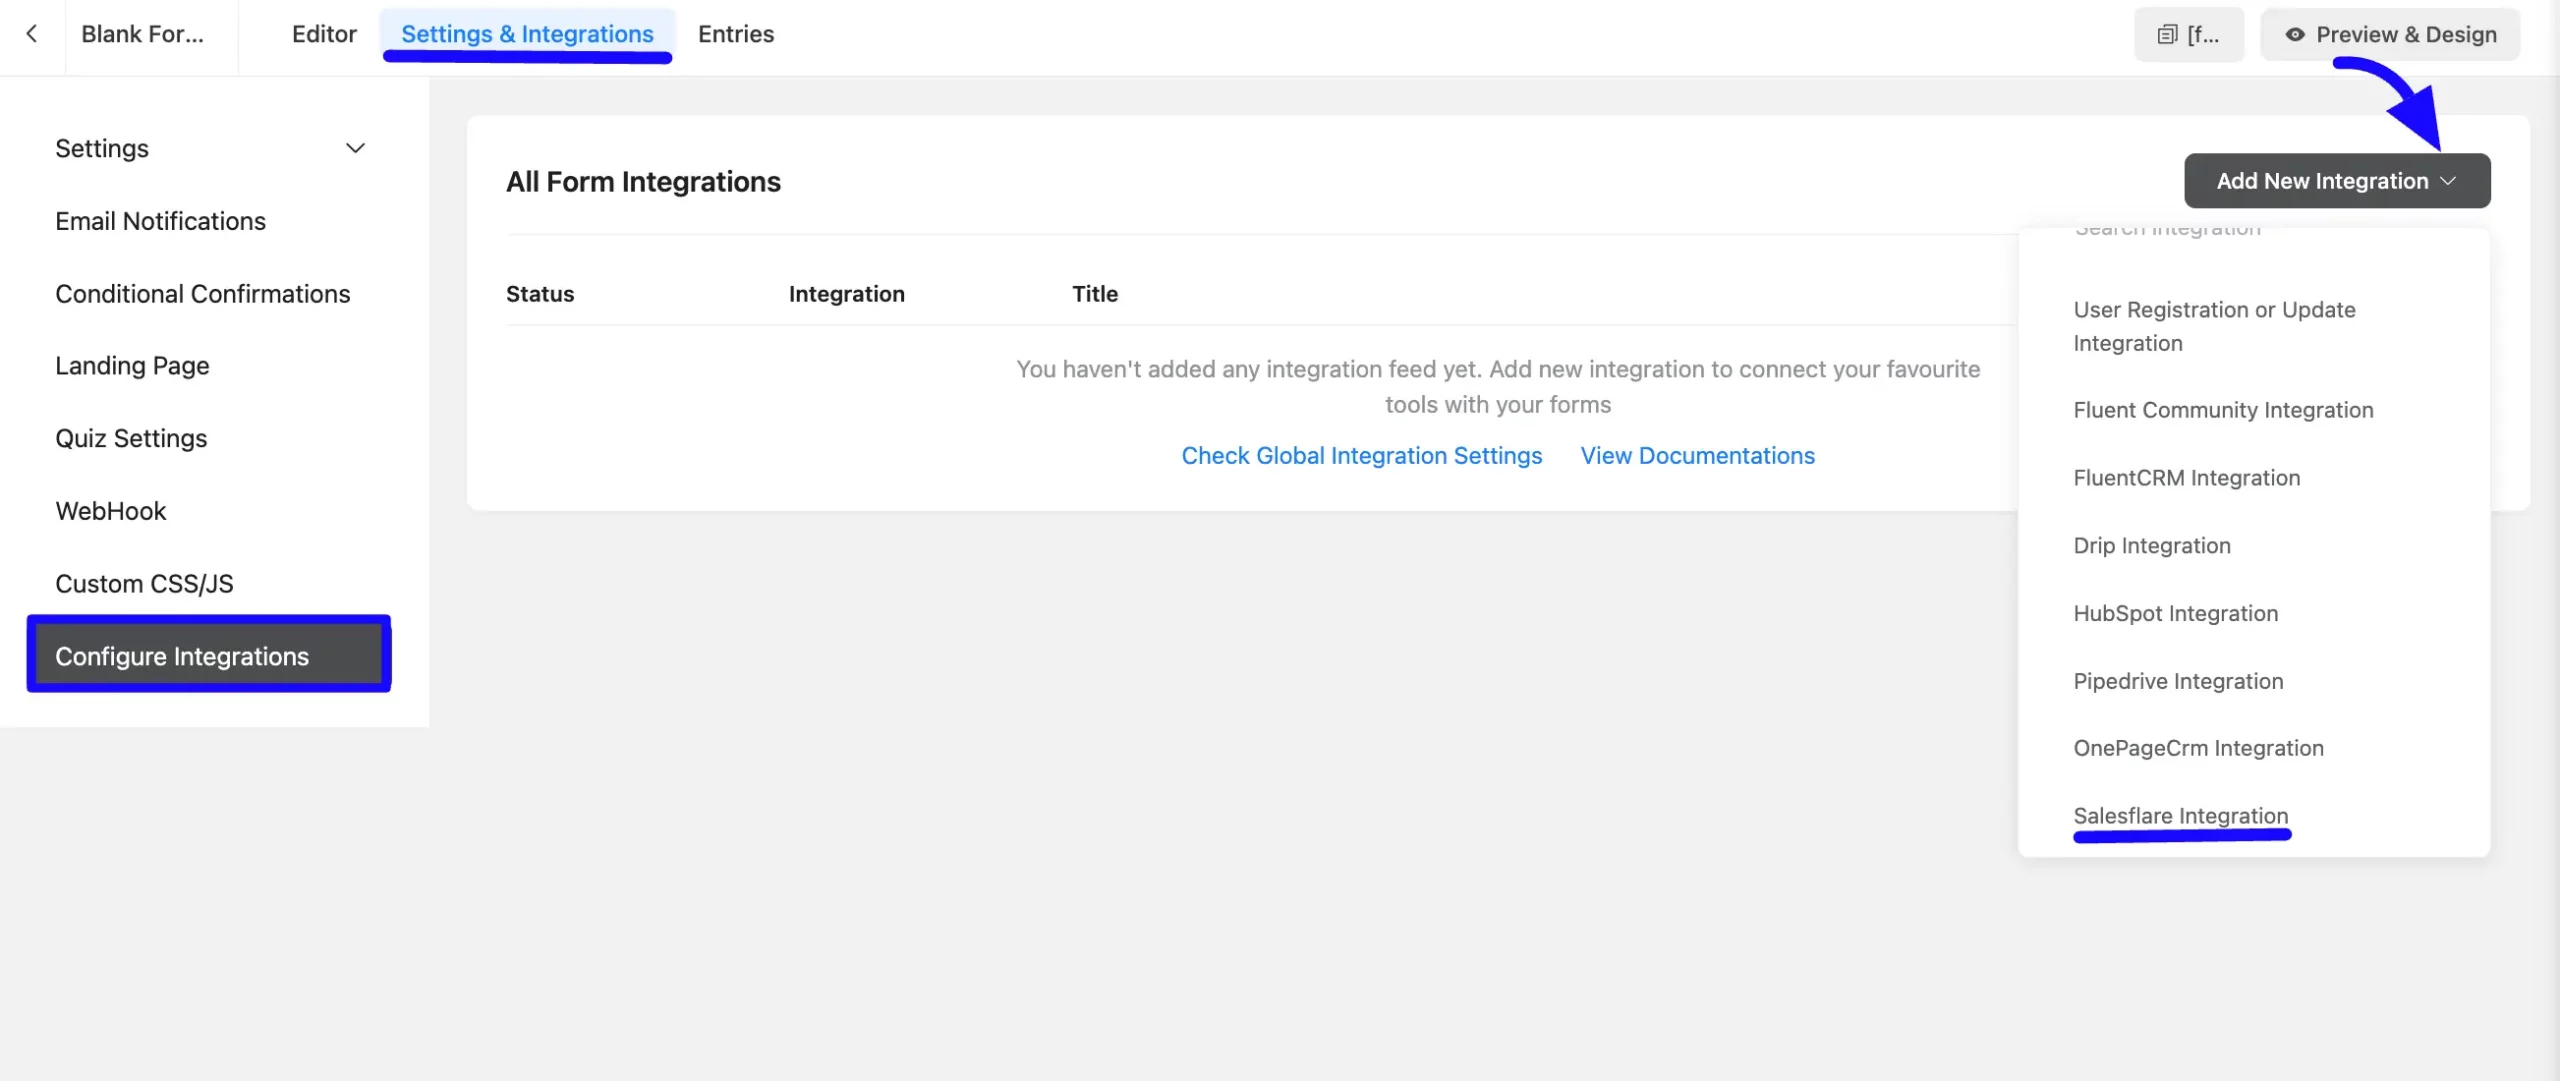
Once you are on the Settings & Integrations, go to the Configuration Integrations tab, click the Add New Integration button, and select Salesflare Integration feed from the dropdown list.
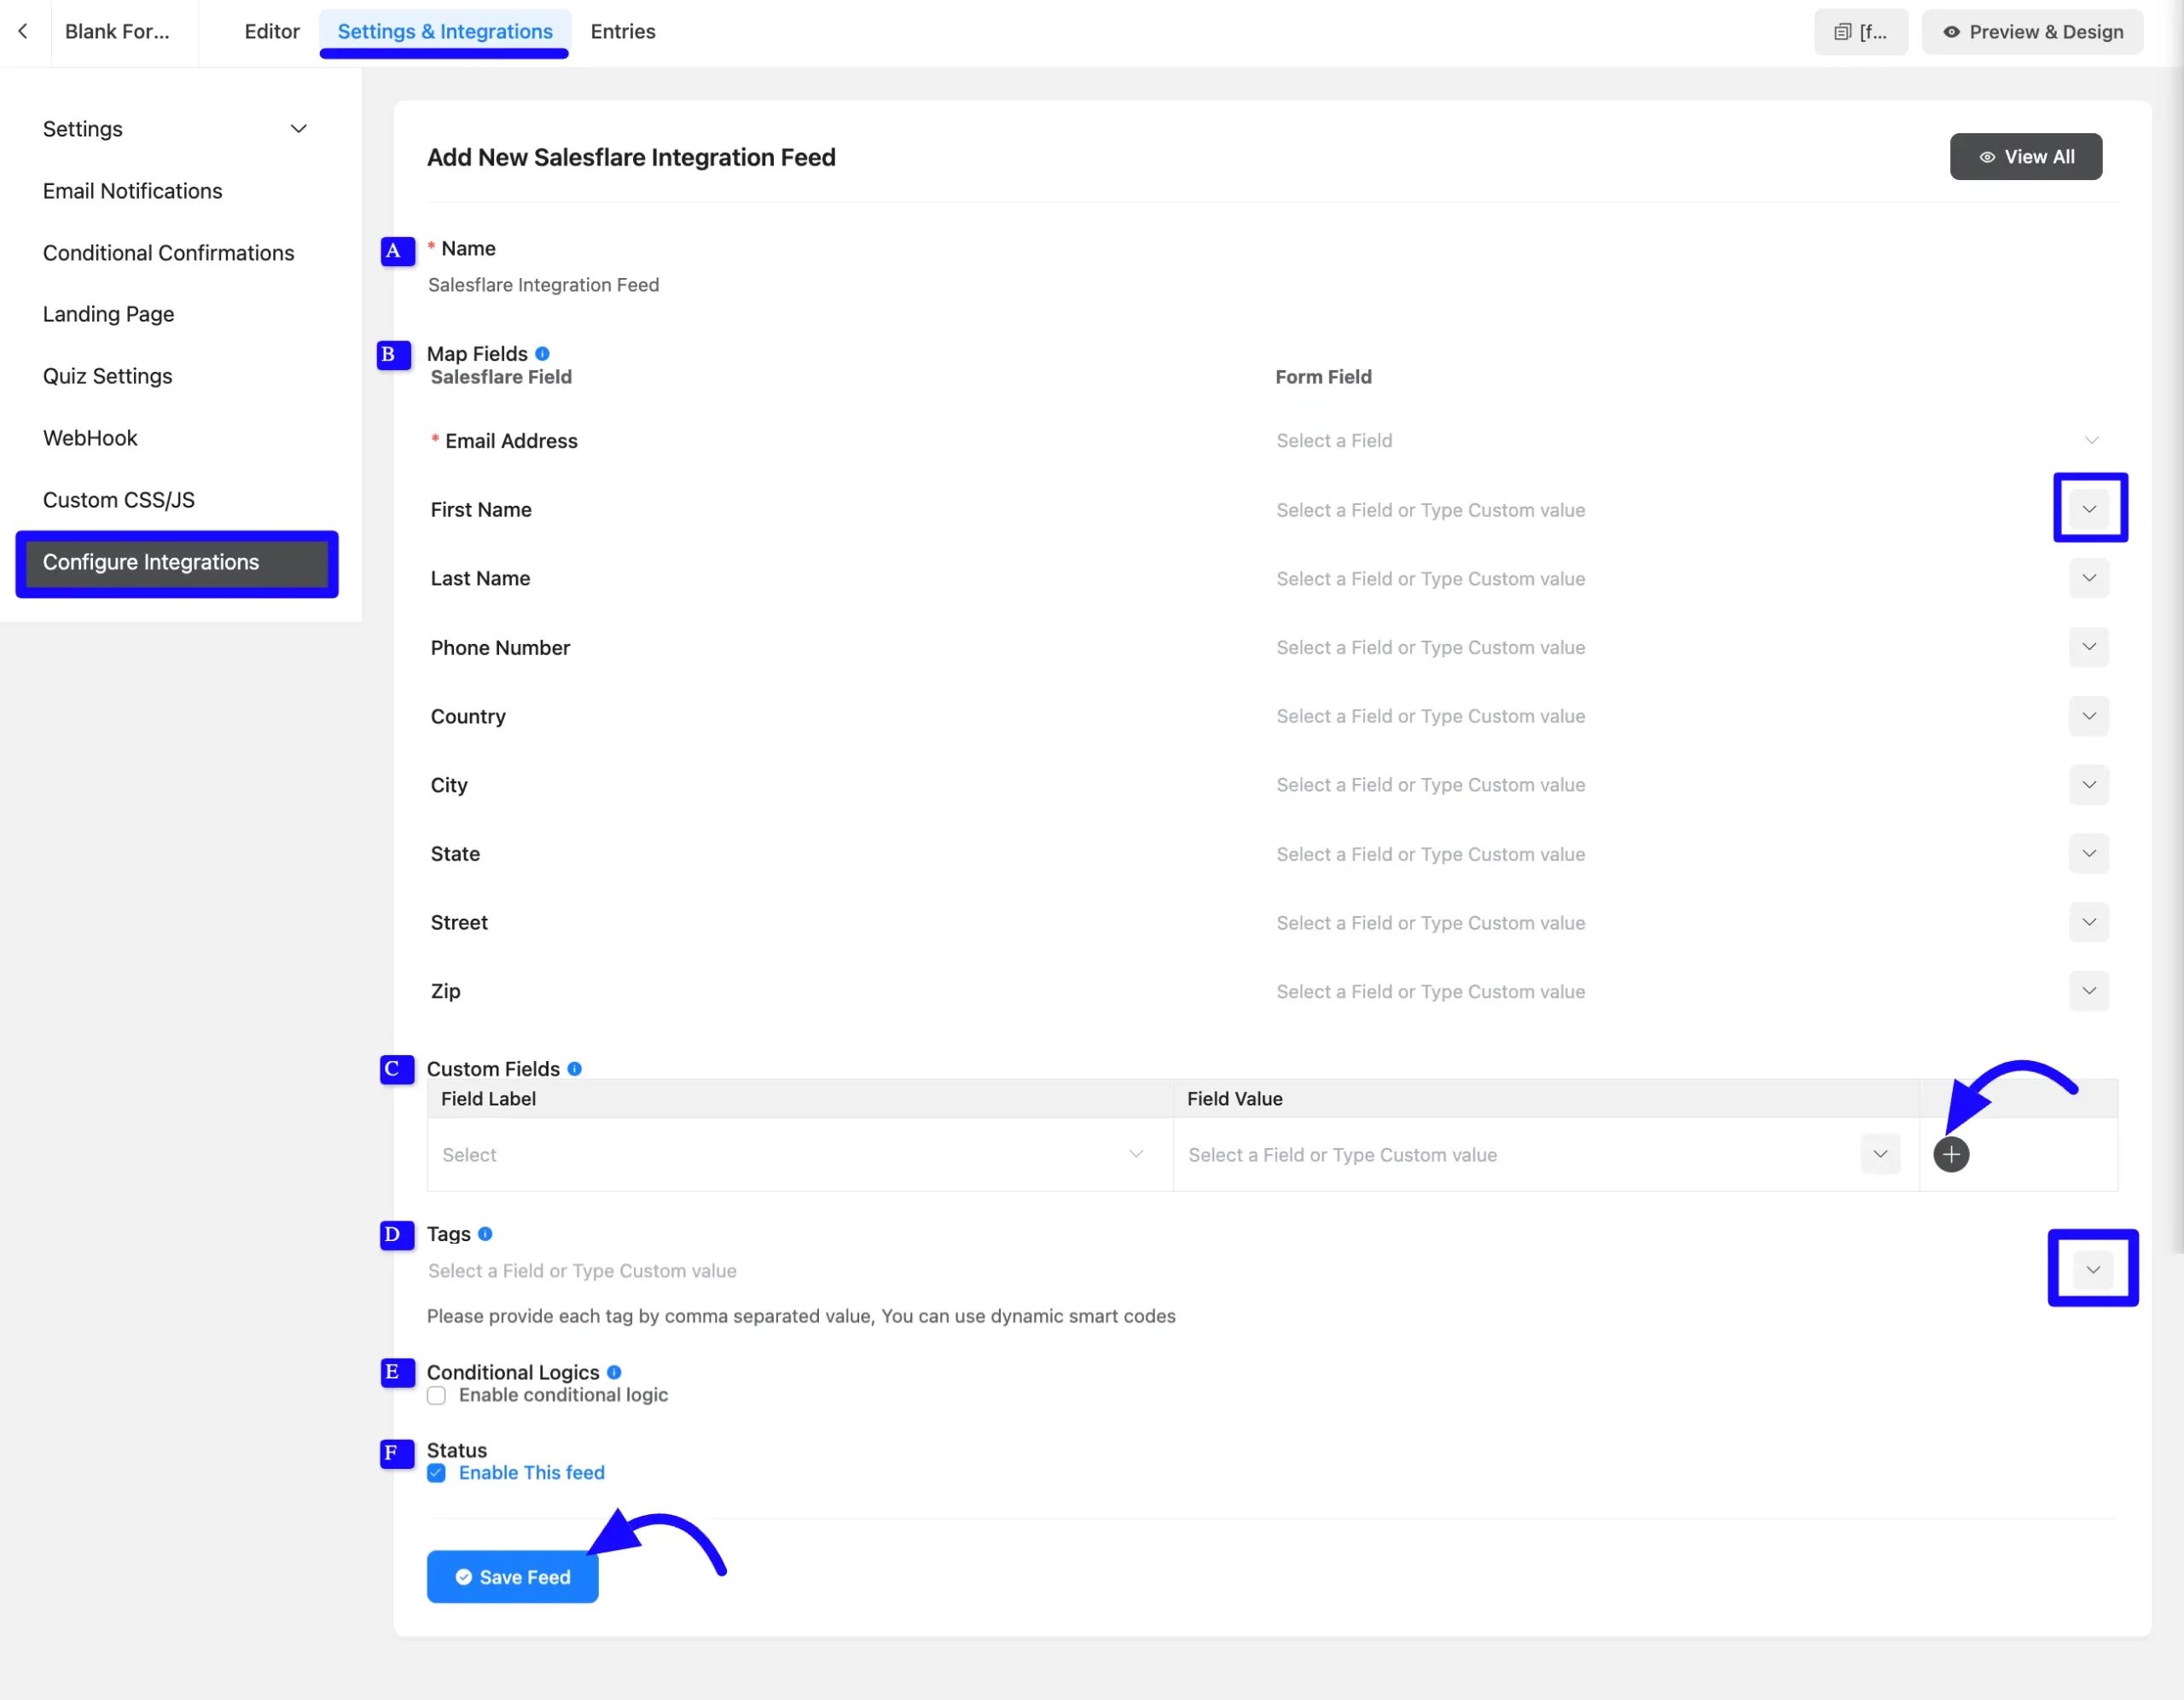
Configure Salesflare Integration Feed #
A. Feed Name: Enter a name for your Salesflare integration feed.
B. Map Fields: Use all the fields under this option to properly link your SalesflareFields with the Form Fields. You can easily select the value for the Form Fields based on the salesflare fields using the Shortcode Arrow.
C. Custom Fields: Use the other field to add custom Salesflare fields to the Form Fields. Using the Shortcode Arrow, you can easily select the value for the Form Fields based on the Salesflare fields.
Also you can add multiple fields dynamically by clicking the Plus Icon.
D. Tag: With this option, you can add tags to your Salesflare contacts with a comma-separated list (e.g. new lead, crucial users, web source). Commas within a merge tag value will be created as a single tag. Also, you can use ShortCodes as the tag.
E. Conditional Logic: If you want to allow Salesflare integration conditionally based on your submission values then Enable Conditional Logic options. To learn more about this conditional logic, read the article.
F. Status: Enable this feed option to activate the integration.
Once the setup is done, finally, click the Save Feed button.
Now, your salesflare will be integrated into this specific form!
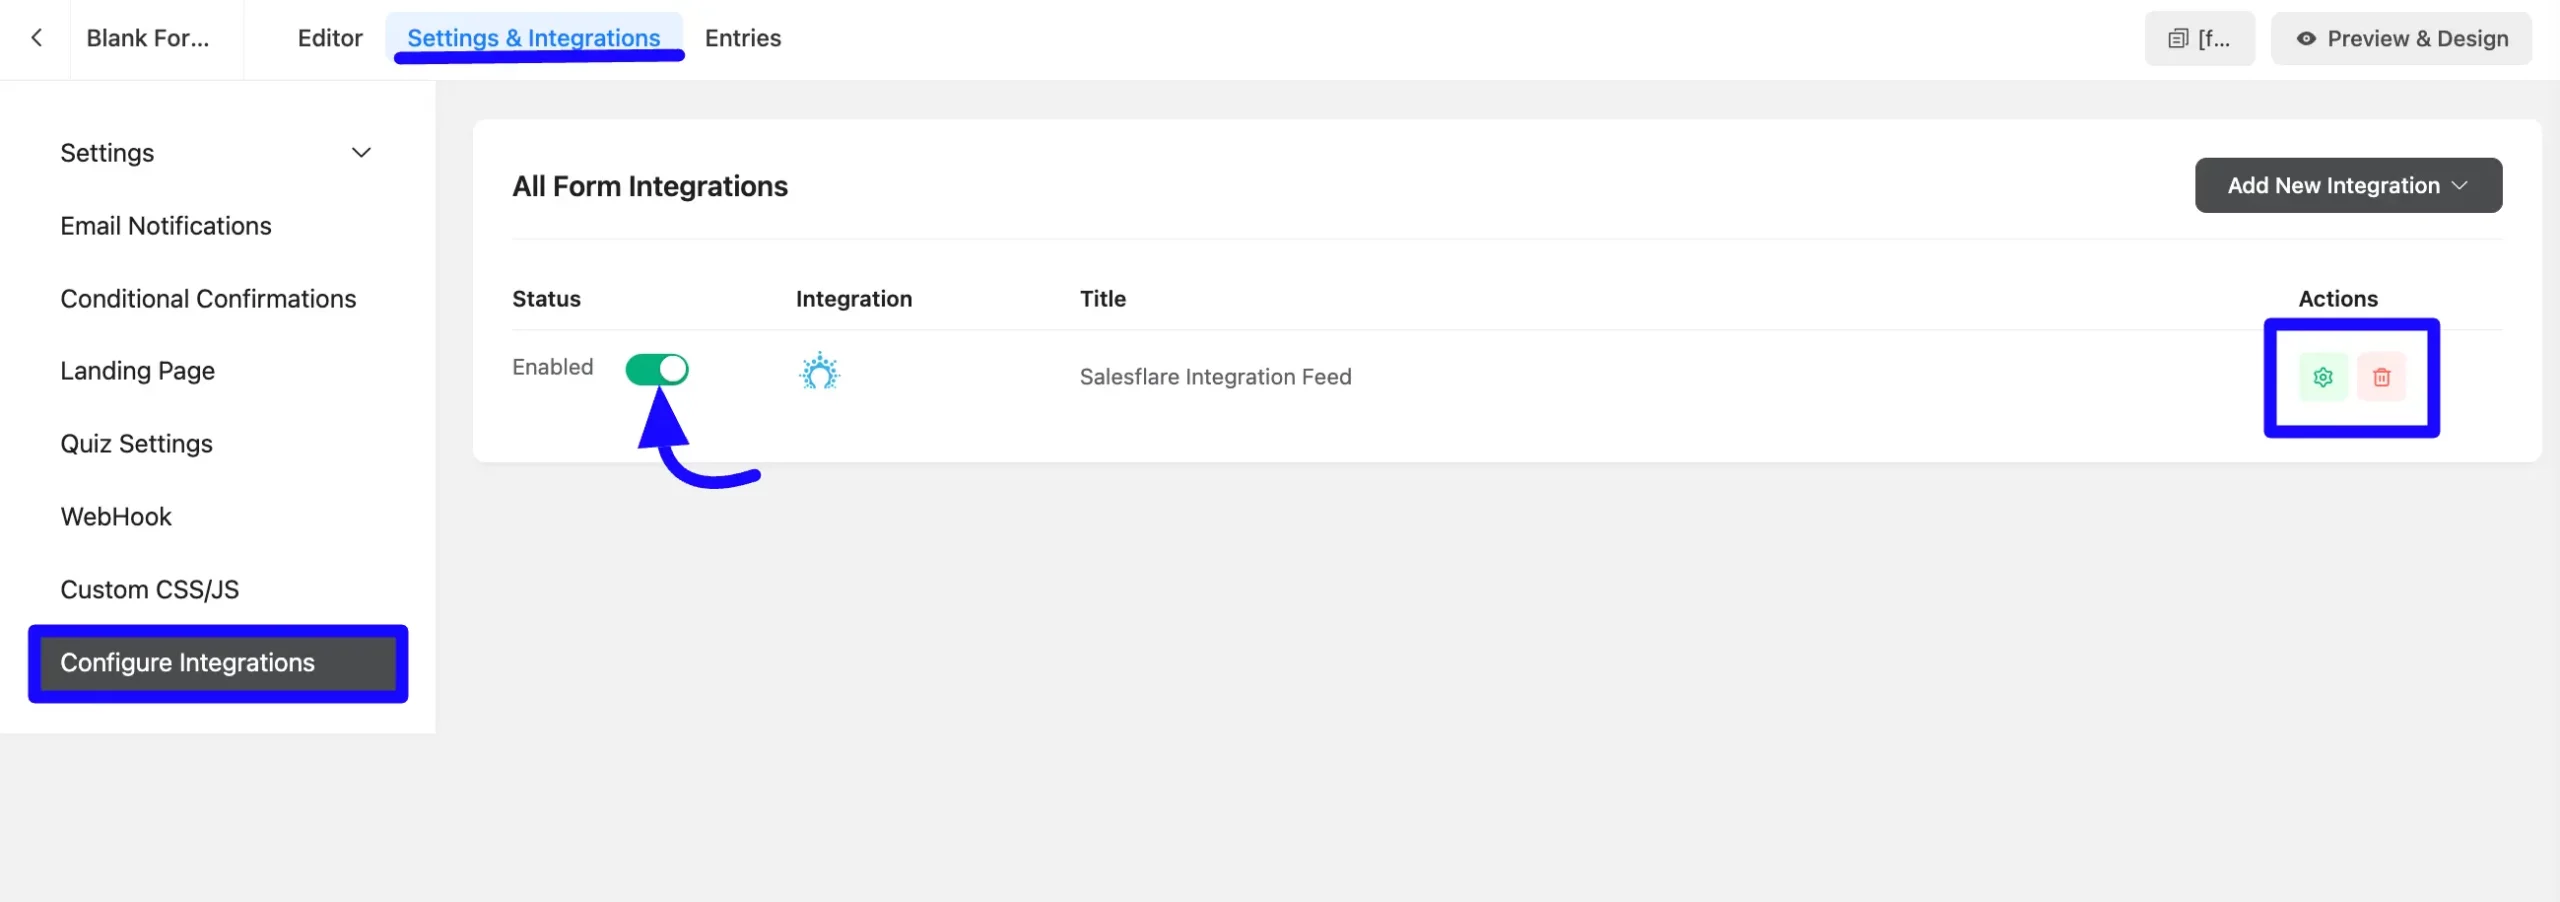
After successful Integration, now you will see that your Salesflare integration Feed has been added here.
You can modify your feed anytime by clicking the Settings Icon and Delete it by clicking the Trash Icon.
Also, you can disable or enable this feed anytime by turning off the Toggle if needed.
Preview of Integrated Salesflare #
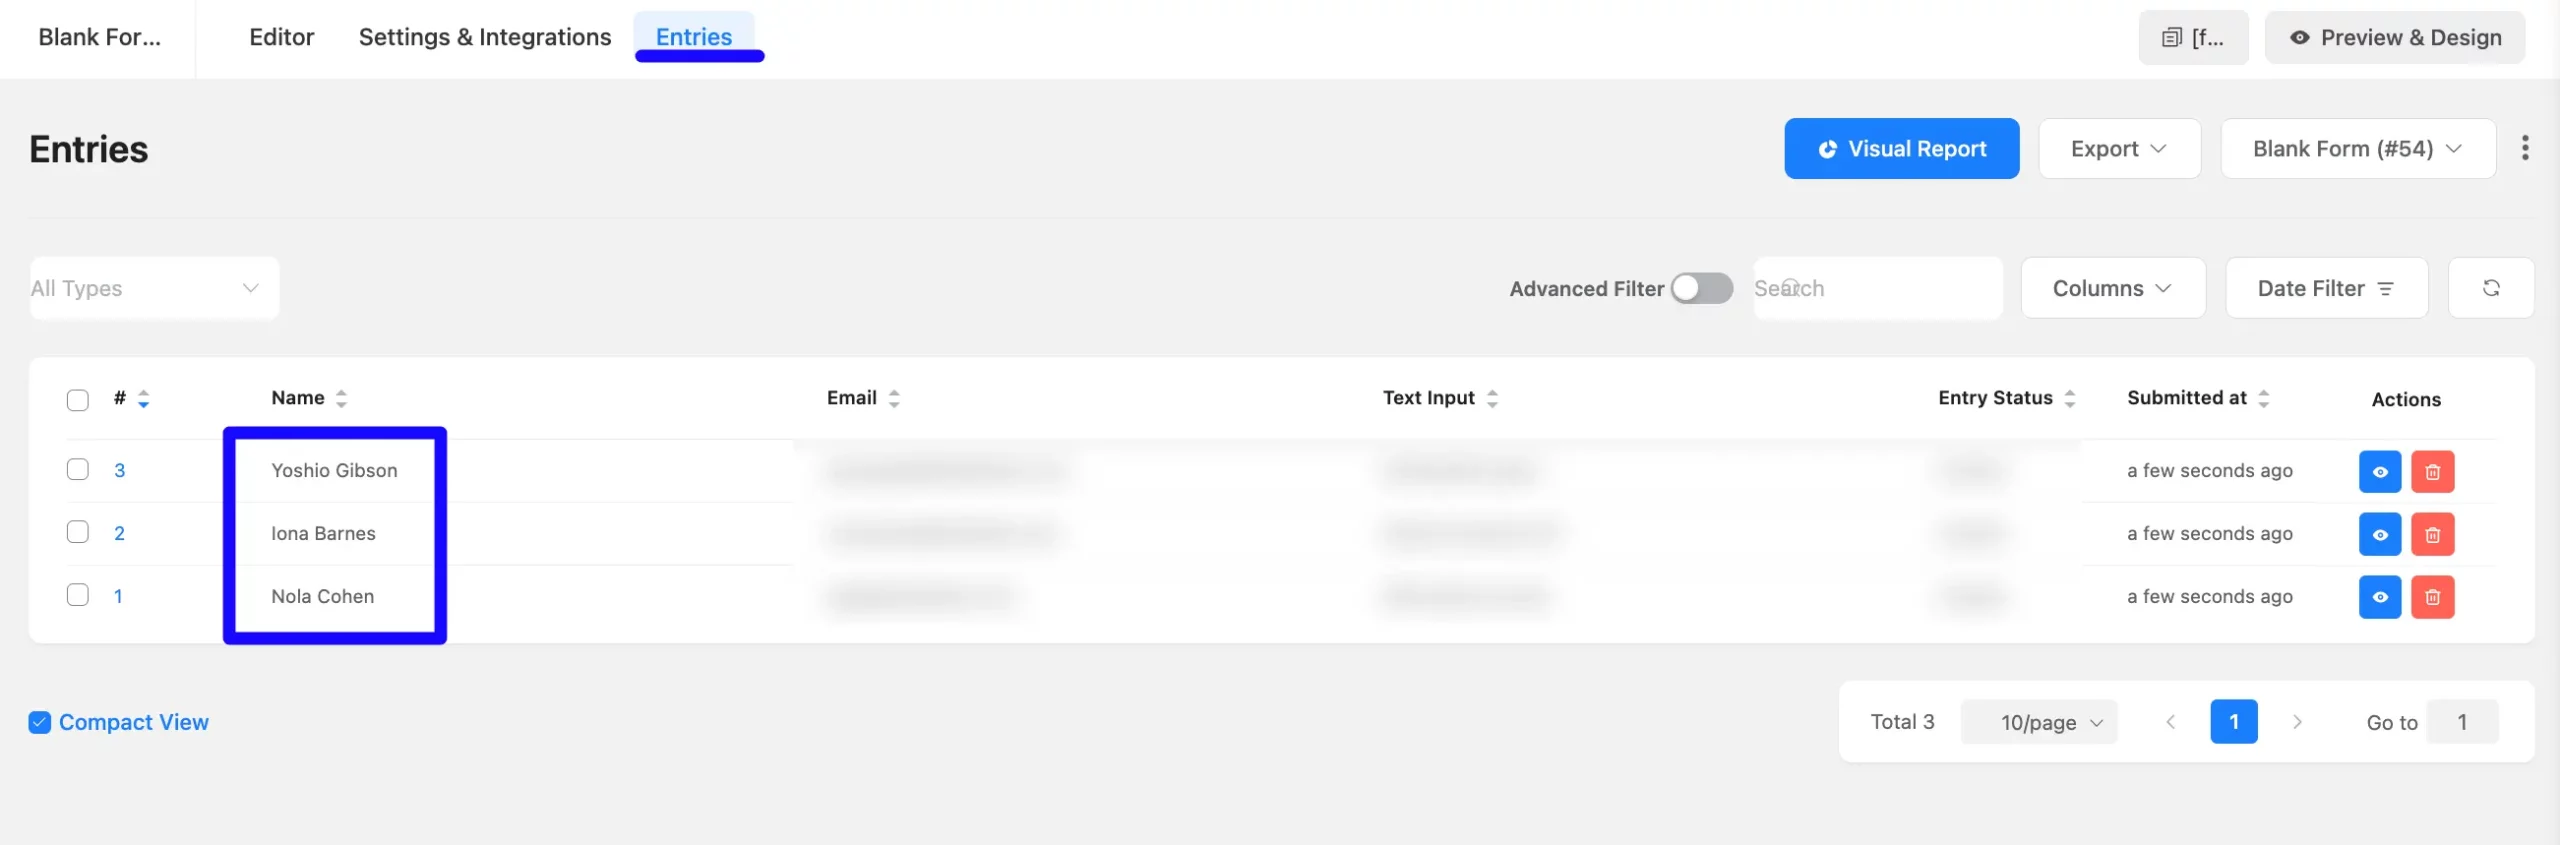
Here, you can see a preview of the added Salesflare contacts through the Form entries that I set up during the integration.
You can see these form submissions from the Entries section of this particular form.
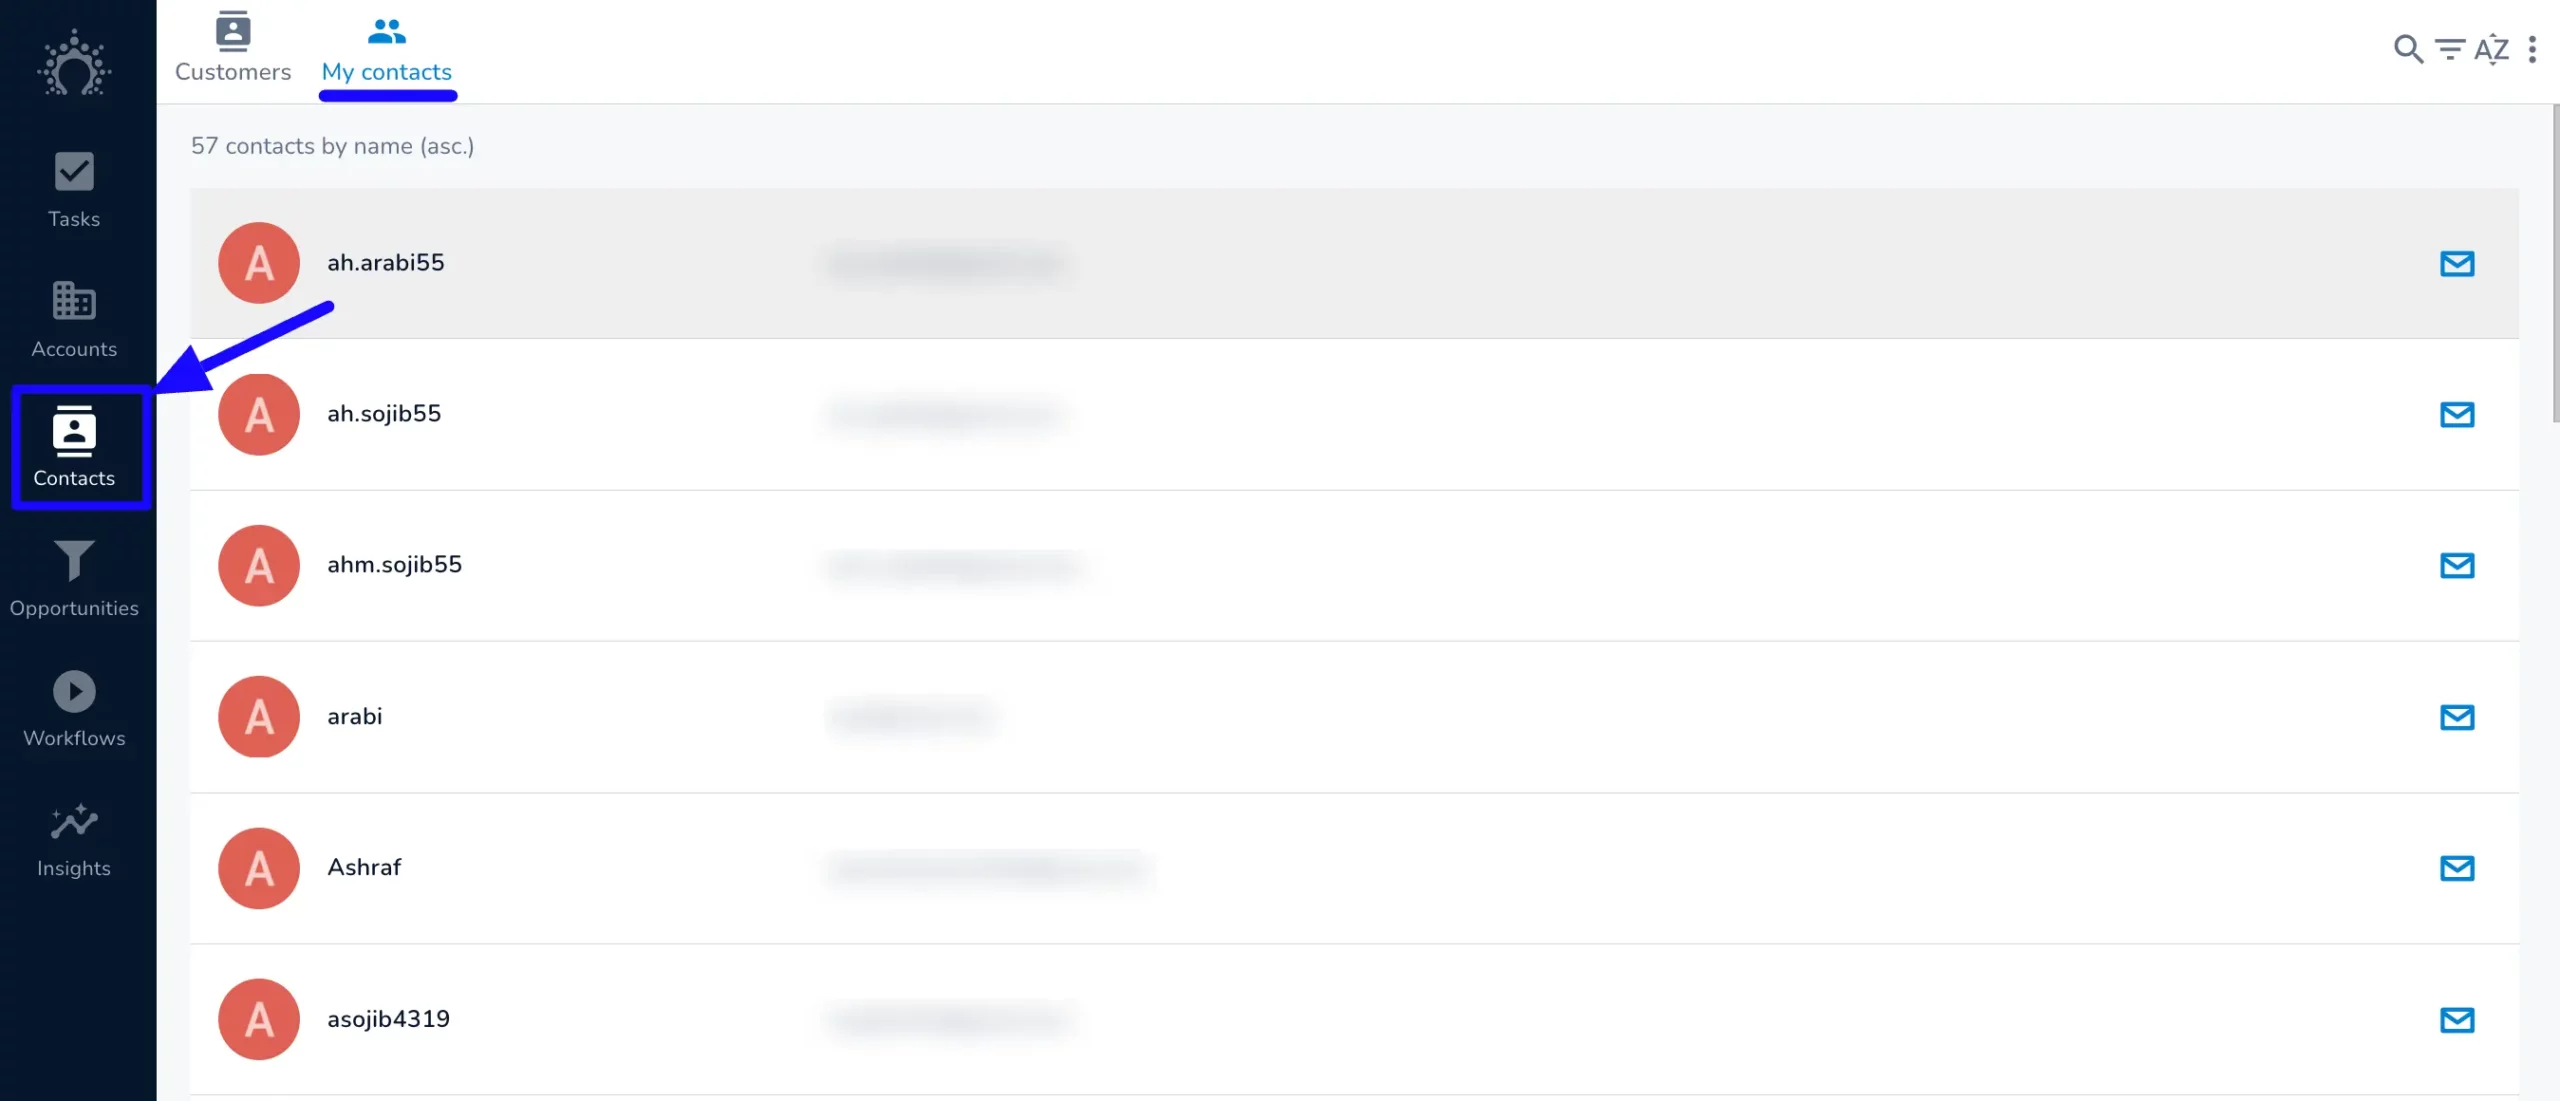
Go to the Salesflare Contacts section from the left sidebar and see the integrated contact list into Fluent Forms.
Following these guide, you can easily integrate Salesflare with Fluent Forms!
If you have any further questions, concerns, or suggestions, please do not hesitate to contact our @support team. Thank you.


