ACF (Advanced Custom Fields) is a WordPress plugin that allows you to add extra custom fields to your pages and posts. Fluent Forms ACF integration feature works only when a Post Form is created using Fluent Forms. It helps deal with the users’ custom field data and makes it visible to your site’s visitors.
This article will guide you through adding ACF (Advanced Custom Fields) in a Post Form on your WordPress Form.
Installing & Activating ACF Plugin #
To start the process, you need to install and activate the ACF (Advanced Custom Fields) plugin on your WordPress site to build custom fields.
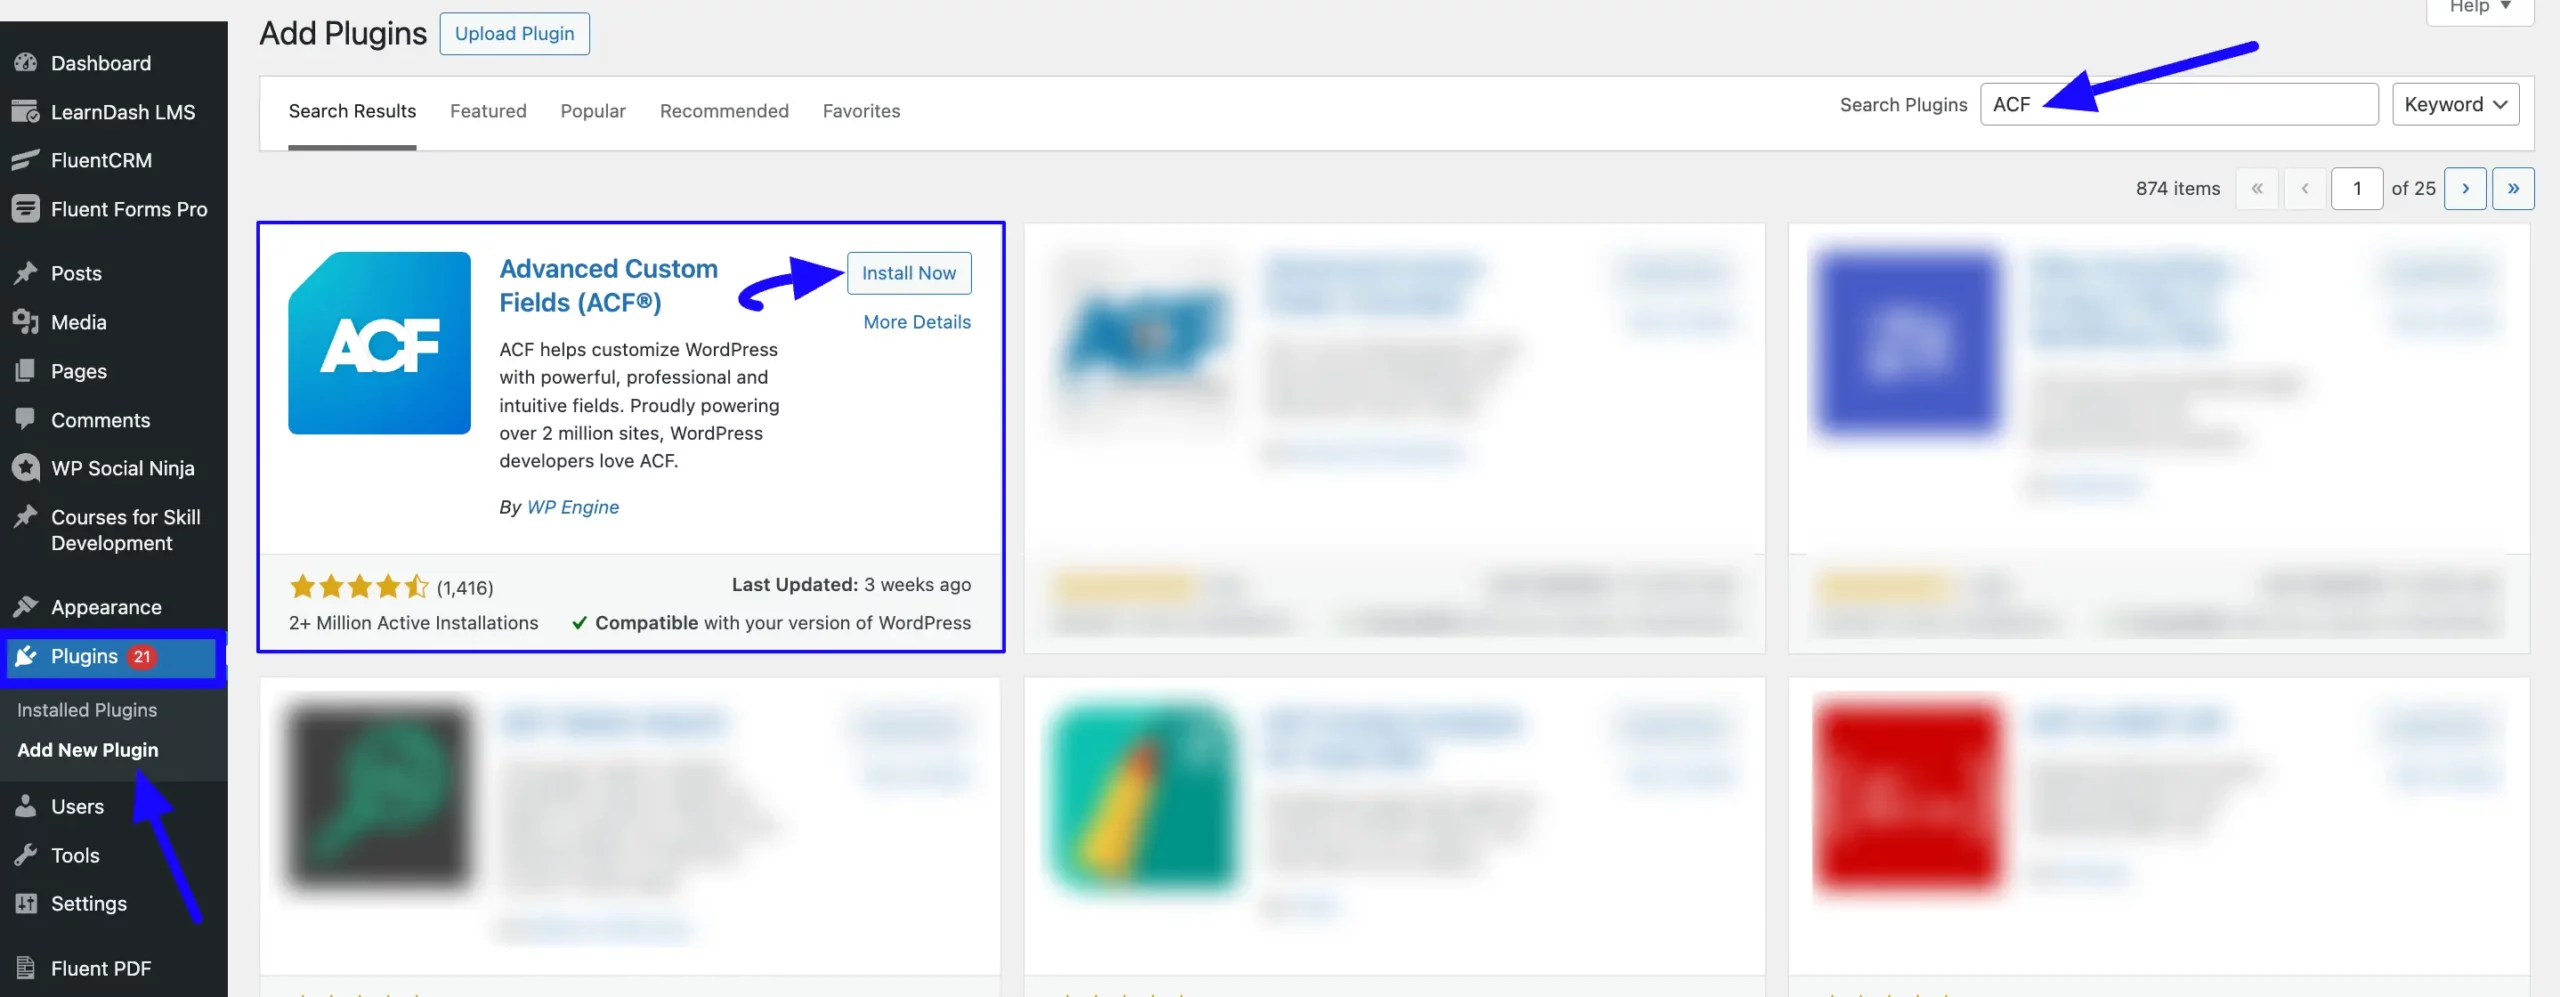
First, go to Plugins in the WordPress Admin Panel on the left side, click Add New Plugin, search for the ACF plugin using the Search Plugins option on the right, and the Advanced Custom Fields (ACF) plugin will appear.
Now, click the Install button, and your ACF plugin will be installed on your site.
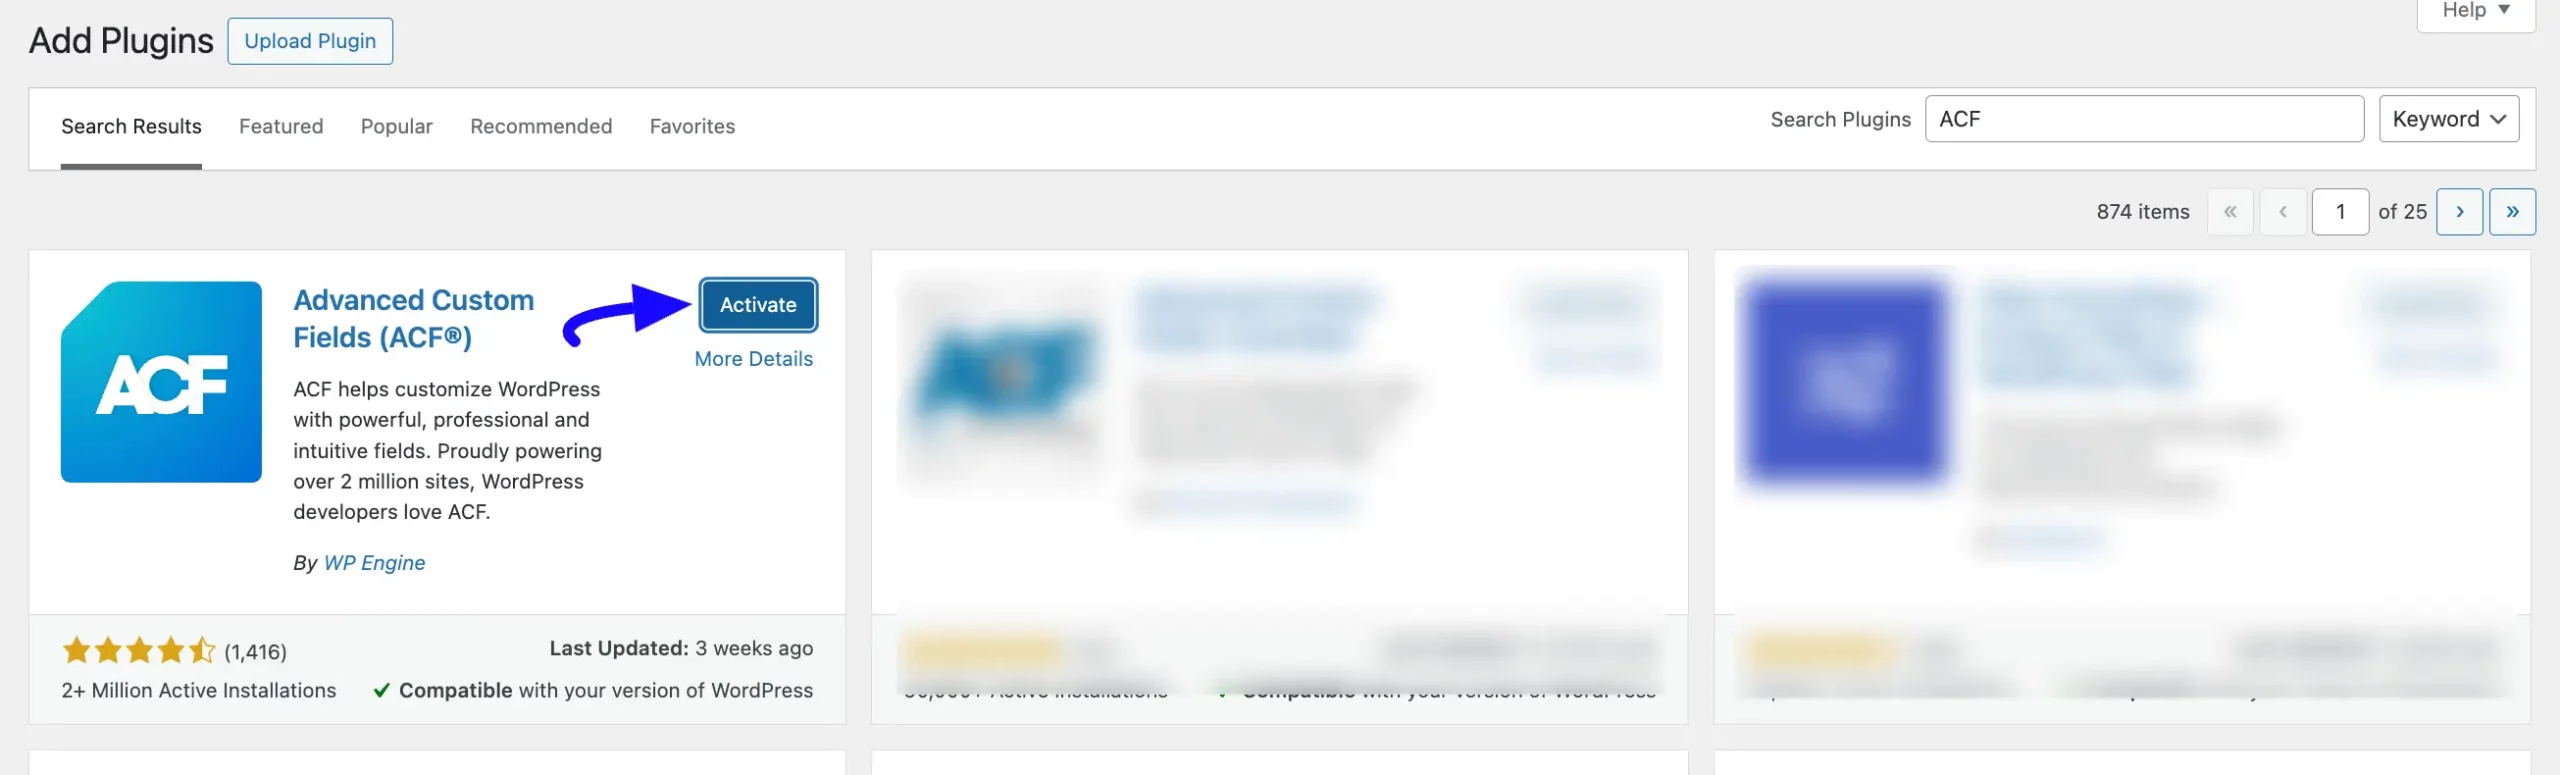
Then, click the Activate button, and the ACF plugin will be activated and ready to function.
Adding Custom Fields in ACF #
After installing the ACF plugin, you need to add the field you want to use as a custom field in your Post Form. For example, you want to add a custom field for reviewing your posts. In this case, you can add a Post reviewer field in ACF and use it in your Post Form.
To learn how to add a field in ACF, follow the steps below –
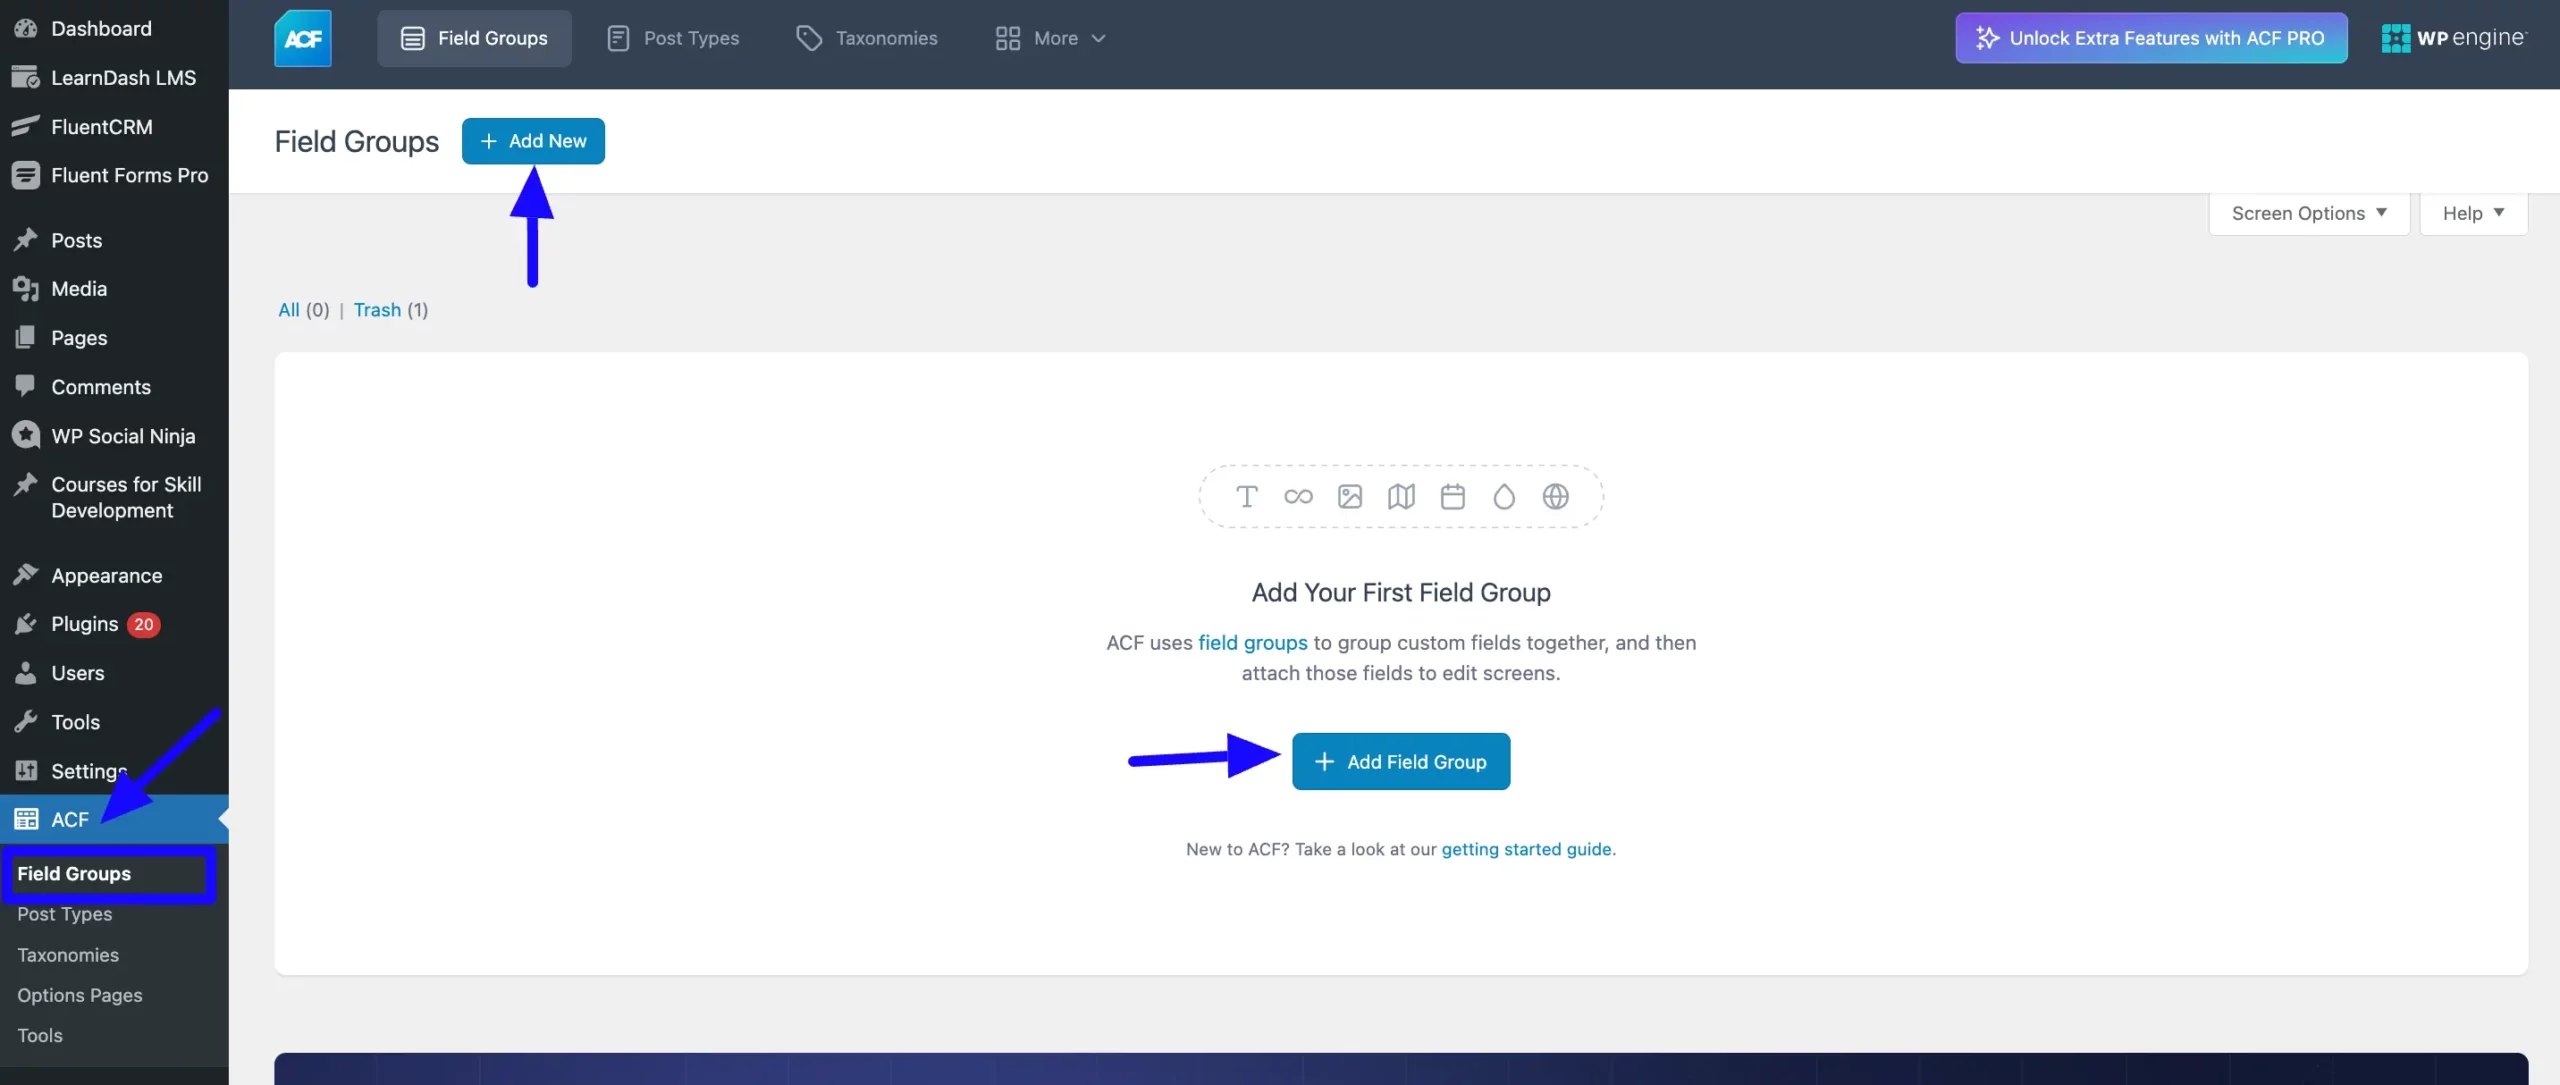
First, go to the ACF plugin from the WordPress Left Sidebar, click the Field Groups, and press the +Add New button in the top right or the +Add Field Group button.
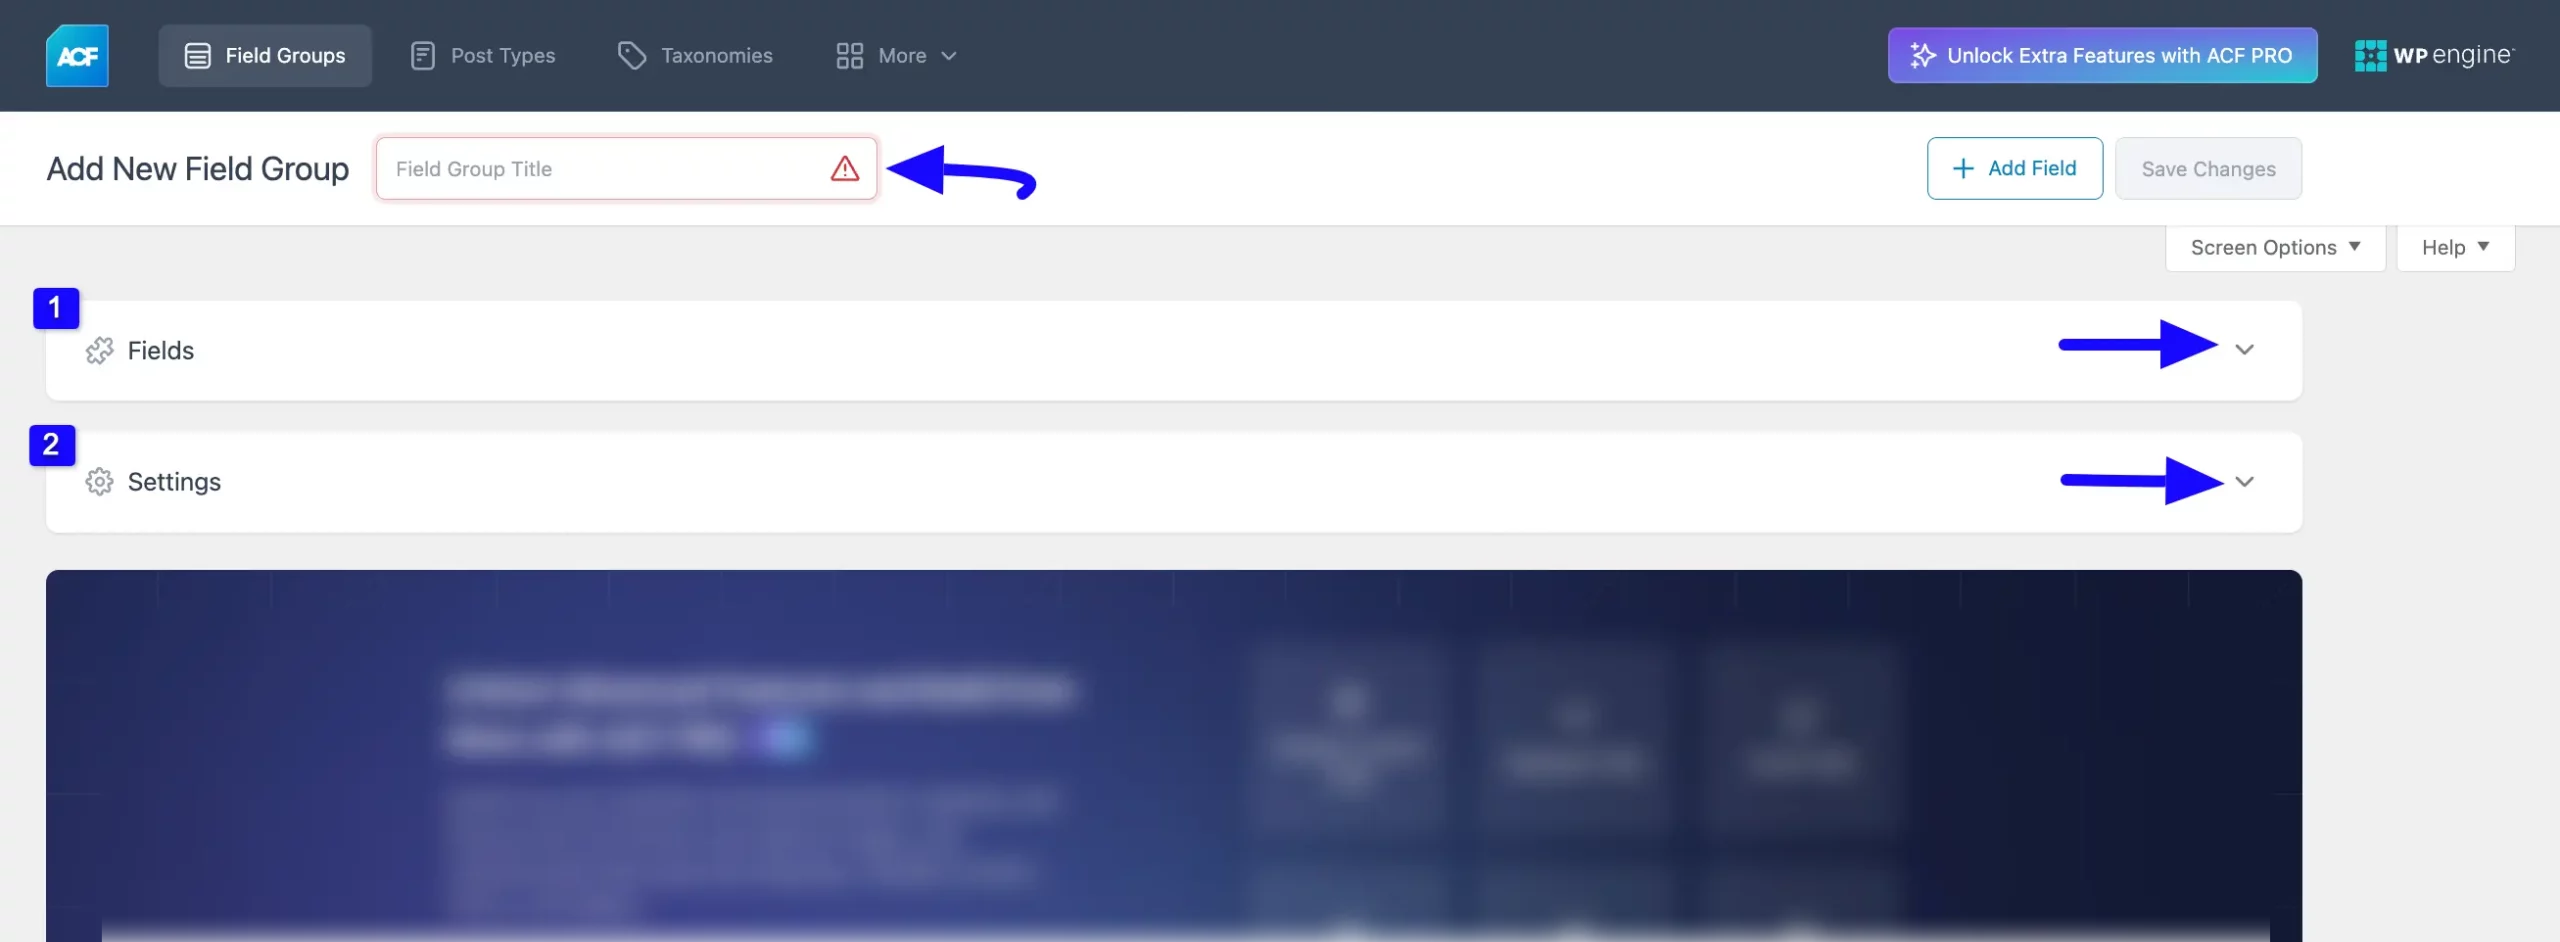
Now, give your Field Group a suitable Title to find the field easily later during the use. Then, you will get the two following options which you can use by clicking the dropdown arrow.
- Fields: This option allows you to add your desired field/s.
- Settings: This option allows you to set location rules (i.e., determine when and where this field will be added).
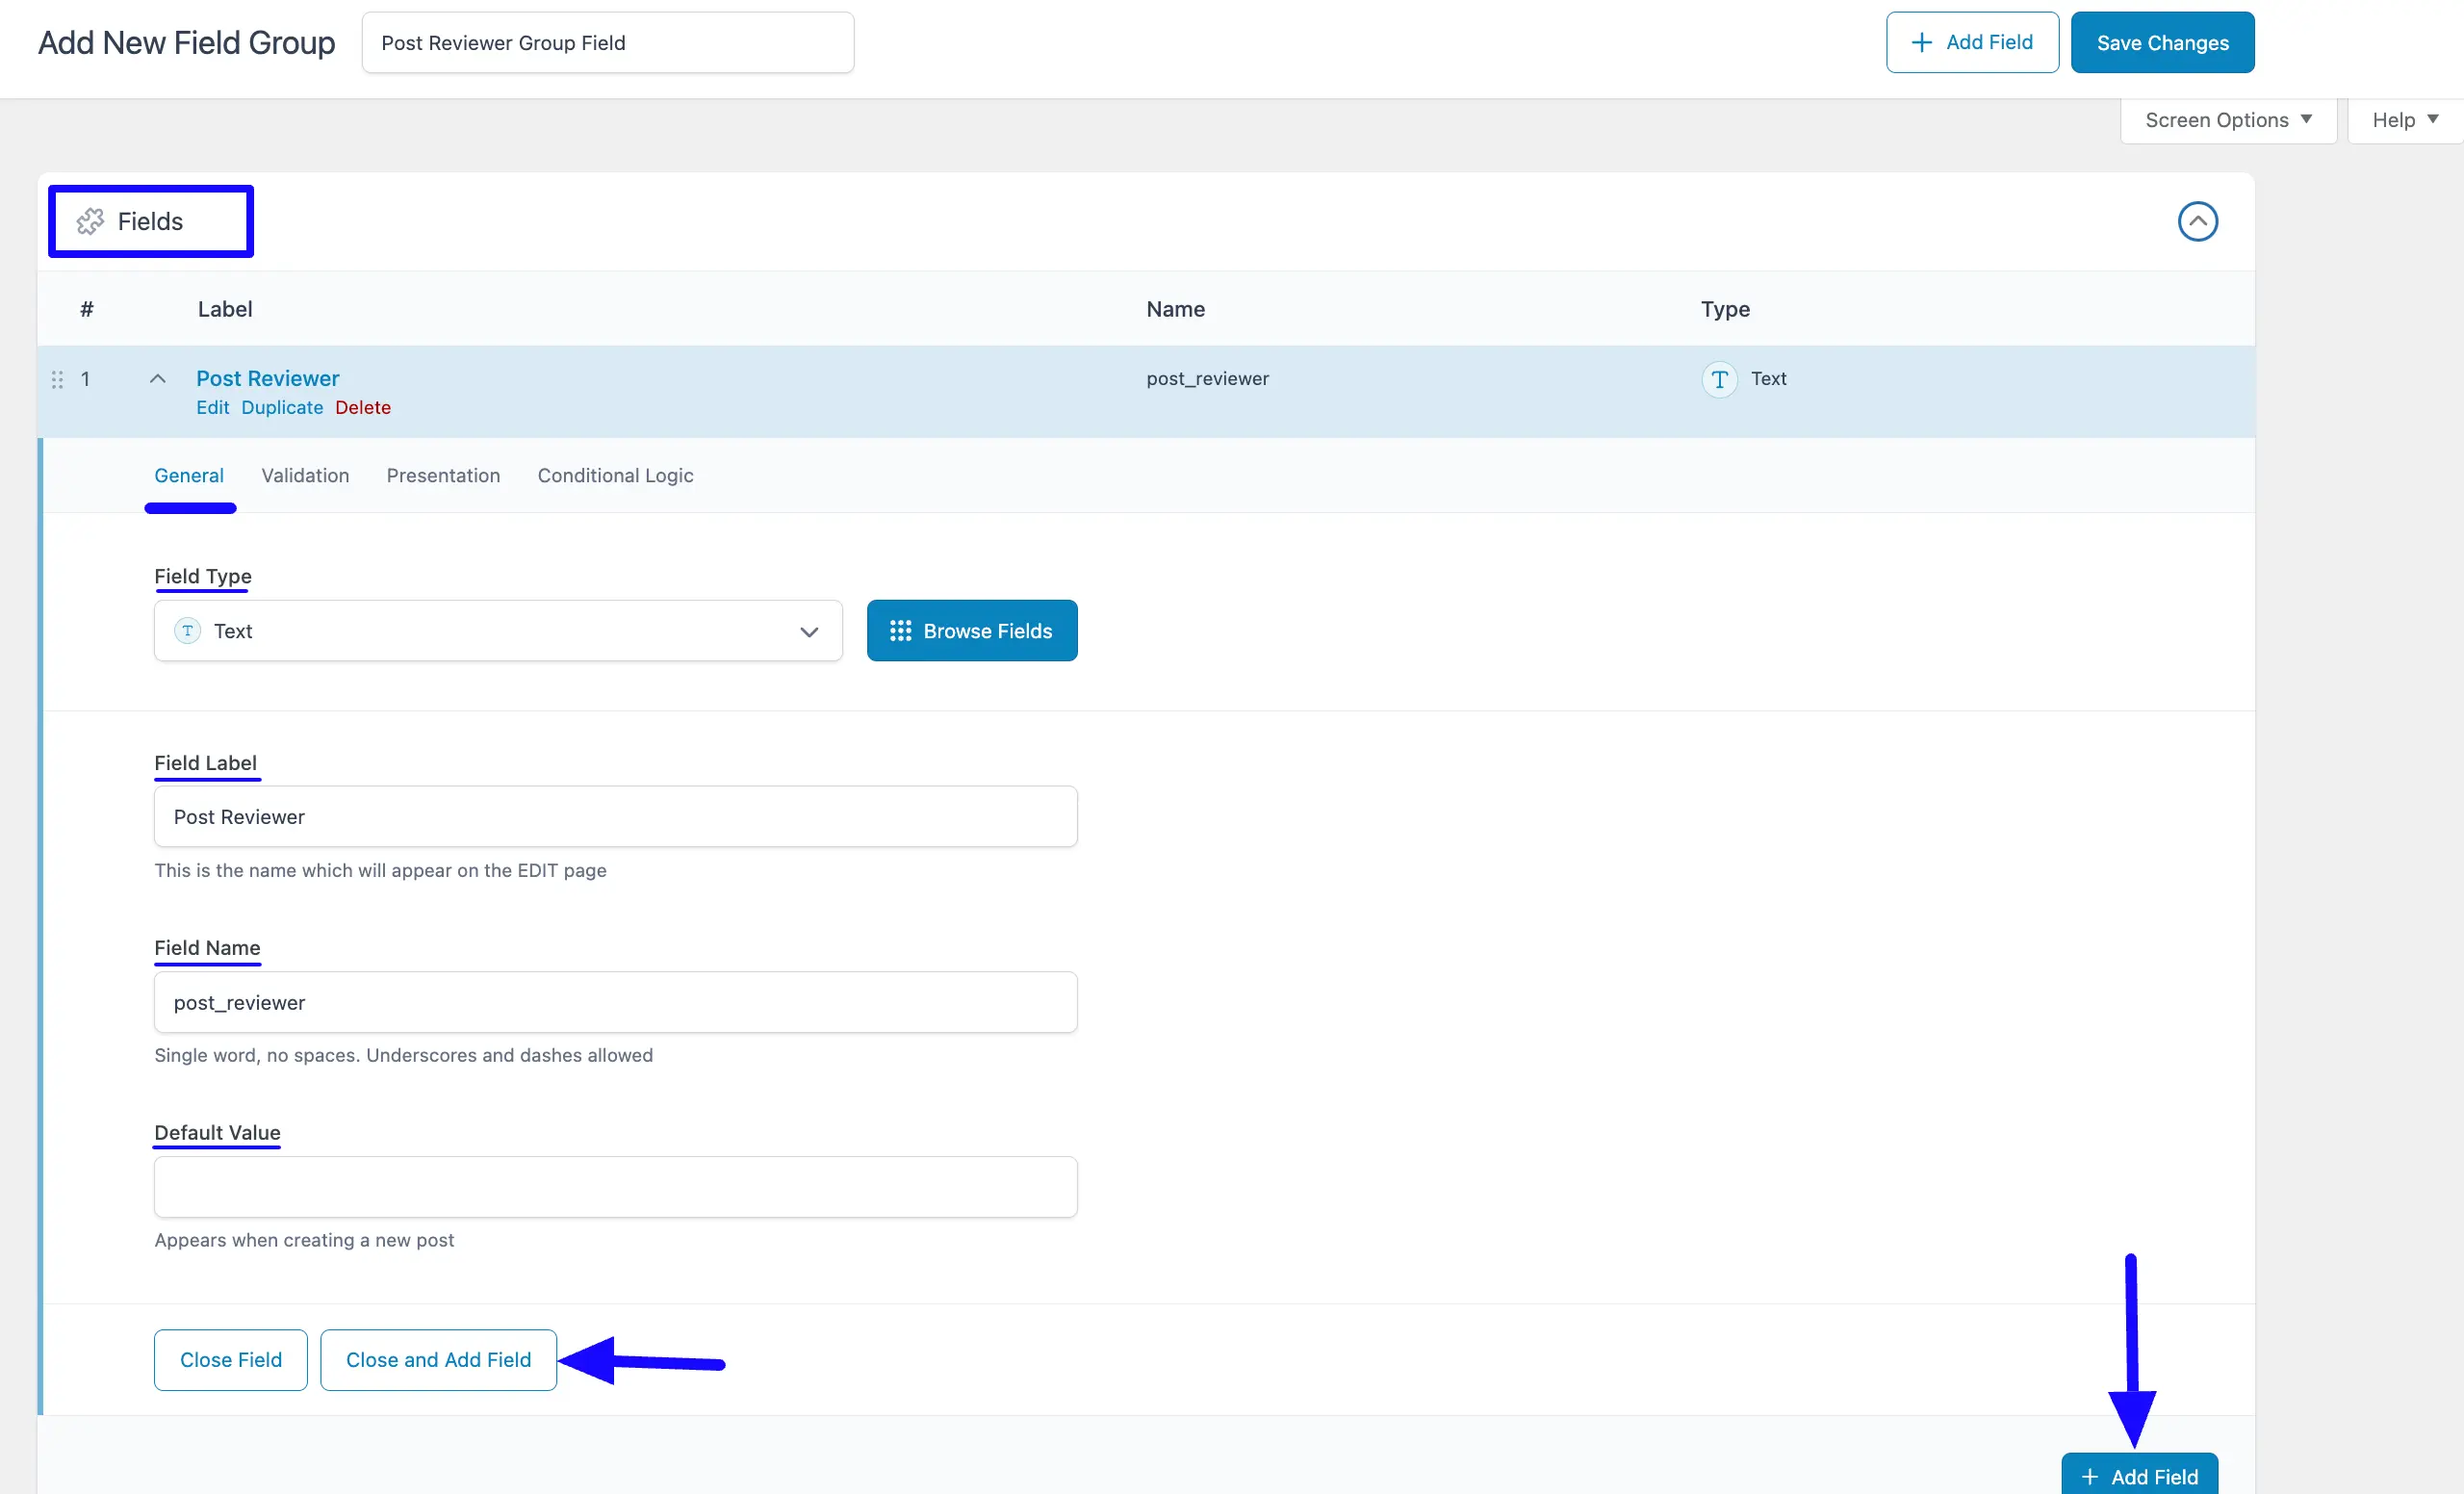
1. Fields #
Here, you can select which type of field you want to add through the Field Type option, set a preferred name for your added field through the Field Label option, and define the field slug through the Field Name option.
You can also set any pre-defined value for your field through the Default Value option. Plus, you can add multiple fields by clicking the Close and Add Field or + Add Field button. For example, here you can see I added a Text type field for creating the Custom Post Reviewer field.
To learn more details about all the options the Fields Section has, refer to this Documentation from the ACF plugin.
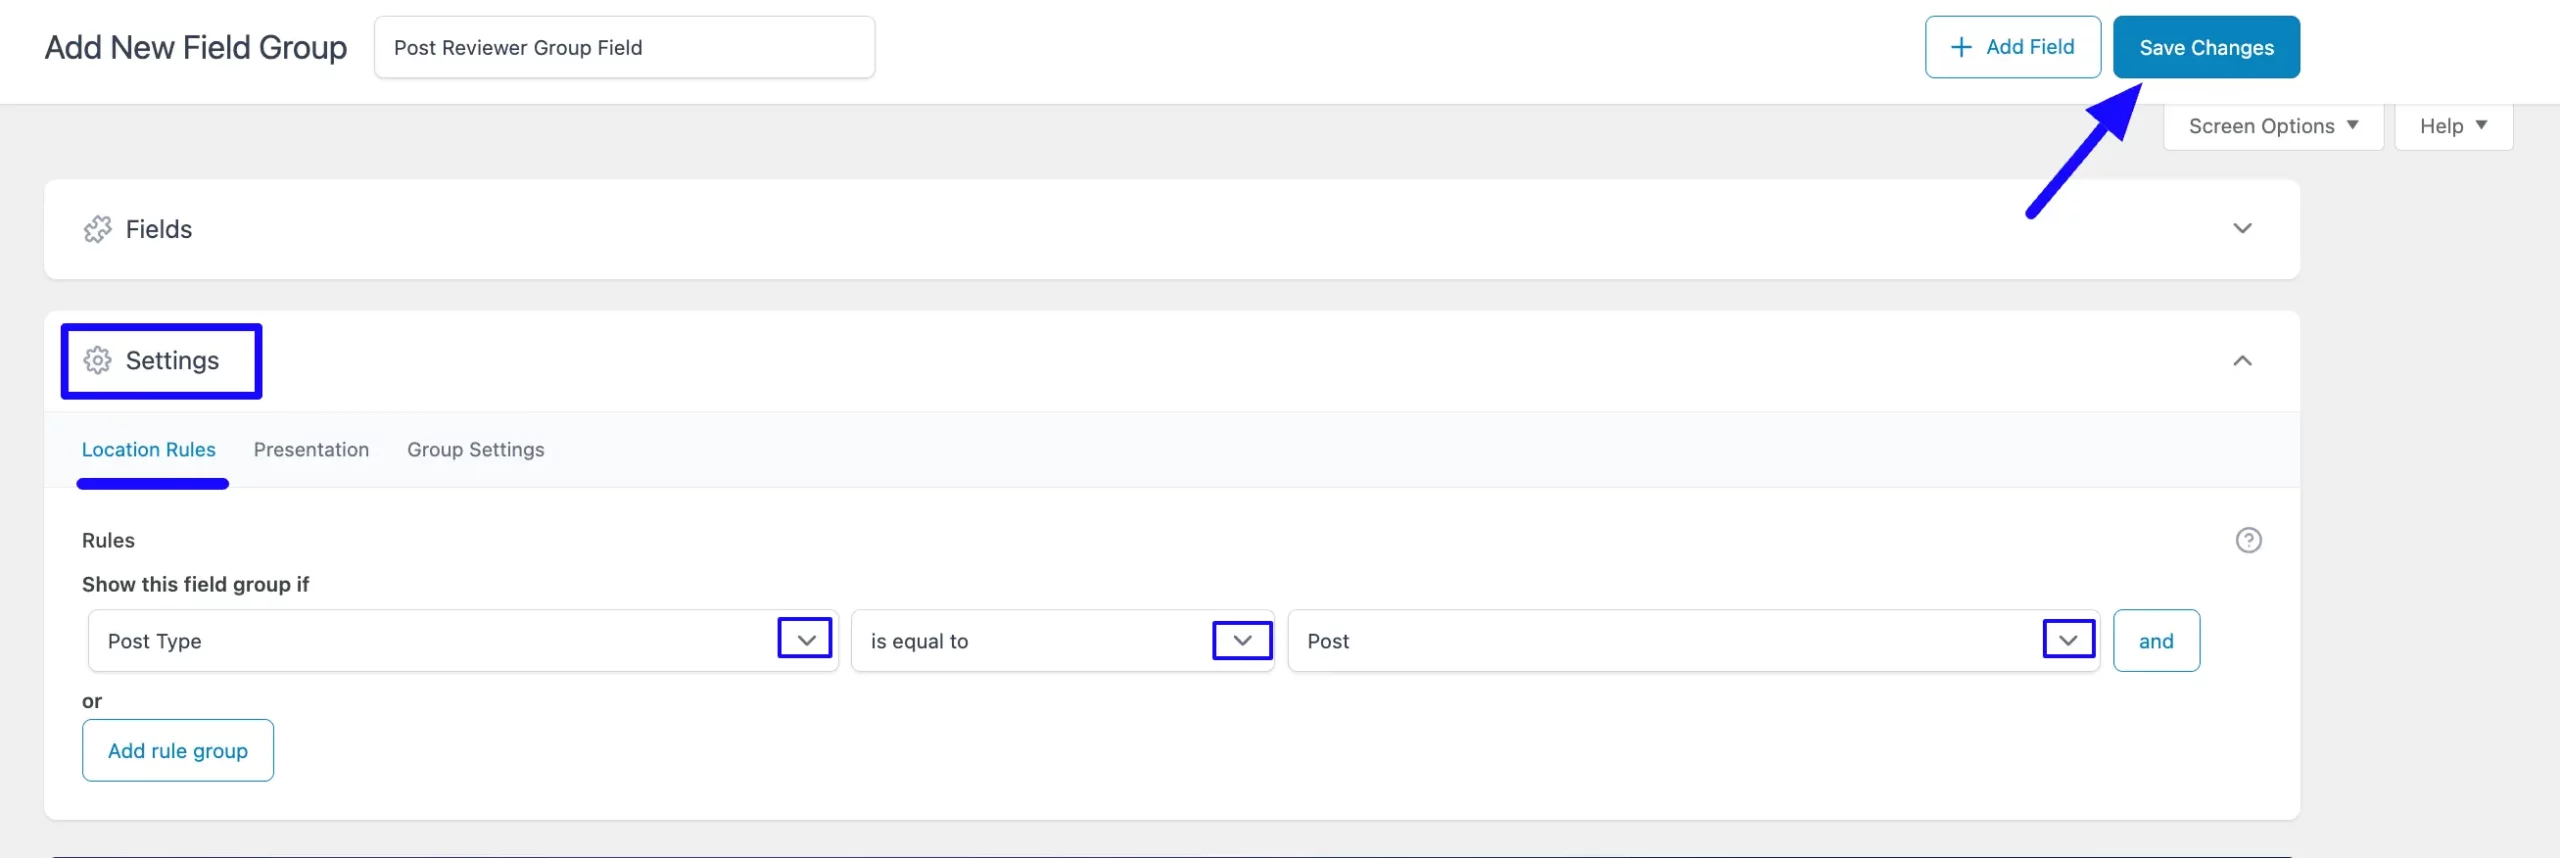
2. Settings #
Here, you can select which post type you want to use this field. For example, I selected the Post as Post Type.
To learn more details about all the options the Settings Section has, refer to this Documentation from the ACF plugin.
Once you are done, click the Save Changes button to save all your changes and make the field functional.
Integrating the ACF Field in a Post Form #
After adding the desired custom field in the ACF, it is time to use this in a Post Form. To learn how to use the added ACF field in a post form, follow the steps below –
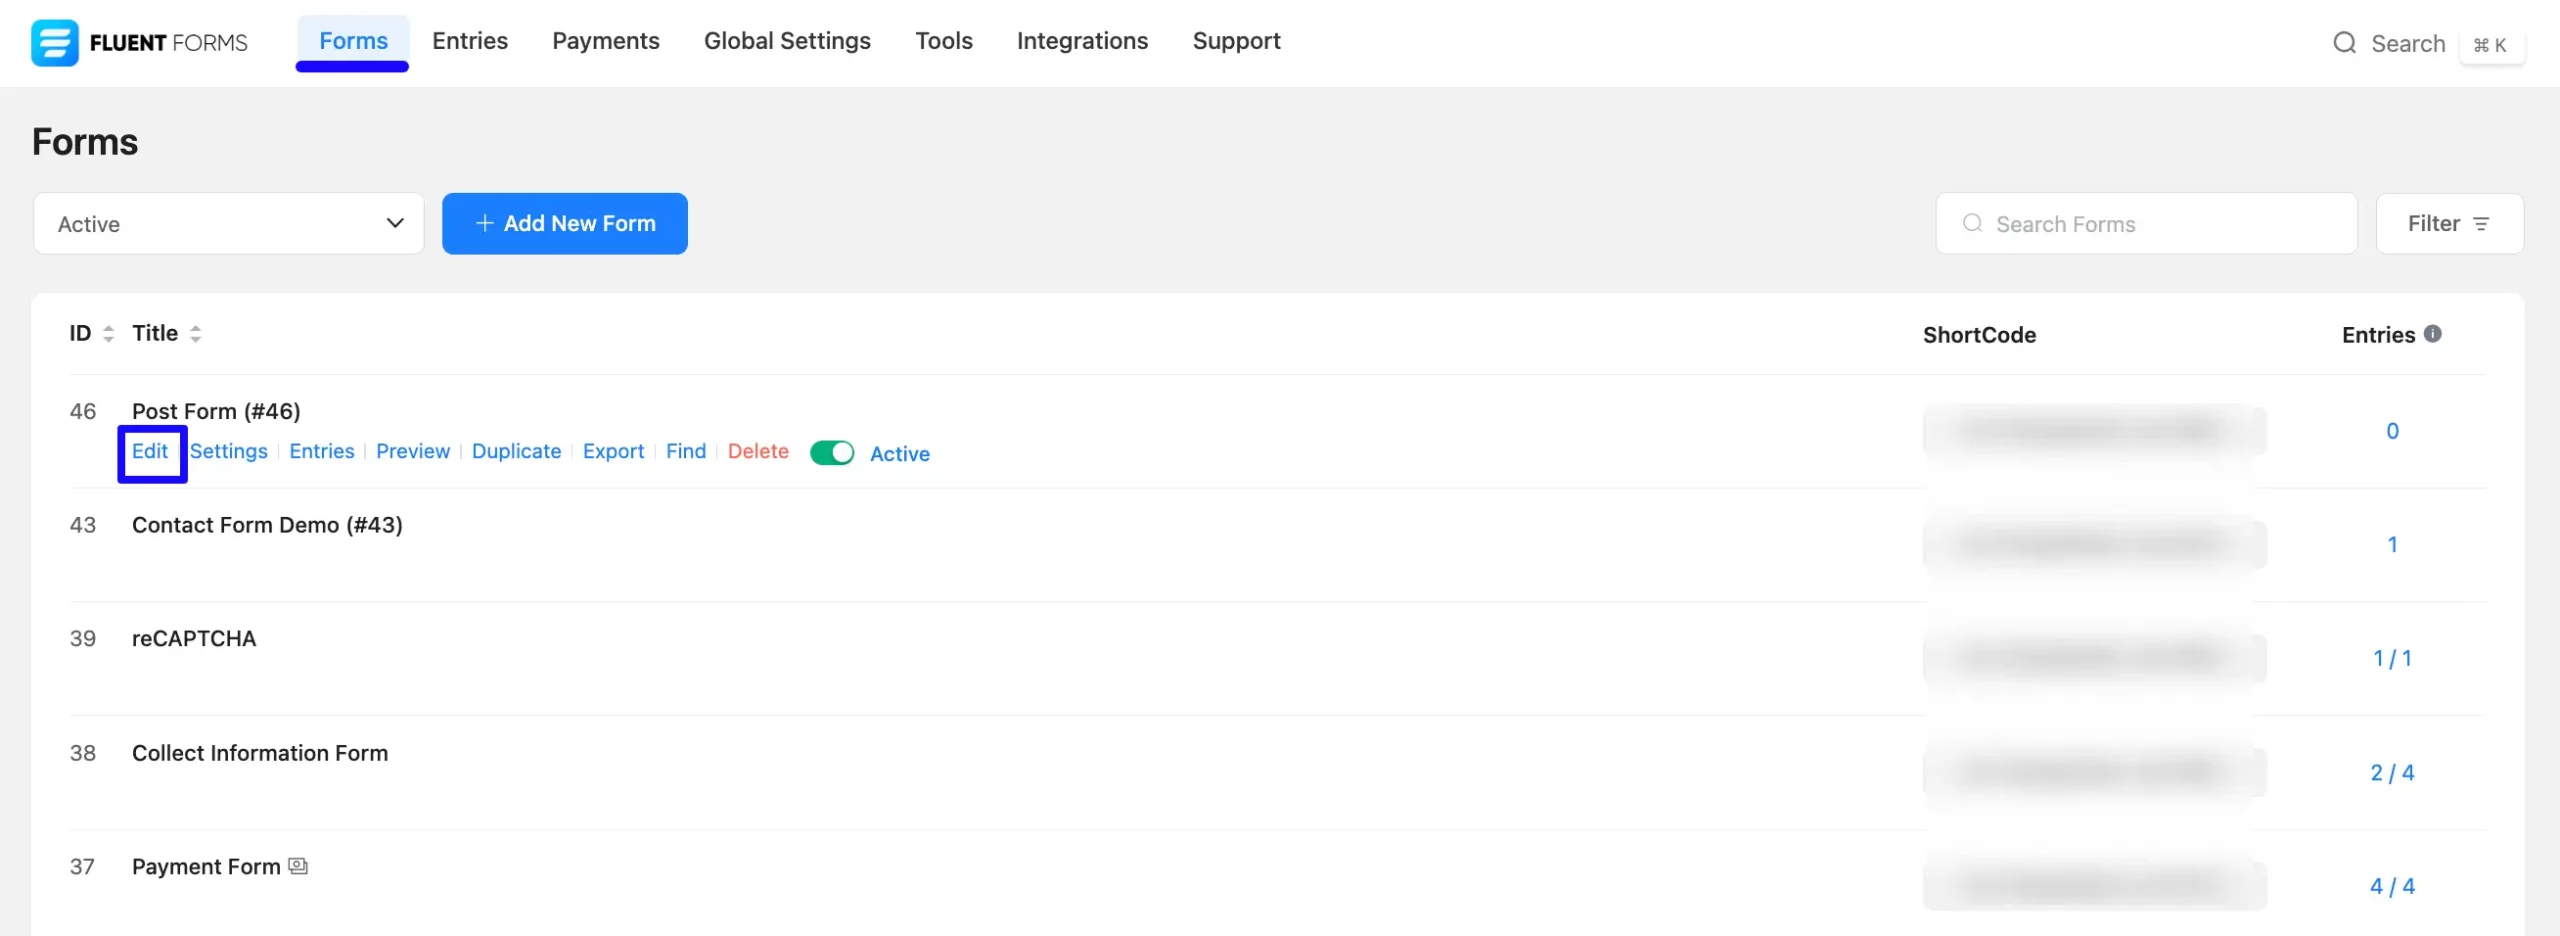
First, go to the Forms section from the Fluent Forms Navbar, choose a desired Post Form, and click the Pencil/Edit icon to open the Editor page of that form.
Remember, you can use the ACF Field only in a Post Form. To learn the whole process of creating a Post Form, read this Documentation.
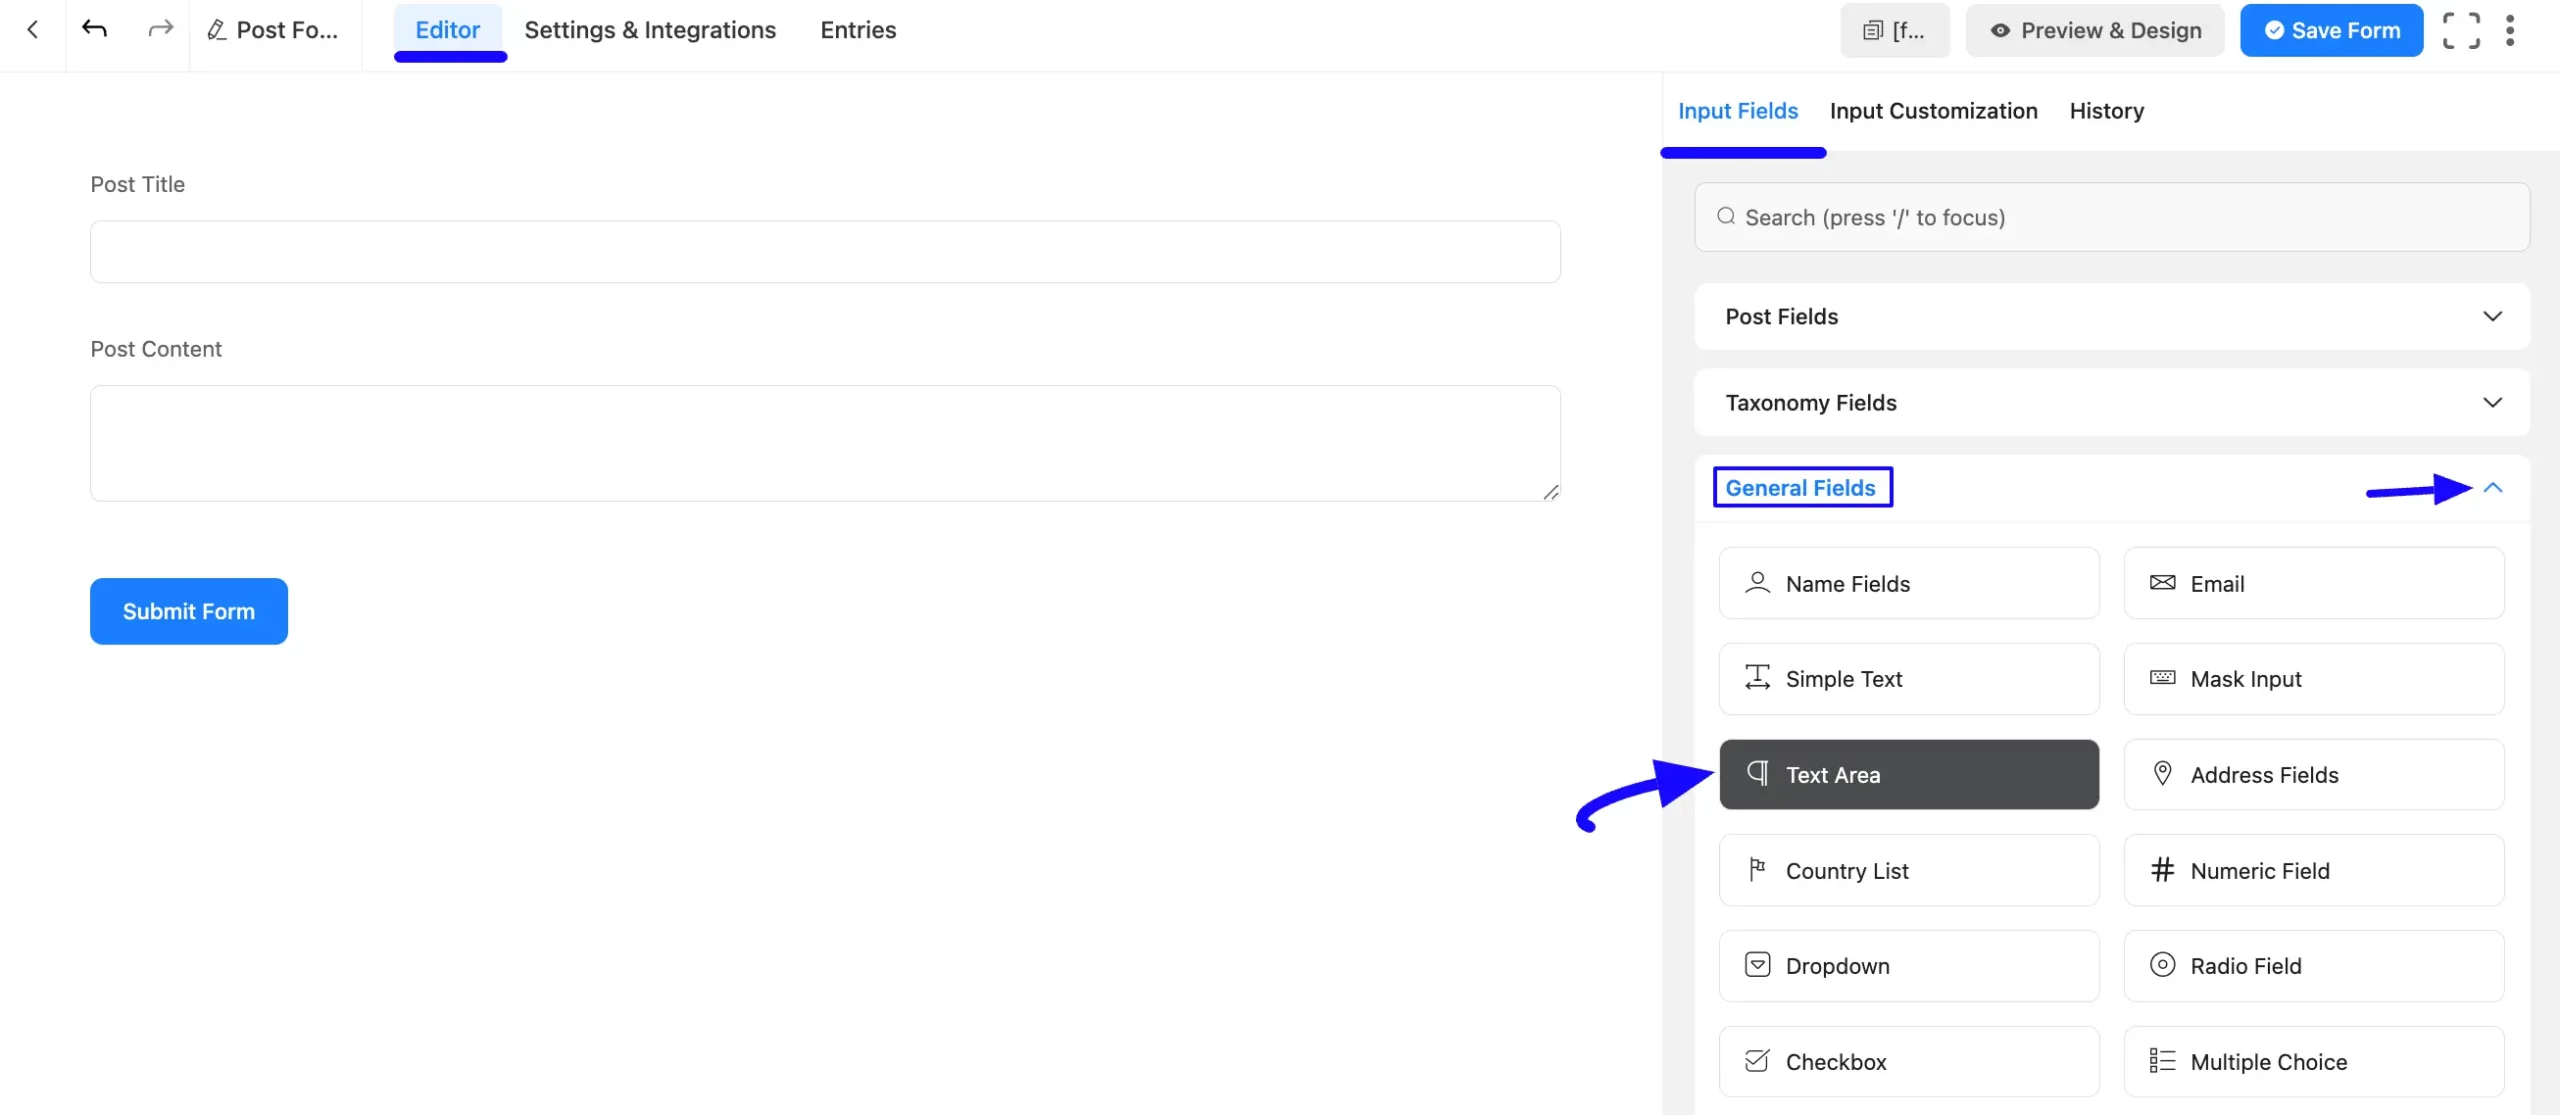
Once you are on the Editor page, you can see Post Title and Post Content fields have already been added.
Now to add the “Post Reviewer” ACF Field in this form, go to the Input Fields on the right sidebar and open the General Fields dropdown list by clicking the Arrow Icon. Then, choose the Text Area field by clicking on it or Drag & Drop it into your editor.
Remember, you have to choose a similar Input Field type that you selected in the ACF Field Type. For example, you can see that I added the Text as field type in the ACF. That is why, I added the Text Area input field here.
Configuring Post Feed Settings #
Now, you need to configure the Post Feed to make your Custom Field functional and properly integrate it into the Post Form. It helps you map your added post fields for data collection and allows users to create more customized posts.
To learn how to configure Post Feed with the Post Form, follow the steps below –
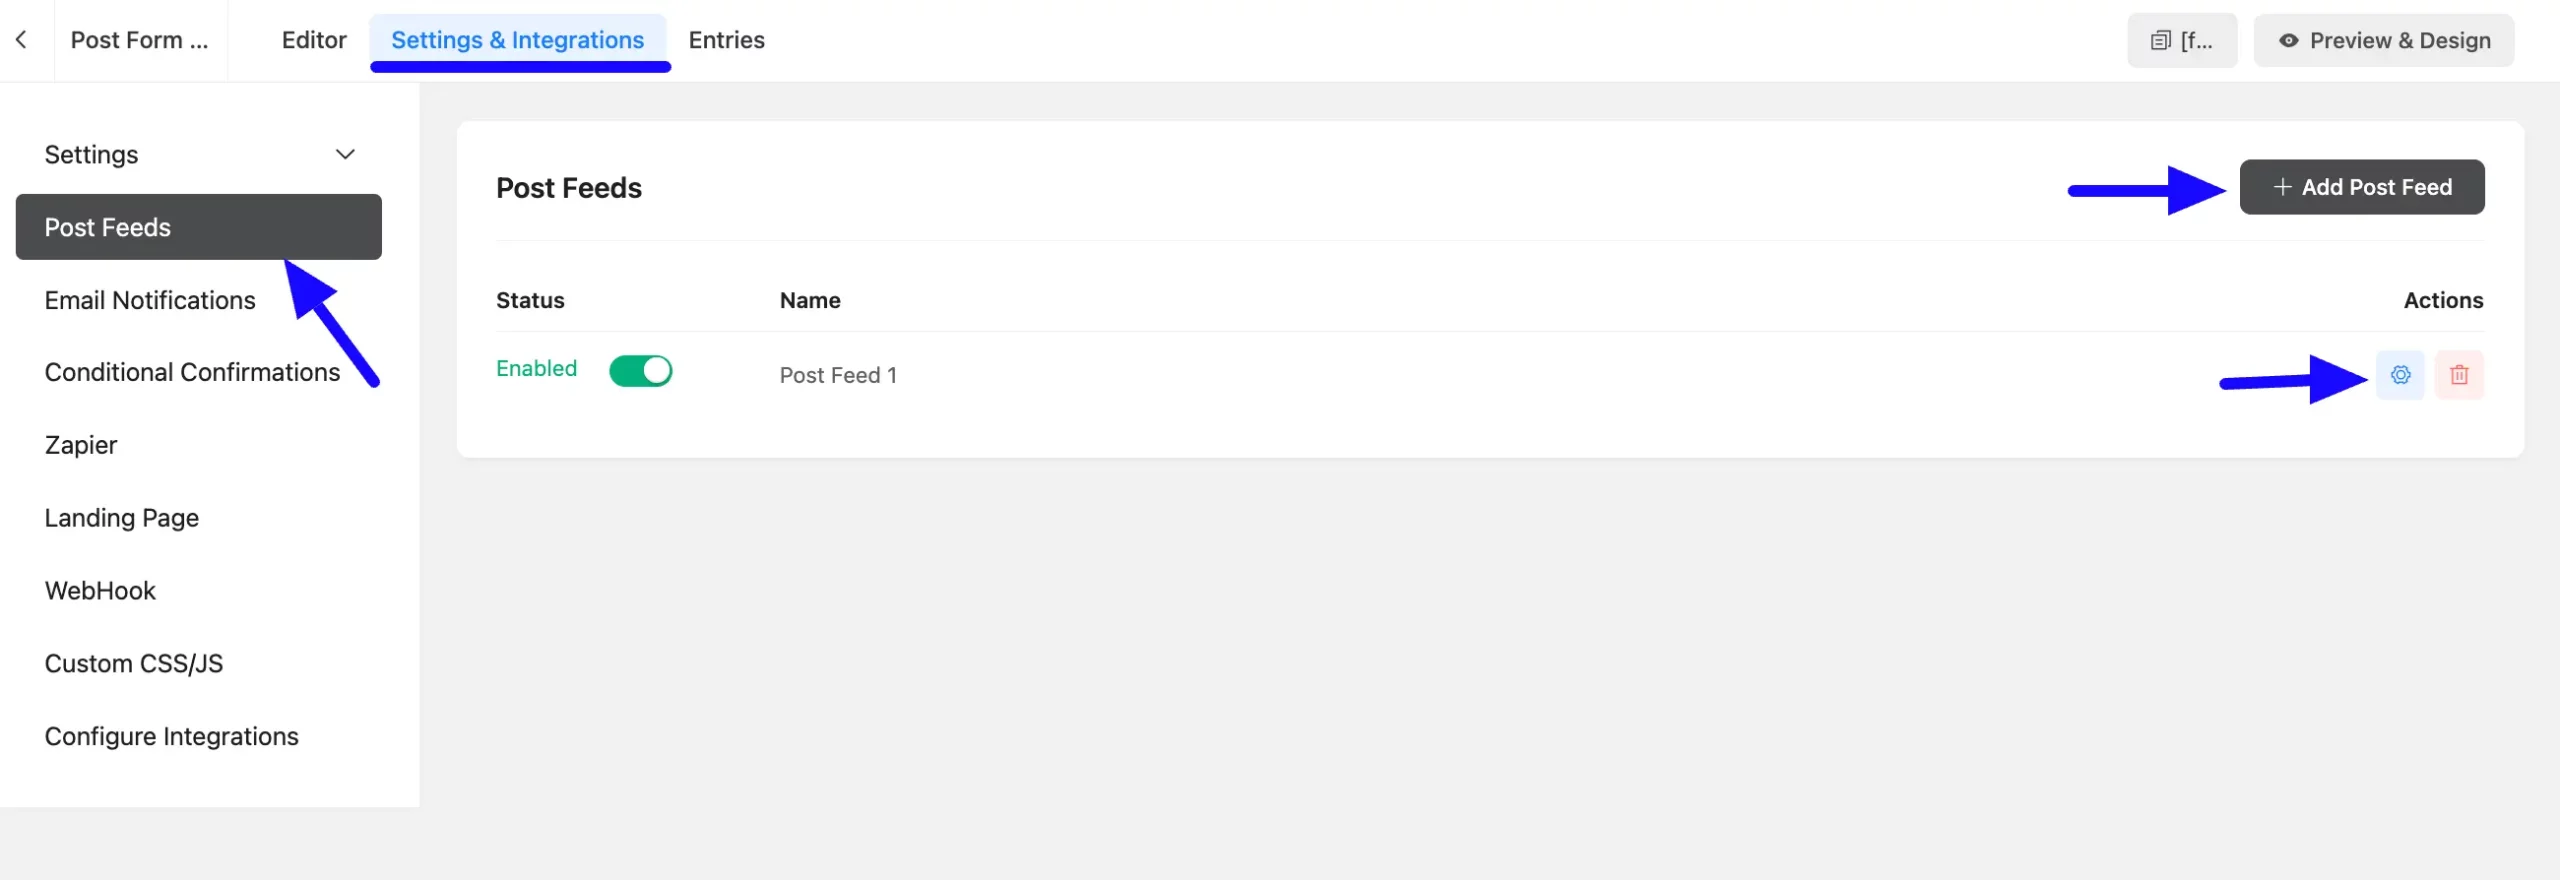
First, go to Settings & Integrations from the Editor page, open the Post Feeds tab from the left sidebar, and click the Settings Icon to open the existing added feed.
If you don’t have an existing post feed, you can add a new one by clicking the + Add Post Feed button. To learn the details process of adding a new post feed, click here. For example, I used an existing Feed to show the process.
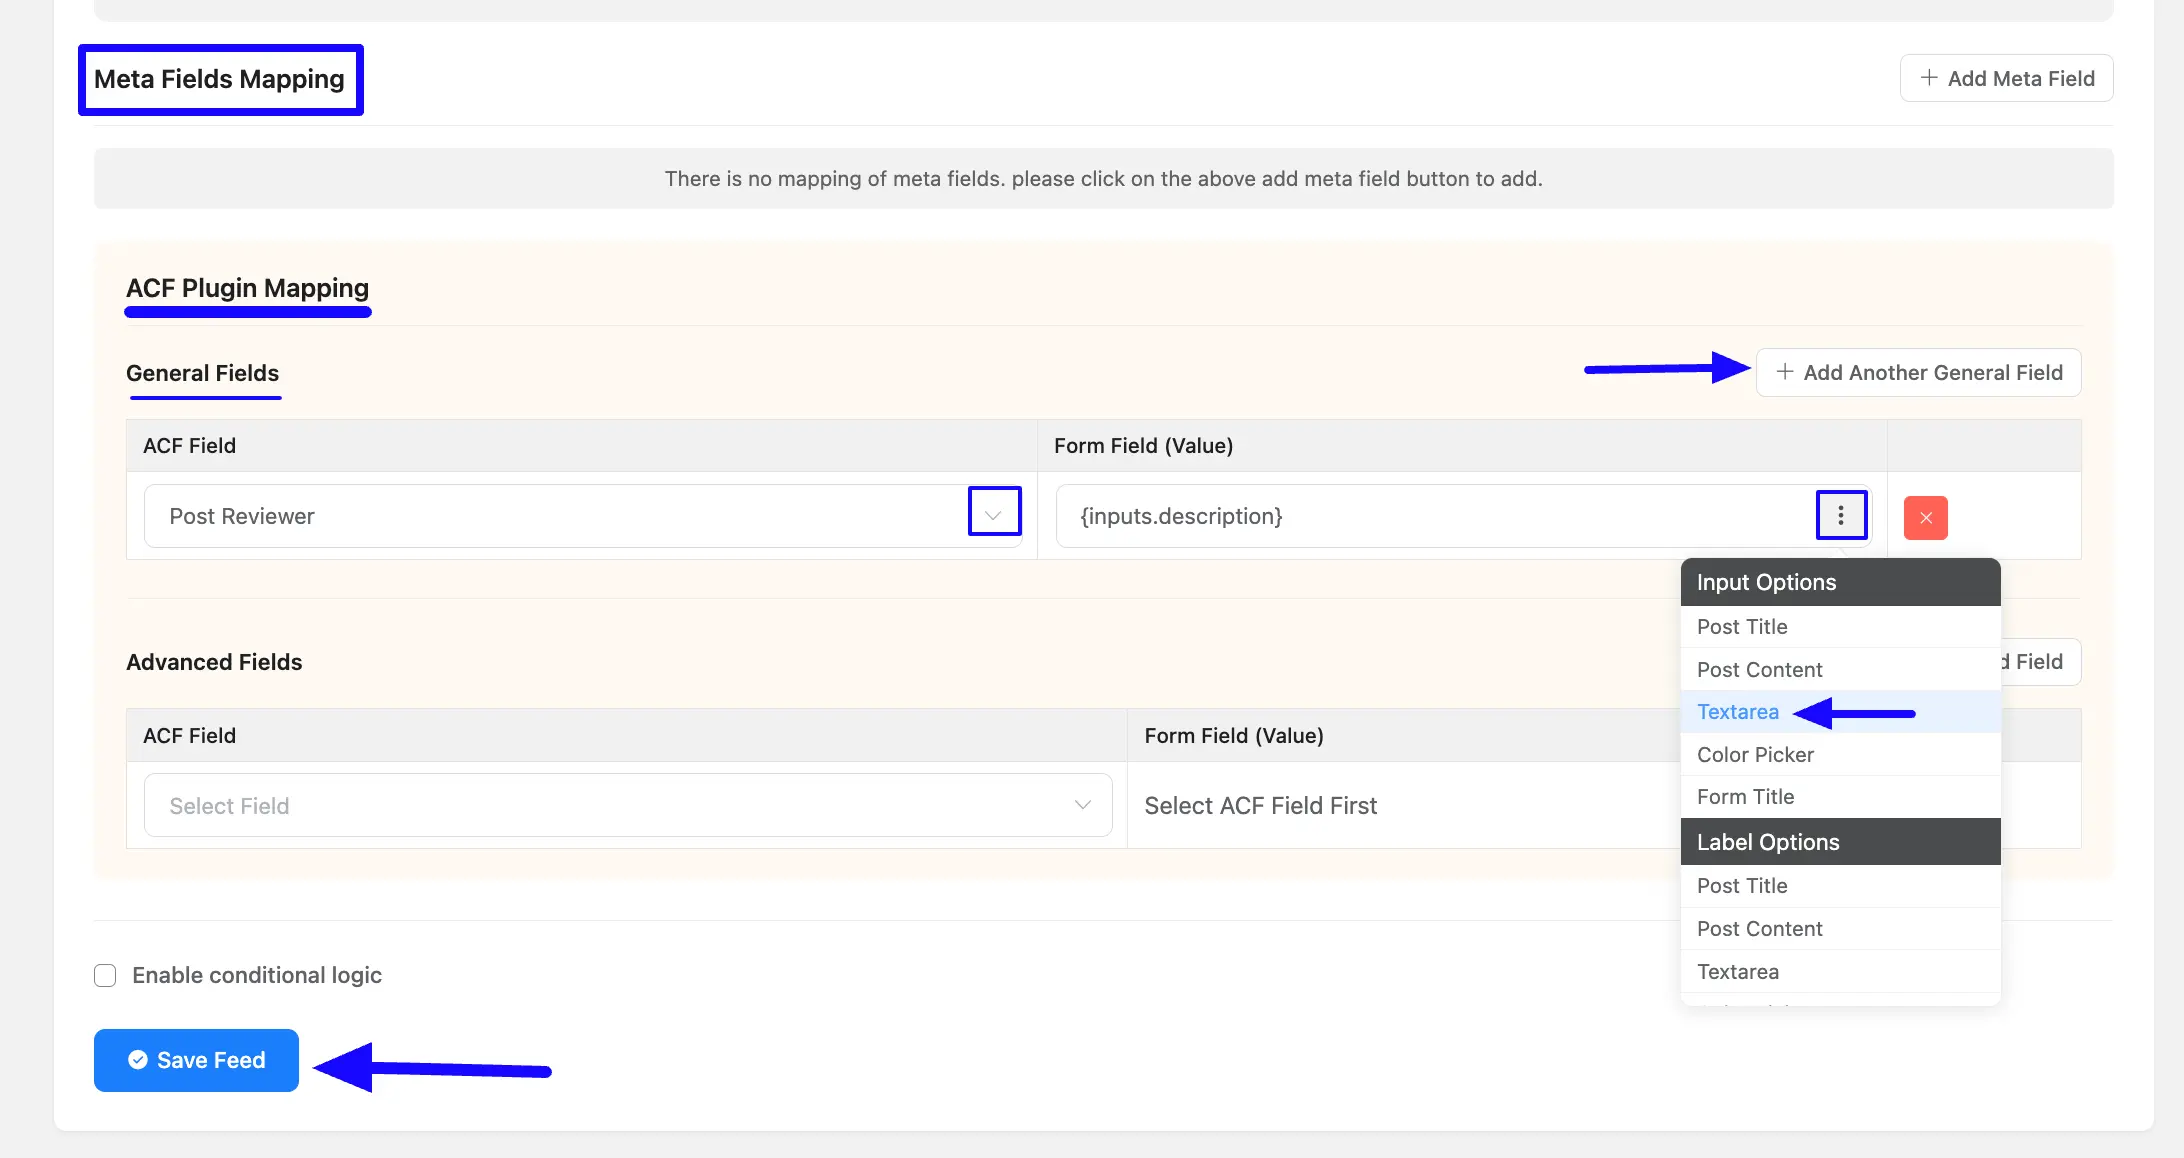
Once you are on the Post Feed page, scroll down to the Meta Field Mapping section. Here, you can see the ACF Plugin Mapping option becomes available.
Under the ACF Plugin Mapping, you will get two types of field mapping options. These are the General Fields and Advanced Fields. As the Post Reviewer field is a text-type general field I map the Textarea field under the General Fields option.
Also, if you want to add multiple general fields, then click the +Add Another General Field button in the right corner, and to delete any field, then click the Cross Icon.
Remember, here, you need to map your ACF Field with the corresponding Fluent Forms Field.
Once the setup is done, click the Save Feed button, and your Post Feed will be configured. Now, your ACF Field integration will function successfully!
Customizing the added ACF Field #
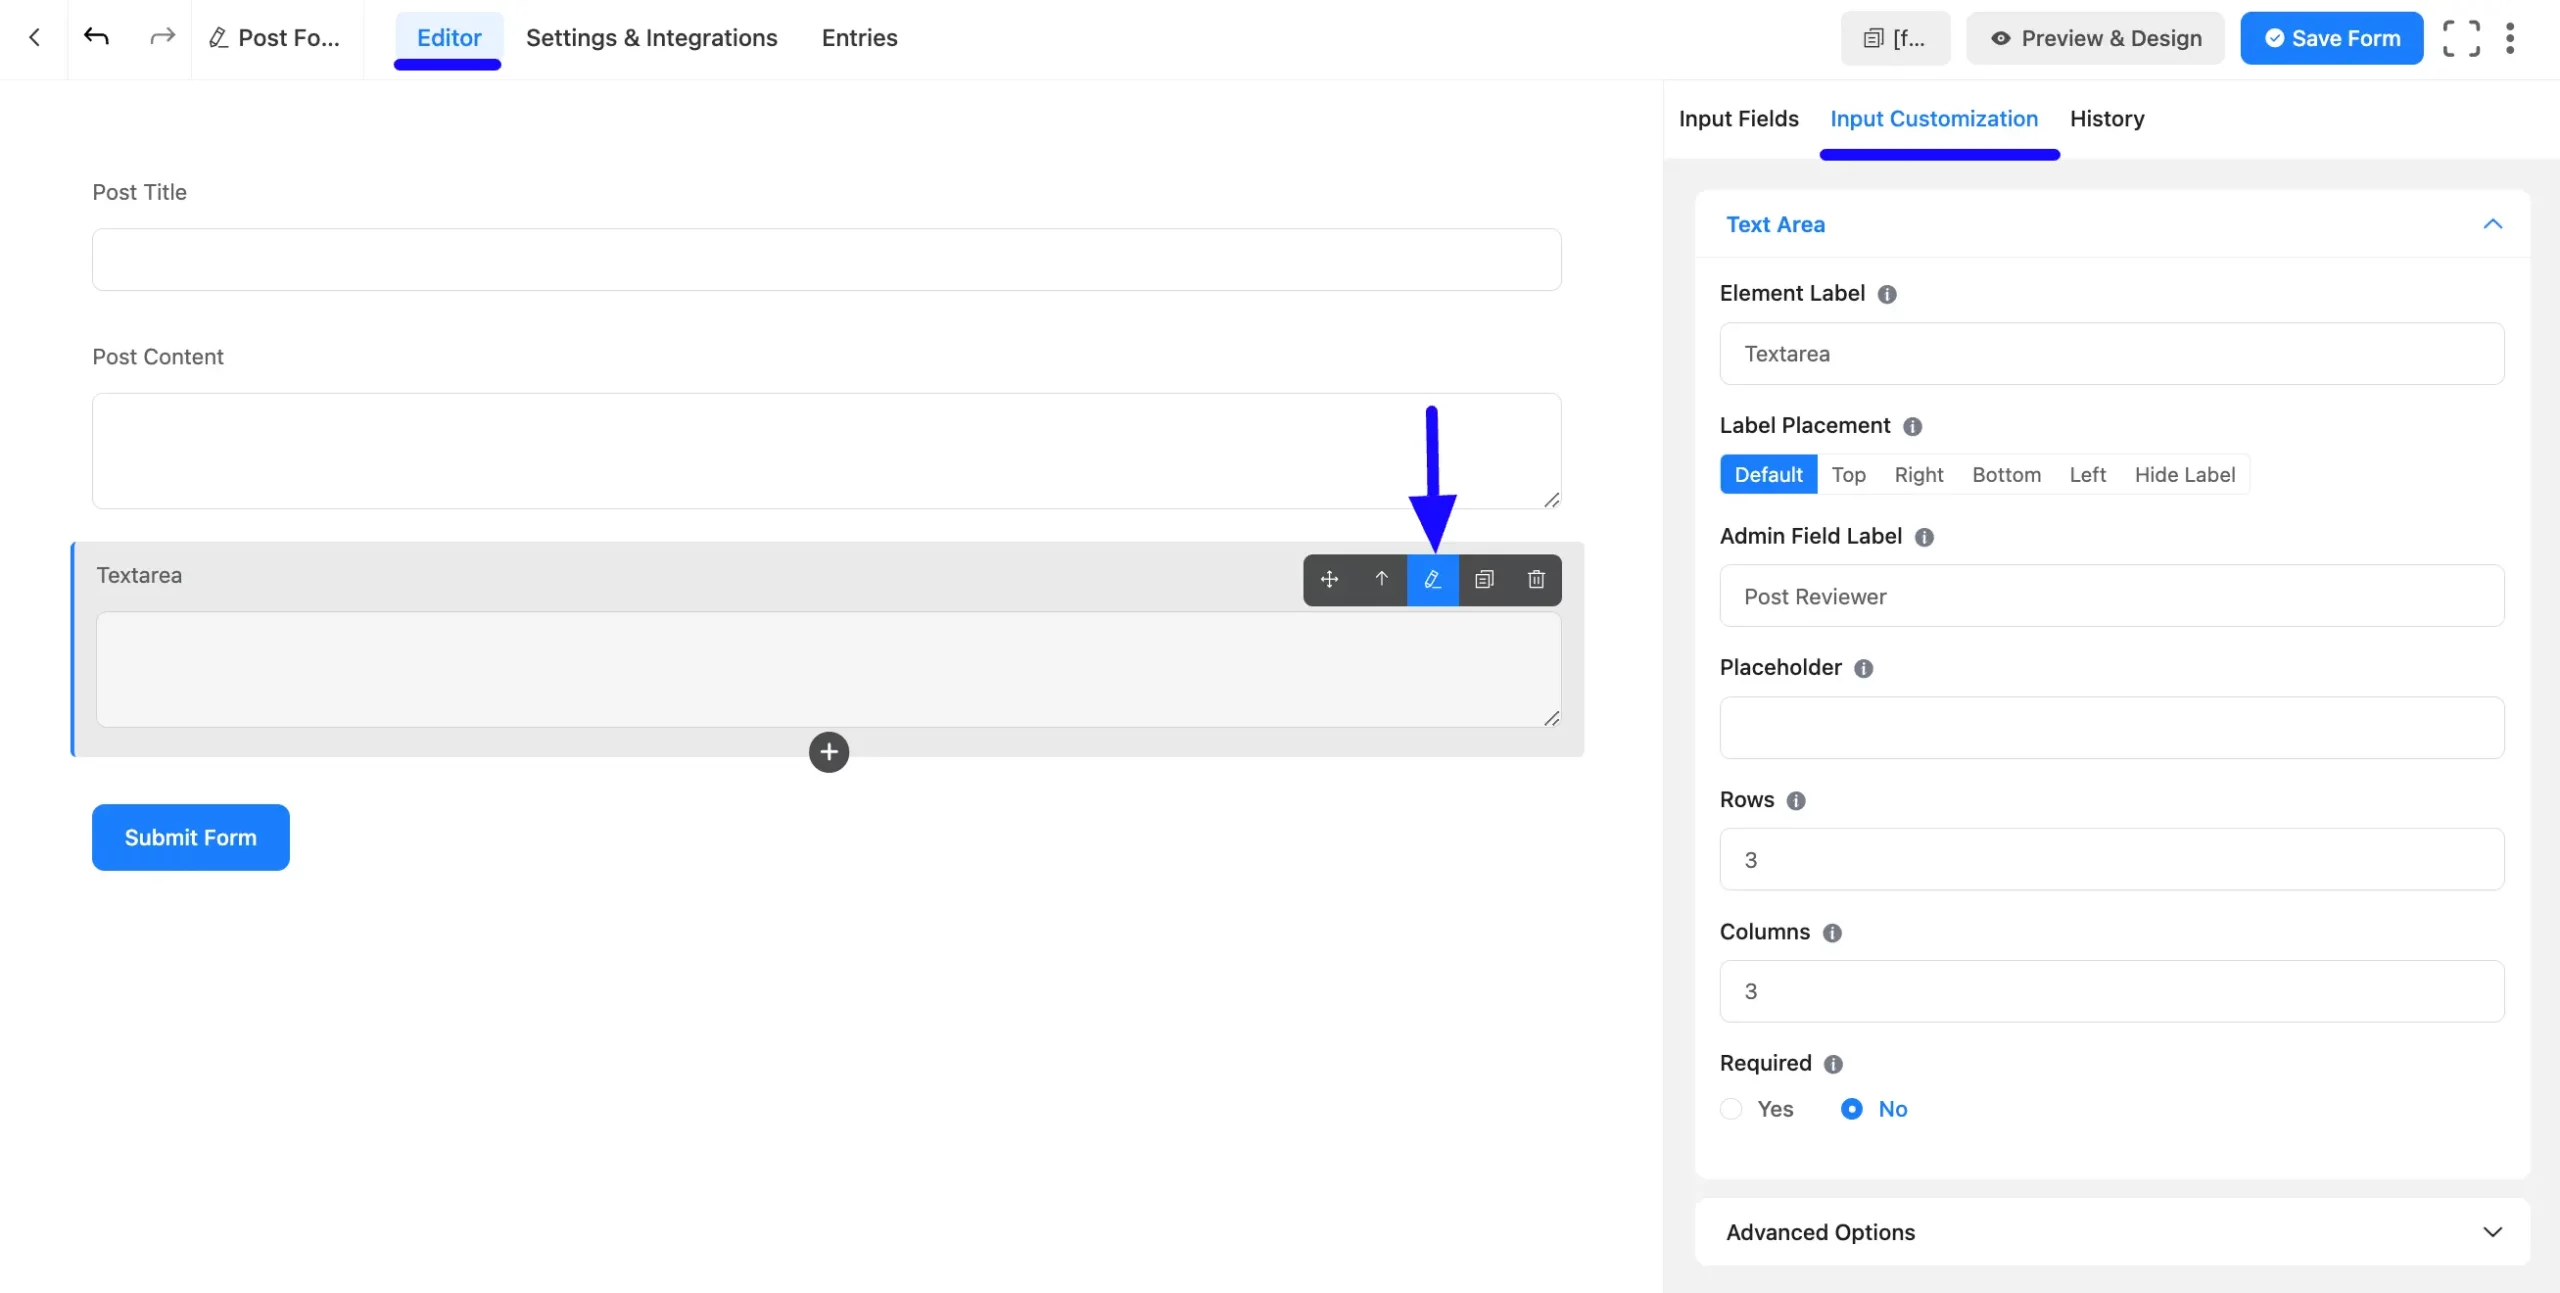
Next, go back to the post form’s Editor where you added the Custom Field. You can see that the Custom Field is added to the form.
Now, you can Edit or Customize this field by hovering over it and clicking the Pencil Icon. It will take you to the Input Customization tab on the right side and offer you the options for customizing the field.
To learn more about the customization of the Text Area field, click here.
Embedding the Form into Frontend #
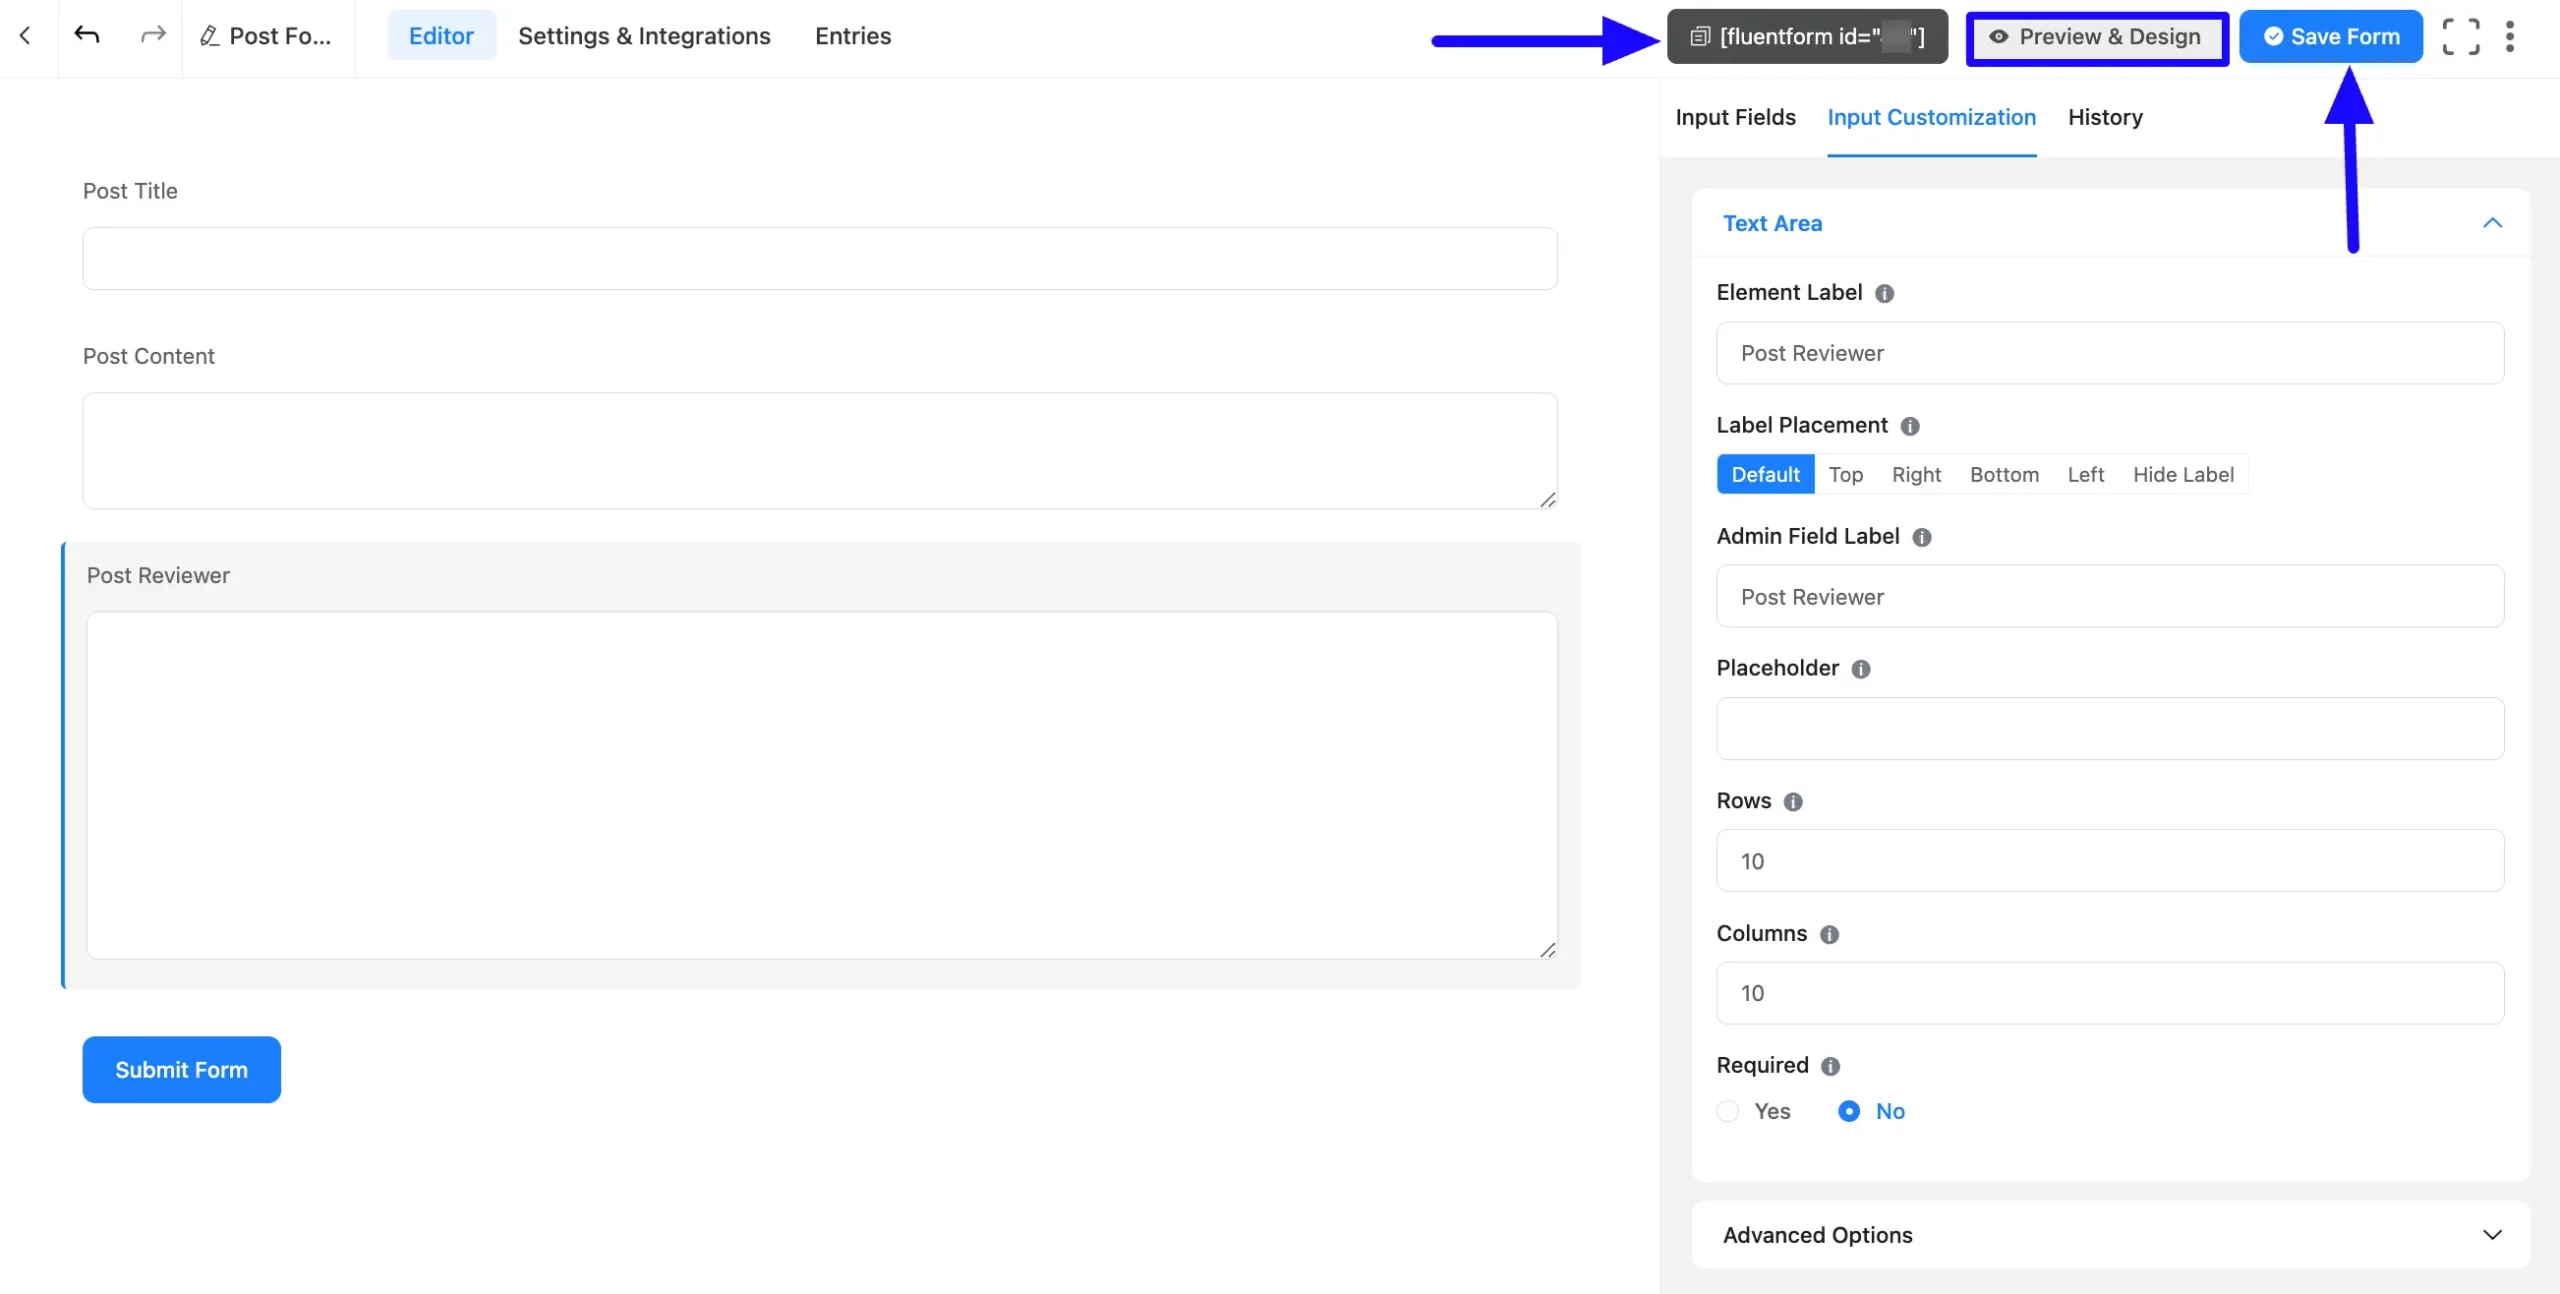
To embed and display the form on a specific Page/Post on your site, copy the Shortcode from the top right side and paste it into your desired Page/Post.
Once you complete the customization, click the Save Form button to save all your changes. Also, to see the form preview, click the Preview & Design button in the middle.
Preview of ACF Field #
Here is the preview of the added ACF Field in a Post Form.

This way, you can easily add the ACF Fields in Fluent Forms!
If you have any further questions, concerns, or suggestions, please do not hesitate to contact our @support team. Thank you.


