Fluent Forms integrates with JetEngine, allowing you to create and map custom fields for your Post Forms. This article will guide you through setting up Custom Fields using JetEngine within Fluent Forms Post Forms.
To create a custom field in your WordPress Post Form, install the JetEngine Premium plugin on your website.
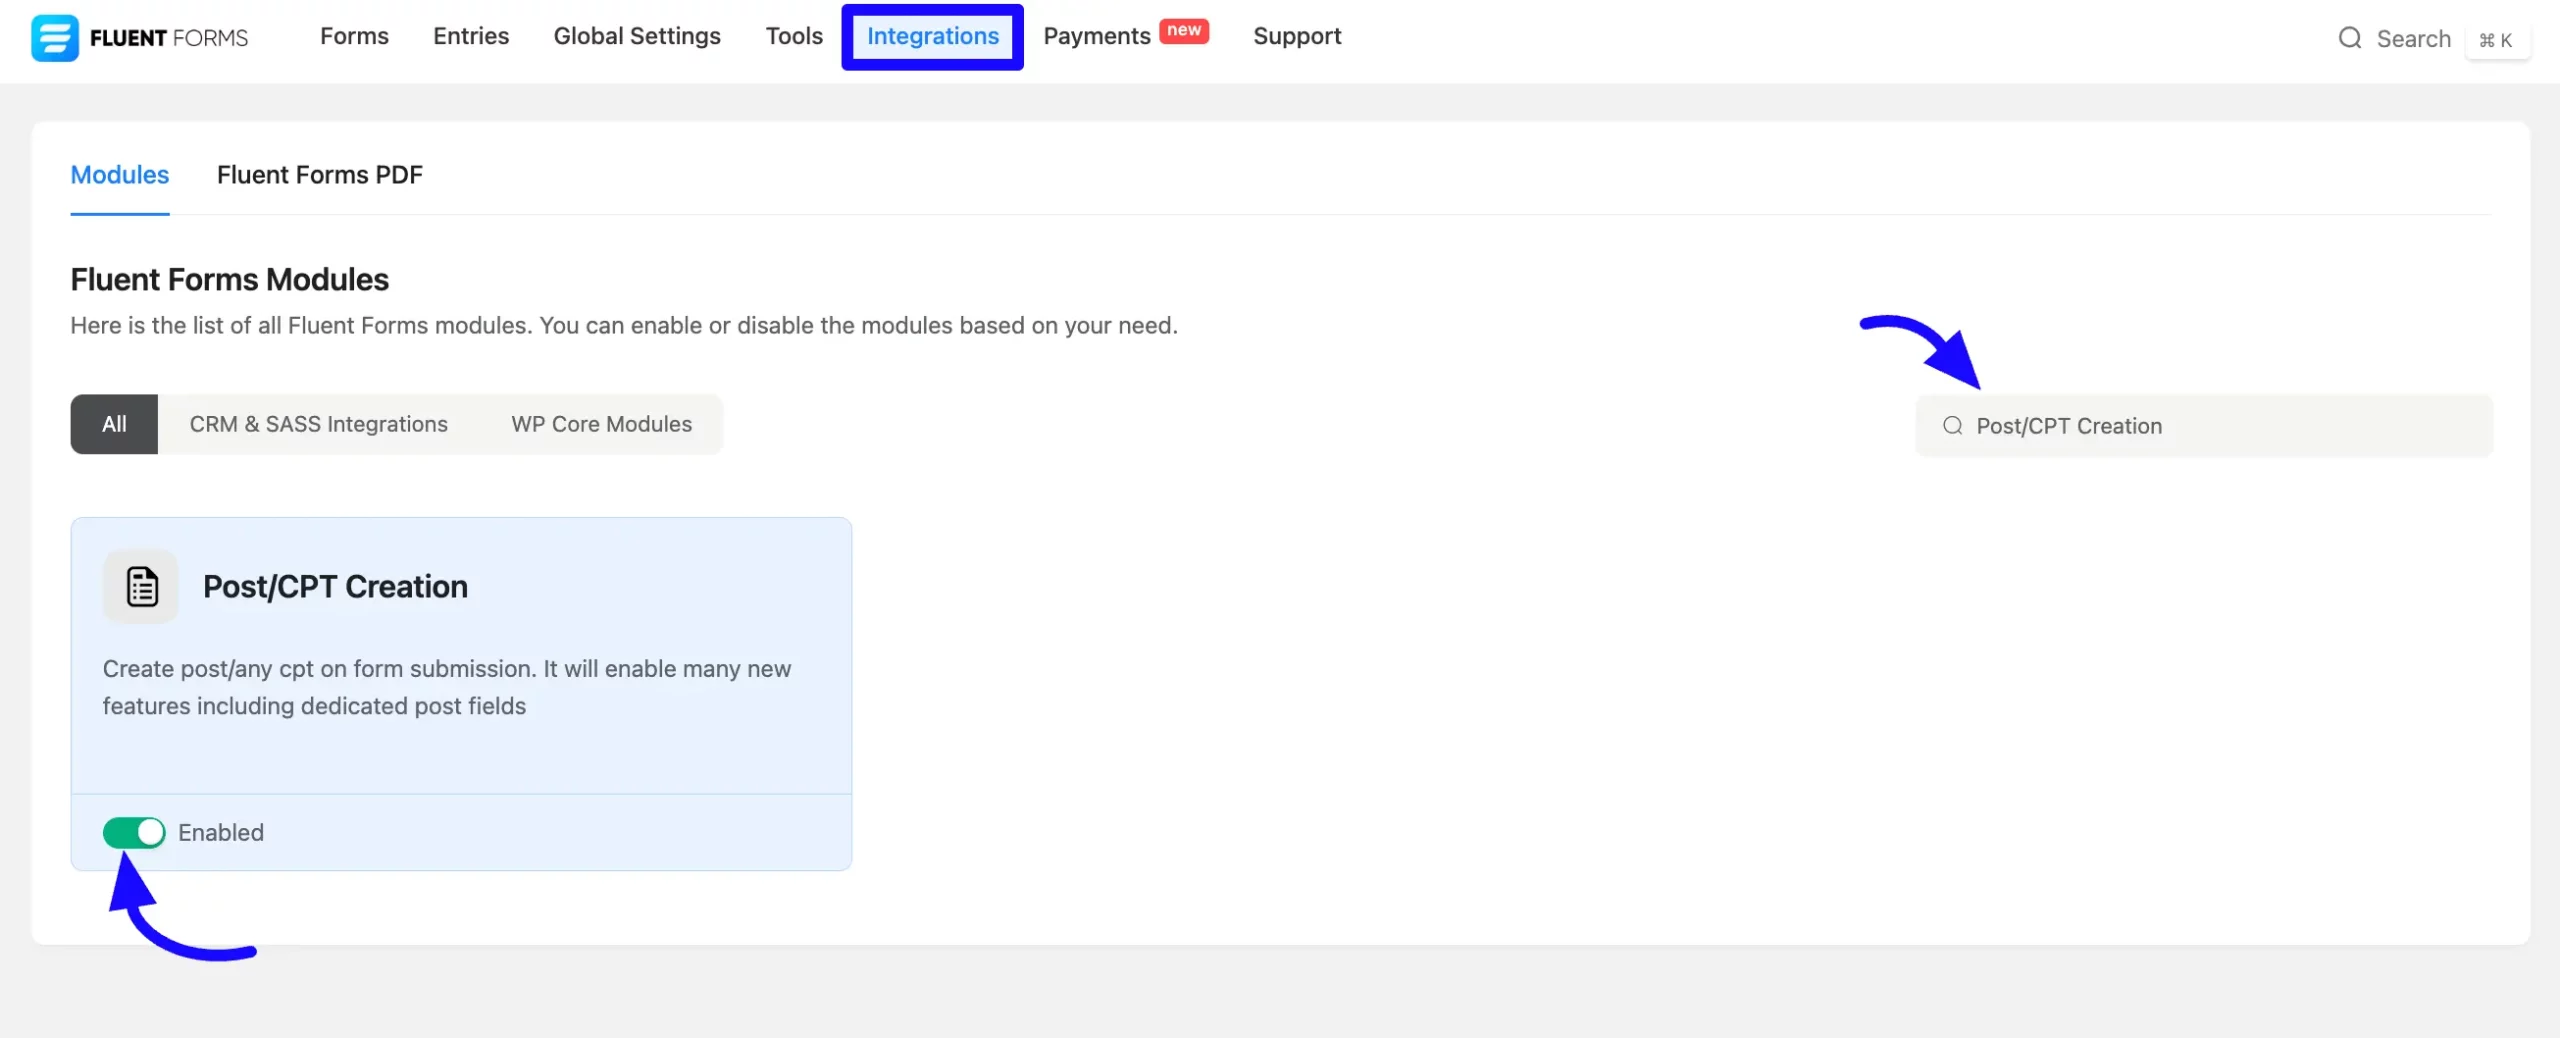
Enable the Post/CPT Creation Module #
To learn how to enable the Post/CPT Creation Module, follow the steps with the screenshots below.
First, navigate to Fluent Forms Pro from your WordPress dashboard. Click on the Integration button from top menu. Then, Search for or scroll to Post/CPT Creation from the right side and Enable the module.
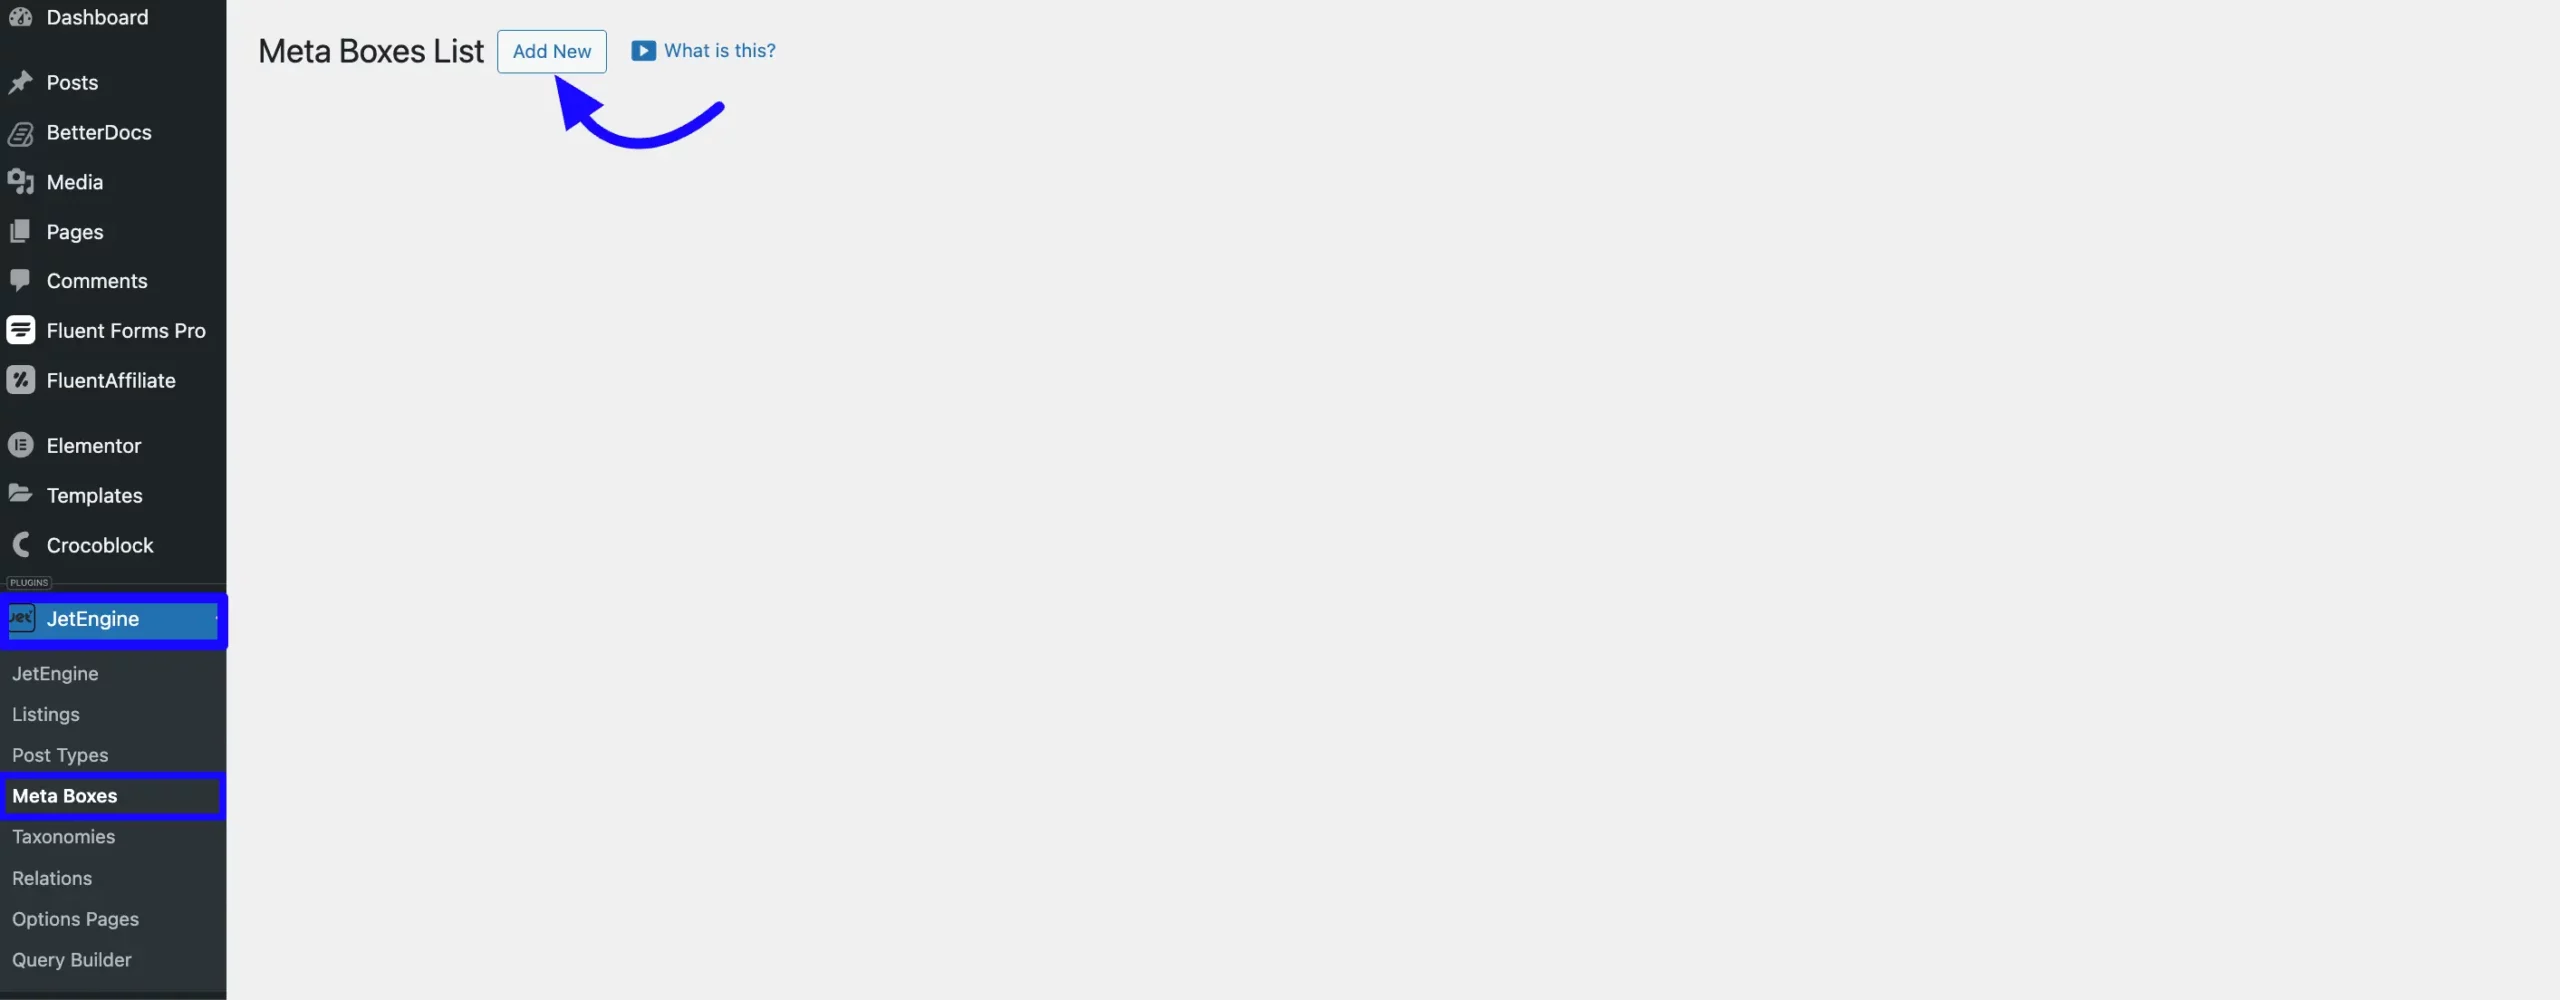
Create a Custom Meta Box #
From the WordPress sidebar, navigate to the JetEngine plugin and select Meta Boxes. It will bring up the Meta Boxes List page, where you can create a new Custom Meta Box for your Post Form.
Now, click the Add New button to add a custom meta box for the Post.
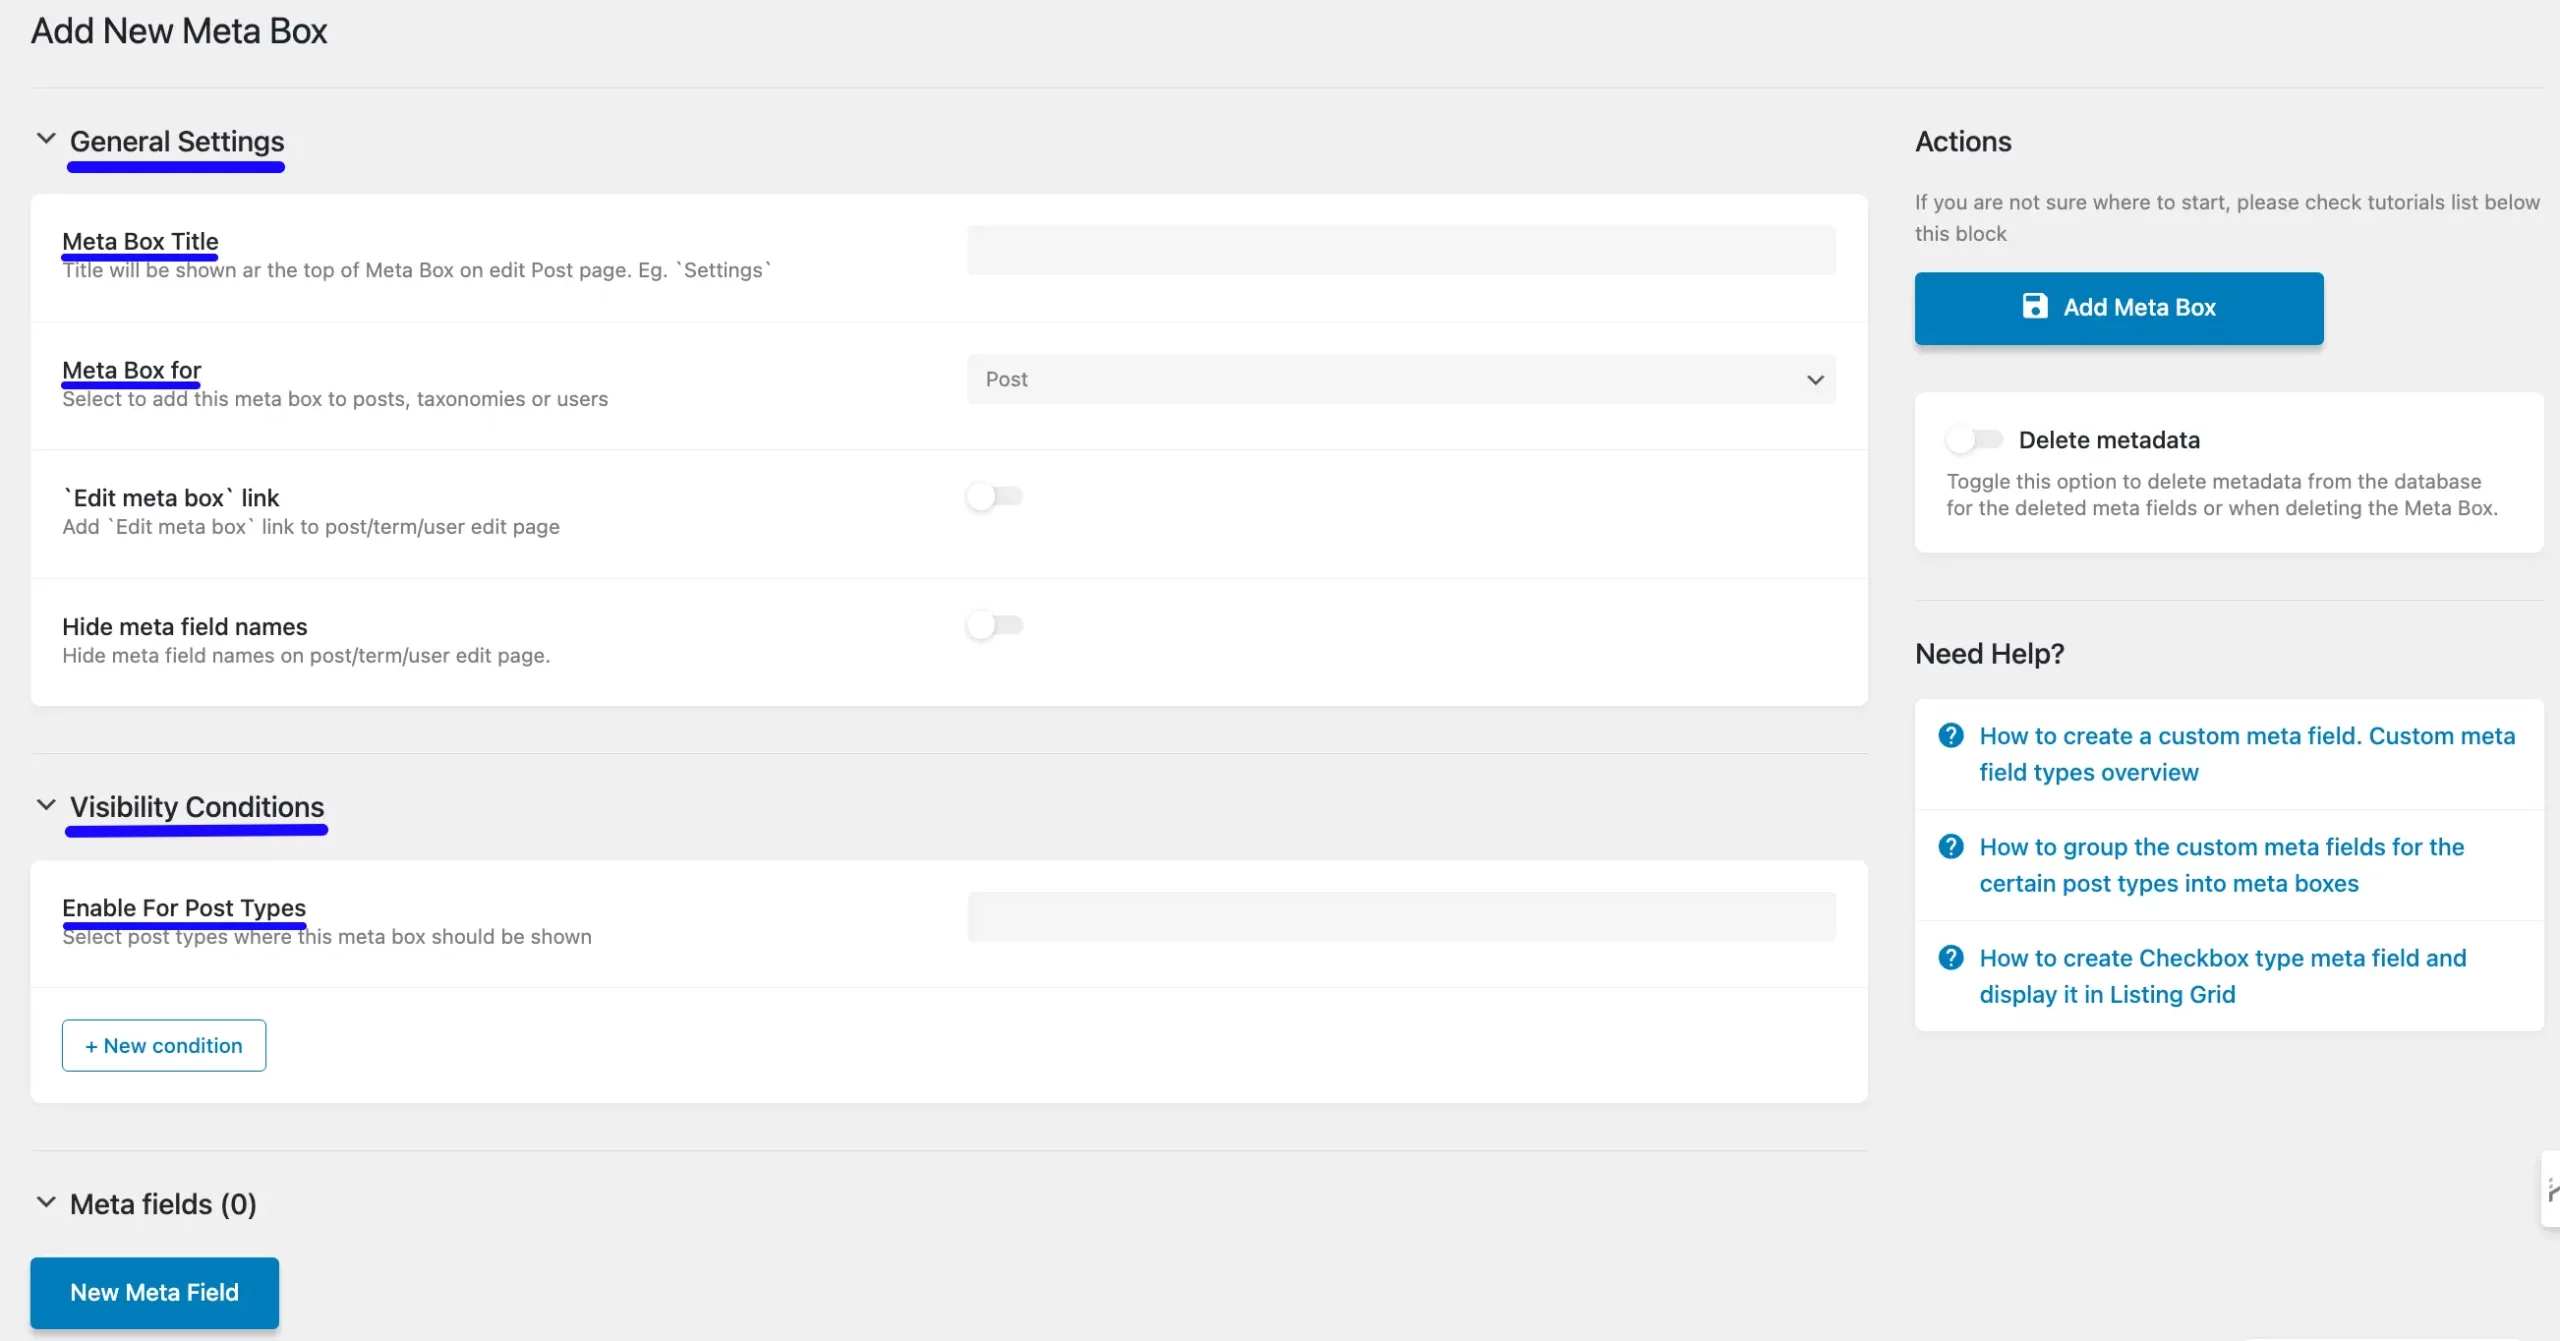
Configure Meta Box Settings #
The Meta Box field settings will appear now. Start by configuring the General Settings, where you can set the Meta Box Title and Meta Box Type.
Then, under Visibility Conditions, go to Enable for Post Types and select Post to apply the custom fields to your posts.
Create Custom Meta Fields #
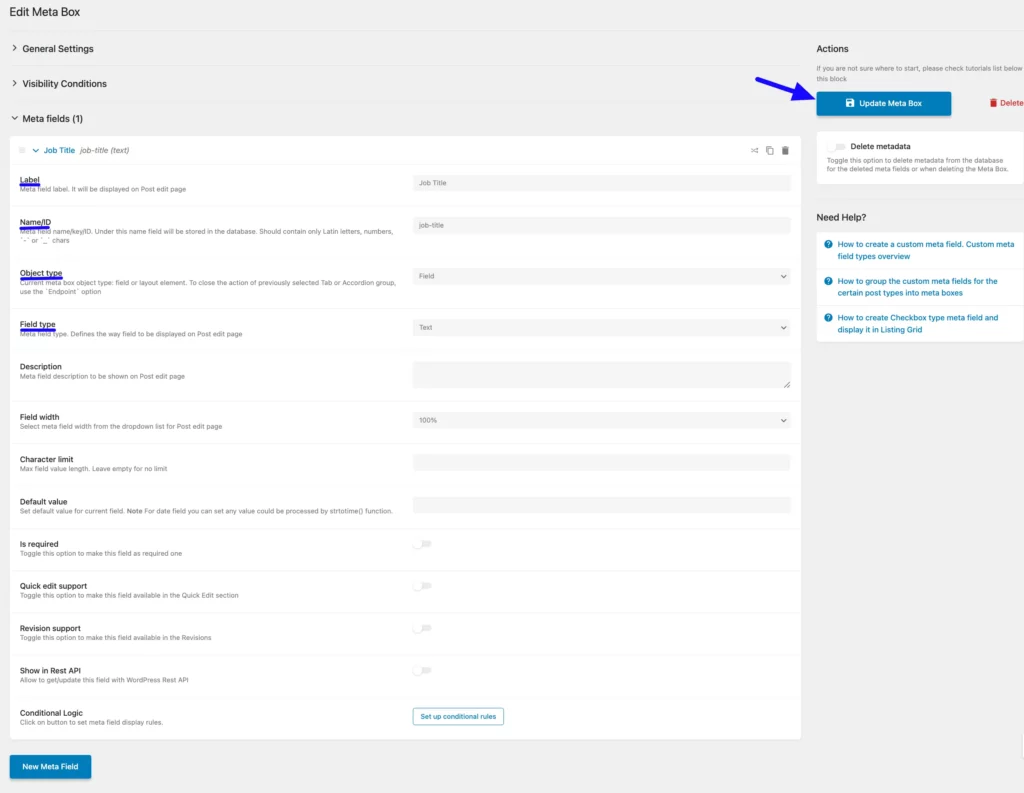
Next, you’ll see the Meta Field settings section. Here, you can create multiple custom meta fields for your post.
In the Custom Meta Field settings, enter the Label Name. The Name ID will be automatically generated based on the Label name. Then, choose the Field Type from the dropdown menu, which can be Text, Number, Date, or any other type depending on your needs.
Once done, click the Update Meta Box button to create your custom meta box field.
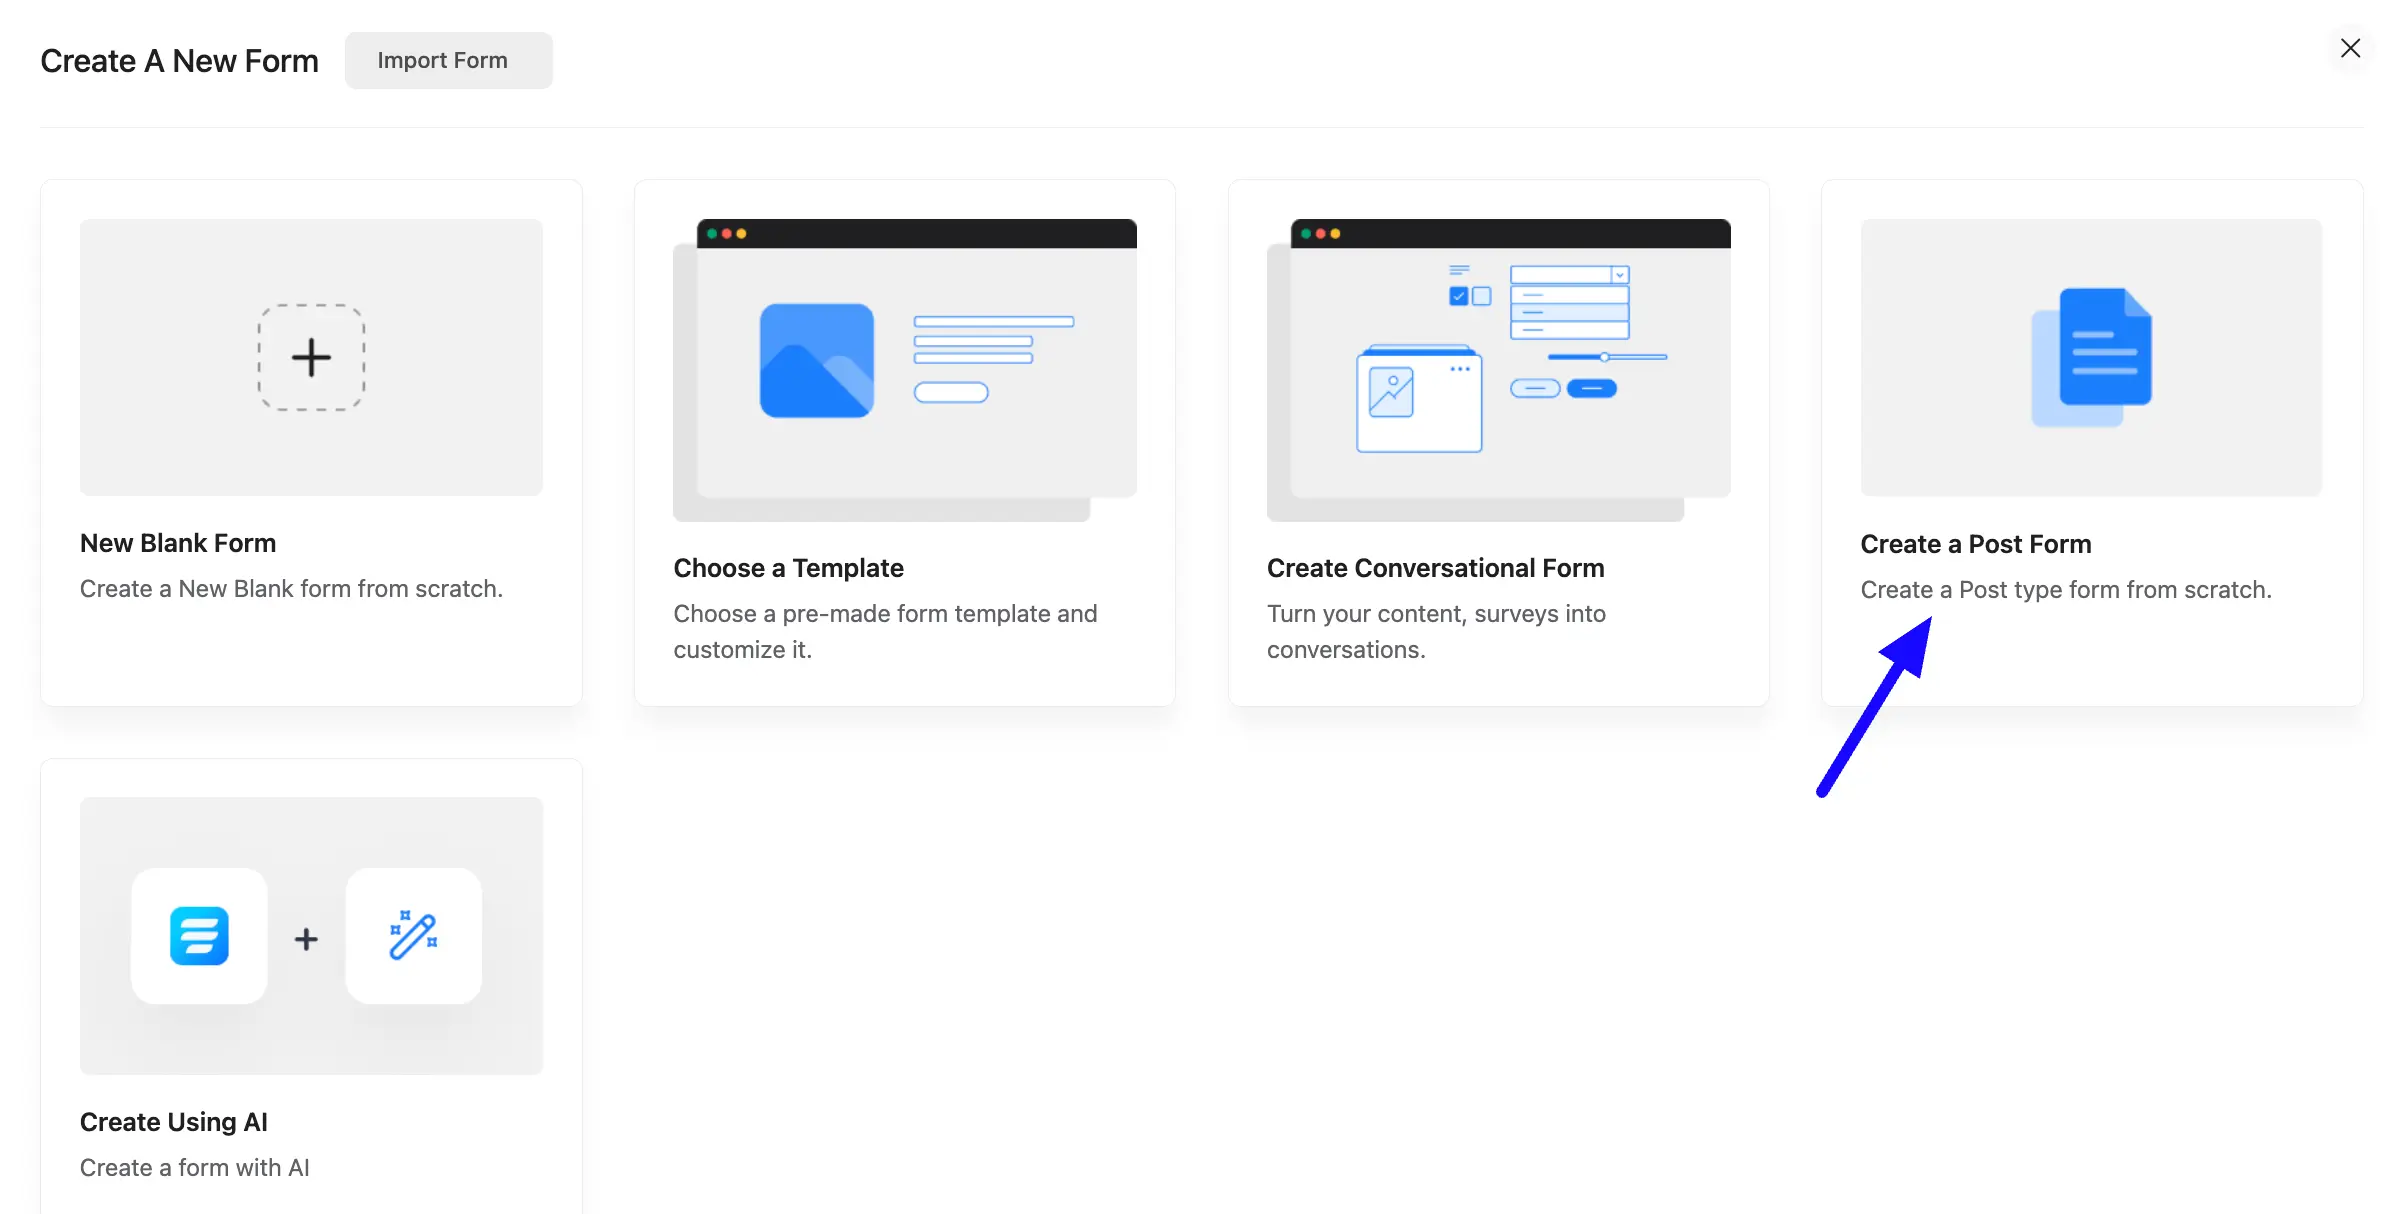
Create a Post Form #
To add this Meta Field to your Fluent Forms Post Form, follow these steps:
First, navigate to Forms from the Fluent Forms Navbar, then click the Add New Form button.

A popup will arrive. Now select Create a Post Form from here.
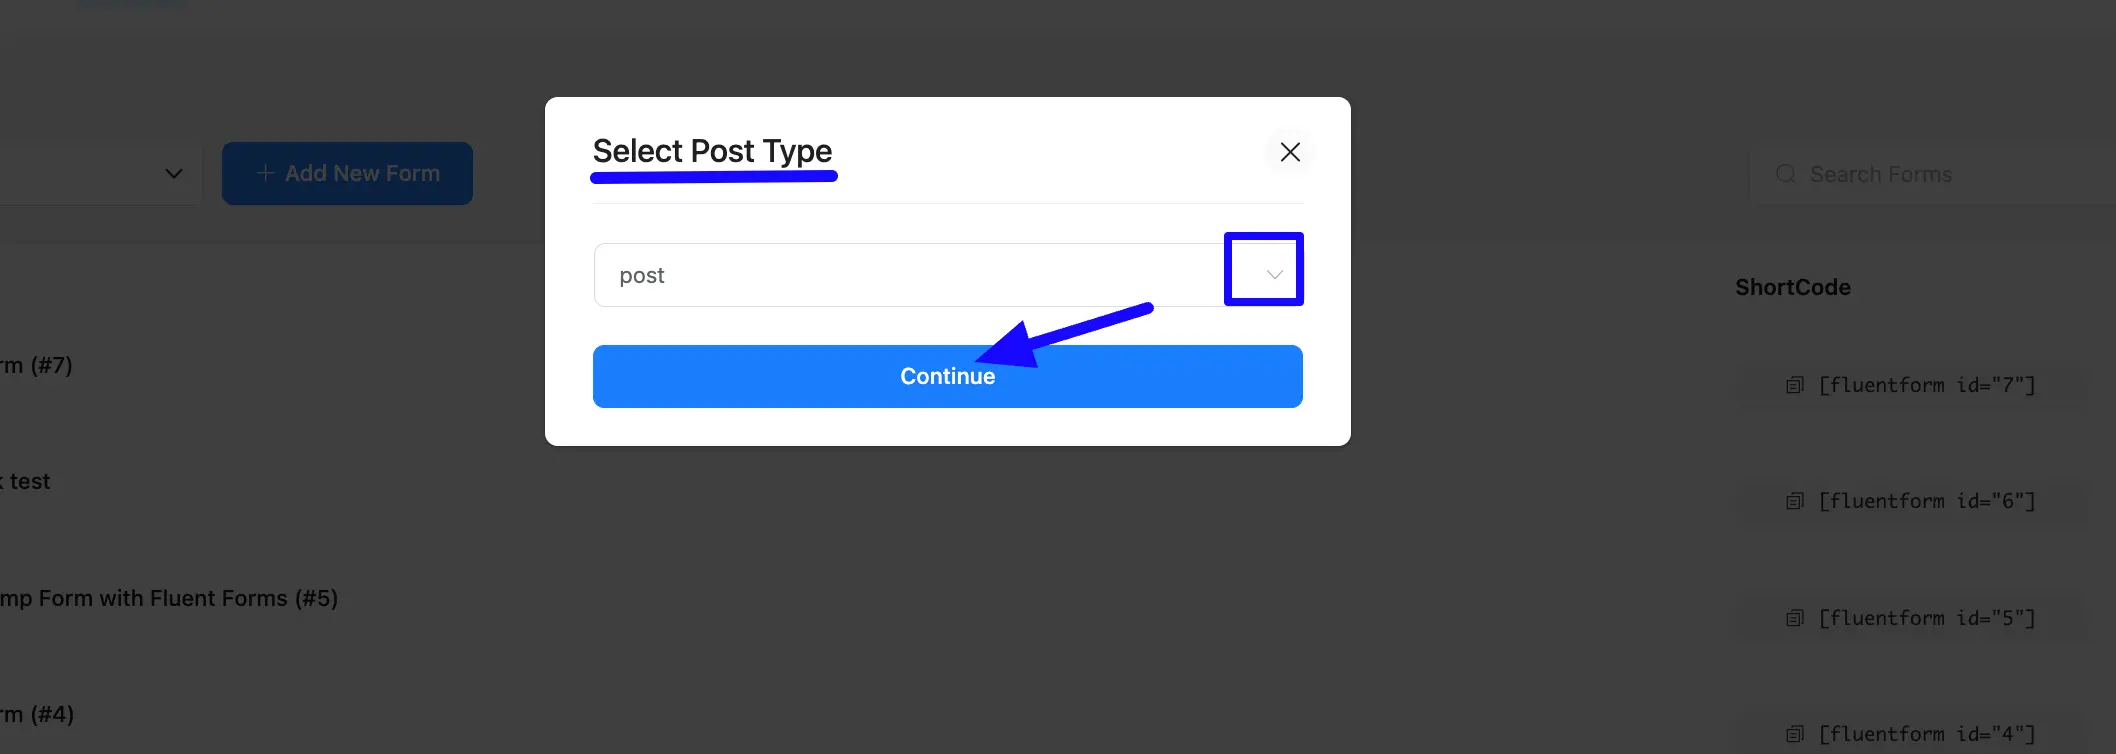
A new popup will also appear here. Now select Post Types from the dropdown options. After that, click the Continue button to proceed to the next step.
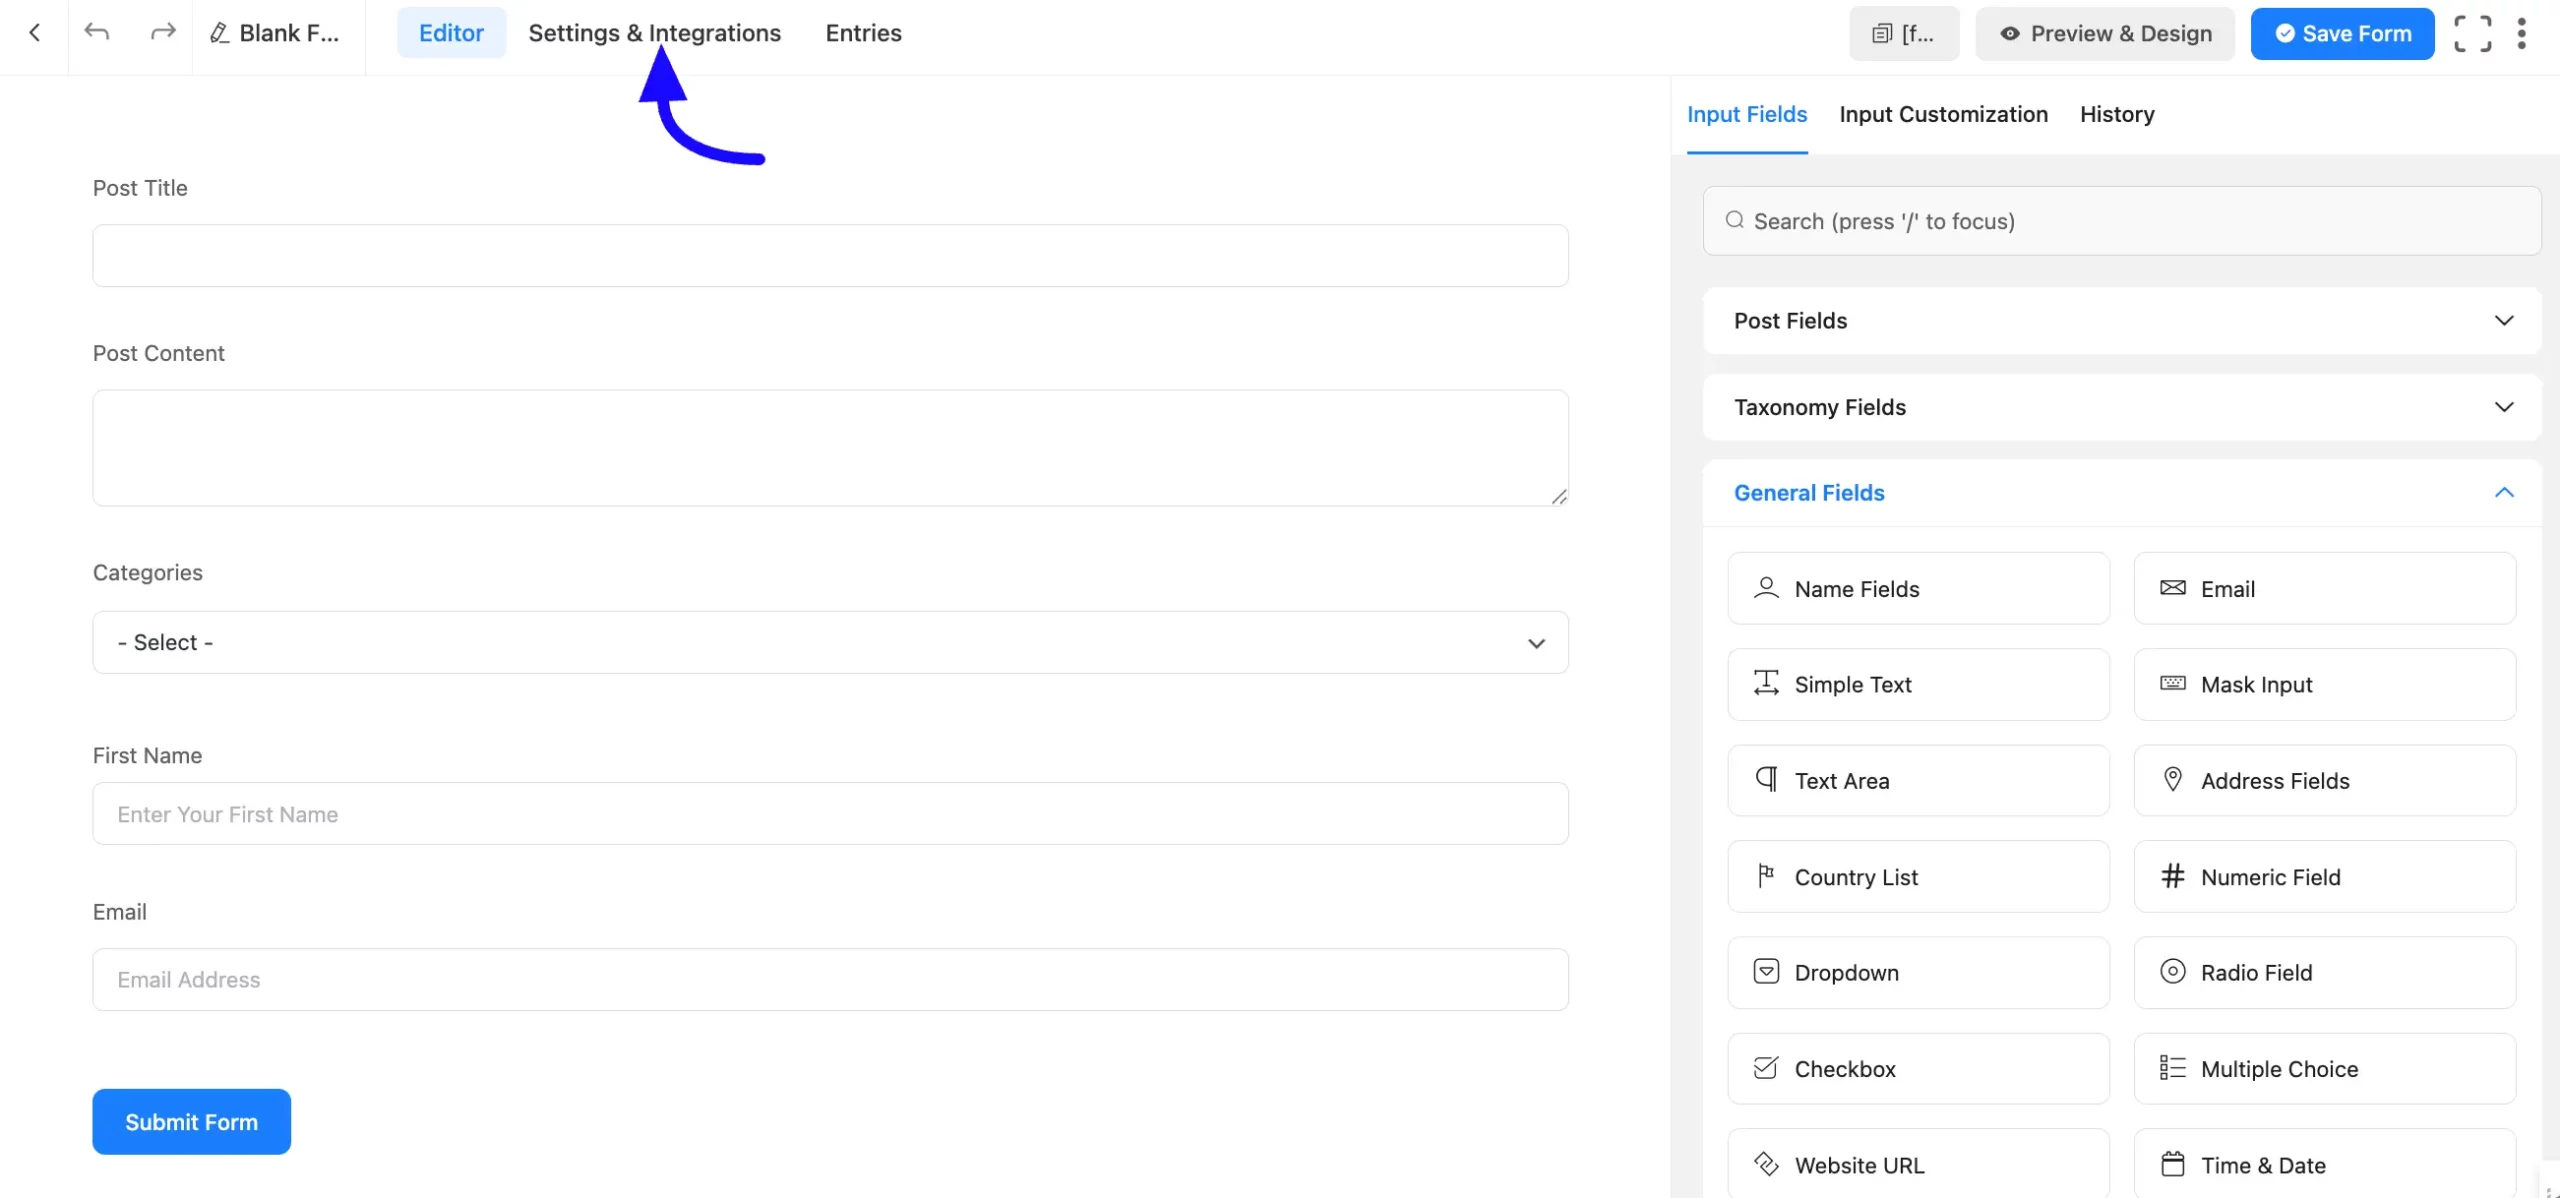
In the Form Editor, edit your Post form as you desire and click the Settings & Integration tab.
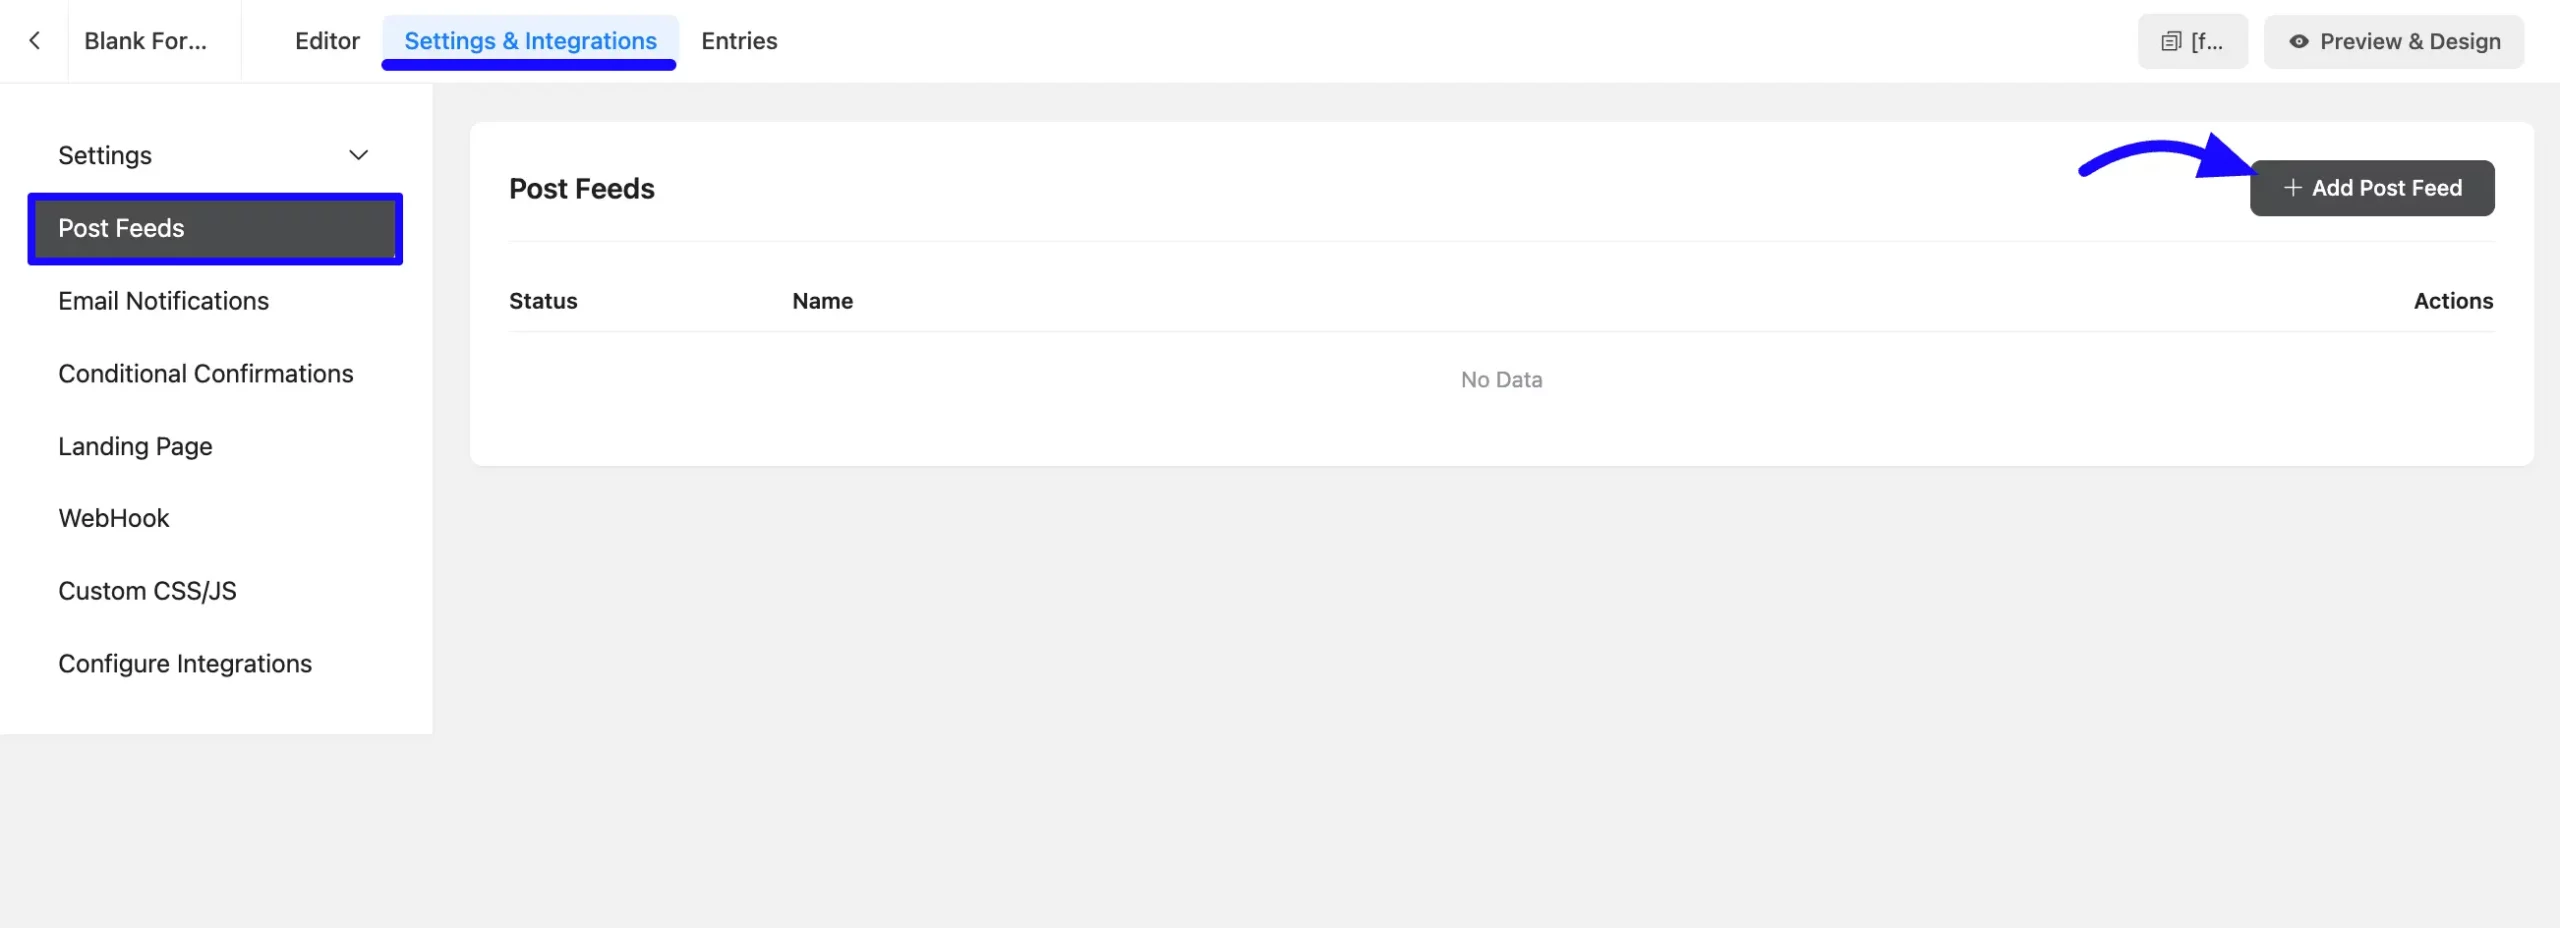
Now, From the left sidebar of Settings & Integration select the Post Feed and then click on the Add Post Feed button.
Set Up the Meta Mapping #
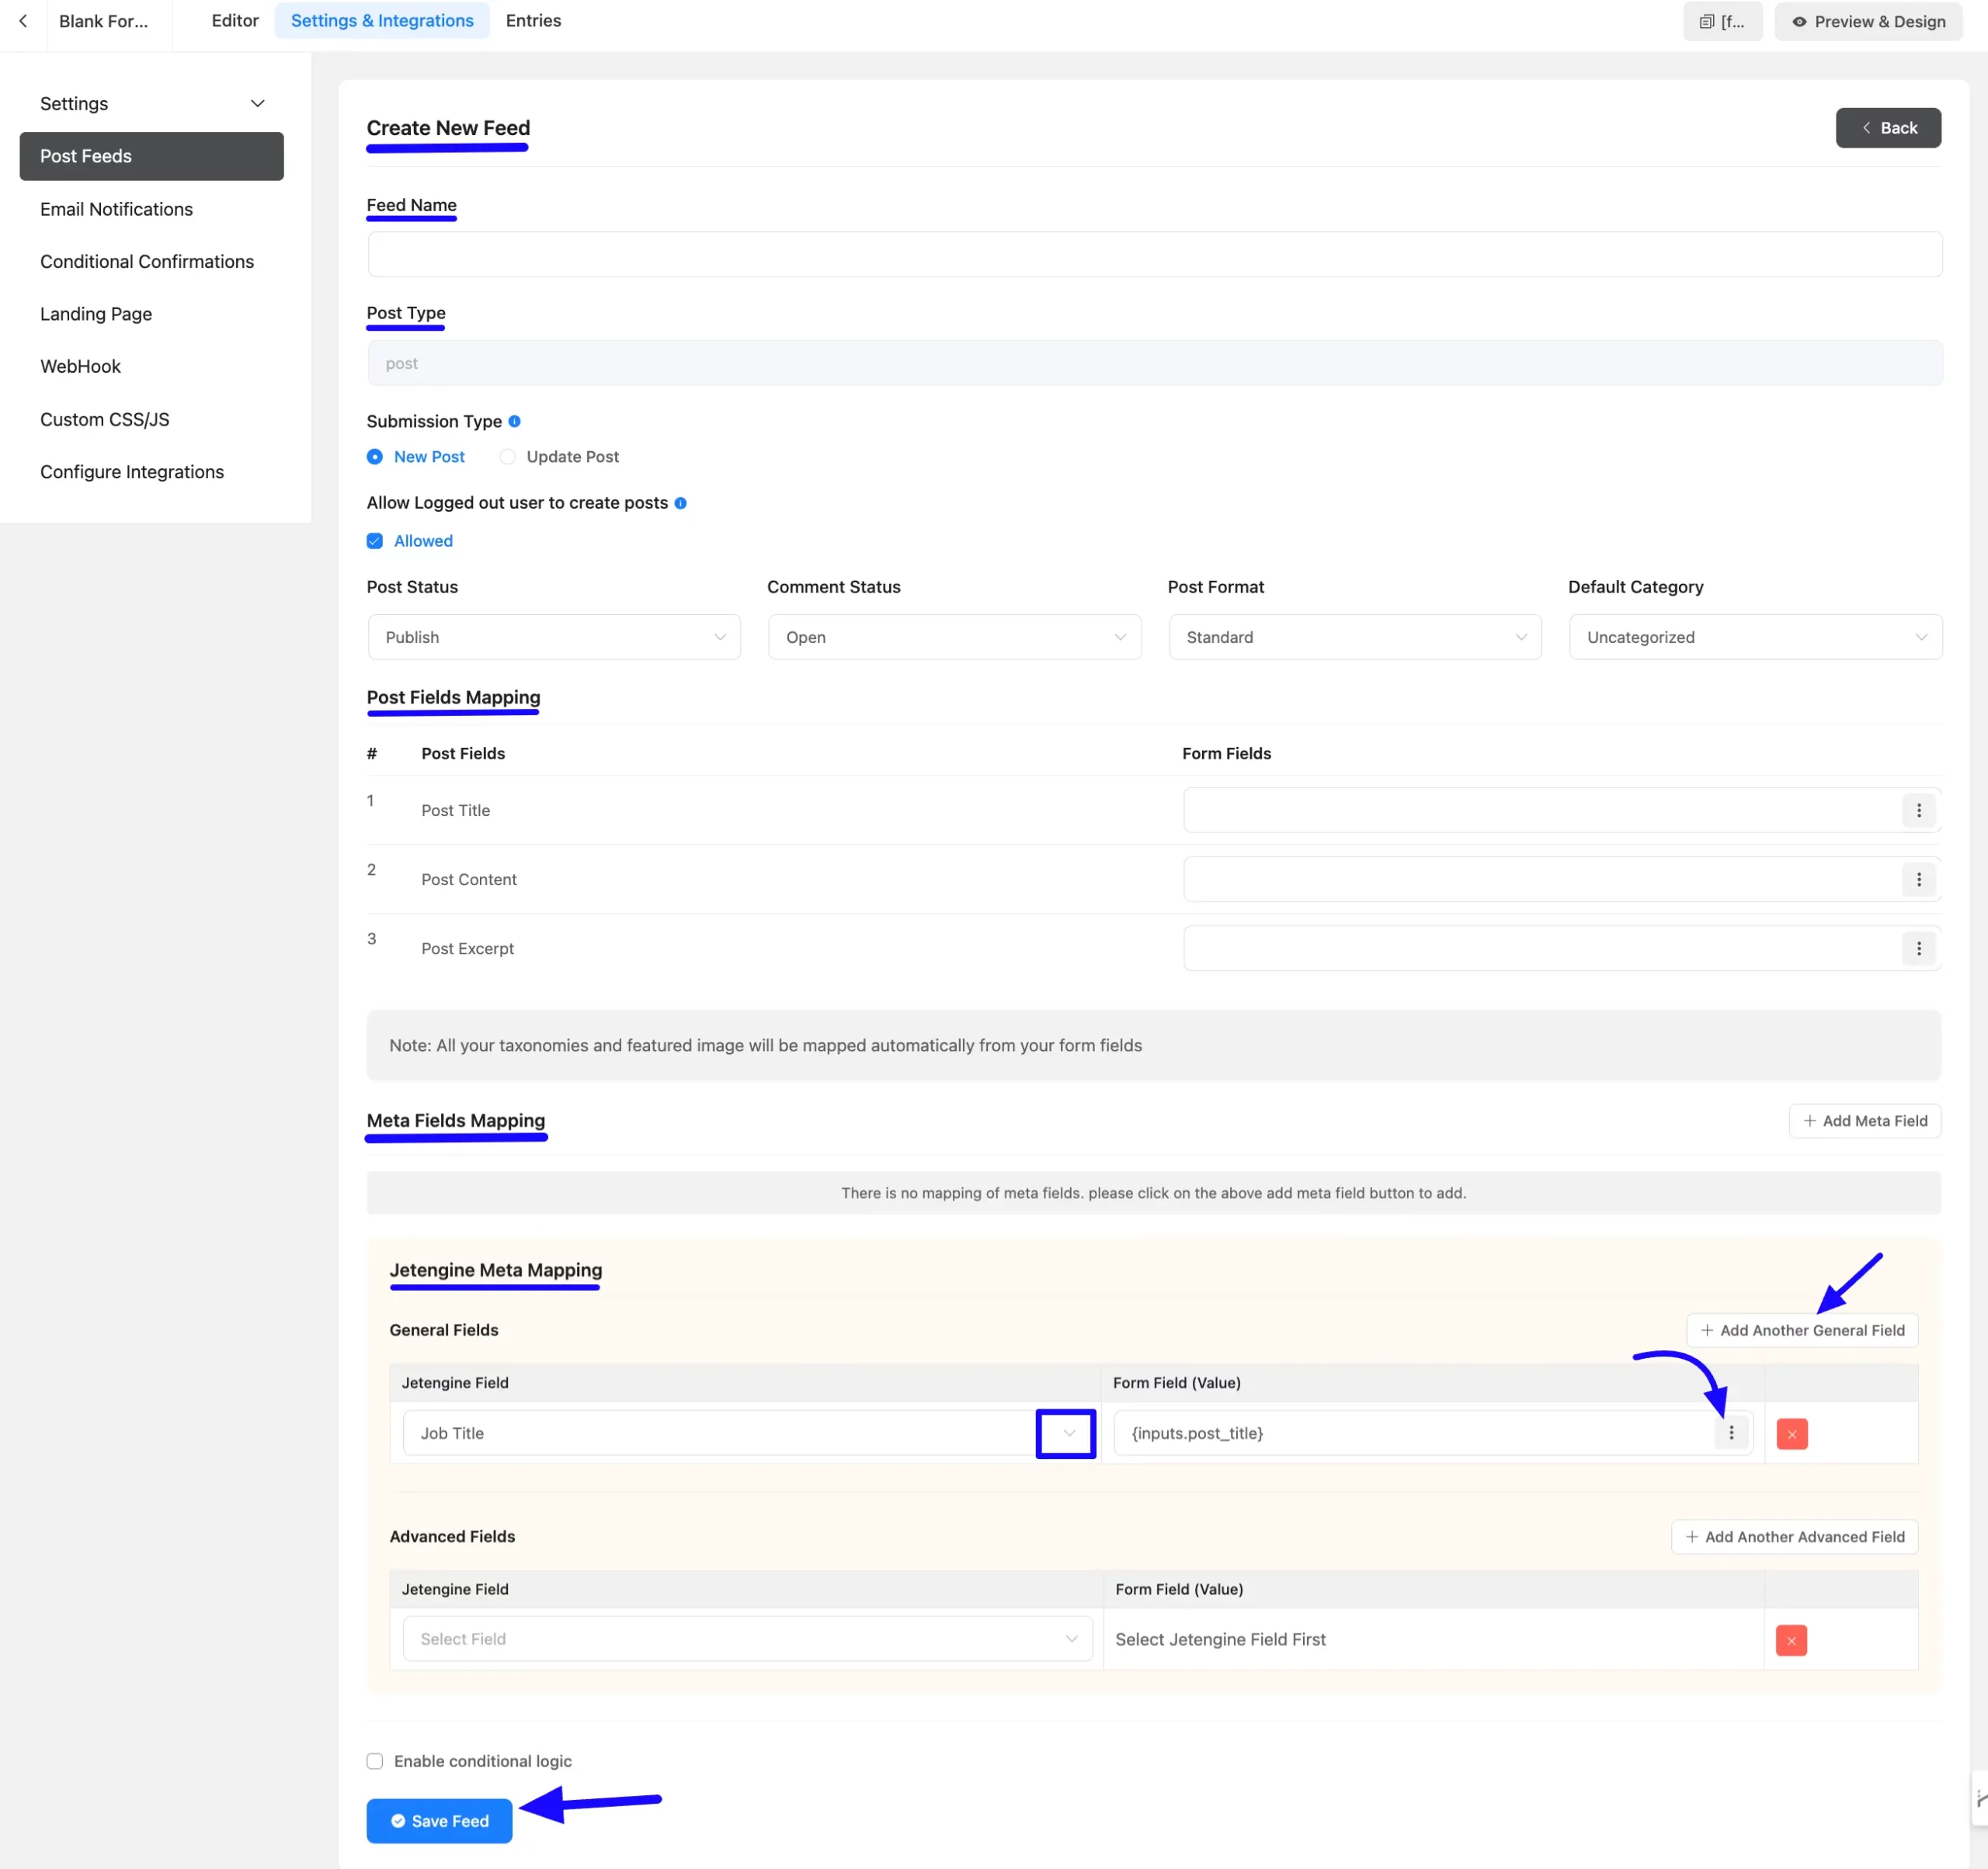
You’ll now see the Create New Feed page, where you can manage and map your custom meta field feed.
Start by giving your Feed Name. Below that, you’ll find additional settings for your Feed.
In the JetEngine Meta Mapping section, map your JetEngine fields to the corresponding Fluent Forms fields. A three-dot button is available here to insert shortcodes to map your Fluent Forms fields.
For example, if you want to populate the ‘Job Title’ custom field with data from the ‘Post Title’ form field, select the ‘input.post.title’ shortcode in the Form Field Value.
If you need to add more field then click the Add Another General Field button. Now click the Save Feed button to save your settings and submit a test post form.
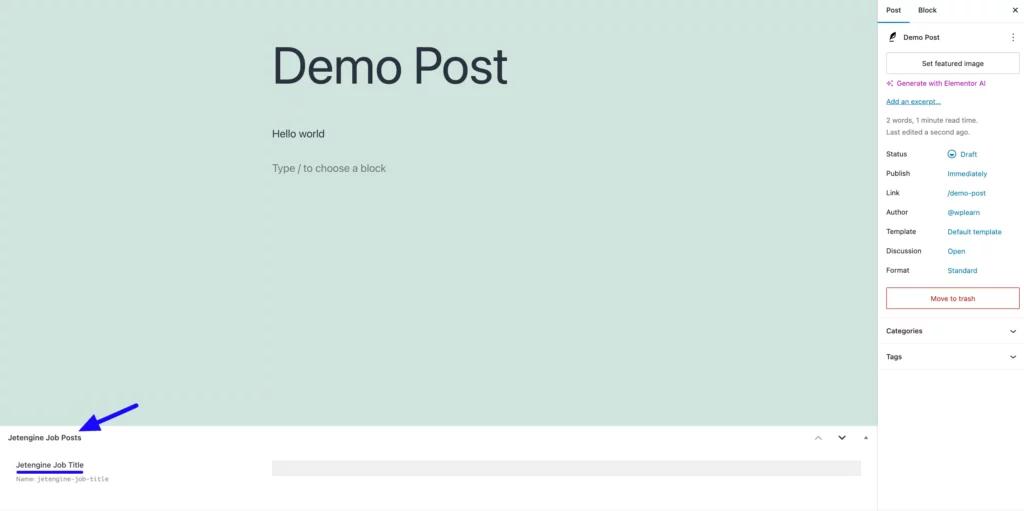
After submitting the post form you will see a custom meta field in your post like this.
Congrats! You have successfully created and mapped JetEngine Custom Fields with Fluent Forms Post Forms.
If you need further assistance, feel free to contact our support team.


