Authorize.net is a global payment gateway that gives you Visa, credit card, and electronic payment services. With Fluent Forms, you can easily credit and debit your online payment.
Remember, Authorize.Net Integration is a Premium Feature of the Fluent Forms Plugin. So, you need the Fluent Forms Pro plugin to integrate this.
Enable Authorize.net Payment Method #
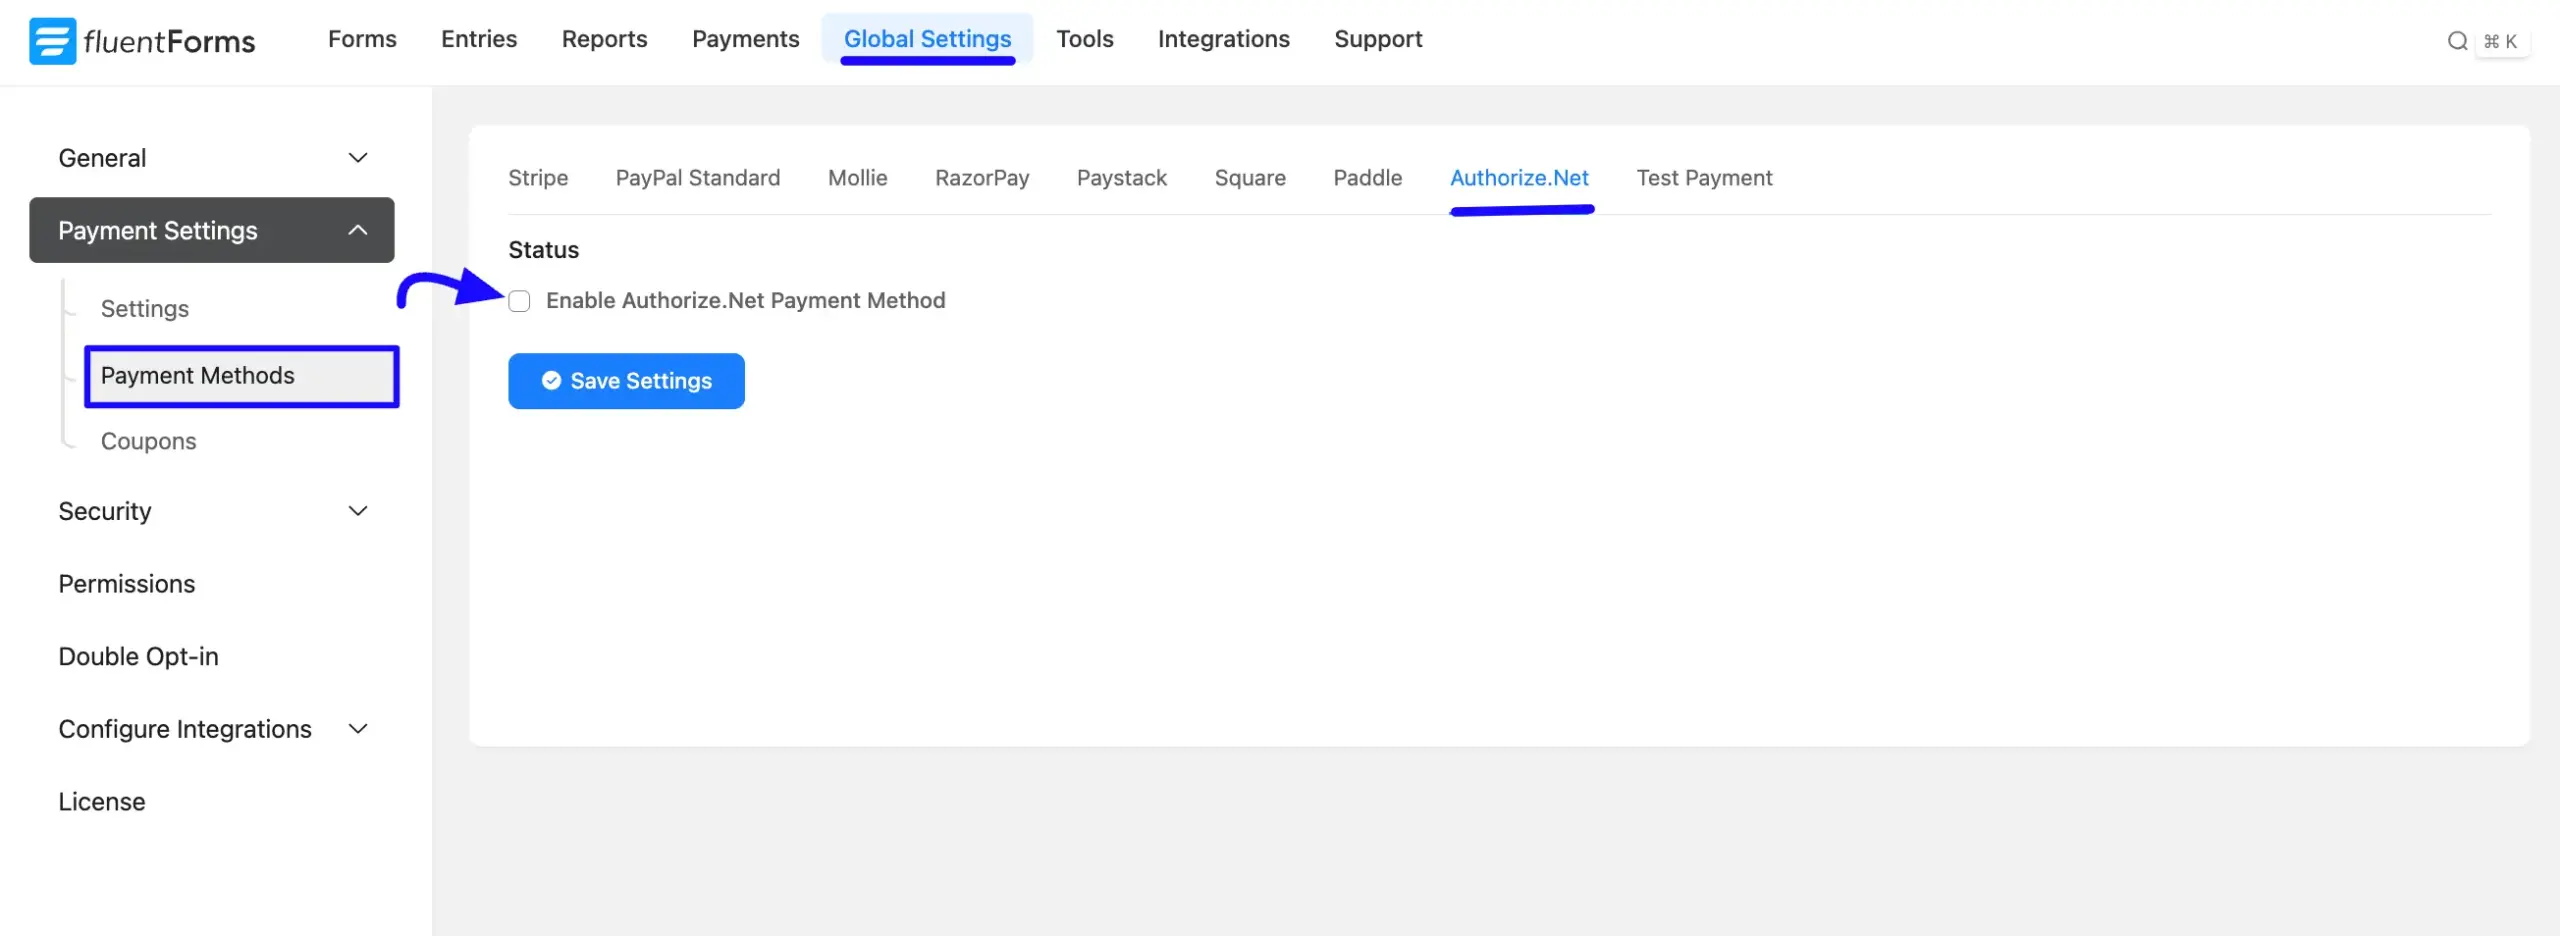
First, go to Global Settings from the Fluent Forms Navbar, open the Payment tab from the left sidebar, and click the Payment Methods option.
Now, go to Authorize.Net in the top navbar and click Enable Authorize.Net Payment Method. The Authorize.Net Payment Method will be enabled globally for all forms.
Configure Authorize.Net with Fluent Forms #
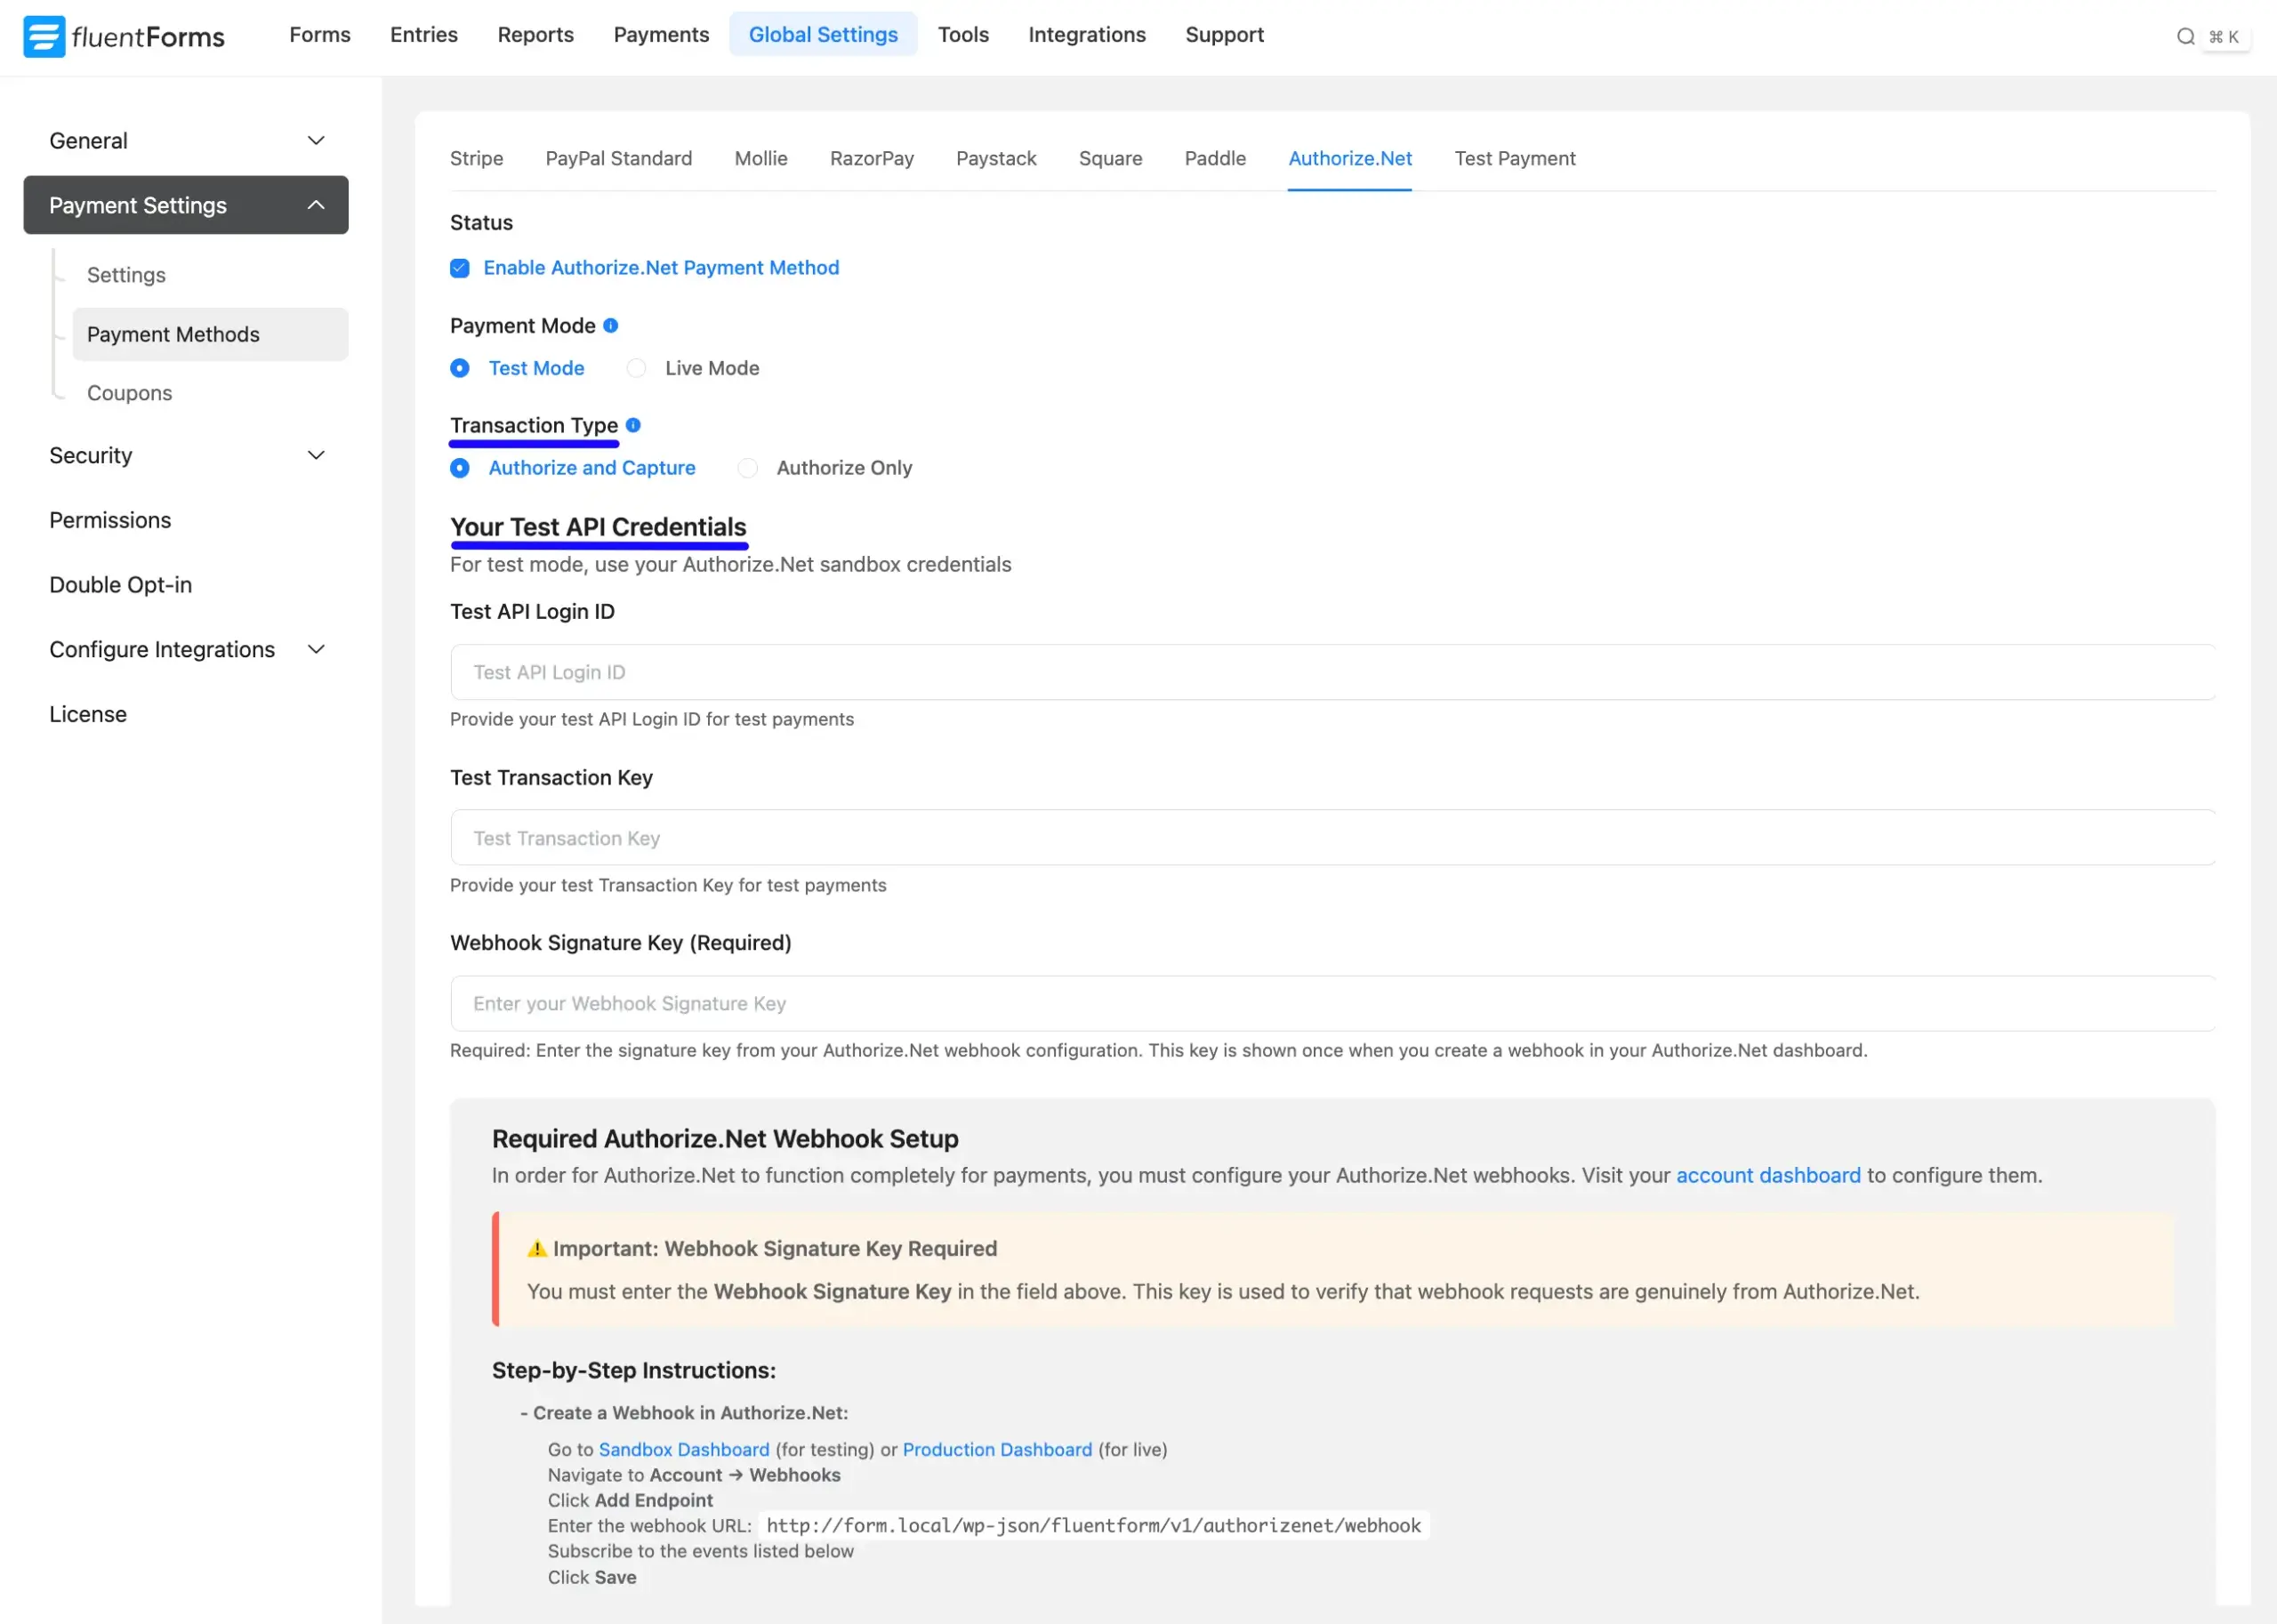
Once you enable Authorize.Net, all the required settings will appear to configure Authorize.Net with Fluent Forms.
Before starting the configuration, select a Payment Mode: Test (for test payments) or Live (for real payments). Both options follow the same process; we choose Test Mode.
Then, you need to select Transaction Type, obtain the API Login ID, Transaction key, and Webhook signature key from your Authorize.Net Account.
Also, you need to set up the Authorize.Net Webhook Setup. Copy your website webhook URL from this page for later use.
Get the Credentials #
API Login ID, Transaction Key, and Webhook SignatureKey from the Authorize Account #
To learn how to get all the required API Credentials from your Authorize.net, follow the steps with screenshots below –
Get API Login ID #
First, log in to your Authorize account from here. Once you log in to the Authorize.Net Dashboard, go to the Accounts and API Settings sidebar, and click on this. Here you will find the API login ID. Simply copy the ID for future use.
Get Transaction Key #
Next, you will find the Transaction Key from the dropdown options. To get the transaction key, click the GENERATE NEW TRANSACTION KEY button.
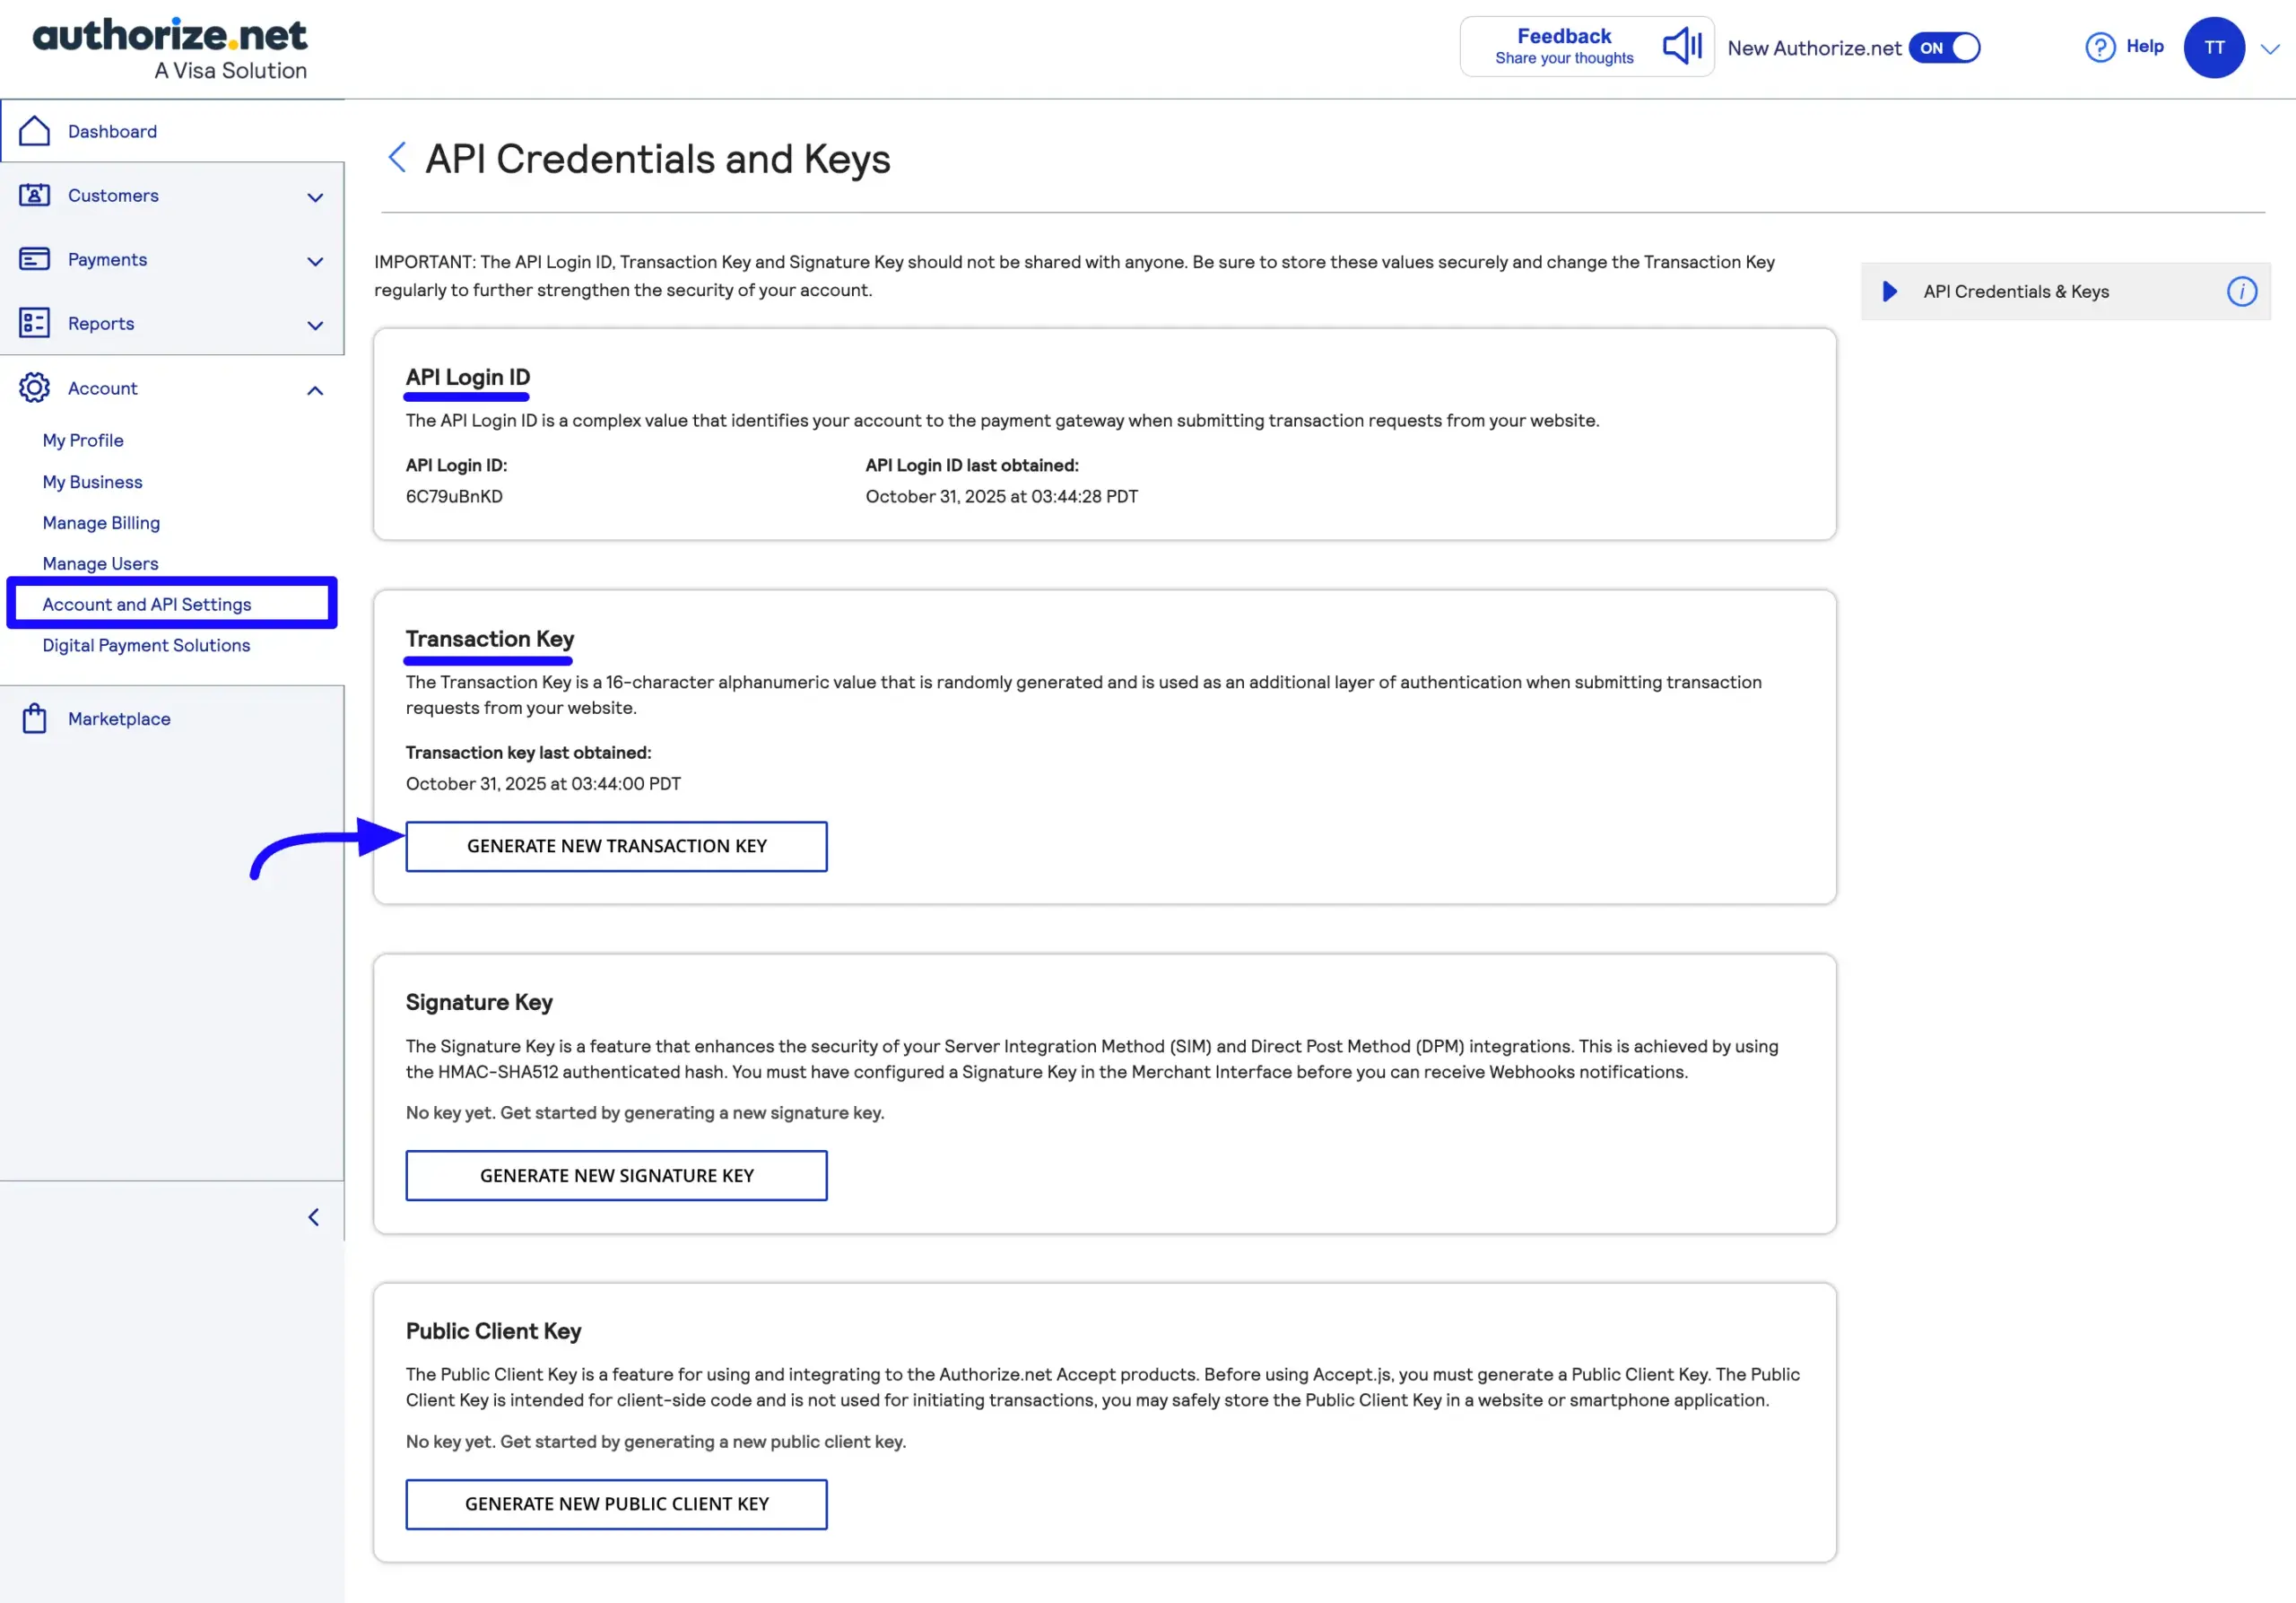
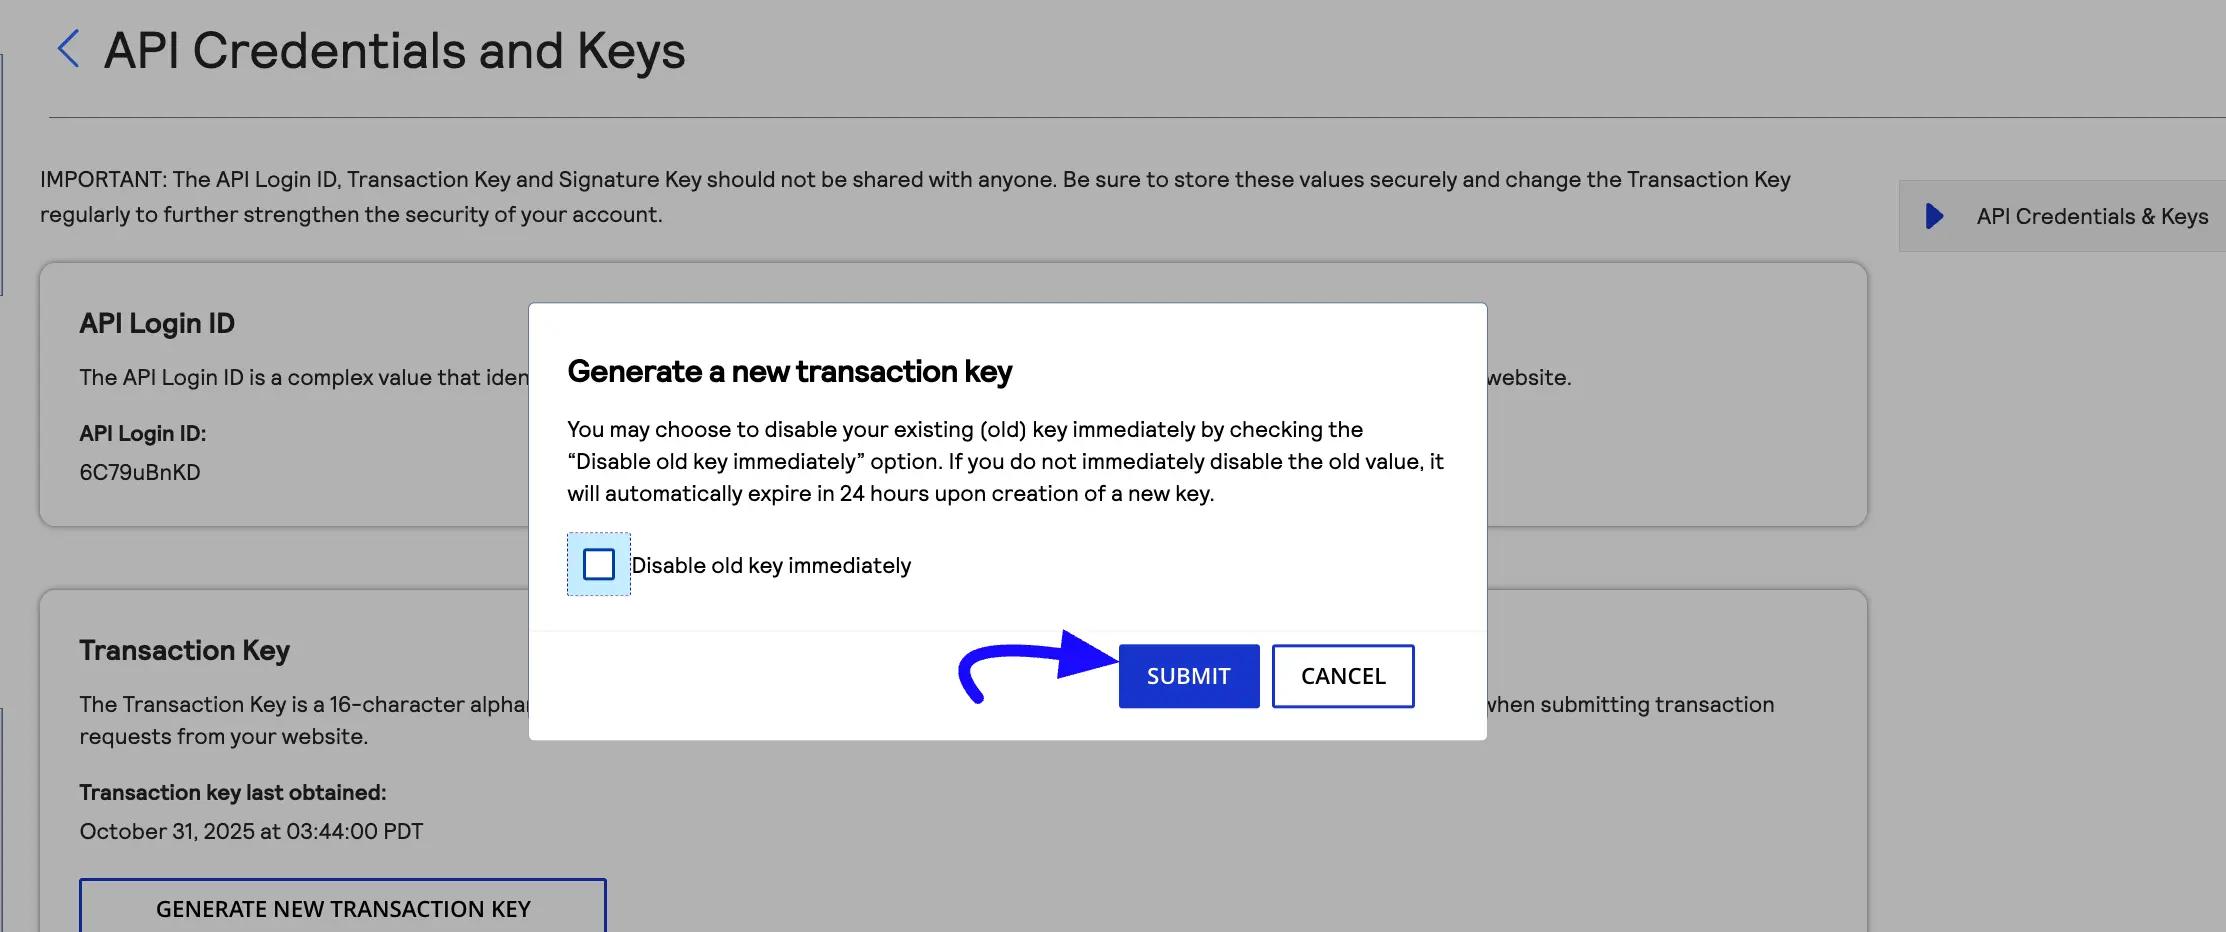
Here appears a new pop-up. Simply, click on the SUBMIT button.
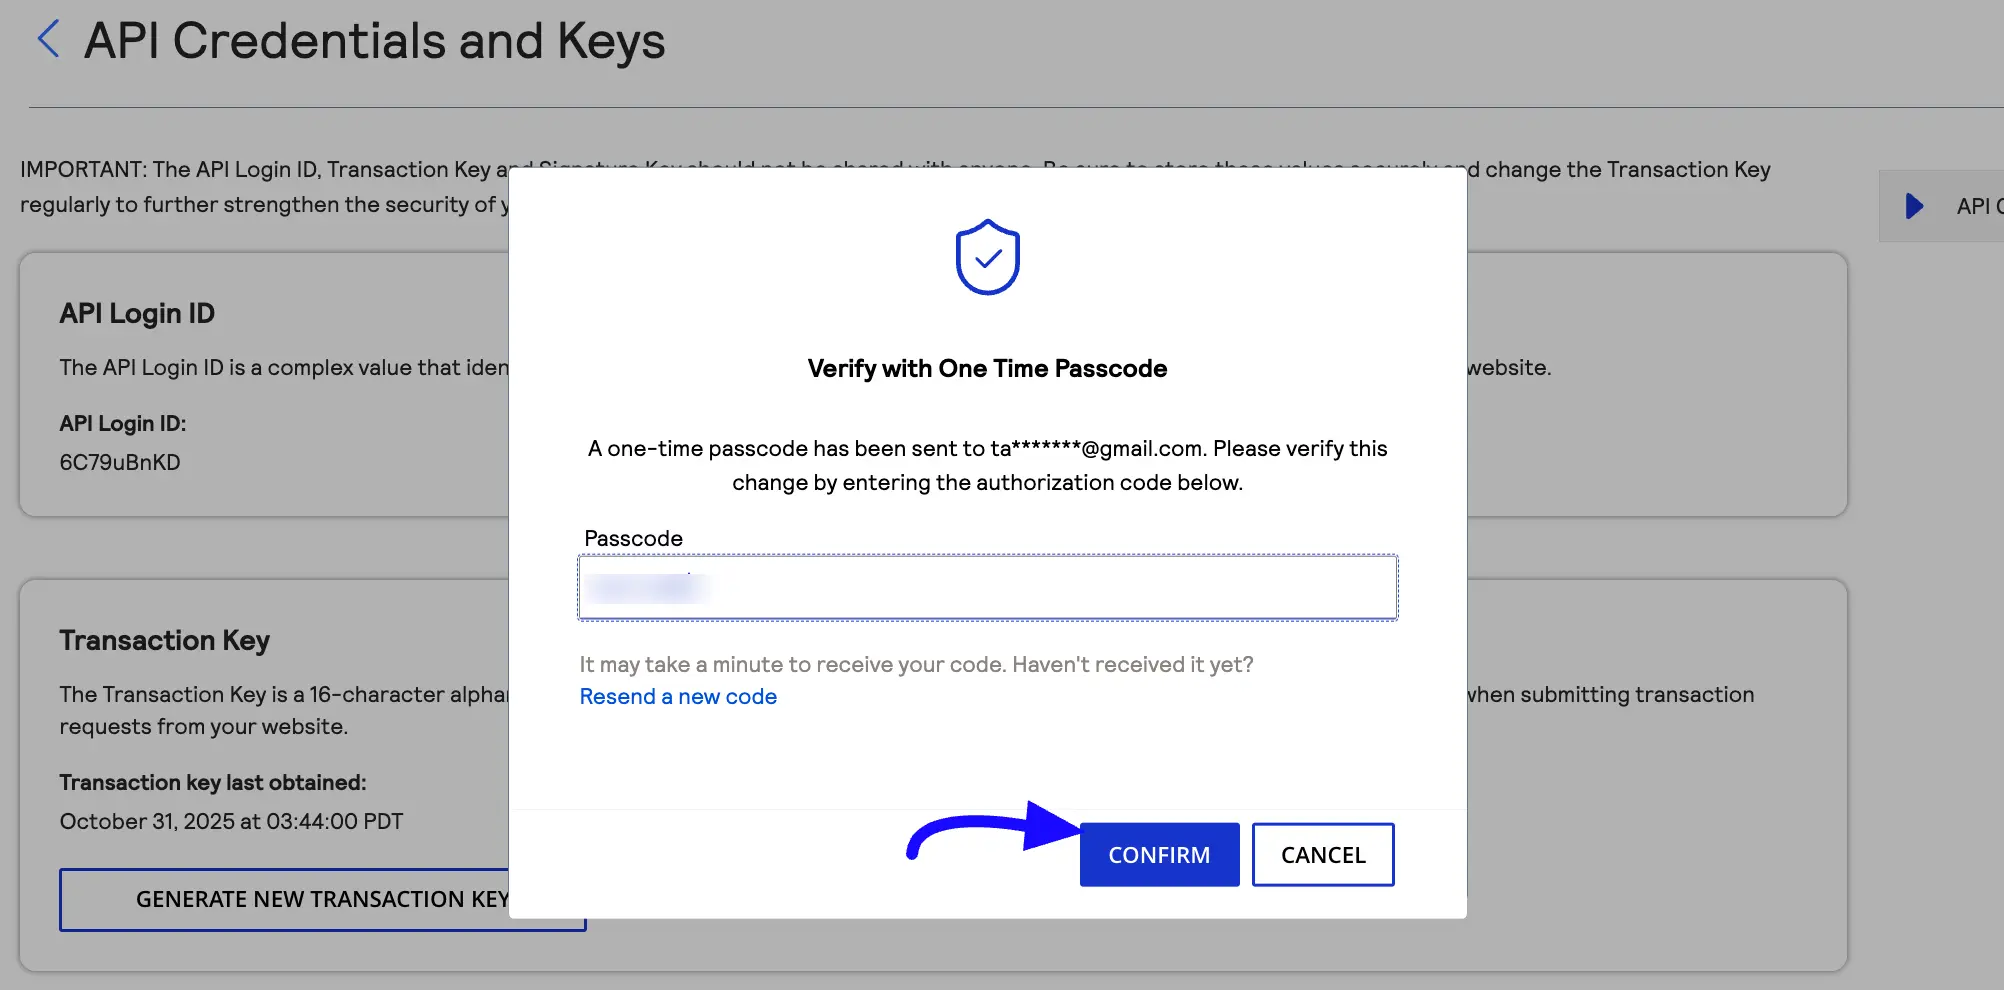
Here, a new pop-up arrives. Enter the passcode from your mail and click the CONFIRM button.
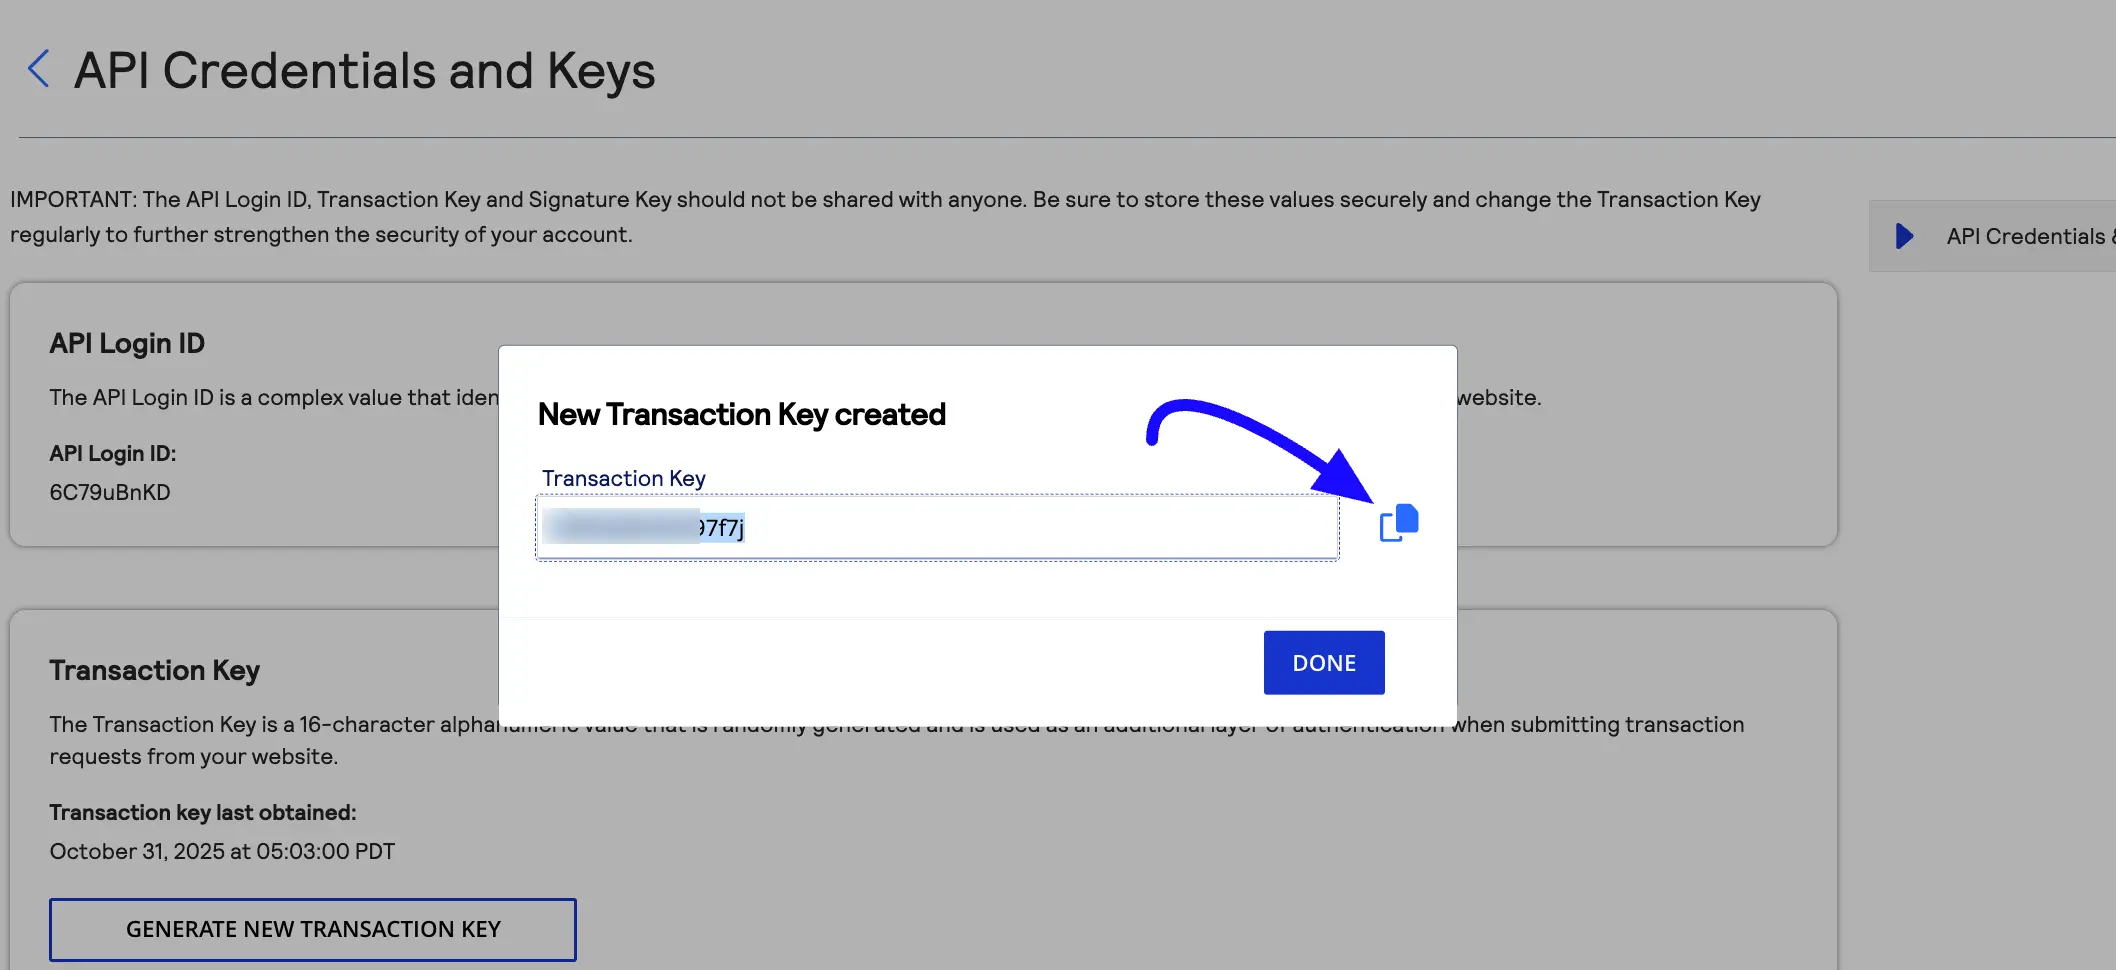
Now your Transaction key has been generated. Copy this for future use.
WebHook Signature Key #
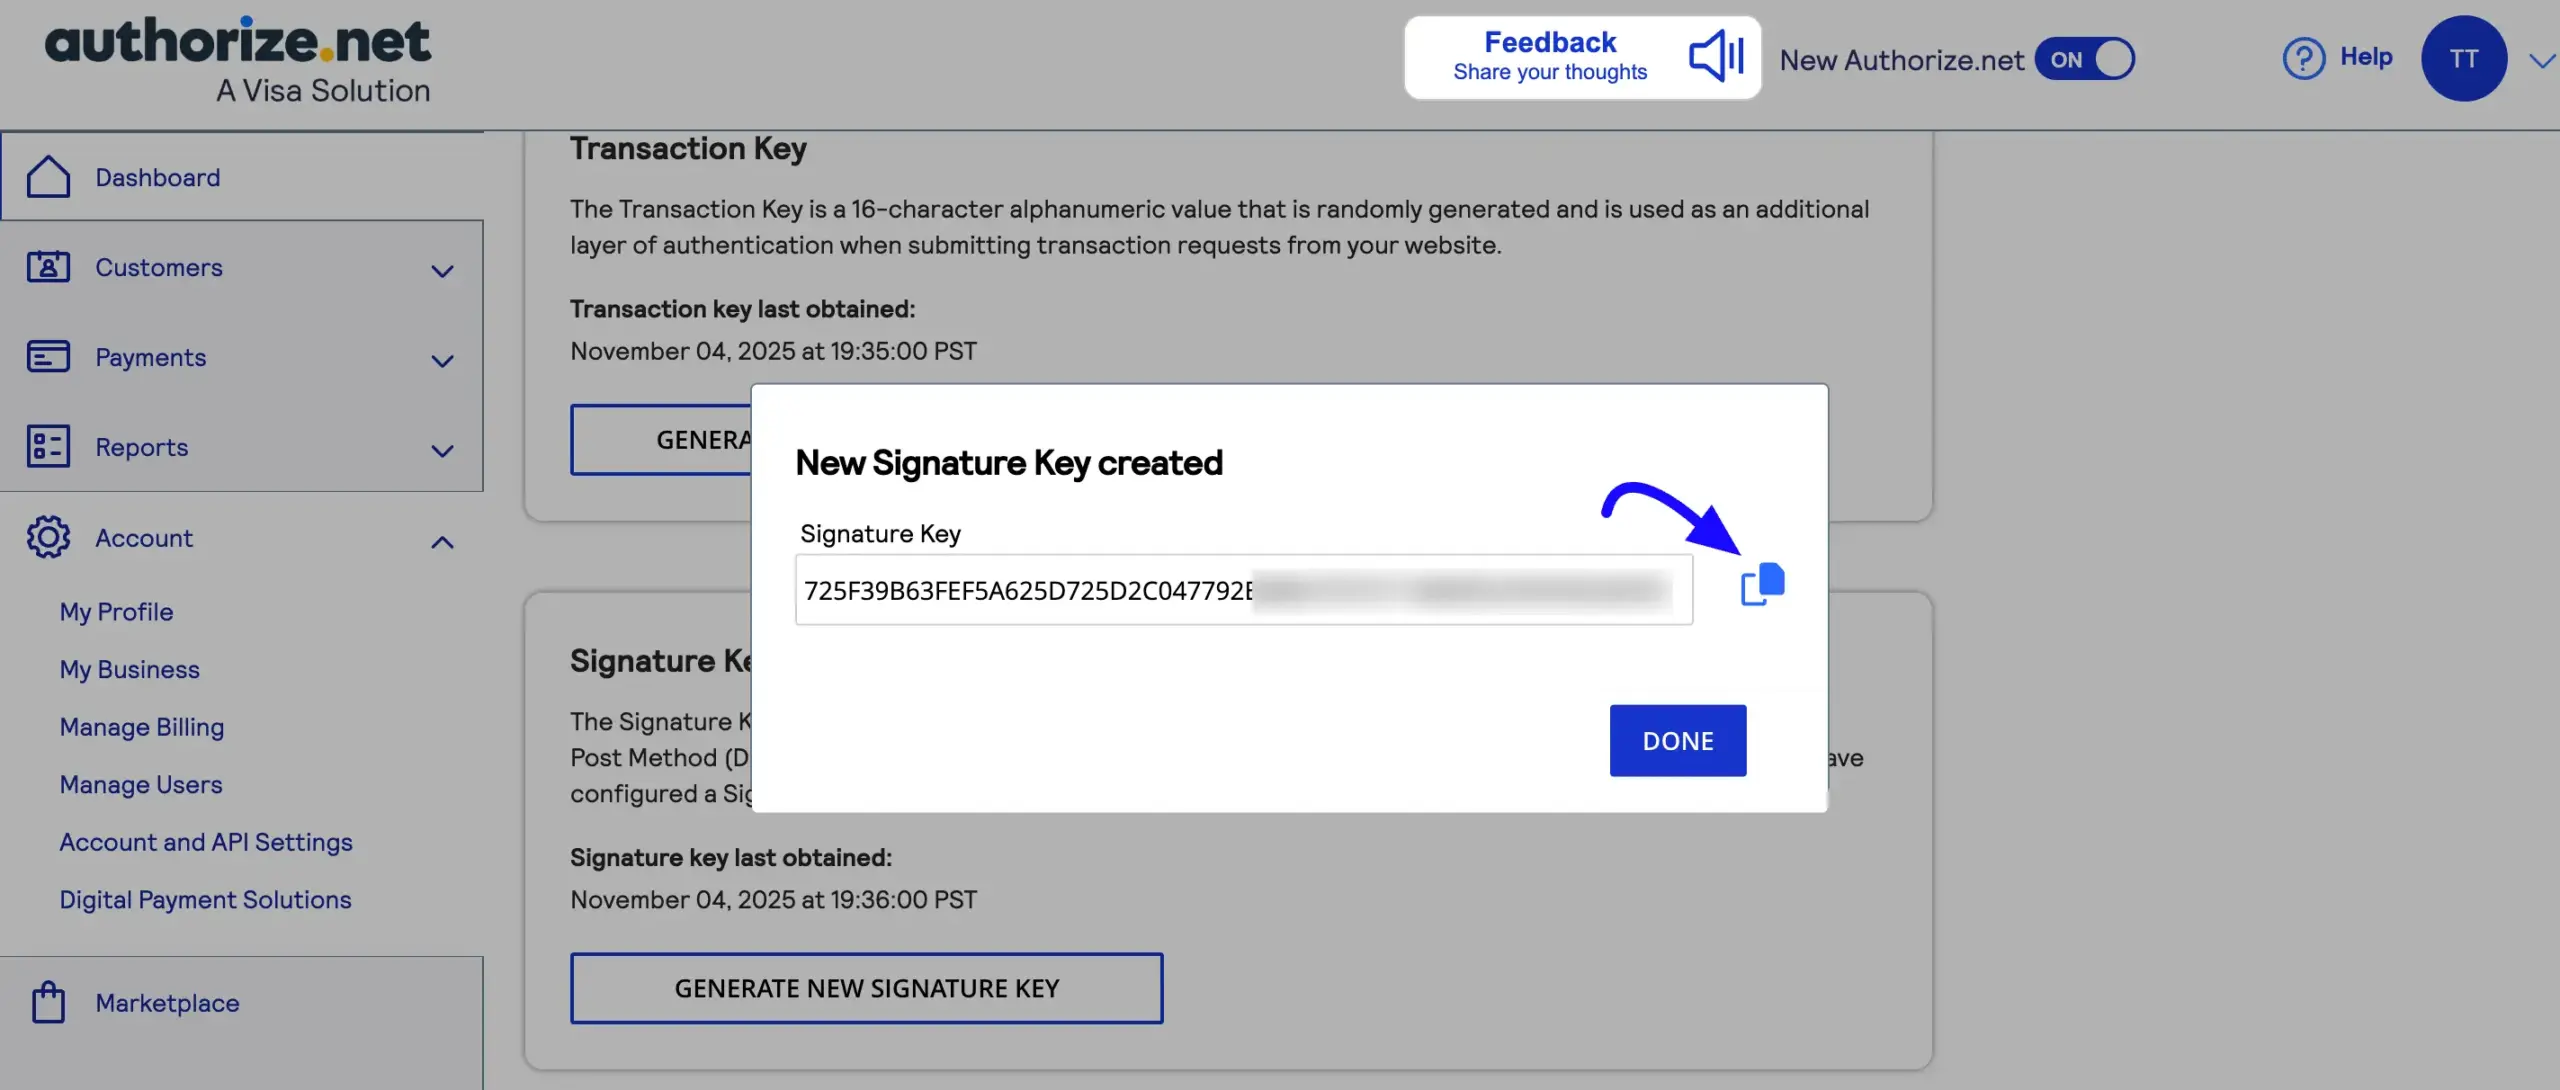
To get the signature key, click on the GENERATE NEW SIGNATURE KEY button. Here appears a new pop-up. Then follow the steps similar to the transaction key, and you’ll get a webhook signature key. Simply copy for future use.
Required Authorize.Net Webhook Events Setup #
For Authorize.Net to function completely for payments, you must configure your Authorize.Net webhooks.
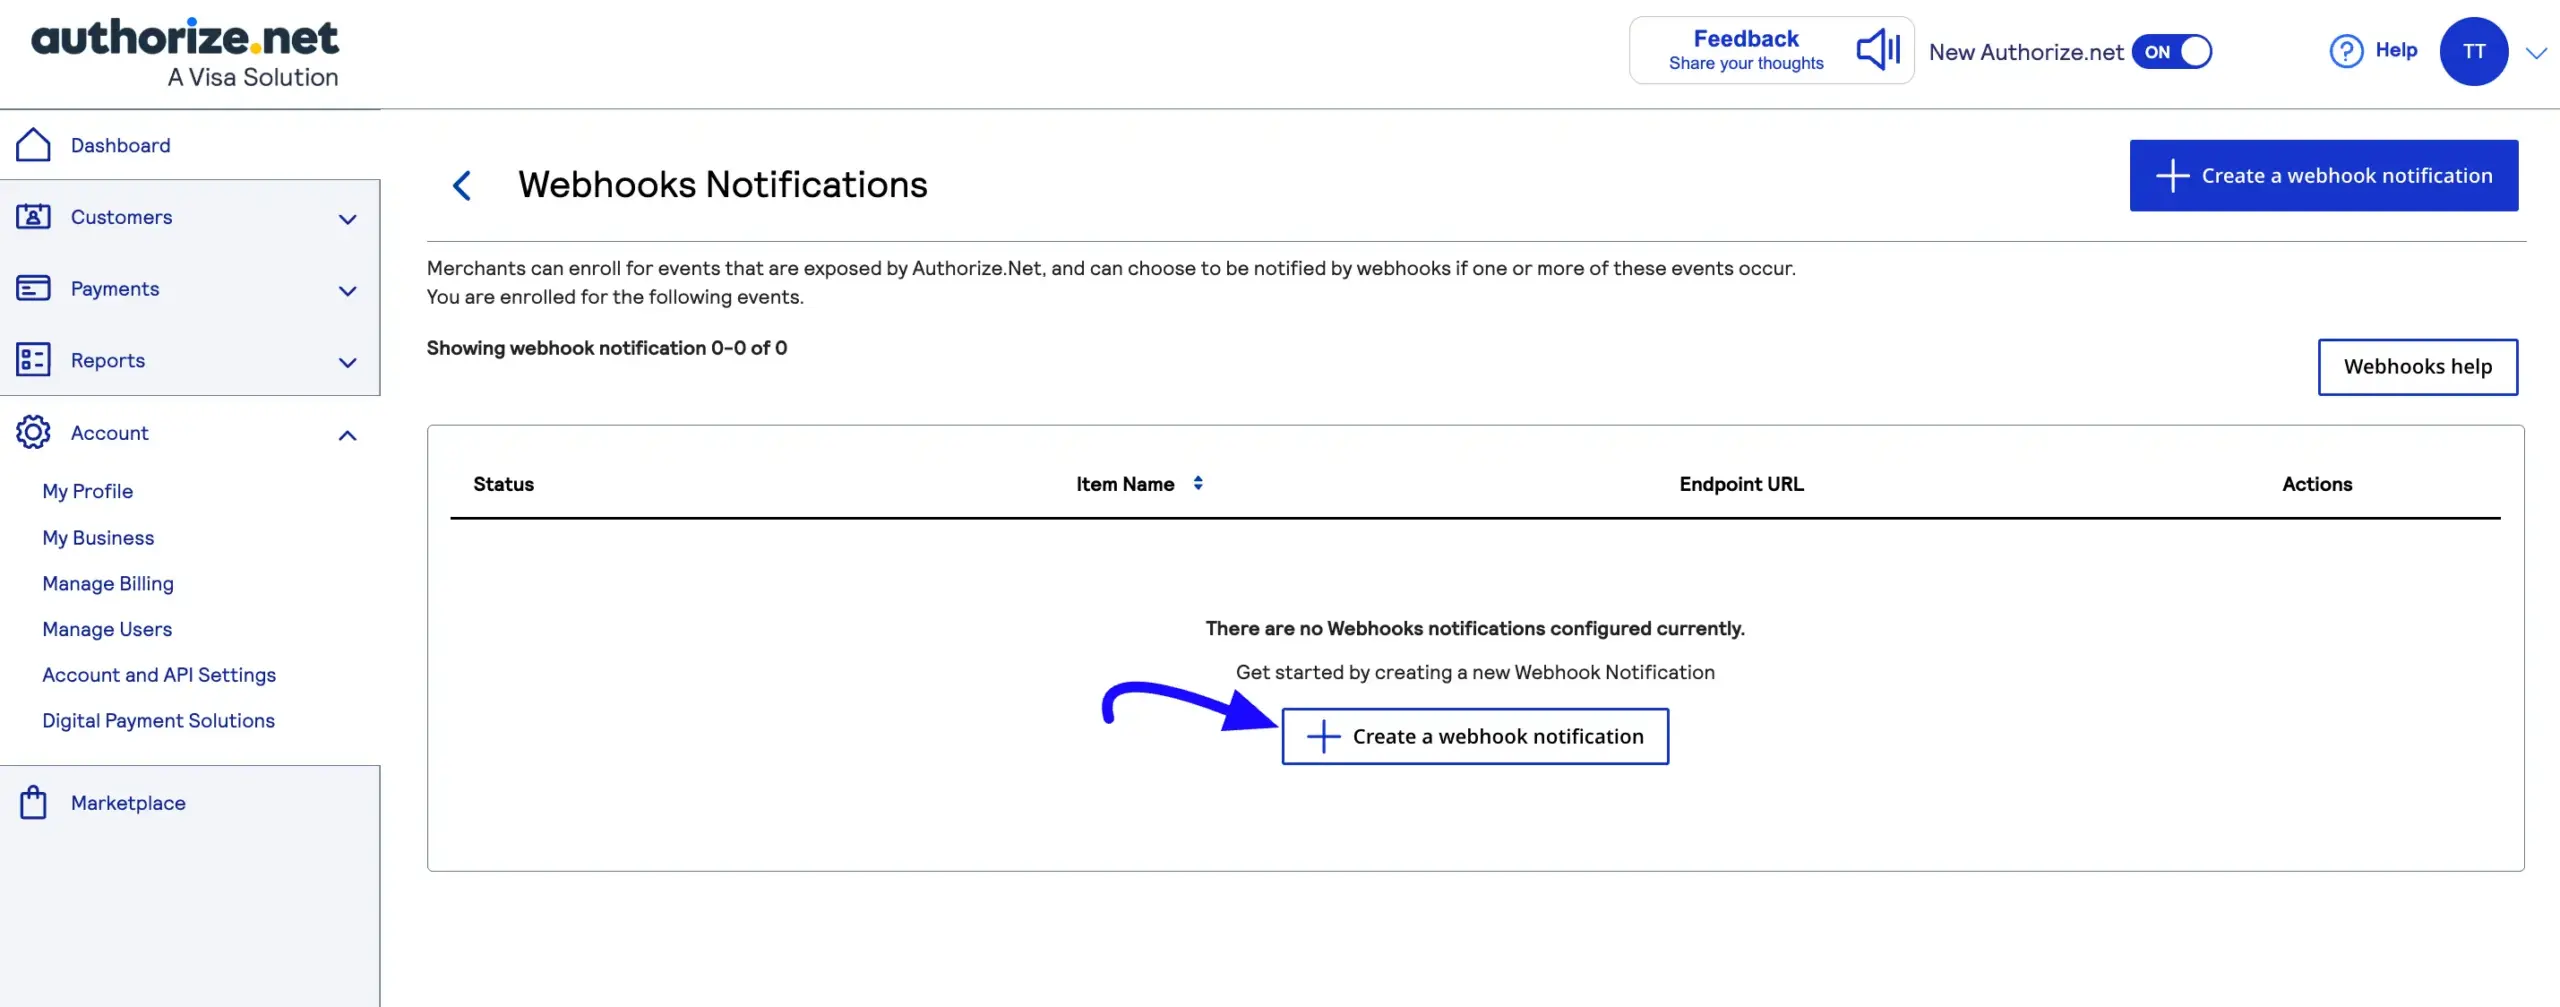
To set up events, go to the Accounts & API Settings sections and scroll down, and click on the Webhooks section.
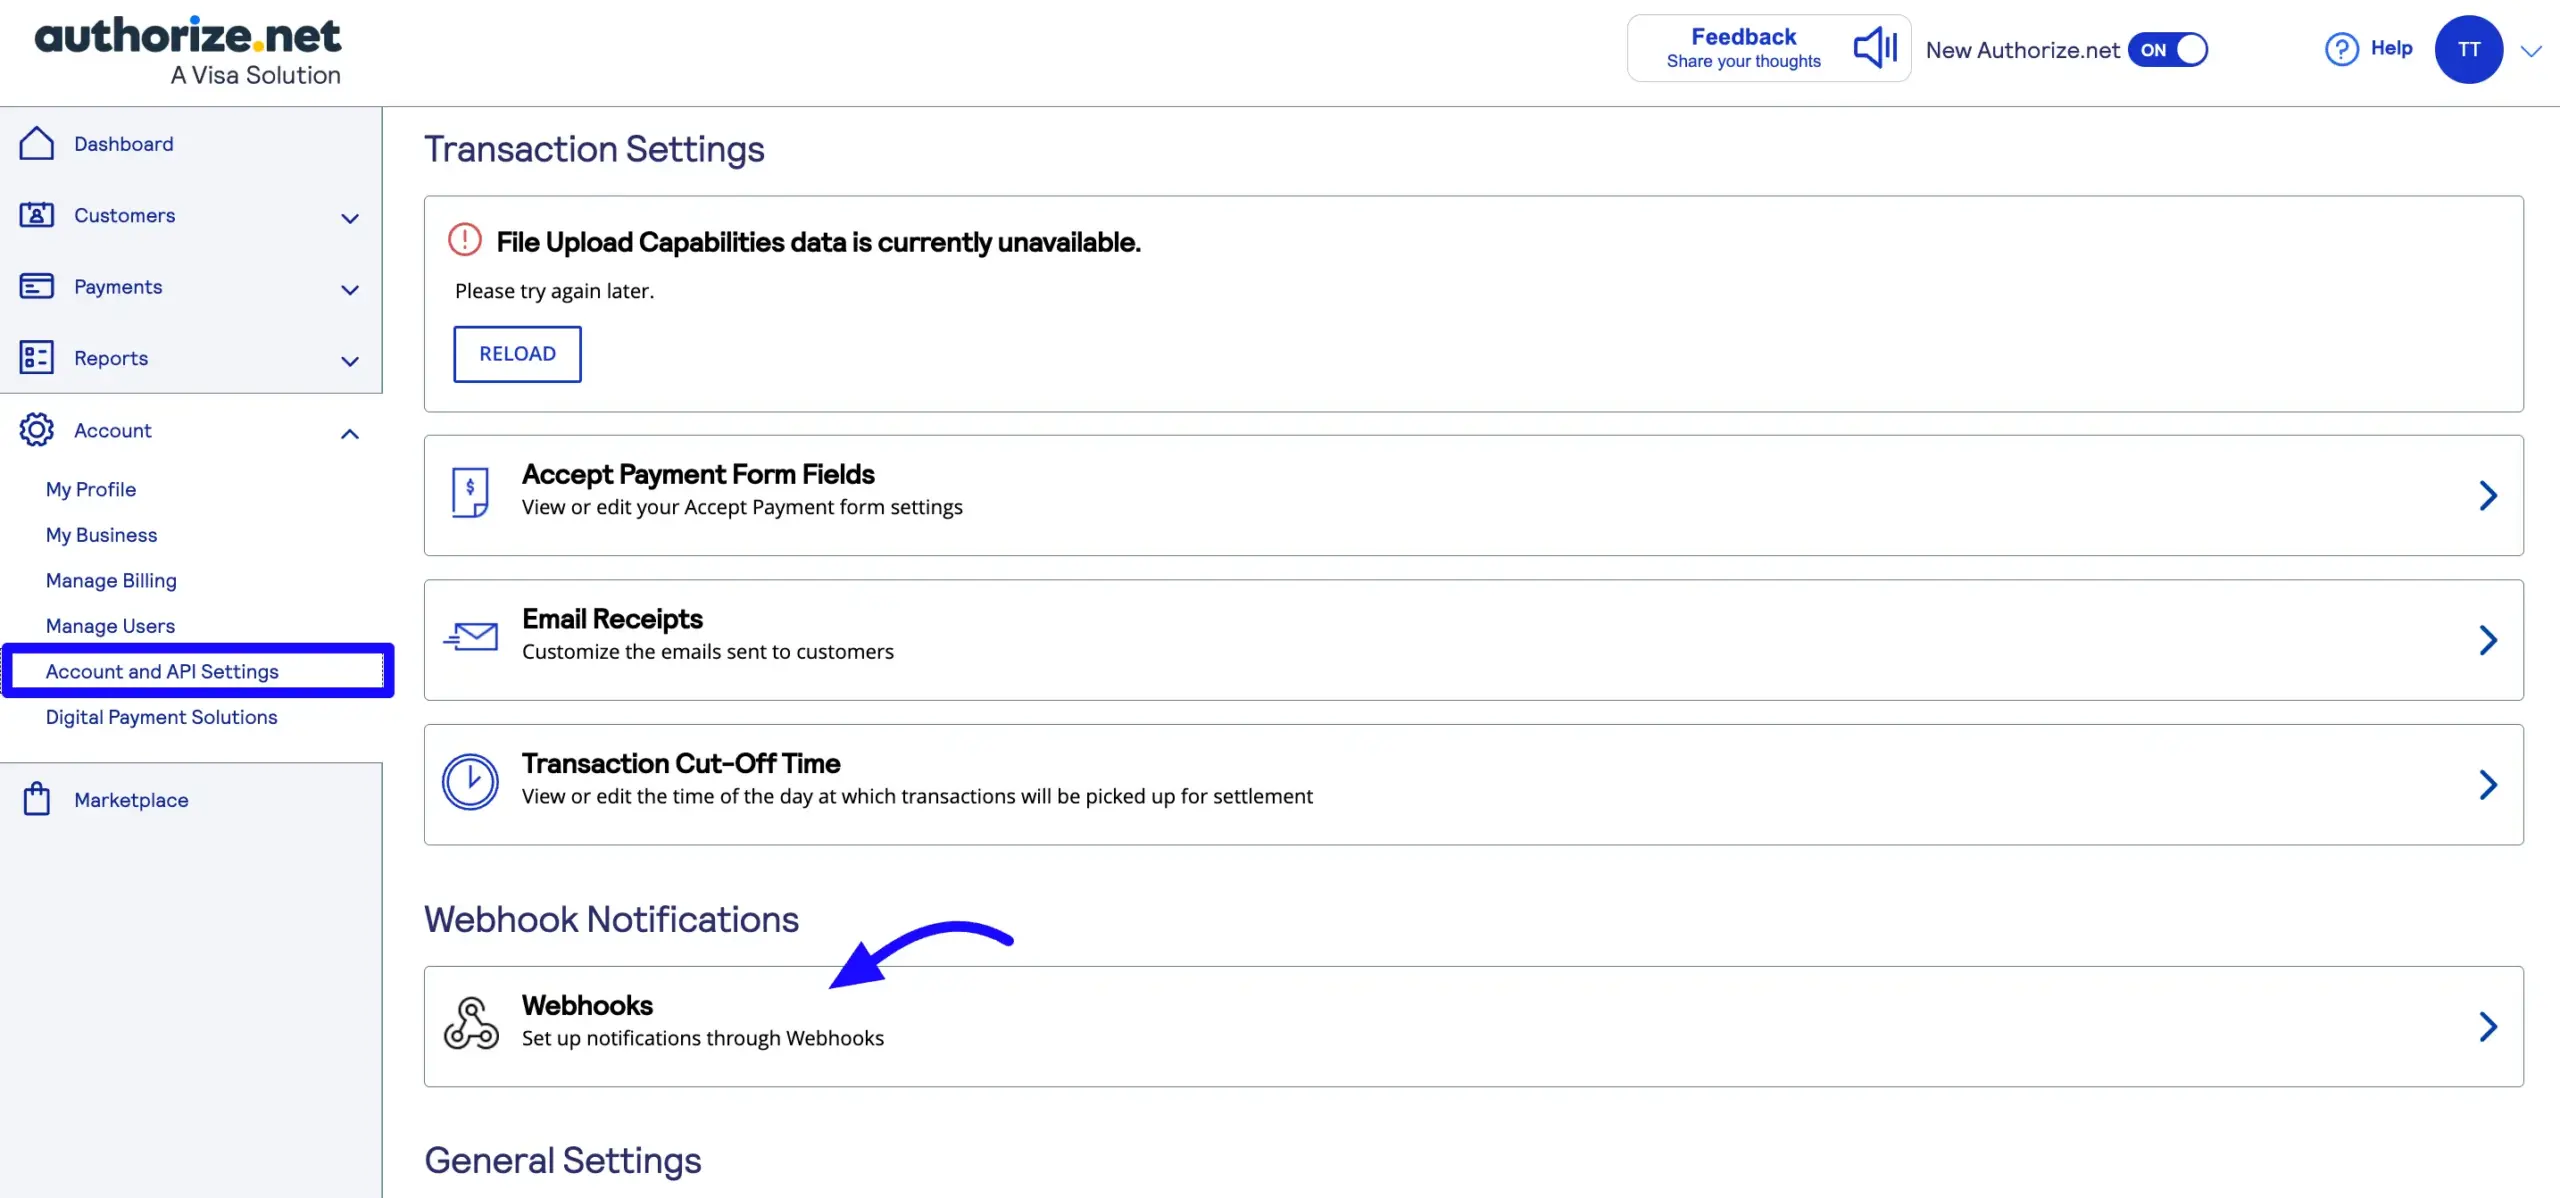
Here appears a new pop-up. Now, click the Create a Webhook notification button.
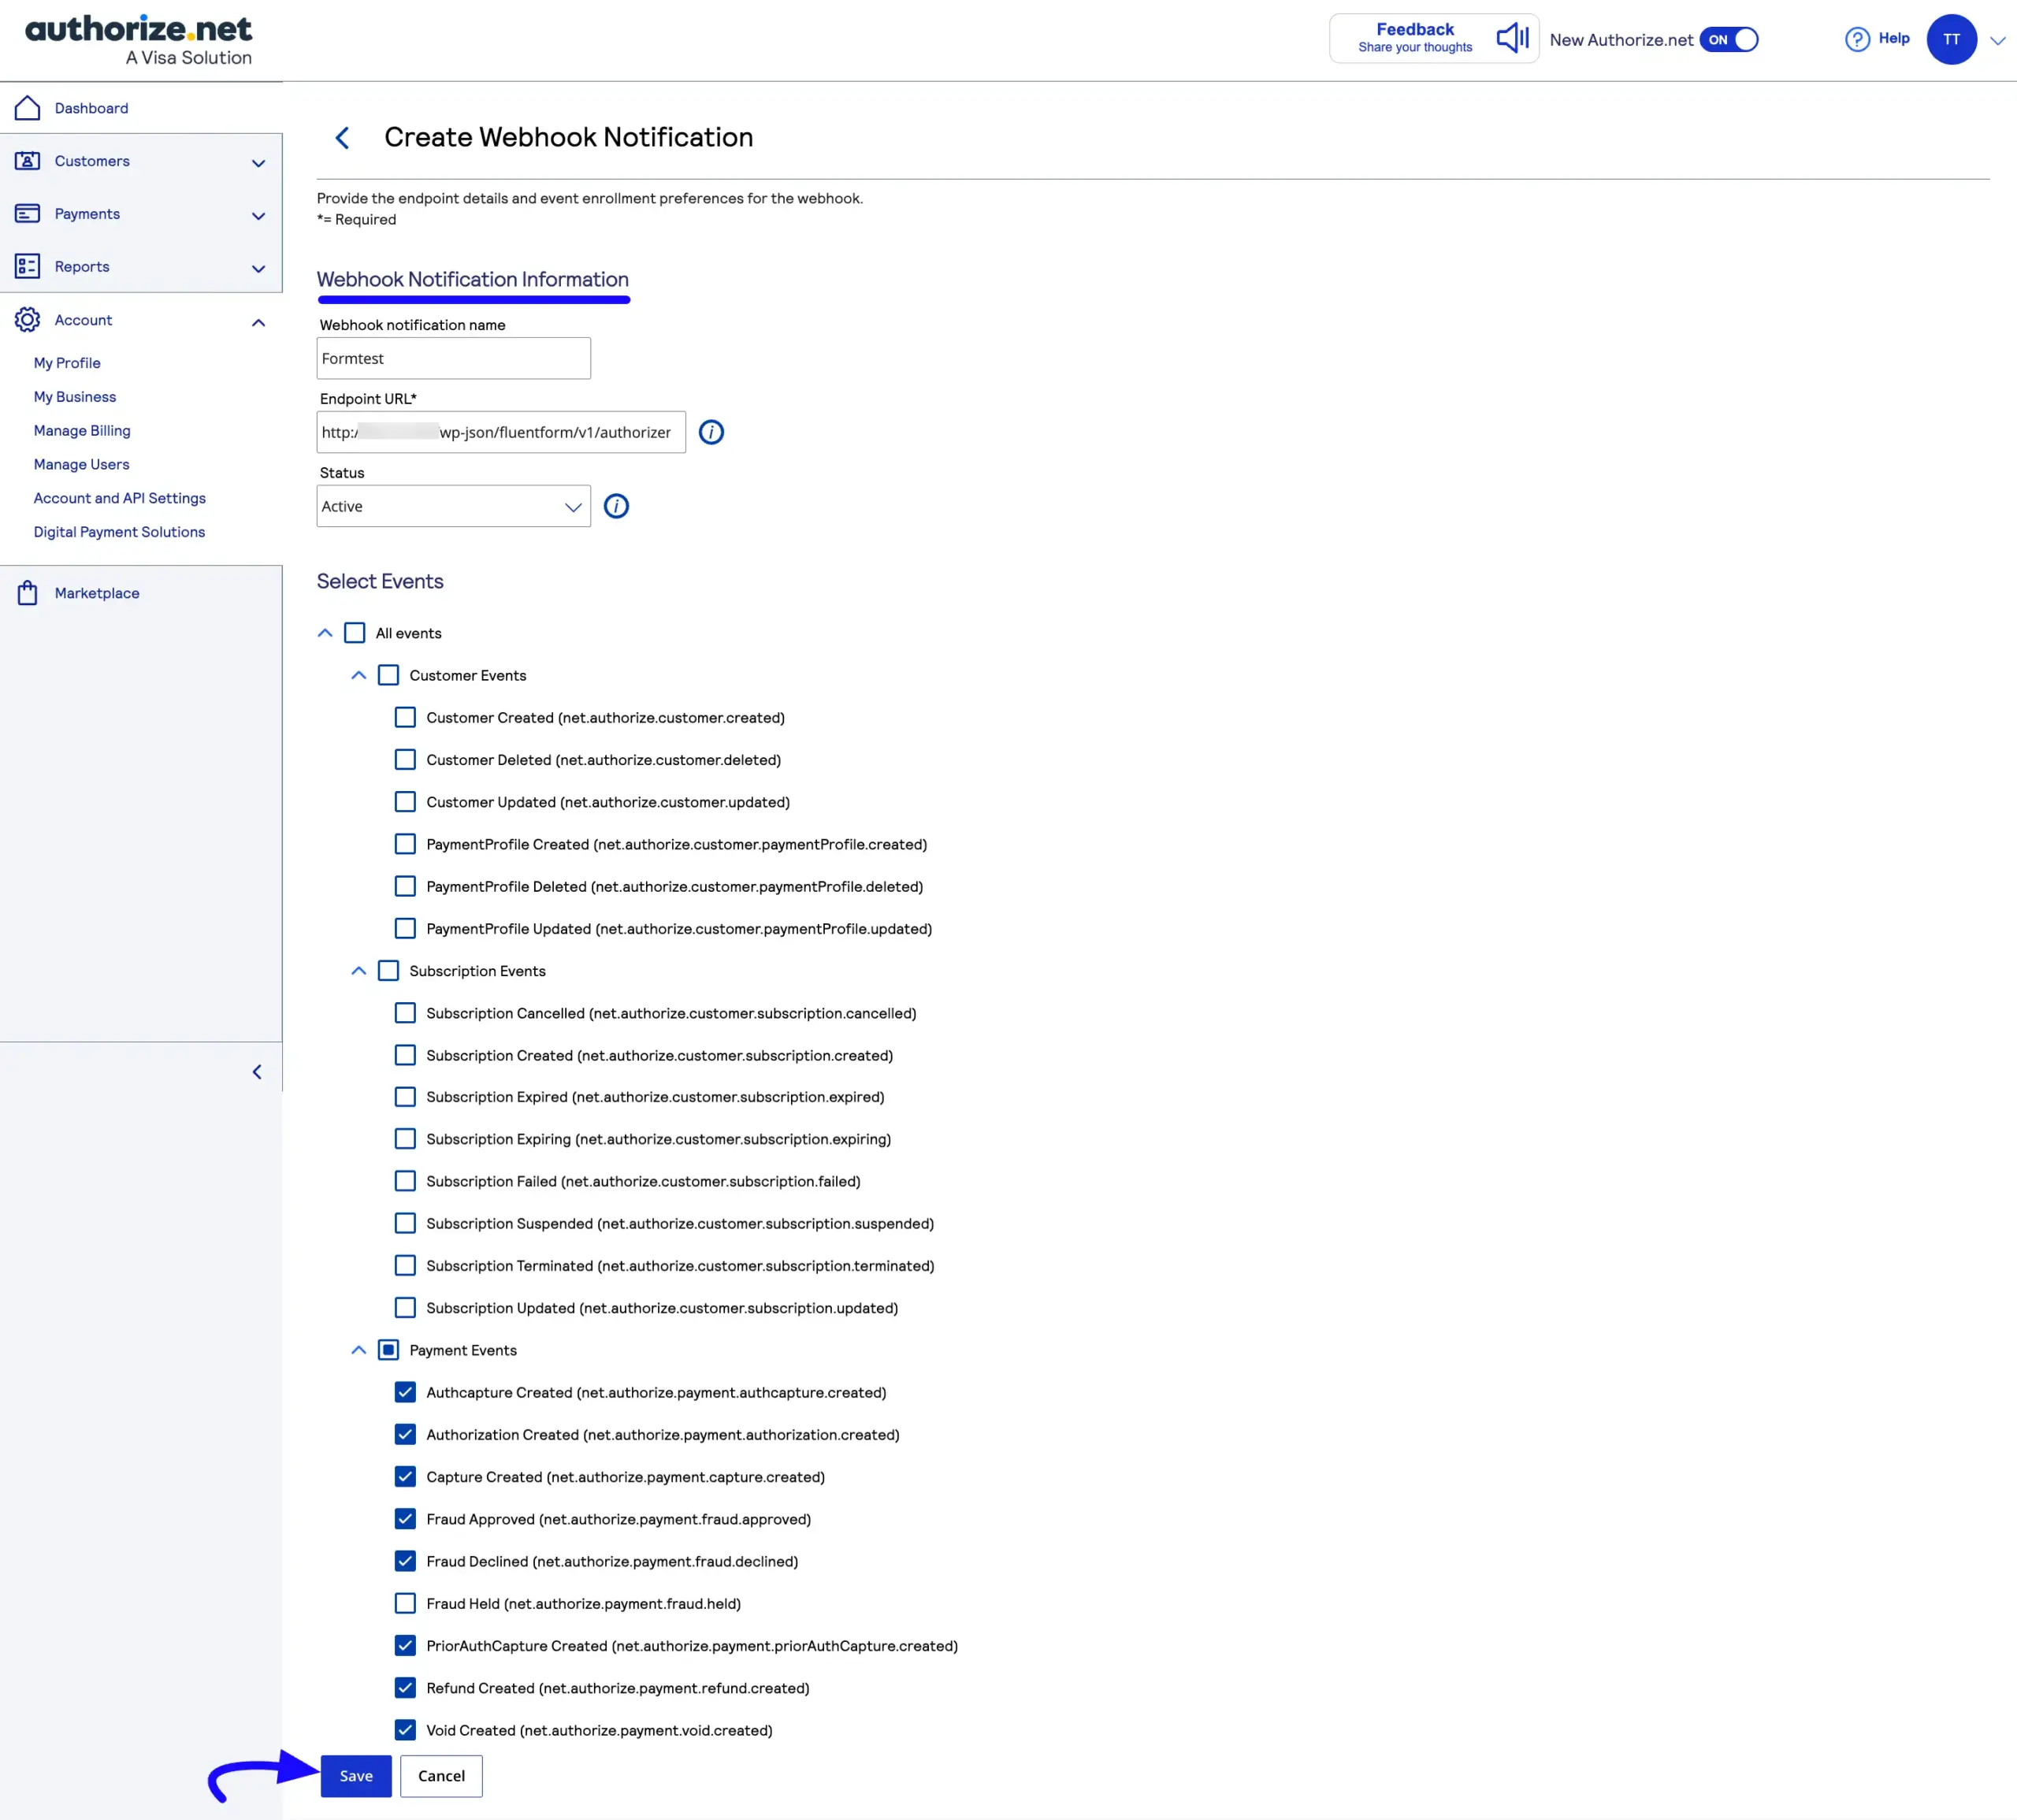
Now, enter all the webhook information. Enter the Webhook notification name, the Endpoint URL that you copied from your website before, and select the Status option Active.
Then, select the Payment Events that are below and click the Save button.
- AuthCapture Created (net.authorize.payment.authcapture.created)
- Authorization Created (net.authorize.payment.authorization.created)
- Capture Created (net.authorize.payment.capture.created)
- PriorAuthCapture Created (net.authorize.payment.priorAuthCapture.created)
- Void Created (net.authorize.payment.void.created)
- Refund Created (net.authorize.payment.refund.created)
- Fraud Approved (net.authorize.payment.fraud.approved)
- Fraud Declined (net.authorize.payment.fraud.declined)
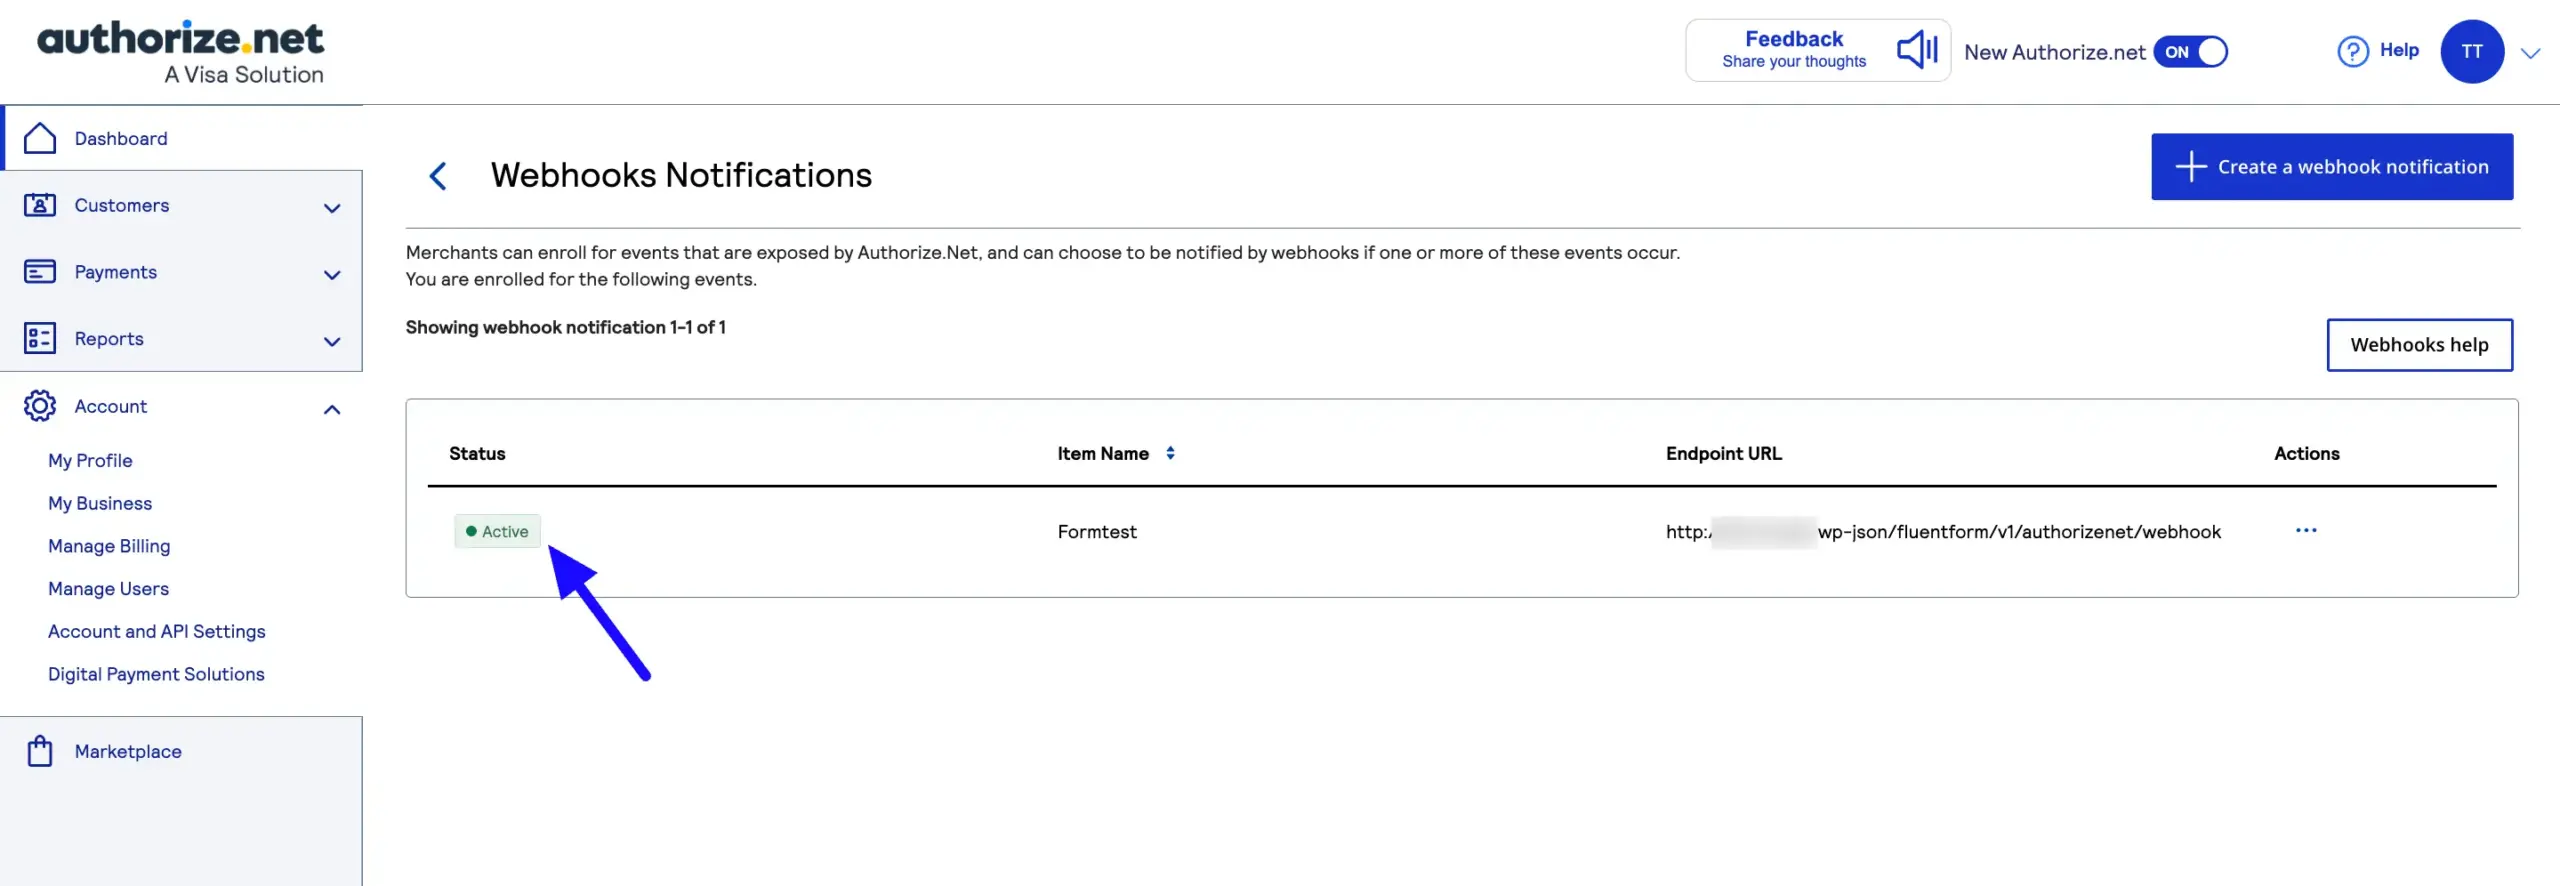
Now, your webhook is in an active status.
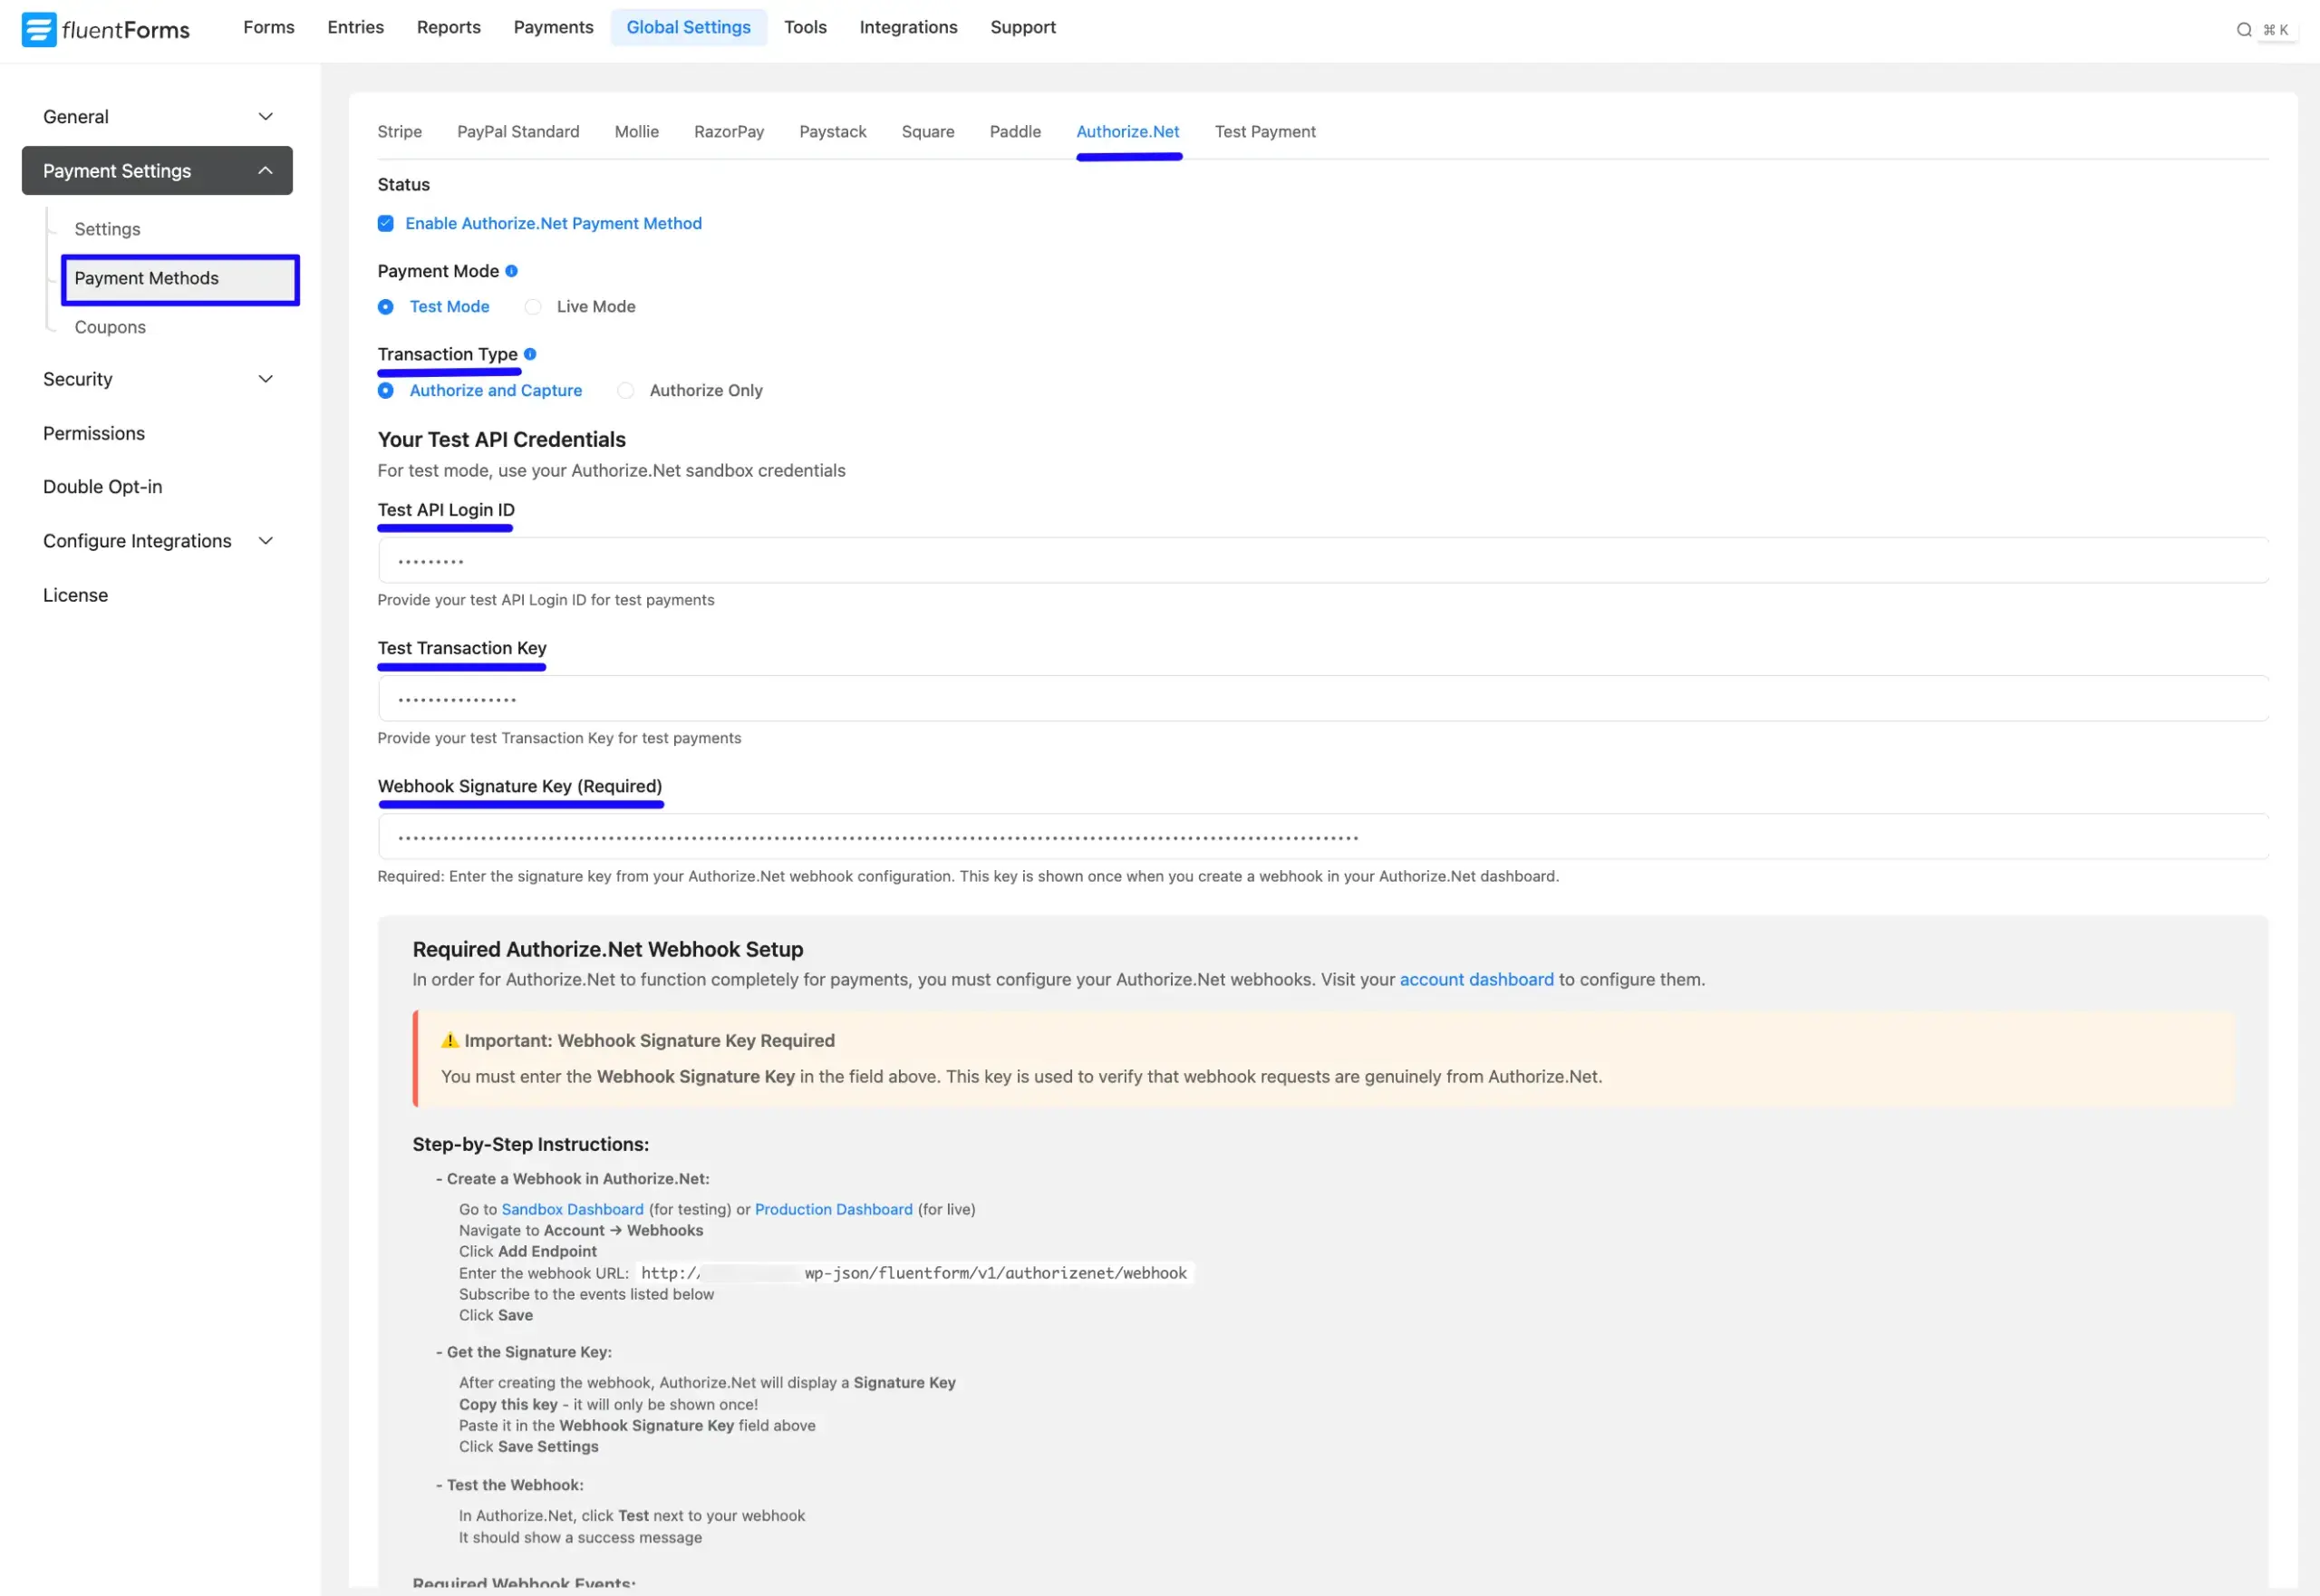
Now, return to the Authorize.net Payment Method Settings from the Global Settings section of Fluent Forms.
Then, paste the API Login ID, Transaction key, and Webhook Signature key in the corresponding fields.
Finally, press the Save Settings button, and your Authorize.net account will be configured with Fluent Forms for your WordPress Site.
Integrate Authorize.Net in Forms #
Once you finish setting up your Authorize.Net payment method, you can easily add this payment method to any of your existing Payment Forms (i.e., a form where Payment Item and Payment Method fields are added).
Note: If you do not have any existing Payment Forms, read this Documentation to learn how to create one.
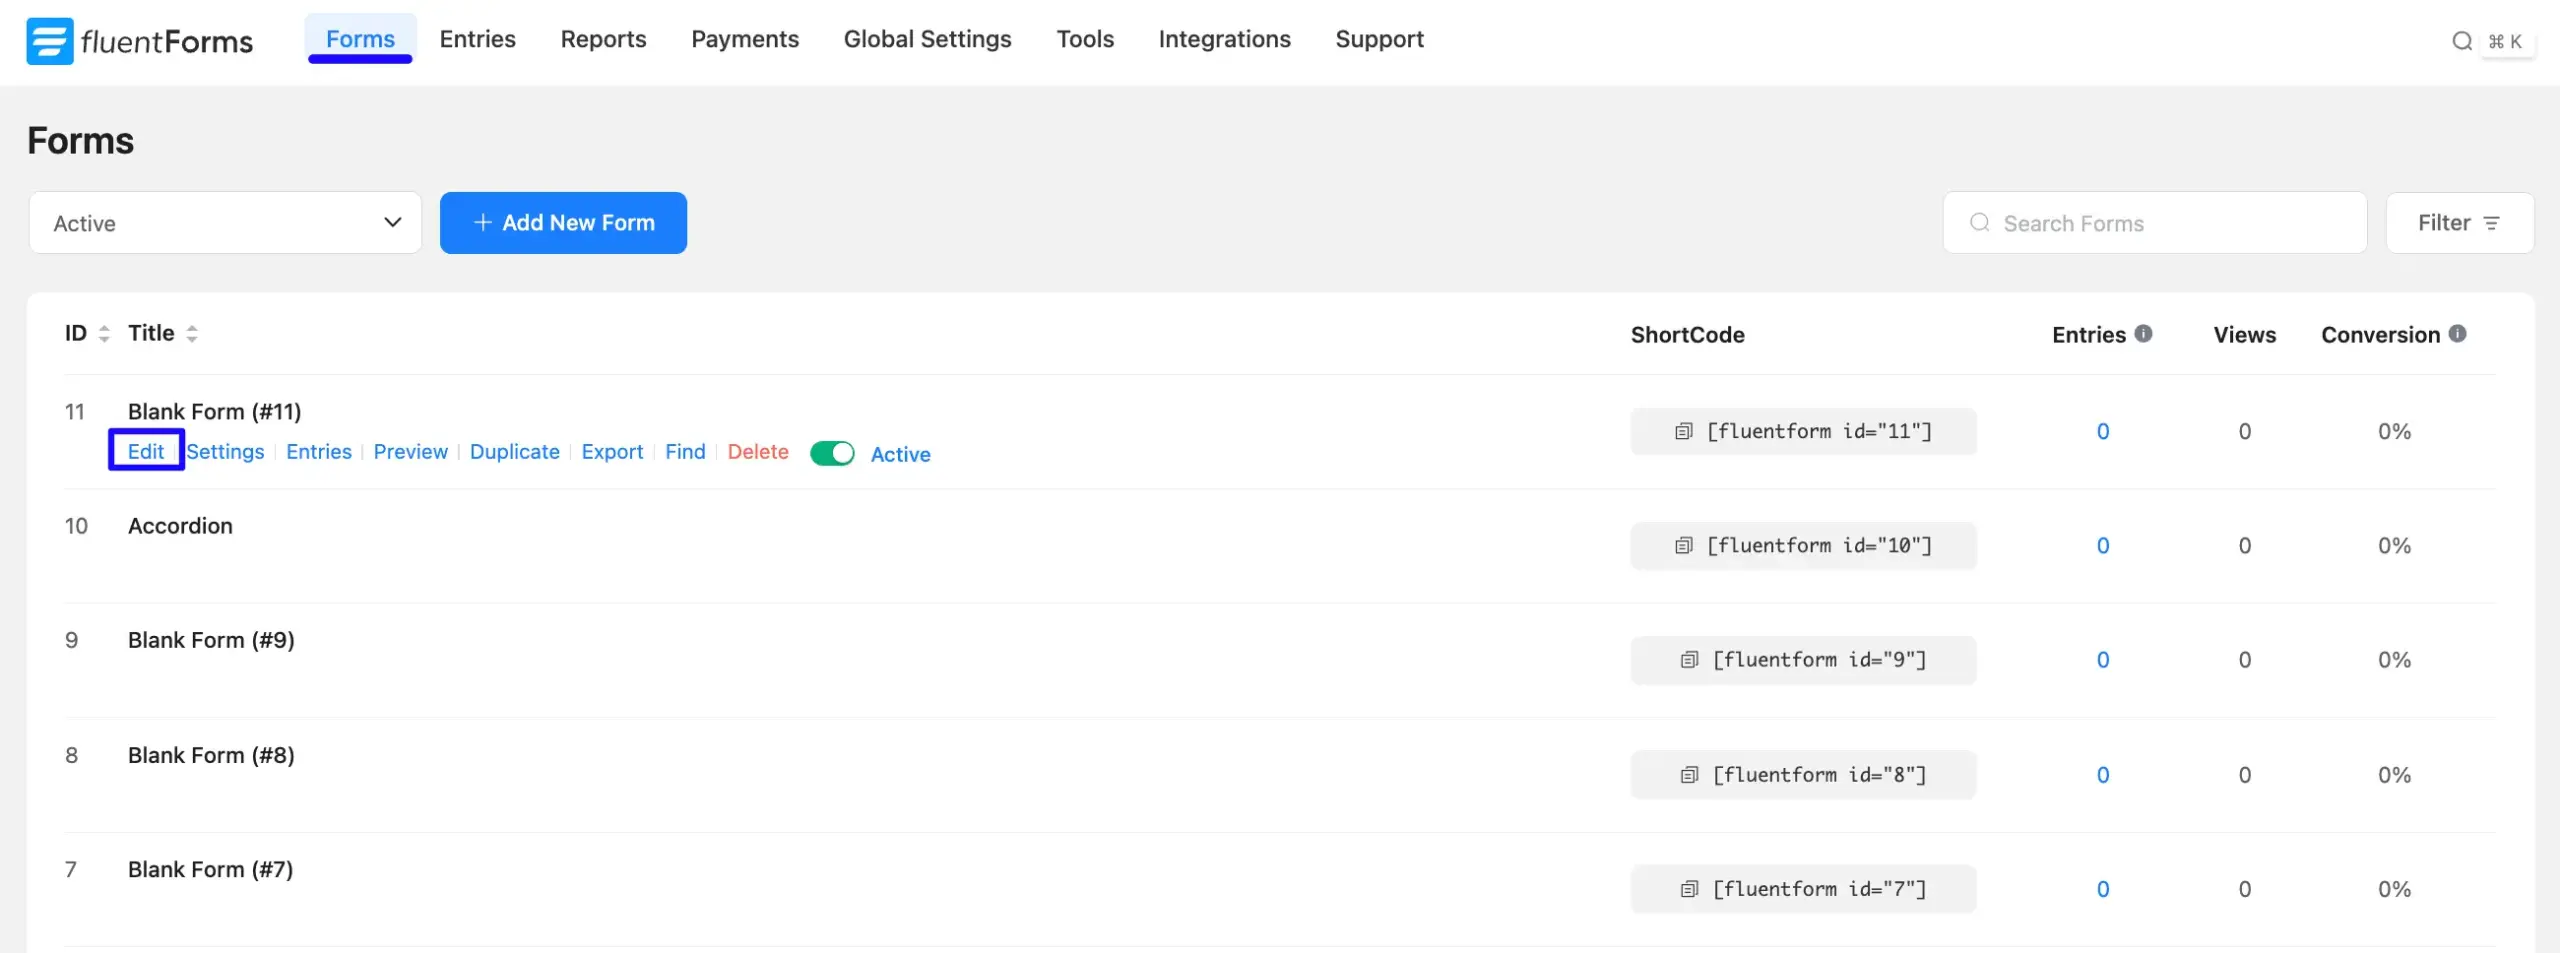
First, go to the Editor page of your desired form by clicking its Edit option.
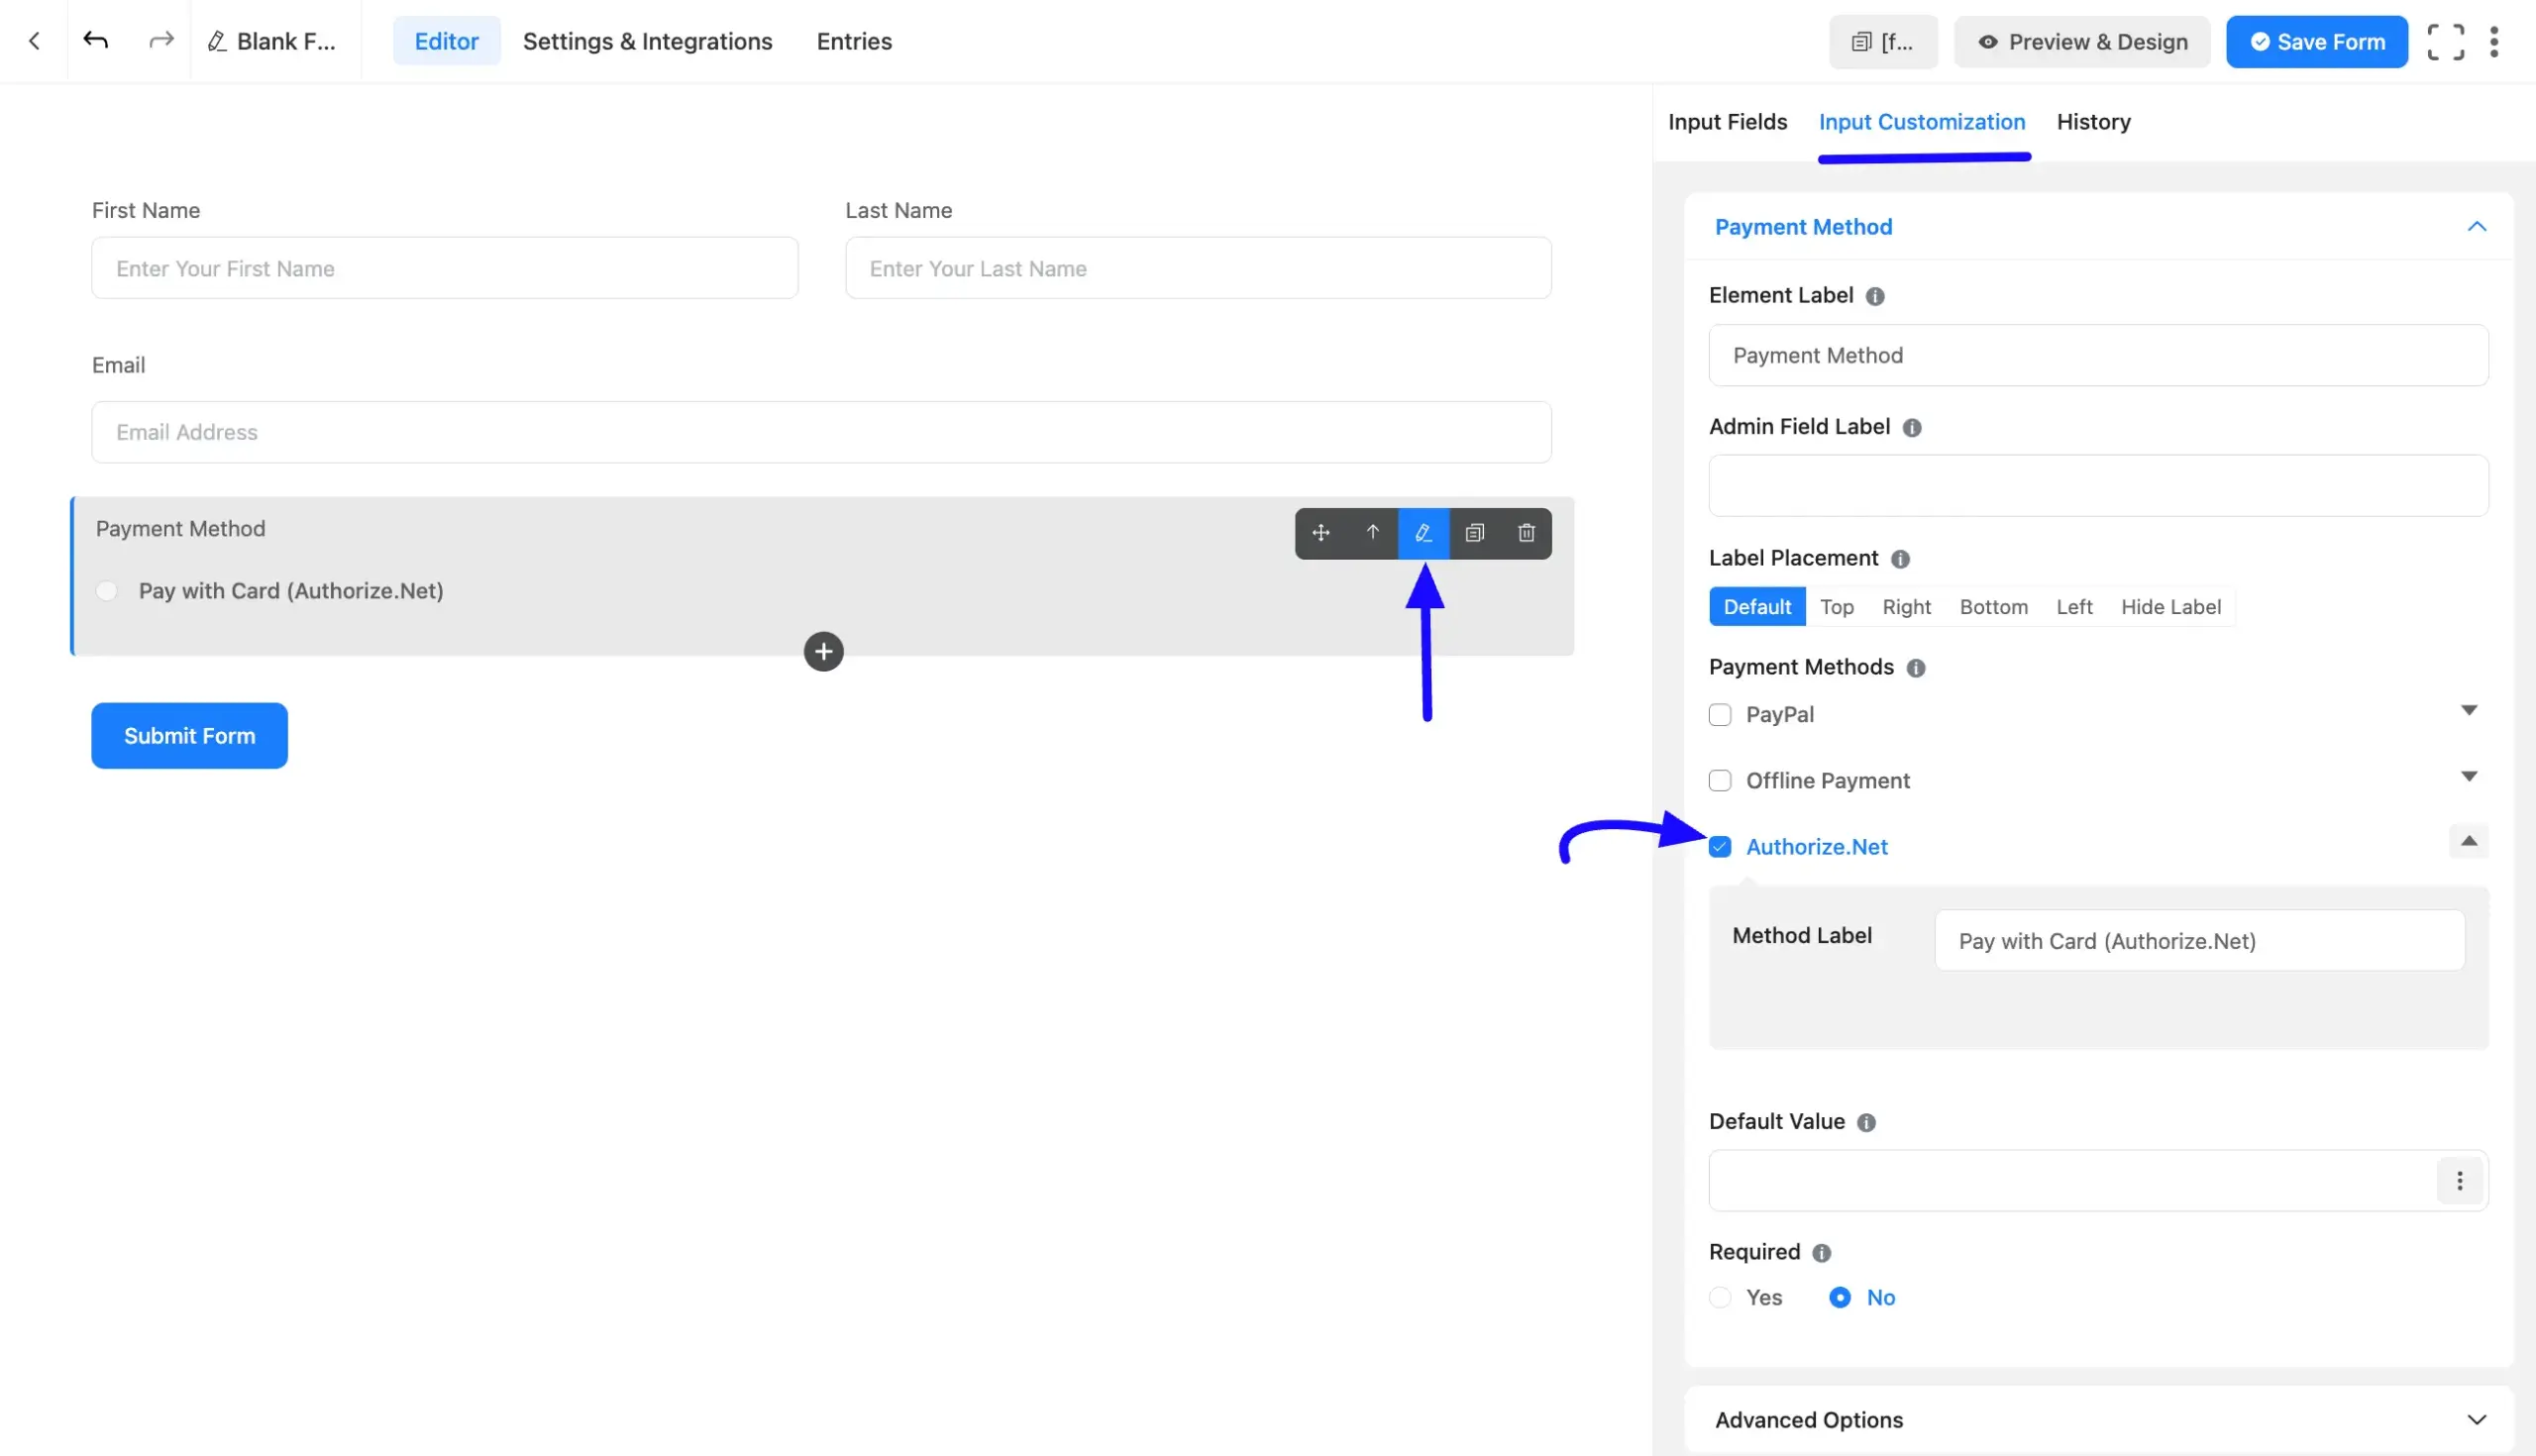
Once you are on the Editor page, go to the Input Customization menu on the right side of the added Payment Method field by clicking the Pencil Icon.
Now, go to the Payment Methods, check the Authorize.Net option, click the Dropdown Arrow, and you will get the option.
- Method Label: Here, you can change the label based on your preference for your added payment method.
To learn more details about the Payment Method field, read this Documentation.
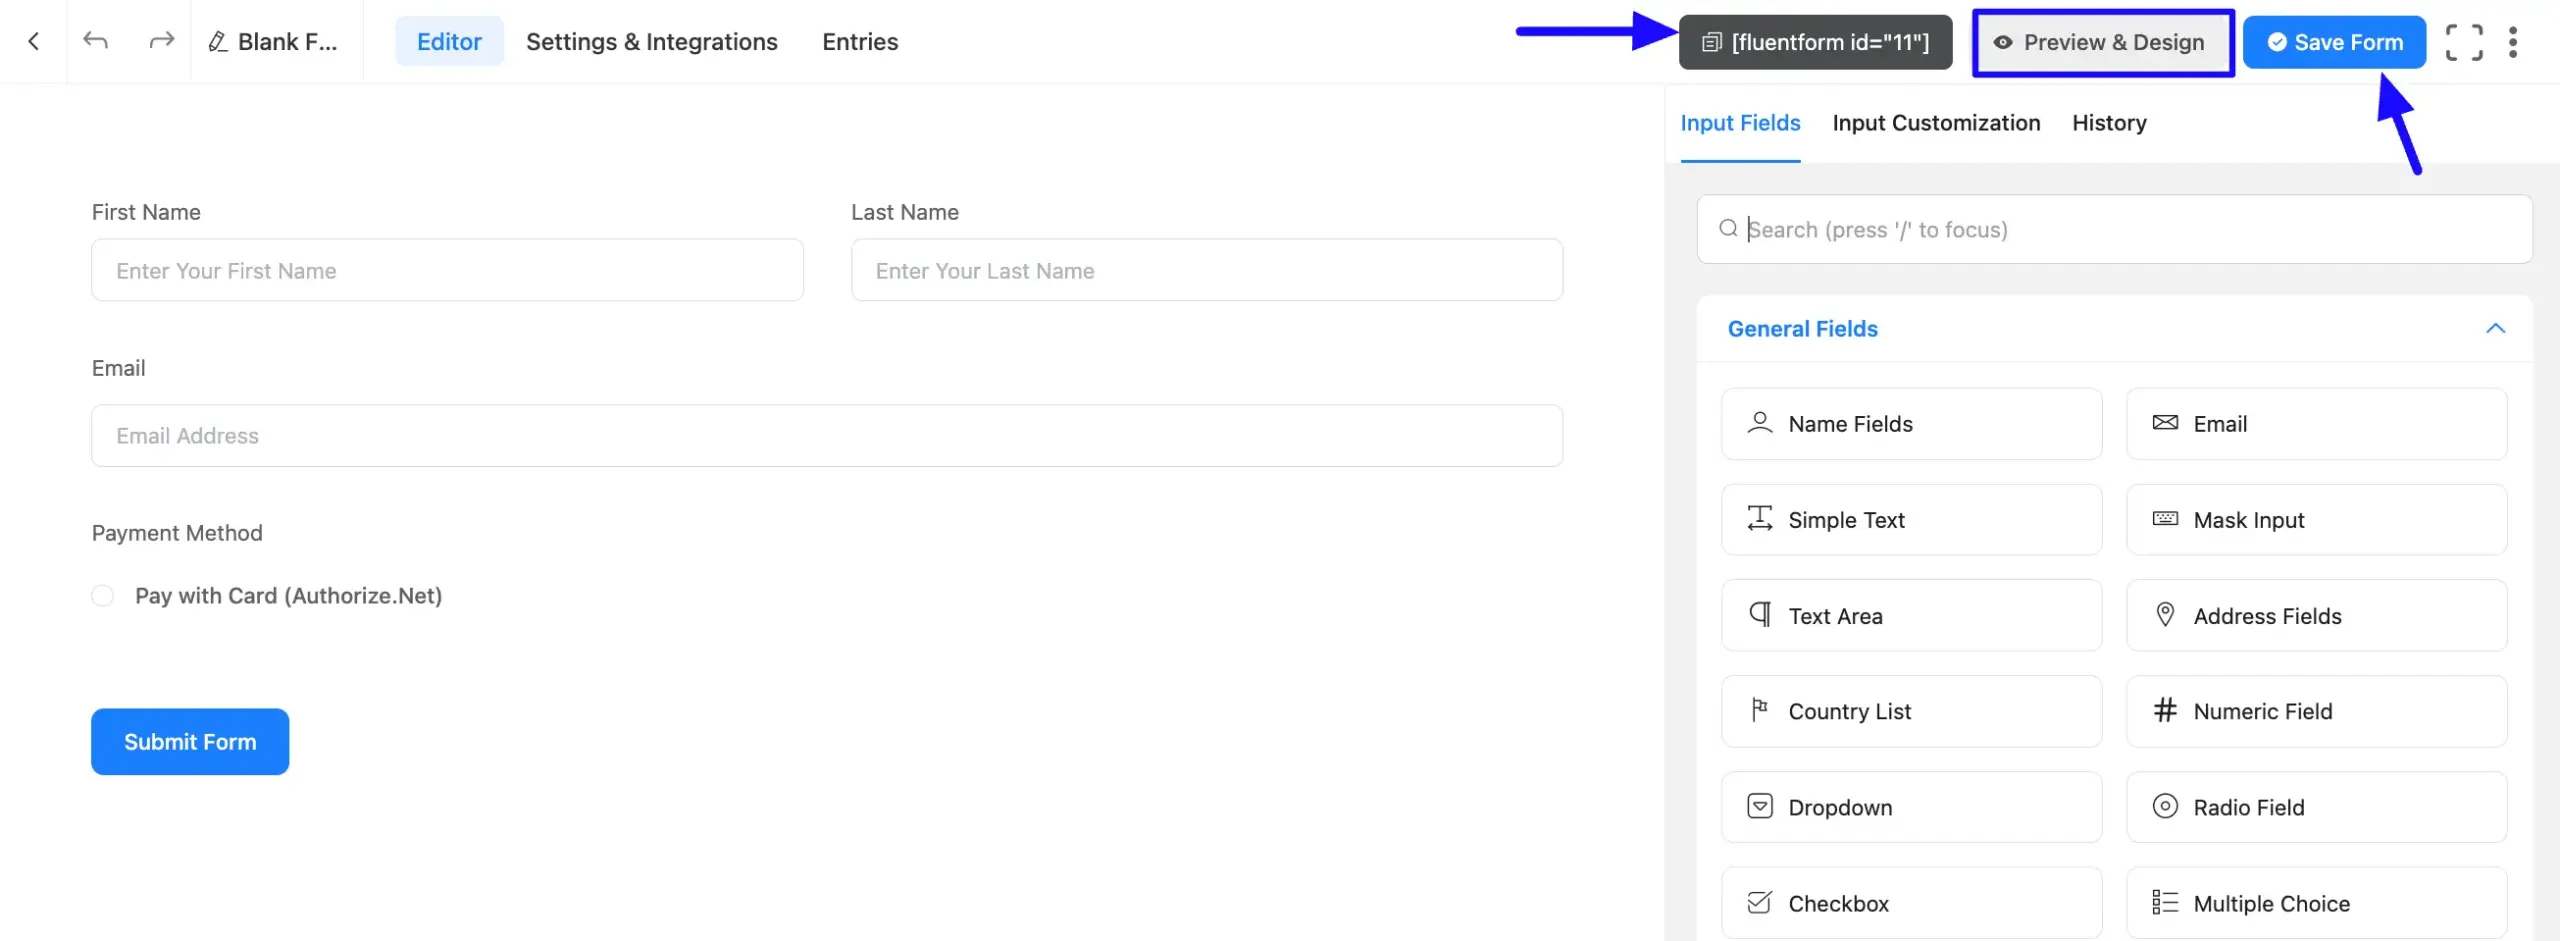
Once you complete the edit, press the Save Form button to save all the changes.
To embed and display your form on a specific page or post, simply copy the shortcode from the top-right corner of the screen. Then, paste it into the content area of your desired page or post where you want the form to appear.
If you’d like to see how the form looks before publishing, click on the Preview & Design button in the middle of the page. This allows you to review and adjust the design before making it live.
Preview of Added Payment Method #
Here is the preview of the Payment Method that we just added.

If you have any further questions, concerns, or suggestions, please do not hesitate to contact our support team. Thank you.


