Fluent Forms offers Post Forms, making it easy for you to accept user-submitted posts through forms and publish them directly on their site. This form automatically sets up a post after a user submits the data.
This article will guide you through creating a Post Form with Fluent Forms.
Enable the Post/CPT Creation Module #
Before starting the process of creating a Post Form, you need to make sure the Post/CPT Creation module is enabled. Otherwise, you will not automatically get the Post Fields module under Input Fields in your Fluent Forms.
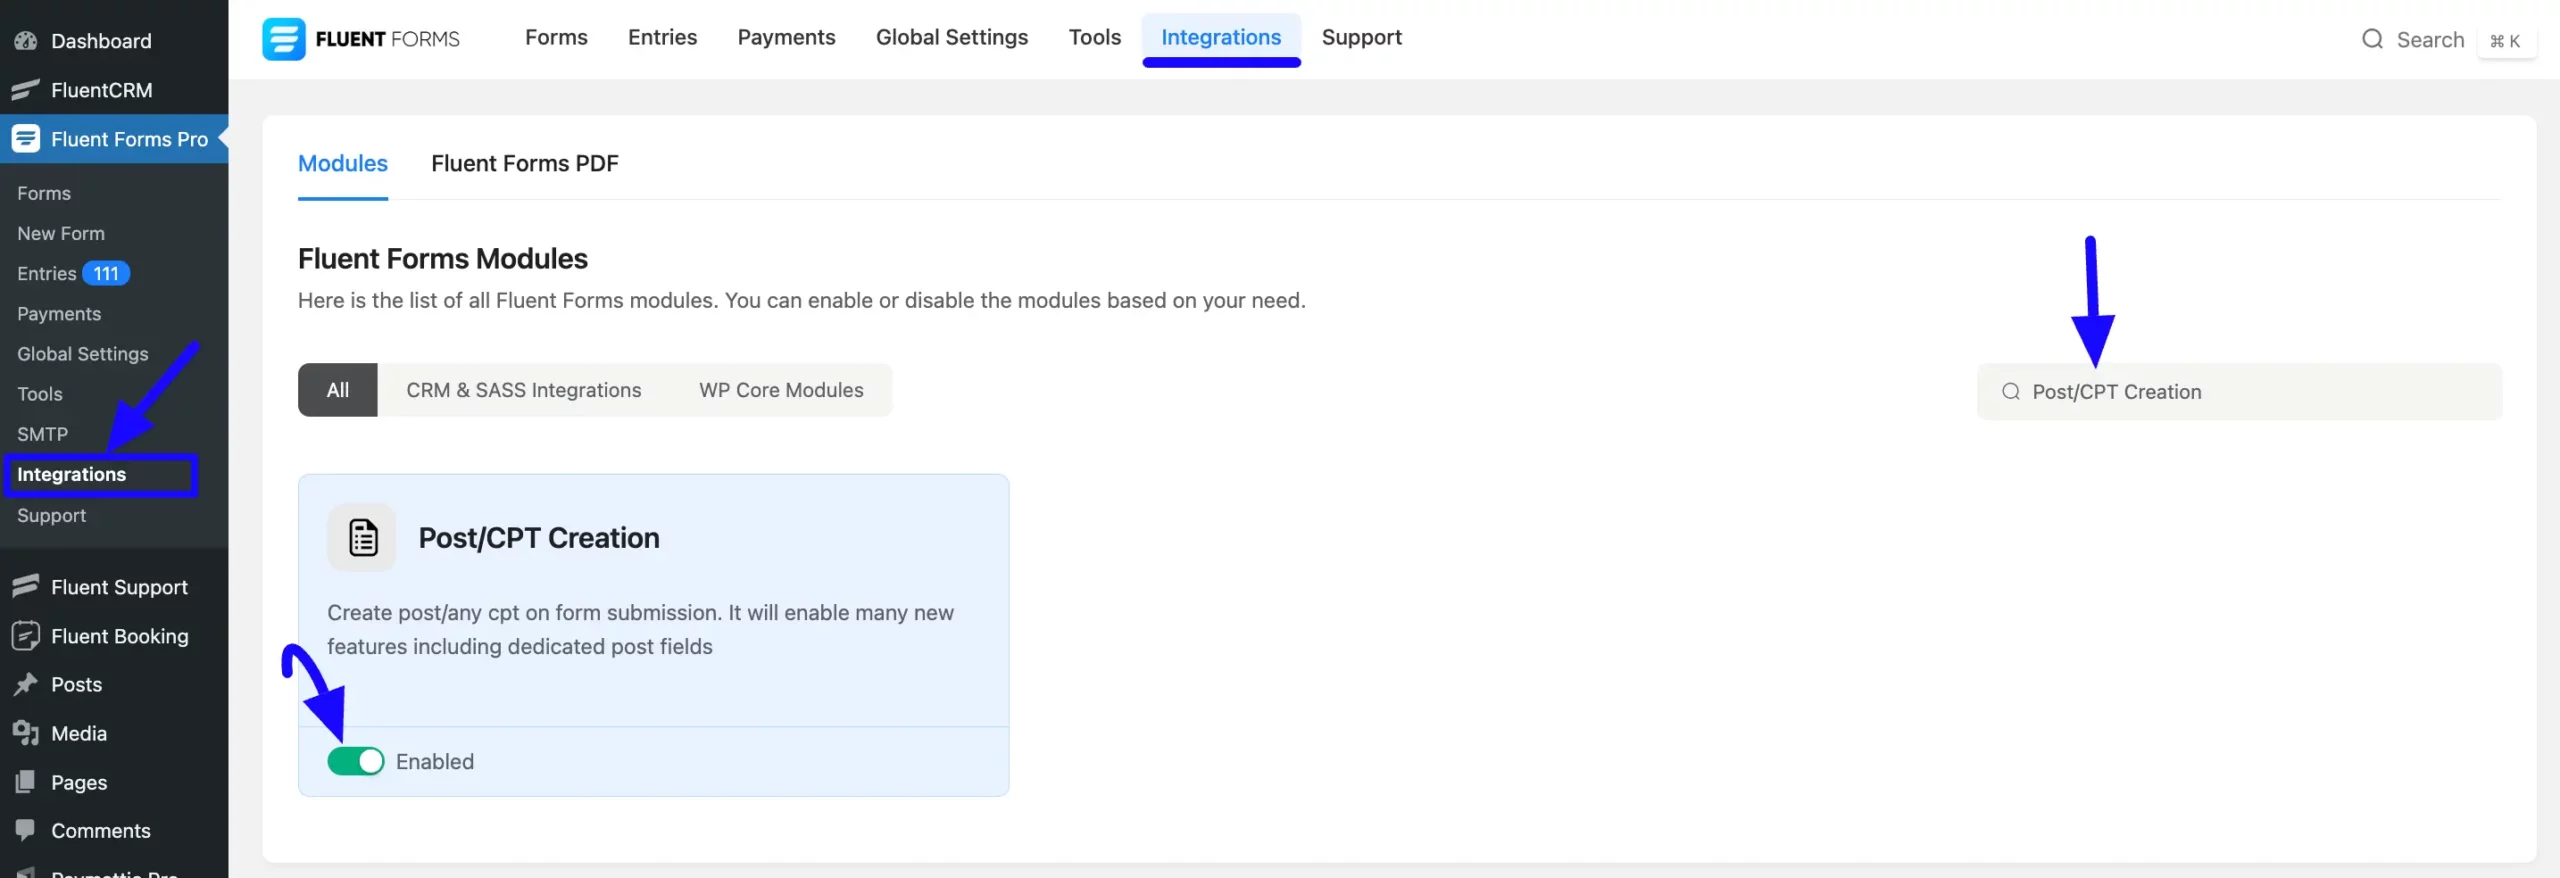
To enable the Post Fields module in your Fluent Forms, go to Integrations from the WordPress Left Sidebar or Fluent Forms Navbar.
Now, search for Post/CPT Creation through the search bar, turn on the Toggle, and your Post/CPT Creation module will be enabled.
Create Post Forms #
To learn how to create a Post form, follow the steps with screenshots below –
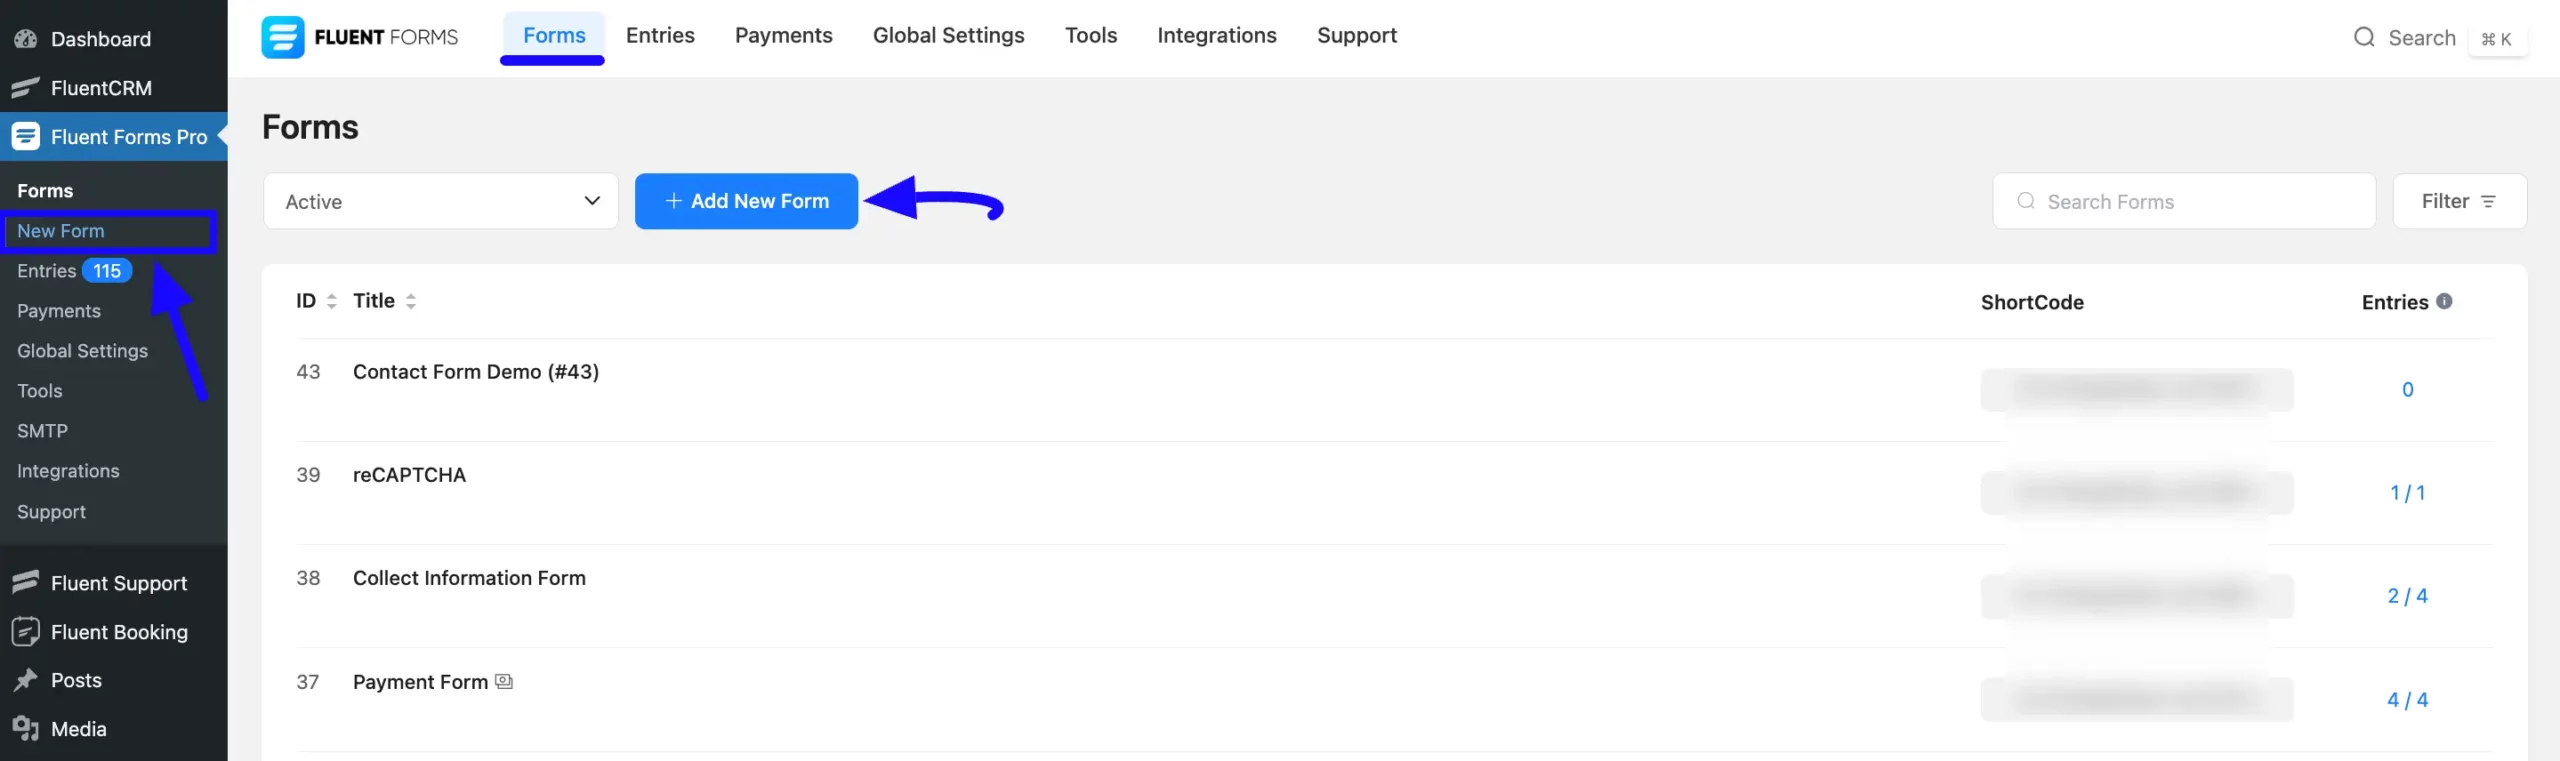
To start, log in to your WordPress Dashboard. Now, navigate to the Fluent Forms Plugin and click the New Form button from the left sidebar.
Or, go to the Fluent Forms Navbar, click the Forms, and click the + Add New Form button.
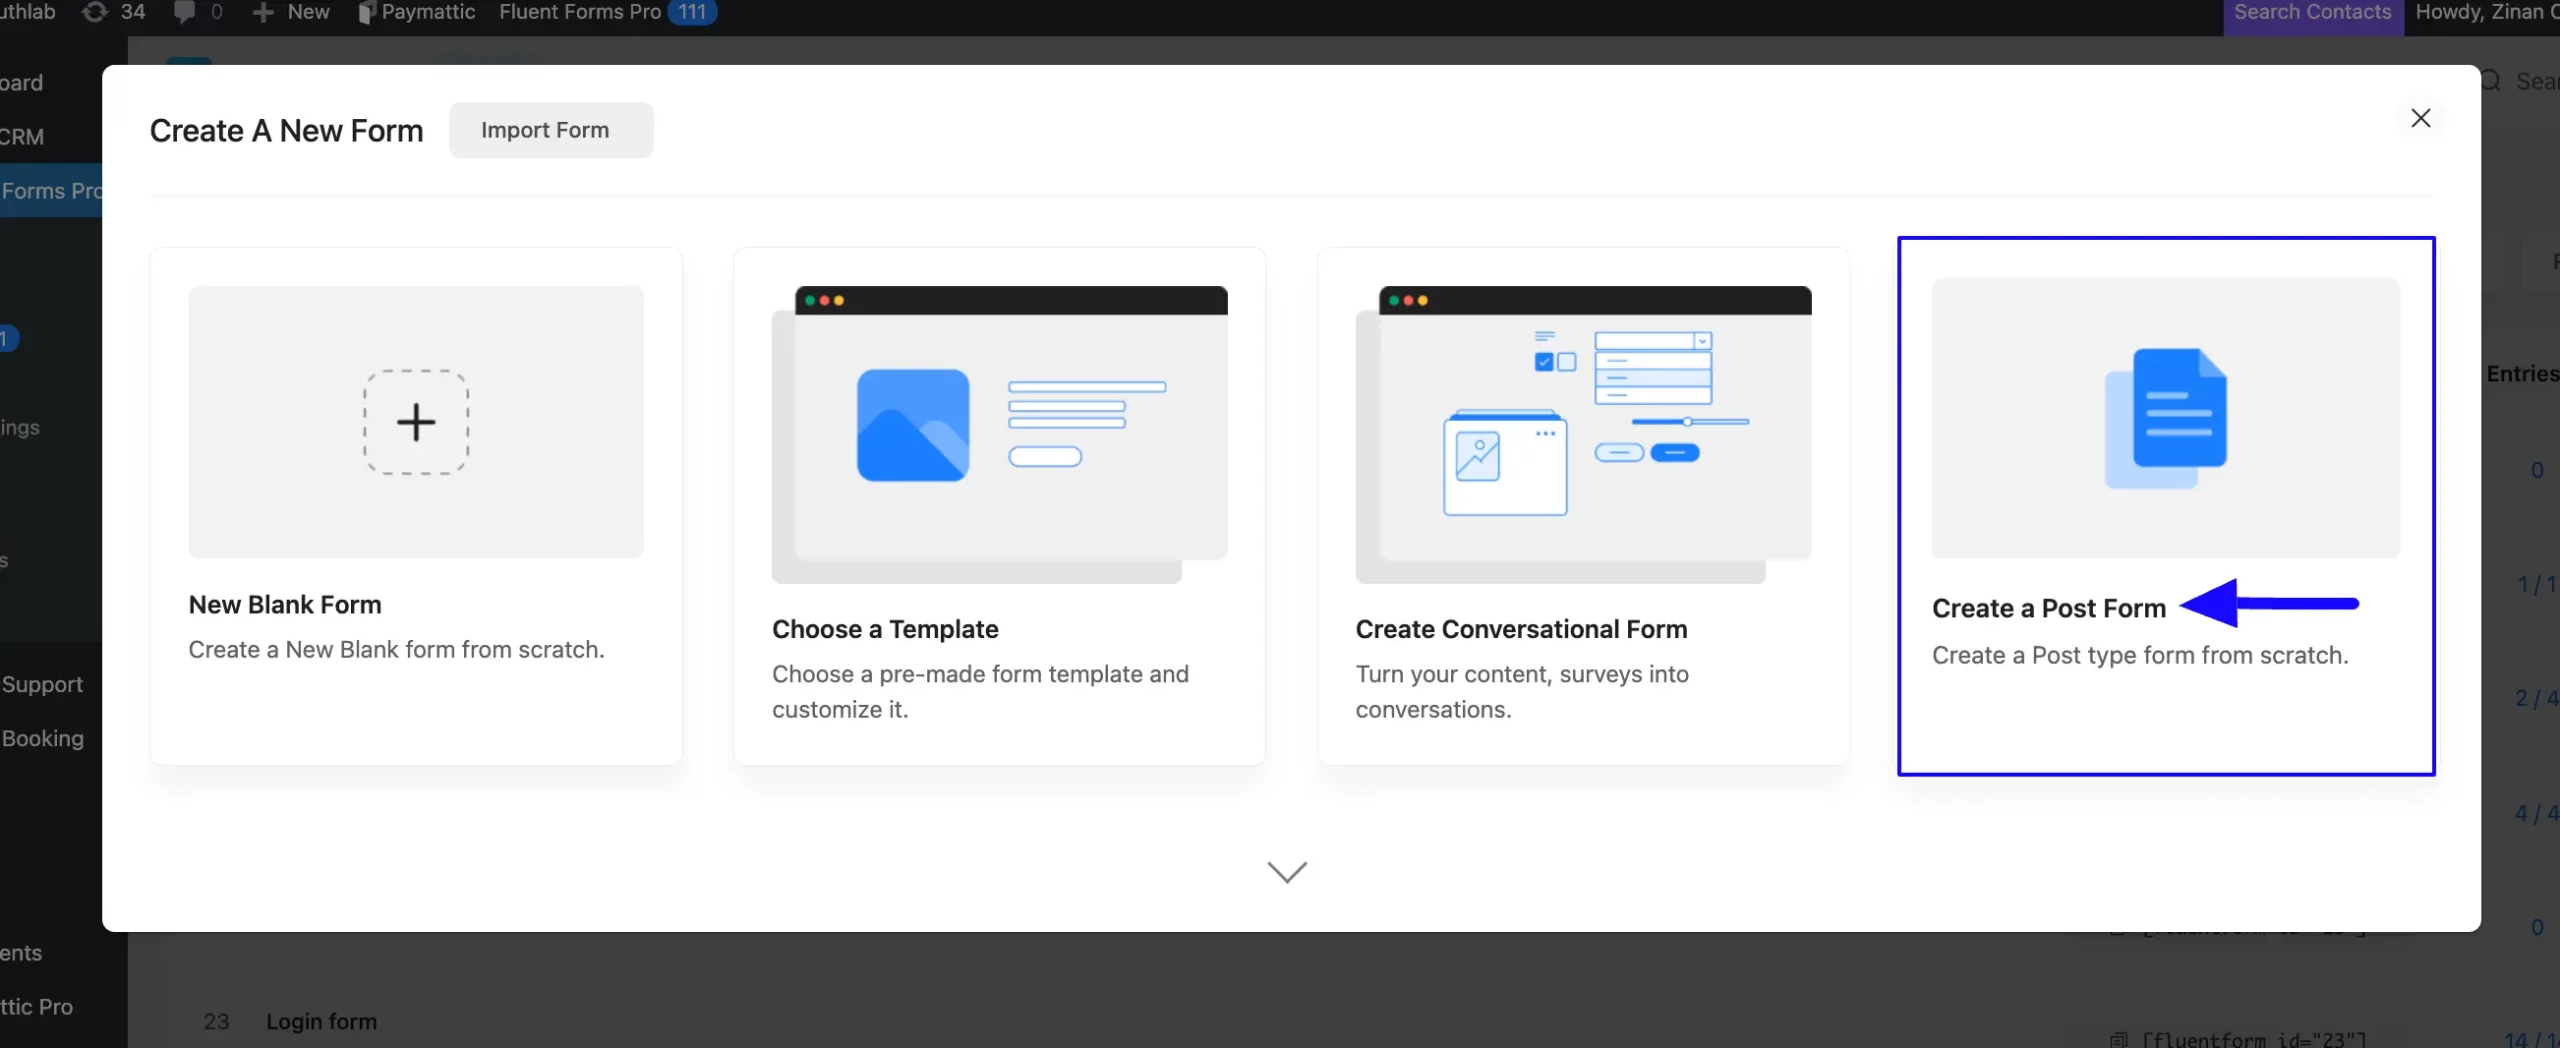
Now, a pop-up will appear with four options. Click the Create a Post Form tab.
Remember this “Create a Post Form” tab won’t appear in your Fluent Forms if you don’t enable the Post/CPT Creation module.
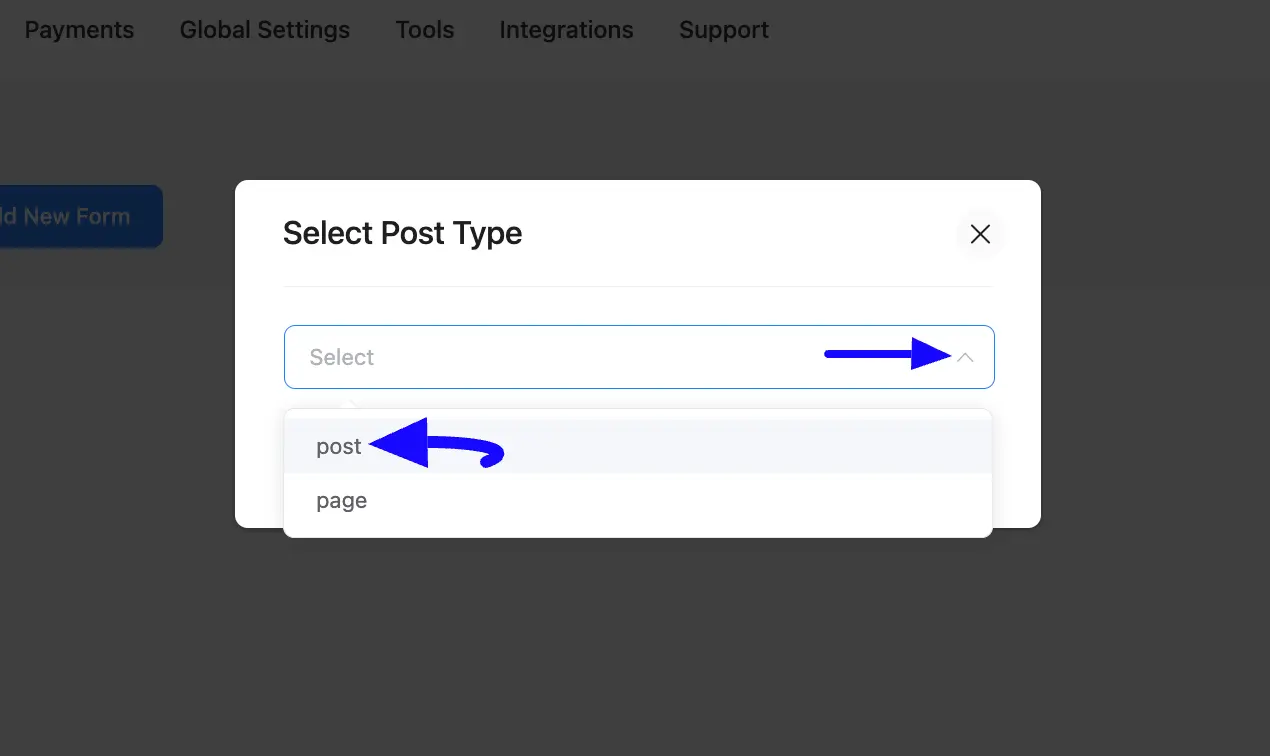
After selecting the Create Post Form, a new pop-up will appear with two basic options Post and Page. Select the Post option from here.
Also, if you have third-party integrations in your site, those options will appear here as well.
Once you select the Post and continue, it will take you to the Form Editor page.
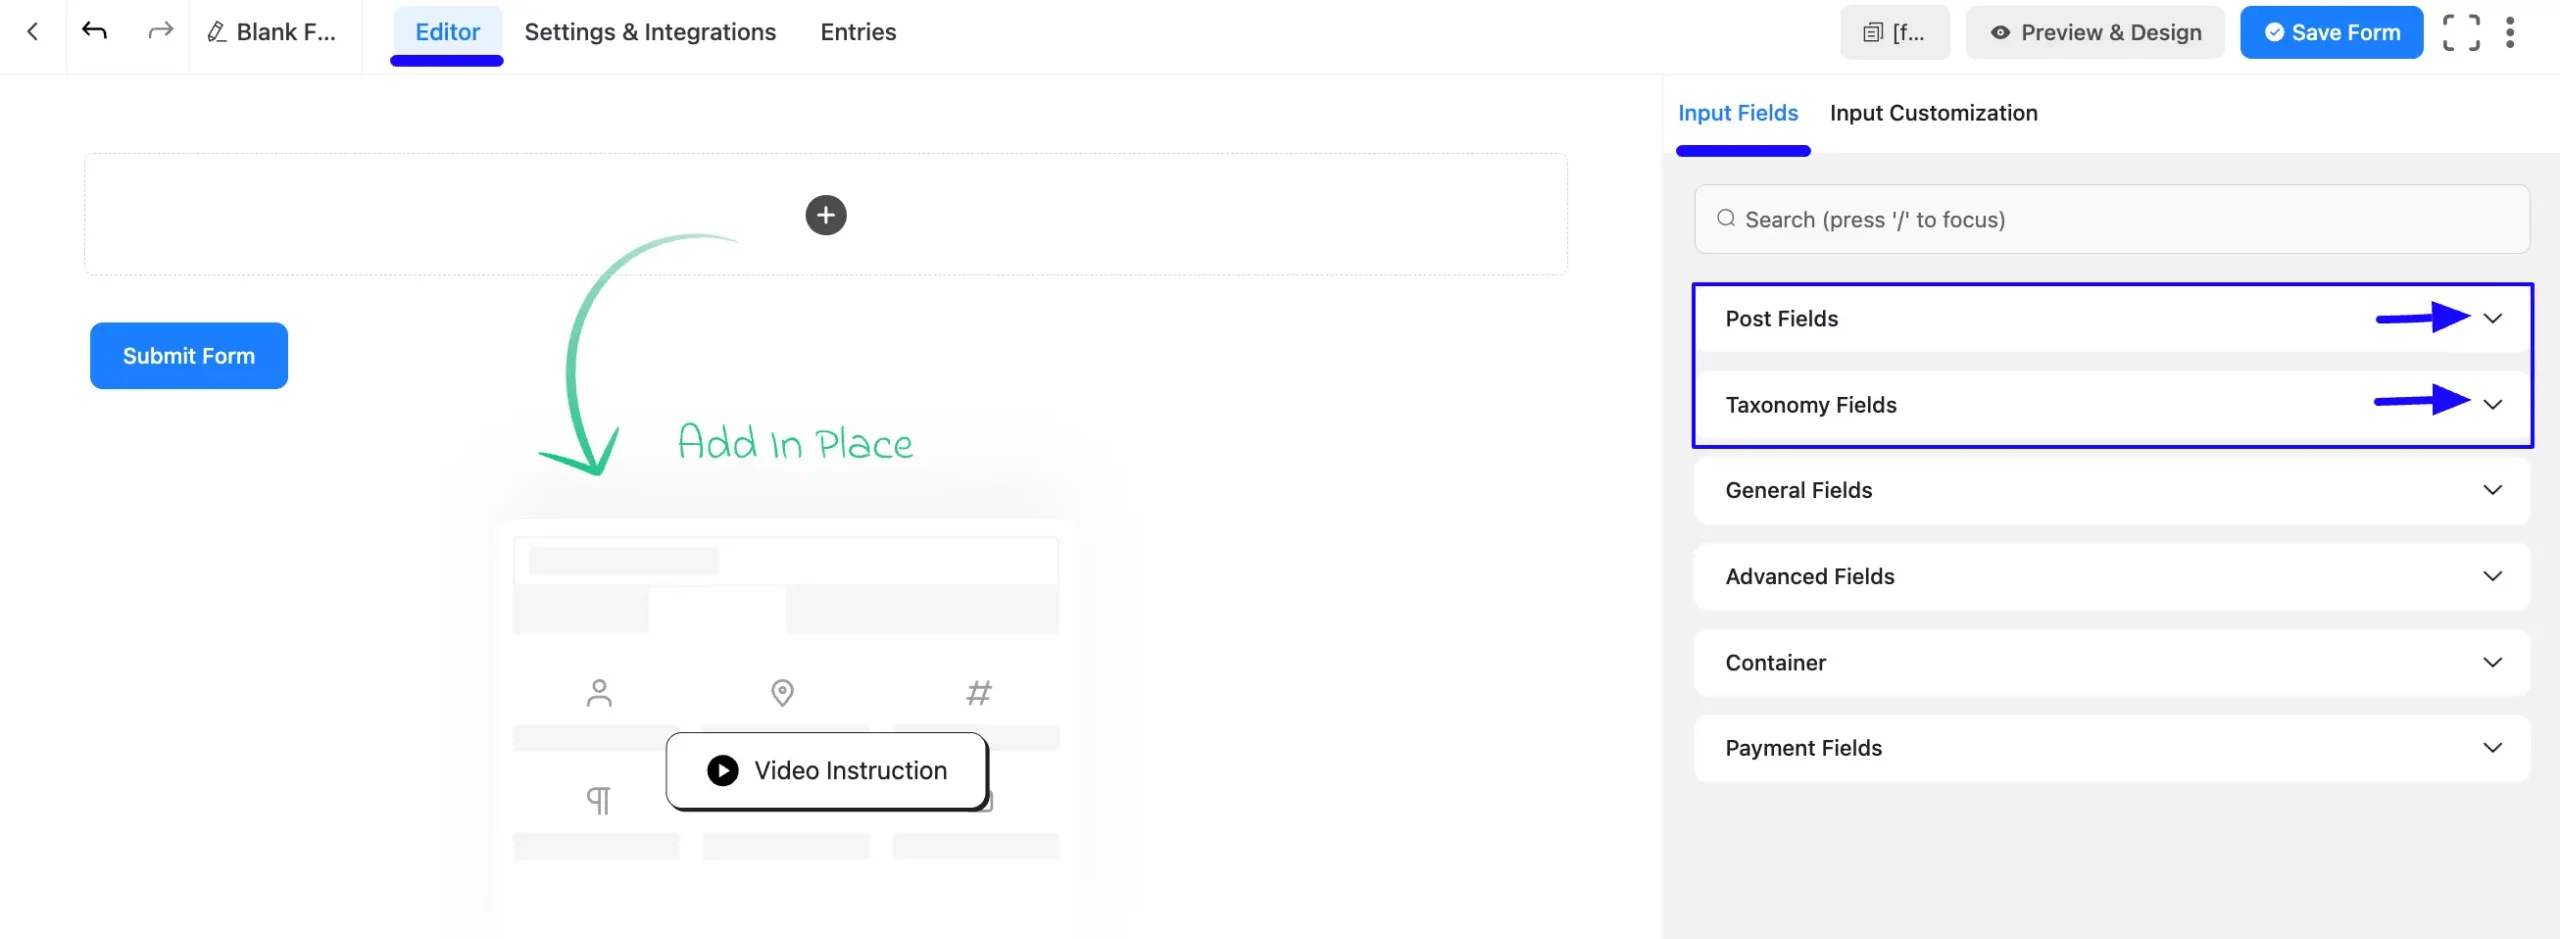
Now, go to the Input Fields in the right sidebar, and you will see the Post Fields and Taxonomy Fields (this module also lets you add taxonomy fields where you can add Categories, Tags, and Formats.) modules are added to help you create a Post Form.
Remember, separate documentation is available for each field in the Post Fields and Taxonomy Fields module. Read them thoroughly to understand the detailed use of each field.
Now, you need to click the Arrow Icon to open the fields modules and add the necessary input fields to create the form.
Add Post Fields #
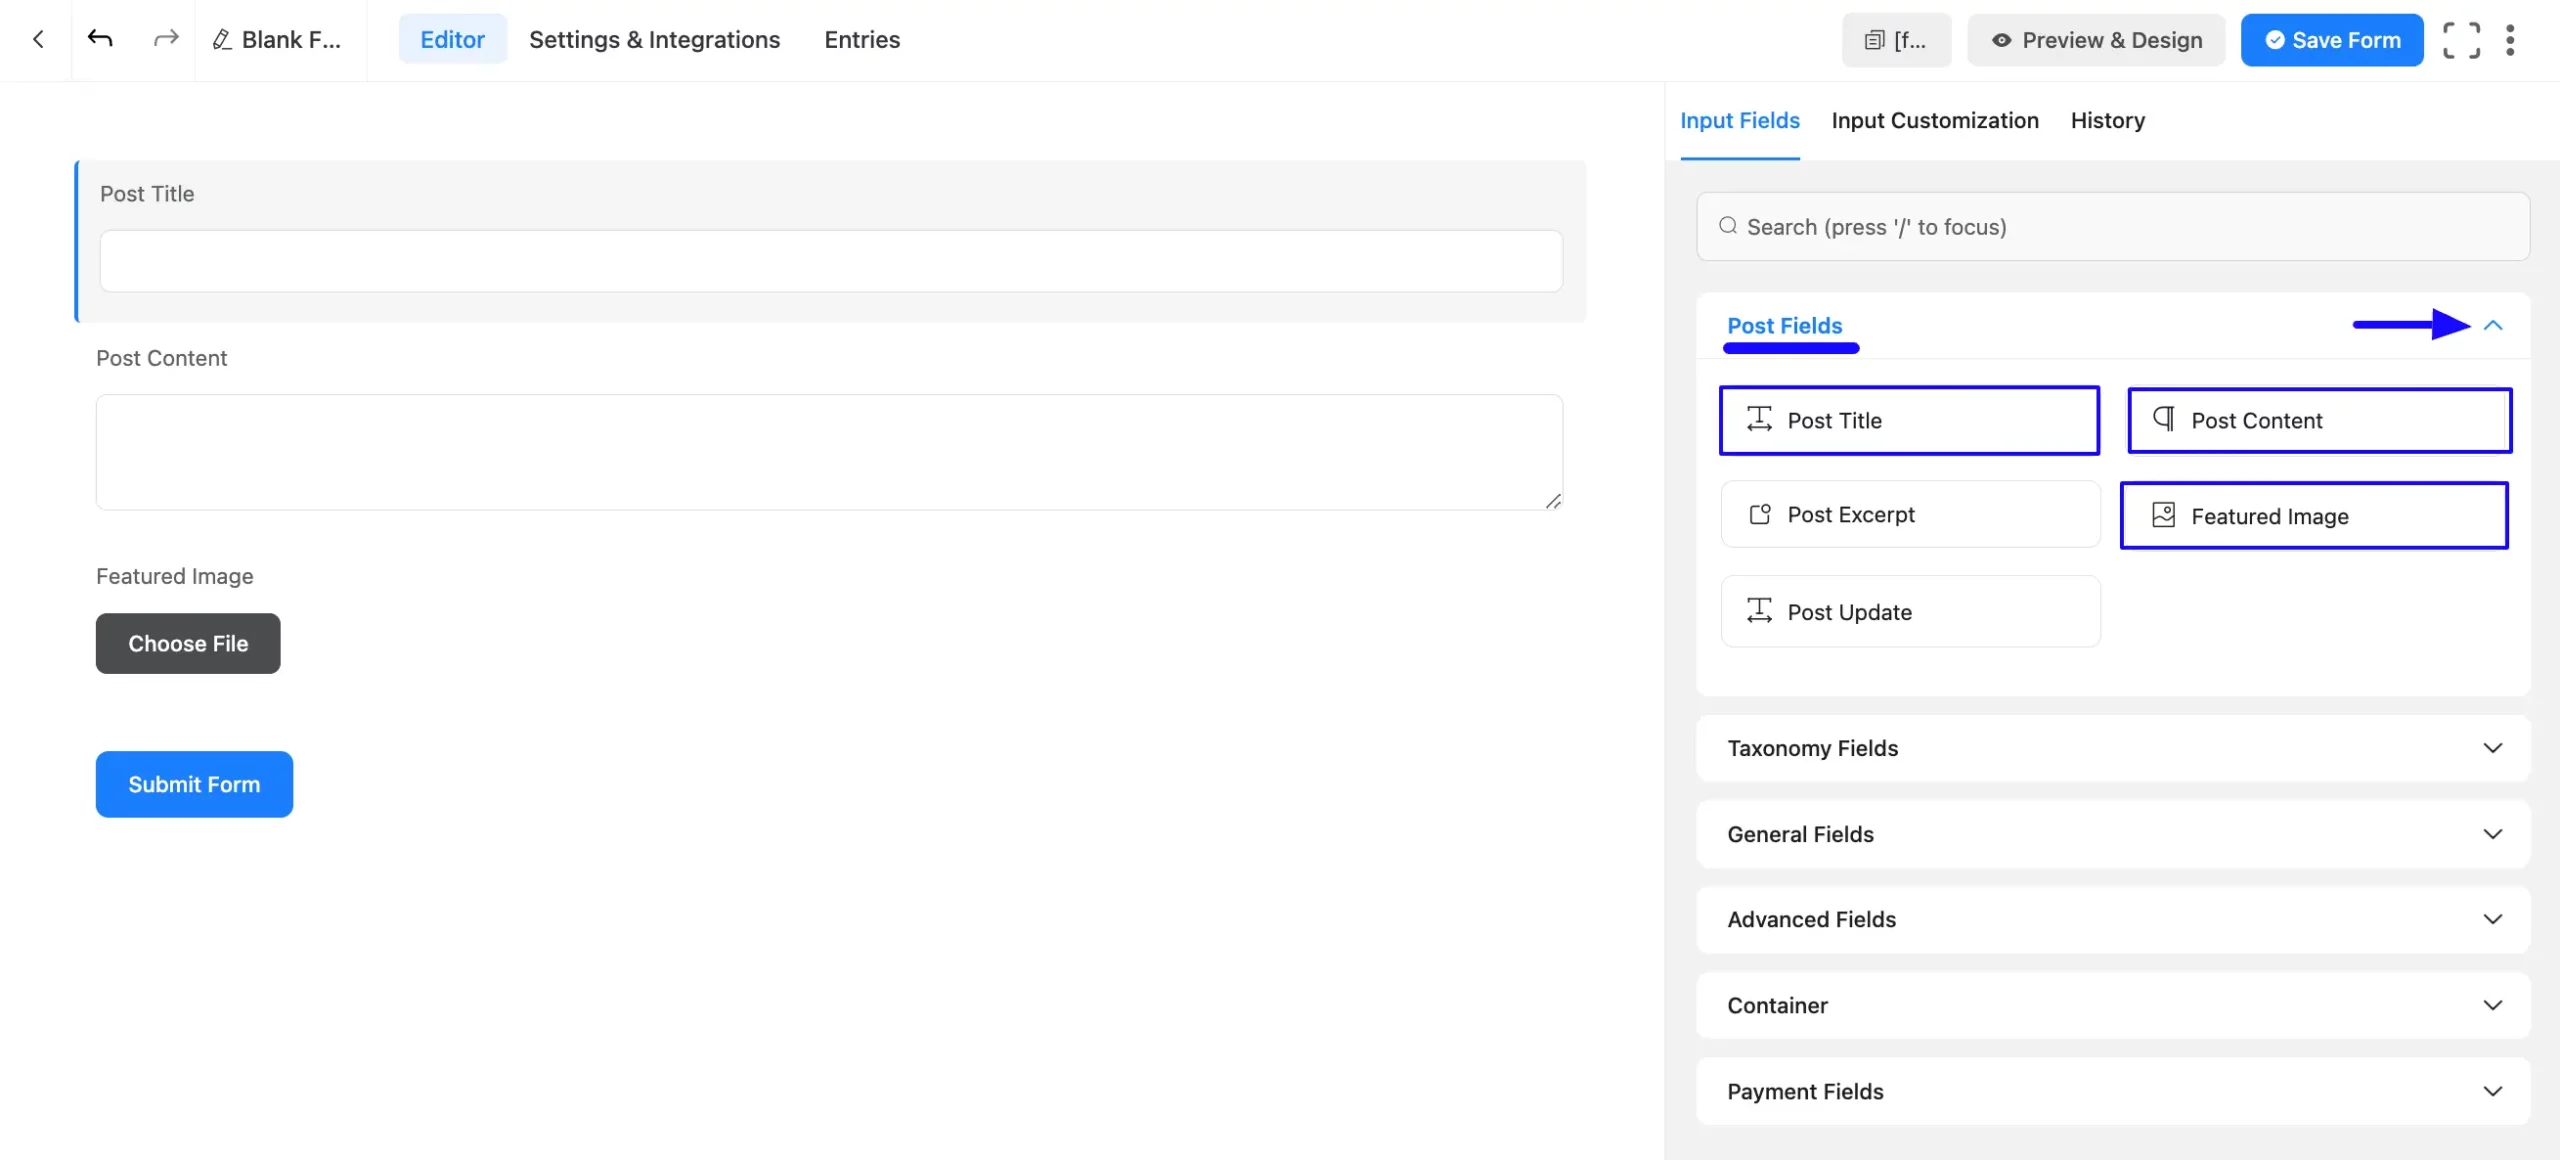
Once you open the Post Fields module, you will get the following Post Fields.
Now, select the necessary fields by clicking on them or Drag & Drop them into the editor.
For example, I added the Post Title, Post Content, and Featured Image fields to show you the further process.
Customize the Form #
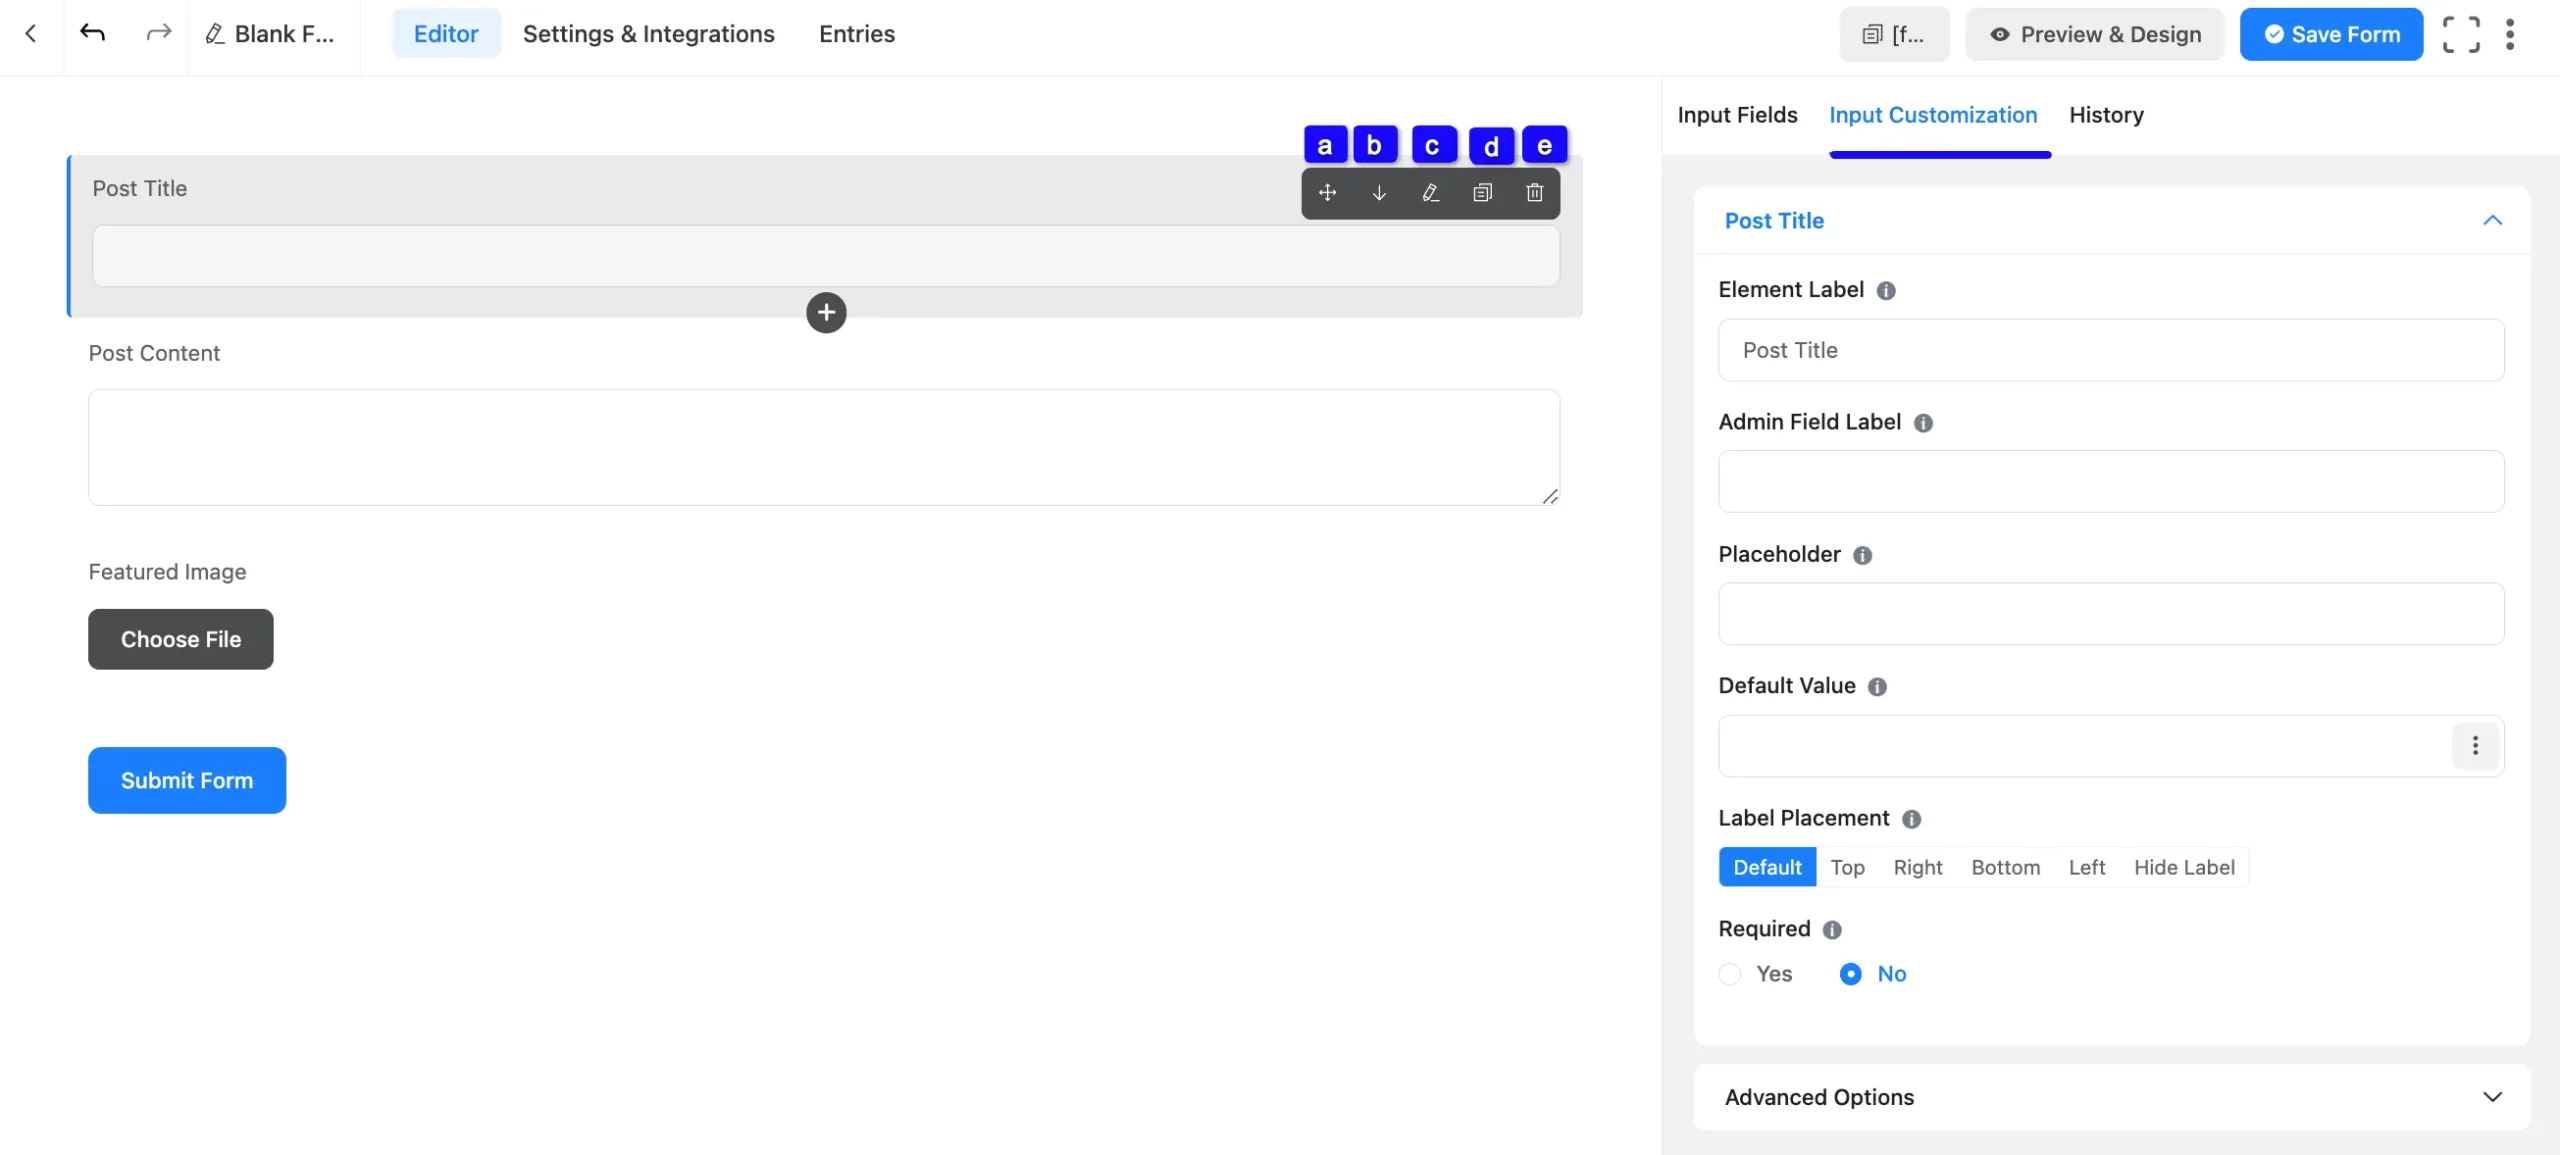
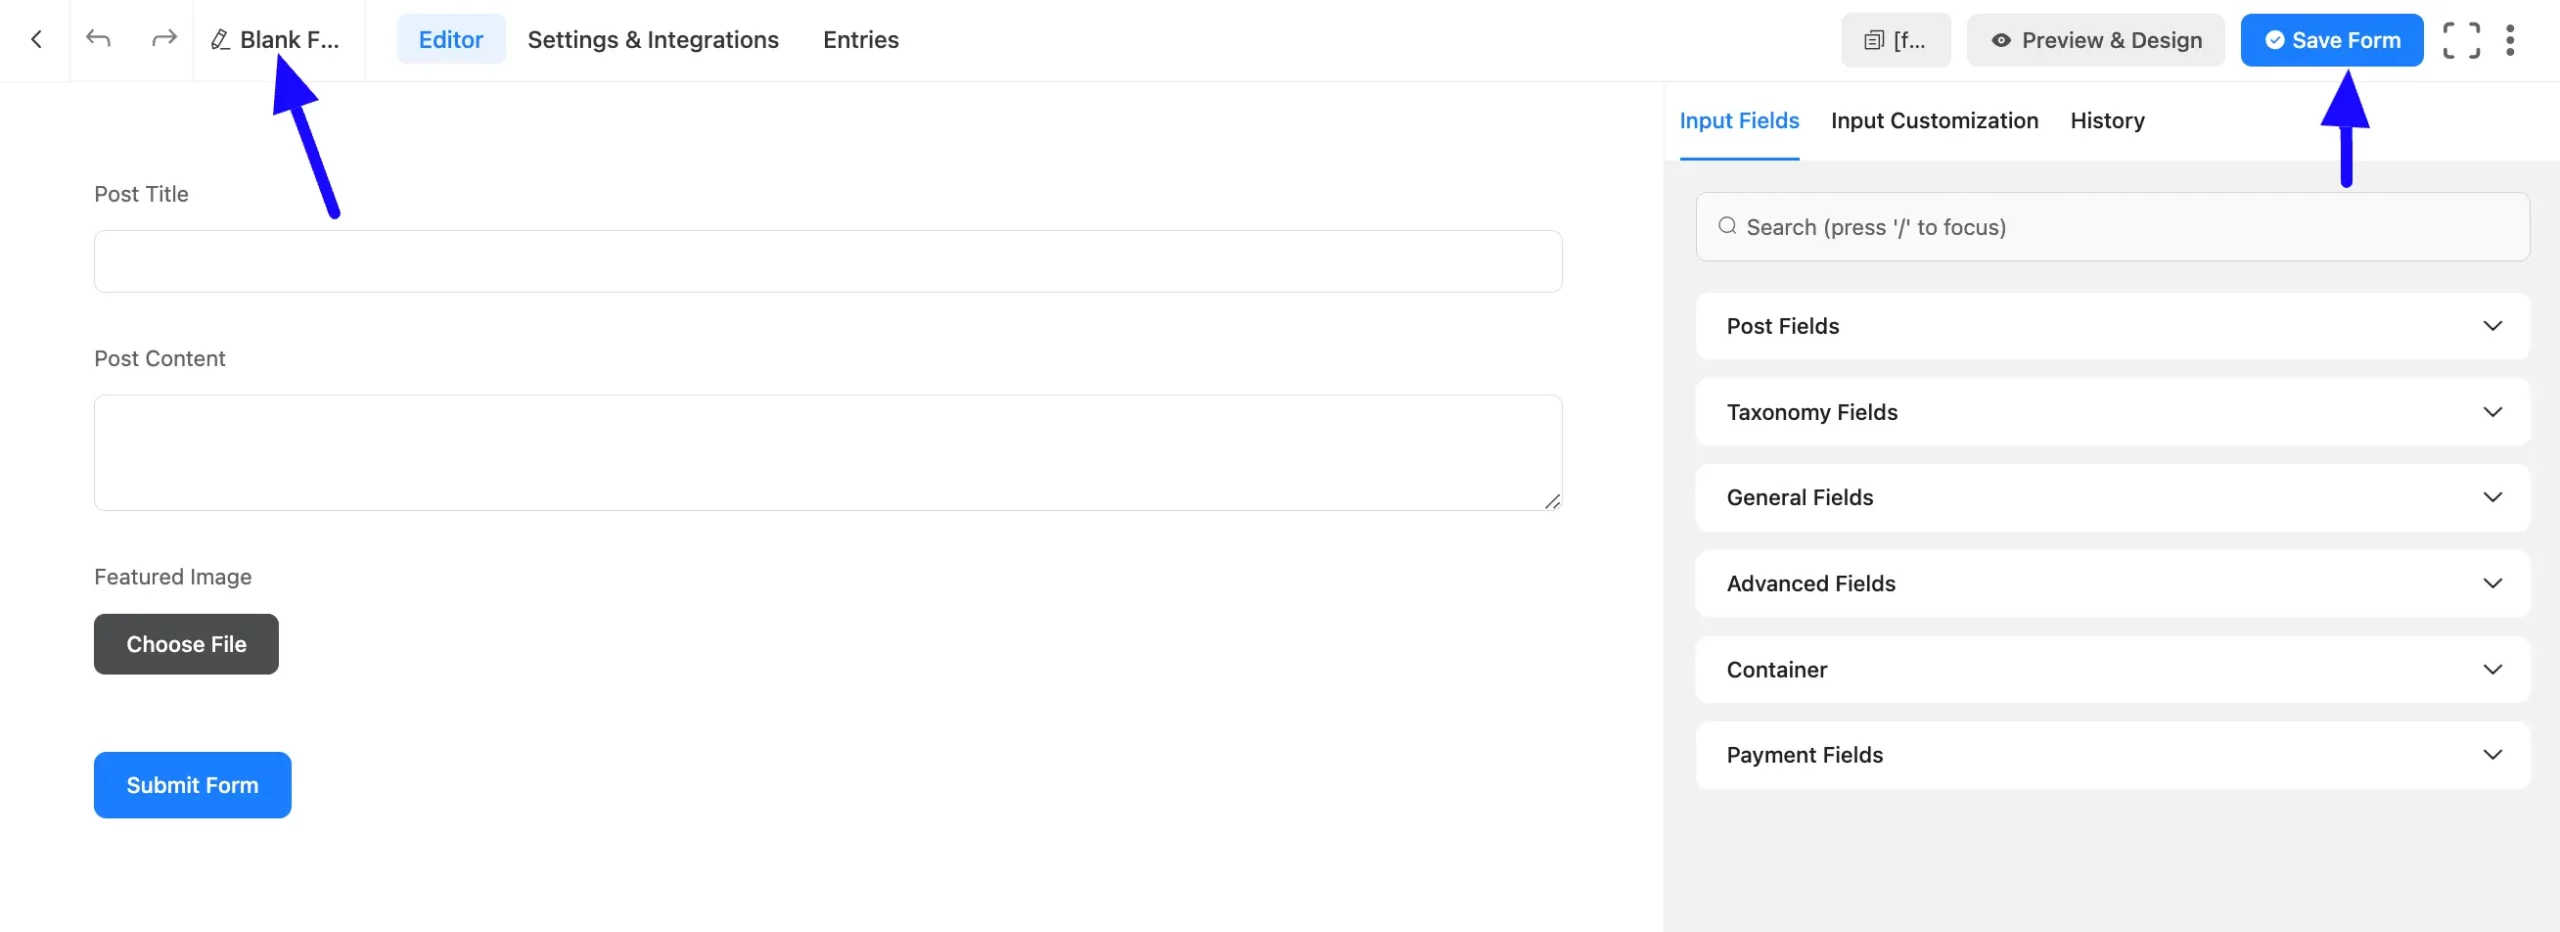
Now you are on the Editor page of your newly created conversational form. Here you can see three fields are already added that you can customize according to your needs.
To customize an added field, hover over it and the following customization options will appear.
a. Drag & Drop: With this option, you can move your fields anywhere easily.
b. Arrow: Using this option, you can move your fields one step up or down.
c. Edit: Click the Pencil/Edit Icon, and it will take you to the Input Customization tab on the right sidebar which offers a wide range of options for customization.
d. Duplicate: Click this button and the field will be duplicated.
e. Delete: Click this Trash Icon and your field will be deleted.
To see the recent changes you made in your form click the History tab. Plus, from this tab, you can restore or delete recent edits at any time by clicking the Restore button or Delete Icon.
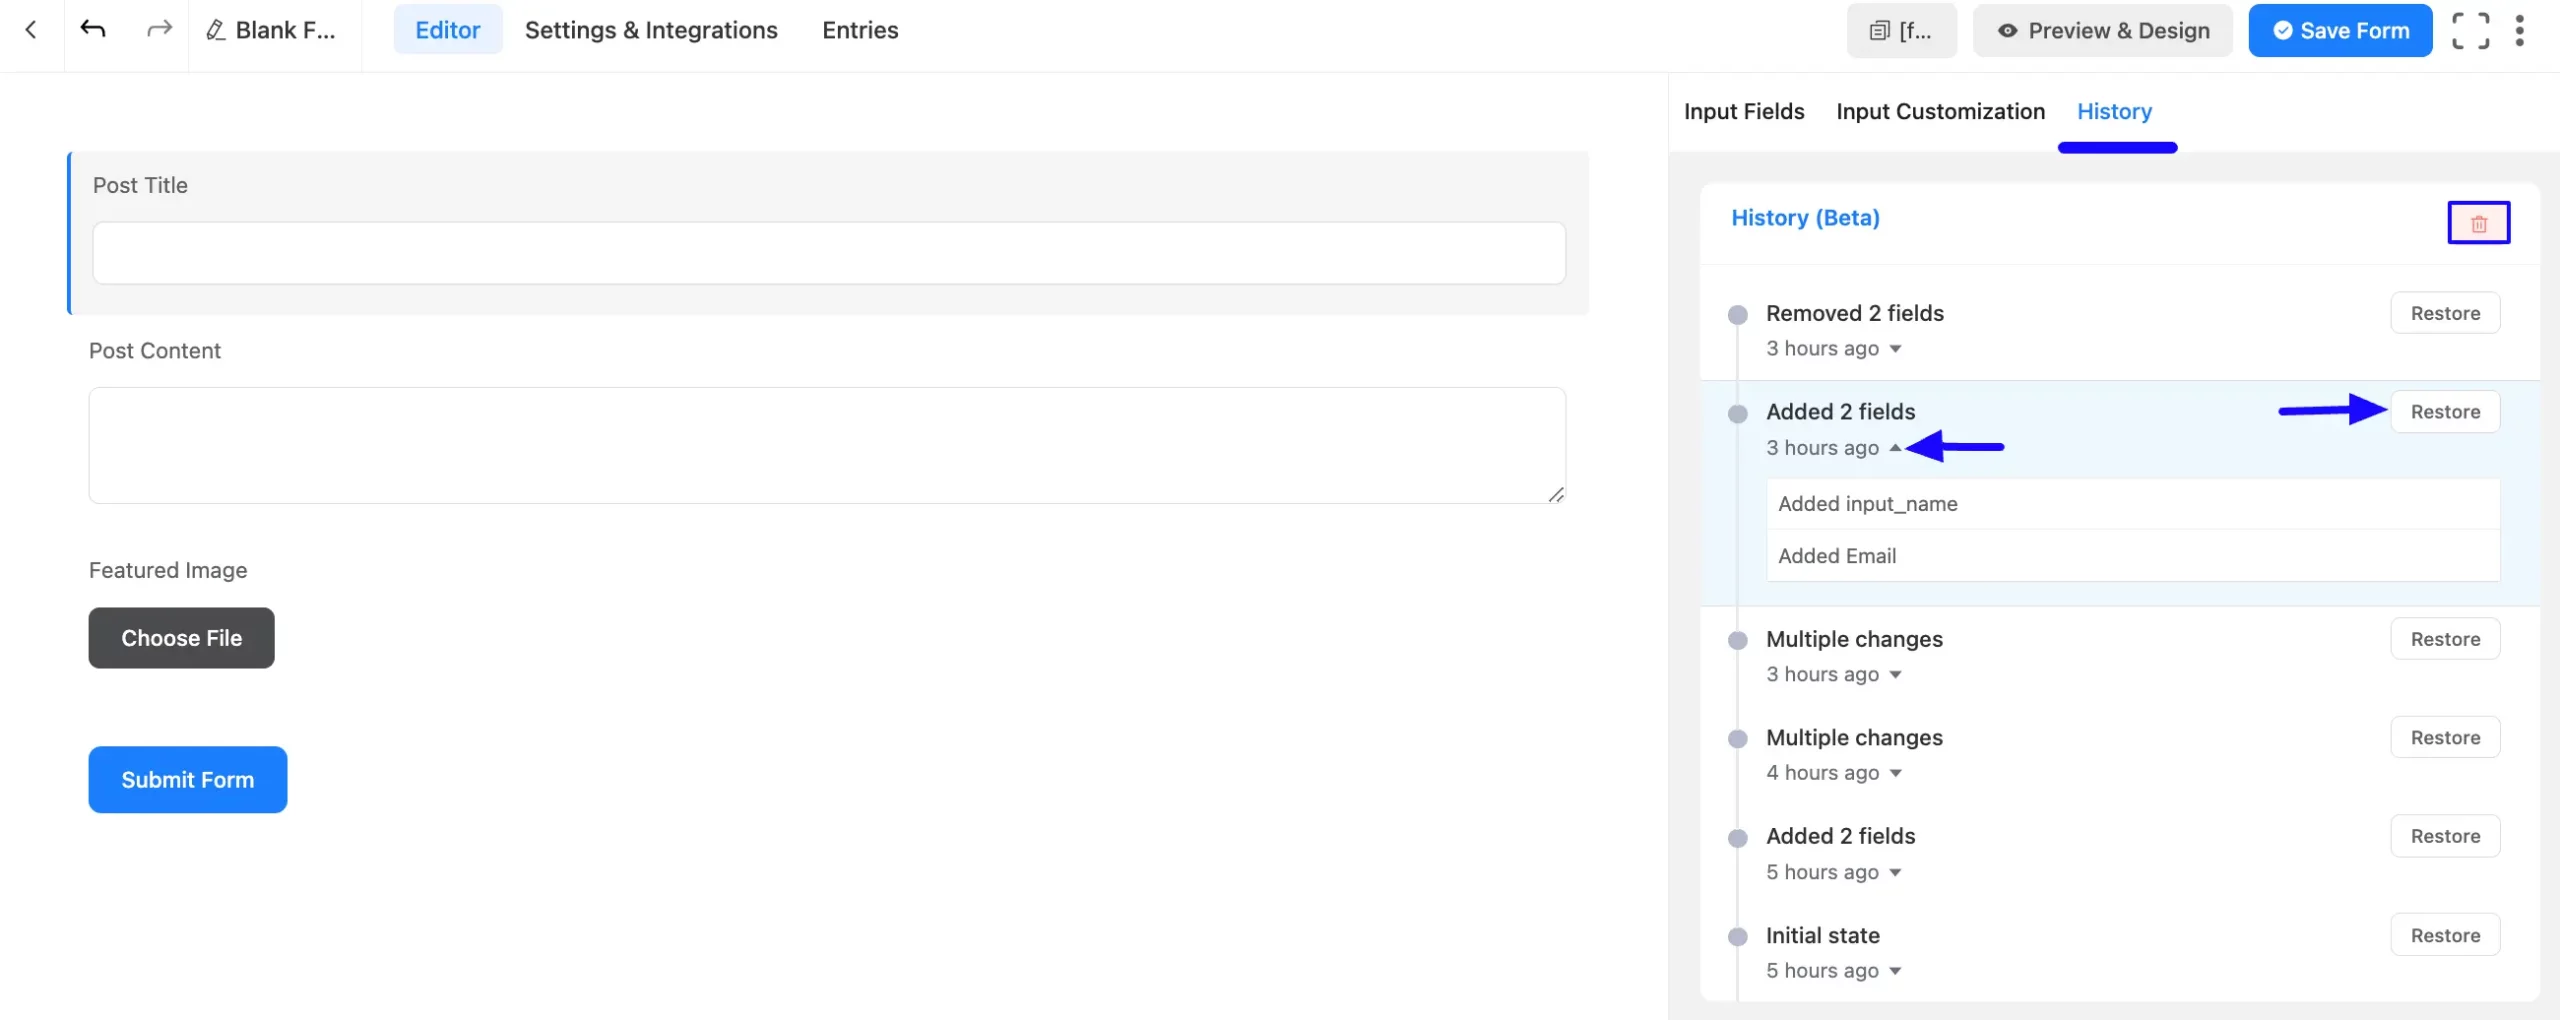
You can change your Form Name anytime by clicking the Pencil Icon in the top left corner.
Once you finish your customization, press the Save Form to save all your changes.
Configure Post Feed Settings #
Lastly, configuring the Post Feed is mandatory to make your Post Form functional. It helps you map your added post fields for data collection and allows users to create more customized posts.
To learn how to configure Post Feed with the Post Form, follow the steps below –
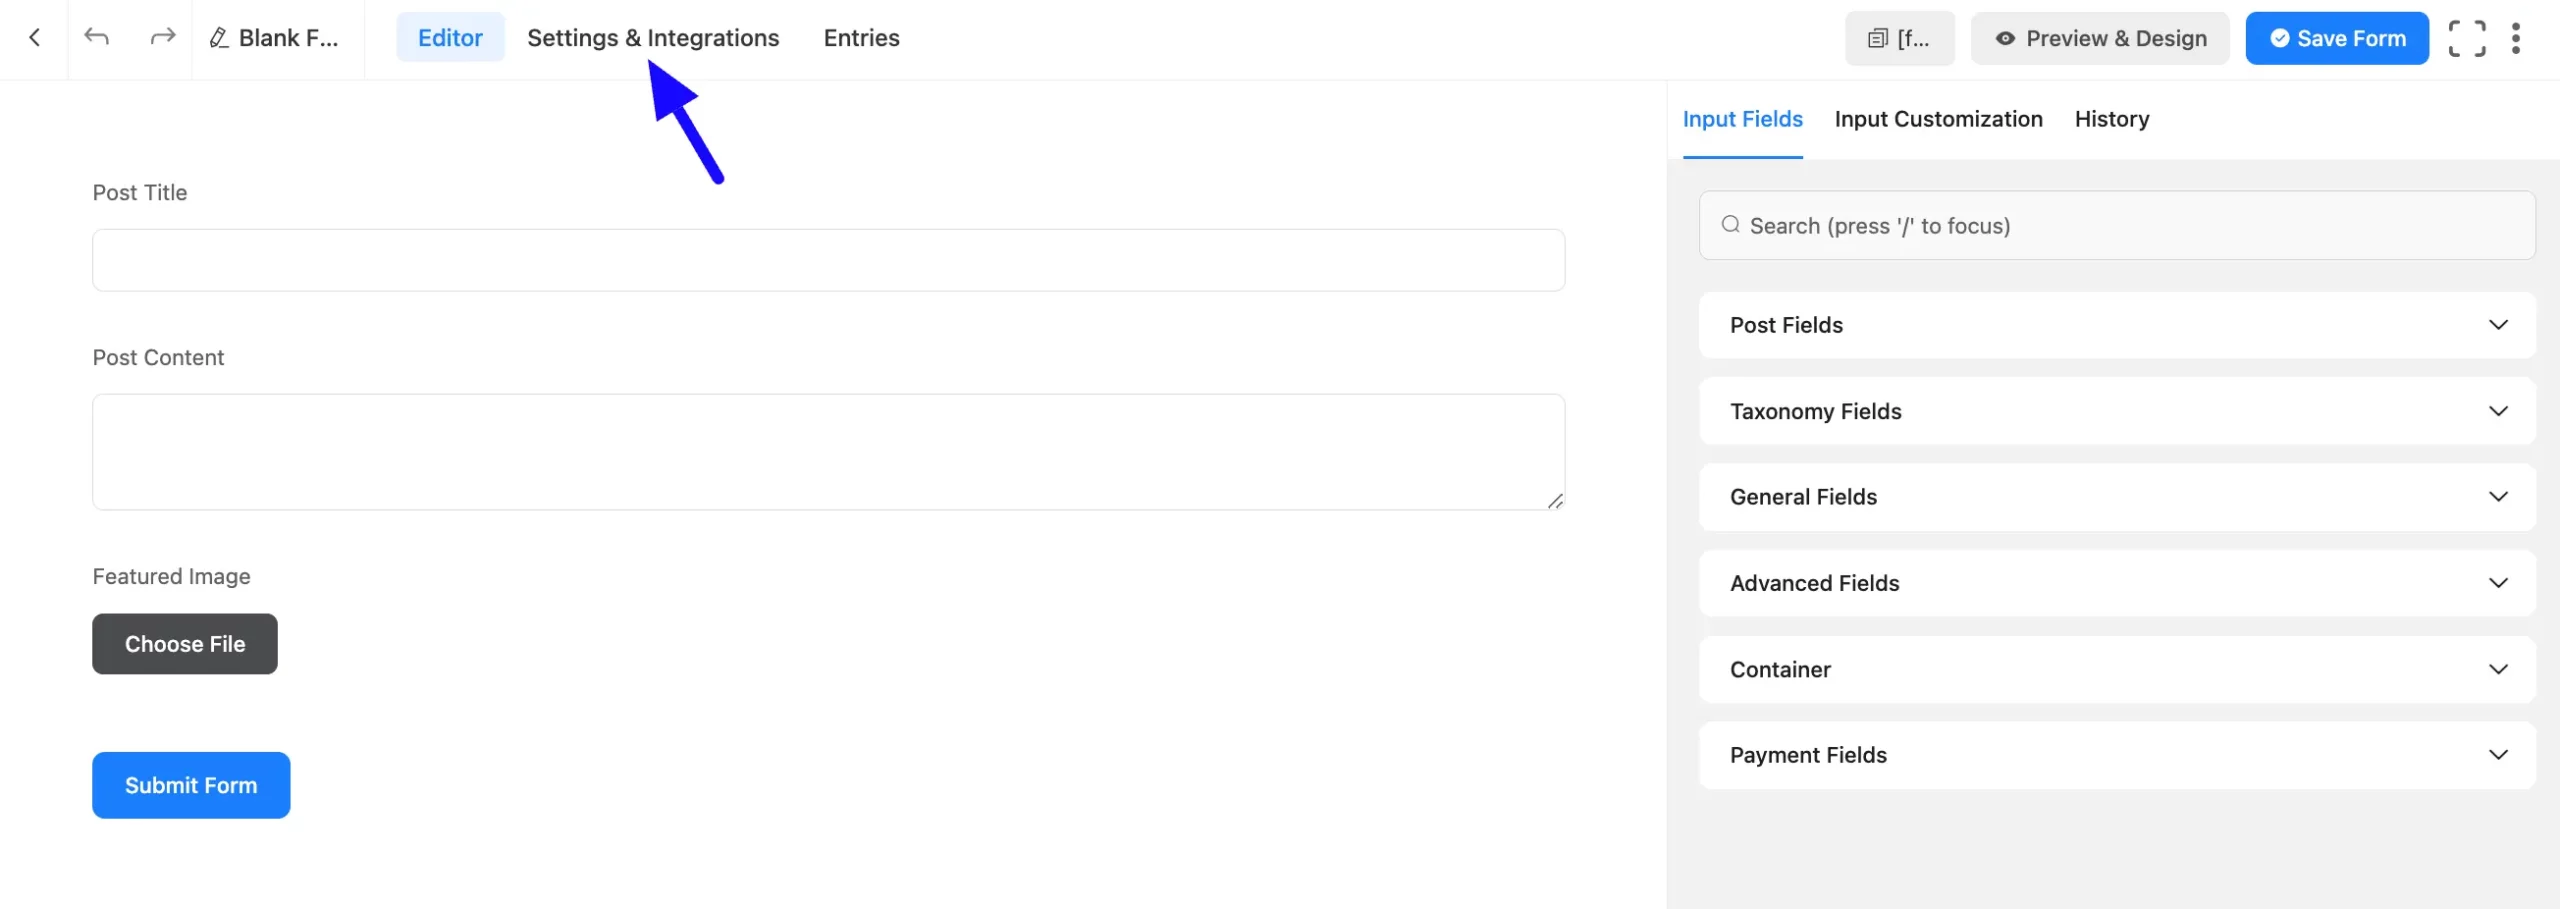
First, go to Settings & Integrations from the Editor page of your desired Post Form where you want to configure the Post Feed.
Now, open the Post Feeds tab from the left sidebar and click the + Add Post Feed button.
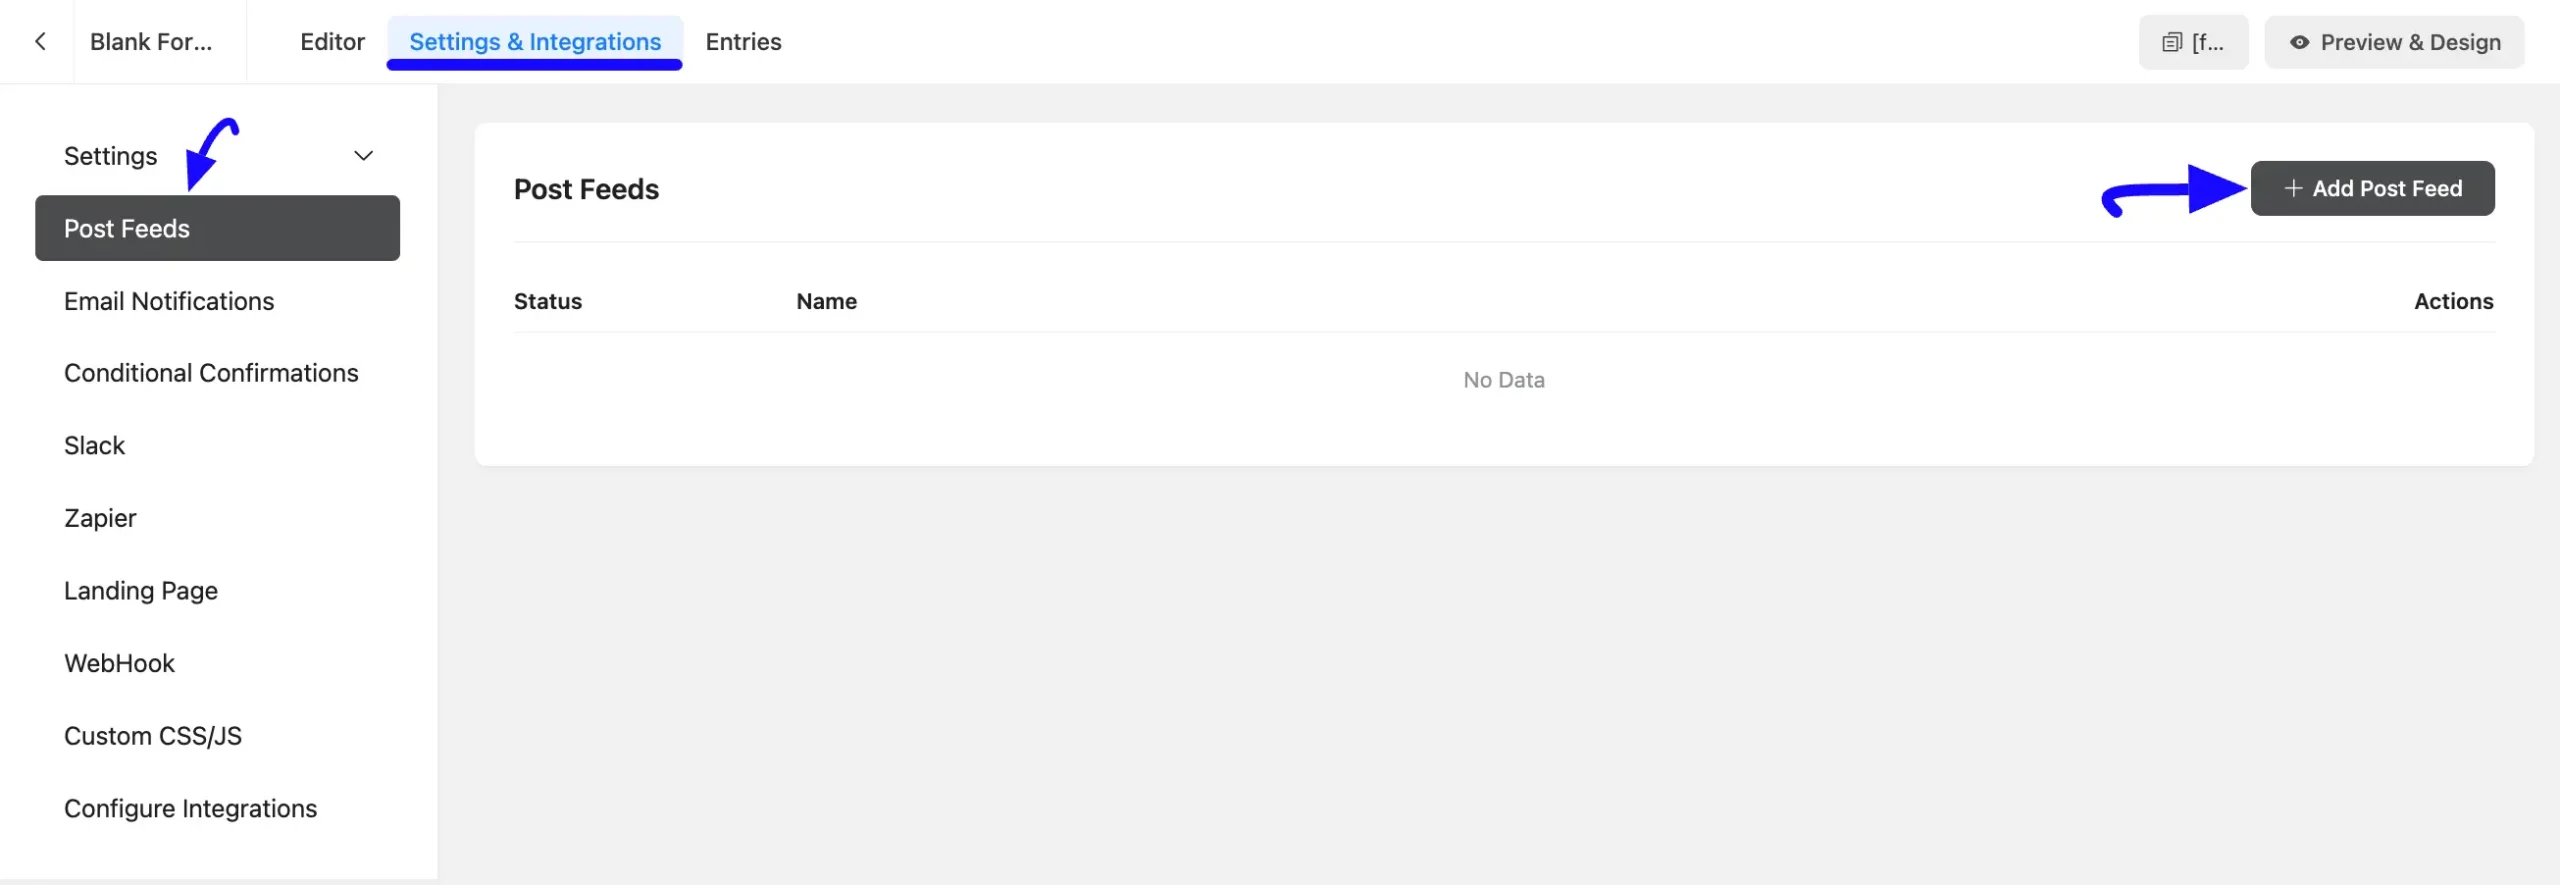
Then, a pop-up page will appear with various settings options for configuring the Post Feed.
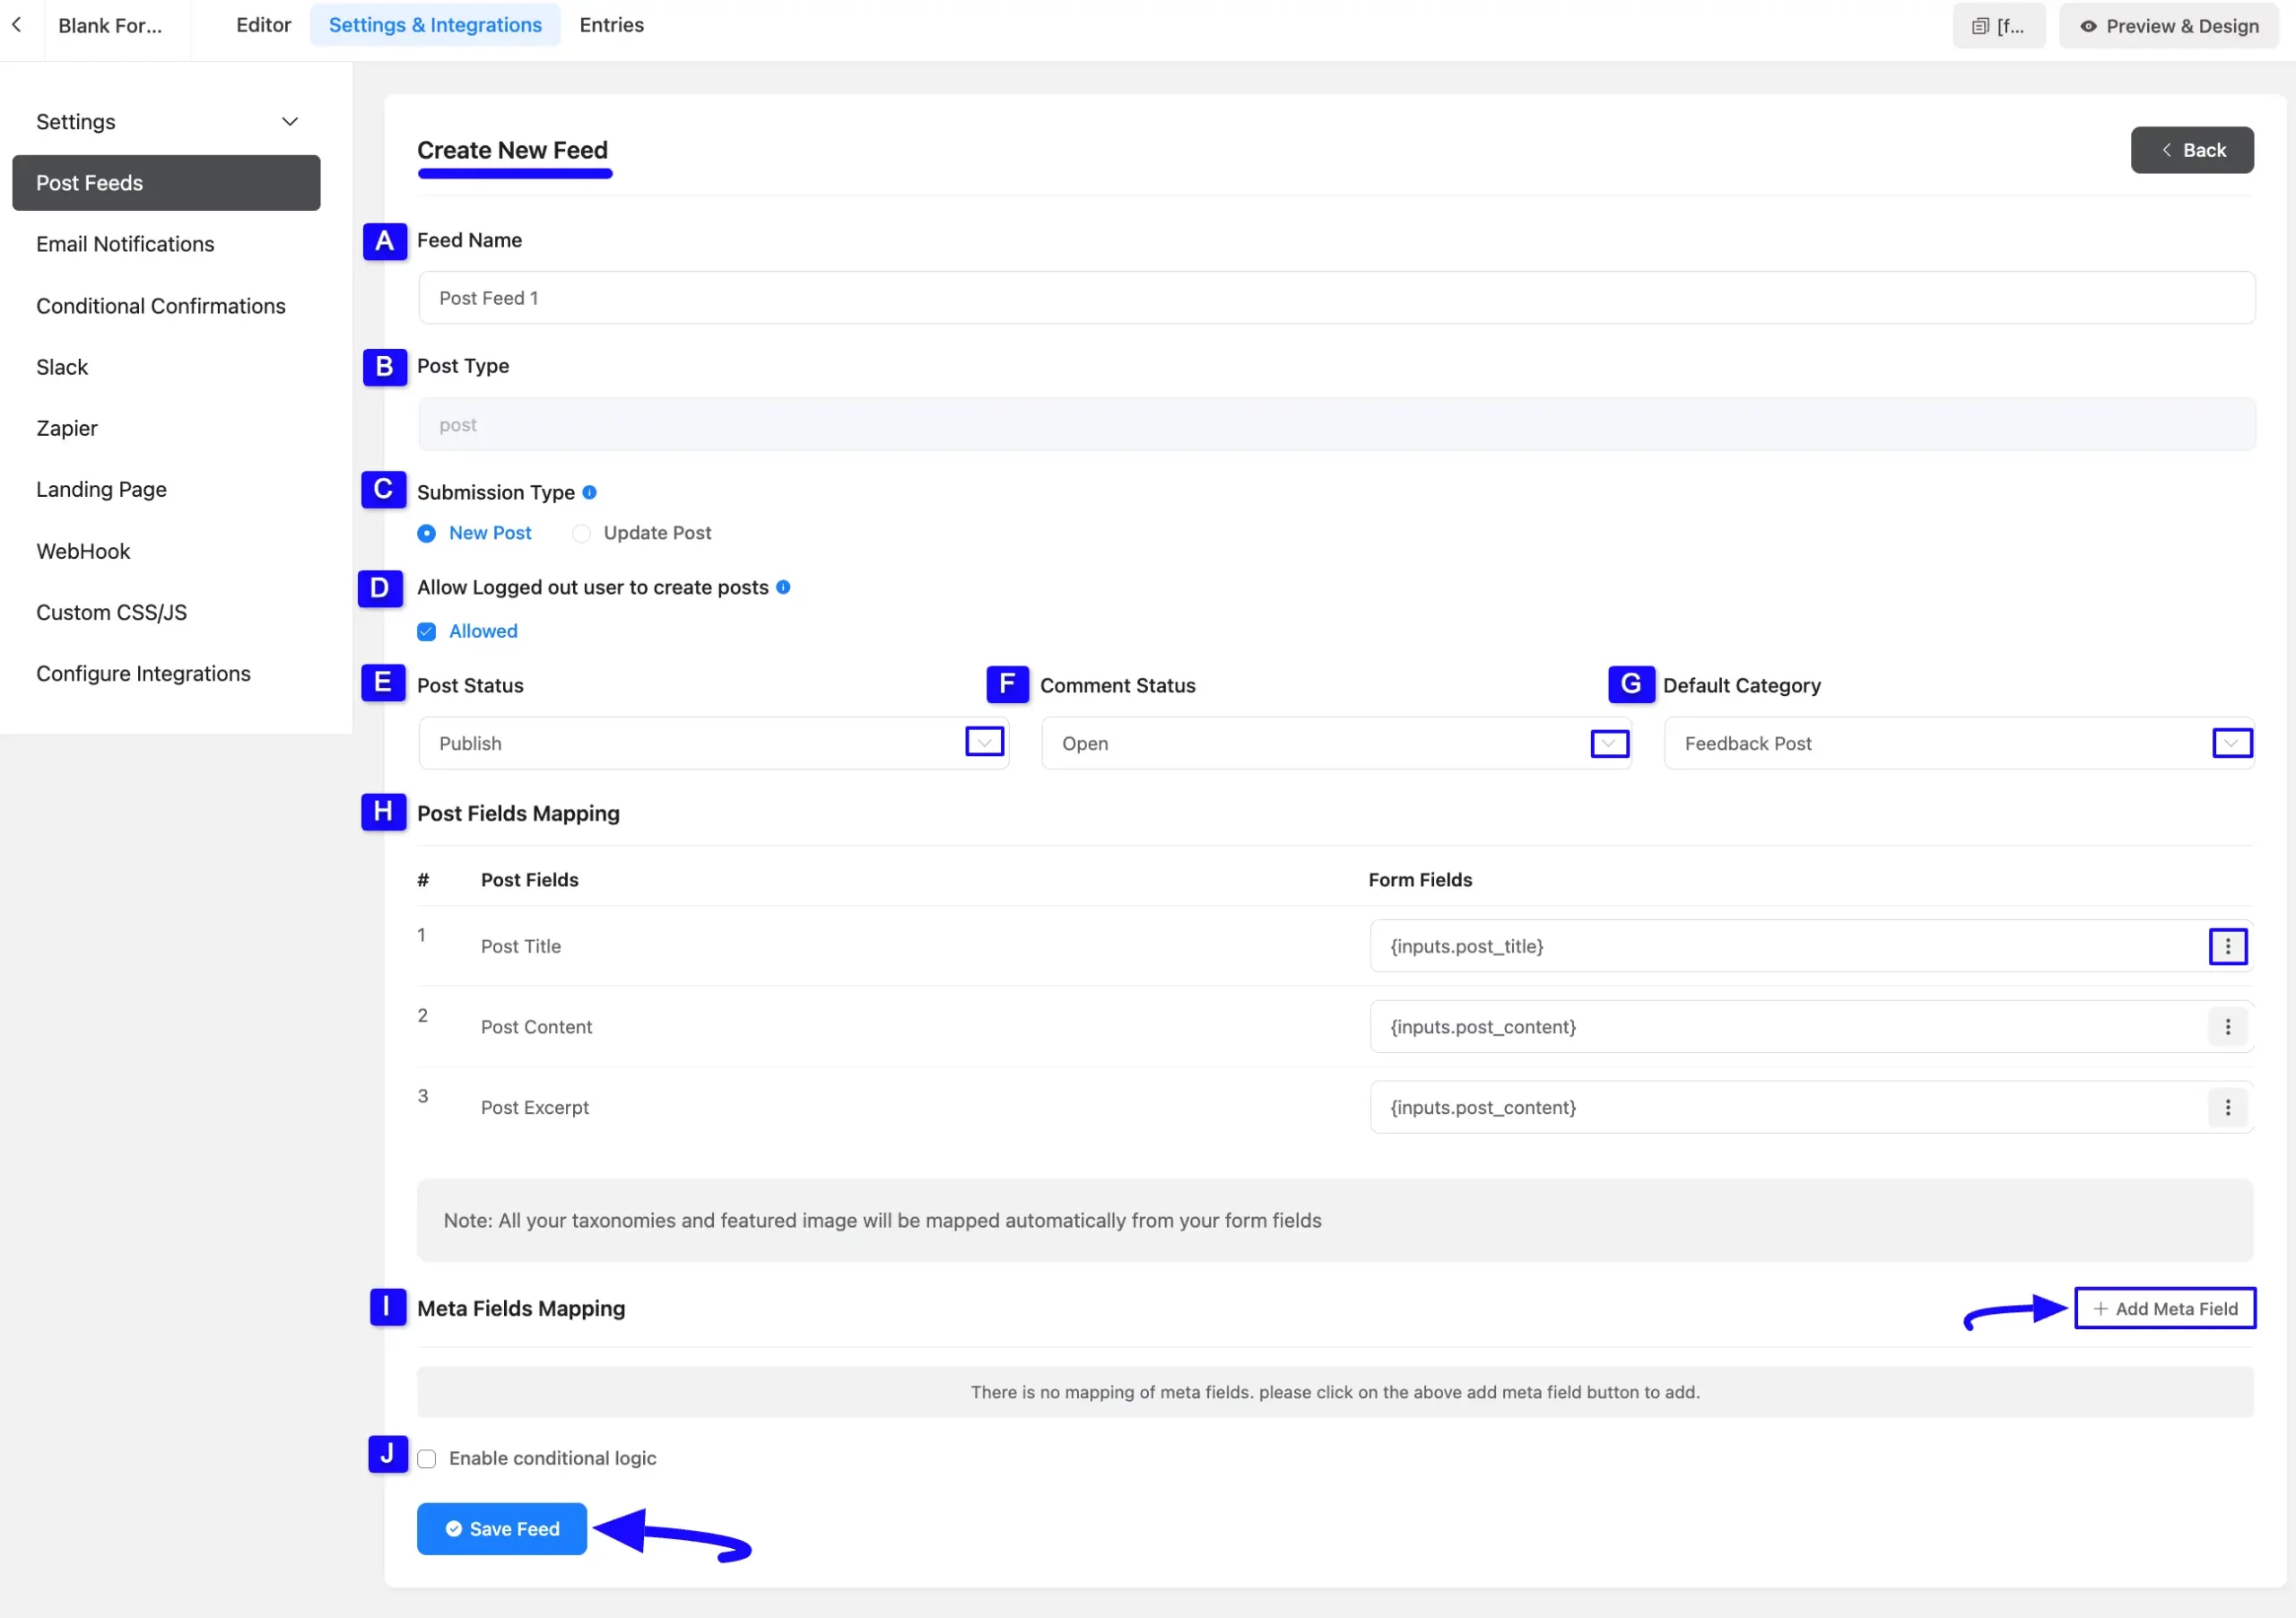
All the settings options mentioned in the screenshot below are briefly explained: #
A. Feed Name: Here, you can give a name to your Post Feed to easily find it later. You can change the name anytime if needed.
B. Post Type: You can not change the Post Type. That is why select the Post Type at the beginning of form creation.
C. Submission Type: Here, you can select the submission type. Actually, For post updates, only one feed is available, if you have more than one feed the first one will work.
D. Allow Logged out user to create Posts: This option is enabled by default. Disable this if you want to allow guest users to update posts. Otherwise, keep it enabled.
E. Post Status: Here, you can select the Post status between Draft, Pending, Private, and Publish.
F. Comment Status: Here, you can select the Comment status between Open and Close.
G. Default Category: Here, you can select the Default Category from the existing Post Category you have in your WordPress Site.
H. Post Fields Mapping: Use all the fields under this option to properly link your Post Fields with the Form Fields. You can easily select the value for the form fields based on the Post Fields Shortcode using the Three-Dot button on the right corner.
I. Meta Fields Mapping:
J. Enable Conditional Logic: This option allows your Post Feed to function conditionally based on your submission values according to your set conditional logic/s. To learn more, read this Documentation.
Once the setup is done, click the Save Feed button and your ActiveCampaign will be integrated into this specific form!
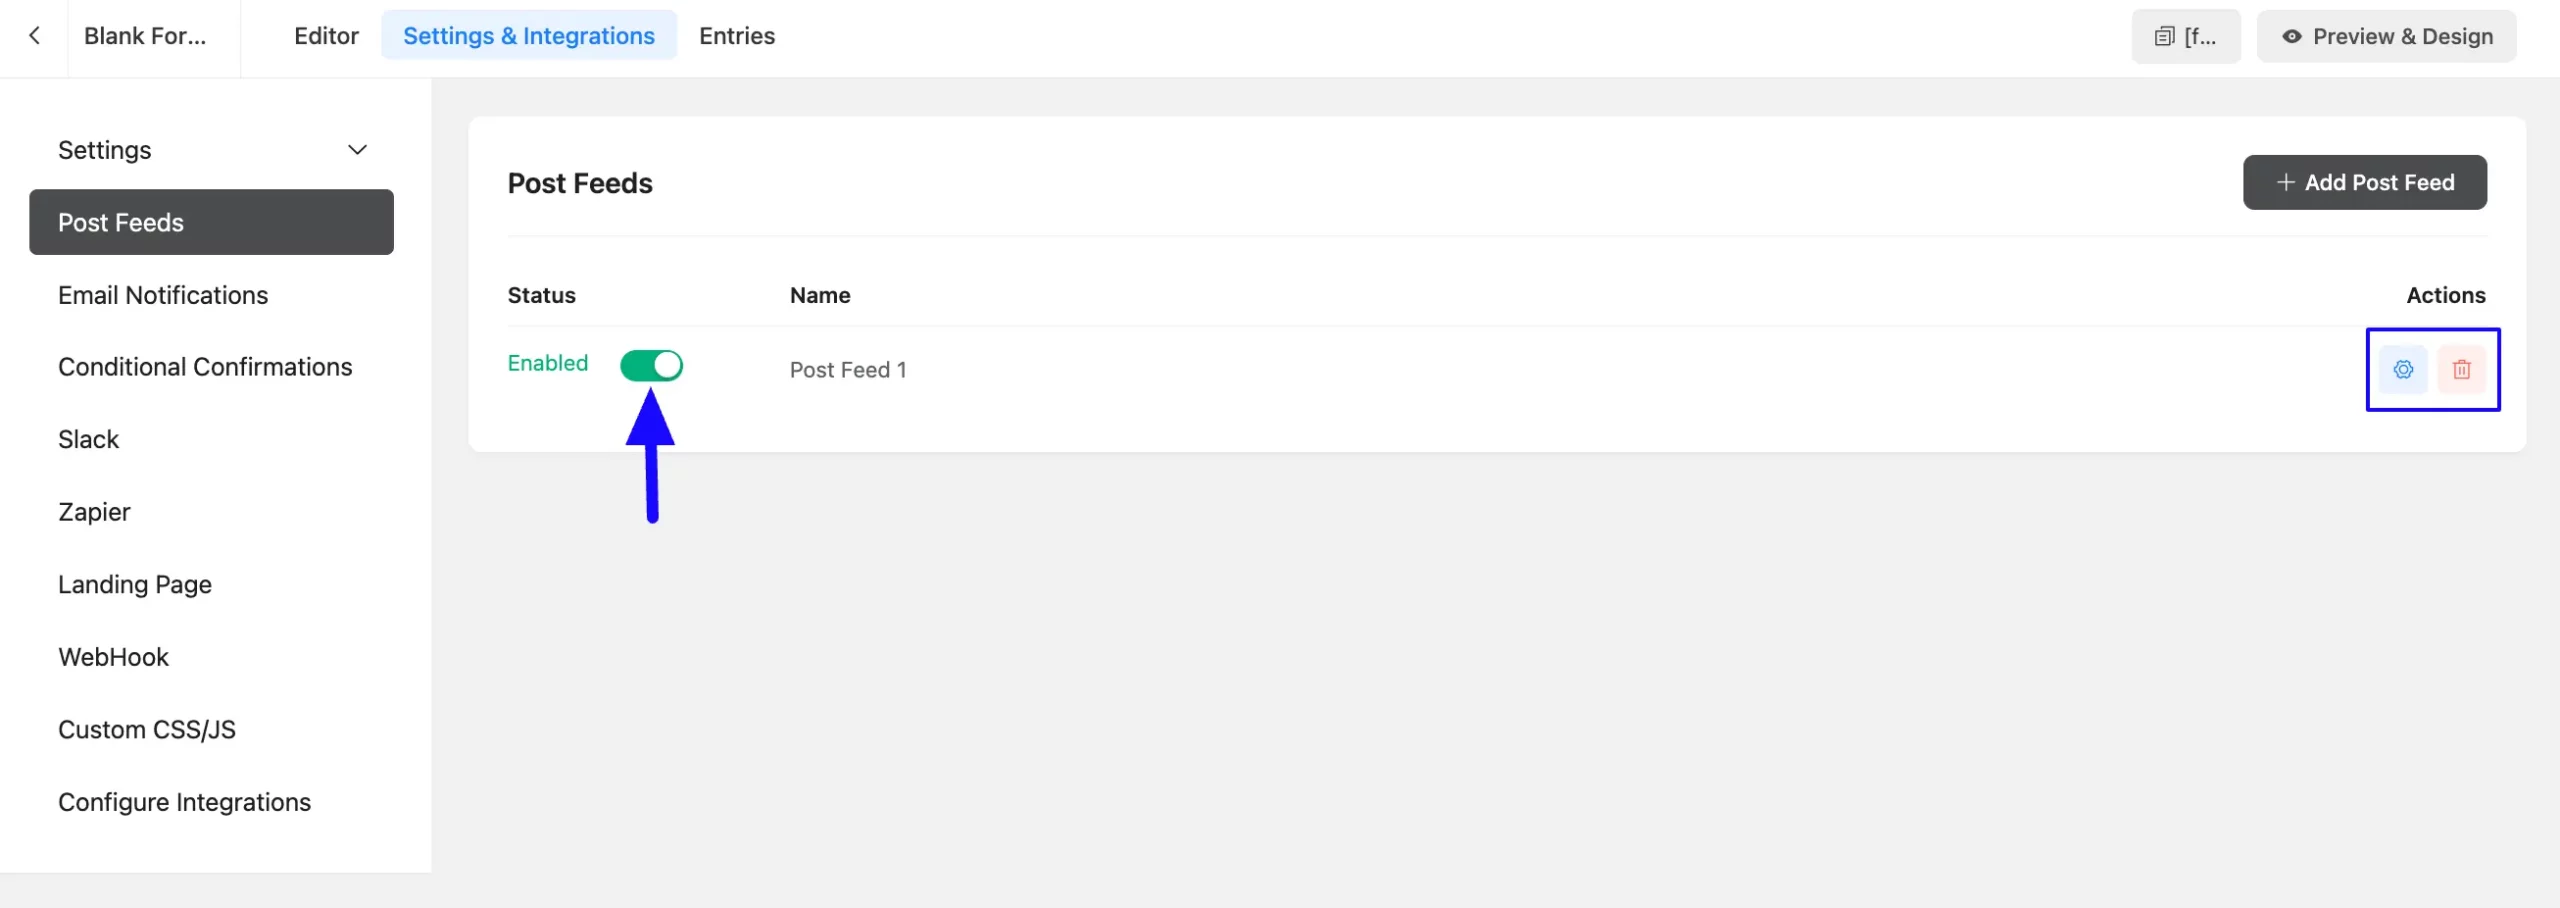
After successful configuration, you will see that your Post Feed has been added here.
You can modify your feed anytime by clicking the Settings Icon and delete it by clicking the Trash Icon.
Ember Form into Frontend #
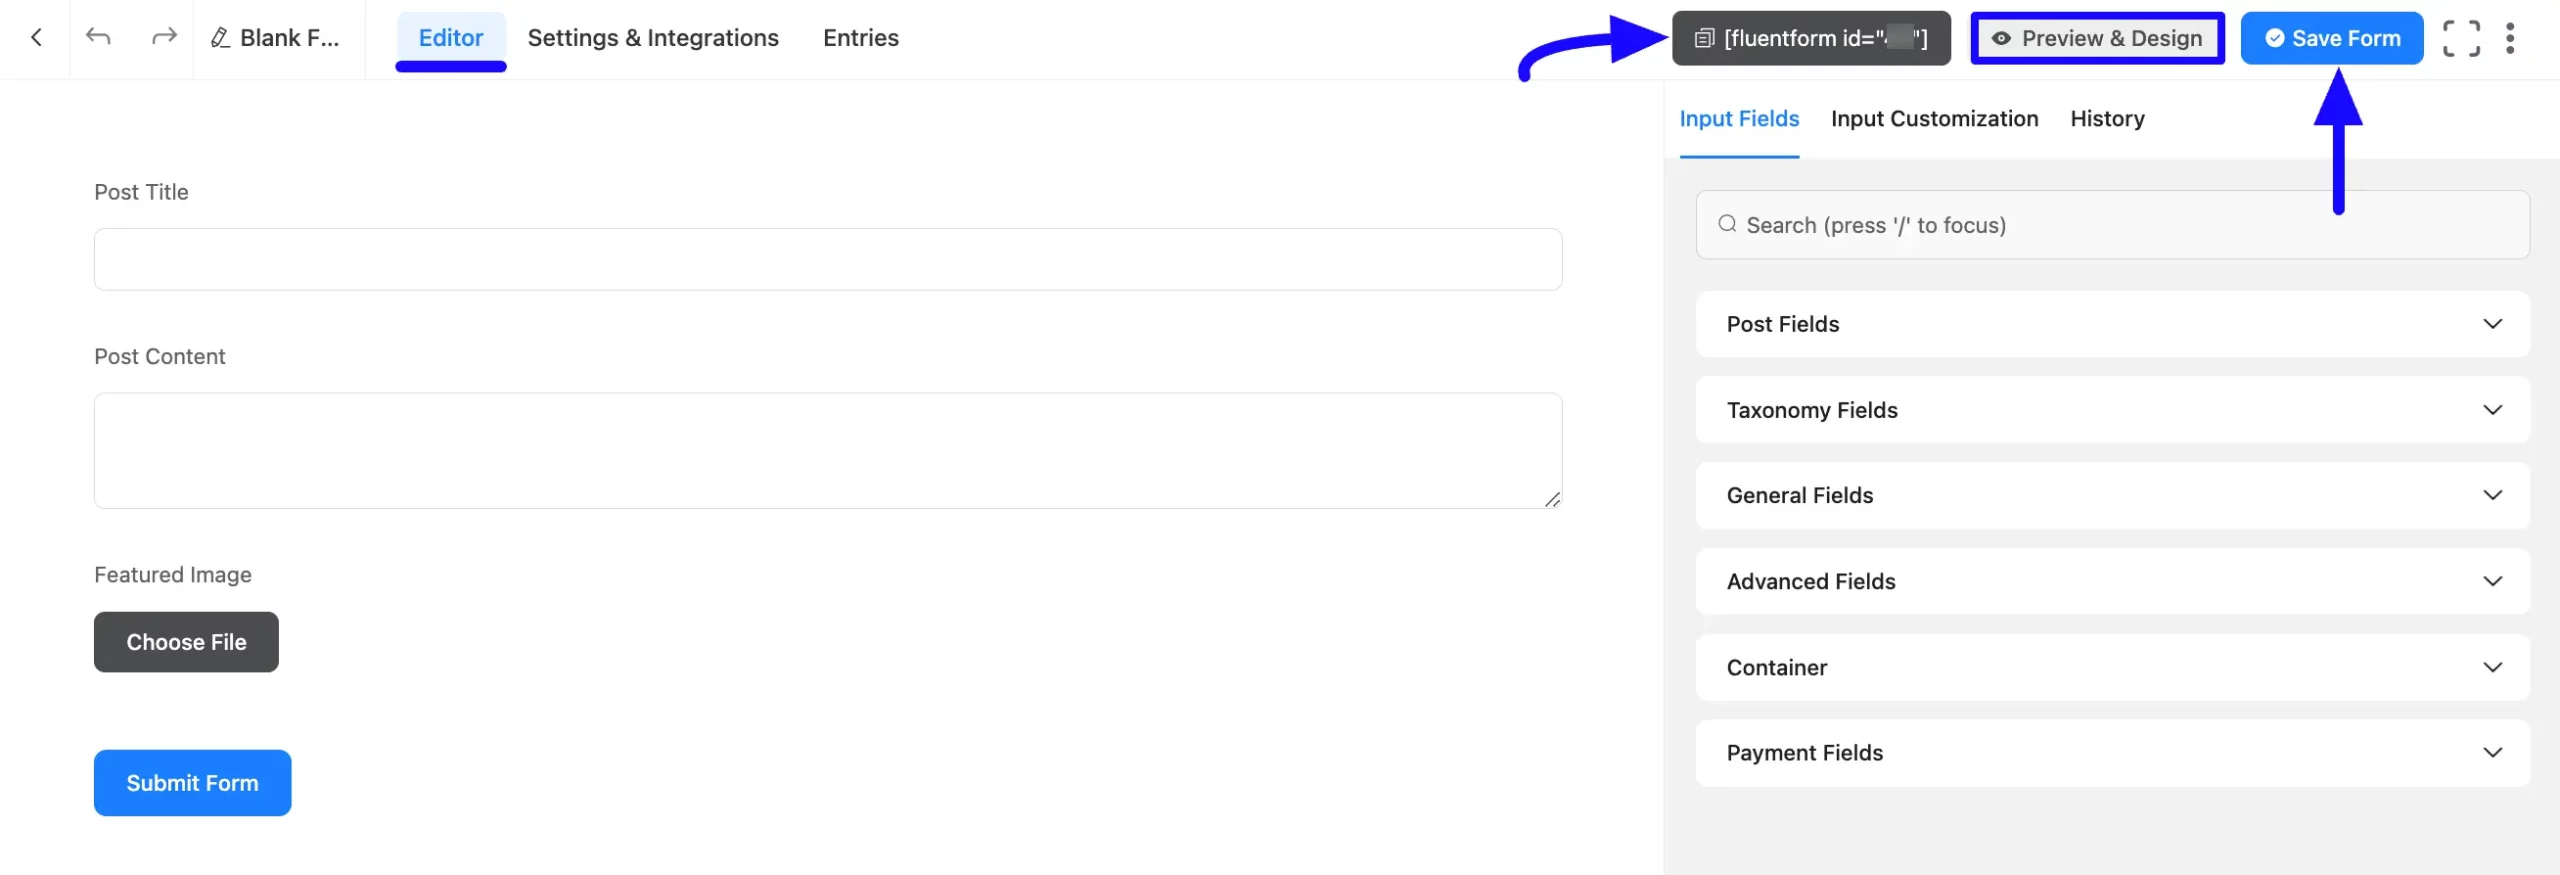
Once you complete the process, press the Save Form button to save all your changes.
Also, to see the form preview, click the Preview & Design button in the middle.
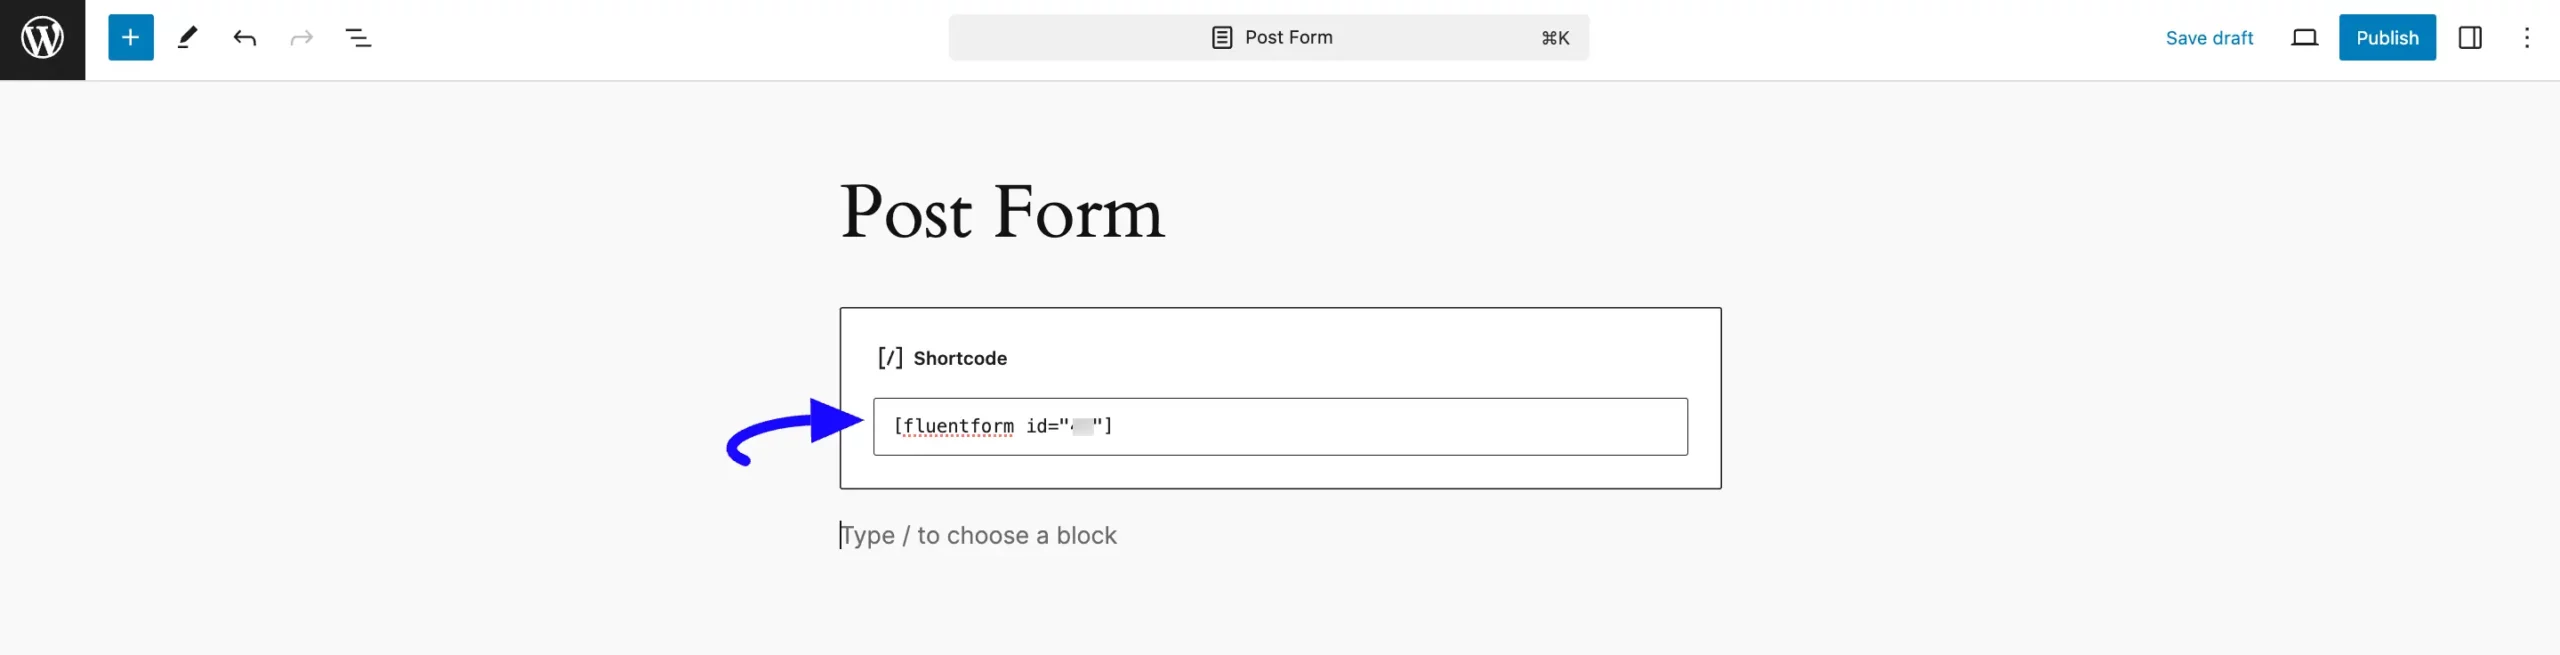
Plus, to embed and display the form on your WordPress Site, copy the Shortcode on the top right side.
Then, paste the copied Shortcode into your desired Page/Post.
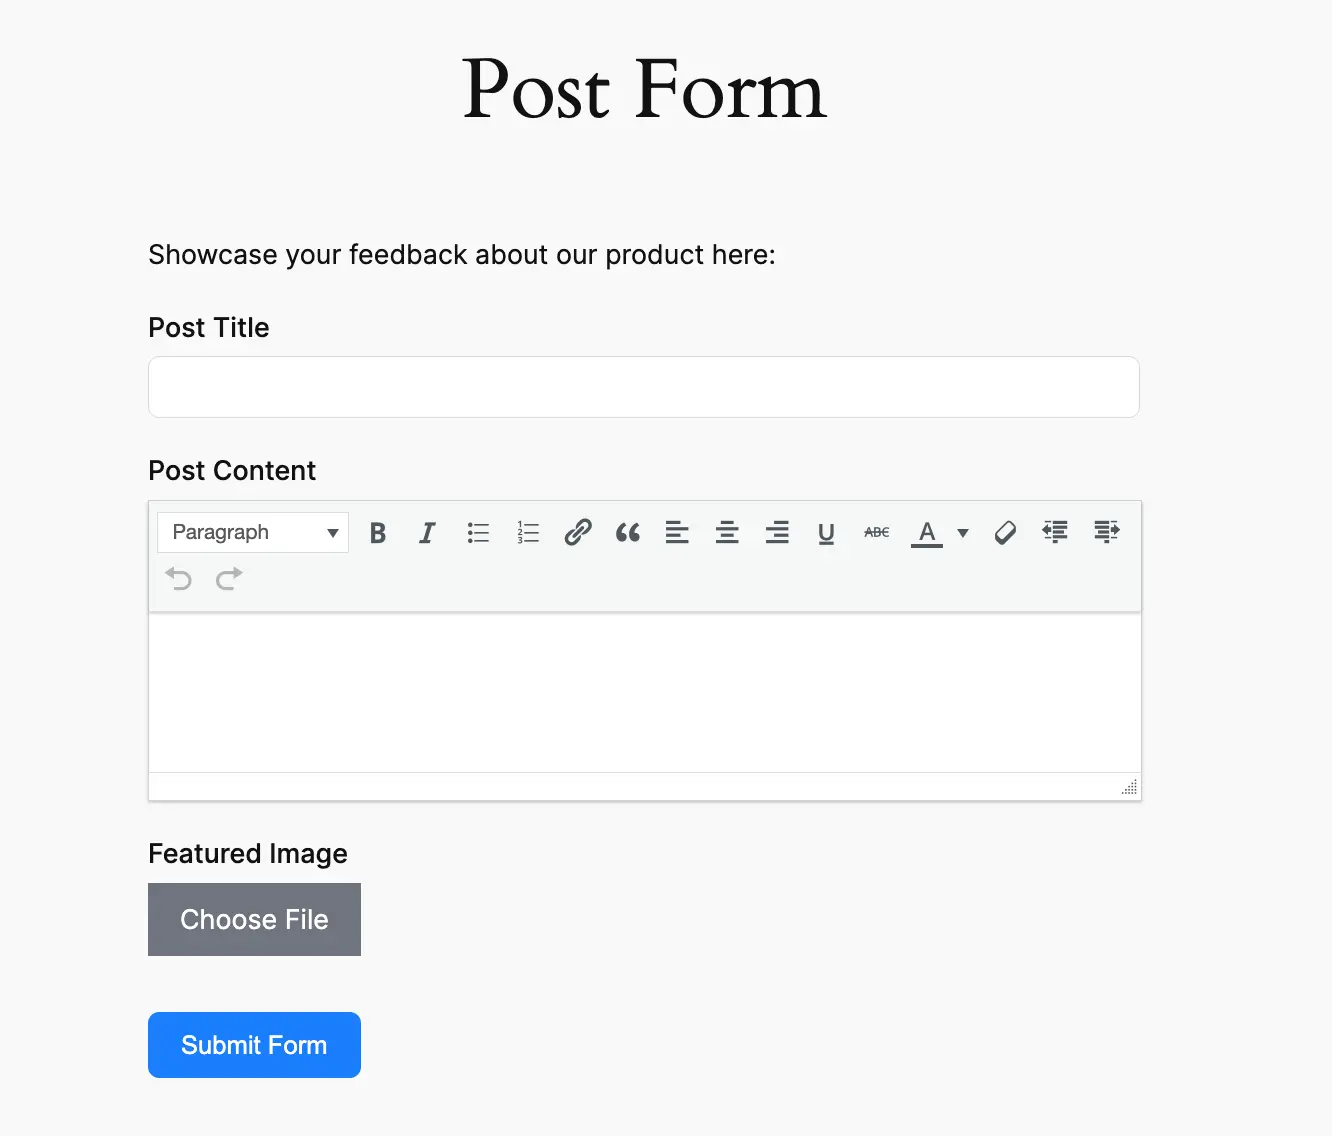
Preview of Post Form #
Here is the preview of the Post Form that we just created.
This way you can easily create the Post Forms in Fluent Forms Forms!
If you have any further questions, concerns, or suggestions, please do not hesitate to contact our @support team. Thank you.


