MailPoet is an email plugin for WordPress Sites to design better email and create loyal subscribers. Integrating MailPoet with Fluent Forms allows users to collect subscribers easily and effortlessly whenever a Form is submitted.
This article will guide you through integrating MailPoet with Fluent Forms.
MailPoet with Fluent Forms #
To learn how to integrate MailPoet with Fluent Forms, follow the steps accordingly with the screenshots below —
Remember, before starting the process, you must install and activate the MailPoet plugin and Fluent Forms Connector for MailPoet add-on on your WordPress Site.
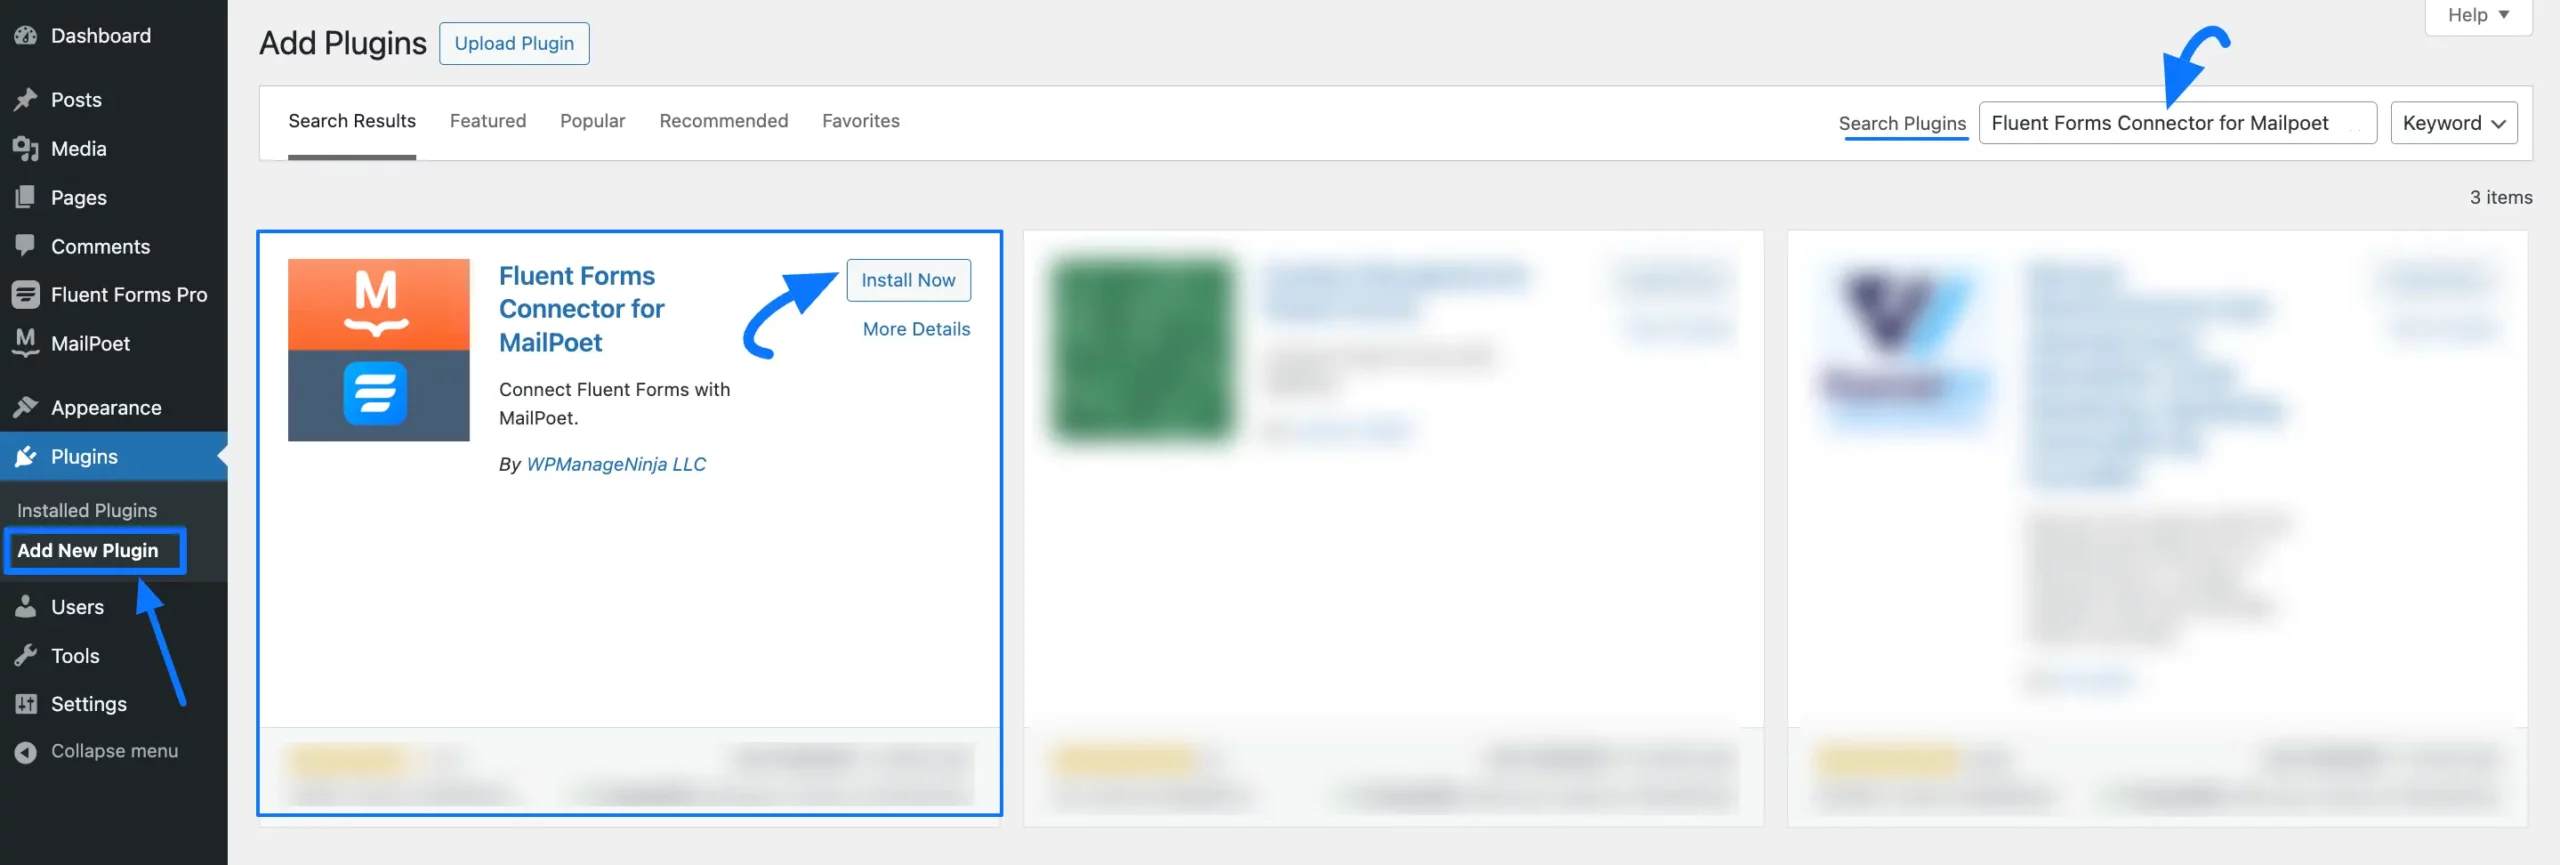
Install & Activate Fluent Forms Connector Add-on #
First, go to Plugins from the WordPress Left Sidebar, click the Add New Plugin, search for Fluent Forms Connector for MailPoet, and click the Install Now button.
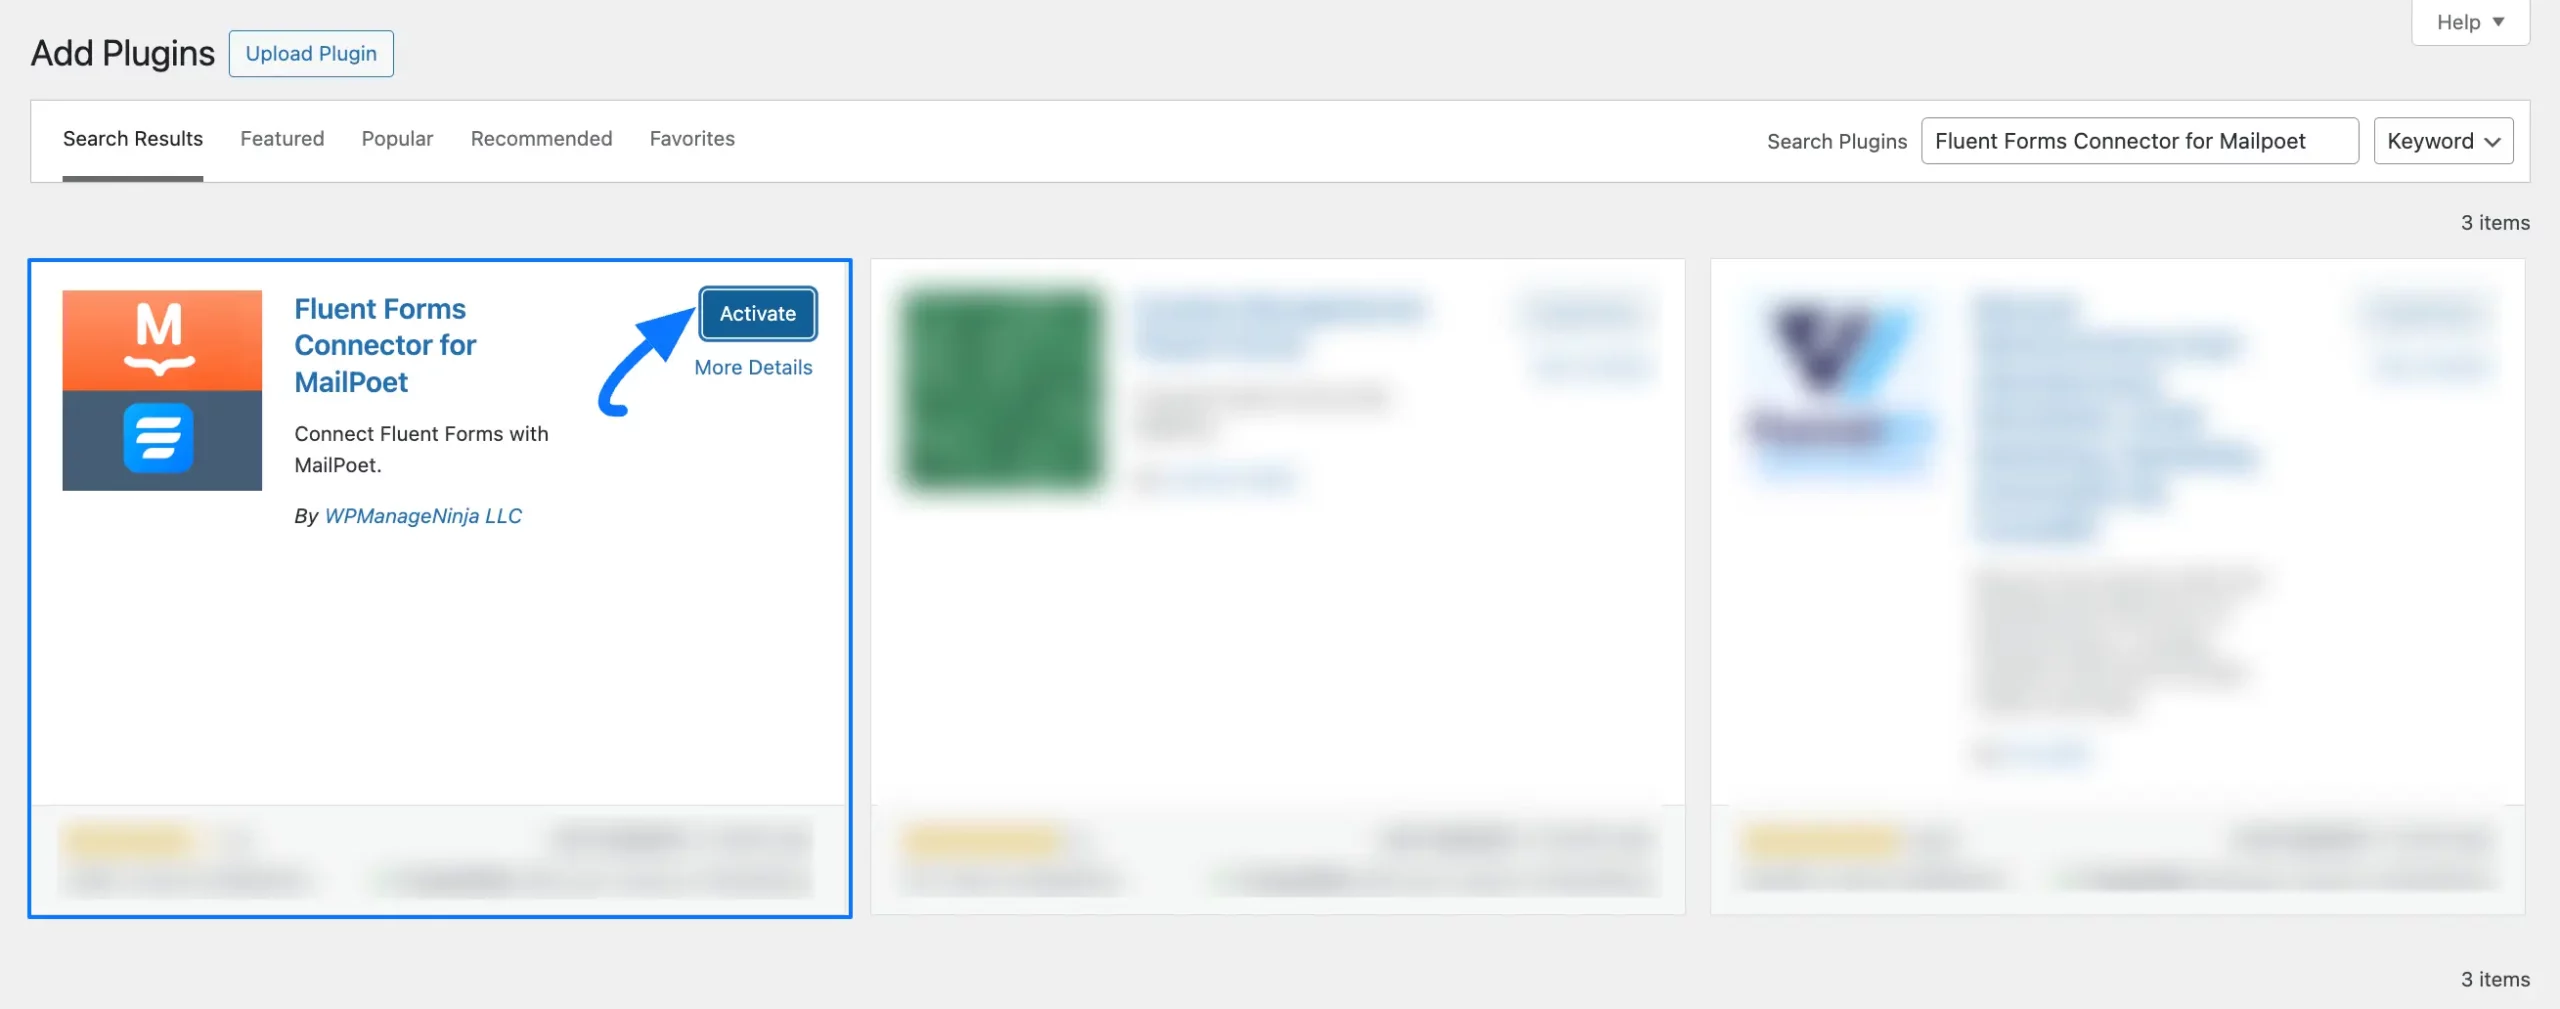
Now, click the Activate button, and your Fluent Forms Connector for MailPoet Add-on will be Installed and Activated successfully on your WordPress Site.
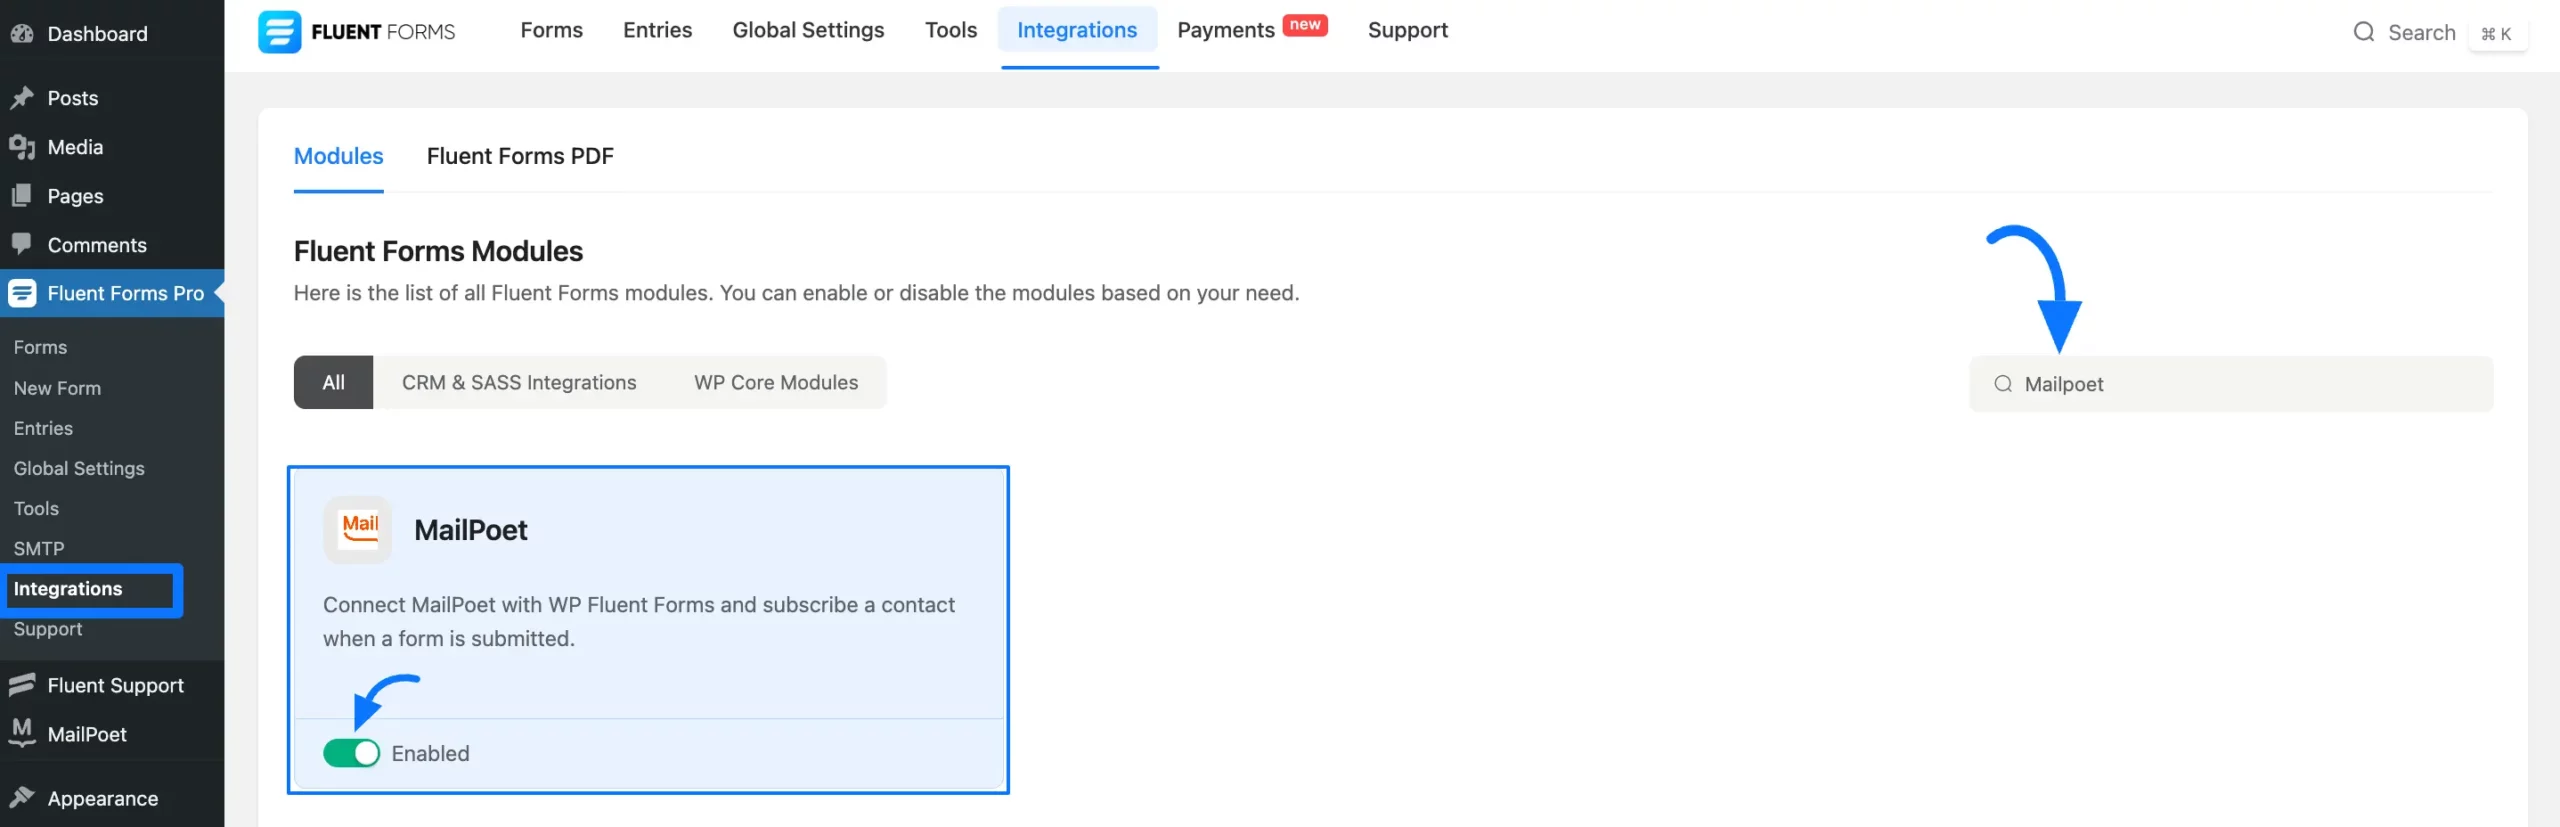
Enable MailPoet Integration #
From your Fluent Forms Dashboard, go to Integrations, search for MailPoet, and click the Toggle button to enable the MailPoet Integration module in your FluentForms.
Integrate MailPoet in Fluent Forms #
To learn how to add the MailPoet Integration feed in a specific form to list its entries in MailPoet, follow the steps with the screenshots below –
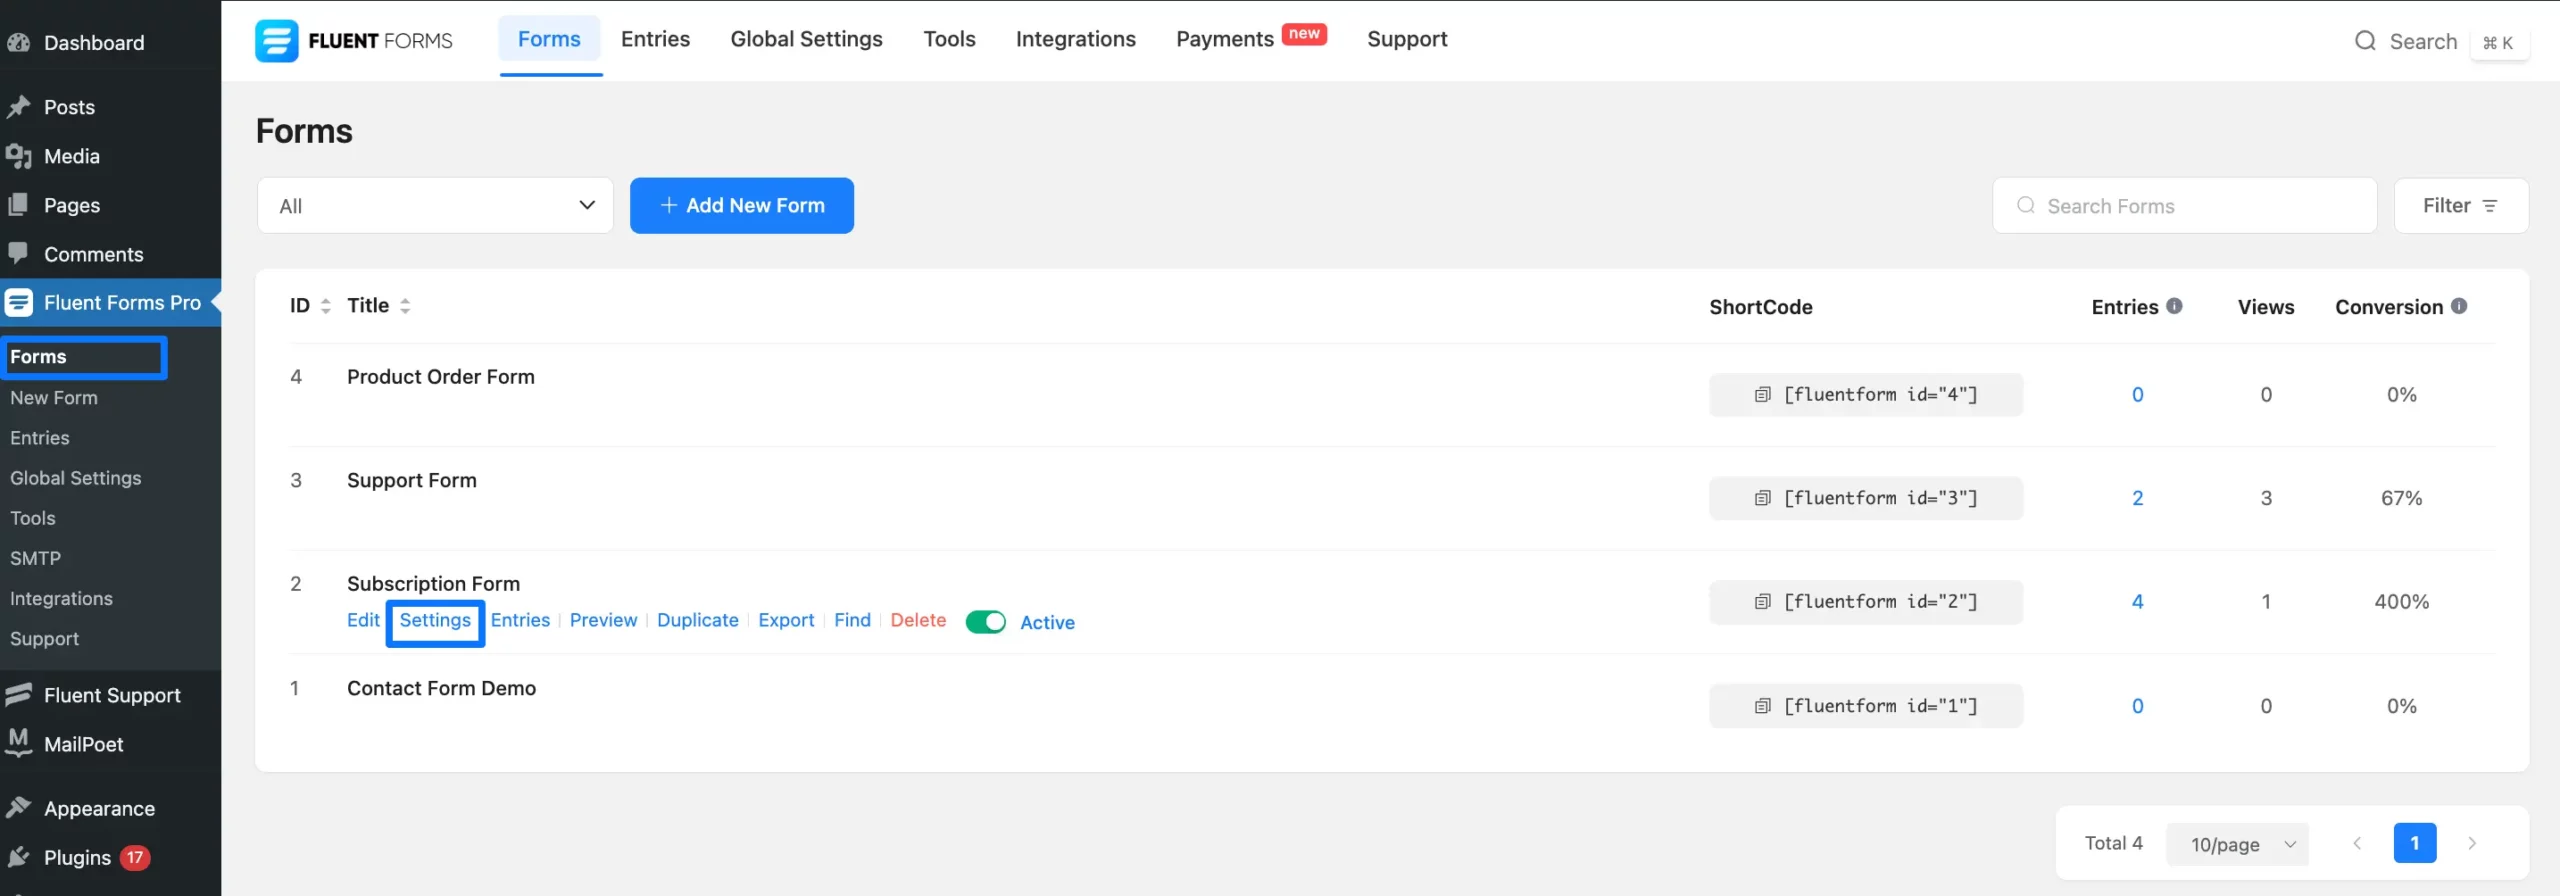
Go to Forms from the Fluent Forms Dashboard and click the Settings button of your desired form where you want to add the feed.
If you do not have any existing forms, read the Create a Form from Scratch or Create a Form using Templates documentation to create a new one.
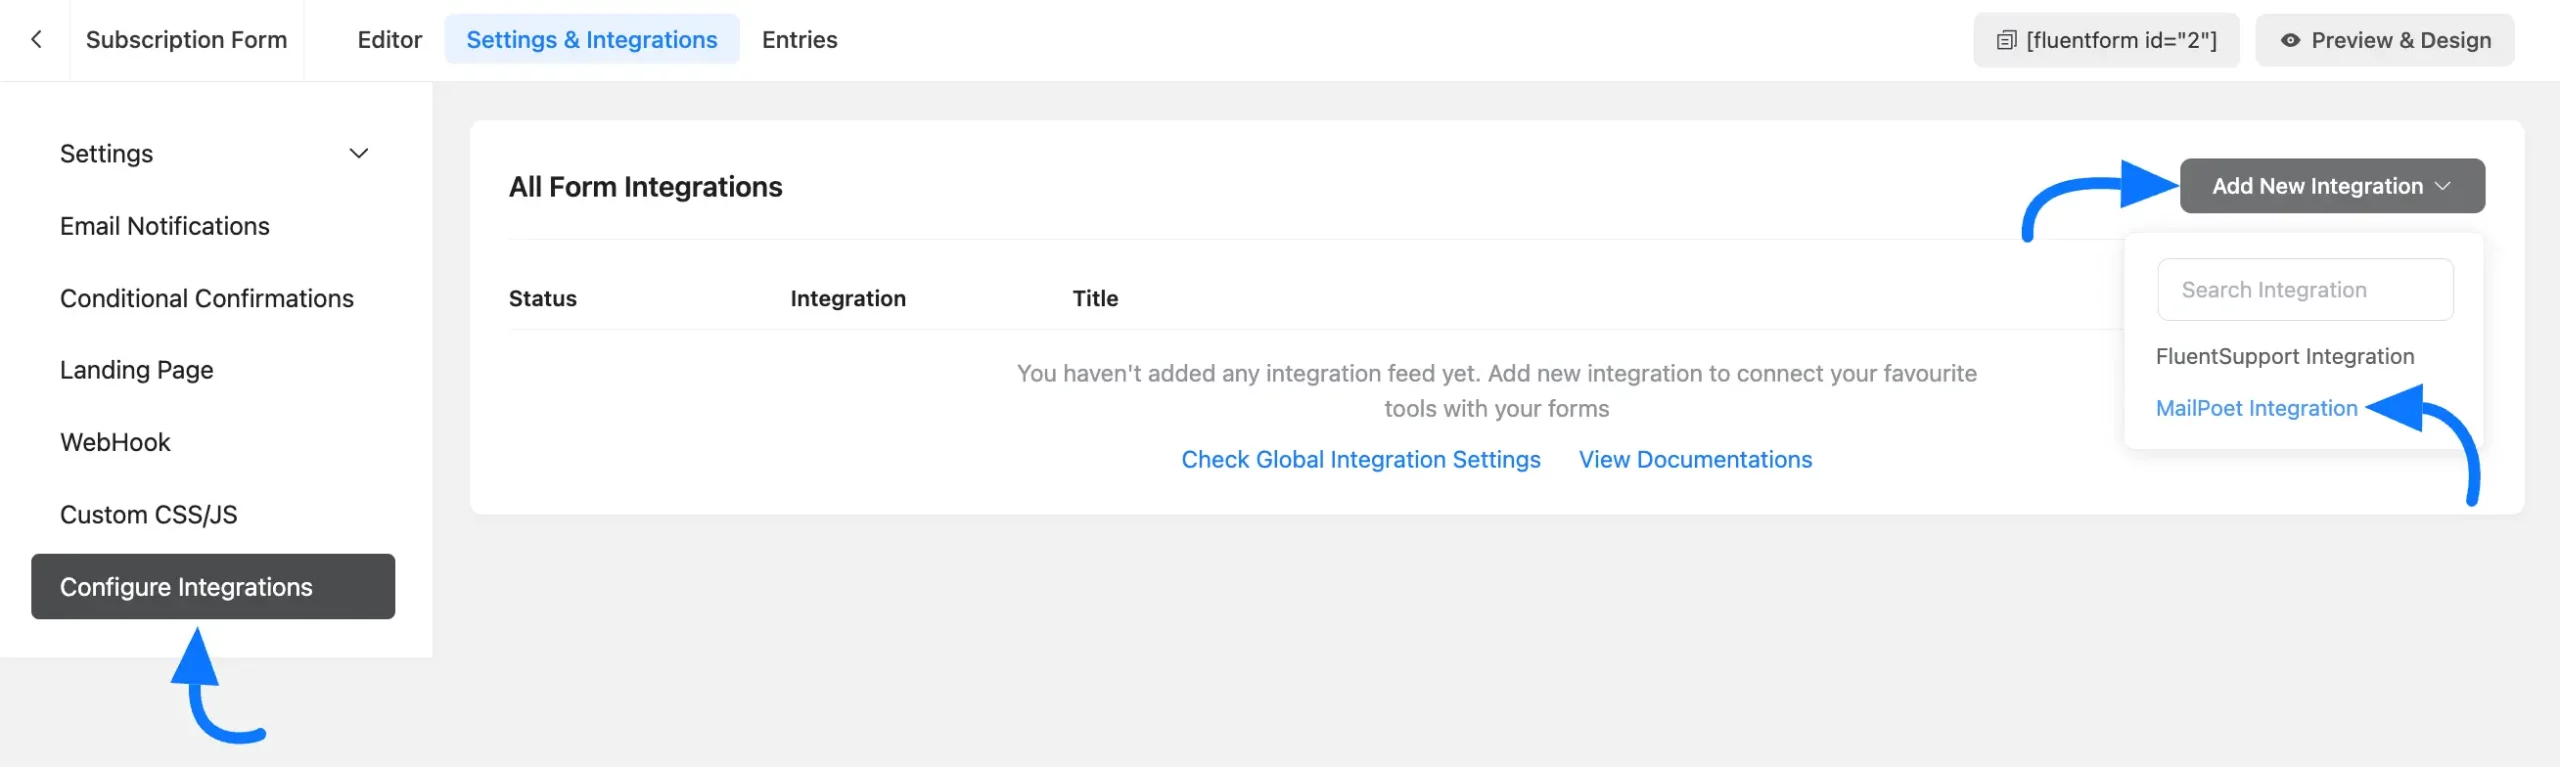
Open the Configure Integrations tab, expand the Add New Integration dropdown, and click the MailPoet Integration feed.
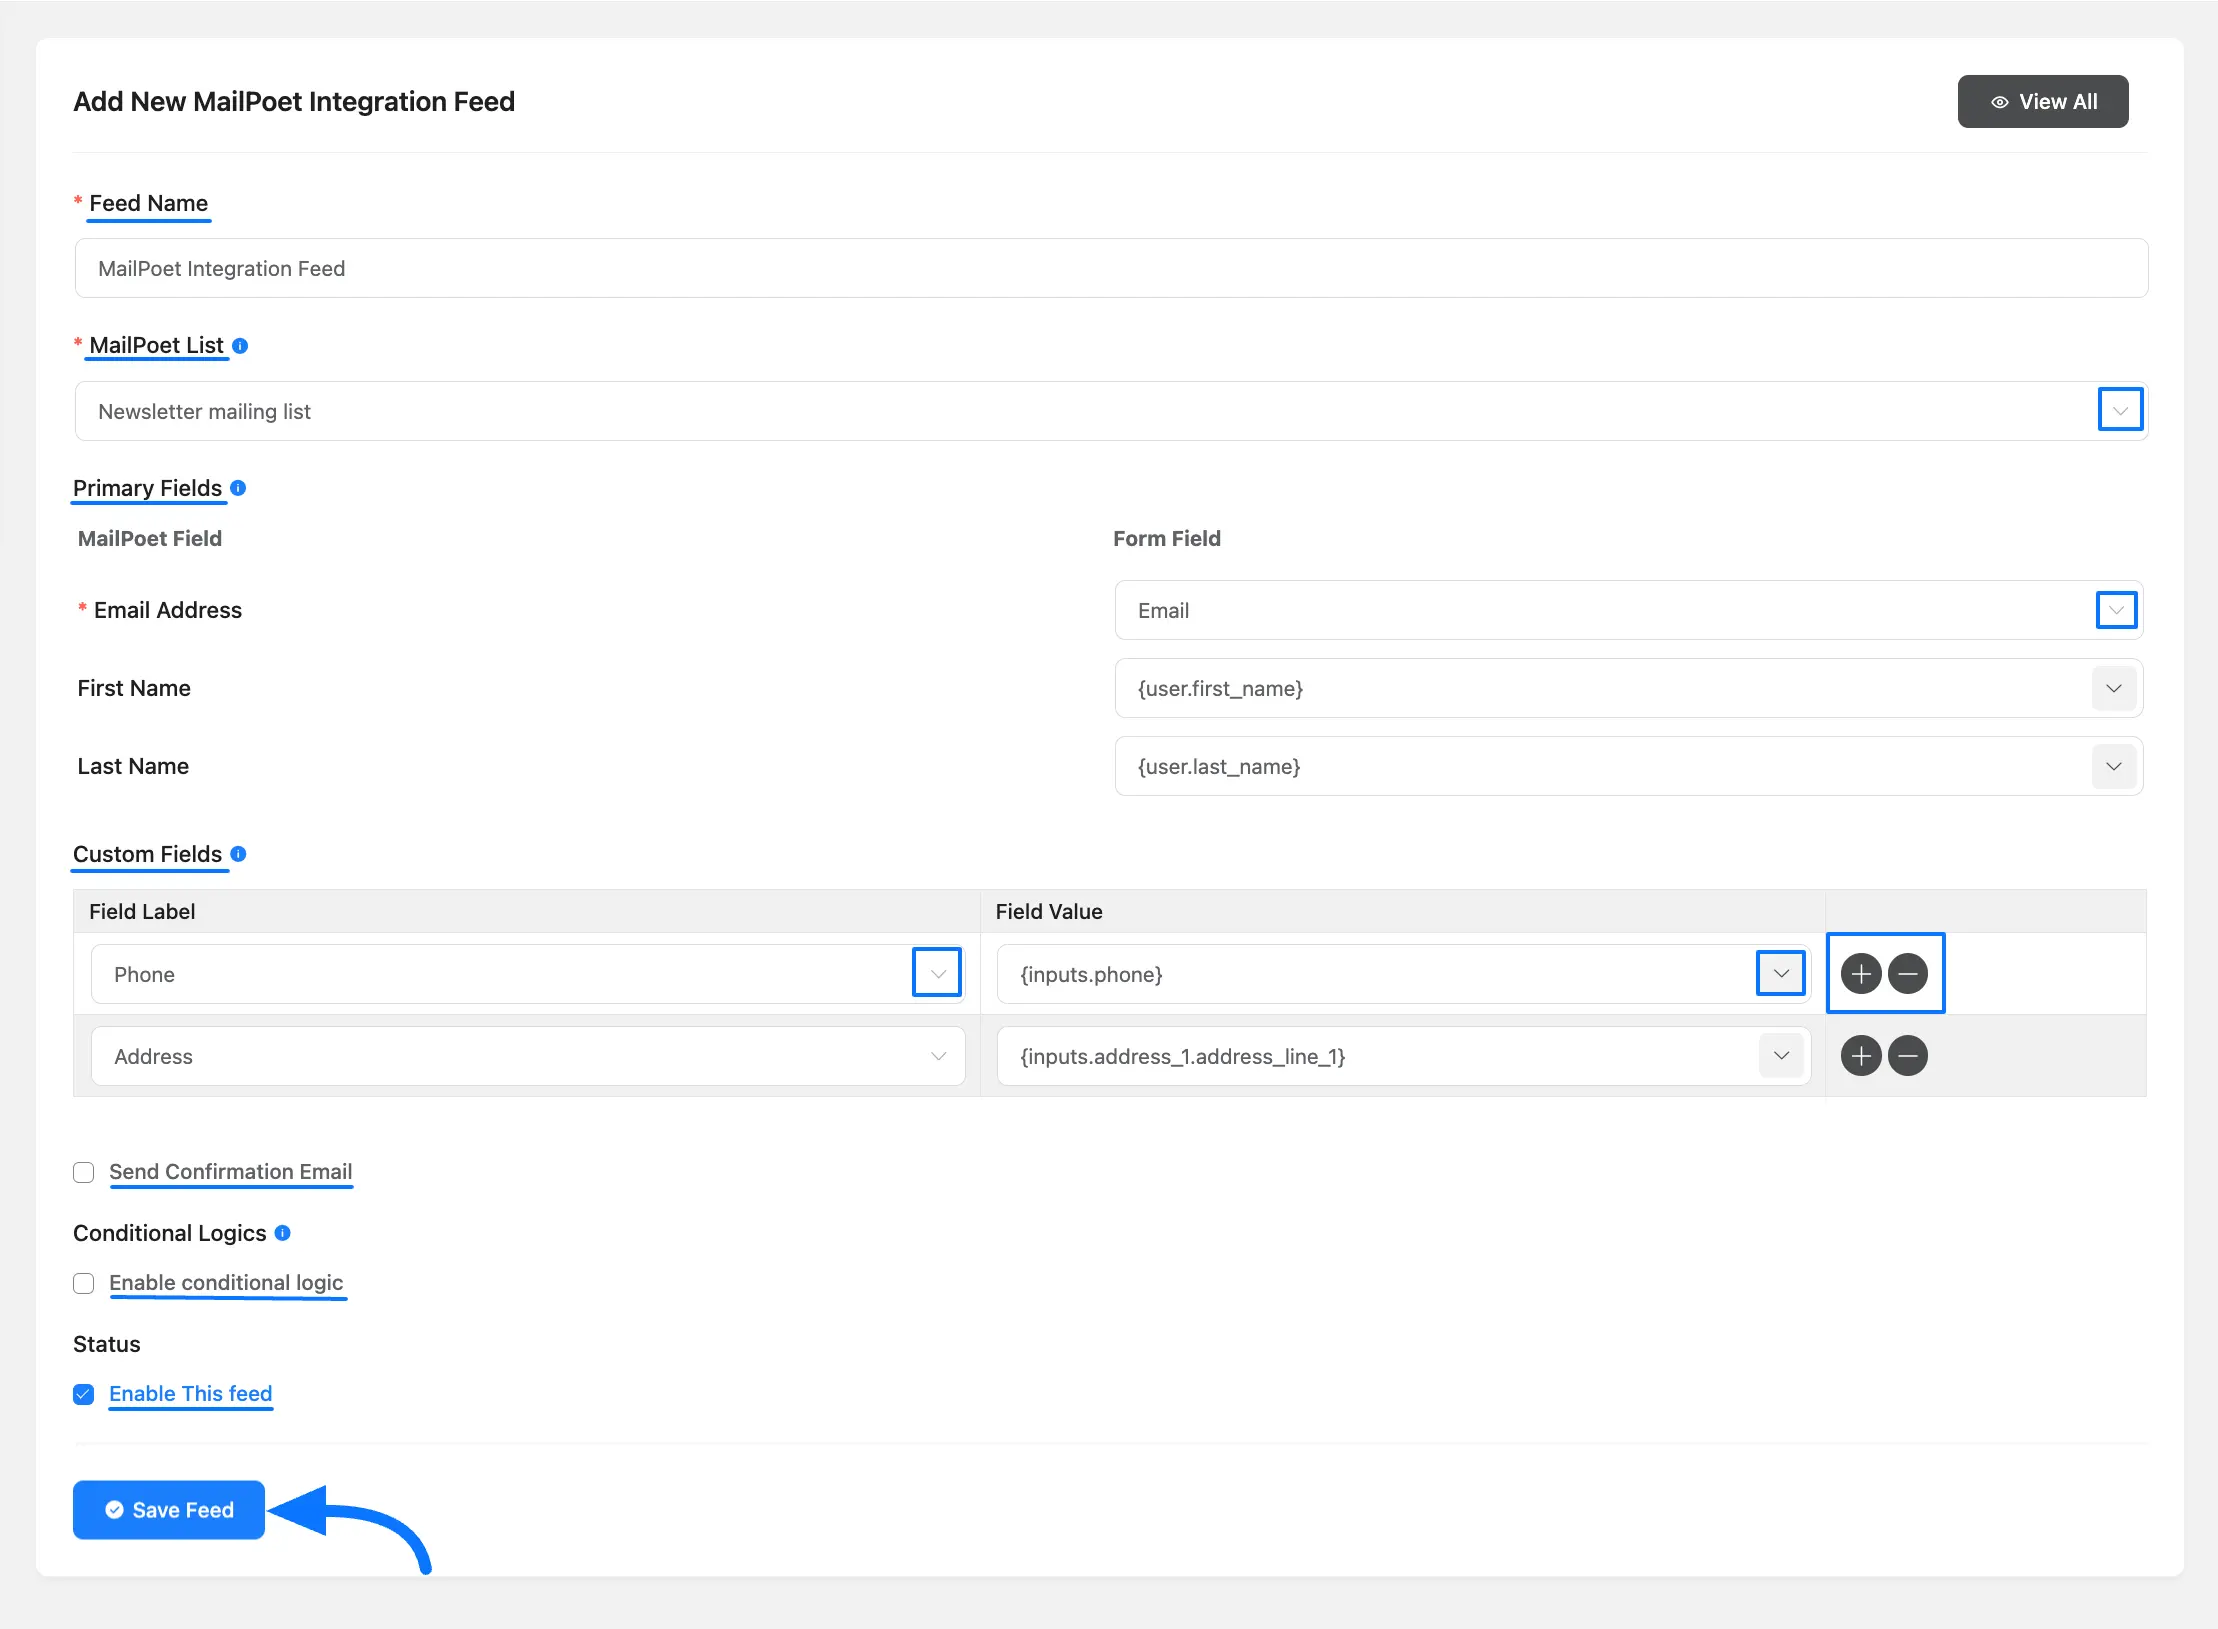
Now, set up your Mautic Integration Feed according to your needs using all the following available settings options.
- Feed Name: Give a name to your feed so that you can find it later easily.
- MailPoet List: Select a MailPoet List from the dropdown where you wish to add your contacts.
- Primary Fields: Associate your MailPoet Field with the appropriate Fluent Forms Field by selecting the appropriate form fields from the dropdown (you can also give your own custom value if needed).
- Custom Fields: Using this option, you can add more customized fields as per your needs. To add or delete more fields use the Plus or Minus icon. Remember, to use the Custom Fields feature, you must have the MailPoet Pro Version. Otherwise, it won’t work.
- Send Confirmation Email: Enable this checkbox, if you want to send an Email for Confirmation. Remember, to use the Send Confirmation Email feature, you must have the MailPoet Pro Version and a Verified MailPoet Account. Otherwise, it won’t work.
- Conditional Logic: This option allows MailPoet integration to work conditionally based on your form submission values. Enable this option if required. To learn more about Fluent Forms Conditional logic click here.
- Status: Uncheck the Enable This Feed box if you want to save this MailPoet Feed as Draft. Otherwise, enable this box to make this feed functional.
Don’t forget to click the Save Feed button when the configuration is done.
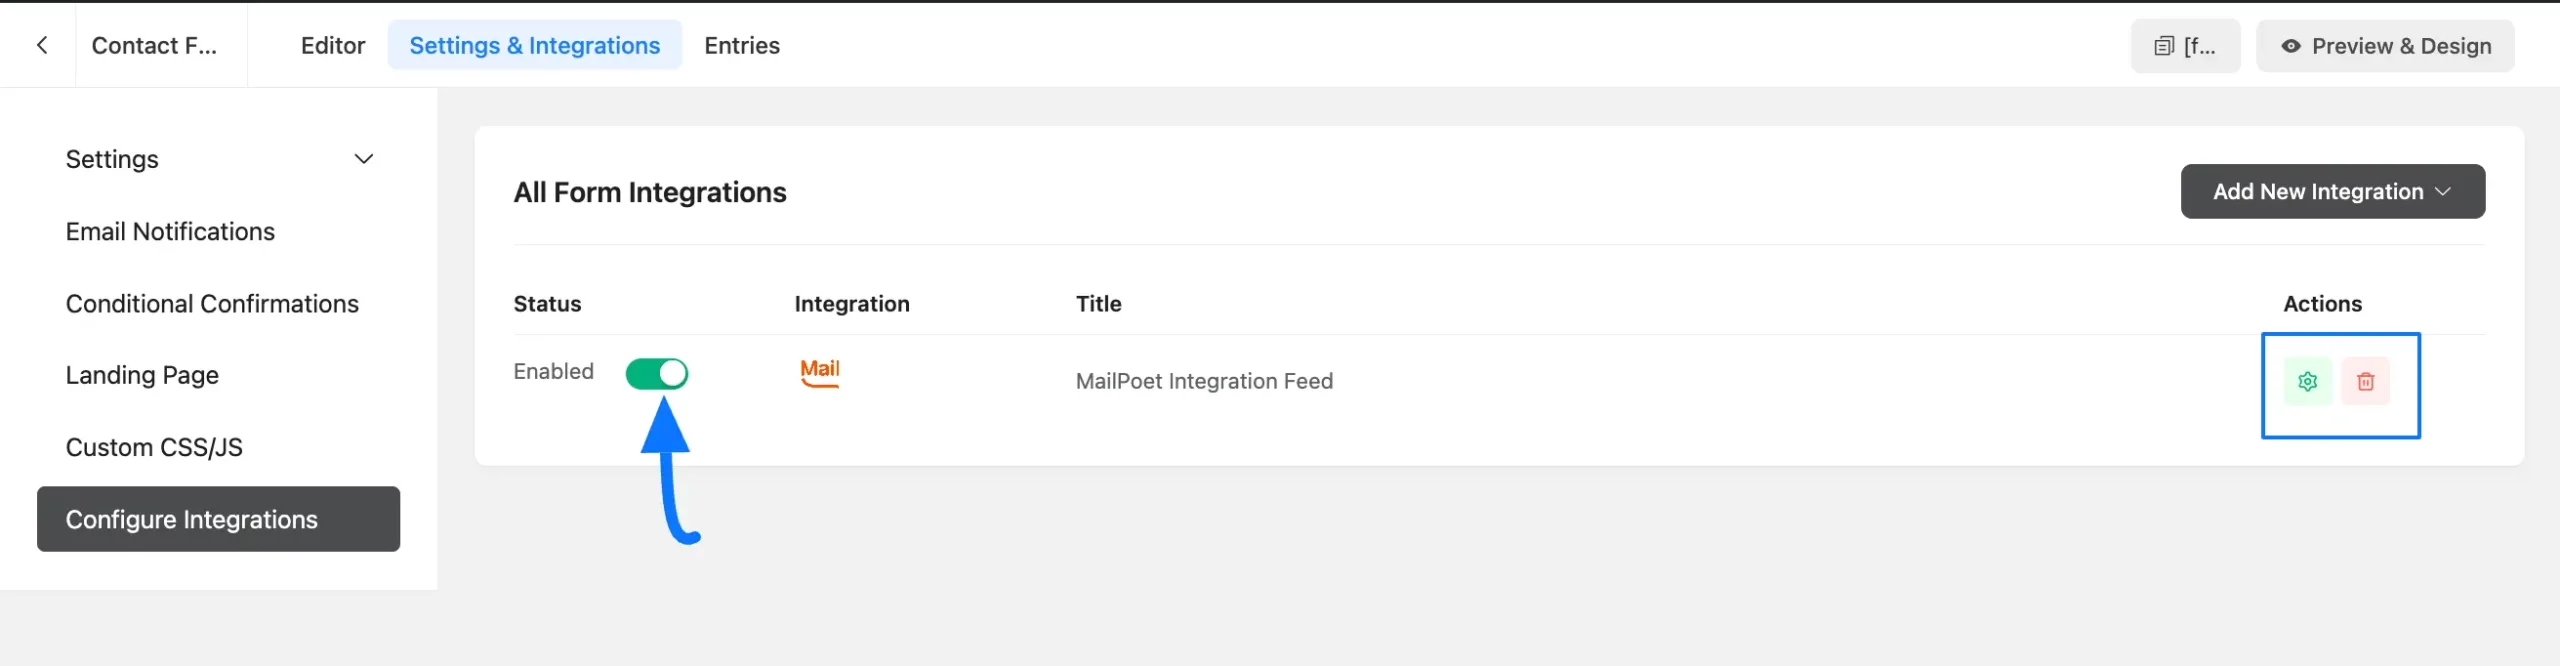
Here, you can see the MailPoet Integration Feed has been added!
You can disable the feed anytime by clicking the Toggle button if needed.
Also, you can customize the feed at any time by clicking the Settings icon or delete it by clicking the Trash icon.
This is how you can integrate MailPoet with Fluent Forms!
If you have any further questions, concerns, or suggestions, please do not hesitate to contact our @support team. Thank You.


