Fluent Forms integrates with Ninja Tables, a table plugin that allows you to display Fluent Forms’ submission Entries on the frontend. This article will guide you through integrating Ninja Table with Fluent Forms.
Installing & Activating Ninja Tables #
Before starting the process, ensure you install and activate the Ninja Table plugin on your WordPress site.
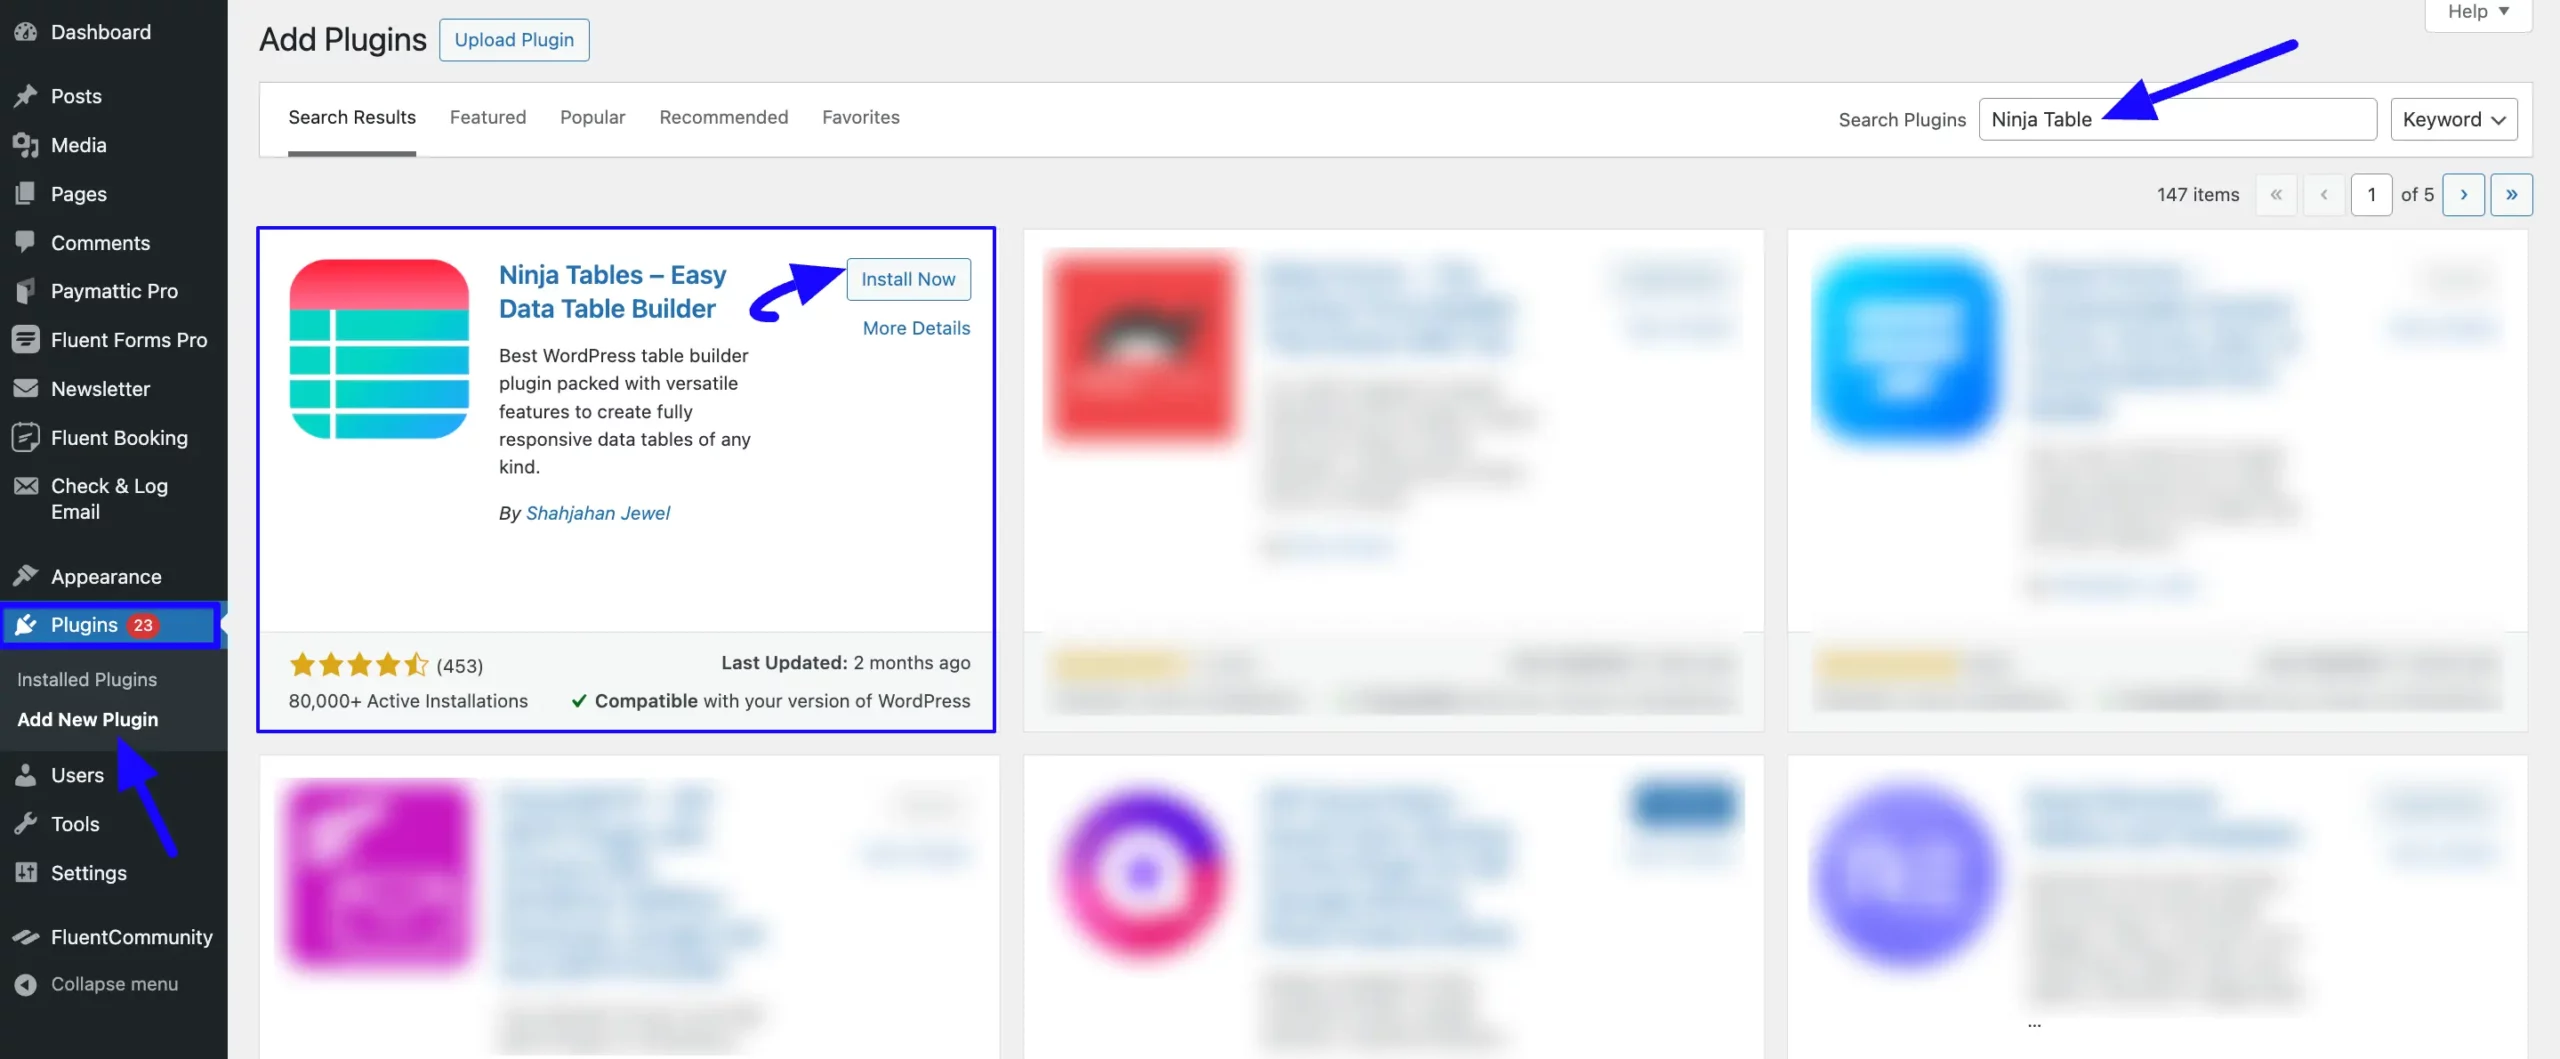
First, go to Plugins in the WordPress Admin Panel on the left side, click Add New Plugin, search for the Ninja Table plugin using the Search Plugins option on the right, and the plugin will appear.
Now, click the Install button, and your Ninja Table plugin will be installed on your site.
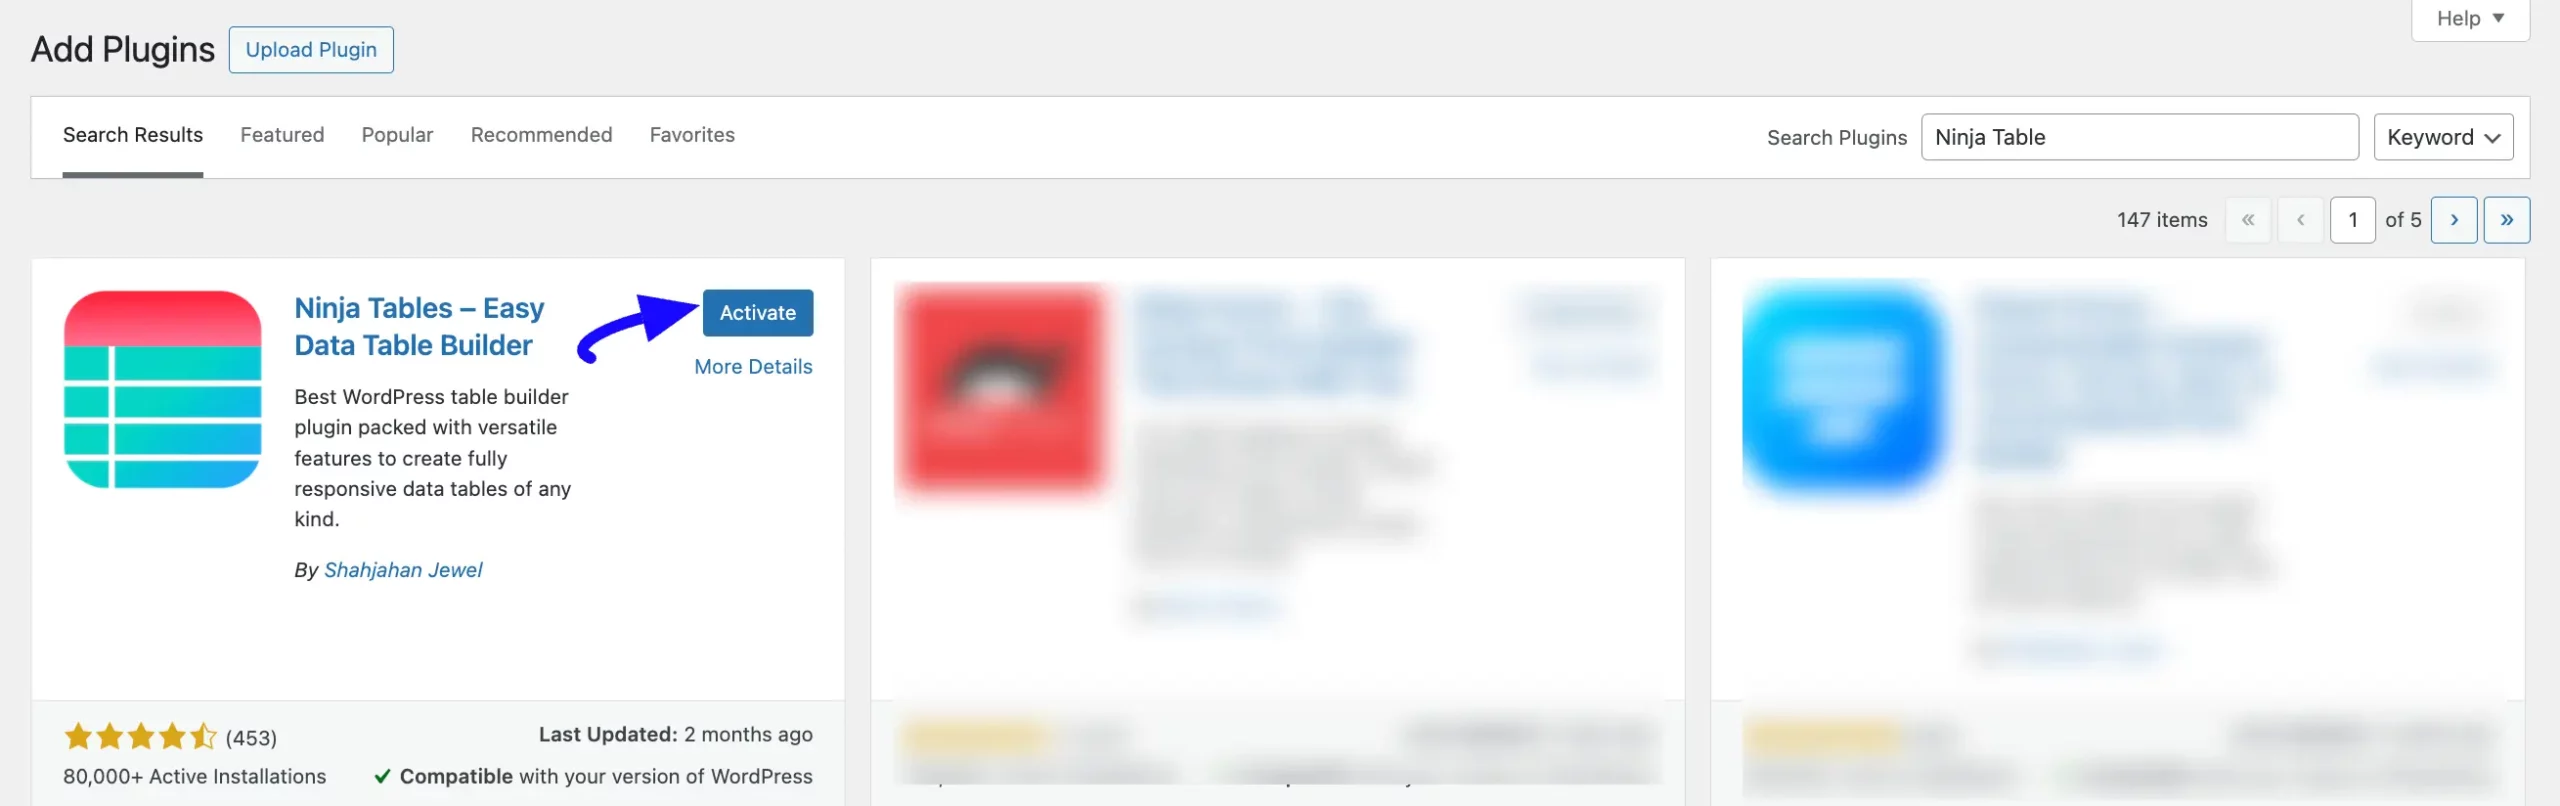
Then, click the Activate button, and the Ninja Table plugin will be activated and ready to function.
Configuring Fluent Forms into Ninja Tables #
Now it’s time to configure a desired form in a table to showcase its entries on the frontend.
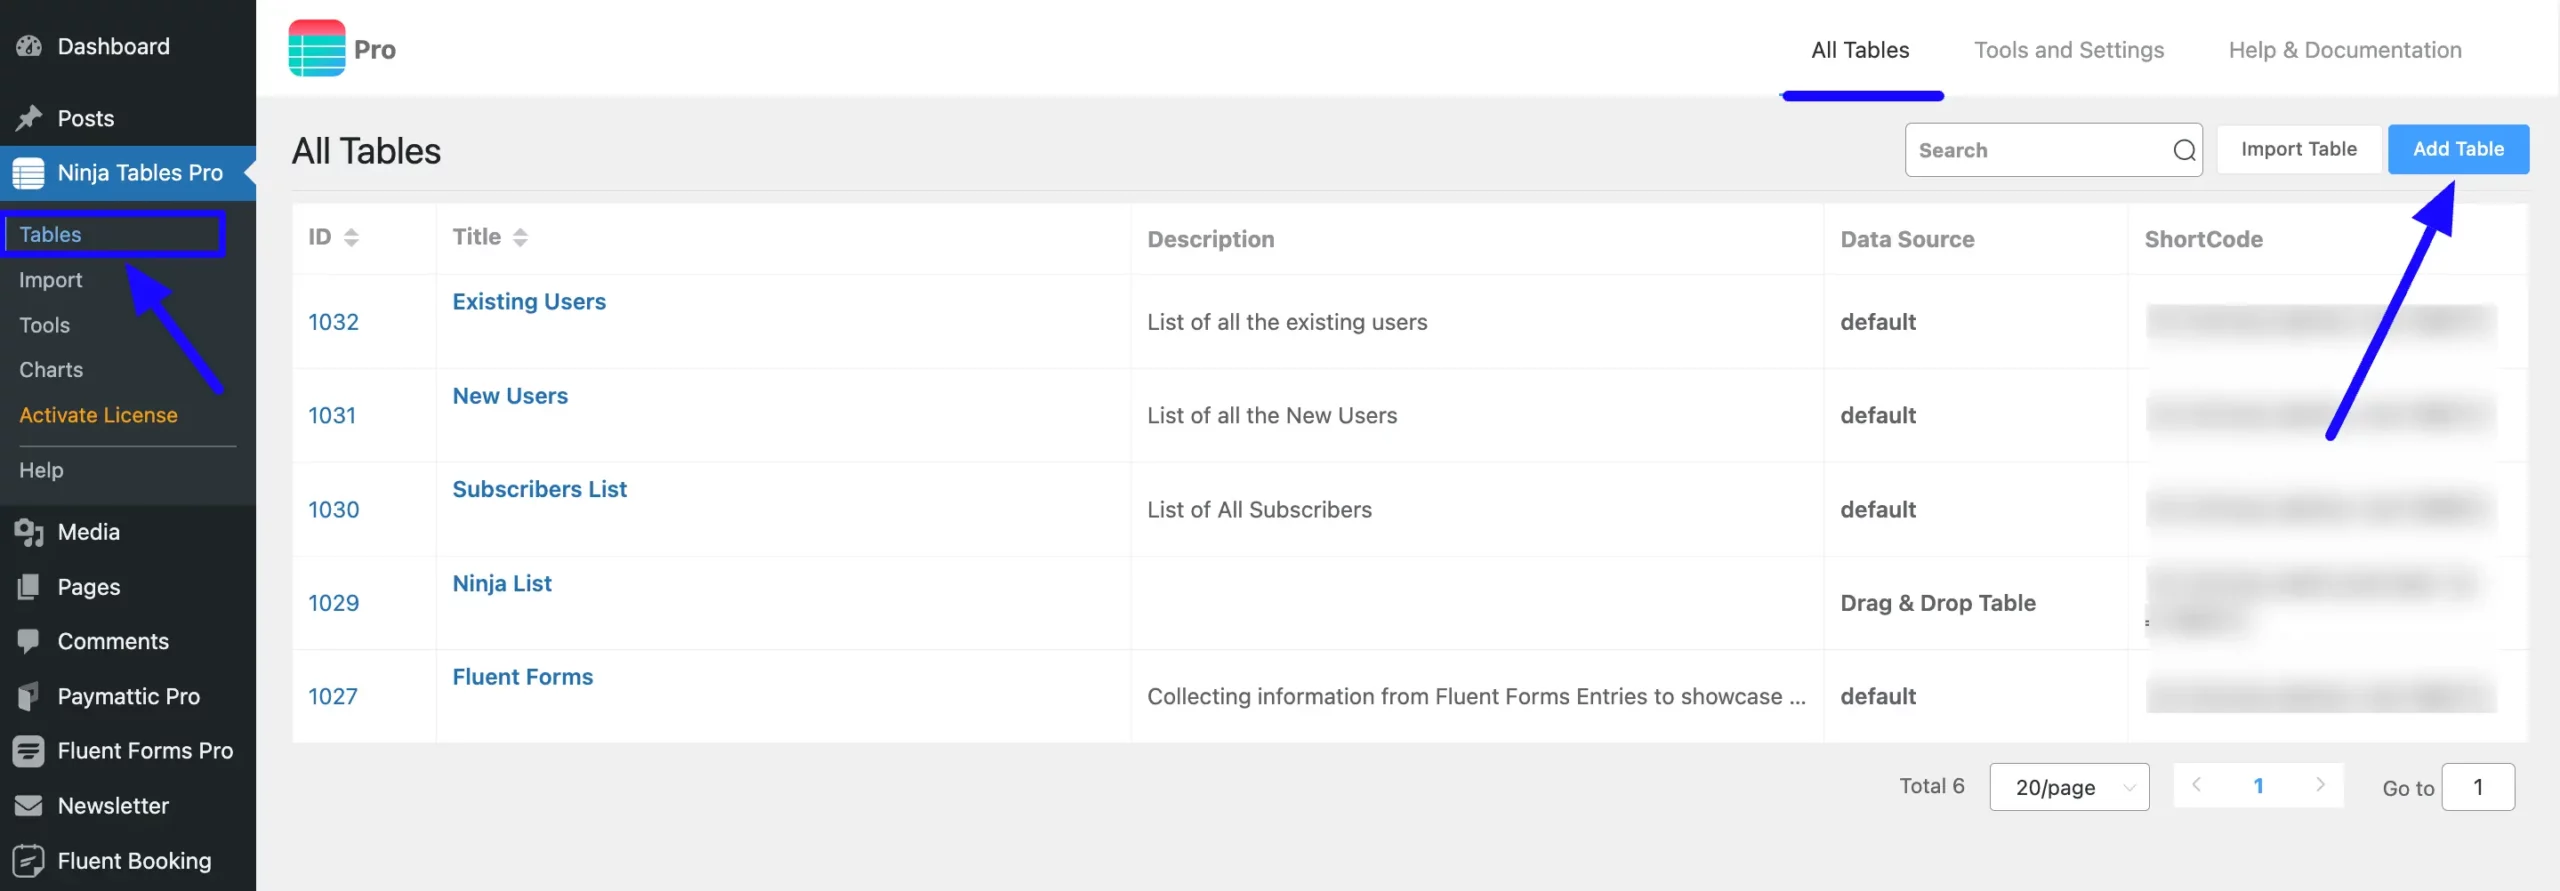
First, go to Tables from Ninja Tables Left Sidebar or All Tables from Ninja Tables Navbar, and click the Add Table button in the top right corner.
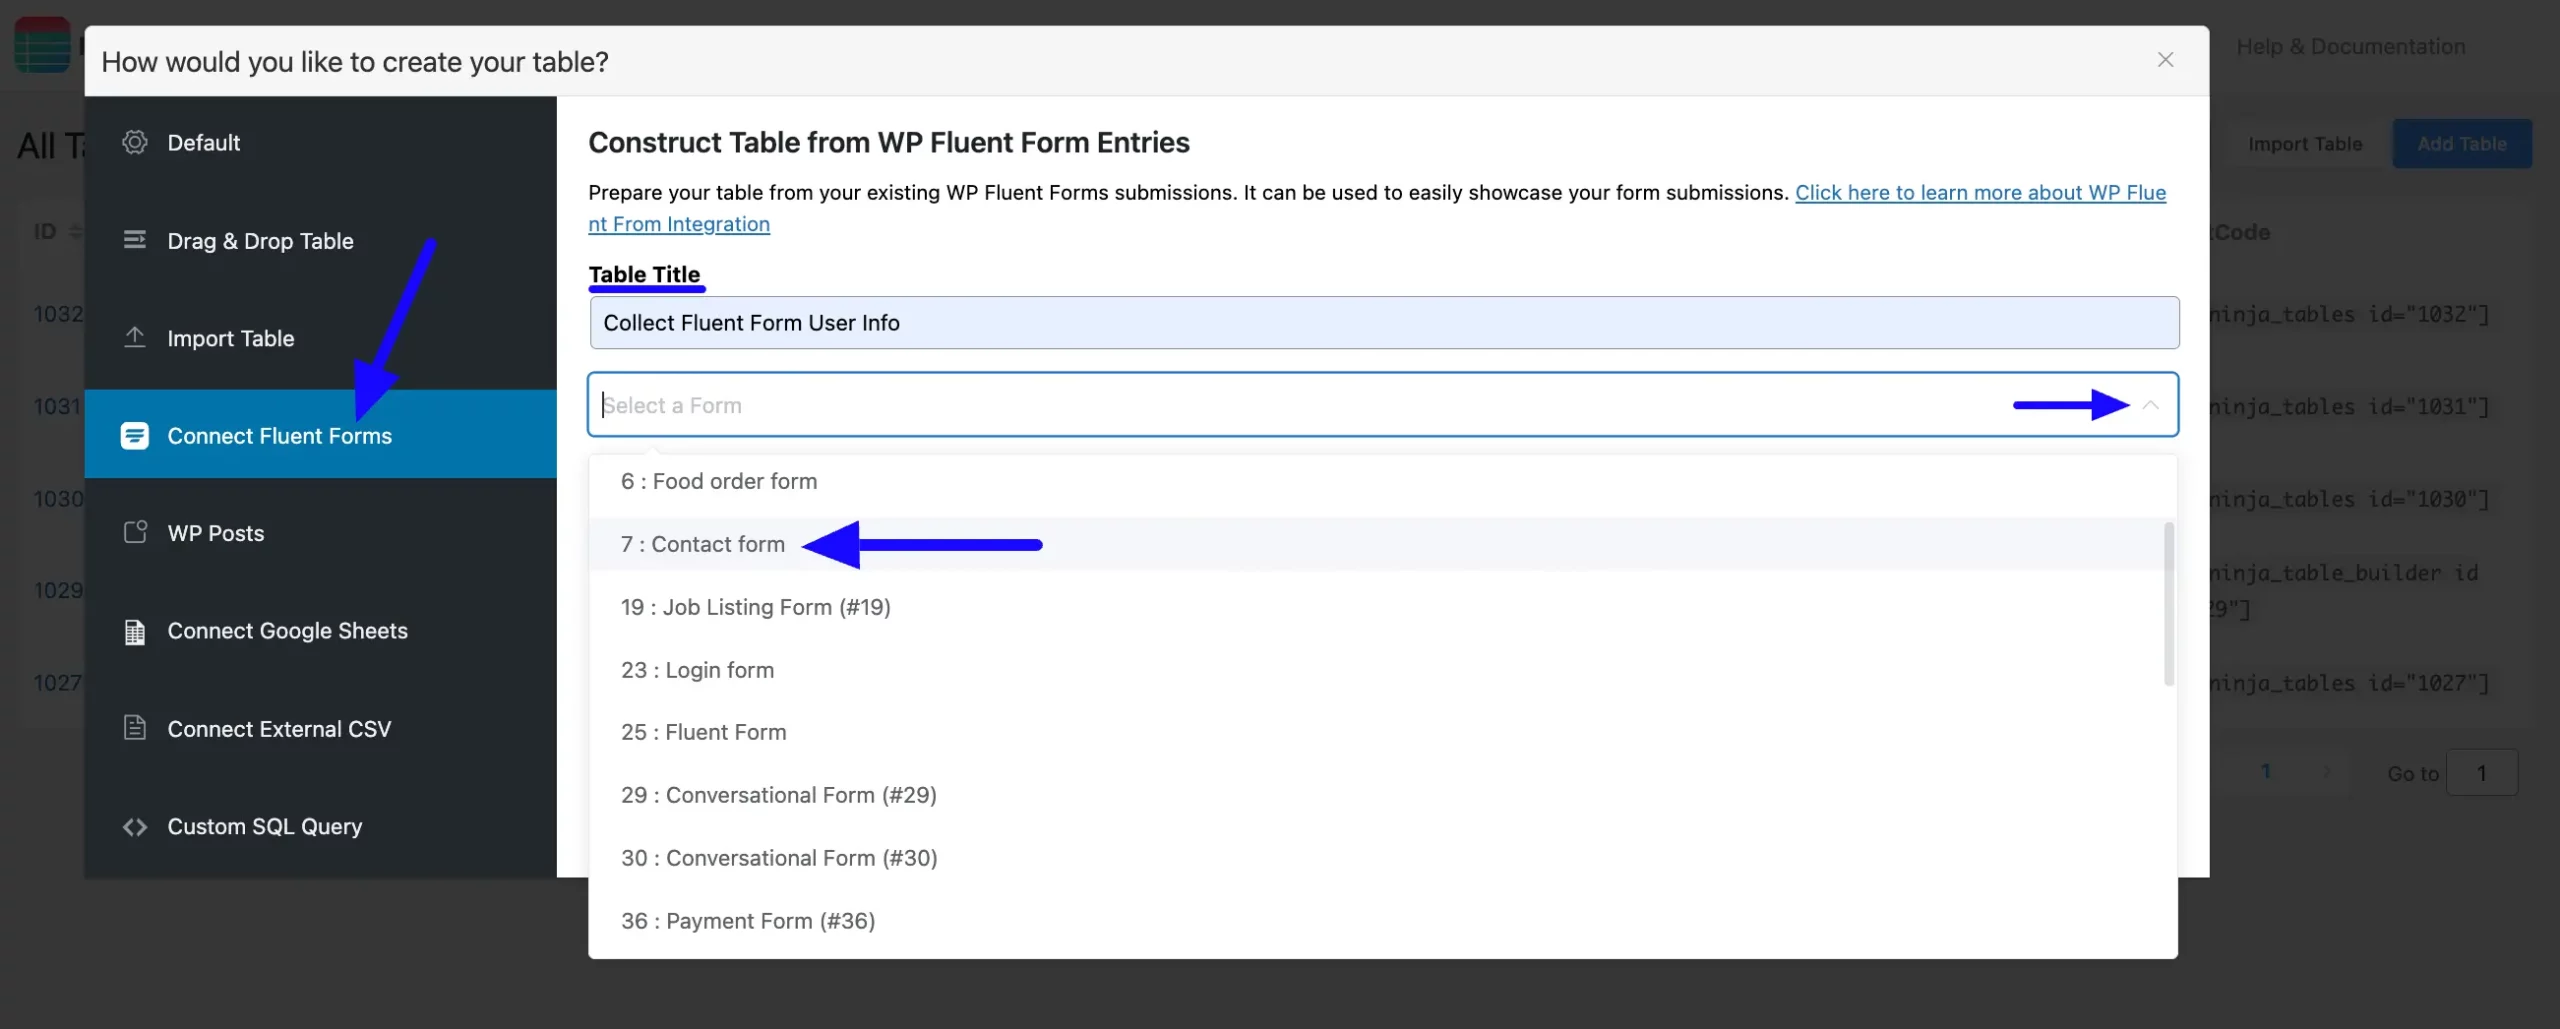
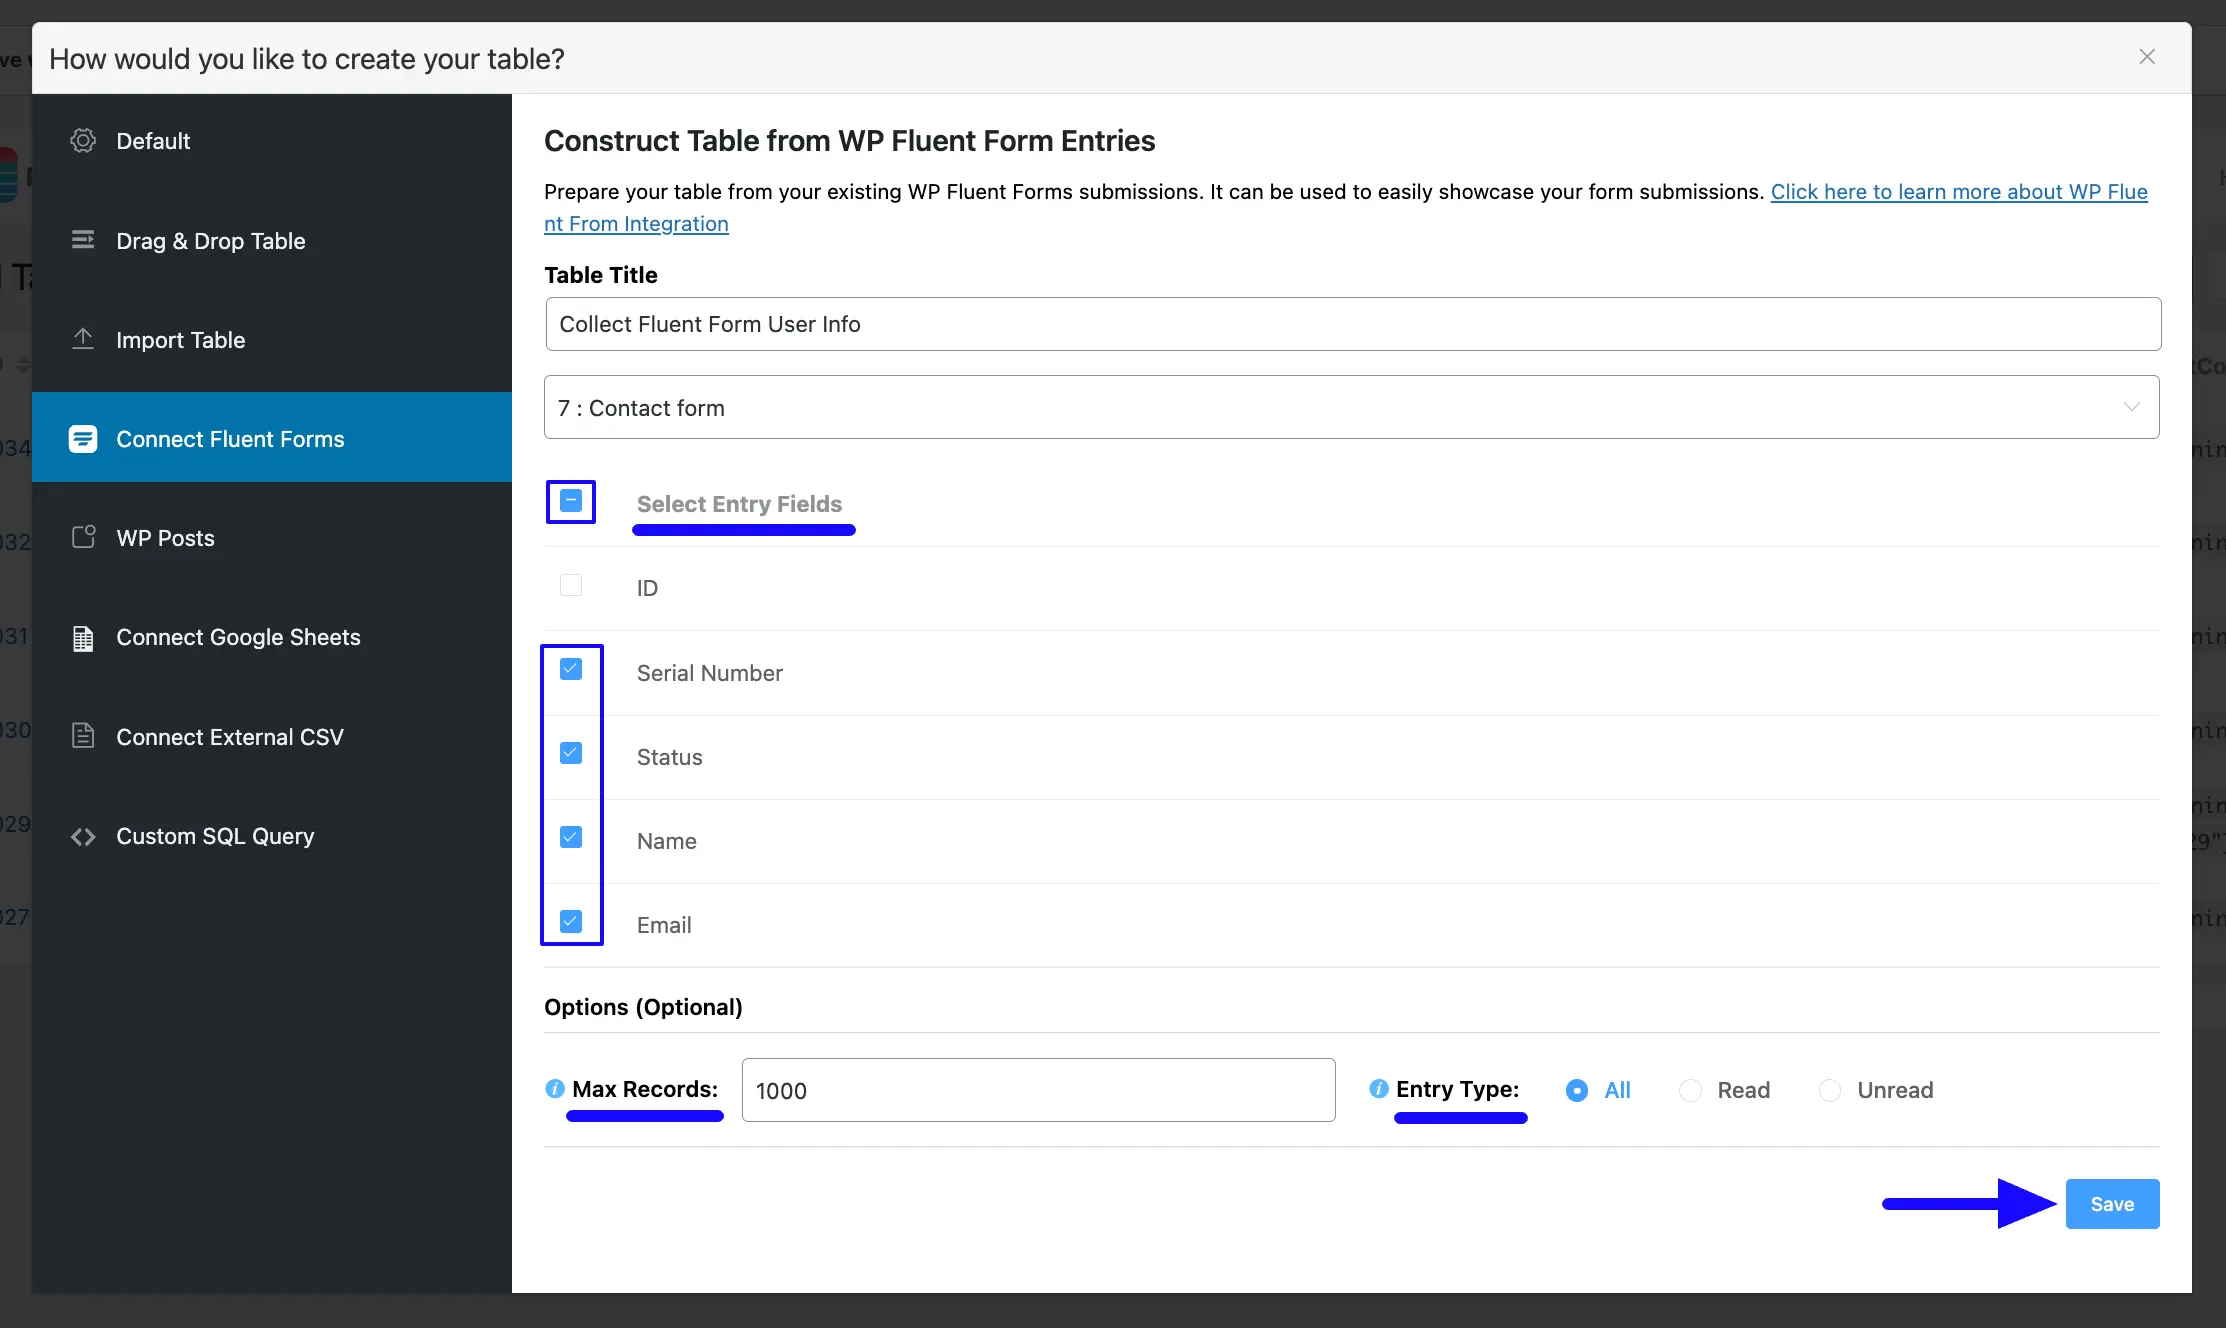
Open the Connect Fluent Forms option from the left menu of the pop-up page and get the configuration option.
Now, provide a Title for the table you are creating. Then select the preferred Fluent Forms’ Form you want to configure with this table using the Arrow Icon.
If you do not have any existing forms, read the Create a Form from Scratch or Create a Form using Templates documentation to create a new one. Plus to learn more details about Form Entries, read this Documentation.
Select Form’s Entry Fields #
After selecting the form, all fields of that form will appear, where you can choose which field/s you want to showcase in your table by clicking the Checkboxes.
To select all entry fields at once, click the checkbox placed just before the Select Entry Fields.
You can also set the number of Maximum Entries you want to display using the Max Records field. Plus, you can select the Entry Type based on the form’s Status.
Once you are done, click the Save button, and your table will be created.
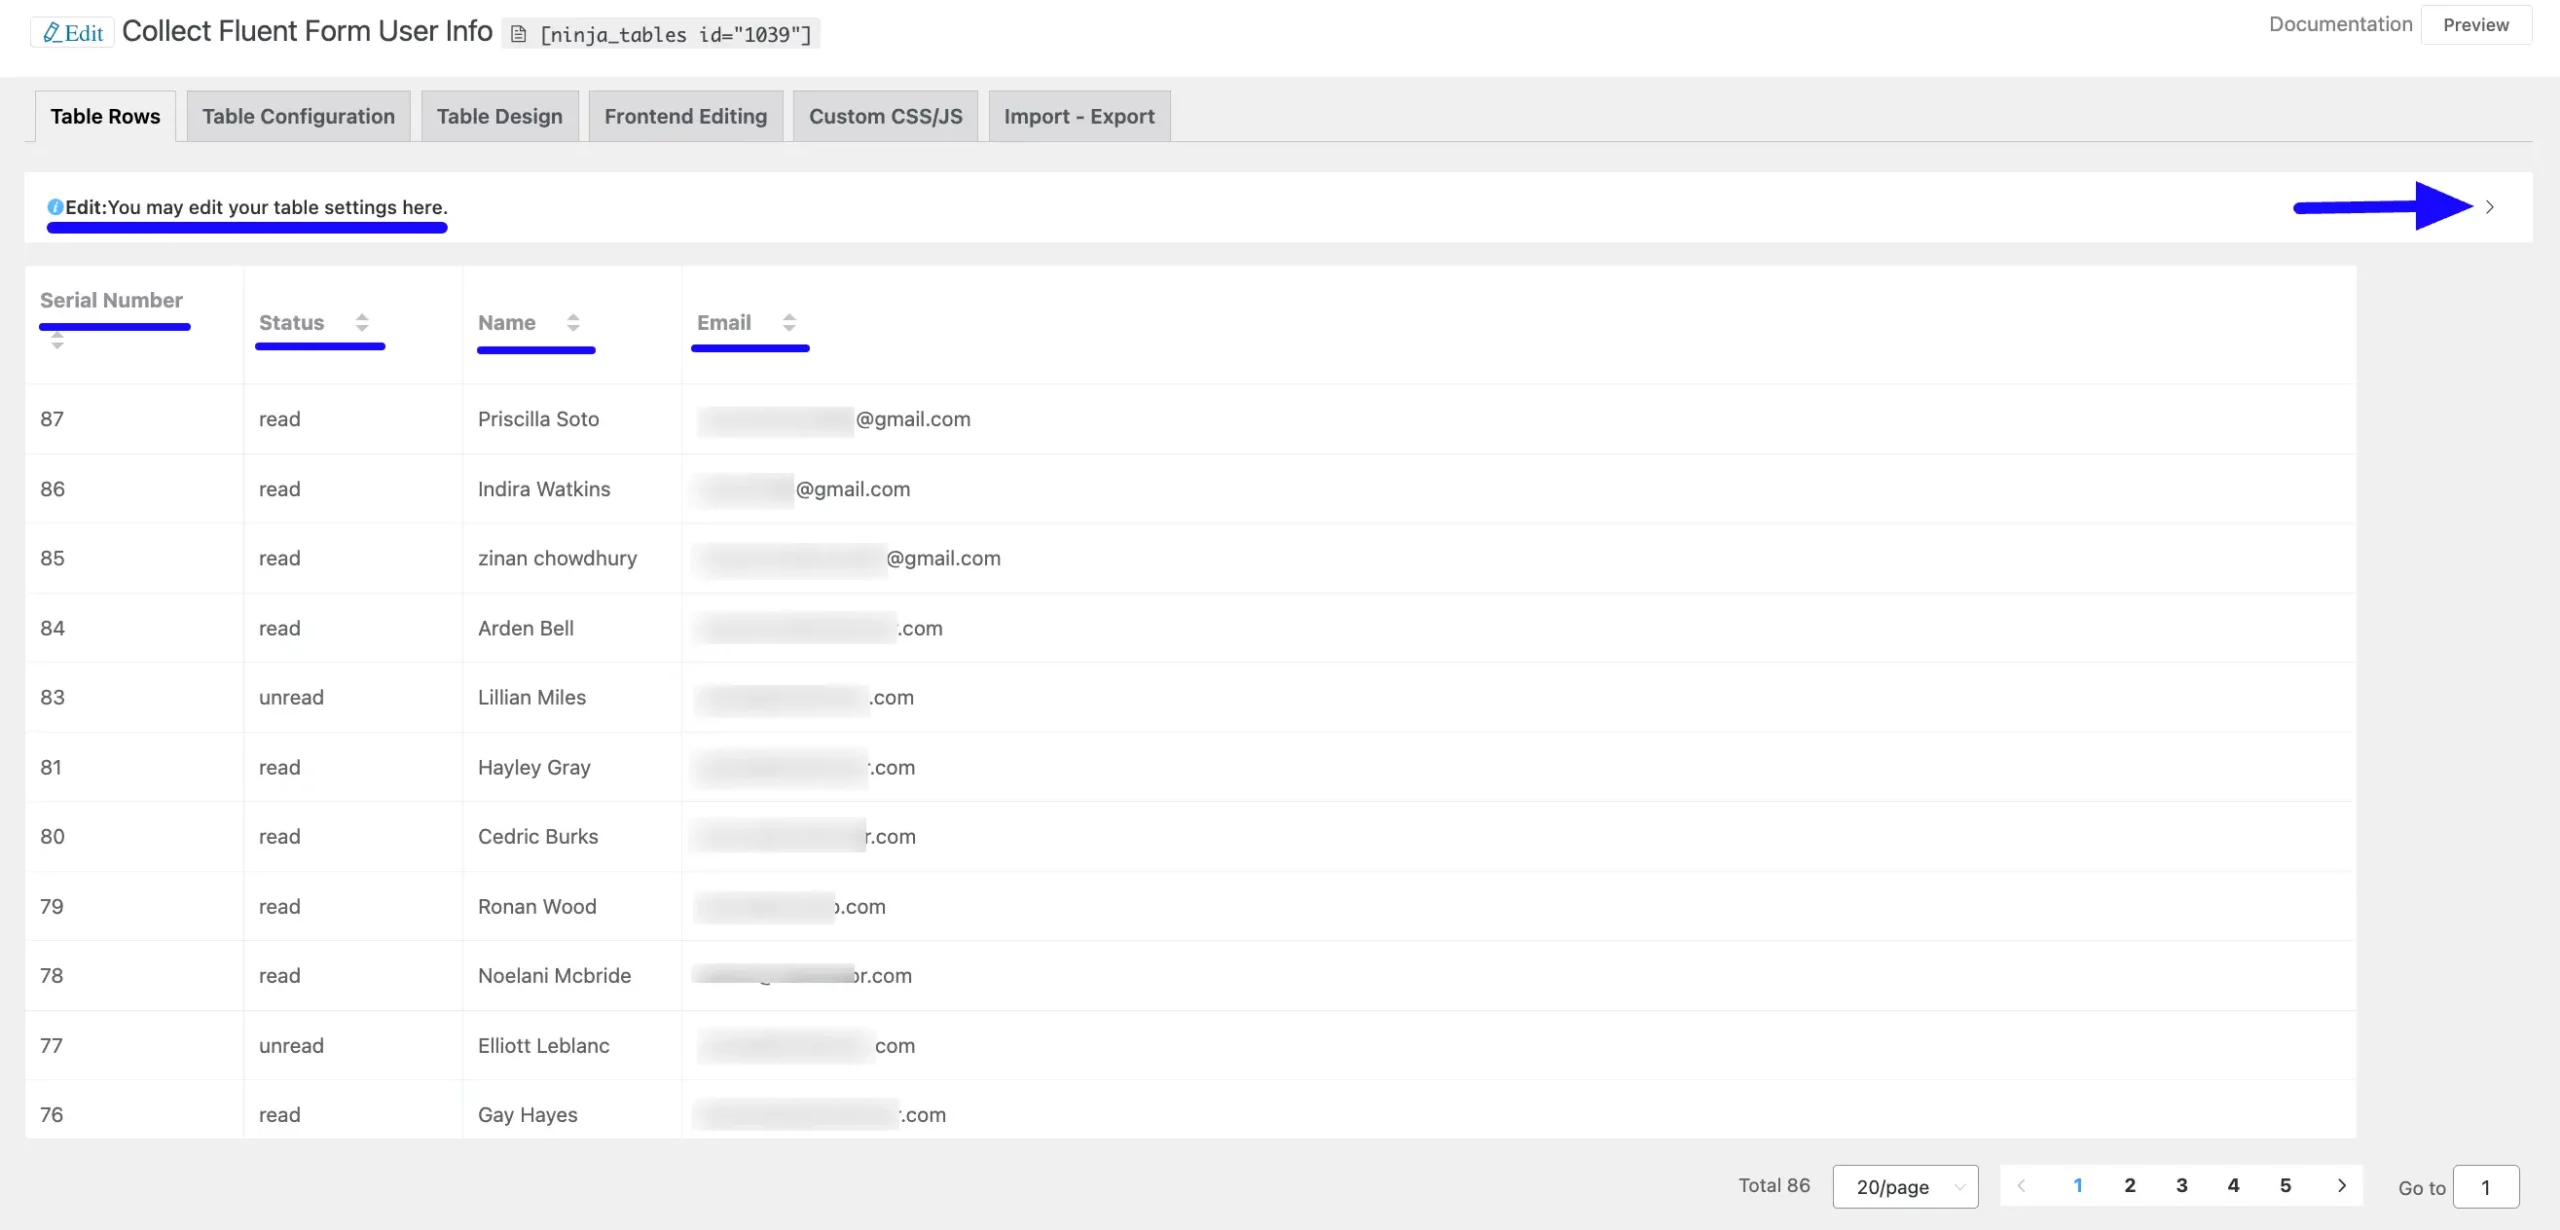
Edit Table Settings #
Here, you can see that all the submission data from the chosen form has been displayed, and all the selected Entry Fields are shown as Table Columns.
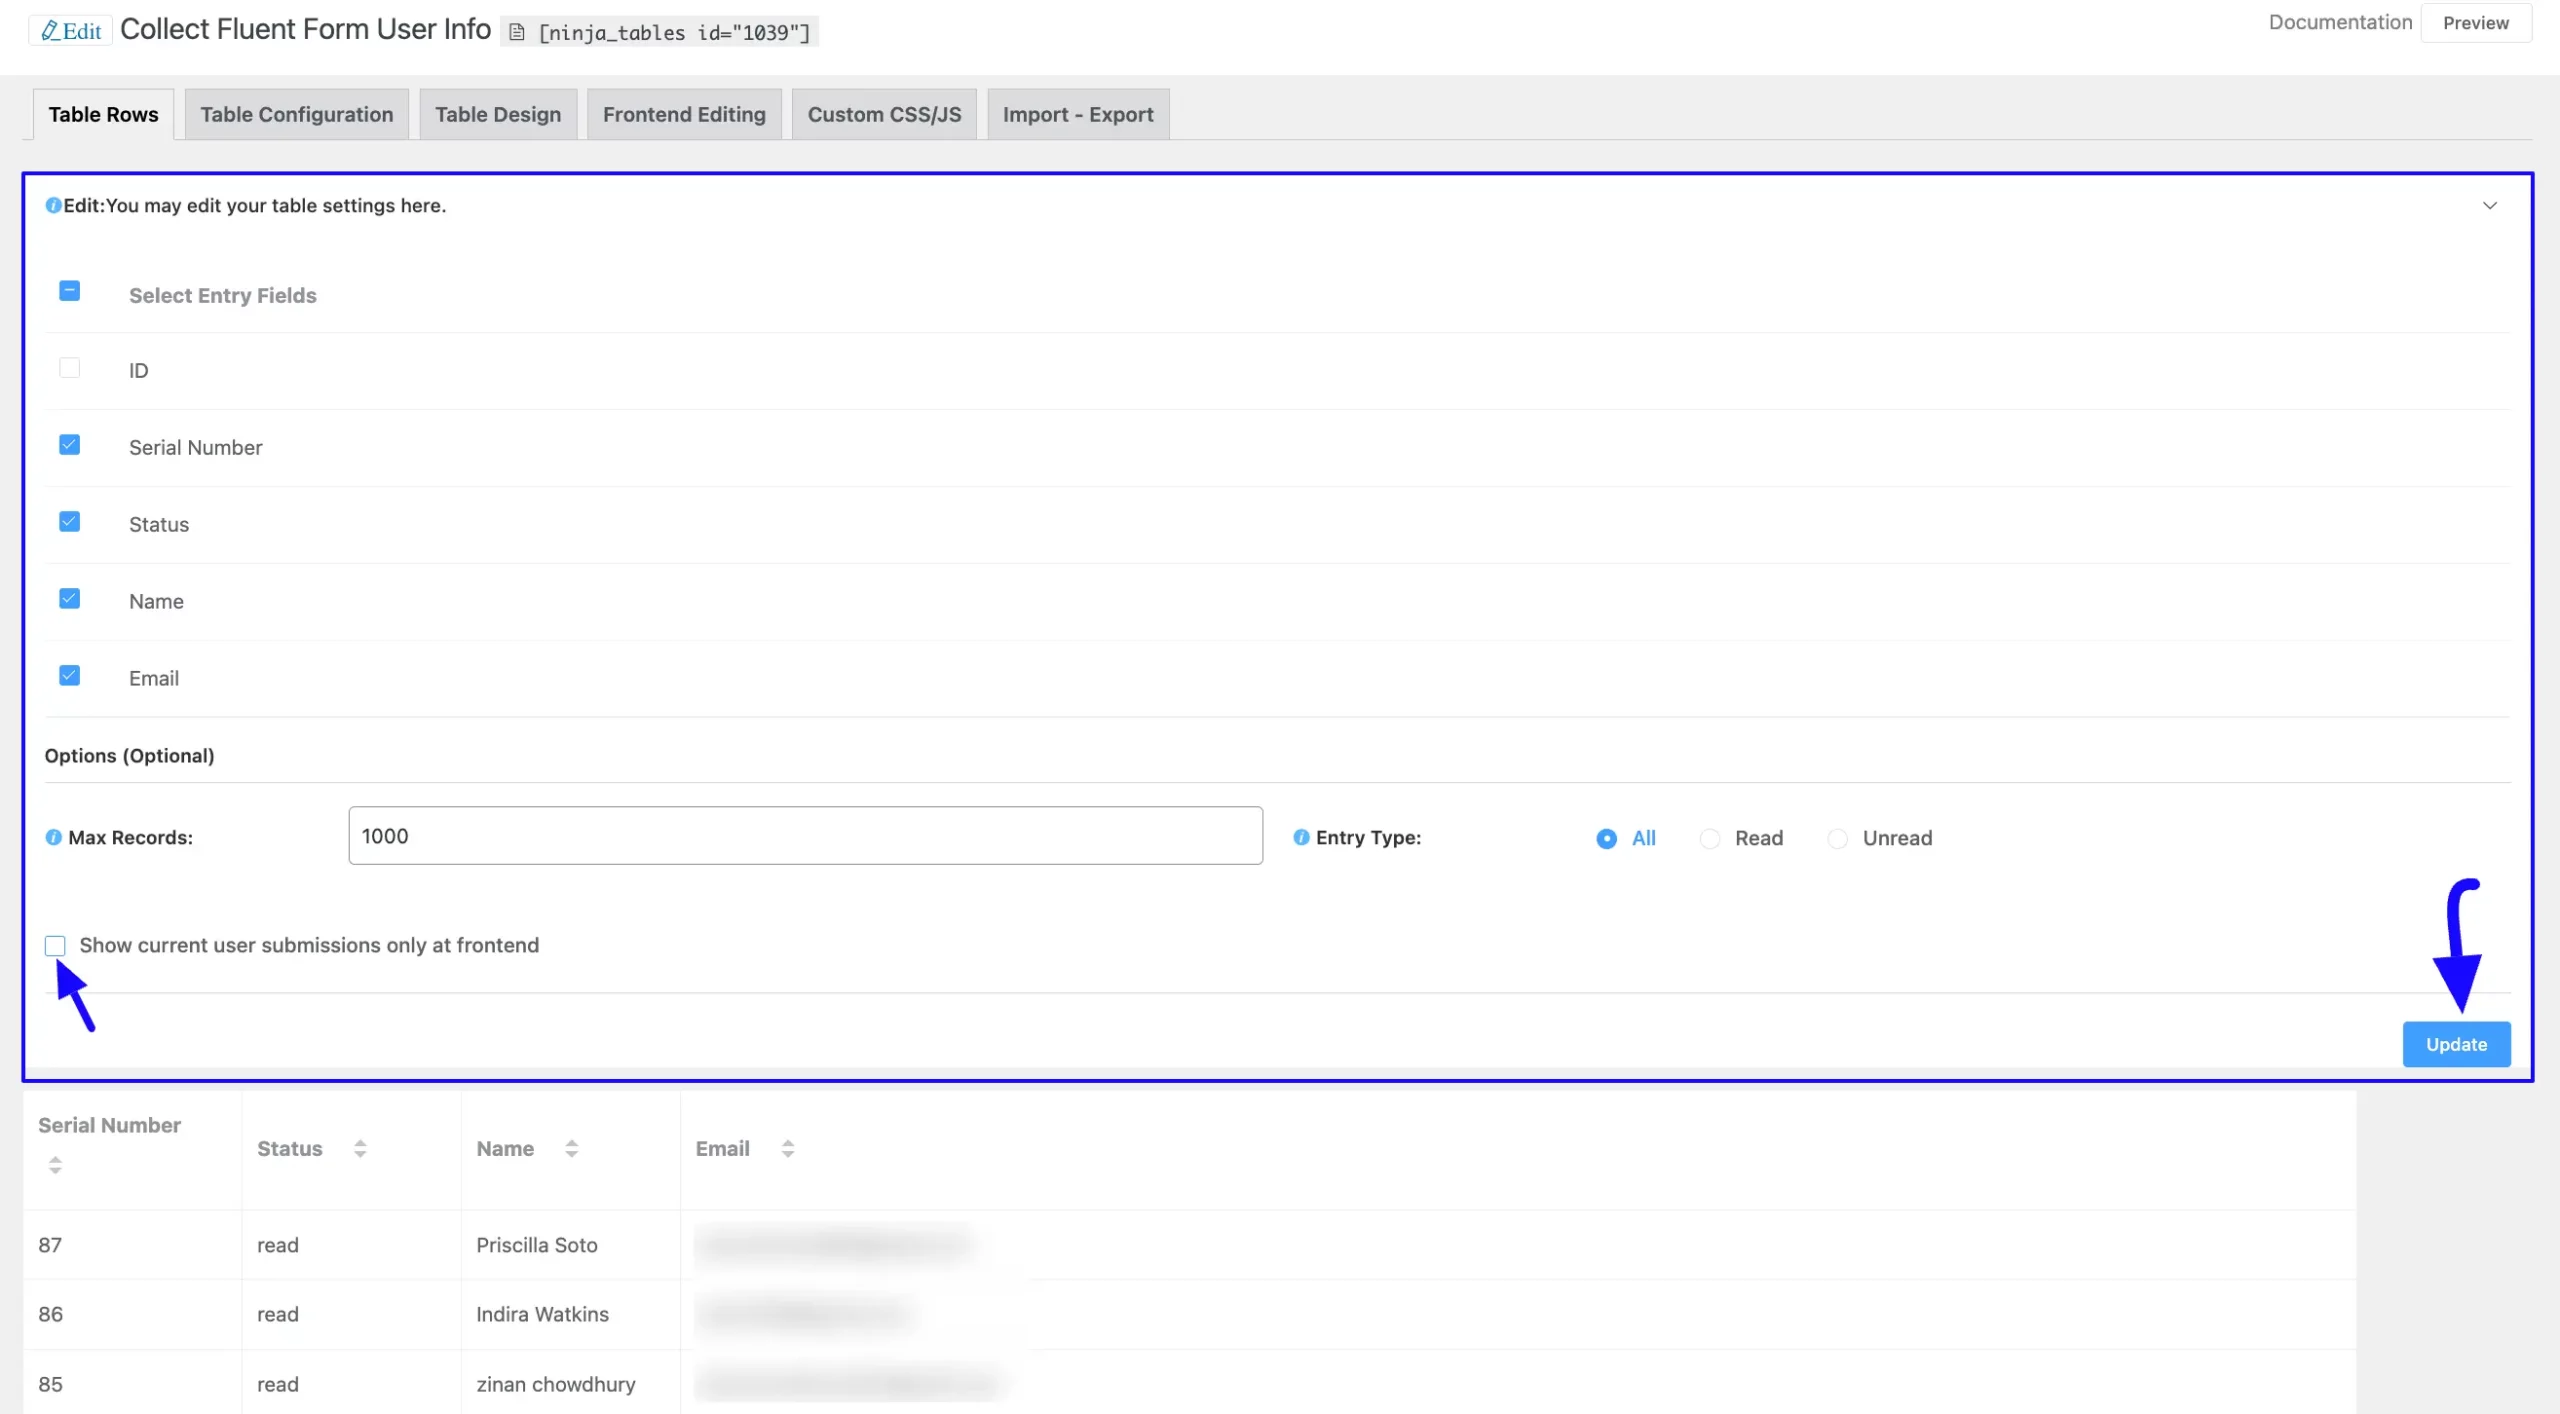
You can edit your table settings by clicking the Arrow Icon on the top right side if needed.
Now, you’ll see a new “Show current submission only at frontend” option. Enable this option if you want to display only the most recent form submission entries on the frontend.
Always click the Update button after making any changes to the settings to save them.
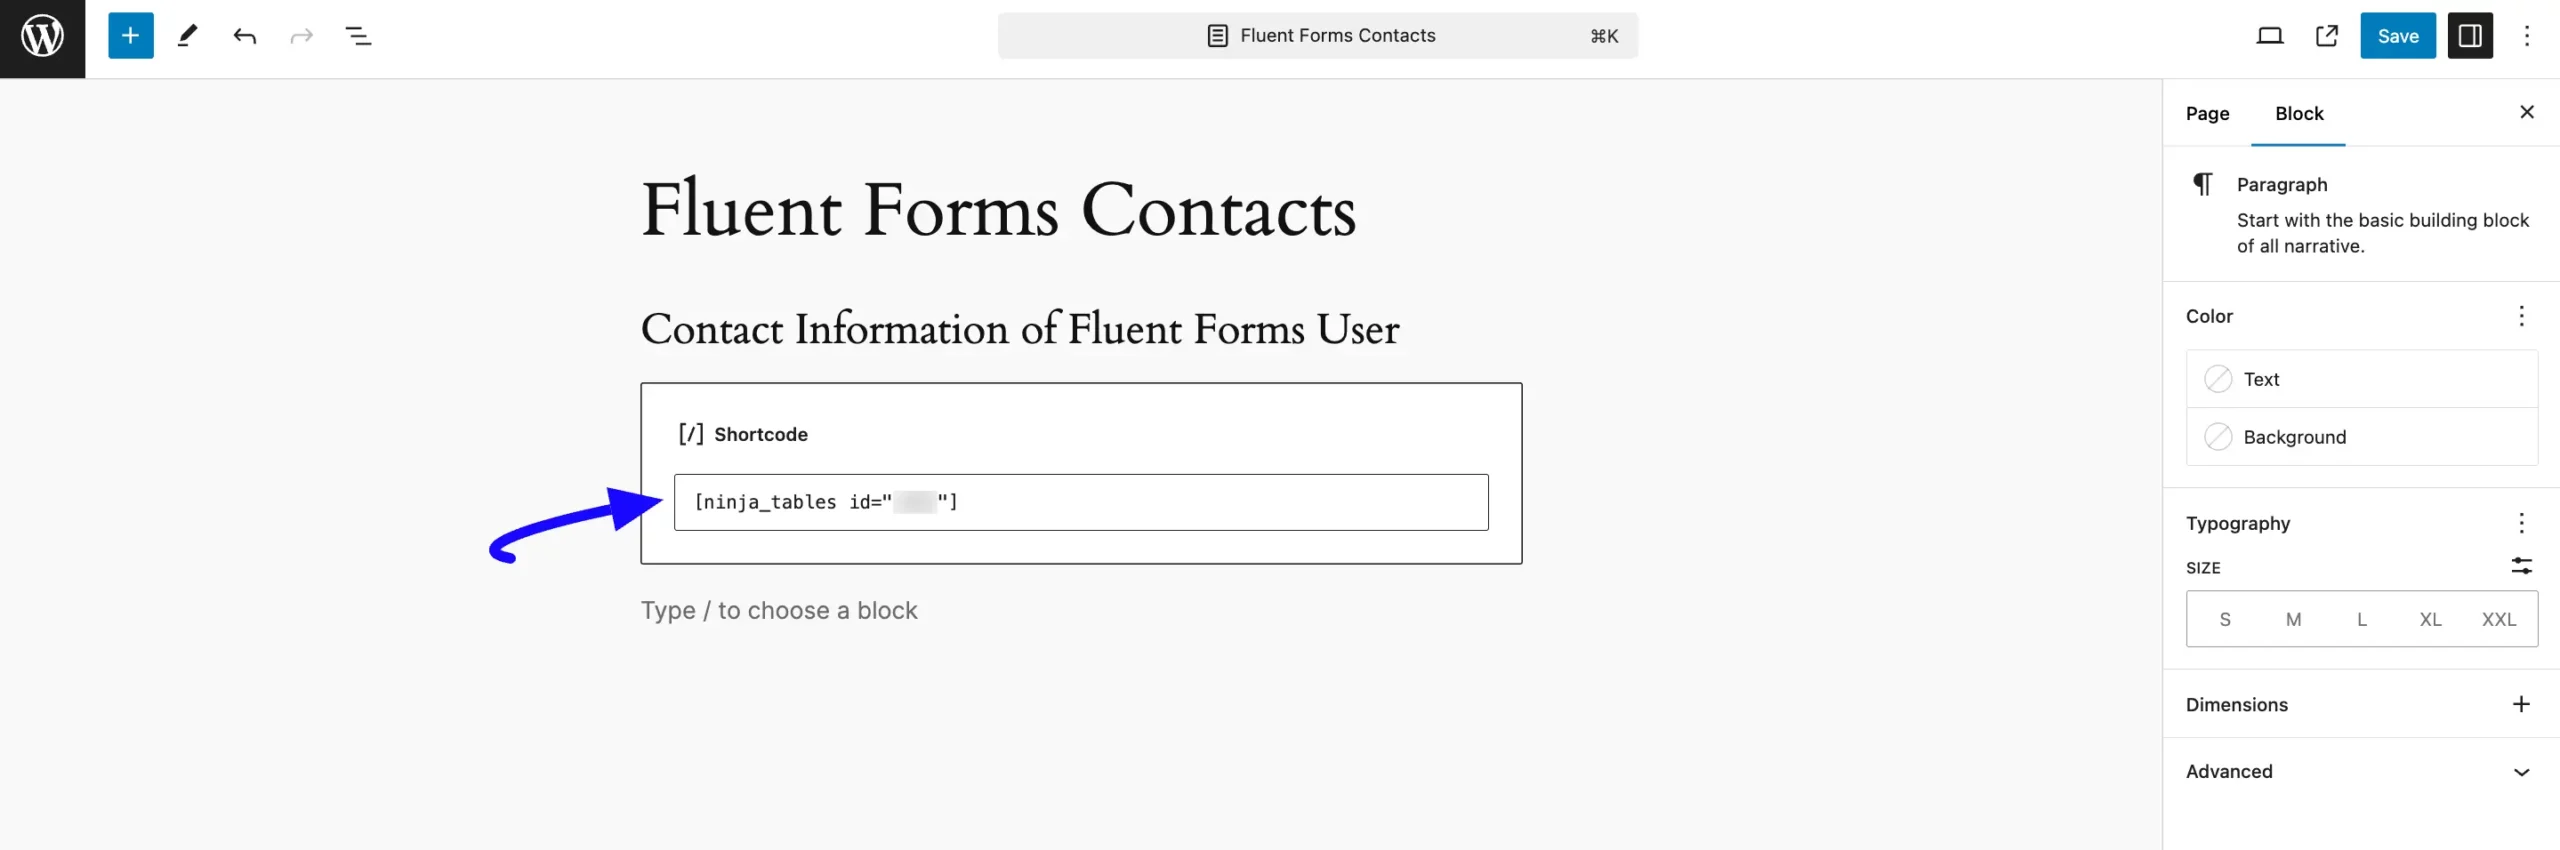
Embedding the Table into the Frontend #
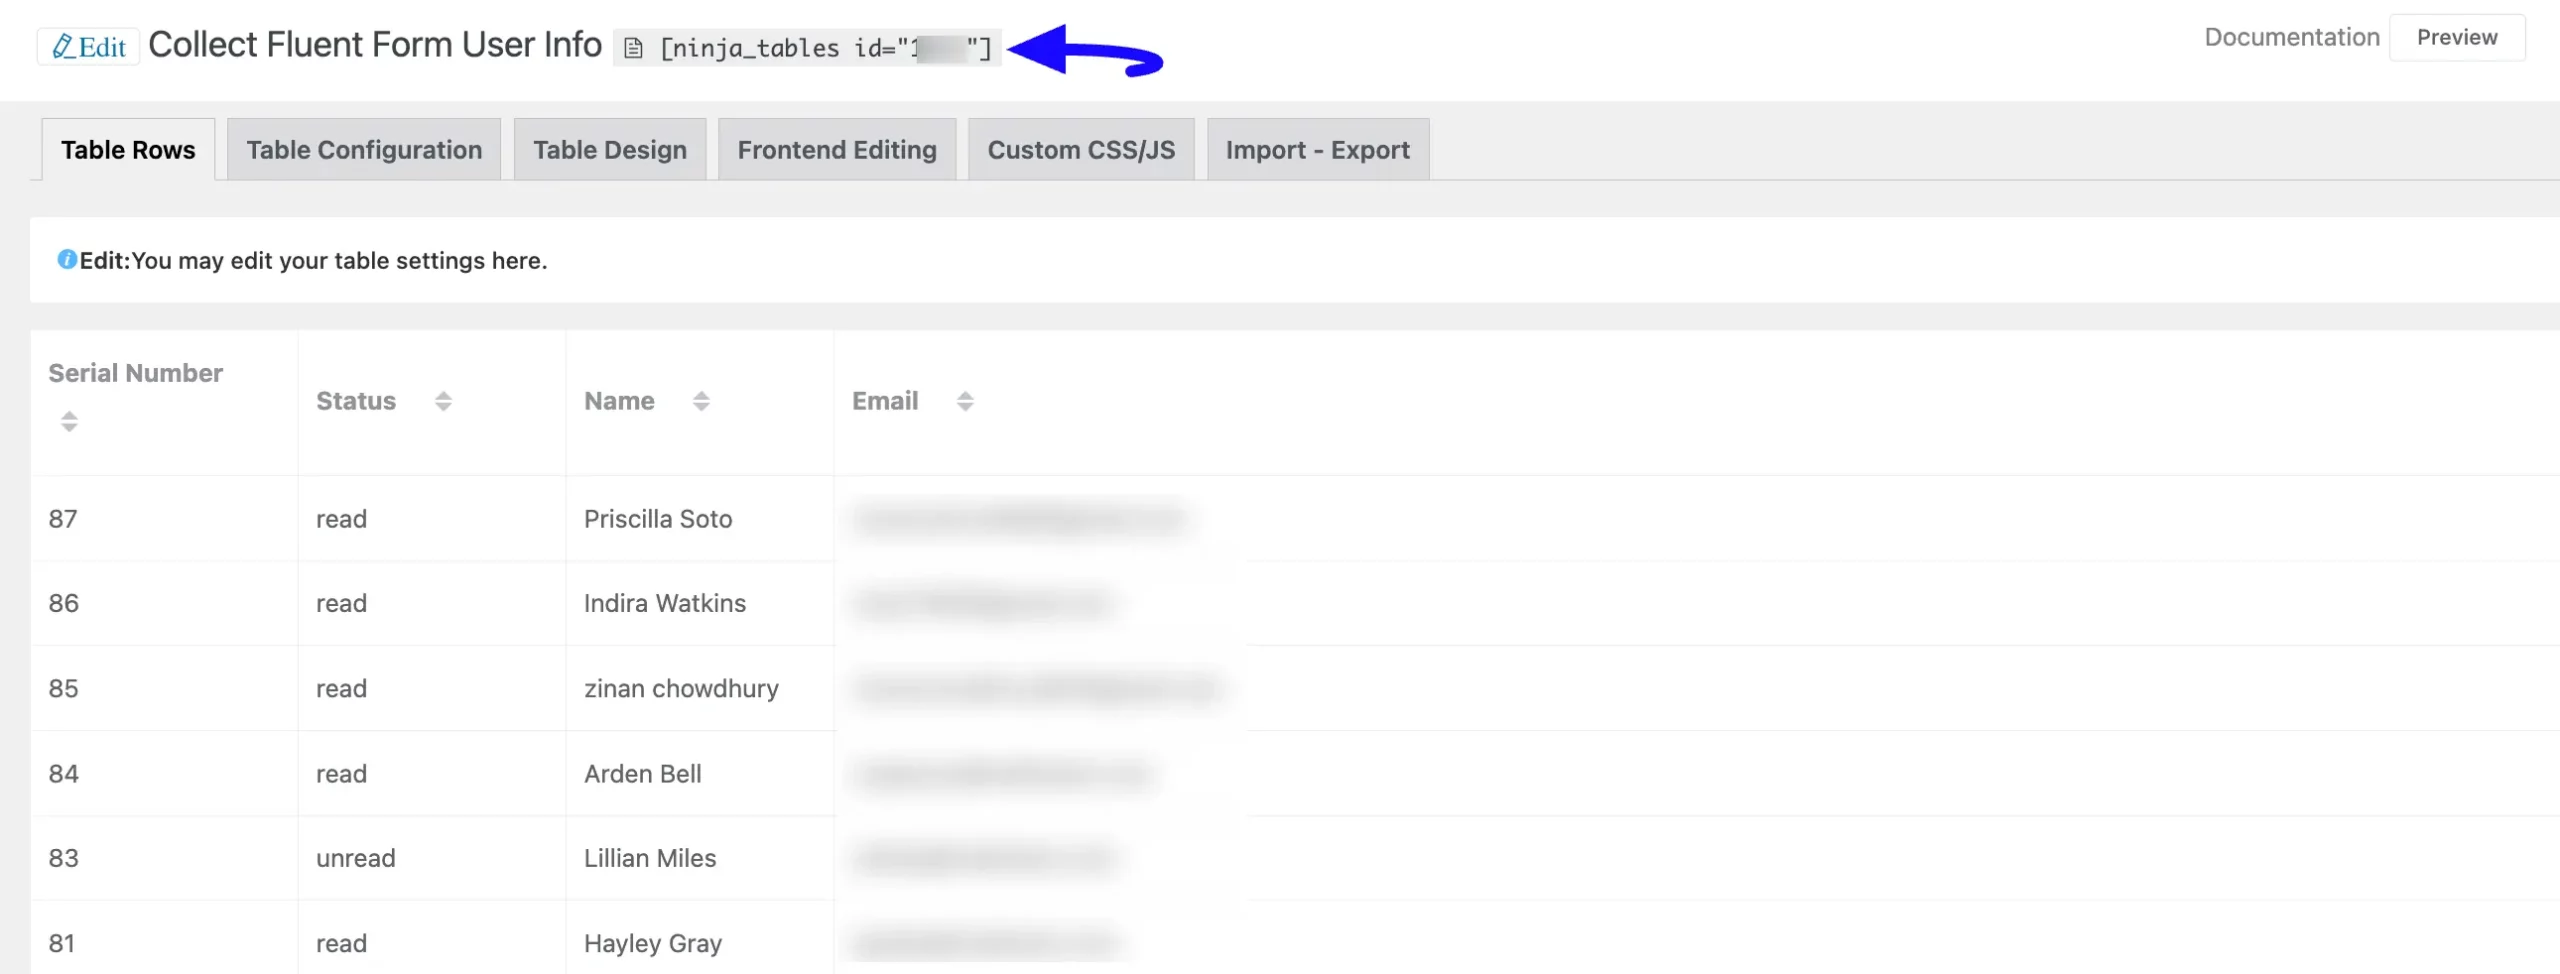
Now, to embed or display the table into the frontend, copy your table’s Shortcode from the top.
Then, paste the shortcode into the desired Page/Post where you want to display the table.
Preview of Integrated Table #
Here is the preview of the added Table where the Form was integrated.
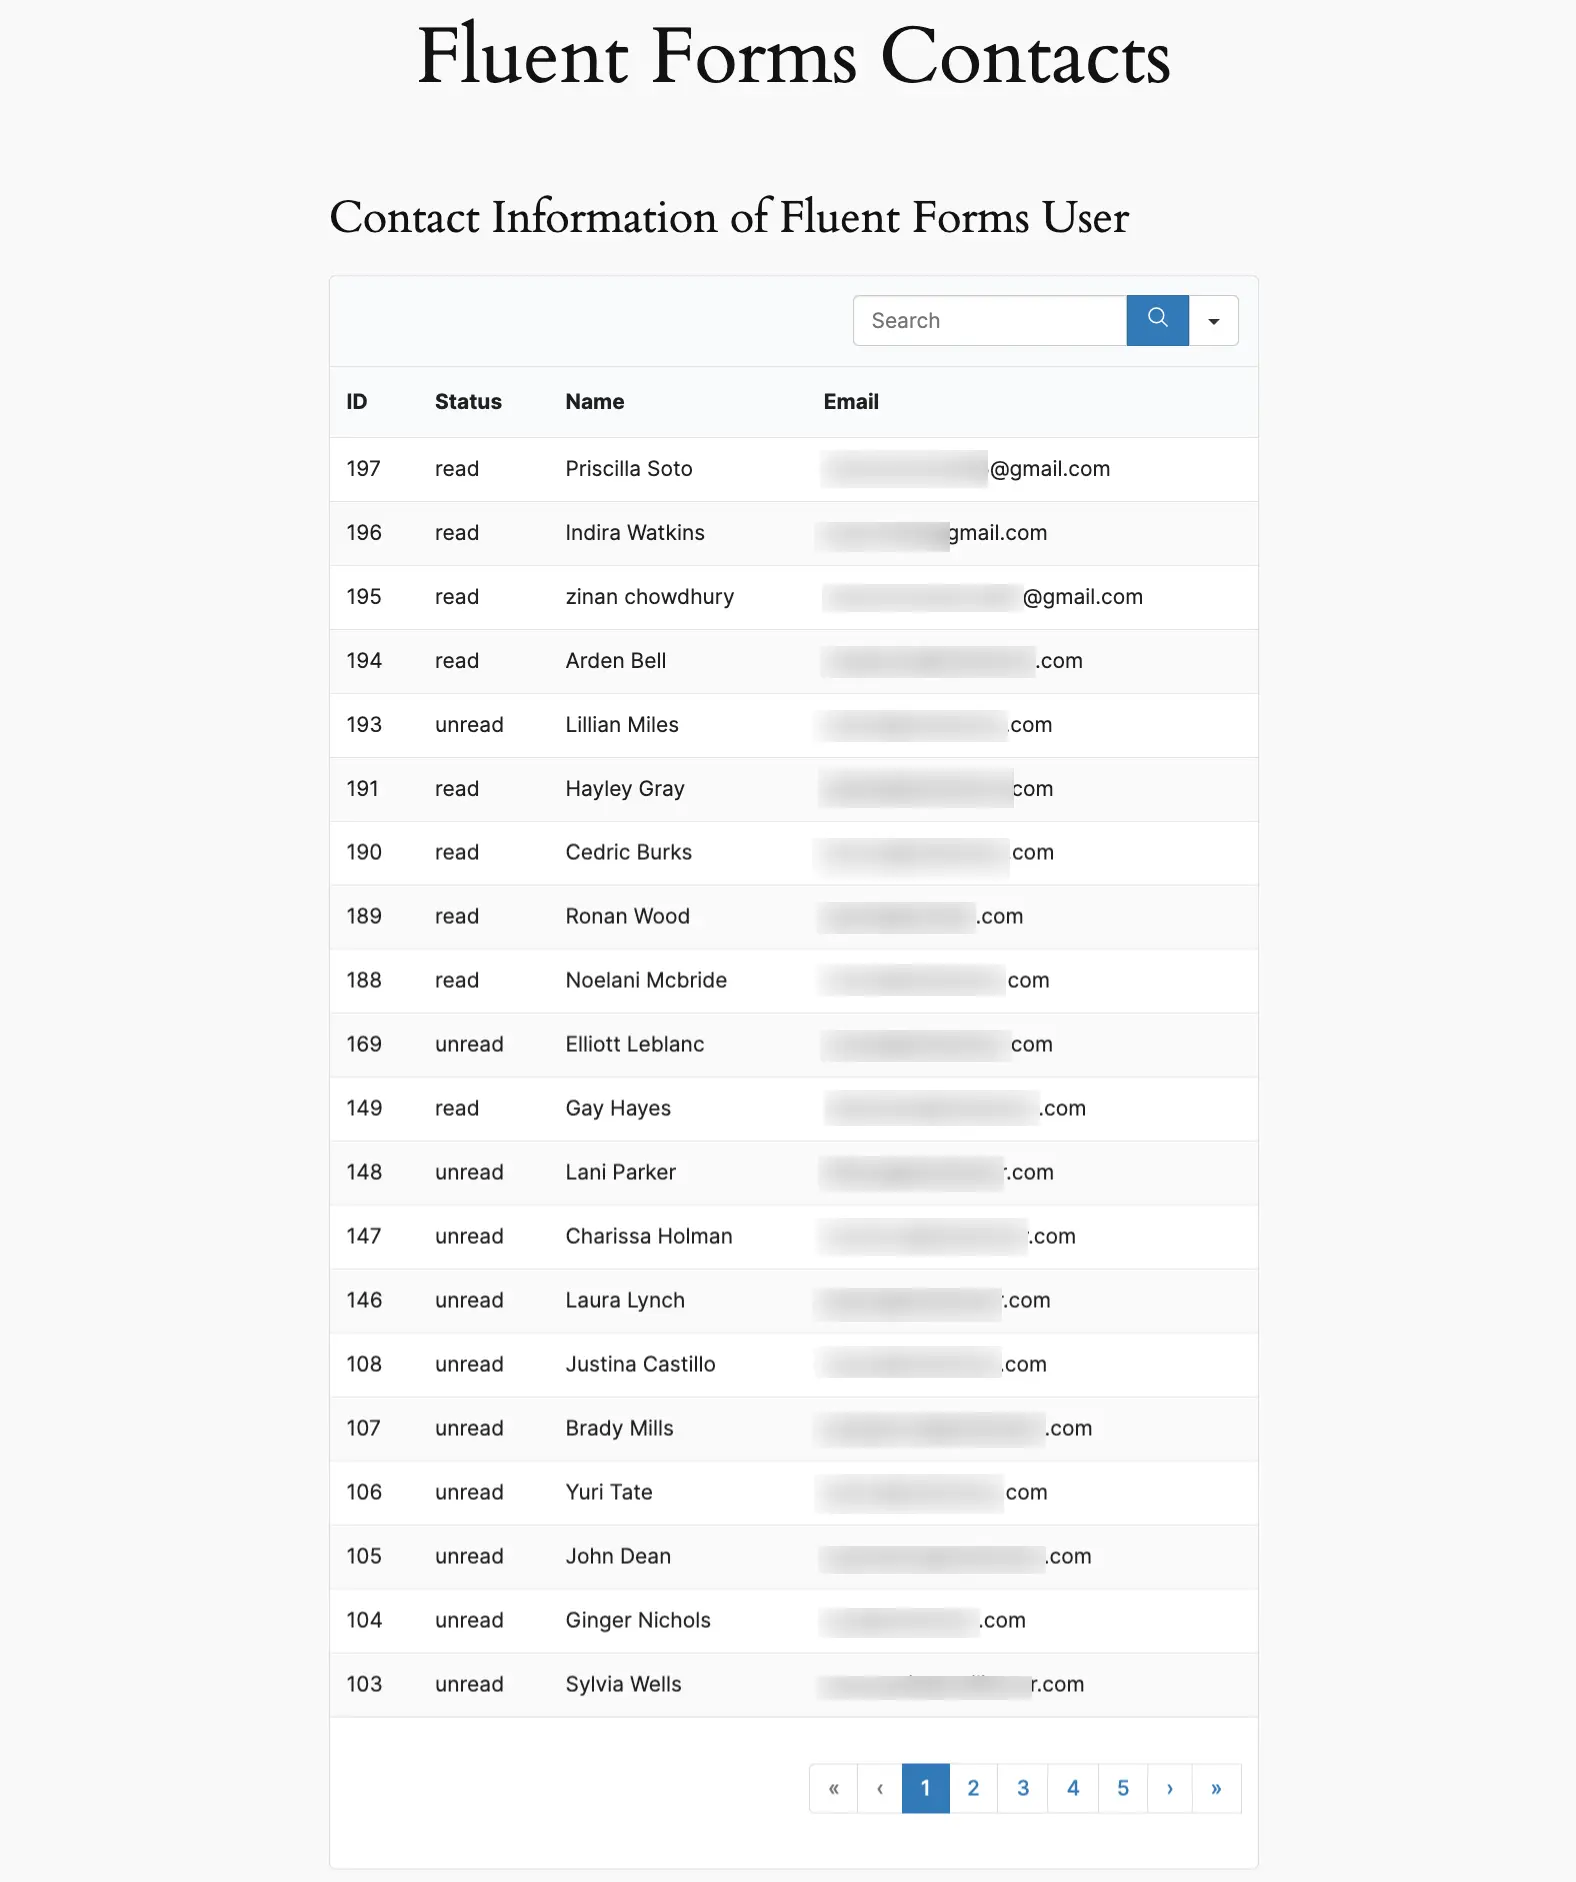
This is how you can Show Entries on the Frontend with Ninja Tables!
If you have any further questions, concerns, or suggestions, please do not hesitate to contact our @support team. Thank you.


