Fluent Forms integrates CleanTalk to enhance the security of your form submissions and protect them from spambots. This article will guide you through integrating CleanTalk on your WordPress Site through Fluent Forms.
This guide will show you how to connect CleanTalk to your forms. There are two simple ways to do this:
Method 1: Use your CleanTalk Access Key directly in Fluent Forms.
Method 2: Use the official CleanTalk plugin for WordPress.
Connect with a CleanTalk Access Key #
This is the easiest way to integrate CleanTalk with Fluent Forms. You’ll just need to get an “Access Key” from your CleanTalk account and paste it into Fluent Forms.
Get Your Access Key from CleanTalk #
To learn how to get the Access Key from CleanTalk, follow the steps with the screenshots below –
Go to the CleanTalk website and log in to your dashboard. If you don’t have an account, you’ll need to create one first.
Once you’re logged in, you will find your Access Key displayed in your dashboard. Copy this key.
But if you log in to an existing CleanTalk account, you will get the Access Key shown in the screenshot below.
Add the Key to Fluent Forms #
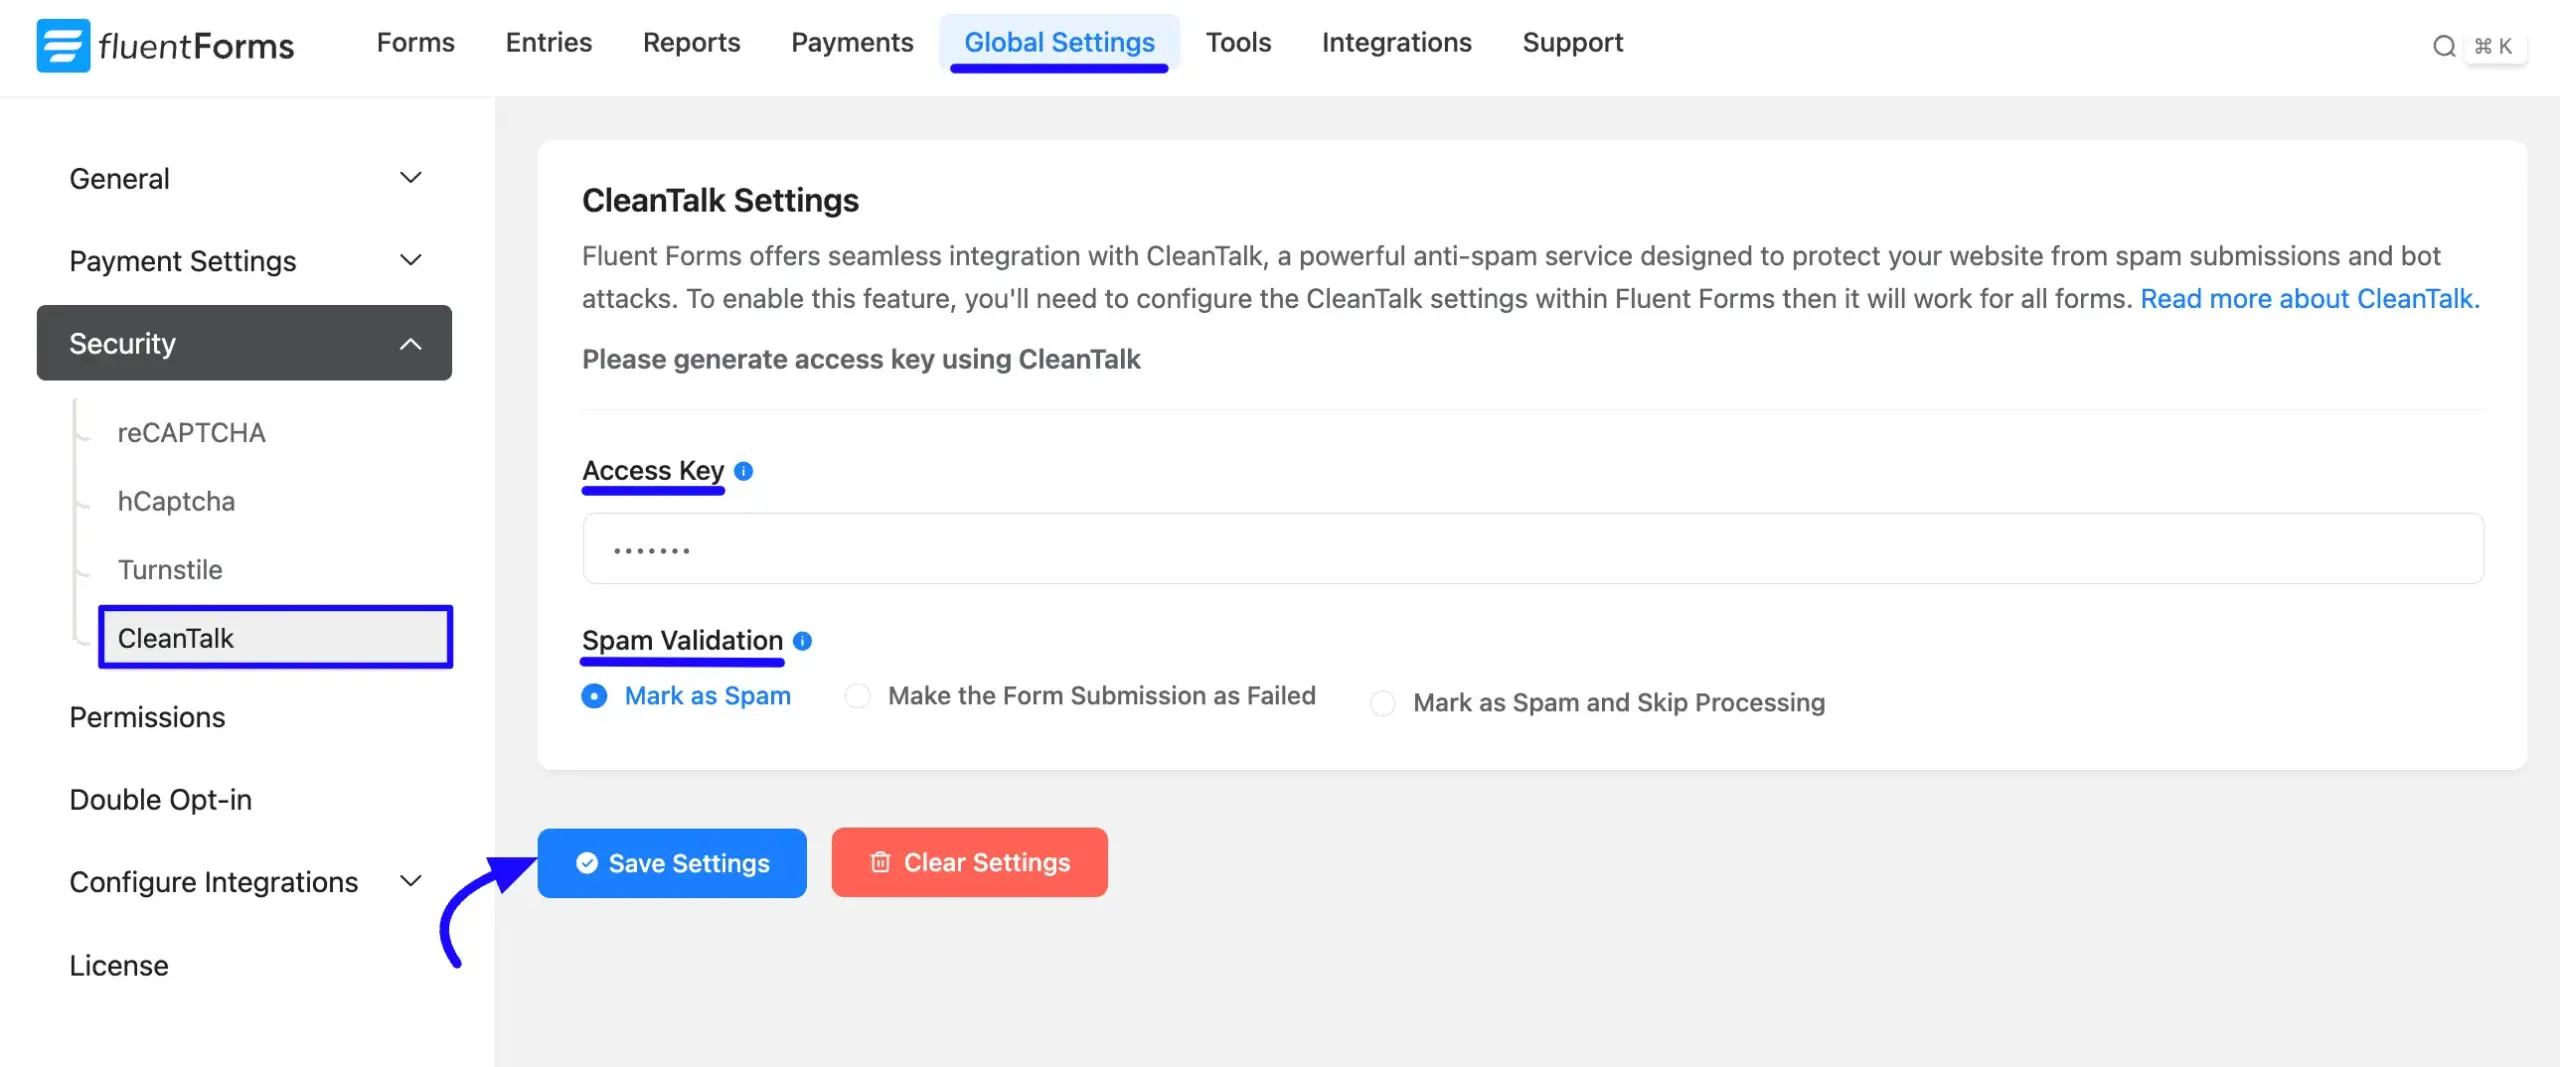
First, go to Global Settings from the WordPress Left Sidebar or FluentForms Navbar, open the Security tab from the left sidebar, and click the CleanTalk option.
- Access Key: Now, you will be asked to provide the Access Key from your CleanTalk Account for the configuration.
- Spam Validation: Using this option, you can select what will happen once a submission is marked as spam. You can choose any one among these “Mask as Spam“, “Make the Form Submission as failed“, or “Mark as Spam and Skip Processing” options.
Once you provide the Access Key, press the Save Settings button to make your CleanTalk Integration functional.
Connect with the CleanTalk Plugin #
If you already use the official CleanTalk plugin on your website, you can connect it to Fluent Forms with a single click.
Install and Activate the CleanTalk Plugin #
To learn how to install and activate the CleanTalk plugin in WordPress, follow the steps below –
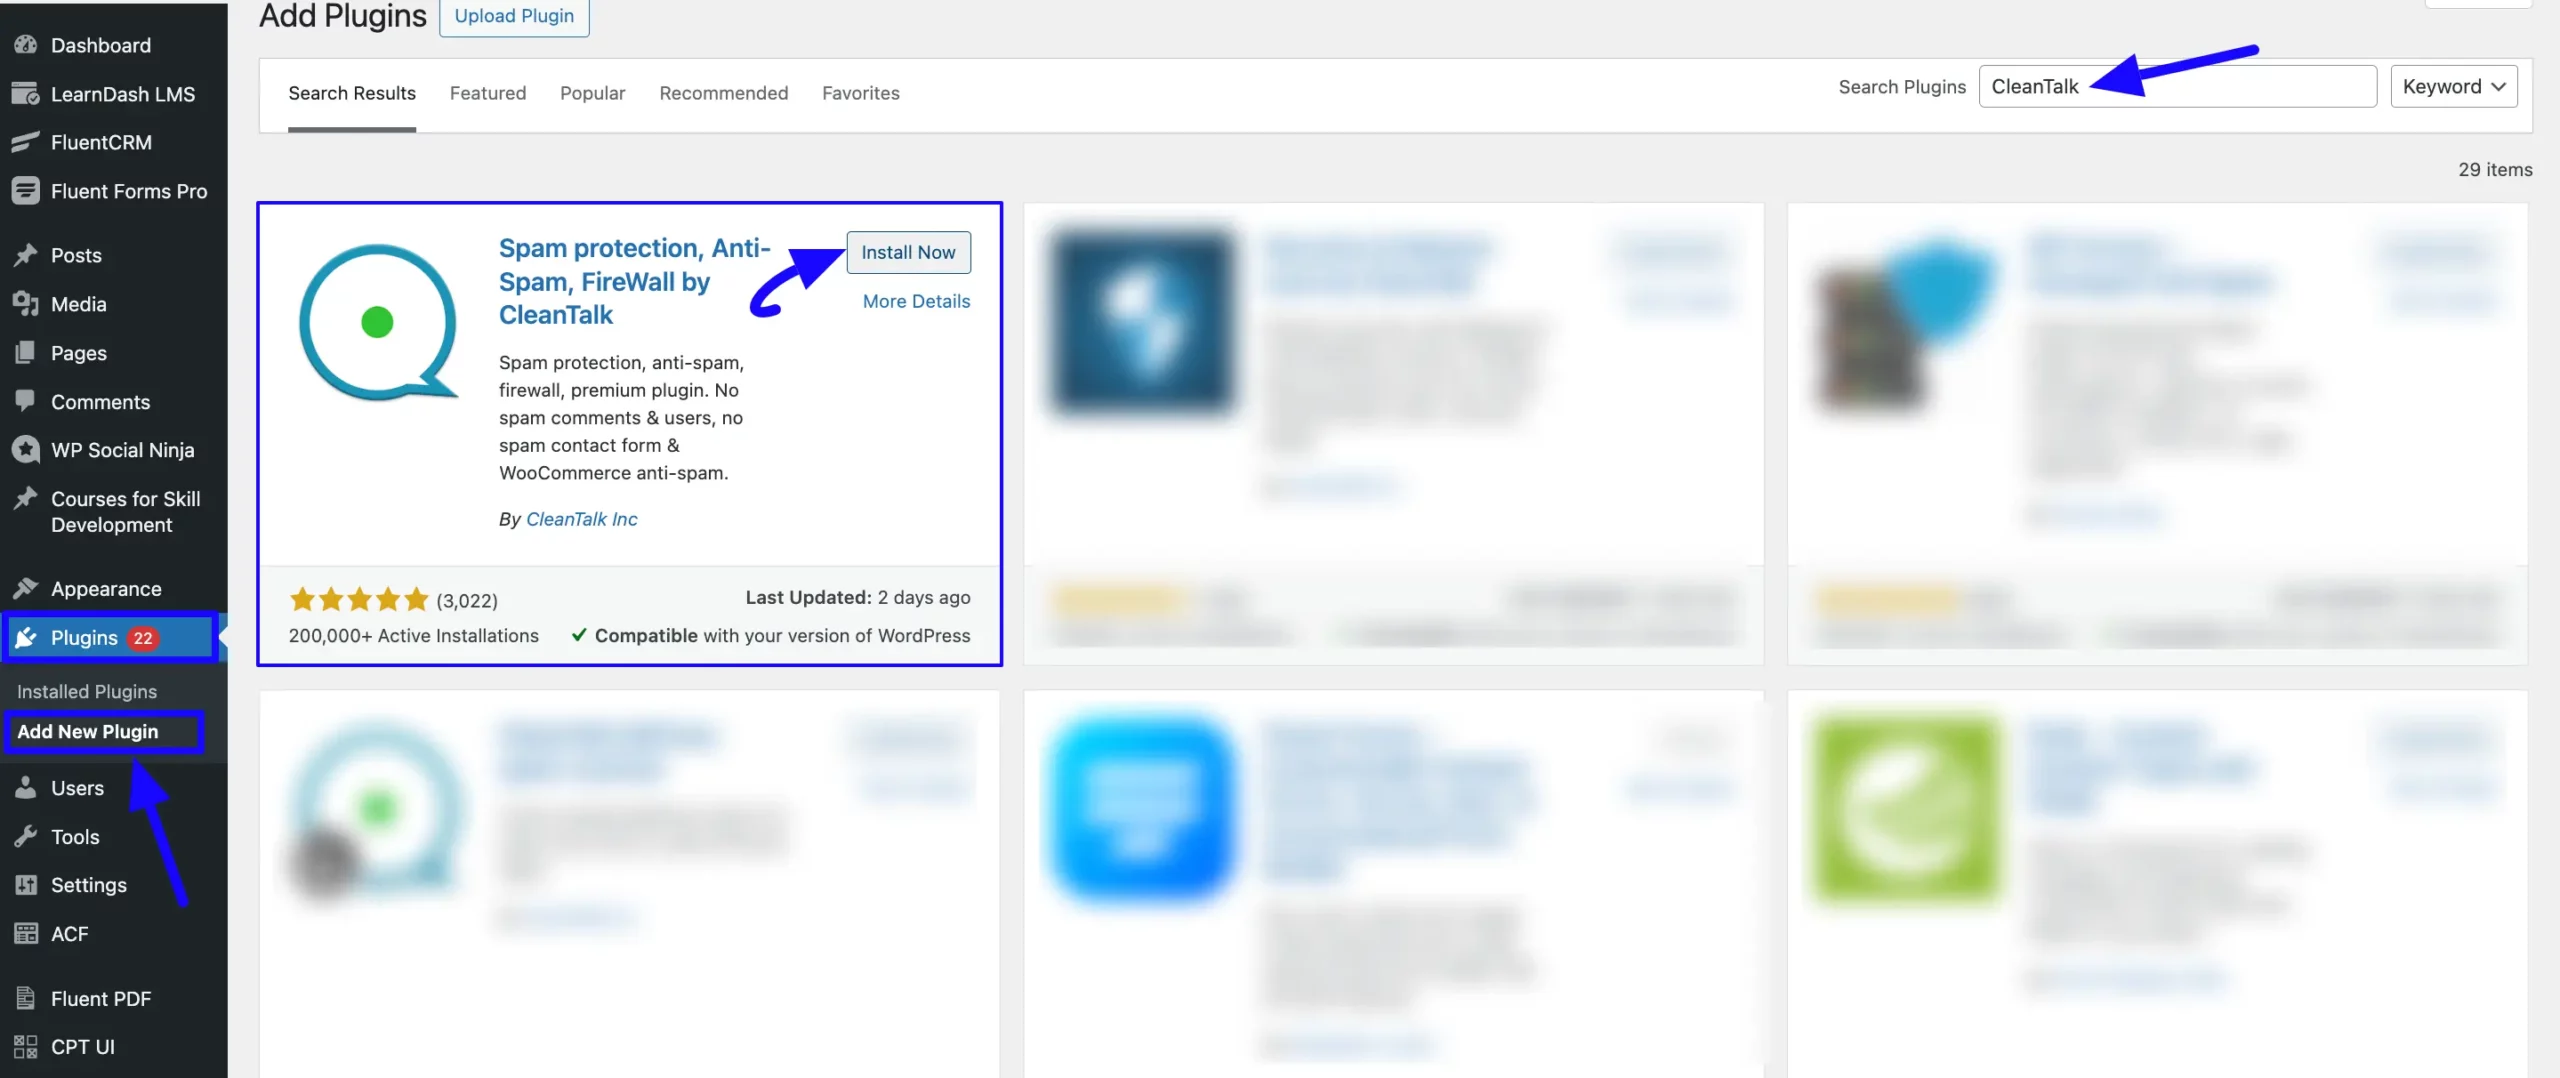
First, go to Plugins in the WordPress Left Sidebar, click Add New Plugin, and search for the CleanTalk plugin using the Search Plugins option on the right.
Once the CleanTalk plugin appears, click the Install Now button, and your CleanTalk plugin will be installed on your site. Then, click the Activate button, and the CleanTalk plugin will be activated and ready to function.
Enable the Integration in Fluent Forms #
Once the CleanTalk plugin is active, follow the steps to integrate with Fluent Forms.
First, go to Global Settings from the WordPress Left Sidebar or Fluent Forms Navbar, open the General tab from the left menu, and click the Miscellaneous option.
Now, turn on the Enable CleanTalk Integration toggle, and the security will be enabled. Here, you will also get the Spam Validation option to select what will happen once a submission is marked as spam.
Remember, to access the ‘Enable CleanTalk Integration’ option, CleanTalk has to be installed and activated on your WordPress site.
Finally, don’t forget to click the Save Settings button to make all the setup functional.

If you have any further questions, concerns, or suggestions, please do not hesitate to contact our support team. Thank you.


